So might have some RC related updates in this thread soon 
But I've been doing a few other experiments with SLA the past few weeks I wanted to share.
First a quick update on the printers. The last few weeks we've had a bit of a cold snap and it's been down in the 40's and 50's in my shop (I have AC in my shop but just a little space heater I can only use when I'm actually out there.) and it turns out resin printing really does work better in warm weather. The resin gets a lot more viscus in the cold which causes a number of issues. The blu and tenacious resins I use for functional parts are pretty much unusable right now in this weather. But a lot of the "fast" resins still flow enough I can still print with them.
But...it also turns out the Elegoo Mars pro either doesn't like to not get used for a day or two...or...the lubricants used on it really don't deal well with cold. I've had it freeze up on me twice where the build platform gets stuck at the top and just will not move. I've been able to get it going again my loosening the two screws that hold the threaded rod bushing to the carrier and manually running the z-axis...then retightening them. But it's kind of a pain to deal with. I've recently tried cleaning the threads and re-lubing with some tri-flow which doesn't gum up as much and isn't as effected by cold so we'll see how that does.
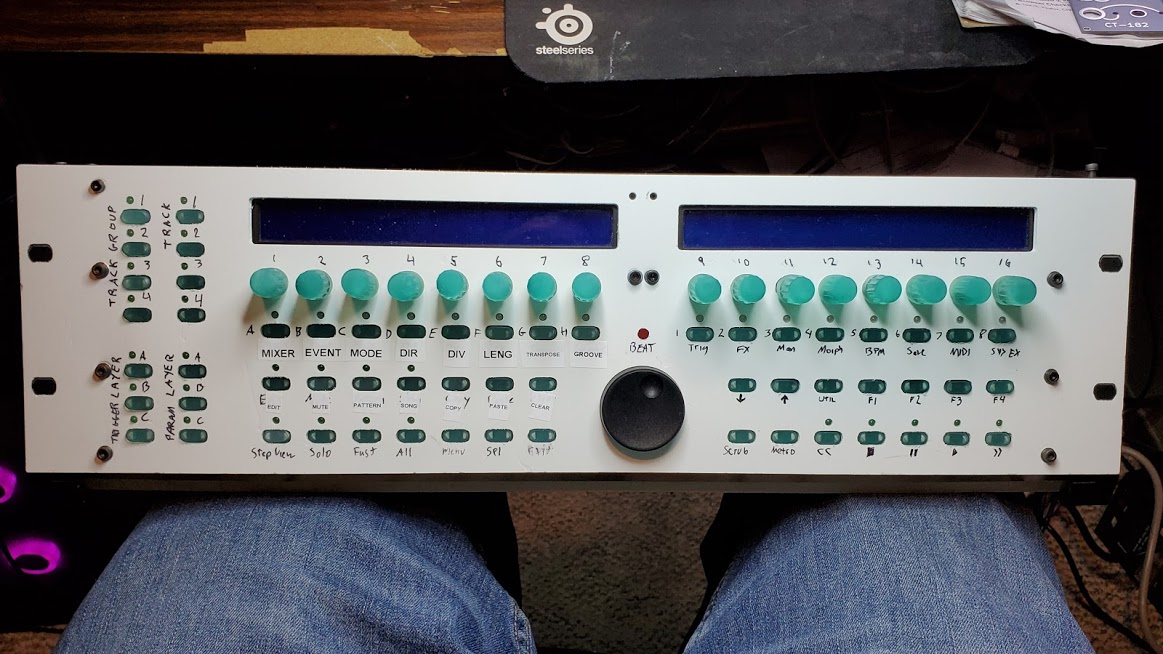
I've been working on fixing up / finishing a project I started on over 10 years ago...then let sit until 3D printing and having a CNC gave me the tools I needed to pick it back up 3 years ago. My midibox sequencer:
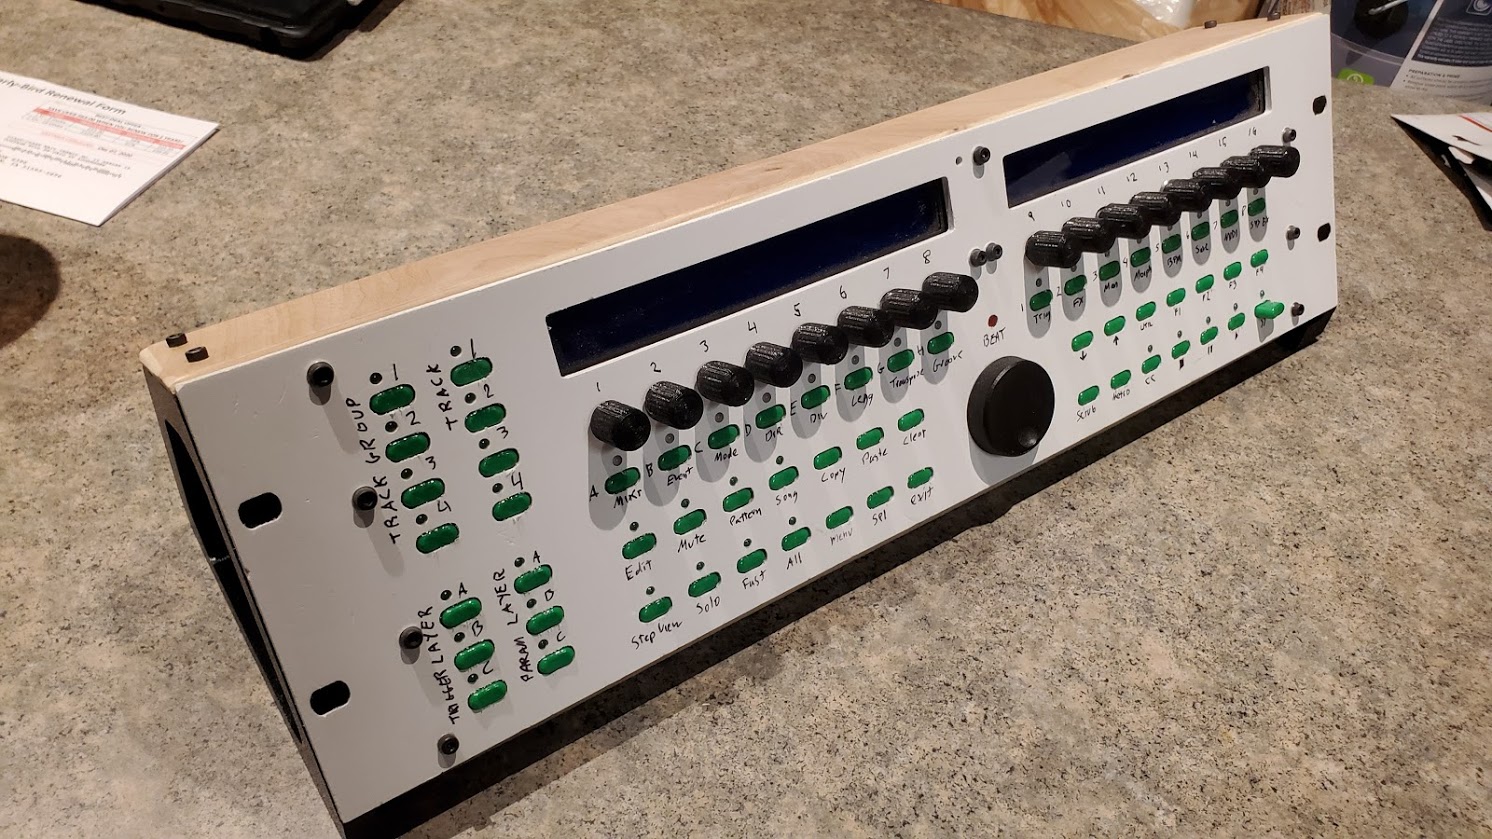
Most of the work I've been doing is designing a new case for it that's made from sheets of 1/4" ply and some FDM printed parts. But...I also decided to replace the FDM printed buttons and knobs that I wasn't overly happy with.
The buttons I did a test print in Siraya Blu with 3 slightly differently sized models and two different print orientations:
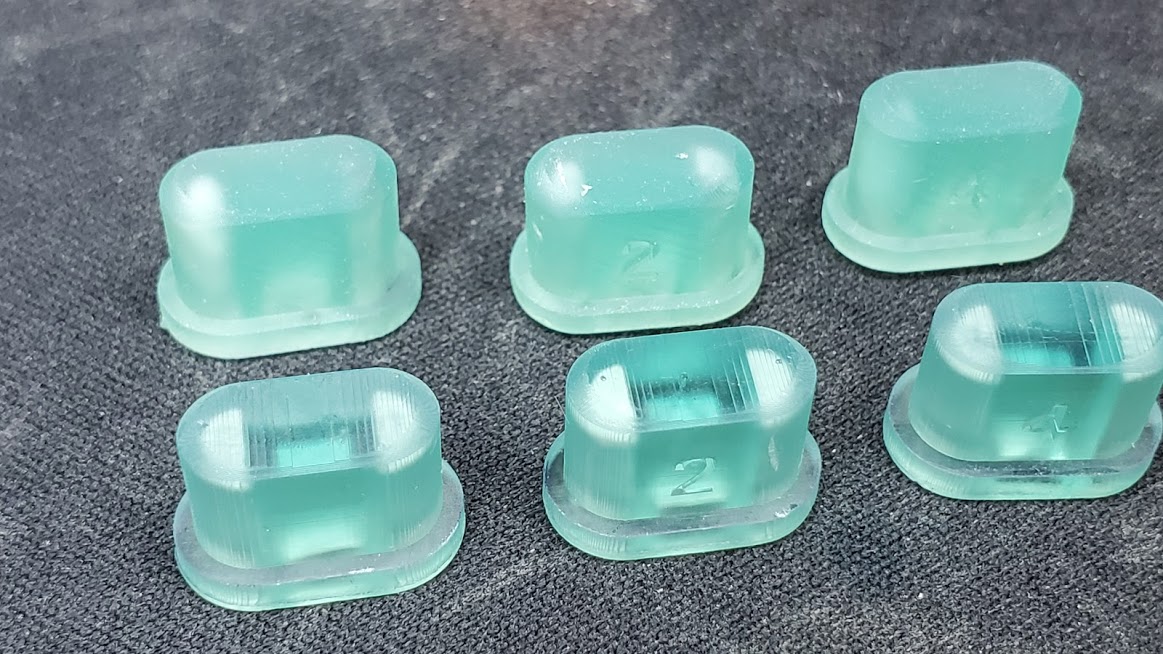
The top row was printed on supports tilted 30 degrees in two axes, while the bottom row were just printed flat on the print bed with no supports. (the numbers on them indicate the sizes so I could tell which was which and see which size fit my needs best and if there was any distortion.)
Both sets are usable....and I like the clear look of the ones printed flat on the bed...plus they print twice as quickly as the angled ones. But....the angled ones are much smoother and more detailed though it's hard to tell from the photo due to the color/transparency of the resin. The tops of these are a gentle curve with a chamfer though and if you look closely you can see there's some stair stepping on the ones printed flat on the bed because the z resolution I used is lower than the x/y resolution of the LCD. I could lower the z resolution further...but that GREATLY increases print times and can lead to other print quality issues and more print failures.
So by tilting the parts that higher x/y resolution results in no more stair stepping and smoother prints. The extra height from the tilt and the supports does mean longer print times and some wasted resin...but...such is the price of quality
So I printed a few build plates full of buttons in blu (this was before the cold weather hit!) and swapped them into the sequencer:
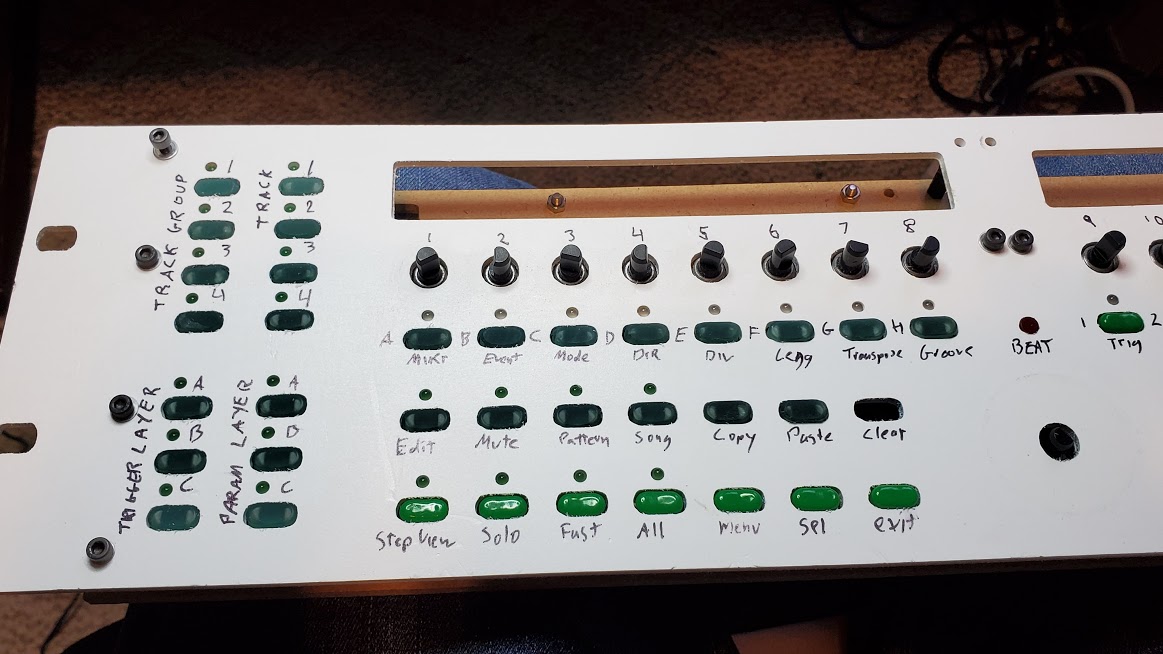
I'm not huge on the color or the transparency...but the feel is night and day different. The old buttons just always felt cheap and sloppy. These. These feel like commercially made high end parts and are so much nicer to use! The fit the switches better and as a result the tactile feel is greatly improved.
Also - I learned a few new tricks about post-processing doing these. Since the blu resin so so viscous and tacky getting it cleaned off of such small parts with interior areas that have to be cleaned well since their dimensions are critical I had to really step up my cleaning game. If you look carefully at the photo above you'll see that the two whiteish areas on either side of the button are more prominent on some than others. The ones where they're more prominent are actually more "correct" because those interior areas were cleaned better - the dark ones are dark because there was uncured resin stuck up there that got cured in my final curing step.
Basically I now do a three step cleaning:
1) A quick rinse in "dirty" denatured alcohol. I call it dirty since it gets the bulk of the left over resin off so it tends to reach saturation faster. I also do a bit of brushing with a toothbrush at this point.
2) A 4-5 minute wash in my wash and cure station with "medium dirty" denatured alcohol. Medium mostly because it takes so much and I'm lazy about straining it and replenishing it. Ideally this would be "clean" alcohol...but that would be a LOT of work and expense with minimal reward.
3) a final rinse in fresh IPA (now that I can find it at the stores again!) then put into a ziploc with fresh IPA and submerged in my ultrasonic cleaner for 3 minutes. With normal resins this isn't as necessary...but with the tacky thick blu...it makes a HUGE difference.
I also wanted a better solution for labeling the buttons. I can cut the panel on my CNC...but trying to engrave the tiny labels is a bit more than my MPCNC is up to. (The text is just too small...even with a very fine engraving bit there's just too much z height variation in this PVC material and my waste board to get even engraving at that size.) Laser would do it...but my CO2 laser isn't working right now and can't do something this big anyway...the CO2 laser could...but you can't laser engrave PVC. So I'd have to cut a new wood panel...and my CNC isn't really in good shape for cutting wood right now.
Then it hit me...the SLA prints are so detailed...maybe I can just make the labels part of the buttons themselves:
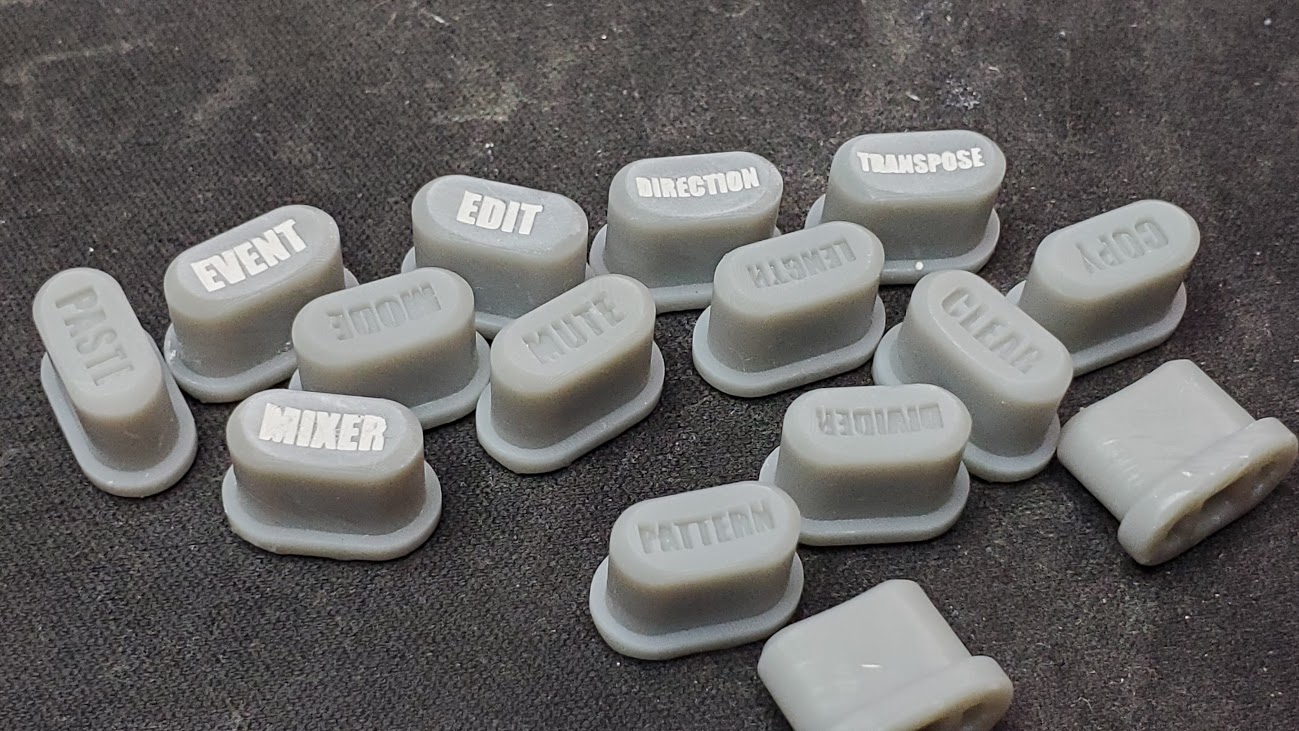
This worked MUCH better than I expected! I used some lacquer-stik to fill in the labels and they look pretty good. I'm not huge on the grey though and was out of black resin. I did try my custom dyed blue resin and a few other colors of lacquer-stik but wasn't quite happy with any of them:
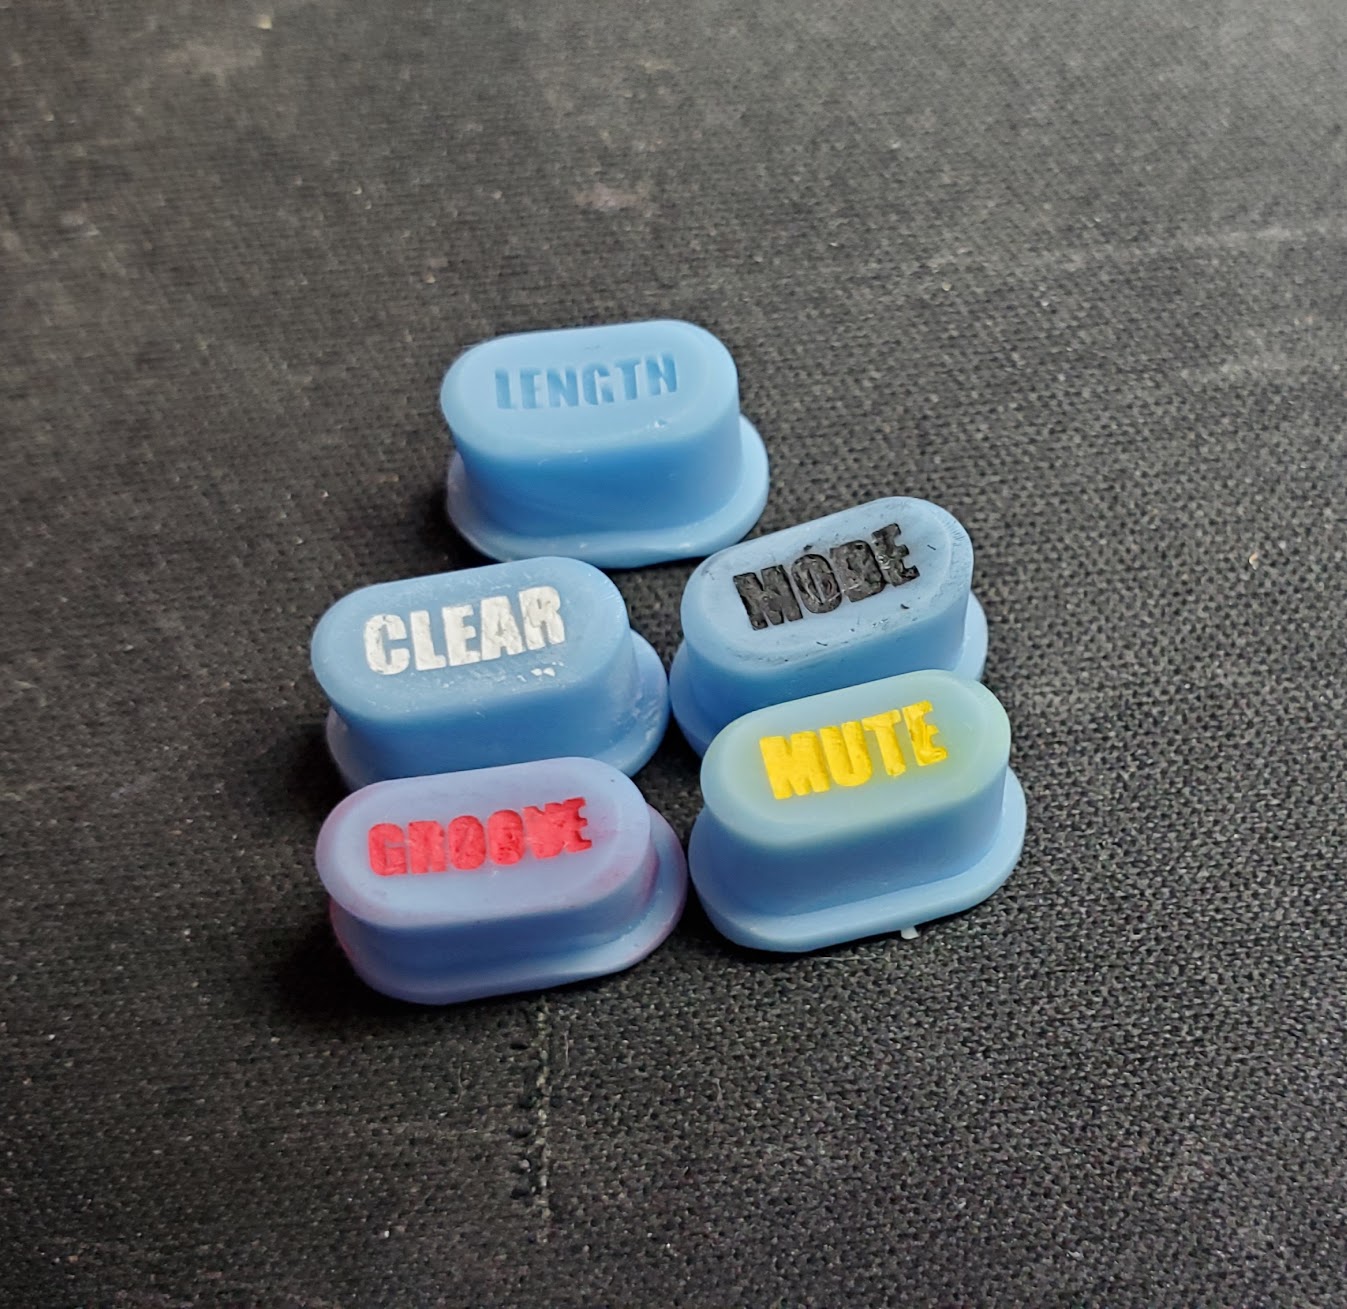
Note - these are really close up photos...in person they look a bit better - but the lacquer stick does tend to stain a bit more noticeably in colors other than white I found.
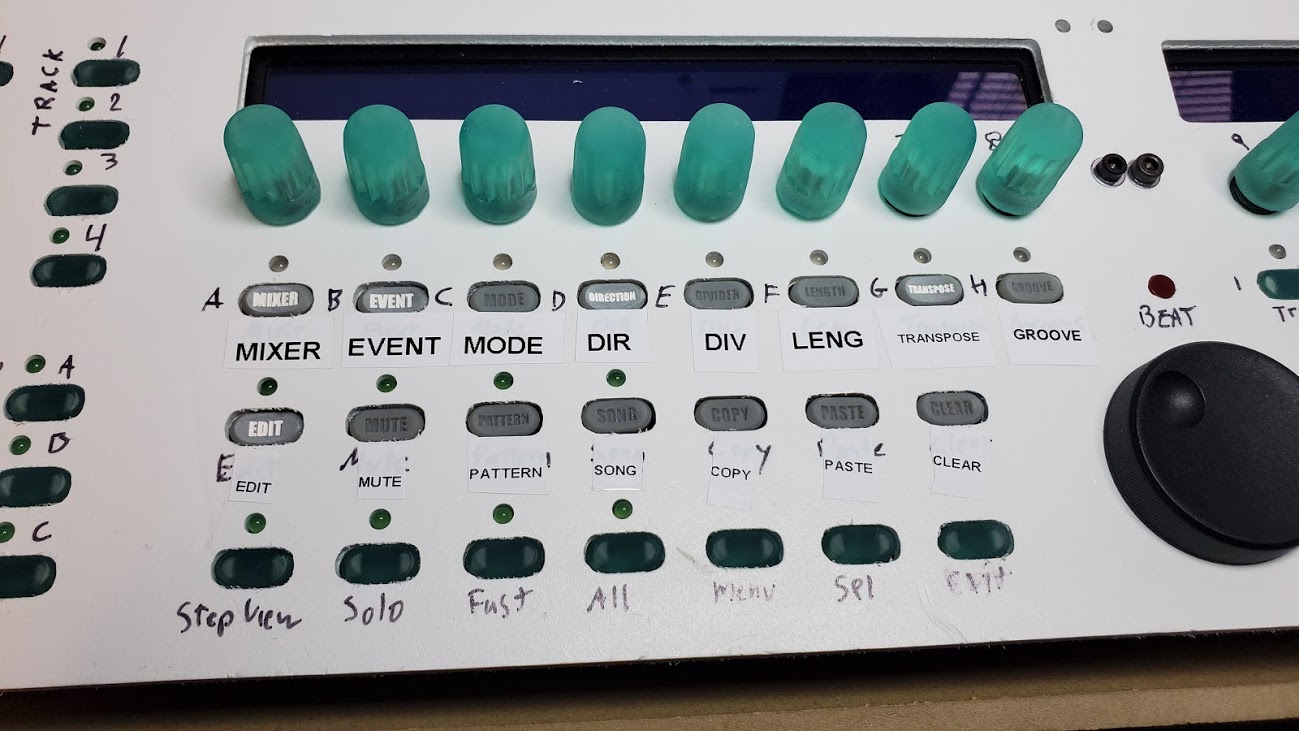
They grey resin isn't quite as dimensionally accurate as the blu though so the labeled buttons aren't quite as professionally feeling as the semi-translucent blu ones:
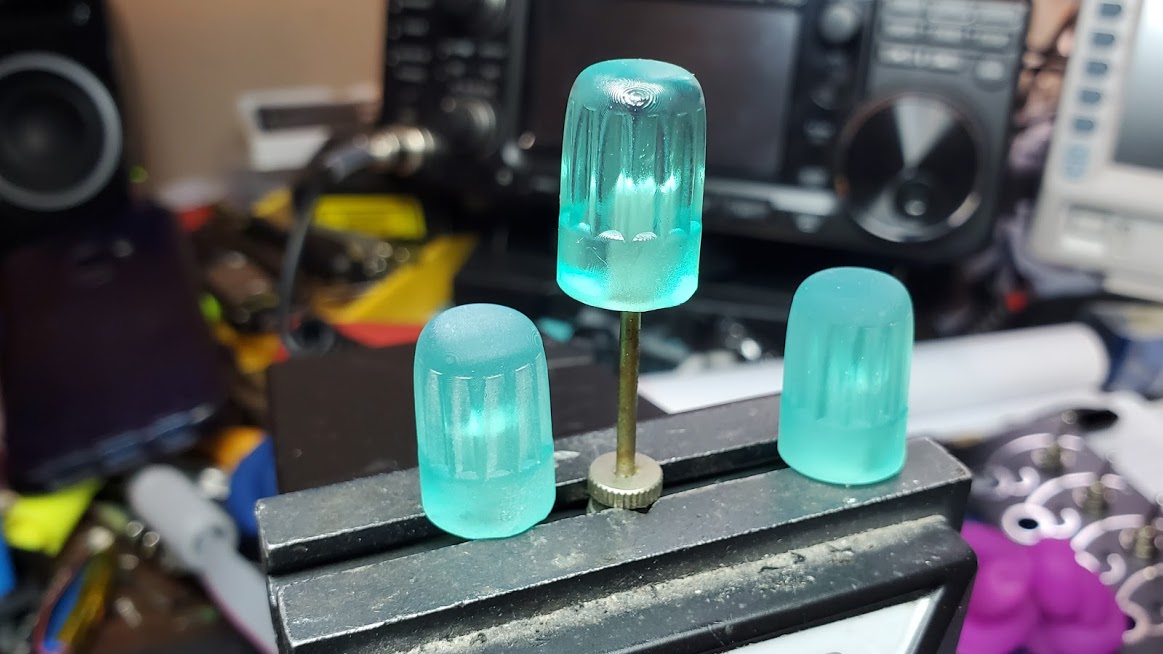
I also designed new knobs. I first printed a SLA set of the ones I was using and they looked a lot nicer...but I was never happy with the feel of them. My new knobs have more taper so it's less likely I'll bump a neighboring knob when turning on. They also fit better and just feel nicer:
But...again...I'm not super happy with the look of the blu resin. I did a quick test and sprayed one with a few coats of high gloss urethane...and as I expected it helped make it a lot more transparent by filling the imperfections in the surface (scroll back up for the microscope shots of SLA prints for reference!)
But...with the gloss coating the layers are more visible (these were also printed on an angle.) and I figure the spray will wear off fairly quickly on something I'm touching all the time. So I wanted to come up with a way to polish the final prints.
I thought about building or buying a rock tumbler....but...the more I thought about it and researched the more I felt a vibratory polisher would be the way to go. I've seen them used industrially in a factory I worked for and they always fascinated me. So...I picked up the cheapest one I could find on amazon...it's designed for tumbling bullet cases for reloading but was about half the price of the other vibratory polishers.
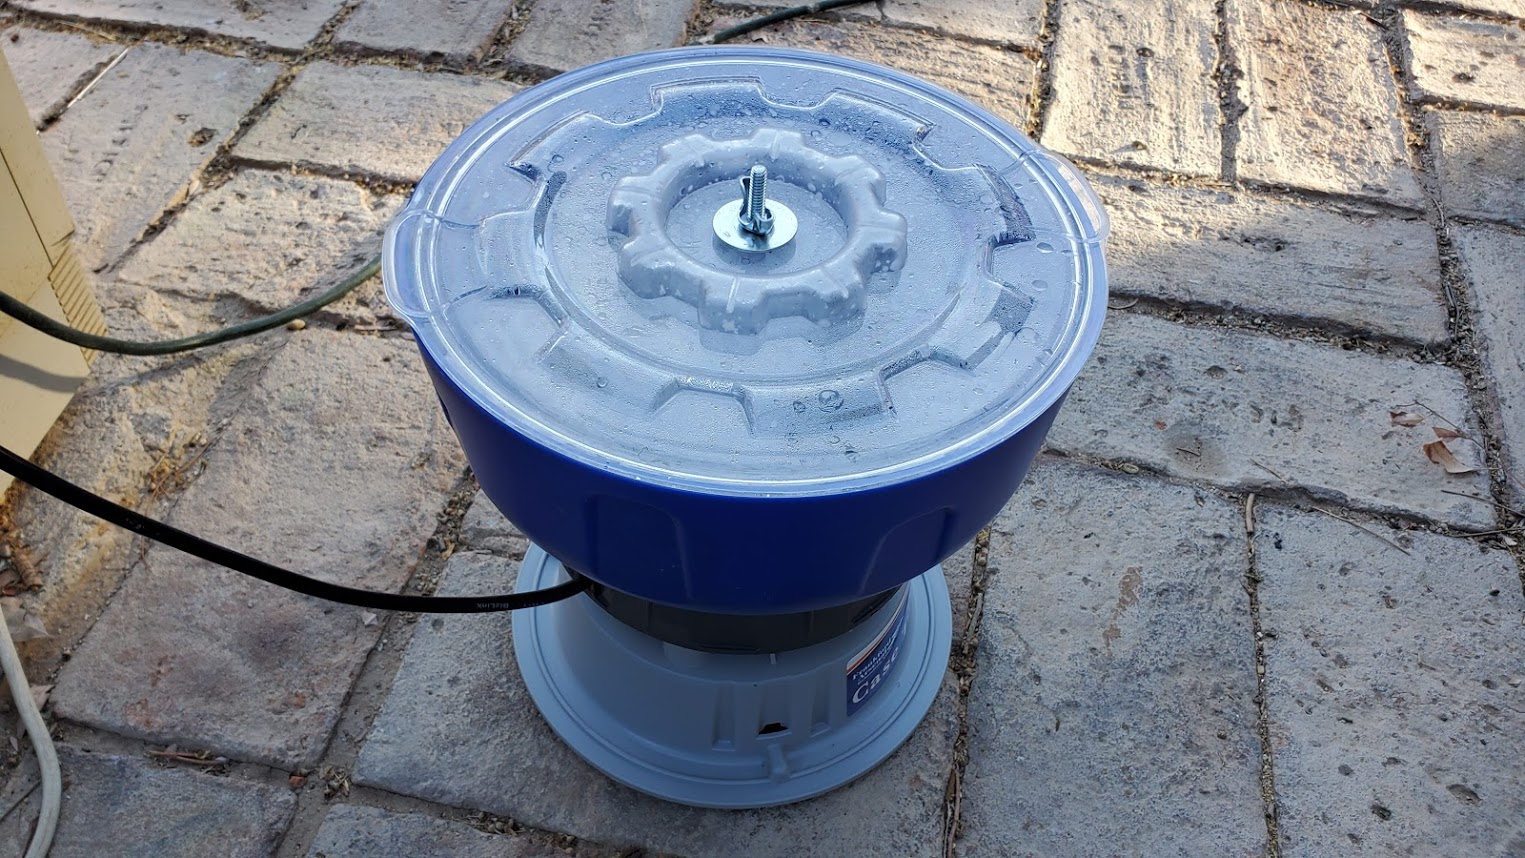
As I feared the vibratory polisher is a bit loud to use inside. This one is only meant to be used with dry media and suggests walnut shells...but the bowl is one piece and the hole the threaded shaft mounts into is blind so while wet media will void the warranty I see minimal risk to using it. I tried walnut shells first...and 6 hours in there with them didn't do much of anything.
A few reviews on amazon suggested adding an inverted 5" funnel in the center of the bowl to get better action from the media in the polisher (the more expensive ones have a toroidal shape inside...this one the center is just that rod.) But I didn't have a funnel on hand so I designed and FDM printed a funnel with printed threads so it could just screw on in there. That both helps get more action out of the media and takes up more space so I can use less media which is nice.
So...with the dry walnut shells not doing much of anything I tried some ceramic rods with rock tumbling grit and water. Bad news...this is a LOT louder! I also screwed up and used way too much water....I learned you're just supposed to use enough water to get the grit to form a kind of paste that sticks to the ceramic rods and your parts. With the pre-polish grit after 4 hours I saw a definite difference:
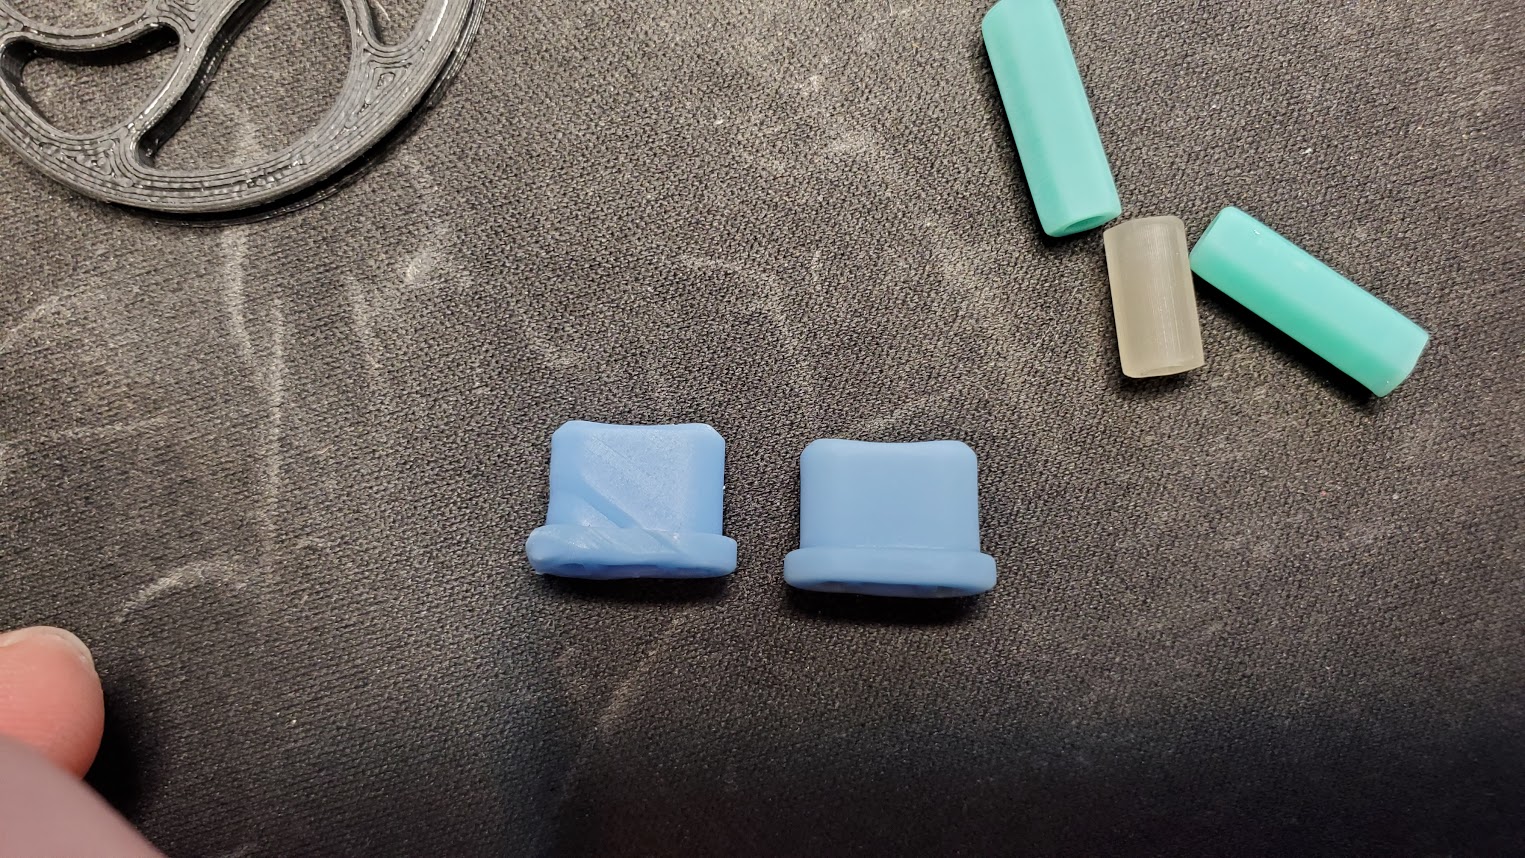
Though...it was a bit more aggressive than wanted. The one on the right is polished. You can see the surface is more even and layer lines are gone...but if you look at the top outline you can also see the sharp edges are gone and the chamfer is rounded over. Though - the engraved text on the top still stayed crisp so that's good!
I also tossed a FDM PLA part in there to see how it did. It didn't really get polished and the layer lines didn't really go away...but the textured surface from my Prusa powder coated build plate did come off and both the top and bottom look about the same afterwards. So...interesting but not something I really need right now.
I then washed out the bowl of the polisher and rinsed off the ceramic rods...and tried again with some final polish 1200 grit:
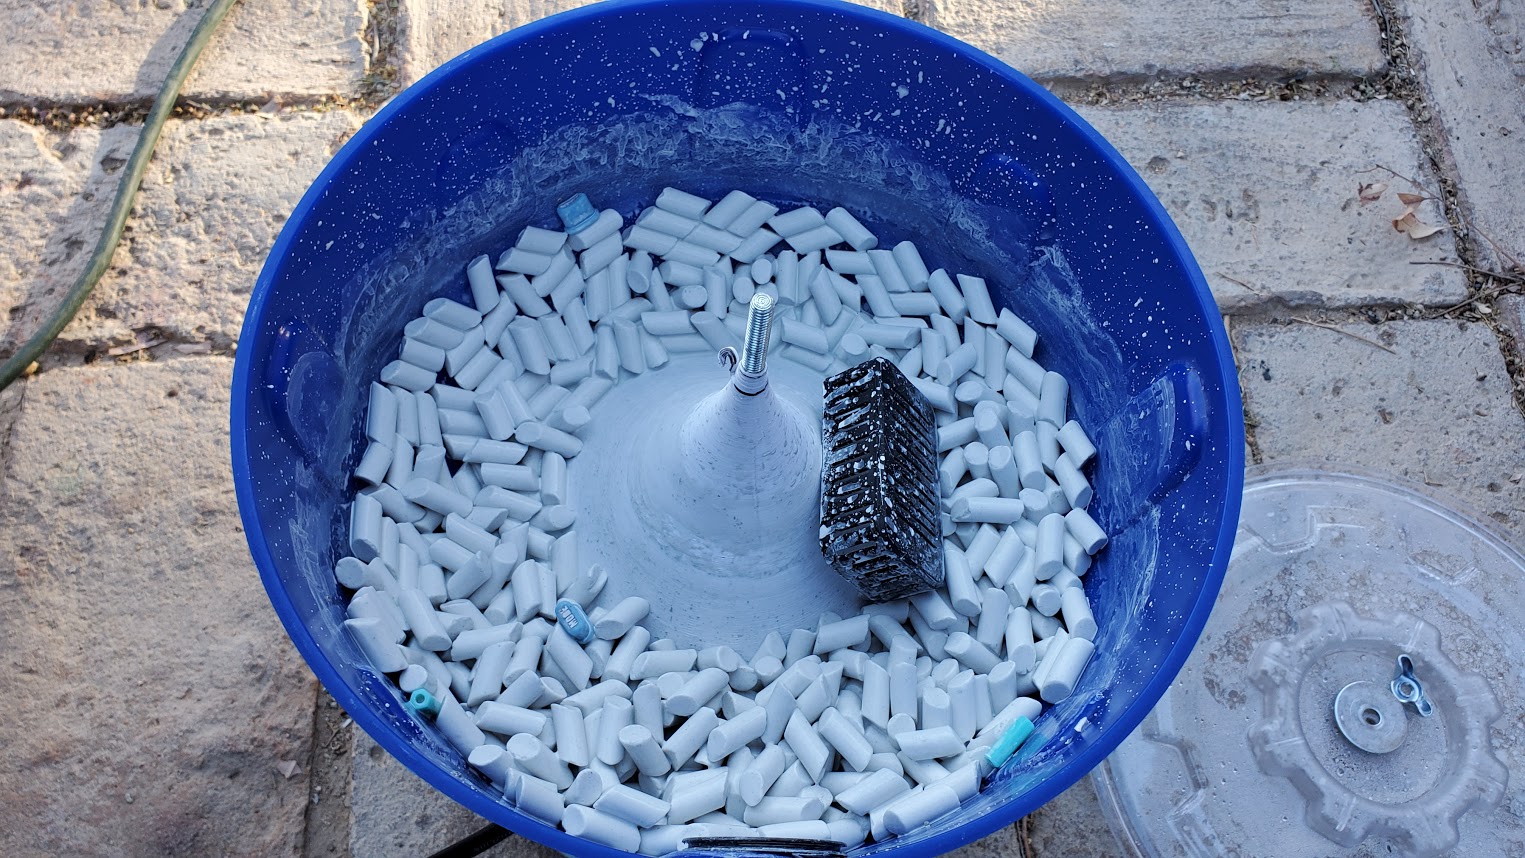
Oh...and here's a quick look at the action in there....I don't really have enough ceramic media for this big bowl...so the action isn't exactly what it should be right now:
But it was effective.
First here's a knob after the medium grit on the left and right off the printer on the right:
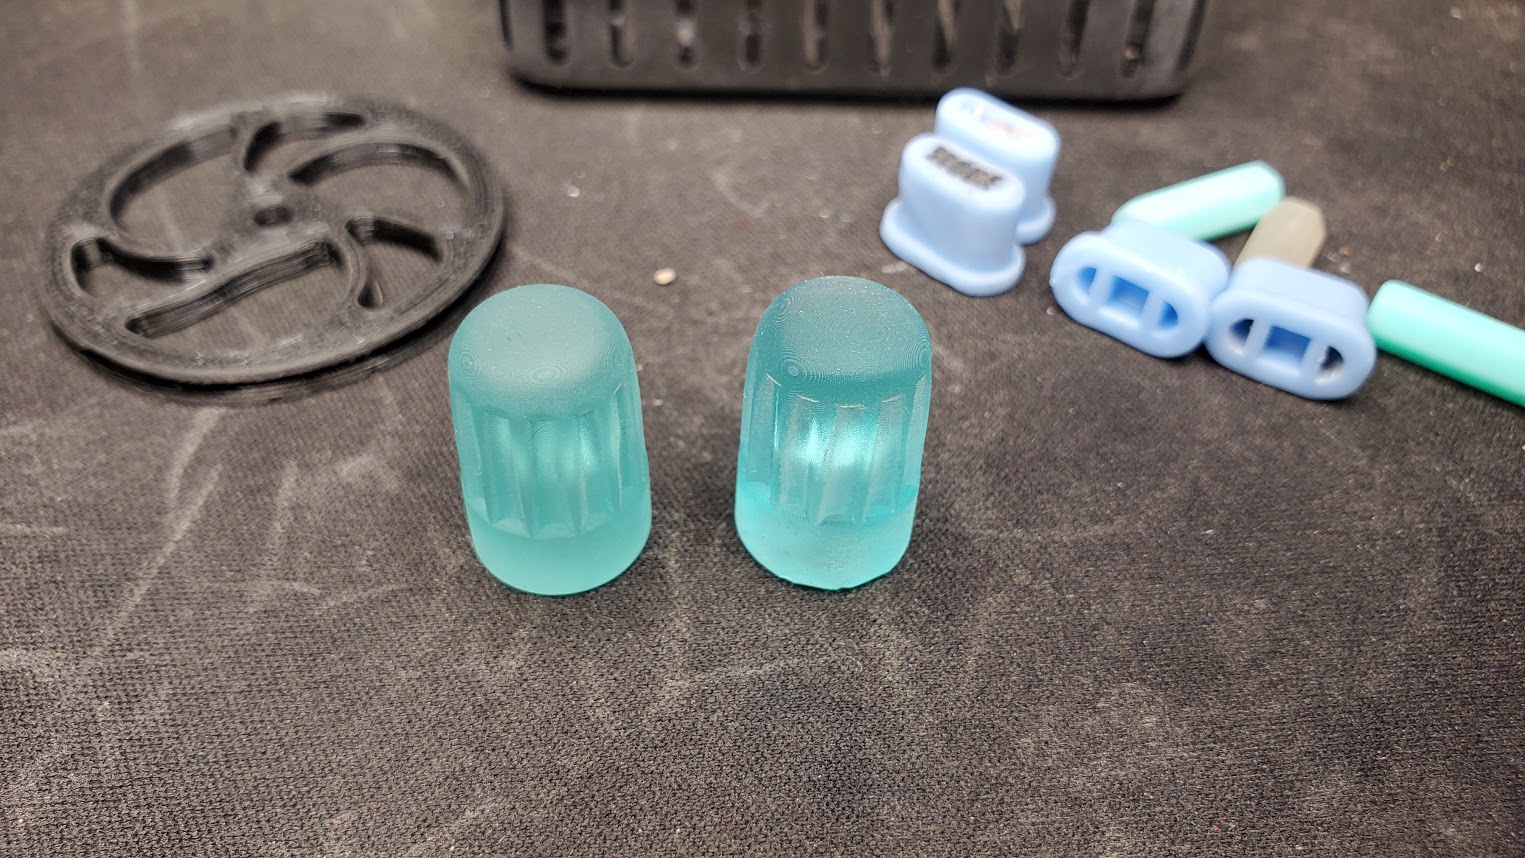
It's hard to tell...but the layer lines are less noticeable and the surface finish is more even.
now...after the 1200 grit polish:
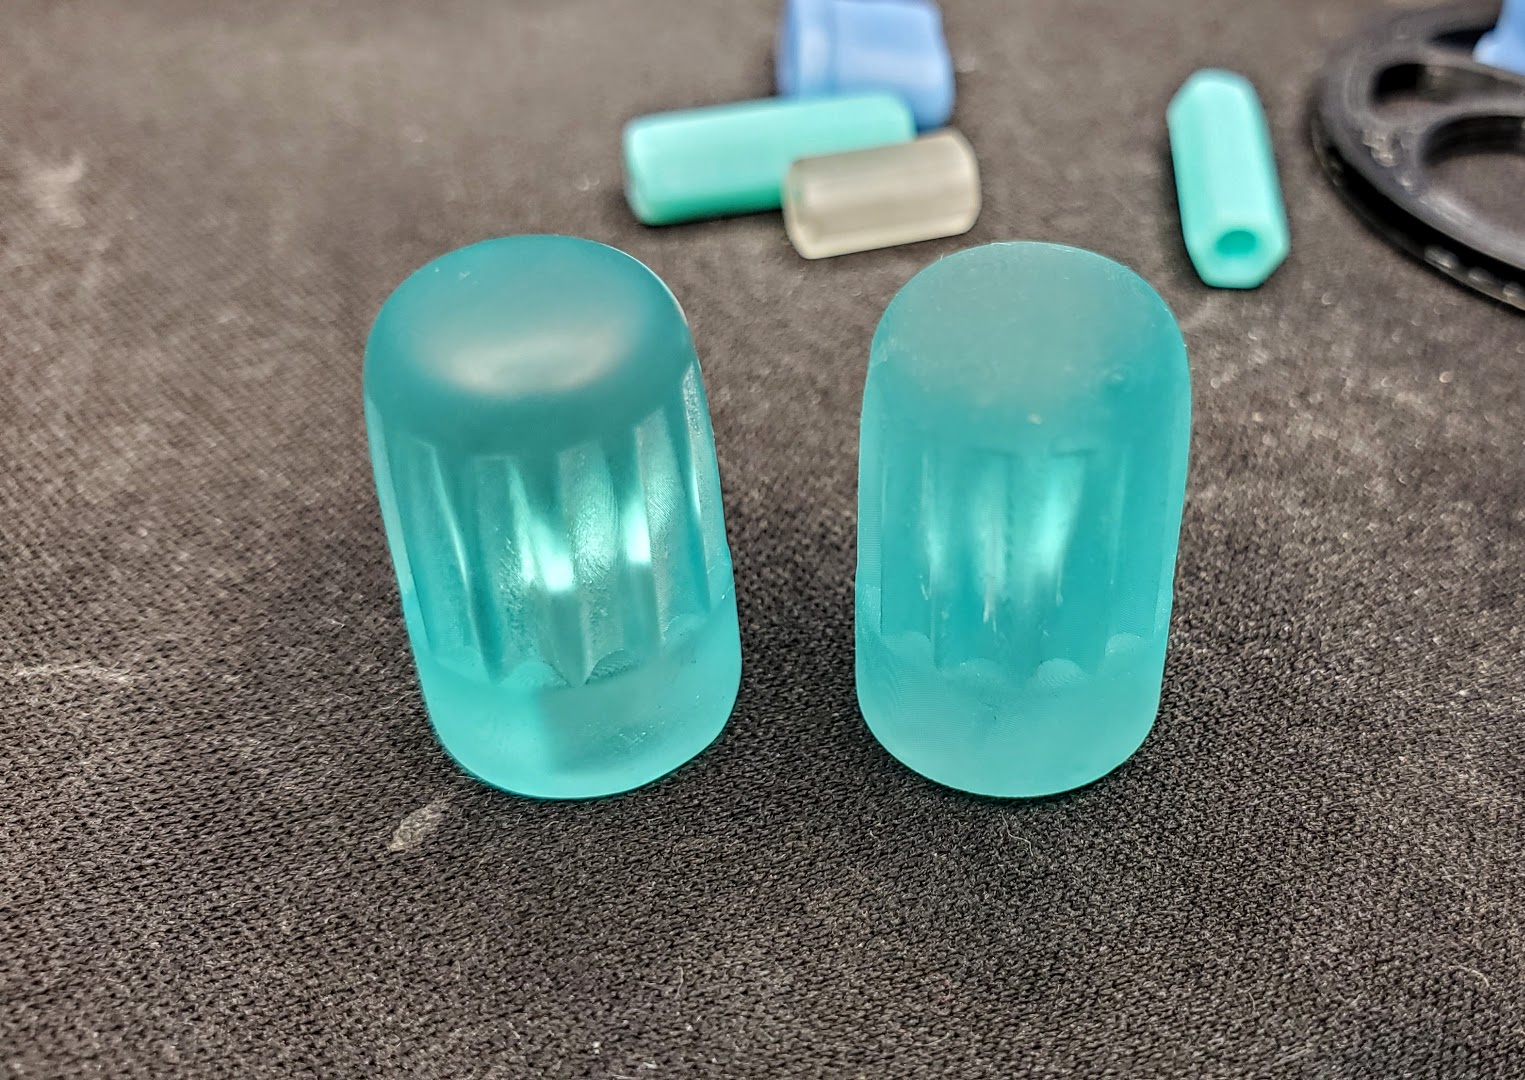
It's MUCH smoother and the layer lines are basically completely gone. Though - inside the knurls they're still visible...the ceramic rods are just too big and don't get the grit into those detailed areas....I have smaller rods and ceramic beads on order that should be here tomorrow to try.
Finally...I put them back in with the walnut shells...but instead of just walnut shells this time I added some nufinish car polish along with the shells....the result is hard to show in a photo...but in person it's an amazing difference:
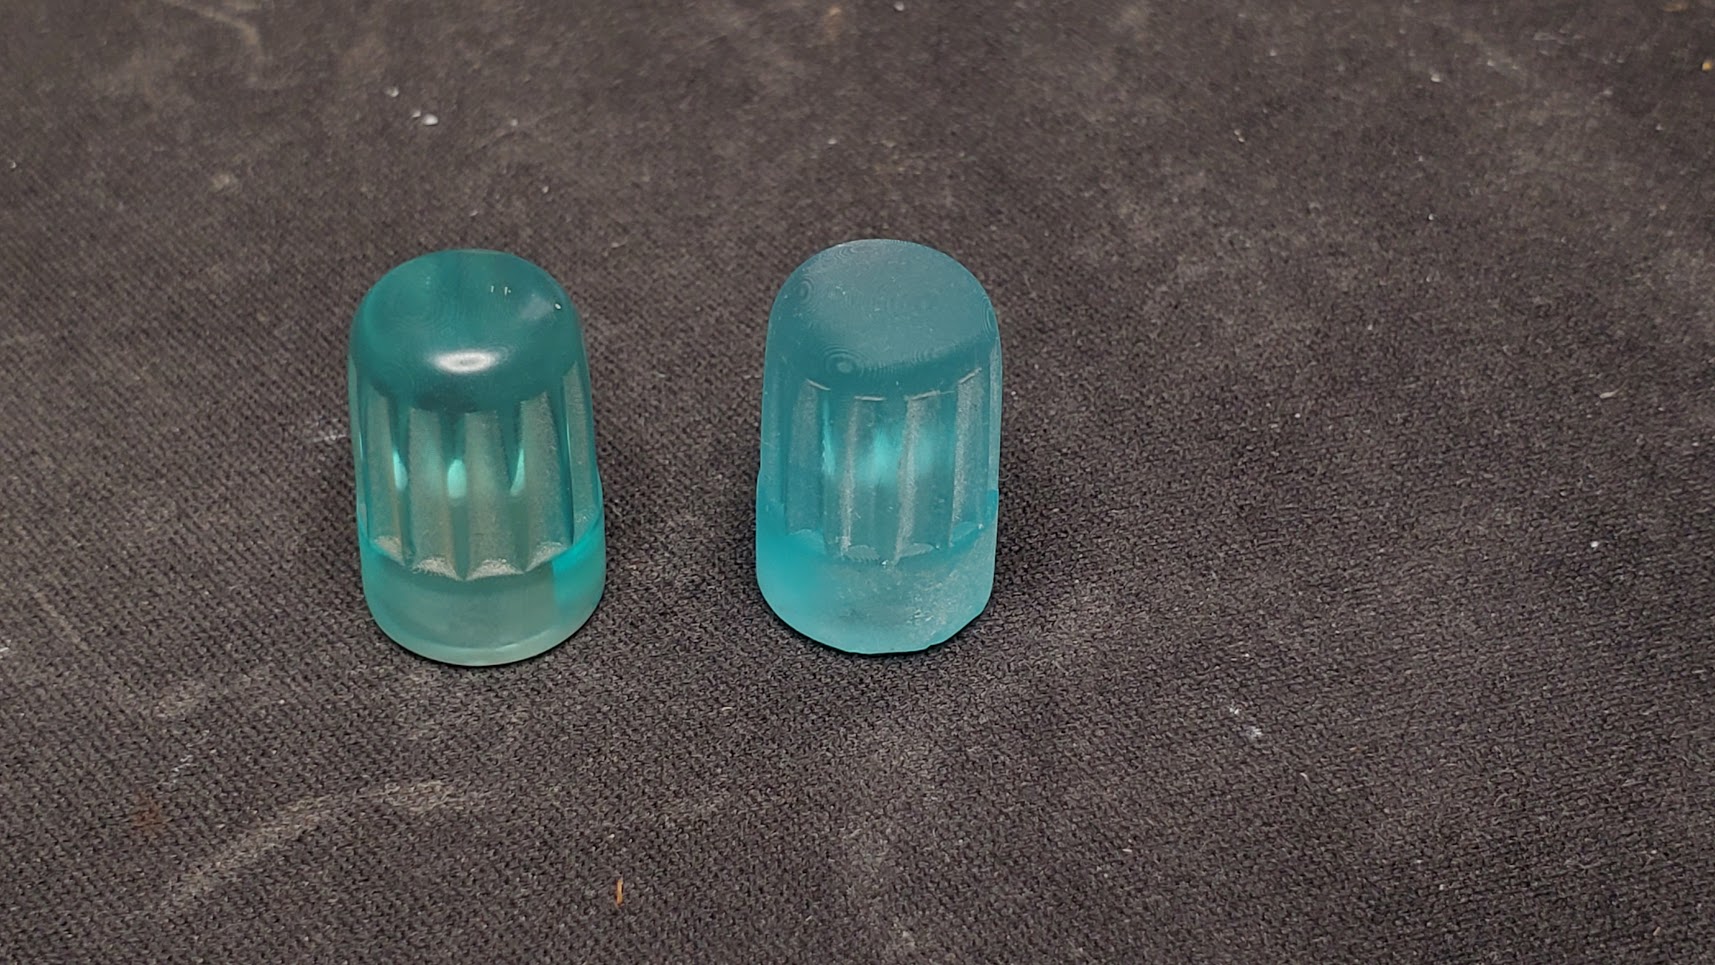
And here they are on a white background for comparison:
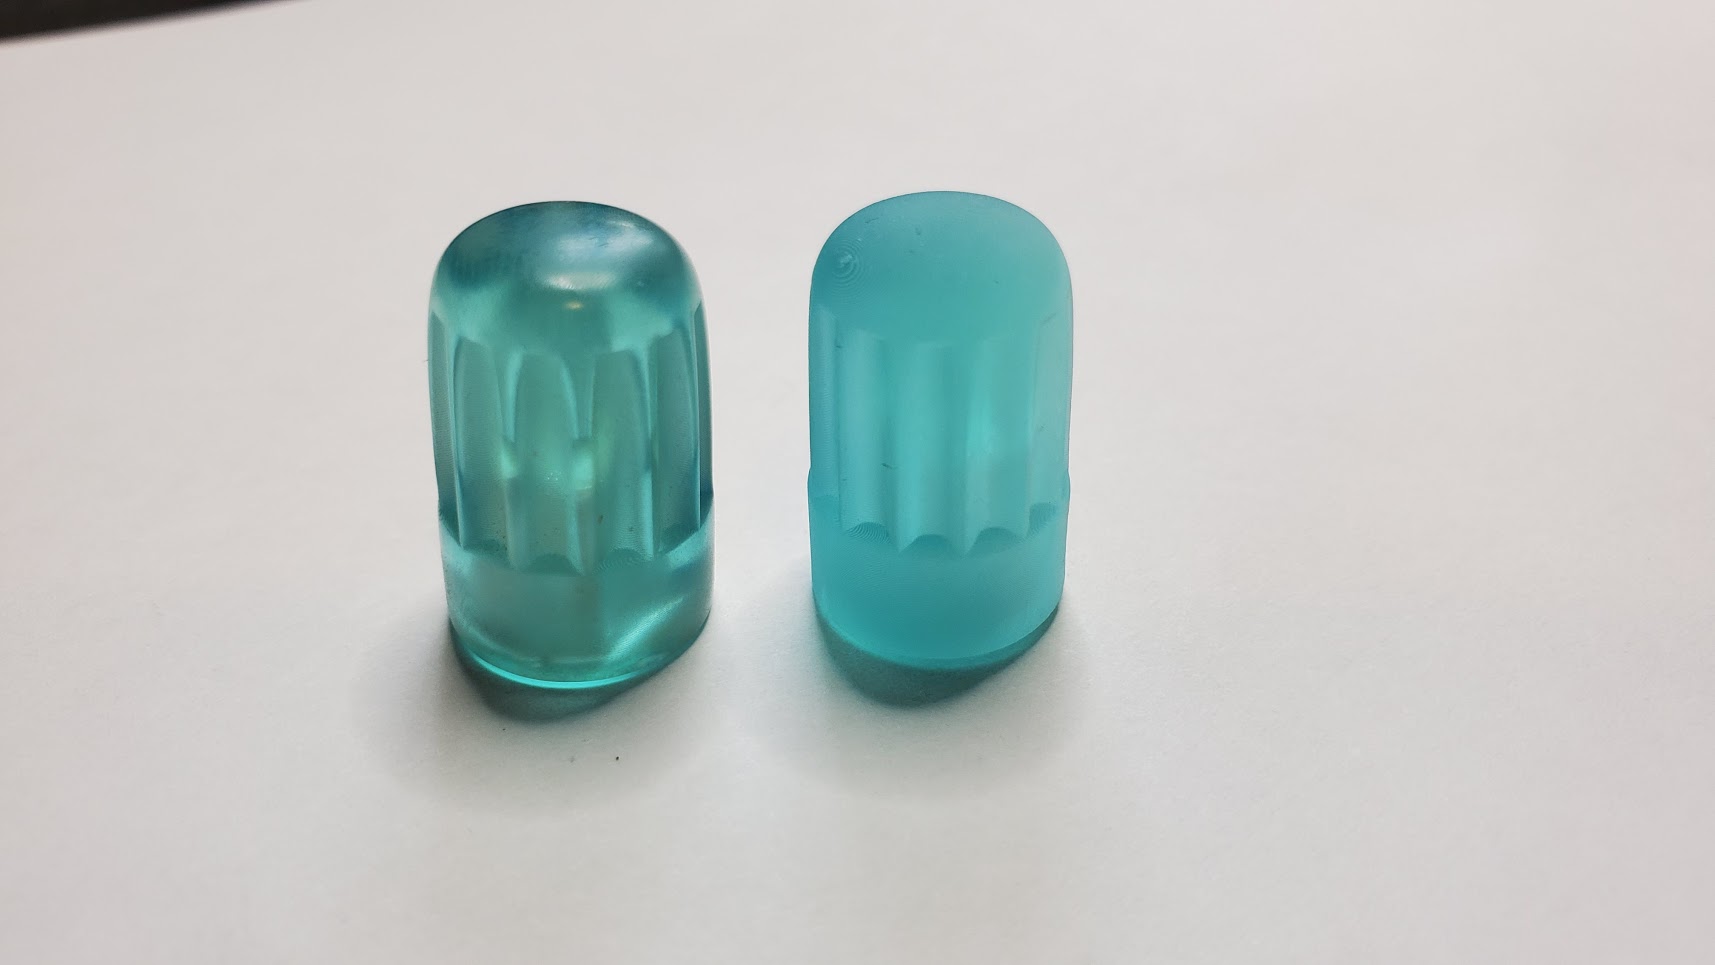
The look and feel in person is night and day. The parts off the printer are ok...but they feel a bit rough and gritty. The polished knob is like glass. It actually shines and almost looks wet. If you remember the look apple used on everything when they first released the "gumdrop imacs" in the late 90's where all their buttons looked like cut gems...that's what this reminds me of.
Note: I did do these polishing steps on the grey/blue buttons as well...but the result isn't as impressive as it is with the translucent resin. It does make them smoother and nicer to the touch...but visually it's just not very noticeable.
So...Making good progress on doing functional high quality professional looking parts!
As for RC related prints.....this literally just finished while I was typing this post up:
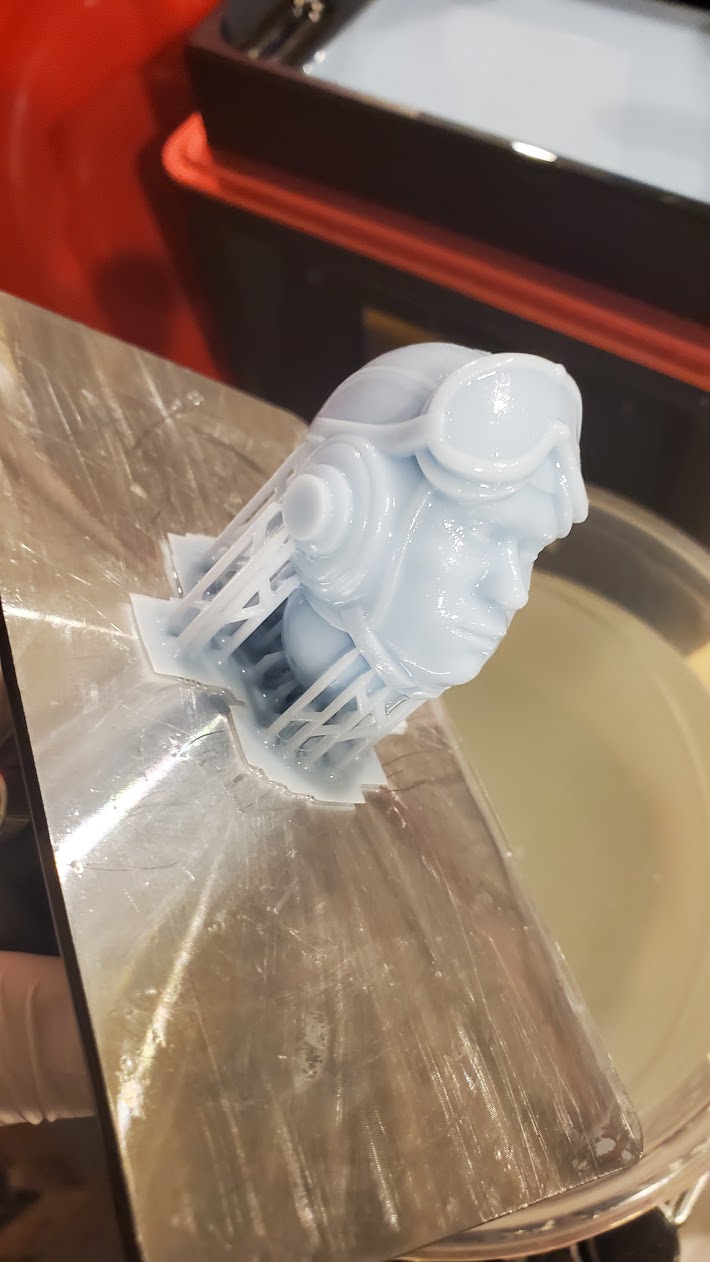
That's right out of the printer with no washing yet. You'll have to wait to see more though
But I've been doing a few other experiments with SLA the past few weeks I wanted to share.
First a quick update on the printers. The last few weeks we've had a bit of a cold snap and it's been down in the 40's and 50's in my shop (I have AC in my shop but just a little space heater I can only use when I'm actually out there.) and it turns out resin printing really does work better in warm weather. The resin gets a lot more viscus in the cold which causes a number of issues. The blu and tenacious resins I use for functional parts are pretty much unusable right now in this weather. But a lot of the "fast" resins still flow enough I can still print with them.
But...it also turns out the Elegoo Mars pro either doesn't like to not get used for a day or two...or...the lubricants used on it really don't deal well with cold. I've had it freeze up on me twice where the build platform gets stuck at the top and just will not move. I've been able to get it going again my loosening the two screws that hold the threaded rod bushing to the carrier and manually running the z-axis...then retightening them. But it's kind of a pain to deal with. I've recently tried cleaning the threads and re-lubing with some tri-flow which doesn't gum up as much and isn't as effected by cold so we'll see how that does.
I've been working on fixing up / finishing a project I started on over 10 years ago...then let sit until 3D printing and having a CNC gave me the tools I needed to pick it back up 3 years ago. My midibox sequencer:

Most of the work I've been doing is designing a new case for it that's made from sheets of 1/4" ply and some FDM printed parts. But...I also decided to replace the FDM printed buttons and knobs that I wasn't overly happy with.
The buttons I did a test print in Siraya Blu with 3 slightly differently sized models and two different print orientations:

The top row was printed on supports tilted 30 degrees in two axes, while the bottom row were just printed flat on the print bed with no supports. (the numbers on them indicate the sizes so I could tell which was which and see which size fit my needs best and if there was any distortion.)
Both sets are usable....and I like the clear look of the ones printed flat on the bed...plus they print twice as quickly as the angled ones. But....the angled ones are much smoother and more detailed though it's hard to tell from the photo due to the color/transparency of the resin. The tops of these are a gentle curve with a chamfer though and if you look closely you can see there's some stair stepping on the ones printed flat on the bed because the z resolution I used is lower than the x/y resolution of the LCD. I could lower the z resolution further...but that GREATLY increases print times and can lead to other print quality issues and more print failures.
So by tilting the parts that higher x/y resolution results in no more stair stepping and smoother prints. The extra height from the tilt and the supports does mean longer print times and some wasted resin...but...such is the price of quality
So I printed a few build plates full of buttons in blu (this was before the cold weather hit!) and swapped them into the sequencer:

I'm not huge on the color or the transparency...but the feel is night and day different. The old buttons just always felt cheap and sloppy. These. These feel like commercially made high end parts and are so much nicer to use! The fit the switches better and as a result the tactile feel is greatly improved.
Also - I learned a few new tricks about post-processing doing these. Since the blu resin so so viscous and tacky getting it cleaned off of such small parts with interior areas that have to be cleaned well since their dimensions are critical I had to really step up my cleaning game. If you look carefully at the photo above you'll see that the two whiteish areas on either side of the button are more prominent on some than others. The ones where they're more prominent are actually more "correct" because those interior areas were cleaned better - the dark ones are dark because there was uncured resin stuck up there that got cured in my final curing step.
Basically I now do a three step cleaning:
1) A quick rinse in "dirty" denatured alcohol. I call it dirty since it gets the bulk of the left over resin off so it tends to reach saturation faster. I also do a bit of brushing with a toothbrush at this point.
2) A 4-5 minute wash in my wash and cure station with "medium dirty" denatured alcohol. Medium mostly because it takes so much and I'm lazy about straining it and replenishing it. Ideally this would be "clean" alcohol...but that would be a LOT of work and expense with minimal reward.
3) a final rinse in fresh IPA (now that I can find it at the stores again!) then put into a ziploc with fresh IPA and submerged in my ultrasonic cleaner for 3 minutes. With normal resins this isn't as necessary...but with the tacky thick blu...it makes a HUGE difference.
I also wanted a better solution for labeling the buttons. I can cut the panel on my CNC...but trying to engrave the tiny labels is a bit more than my MPCNC is up to. (The text is just too small...even with a very fine engraving bit there's just too much z height variation in this PVC material and my waste board to get even engraving at that size.) Laser would do it...but my CO2 laser isn't working right now and can't do something this big anyway...the CO2 laser could...but you can't laser engrave PVC. So I'd have to cut a new wood panel...and my CNC isn't really in good shape for cutting wood right now.
Then it hit me...the SLA prints are so detailed...maybe I can just make the labels part of the buttons themselves:

This worked MUCH better than I expected! I used some lacquer-stik to fill in the labels and they look pretty good. I'm not huge on the grey though and was out of black resin. I did try my custom dyed blue resin and a few other colors of lacquer-stik but wasn't quite happy with any of them:

Note - these are really close up photos...in person they look a bit better - but the lacquer stick does tend to stain a bit more noticeably in colors other than white I found.
They grey resin isn't quite as dimensionally accurate as the blu though so the labeled buttons aren't quite as professionally feeling as the semi-translucent blu ones:

I also designed new knobs. I first printed a SLA set of the ones I was using and they looked a lot nicer...but I was never happy with the feel of them. My new knobs have more taper so it's less likely I'll bump a neighboring knob when turning on. They also fit better and just feel nicer:

But...again...I'm not super happy with the look of the blu resin. I did a quick test and sprayed one with a few coats of high gloss urethane...and as I expected it helped make it a lot more transparent by filling the imperfections in the surface (scroll back up for the microscope shots of SLA prints for reference!)

But...with the gloss coating the layers are more visible (these were also printed on an angle.) and I figure the spray will wear off fairly quickly on something I'm touching all the time. So I wanted to come up with a way to polish the final prints.
I thought about building or buying a rock tumbler....but...the more I thought about it and researched the more I felt a vibratory polisher would be the way to go. I've seen them used industrially in a factory I worked for and they always fascinated me. So...I picked up the cheapest one I could find on amazon...it's designed for tumbling bullet cases for reloading but was about half the price of the other vibratory polishers.

As I feared the vibratory polisher is a bit loud to use inside. This one is only meant to be used with dry media and suggests walnut shells...but the bowl is one piece and the hole the threaded shaft mounts into is blind so while wet media will void the warranty I see minimal risk to using it. I tried walnut shells first...and 6 hours in there with them didn't do much of anything.
A few reviews on amazon suggested adding an inverted 5" funnel in the center of the bowl to get better action from the media in the polisher (the more expensive ones have a toroidal shape inside...this one the center is just that rod.) But I didn't have a funnel on hand so I designed and FDM printed a funnel with printed threads so it could just screw on in there. That both helps get more action out of the media and takes up more space so I can use less media which is nice.
So...with the dry walnut shells not doing much of anything I tried some ceramic rods with rock tumbling grit and water. Bad news...this is a LOT louder! I also screwed up and used way too much water....I learned you're just supposed to use enough water to get the grit to form a kind of paste that sticks to the ceramic rods and your parts. With the pre-polish grit after 4 hours I saw a definite difference:

Though...it was a bit more aggressive than wanted. The one on the right is polished. You can see the surface is more even and layer lines are gone...but if you look at the top outline you can also see the sharp edges are gone and the chamfer is rounded over. Though - the engraved text on the top still stayed crisp so that's good!
I also tossed a FDM PLA part in there to see how it did. It didn't really get polished and the layer lines didn't really go away...but the textured surface from my Prusa powder coated build plate did come off and both the top and bottom look about the same afterwards. So...interesting but not something I really need right now.
I then washed out the bowl of the polisher and rinsed off the ceramic rods...and tried again with some final polish 1200 grit:

Oh...and here's a quick look at the action in there....I don't really have enough ceramic media for this big bowl...so the action isn't exactly what it should be right now:
But it was effective.
First here's a knob after the medium grit on the left and right off the printer on the right:

It's hard to tell...but the layer lines are less noticeable and the surface finish is more even.
now...after the 1200 grit polish:

It's MUCH smoother and the layer lines are basically completely gone. Though - inside the knurls they're still visible...the ceramic rods are just too big and don't get the grit into those detailed areas....I have smaller rods and ceramic beads on order that should be here tomorrow to try.
Finally...I put them back in with the walnut shells...but instead of just walnut shells this time I added some nufinish car polish along with the shells....the result is hard to show in a photo...but in person it's an amazing difference:

And here they are on a white background for comparison:

The look and feel in person is night and day. The parts off the printer are ok...but they feel a bit rough and gritty. The polished knob is like glass. It actually shines and almost looks wet. If you remember the look apple used on everything when they first released the "gumdrop imacs" in the late 90's where all their buttons looked like cut gems...that's what this reminds me of.
Note: I did do these polishing steps on the grey/blue buttons as well...but the result isn't as impressive as it is with the translucent resin. It does make them smoother and nicer to the touch...but visually it's just not very noticeable.
So...Making good progress on doing functional high quality professional looking parts!
As for RC related prints.....this literally just finished while I was typing this post up:

That's right out of the printer with no washing yet. You'll have to wait to see more though


