A few us are currently building from balsa (not all planes are made from foam!) and one discussion turned to prepping balsa prior to covering it. For the planes I've built and covered I have only sanded the balsa and cleaned off the dust before covering, and have never sealed the wood. Others use various sealing compounds prior to covering.
My covering work has always been satisfactory to me, but it has never been what could be considered silky smooth and perfect. With the thinner covering such as SoLite I can usually see the grain of the wood. This isn't a big deal to me, I'm still relatively new at building and figure the plane will eventually be brought home in a basket anyway, so why spend the extra time? Well, maybe it doesn't take that much extra time or effort, and maybe the results will be worth it.
Time to experiment!
I've got the material on-hand to try three different sealing methods, sanding sealer, glue/water mix, and hair spray. All are various avenues in achieving the same results - locking the wood fibers in place so they can be sanded smooth while providing a very smooth finish to apply the covering to. There are probably dozens of other products to use, but this is what I've heard of and I happen to have the material currently to try all three of them.
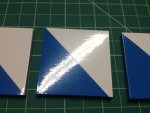
I took a 2" wide strip of balsa and cut it into 2" squares. Using the same original piece of balsa should help avoid differences you'd find from one piece to another giving more consistent results. Each piece was marked on the back and the front was then sanded with 220 grit sandpaper. Two were put off to the side as they won't get any more work prior to covering. The remaining 8 were then sanded with 400 grit wet/dry paper, and again 2 were put off to the side. The 4 that were removed will be covered as-is without any sealing to see how they compare to the sealed wood. My thought is that if I can't see any real difference I probably won't bother sealing wood in the future.
2 of the pieces were sprayed with "Aussie Instant Freeze" hairspray and allowed to dry. They were then sanded with 400 grit and re-sprayed. Once thoroughly dry another light sanding will follow with 400 grit and they'll be ready to cover.
2 of the pieces were given a coat of Aero Gloss sanding sealer and allowed to dry. Then a quick sanding with 400 grit and another coat was added. Once thoroughly dry another light sanding with 400 will follow and they'll be ready to cover.
The last 2 pieces were covered with a 50/50 mixture of water and Titebond II wood glue and allowed to dry. These are currently taking the longest time to dry, but once done they'll be sanded with 400 grit and given another coat. After drying will be a light sanding with 400 grit and all will then be ready to cover.
If you are wondering why I'm using two blocks with each type of sealing material it's because I'm going to cover one of them with SoLite and one with regular weight covering material. The SoLite shows more imperfections from what I've seen as it is thinner and allows the grain of the wood to telegraph through.
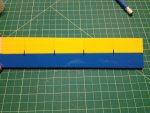
Taking it one step further, each piece will be covered with a light and dark color, mainly in an attempt at being able to see the differences in a picture. The eventual pictures may not look different at all from one another, but I'll try my best. I'll also have the wife and kids do a blind rating from best to worst since I'm biased. I want the untreated wood to look every bit as good as the treated stuff, as that means less work for me in the future!
I may be doing this completely wrong or in a half-assed manner - if so, speak up now so I can fix/change things before going to far!


