
You are using an out of date browser. It may not display this or other websites correctly.
You should upgrade or use an alternative browser.
You should upgrade or use an alternative browser.
Cessna 180 Swappable with plans. 50" inch wing span.
- Thread starter Timmy P
- Start date
corytee
FoamBoard Fragment Distro
Wow it looks nice. Are the floats made of foamboard?
Thanks. Yes, the floats are made from foamboard. I still have to coat them with something to waterproof them; I'll probably use water based polyurethane. I used the plans provided by OrangutangSurfer. The link to his thread with the plans is below.
http://forum.flitetest.com/showthread.php?21518-DTFB-FLOATS!!!-V1
Timmy P
Member
Cessna with floats attached - I haven't flown it like this yet. I haven't ever flown a plane from the water so whenever I find the time, this will be fun and interesting. I might have to rig a harpoon gun on the front of the air boat like Peter's so I can recover the wreckage.
View attachment 73704 View attachment 73705
Thats badass. Ive been wanting to build a pair of floats.. Those are perfect. I love the look of Cessnas with floats and also want to do some float plane flying.. I have a good buddy that has a nice pond in his yard. Ill have to check the link and build a set. Seeing what you guys do with this plane is just awesome.. Thanks everybody.
Thanks Timmy P for the awesome plans. This is my second post on the forum. I have been building FT planes (and thanks to FliteTest) for about a year or so and I really enjoy seeing what others are doing. I get a lot of inspiration from the community so I thought that I would also post some pictures of my build.
Once again, thanks for the hard work on these plans. It really is appreciated.
So, if I can figure out this whole forum posting thing...here it goes.
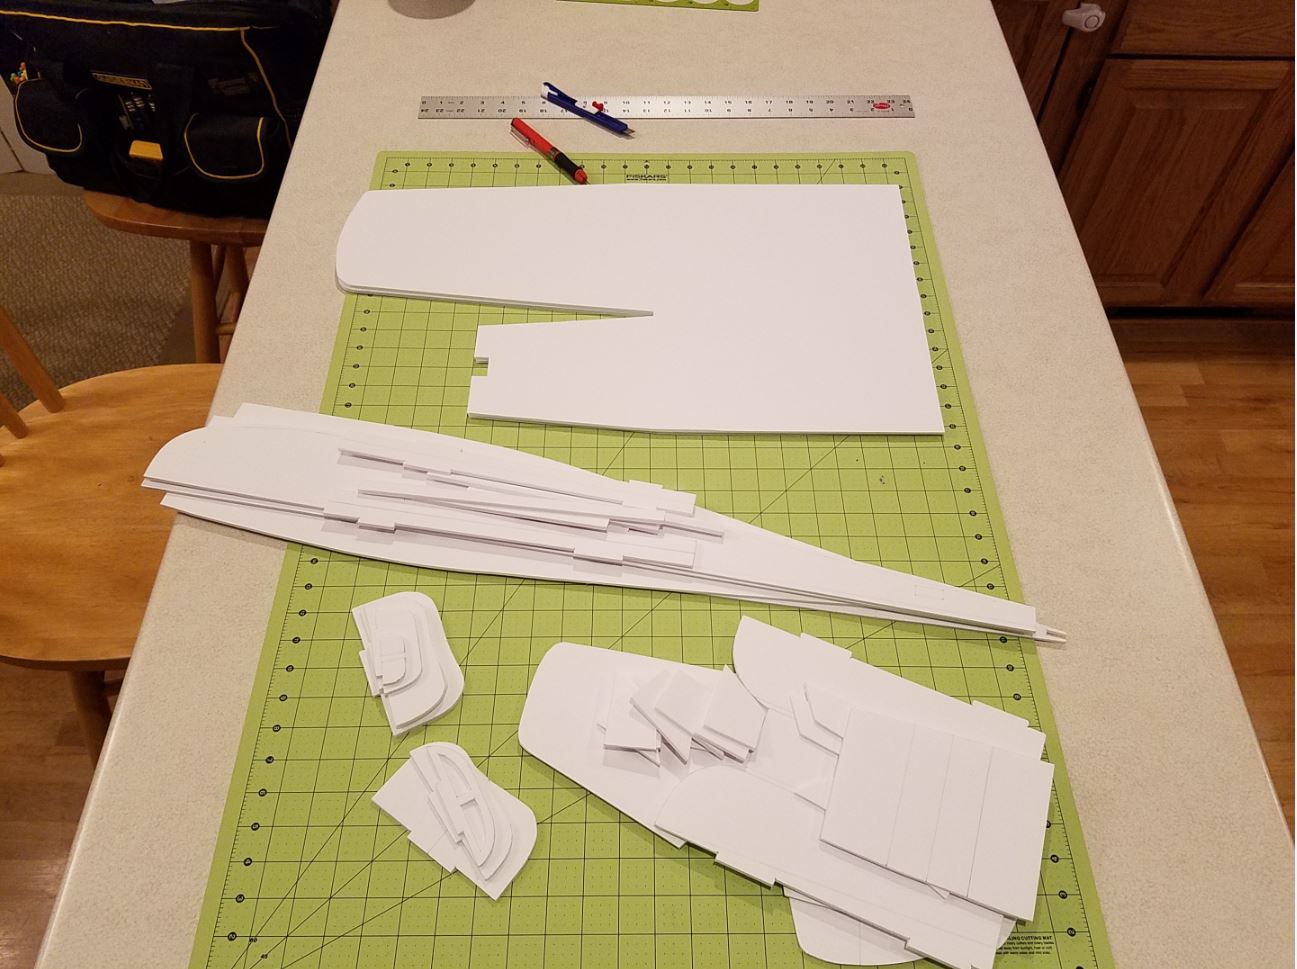
I started by using Ross foam board. I like to use this stuff because the paper does not peel off as easy. I don't have to use hot glue on the hinges then. Also, it is brighter white and doesn't see to warp as much. Not quite as durable though. This is just my preference. I have used DTFB in the past and it works pretty well too.
I print the plans and then tape together. Then I use some old marble cheese slicer slabs to hold the plans to the foam board. The piano wire on the cheese slicers keep breaking and the handles fall apart so I have them just laying around. We're pretty rough on the cheese slicers here in Wisconsin.
So anyway, I weight the plans down and use a push pin to mark all of the lines and junction points. Then I use a straight edge to connect the dots and hand draw all of the curves. This reminds me of the good old days in high school drafting class. When you actually had to use a pencil to draw...
Next step, cut the parts out. The only trick I use here is making the slots for the tabs. I can never seem to hold the blade straight so the slot comes out all weird on the other side when I try to cut straight through. So now I cut only 50% on one side. Then I punch a pin through so that there is a little hole on the other side of the part at the four corners. Then I cut the other side 50%. Bam! A nice, square slot.
So, here is my progress so far. I will keep posting. Ya know, this is really cool that there is a community that is:
1. very positive and genuinely helpful to others
2. willing to share a wealth of knowledge and ideas
Thanks again.
Once again, thanks for the hard work on these plans. It really is appreciated.
So, if I can figure out this whole forum posting thing...here it goes.
I started by using Ross foam board. I like to use this stuff because the paper does not peel off as easy. I don't have to use hot glue on the hinges then. Also, it is brighter white and doesn't see to warp as much. Not quite as durable though. This is just my preference. I have used DTFB in the past and it works pretty well too.
I print the plans and then tape together. Then I use some old marble cheese slicer slabs to hold the plans to the foam board. The piano wire on the cheese slicers keep breaking and the handles fall apart so I have them just laying around. We're pretty rough on the cheese slicers here in Wisconsin.
So anyway, I weight the plans down and use a push pin to mark all of the lines and junction points. Then I use a straight edge to connect the dots and hand draw all of the curves. This reminds me of the good old days in high school drafting class. When you actually had to use a pencil to draw...
Next step, cut the parts out. The only trick I use here is making the slots for the tabs. I can never seem to hold the blade straight so the slot comes out all weird on the other side when I try to cut straight through. So now I cut only 50% on one side. Then I punch a pin through so that there is a little hole on the other side of the part at the four corners. Then I cut the other side 50%. Bam! A nice, square slot.
So, here is my progress so far. I will keep posting. Ya know, this is really cool that there is a community that is:
1. very positive and genuinely helpful to others
2. willing to share a wealth of knowledge and ideas
Thanks again.
Attachments

planebreaker2000
Active member
Keep posting and good luck with the build. This is a great flying plane, and you will enjoy it.


Very nice!
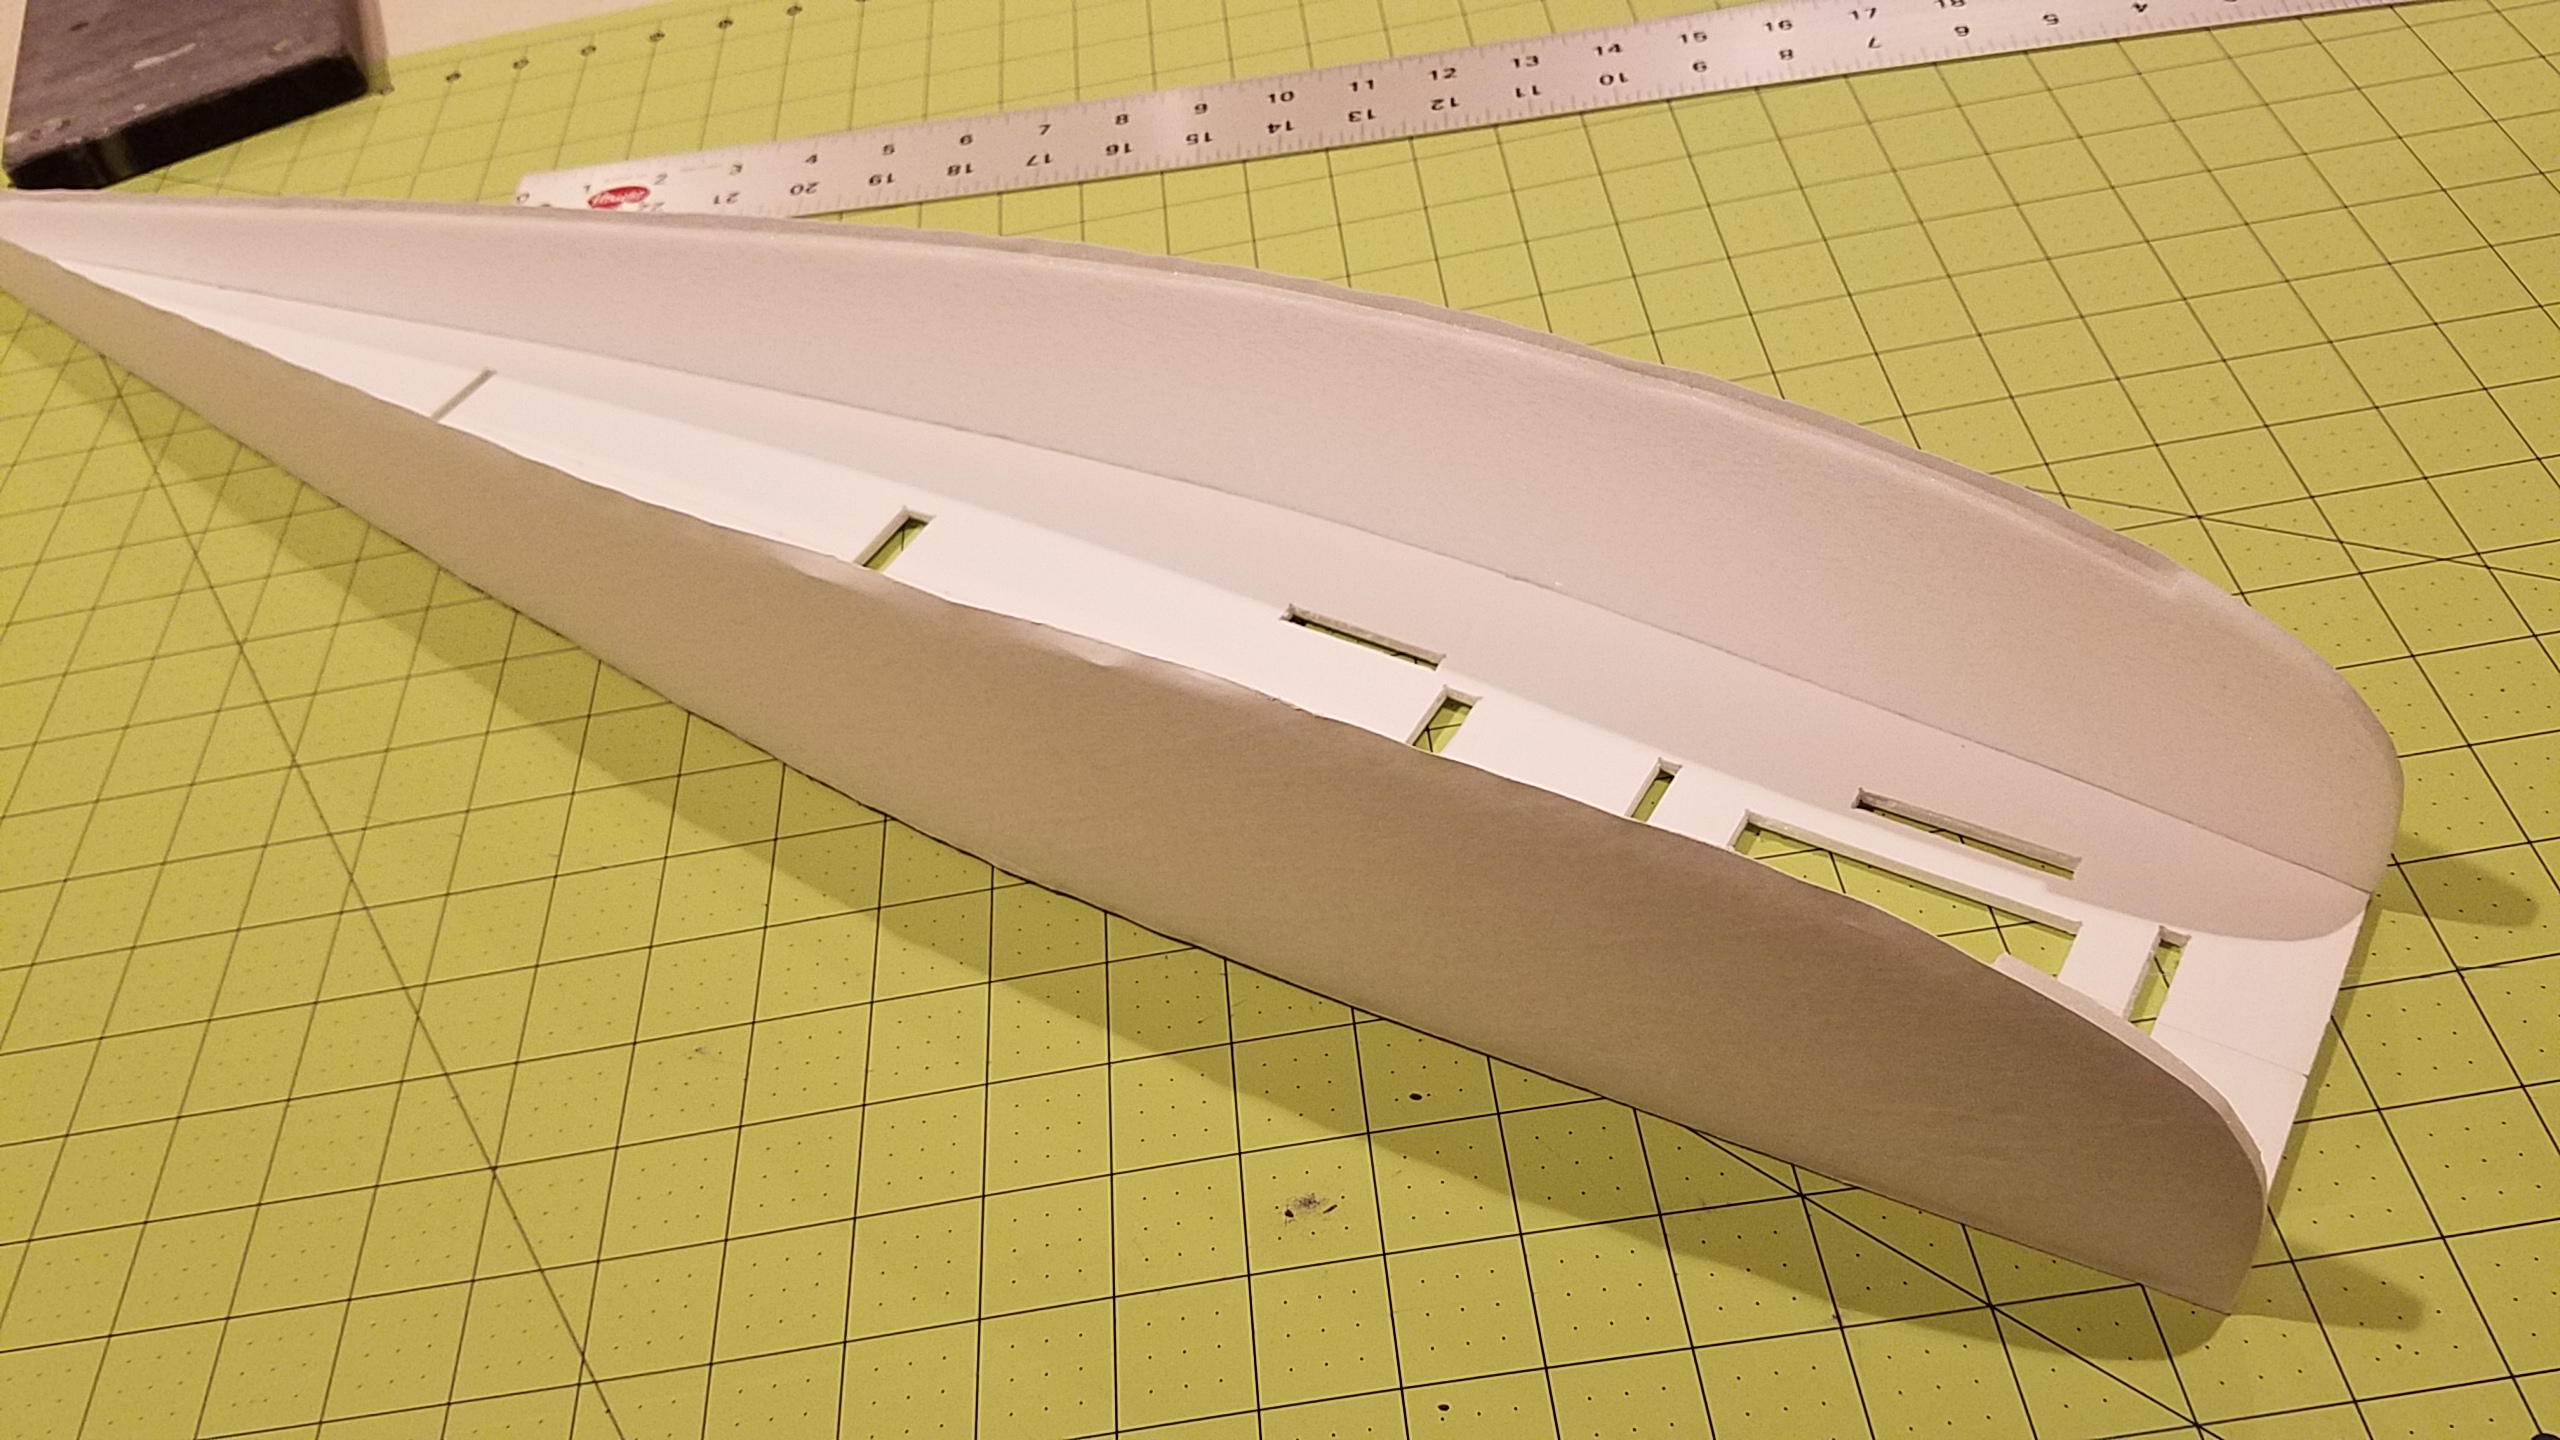
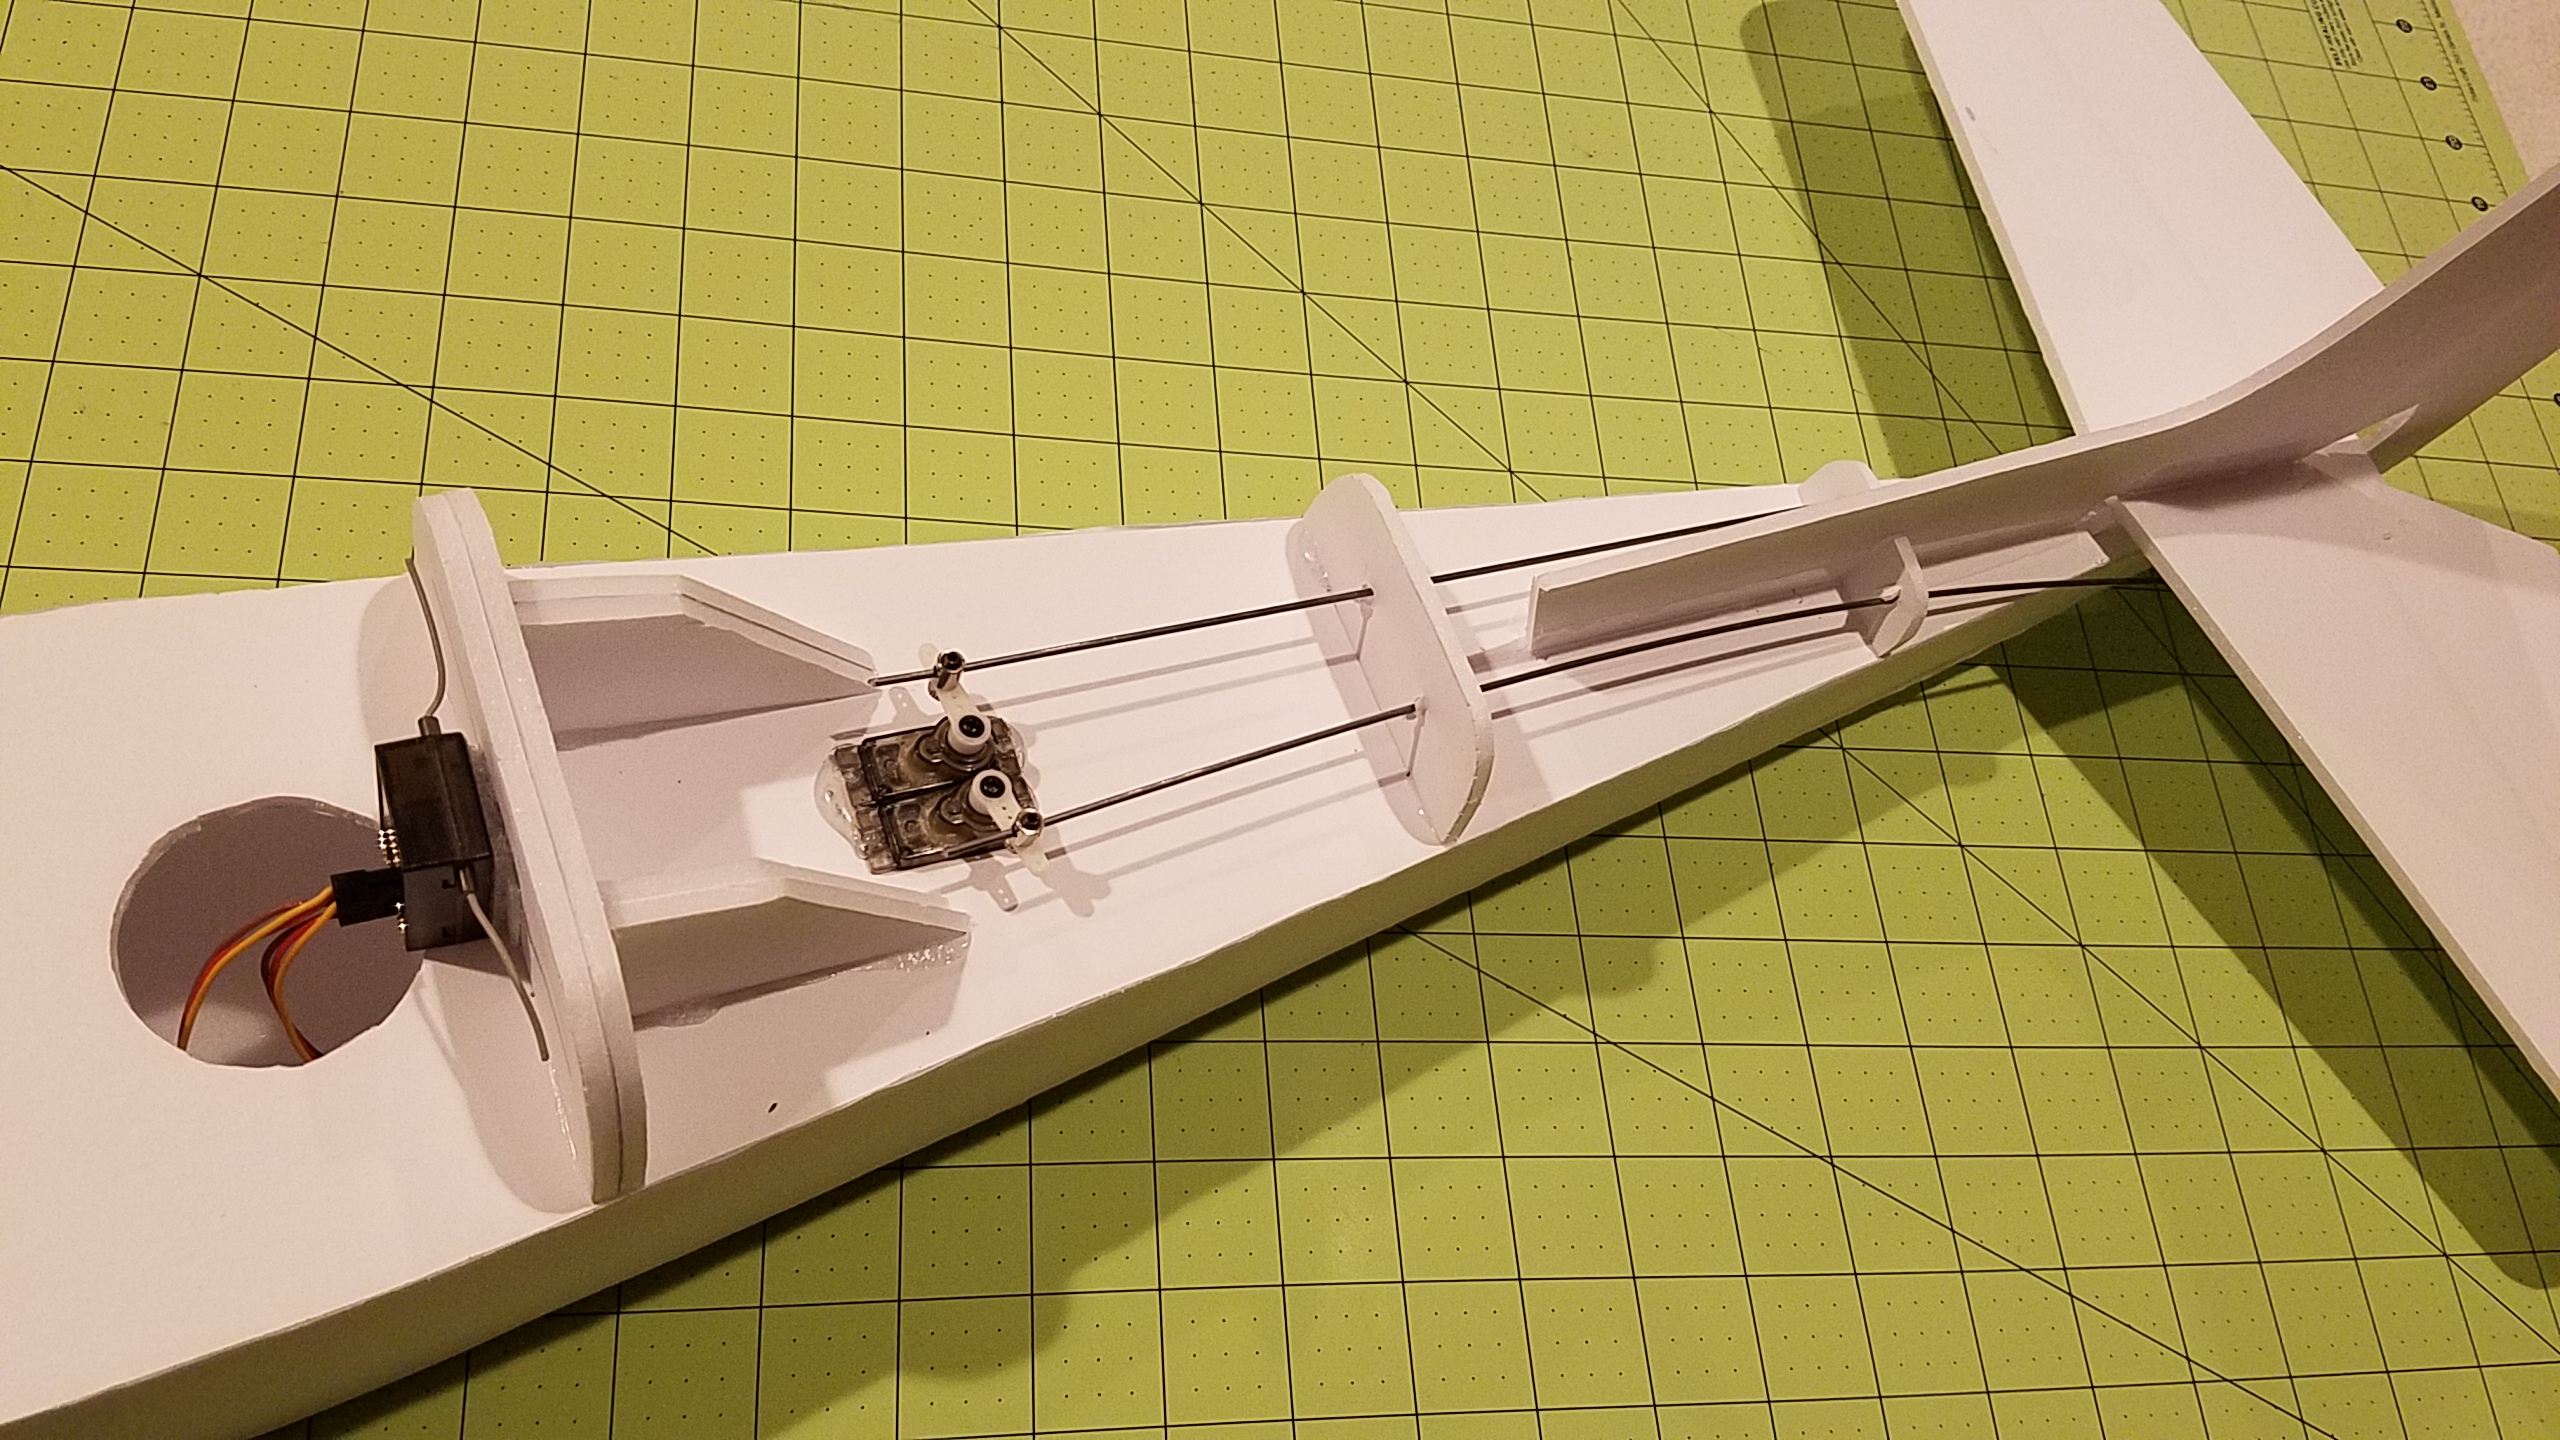
Still working on it. Here is my progress so far. I moved the tail servos to just behind the cabin bulkhead. The control rods are from those orange marker flags. I use dental flossers for the control horns as well. They work pretty good and the holes are just the right size for the marker flag wire.
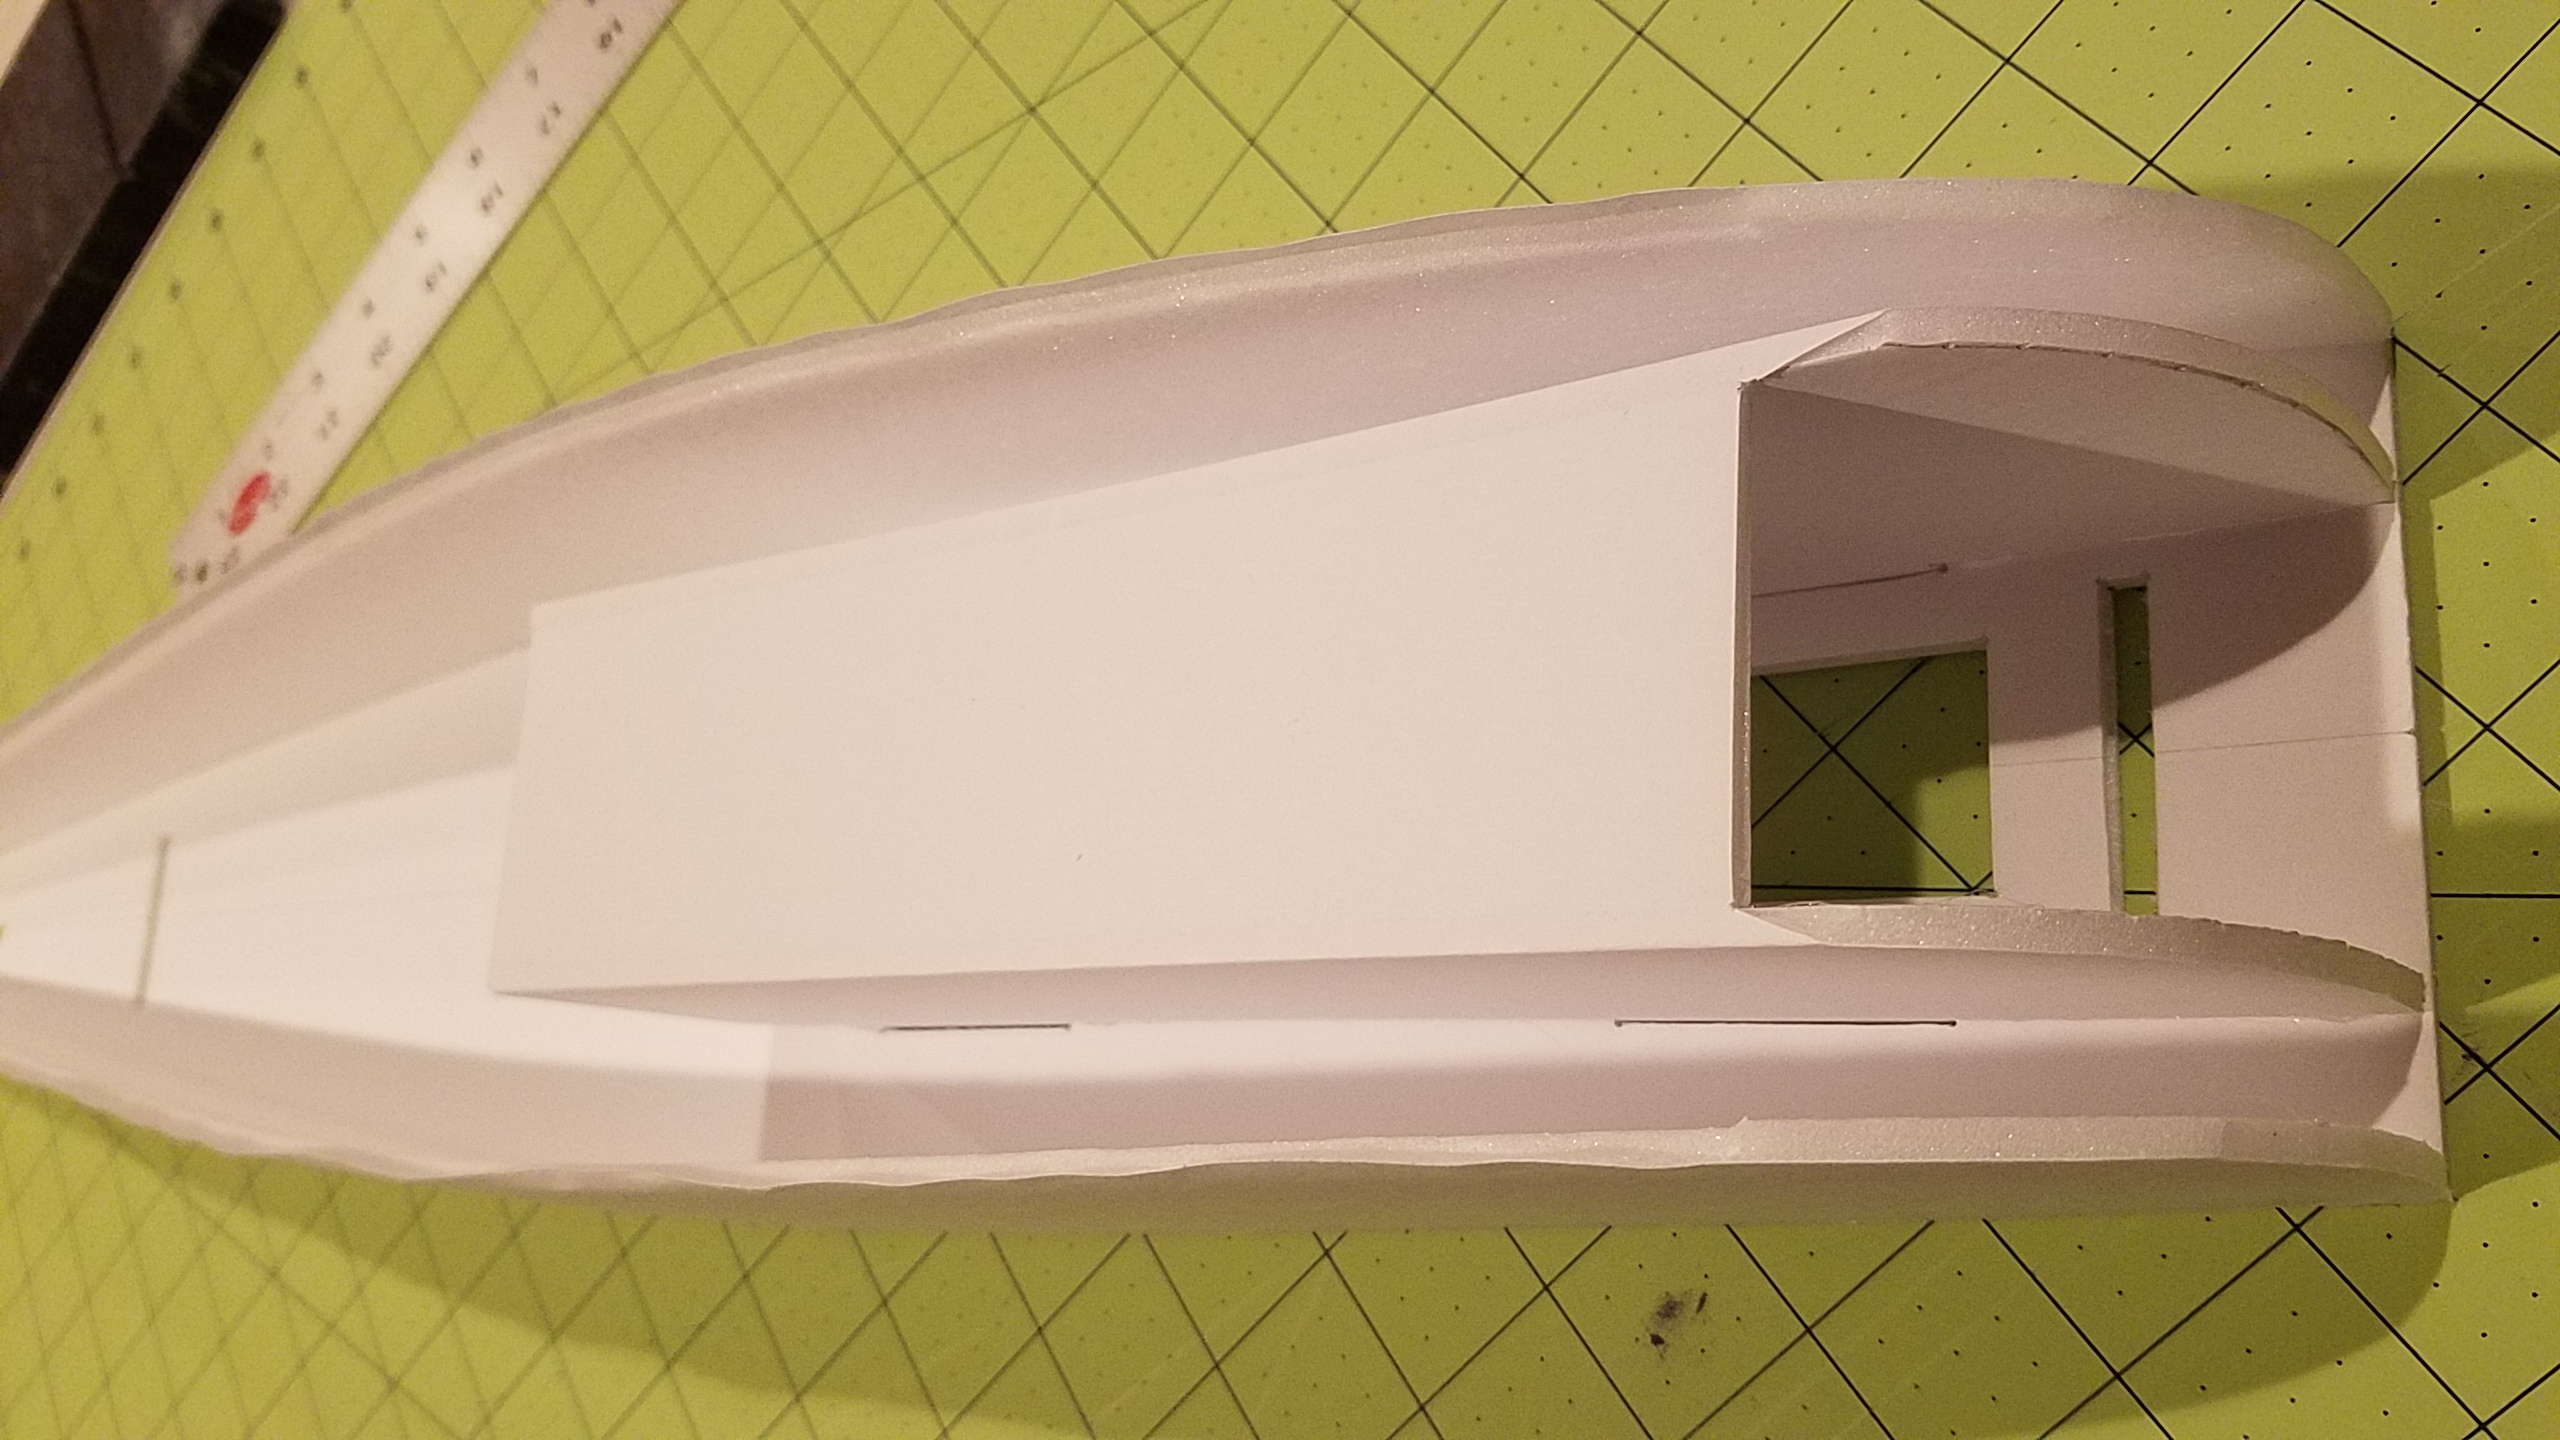
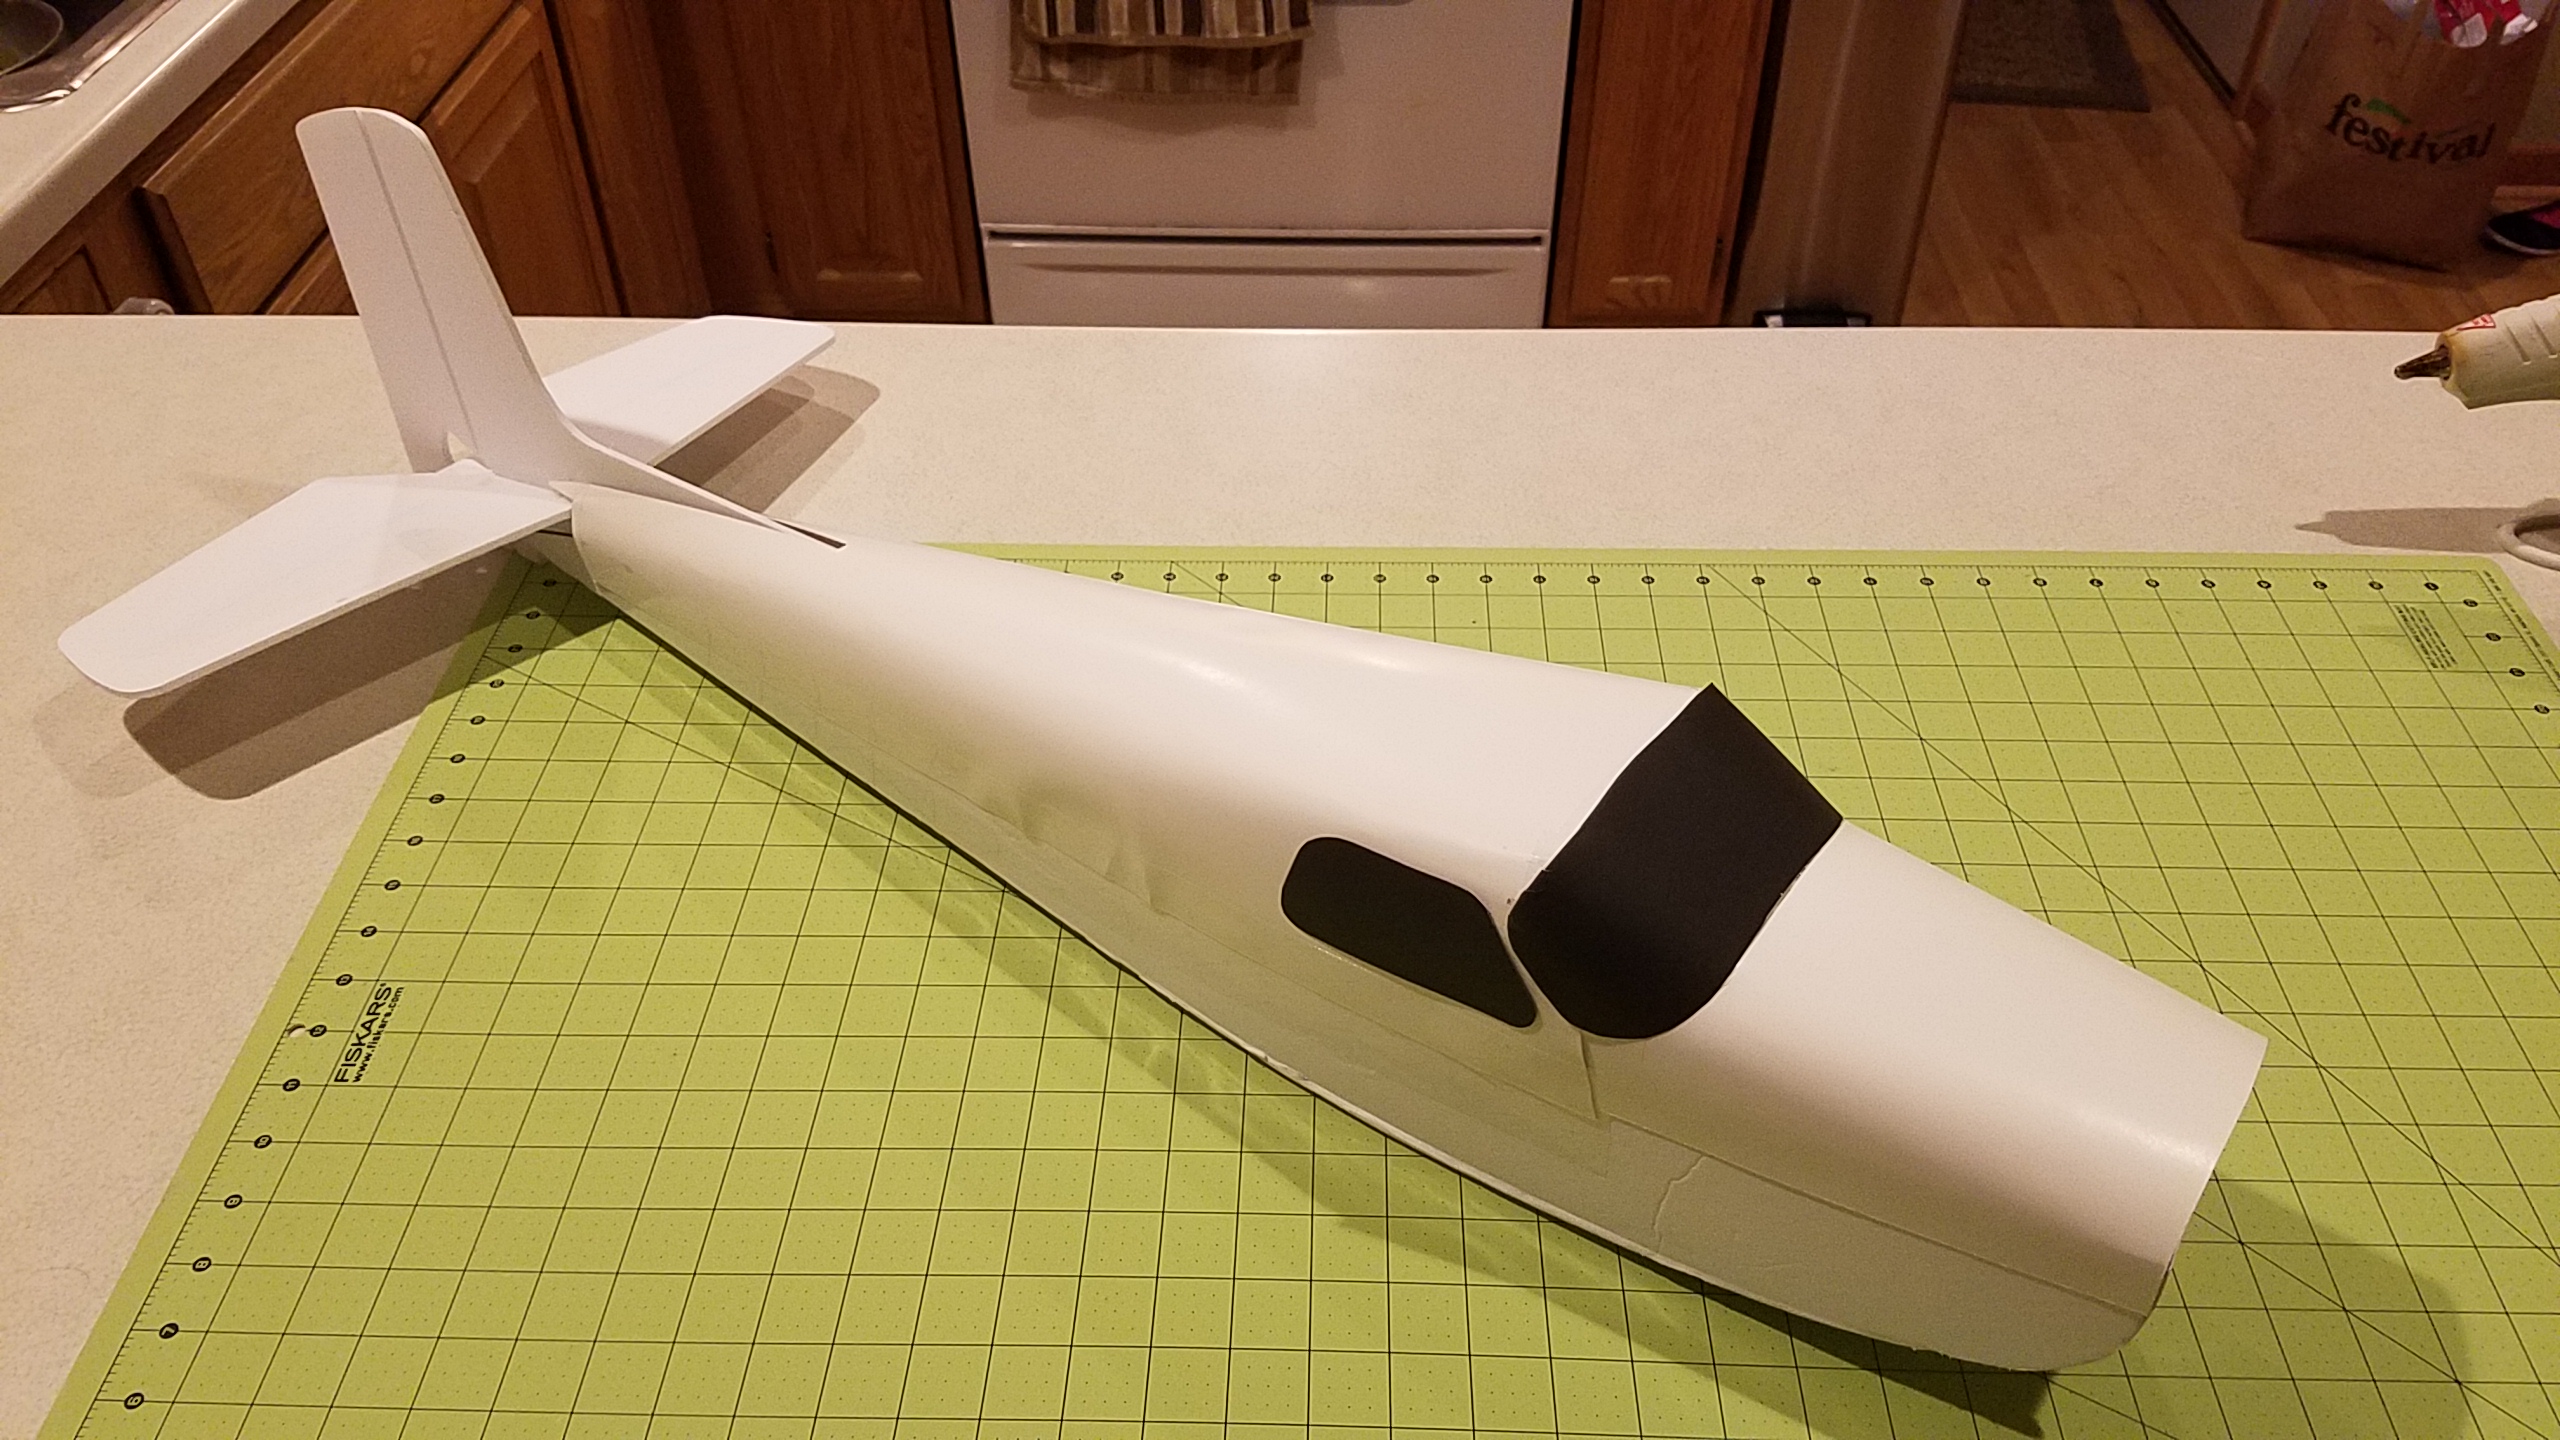
I had a little trouble lining up all of the poster board. I guess I have to accept a few wrinkles and general ugliness on the first iteration. When you take a few steps back, the fuse design is really pretty cool looking. Amazing the contours that you can get with foam board and poster board.
I had a little trouble lining up all of the poster board. I guess I have to accept a few wrinkles and general ugliness on the first iteration. When you take a few steps back, the fuse design is really pretty cool looking. Amazing the contours that you can get with foam board and poster board.
Attachments

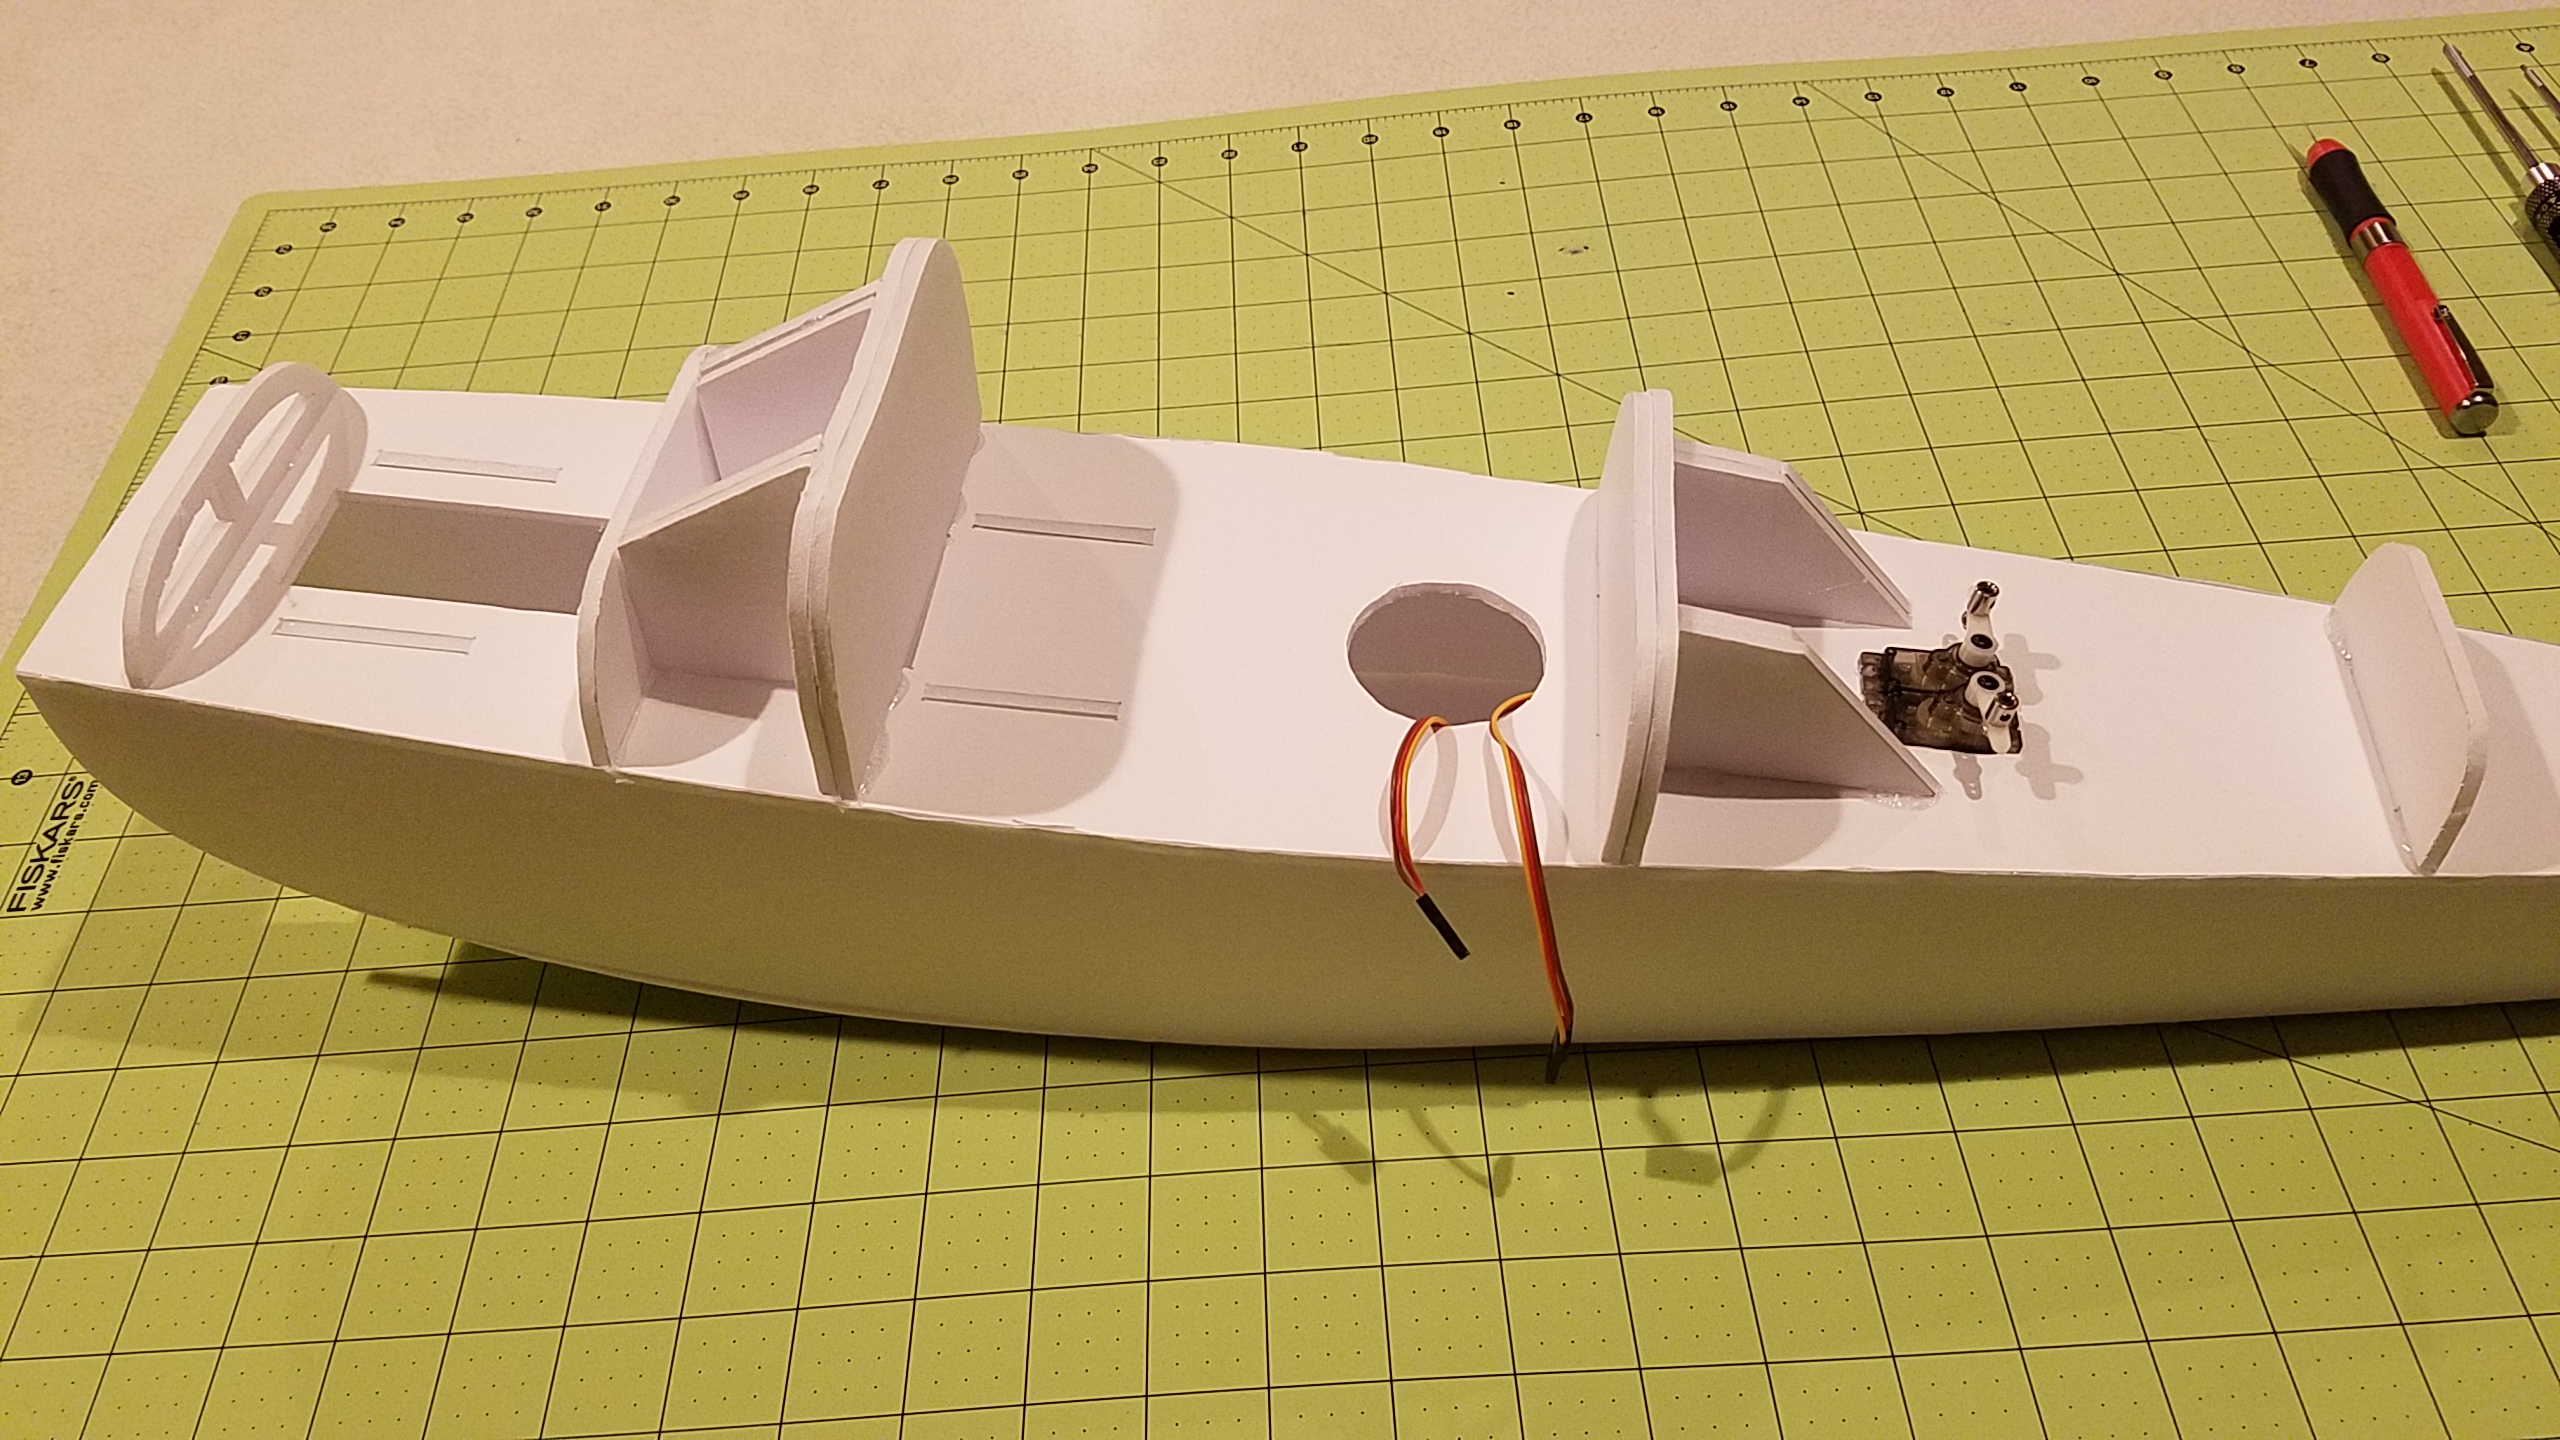
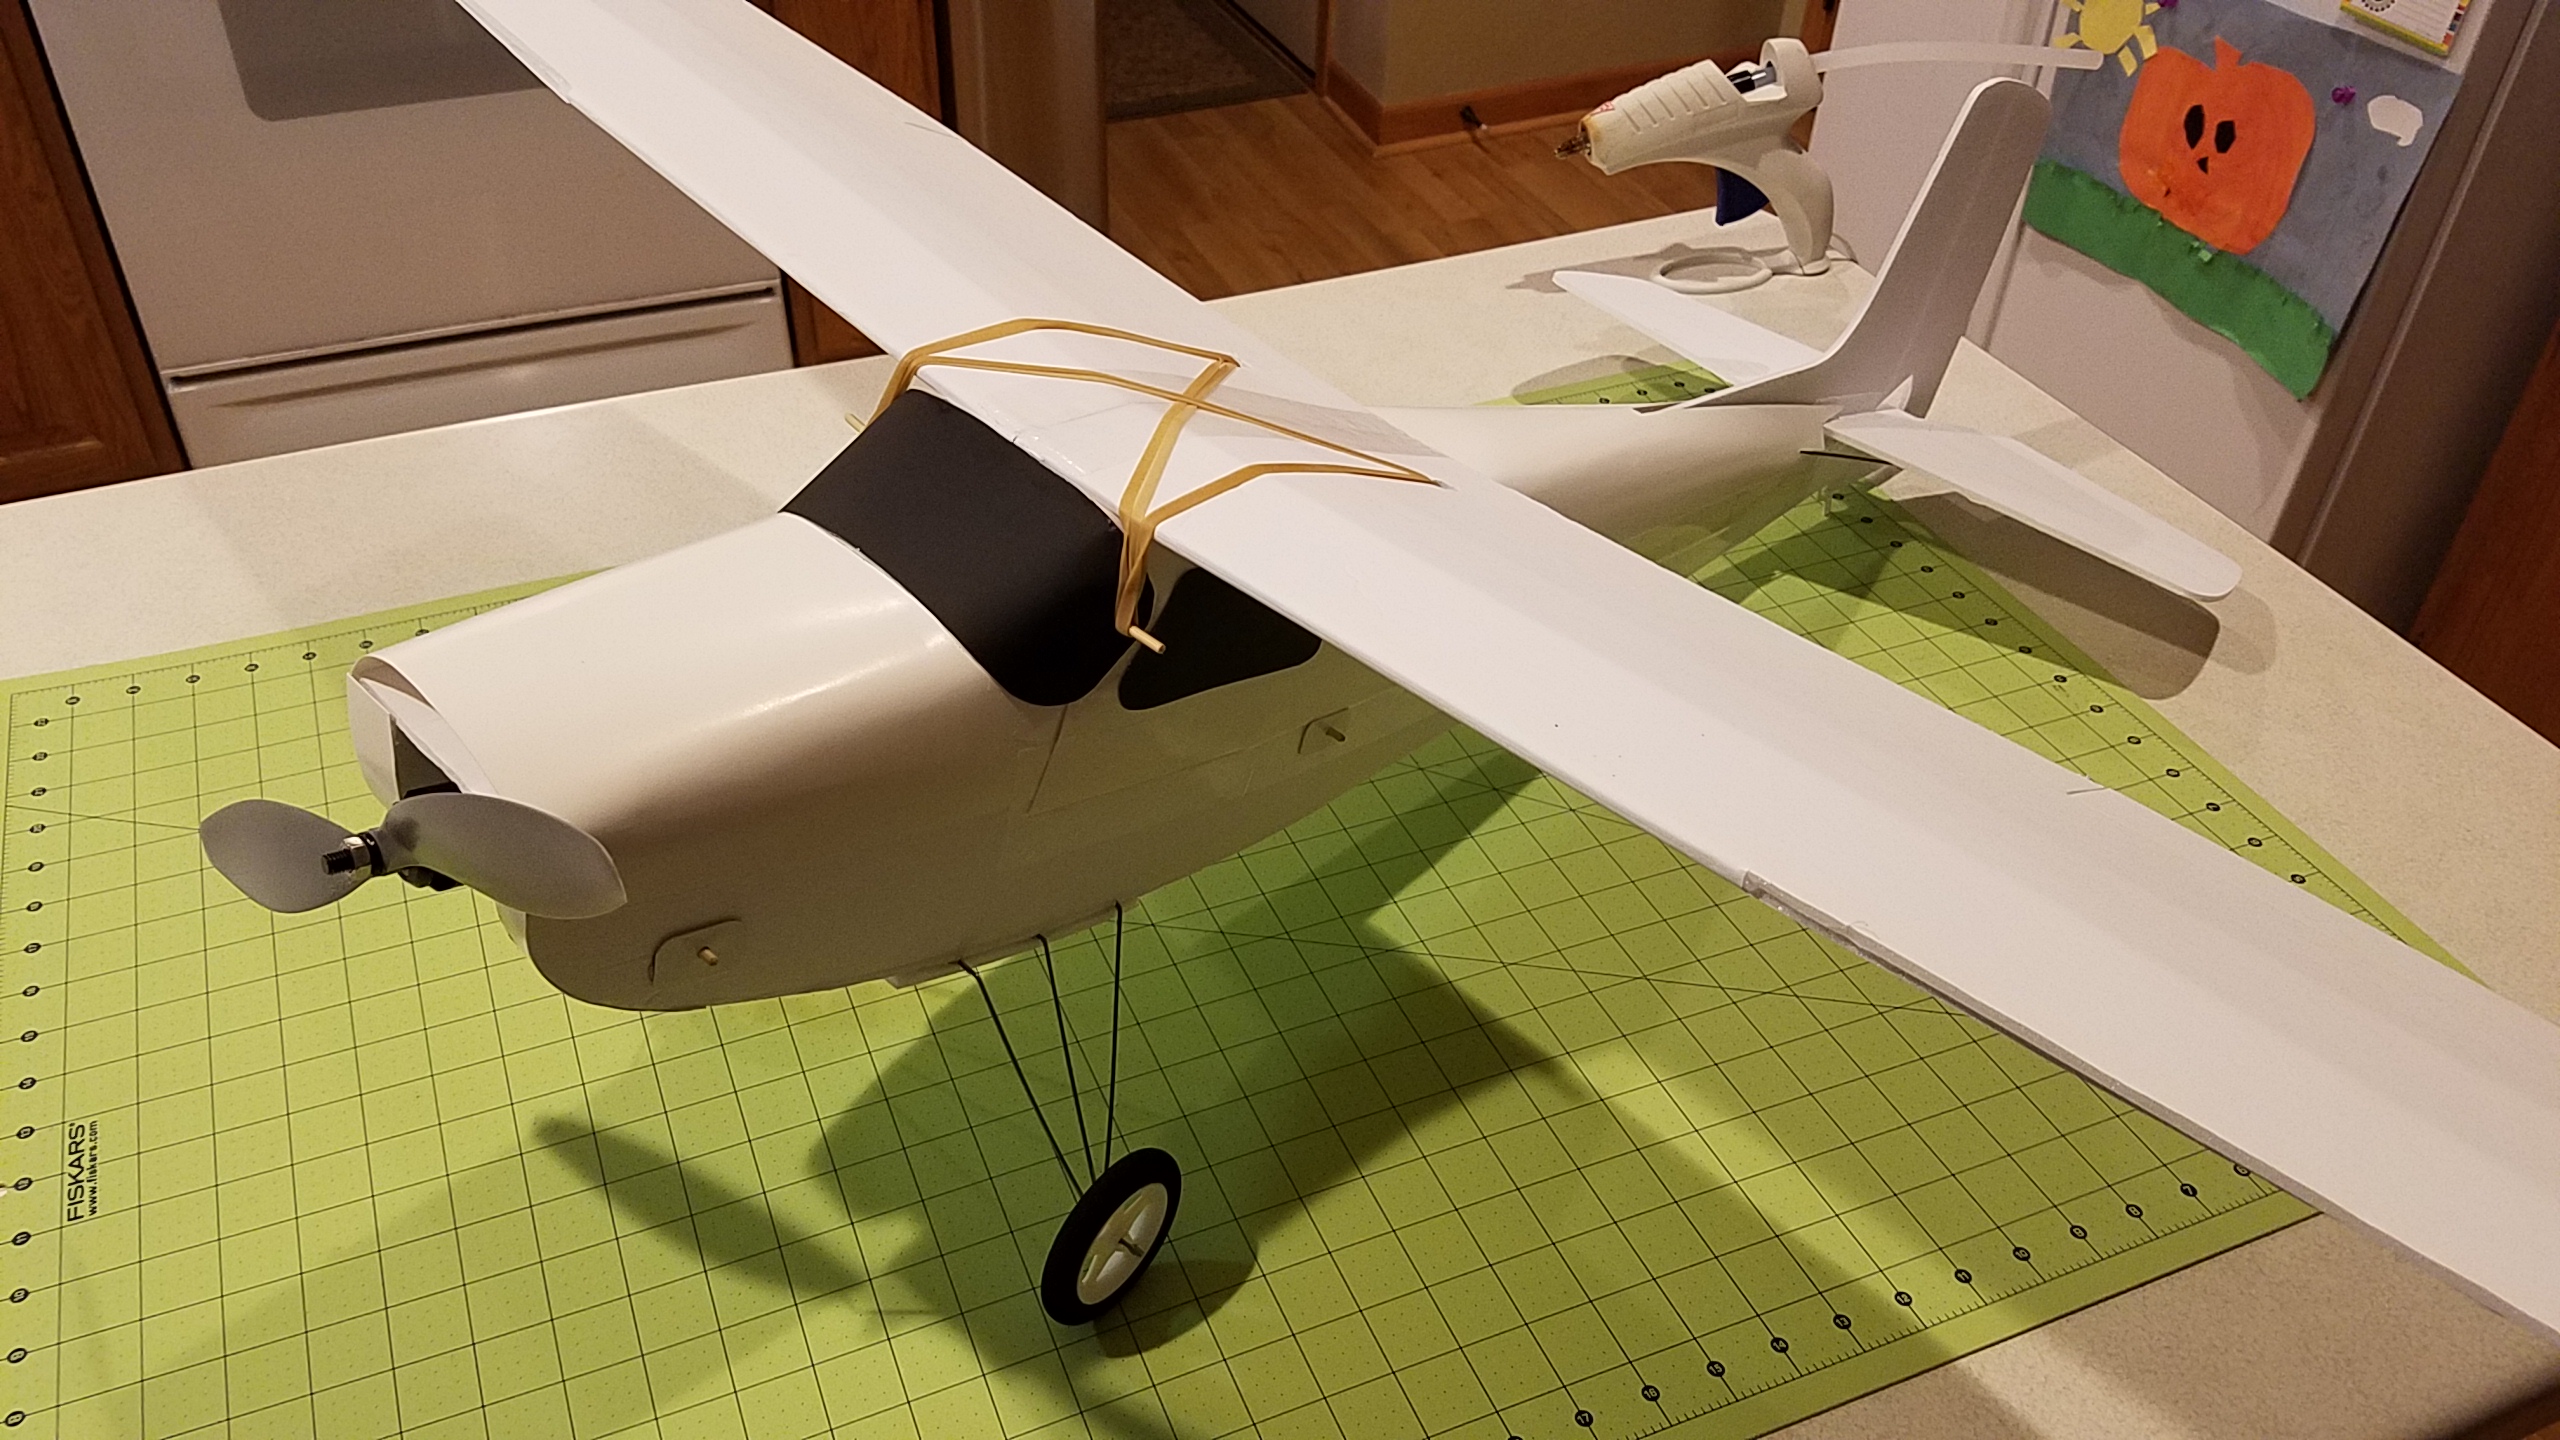
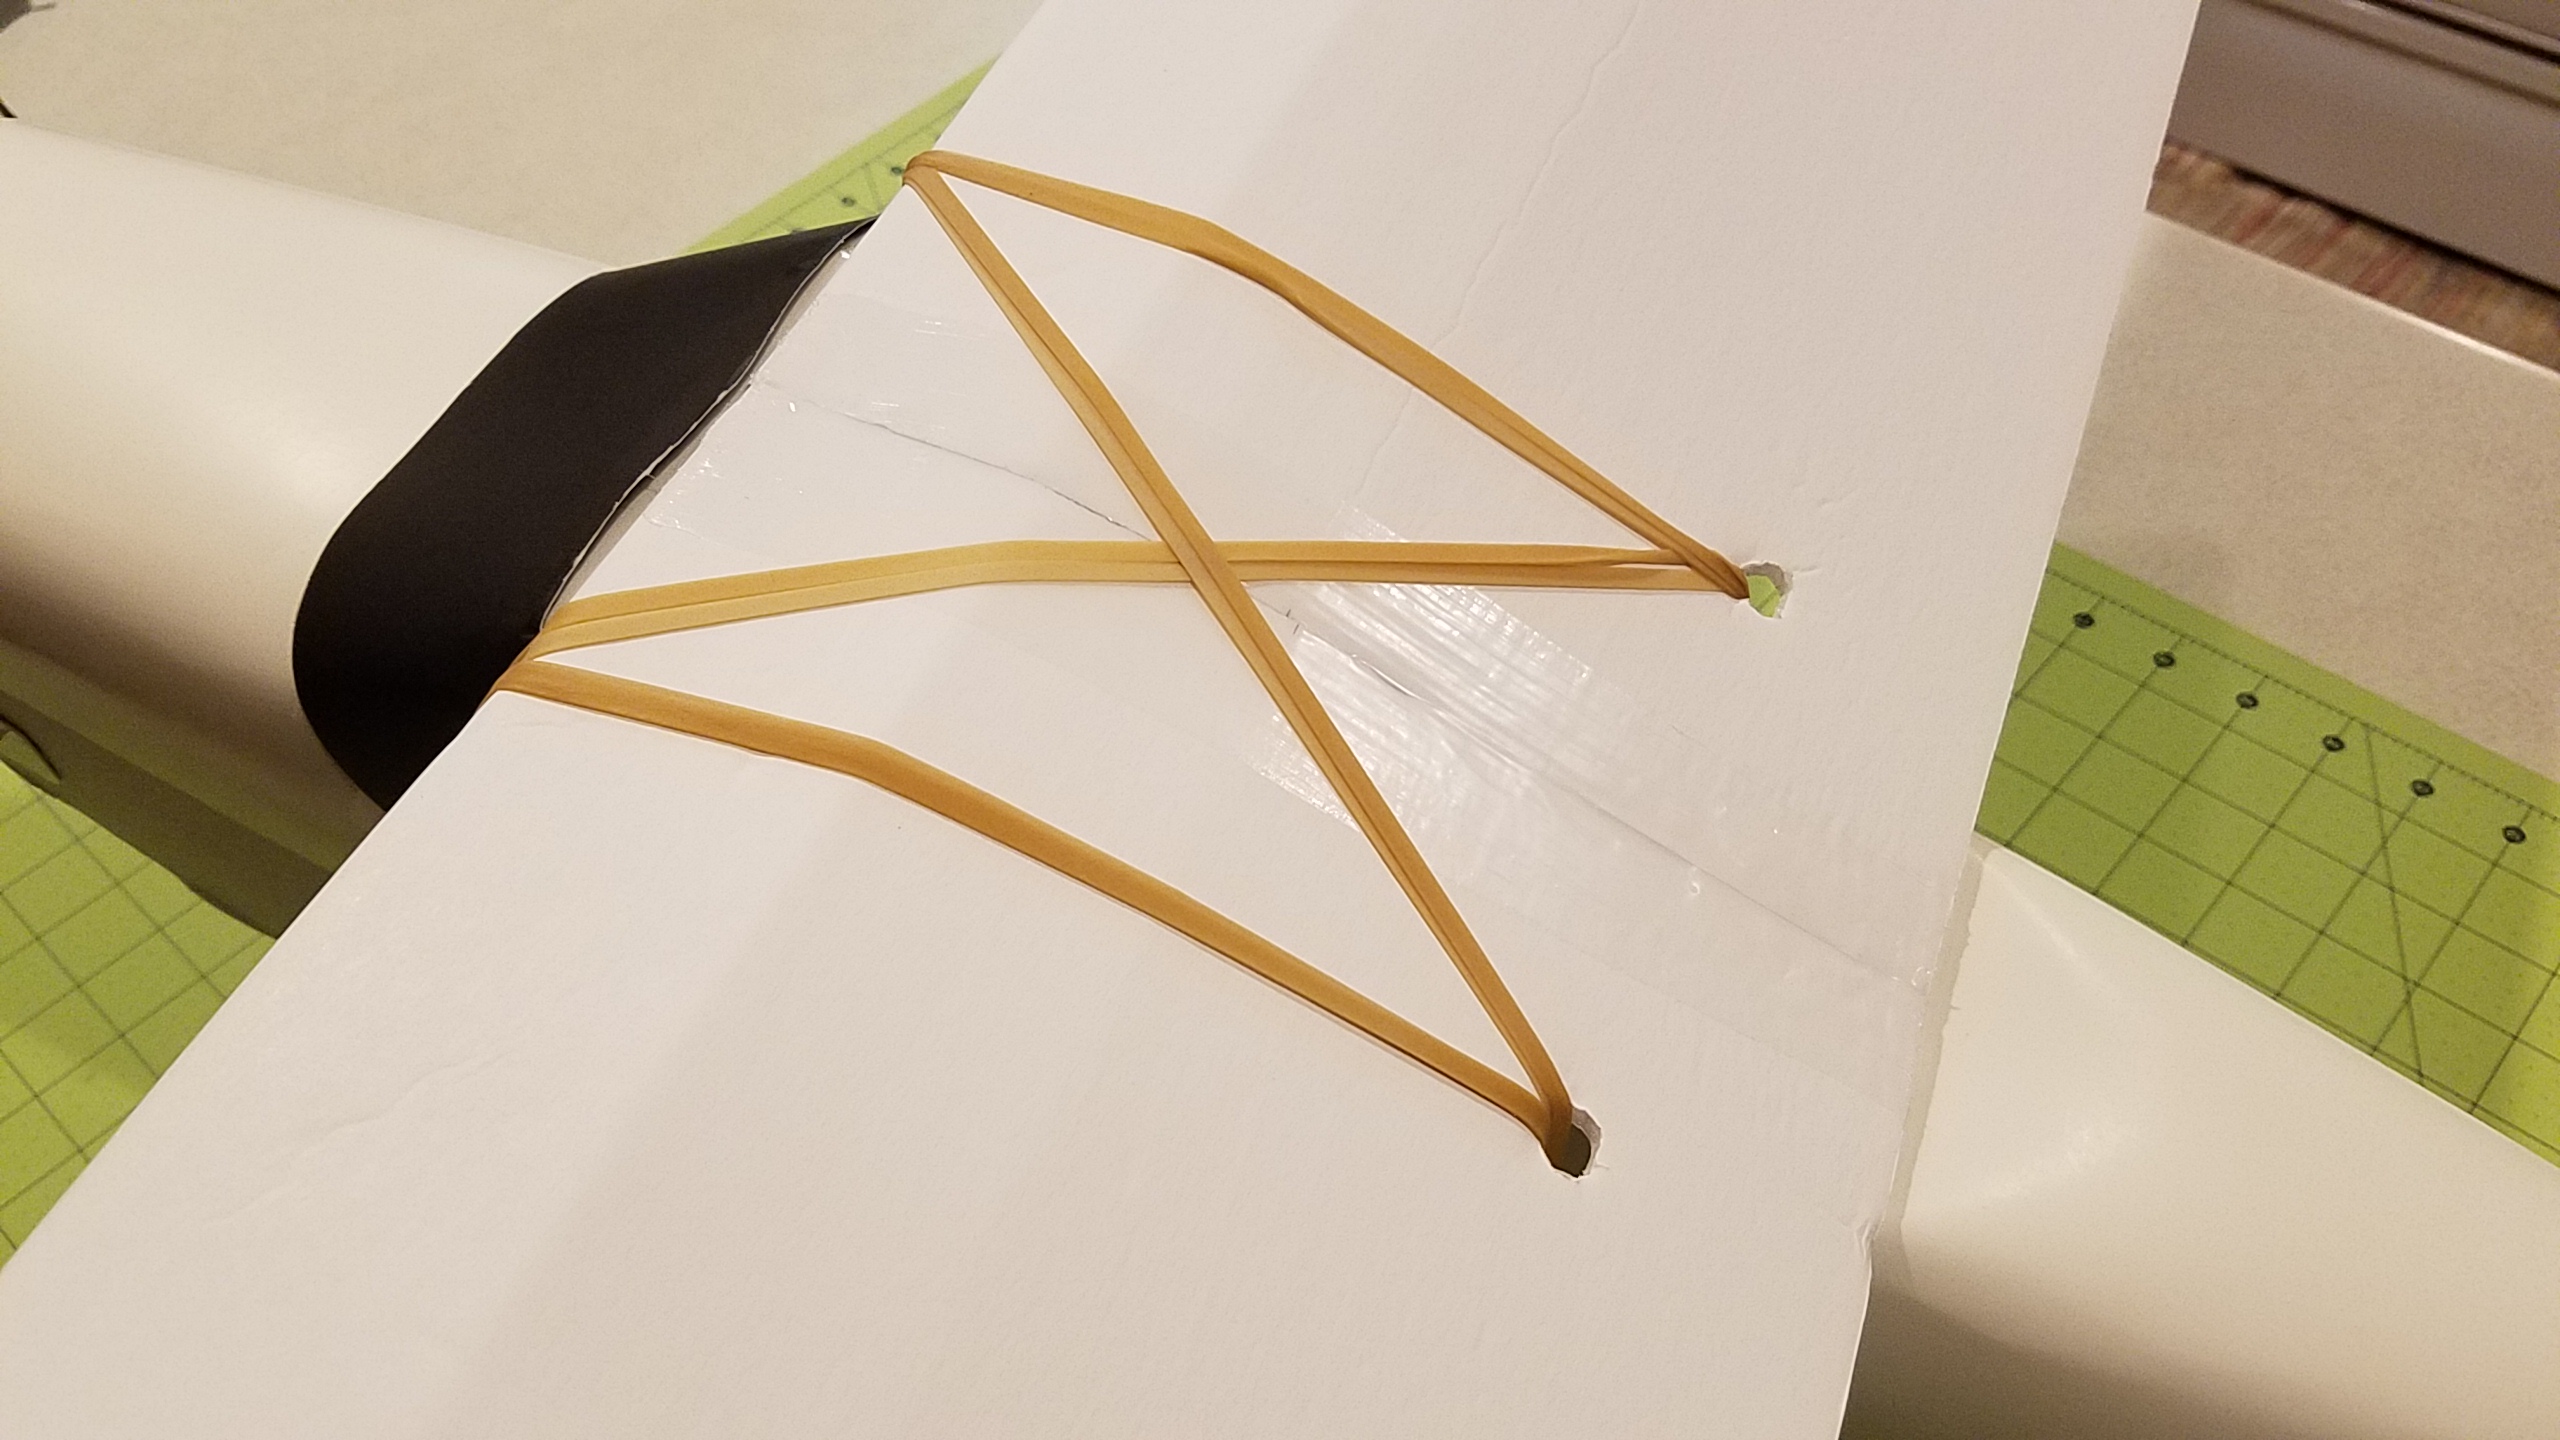
Getting there. Has anyone used nylon nuts and bolts to attach the wing? The rubber bands tended to deform the wing on a few Storches that I built. This one will use the rubber bands though.
Attachments


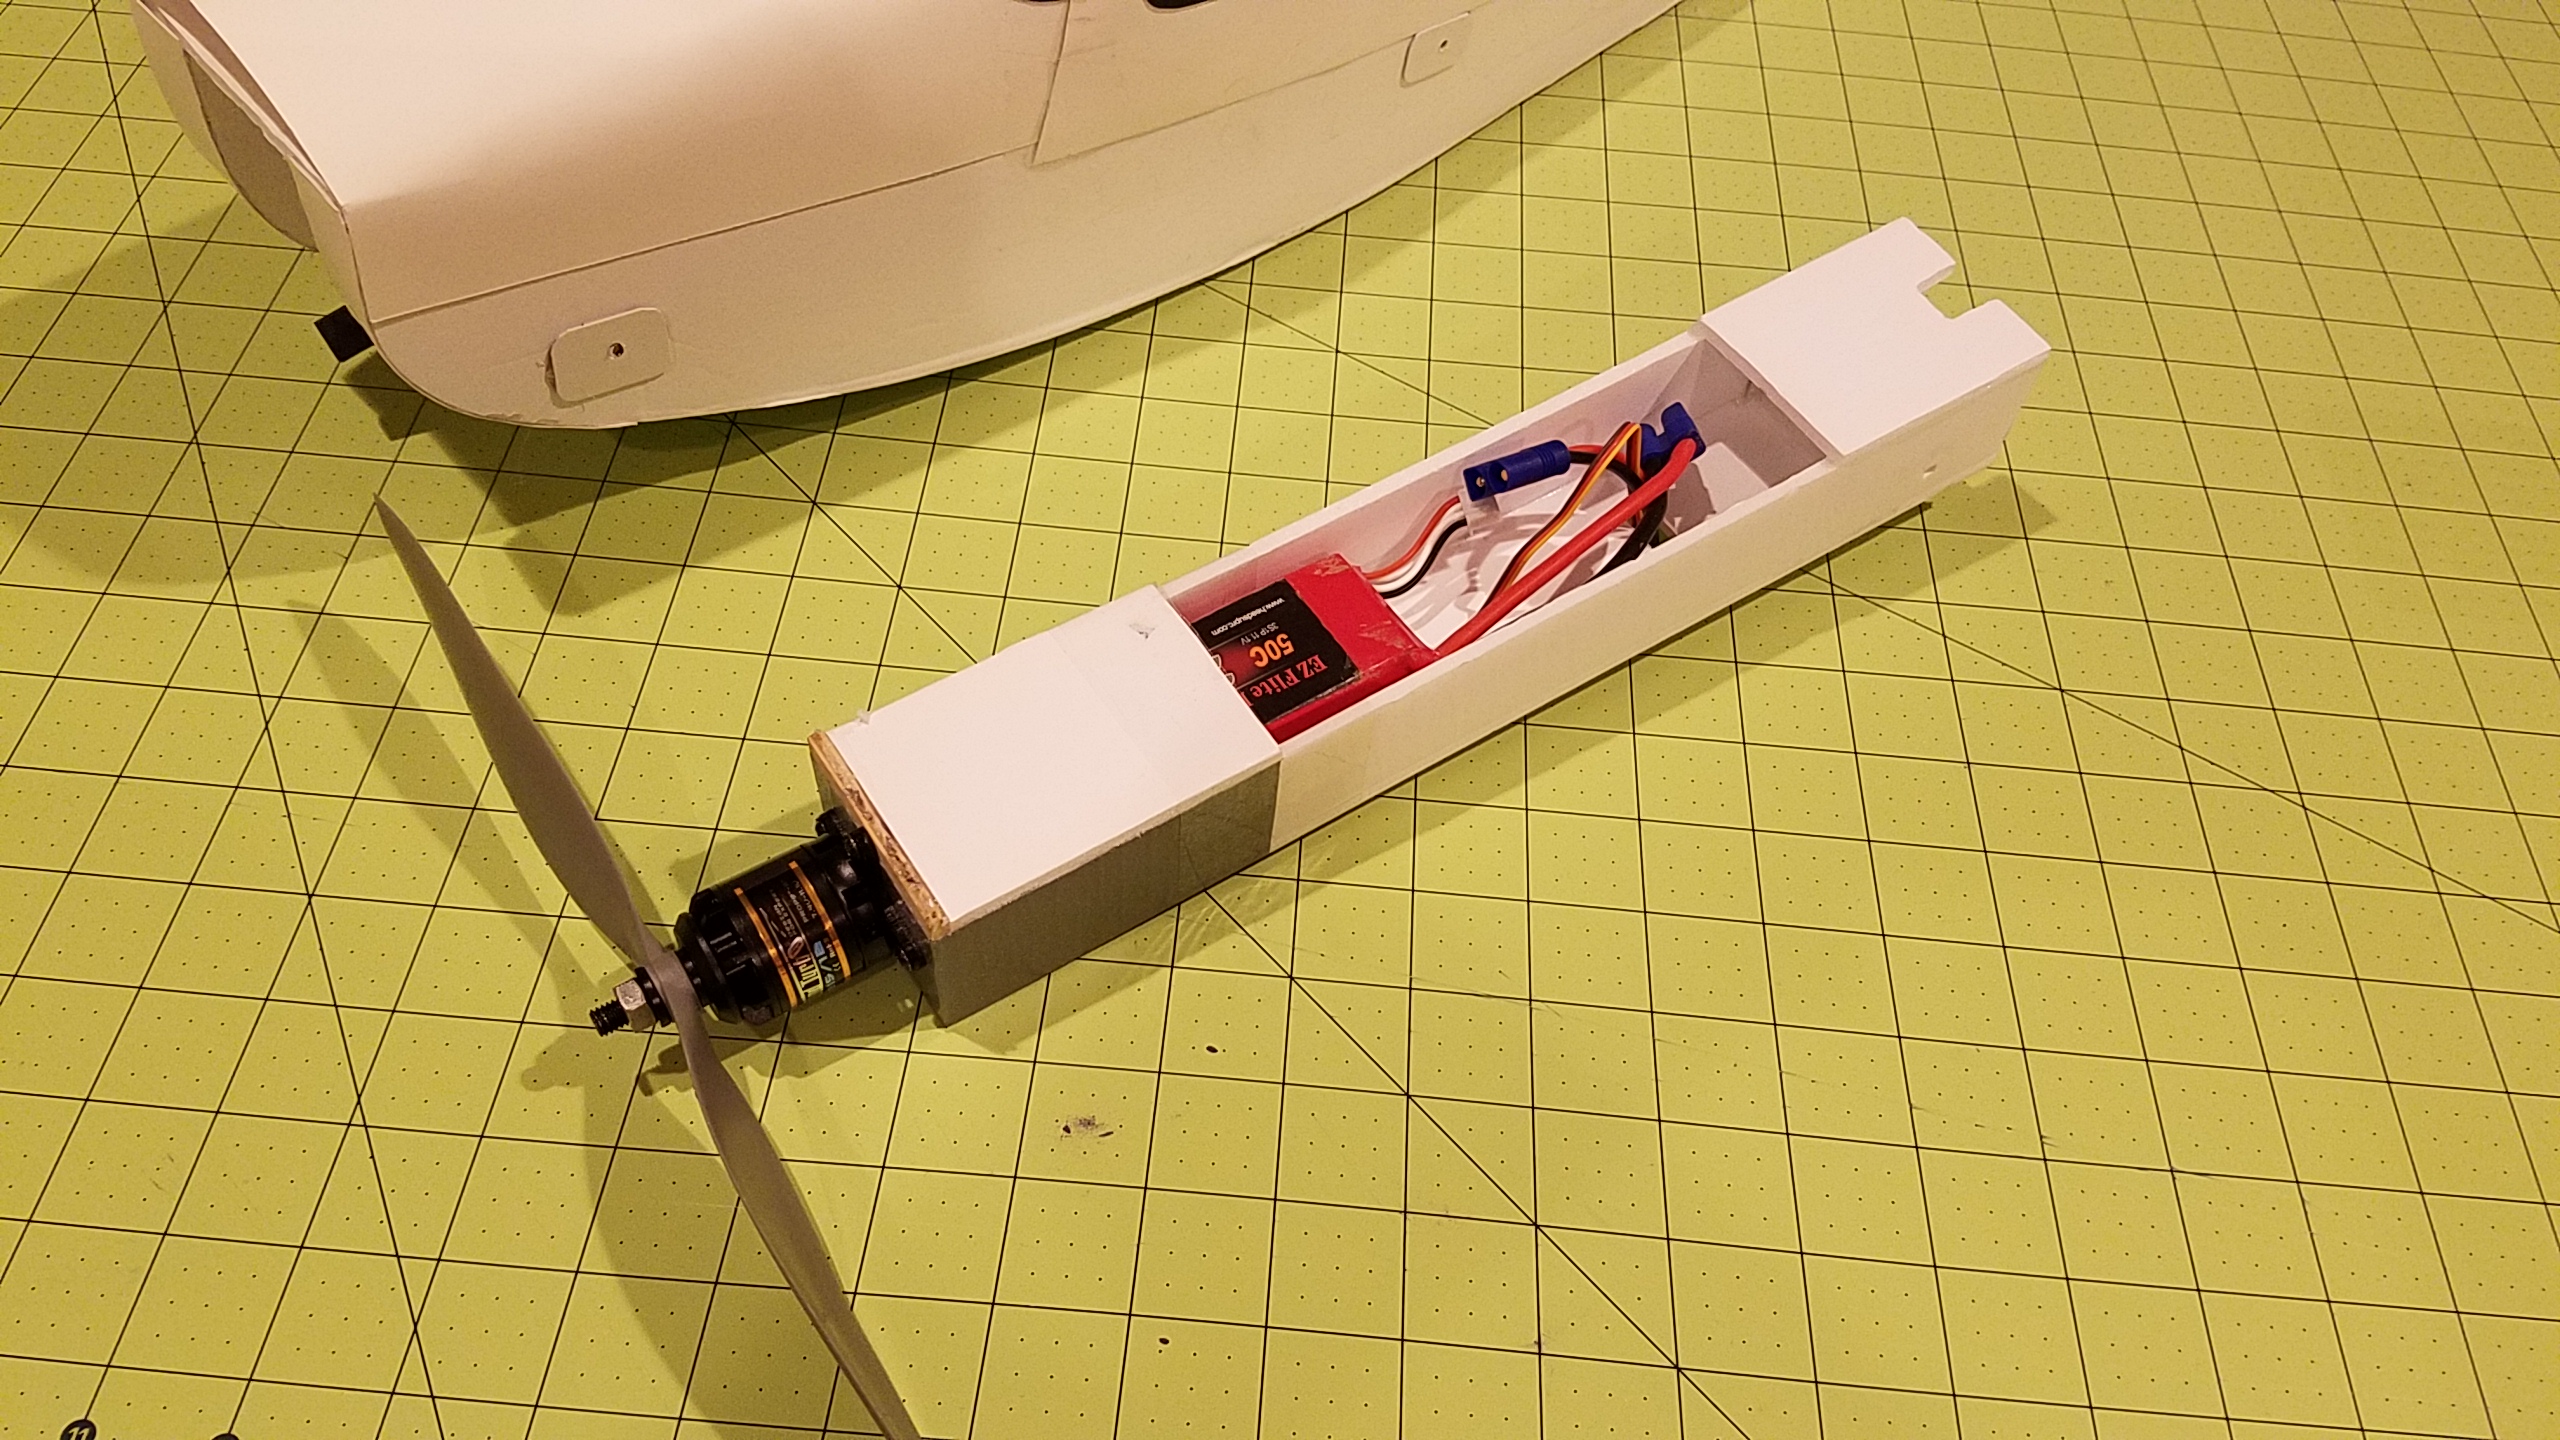
Well...I finished it up (as much as it is going to be anyway). I used an Emax GT2215/12 motor with an 11X4.7 prop. About 34oz. of thrust at 16 amps. I was afraid that the rubber bands would buckle the wing so I put some holes in to route the bands. I think that it worked out pretty well.
Just went out to maiden it at lunch. There is a park close by. It just jumped into the air with about half throttle. There was some wind to deal with but it flew really well. I went through a 2200mA battery with no issues. I tried to get a video but couldn't hold my phone and operate the little levers and buttons very well. If only I had another friend besides the table
I really like how this one flies and would like to thank Timmy P again for all of the hard work with the design. Thank you.
I plan on another now that I have some idea of how it goes together. Next one will have color and hopefully be more prettier.
Attachments


bhursey
The Geeky Pilot
Looks like you will get around 28-30 oz of thrust with the 2212 and an 8X4 prop. This should be enough to get it off the ground. I'd try to keep it light though.
Good luck...and I'm looking forward to some pics.
That sounds good awsome. I have an 8x6 prop right now. I plan on building this week I had vacation days to burn. I hope to have it built by Thursday when I plan a maden. I was going to cover it but I think I am going to wait tell after the maden. If it flys decent i may add the covering. Of I may just minwax it and add just some tape for some decals.
An 8X6 might be a bit much for your motor. A slow fly prop might be better. I'd expect the 8X6 to pull a lot of amps.
Someone with more wisdom in this area might want to chime in. It would suck to burn up your motor or ESC.
Unless you have ran this motor/prop combo before.
Someone with more wisdom in this area might want to chime in. It would suck to burn up your motor or ESC.
Unless you have ran this motor/prop combo before.
bhursey
The Geeky Pilot
An 8X6 might be a bit much for your motor. A slow fly prop might be better. I'd expect the 8X6 to pull a lot of amps.
Someone with more wisdom in this area might want to chime in. It would suck to burn up your motor or ESC.
Unless you have ran this motor/prop combo before.
Iv been running it on my balsa trainer for a year. LOL the prop and a 30A esc came with the 2212 1400kv. Nothing ever seems hot. The dang thing goes vertical. However I may look into an 8x4 I guess.

I don't know the difference in weight between the 11g and the 9g servos but with a lighter motor, you may want to move the servos behind the bulkhead. Otherwise, it may be tail heavy. If the battery is bigger, then it might balance out nicely. I personally hate adding weight to the nose.
Looks like it is going to be awesome! Thanks for the pics. Keep 'em coming.
Looks like it is going to be awesome! Thanks for the pics. Keep 'em coming.

Similar threads
- Replies
- 19
- Views
- 2K
- Replies
- 0
- Views
- 682
- Replies
- 3
- Views
- 976
- Replies
- 6
- Views
- 345