Measure & Cut Scratchbuild - jrSloJo

JohnRambozo

Posted a thousand or more times
I have to admit, I've developed a bit of designers anxiety on my BirdDog design. In an effort to just break away from the tedious process of designing plans, cutting, building, testing, redesigning, recutting and rebuilding and so on... I've liberated myself briefly by abandoning plans altogether to design a new plane with a ruler, a knife and not much else.

Quick, fast, easy and fun improvisation was the goal while creating a plane that can fly slow and still be a pretty aerobatic high-wing trainer.

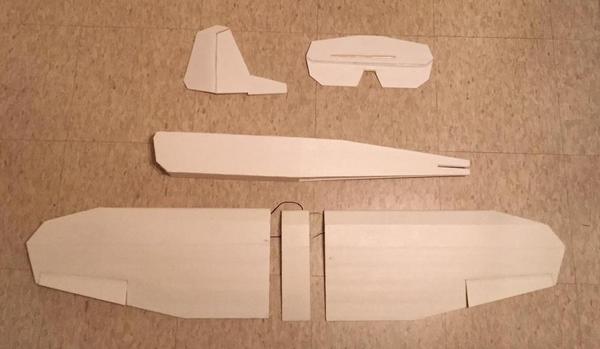
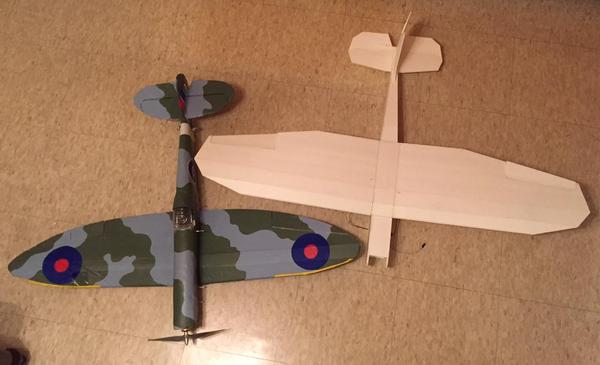
I started by using the full length of a sheet of Adams foam board as the fuse length and keeping it simple. I referenced my FT Spitfire very loosely to make a much more angular shape. The entire design stems from an improvised H.Stab. I just cut angles until I liked what I saw and then made it functional.

From there, I did the profile of the fuse incorporating some of the same angles and then on to the wings employing the same process to create a more angular shape while looking at the general shape of the FT Spitfire wing.

I finally settled into specific wing build steps that really work for me that I will be sharing.

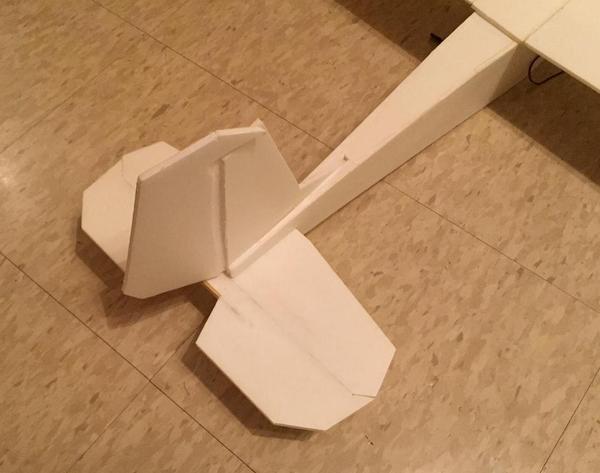
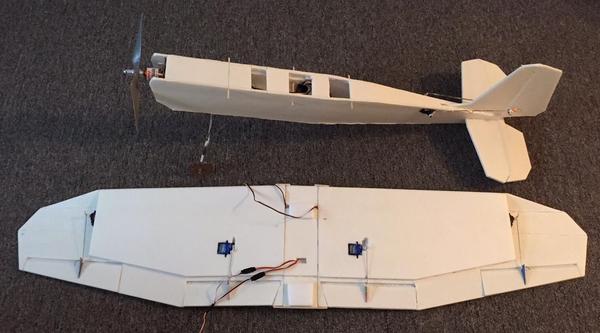
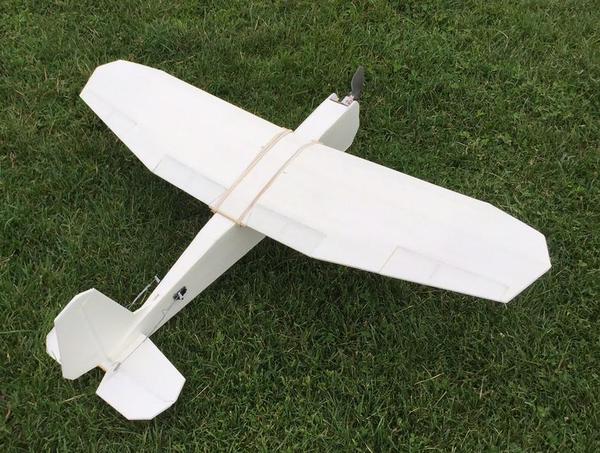
After only two short sessions (one mostly cutting and the second being mostly assembly) it is nearly ready to fly. One more session of final assembly and finishing touches should have her ready for the air.

I'm calling this one the SloJo and will post measurements, steps soon.
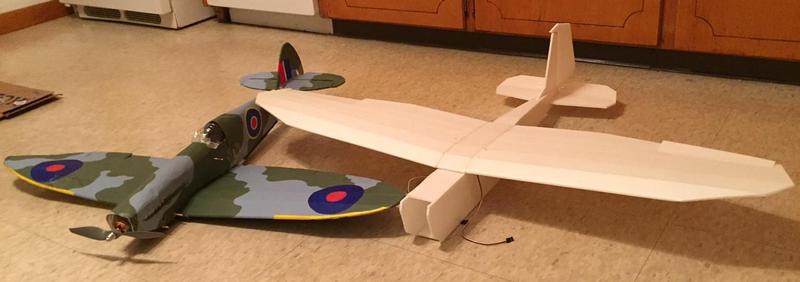

0C0UQOu.jpg


URsjF9t.jpg


VKZvTcq.jpg


JS3PSxK.jpg


eCgooQF.jpg


Aaannnddd, done!


tPiHUl2.jpg


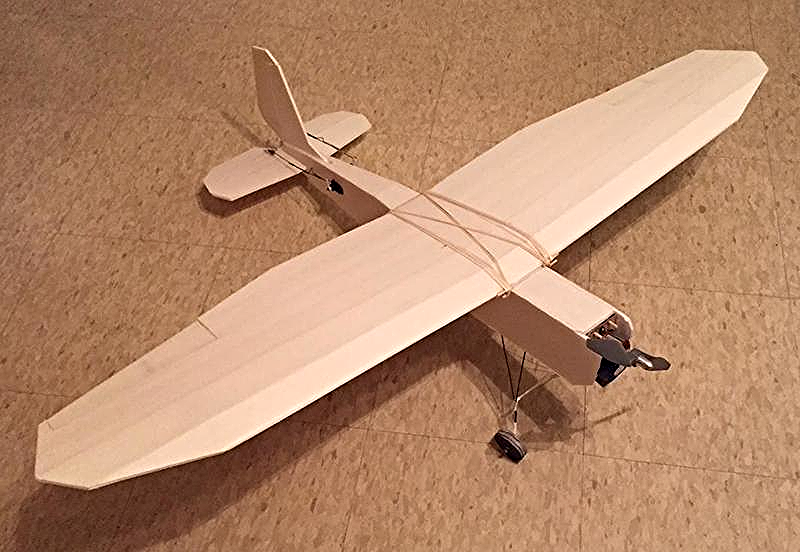
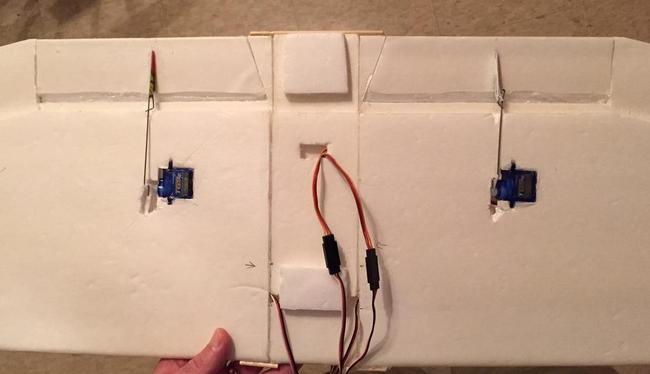
There's plenty of wing area but it was gliding faster than I wanted on initial tests so I added flaps.

RJABngg.jpg


aTwXTkC.jpg


mG3SpdV.jpg


8BdUyTy.jpg

 
Last edited:

saiga556

Full of...
The ruler and knife method is my personal favorite. I often find that my version 1.1 is usually better than the 1.0 when designing on the fly but I agree that is is fun. To this point I have probably built 6 or 8 planes this way and have ended up with more unique final products than plan, design, draw, cut method.
 

JohnRambozo

Posted a thousand or more times
The ruler and knife method is my personal favorite. I often find that my version 1.1 is usually better than the 1.0 when designing on the fly but I agree that is is fun. To this point I have probably built 6 or 8 planes this way and have ended up with more unique final products than plan, design, draw, cut method.

This is the first time I've taken this approach. My other designs are probably unnecessarily built to scale. Can you point us to a some of your "ruler and knife" designed planes?
 

JohnRambozo

Posted a thousand or more times
That looks fun. Did you glue the wing on, or will you use rubber bands and skewers?

The wings are just resting on there in the picture. I will use skewers and rubber bands. Its also going to have fixed landing gear.
 

saiga556

Full of...
This is the first time I've taken this approach. My other designs are probably unnecessarily built to scale. Can you point us to a some of your "ruler and knife" designed planes?

I haven't taken the time to document most of them but one I can point you to that was is the SAIGA6ix. Link to thread in my signature. Our tail feathers are very similar.

I'll have to see ifn I can find pics of others.
 

JohnRambozo

Posted a thousand or more times
That's a sweet build, saiga. I like everything about that plane. That is funny how similar our tailfeathers are. I guess that's a design tendency that comes from the tools. How does it fly?

I just finished my v1.0 up and took it across the street to an empty parking lot at night for a 'taxi run' that turned into a short and exciting flight dodging small trees and light posts. Luckily I missed all of them.

The area was too small to get a good feel for it, but it did fly pretty well. It seemed faster than I expected but maybe that's just the zero wind and small area.

I need real wheels. Those flitetest coffee stir & foam wheels blew right off the gear when I touched down and I came in nice and smooth, then pop, scrrrrrrrrchchchchchchchc, flip. No damage. It lays upside down on the wings without touching the tail. Lucky accident in the design there.

I updated the first post with the final, unpainted pic.

Now to decide about paint and maybe add some flaps.
 
Last edited:

JohnRambozo

Posted a thousand or more times
Flaps were cut to fit the flat part of the trailing edge which measures about 7.5 inches of the wingspan on each wing and 2 inches up to just before the lower and upper wing meets. I inserted servos and since I only have a DX5, I used a splitter to plug them into the Gear slot (Channel 5) on the receiver which is activated by a 3 position switch on the controller.

Tests coming soon, then paint if all goes well!
 

JohnRambozo

Posted a thousand or more times
Updated the first post with more pics.

I made a wierd little DIY wheel by cutting circles out of cardboard and filling the channels with hot glue and then using ball chain links (the little connectors) as a hub. They roll nice but the hot glue didn't keep them on the landing gear when landing. I guess I need something stronger to keep them on.

On a positive note, the plane flew great after balancing right up until I got daring and started flying through a soccer goal (no net, of course) then misjudged it on the second pass and smacked the crossbar just under the motor. The prop exploded and there was minor damage to the fuse. The landing gear blew right off, but its nothing a little hot glue won't fix.