The best $20 I invested

Hai-Lee

Old and Bold RC PILOT
In the past I have built and flown many mighty minis and other small planes like the bloody baron as well as attempted a few of the smaller funfighters but sadly my launching technique was variable to say the least and I kind of lost interest in things that were effectively difficult to get flying with their increased risk of a failed maiden due to my inability to launch them properly.

Anyway I witnessed a club member hand launching a ducted fan while the owner manned the transmitter controls. The throttle was running flat out and the plane was thrown. Sadly the release was a little late and the hand drag turned the plane so that it was flying sideways. It took some skill to keep the wings level but it pancaked HARD and exploded removing the nose, and also ripping the wing LE out of the fuselage.

I had been considering a bungee launcher but I just never got around to it. I spotted some shock cord in a local camping supplies shop so I purchased 10 metres of it and 2 metres of braided cord as a leader. I raced home and dug out a large washer and some old heavy 8ply, (ex furniture), and made up a foot release for the shock cord and this morning I went to the local field to test if it would work without a launch ramp. I had previously fitted a tow hook on my KFM wing.

Pegged down the shock cord and the foot release, stretched and locked the shock cord to the foot release, and applied the safety lock. Placed the wing on the ground over the leader and slipped the tow hook onto the launcher tow loop. Checked that everything was working on the plane correctly. Removed the safety and held the transmitter looking at the far end of the shock cord. I could not apply throttle as the prop would strike the ground or foul the shock cord. I stomped on the release pedal and the wing launched forward and flew over the anchored end of the shock cord at a height of about 1 metre. I had not touched the controls so it was launched with the elevons in neutral. After the plane was clear of the anchor point I slammed the throttle and actually watched the wing slowly slow down to its normal flying speed.

After a short flight I landed and retried the procedure for various control inputs and wing directions. Full up saw the wing soar to a height of around 7 metres without the motor thrust being applied and in a strong crosswind the wing did roll very slowly on launch but flew straight and gathered straight line speed like a missile.

When I think of the cost of all of the planes I have damaged or destroyed trying to perfect hand launched maidens I could almost cry, especially when $20, (less than the cost of a single motor or repair), could have saved me all of the troubles. For those who struggle to hand launch and cannot find a strong reliable arm to help them I suggest you buy yourself a bungee launcher or at least make one. This opens up an entire range of mini and micro models which I was hesitant to try before! (Here $20 is the cost of 4 cups of retail coffee and I must have drunk gallons of coffee discussing why I crashed my latest attempt at a mini).

If you want the details of my foot release just post and I will supply details and maybe a few pics, (when the paint is dry that is).

Happy boy today!

Have fun!
 
Last edited:
  • Like
Reactions: FDS

FoamyDM

Building Fool-Flying Noob
Moderator
I'm in - show me please. I tend to fly at uncommon hours and I think It would be helpful to me to see the setup and foot release you have.

As you have un-doubt-ably seen, Hai-Lee, with the unforgettable Pizza launch of the LPL flying sub :oops: or the other big launch s.n.a.f.u.'s. a reliable launch system would be so very welcome.
With some of my unique planes. I would just love so see the flying tenancies and not the poor launching capacities of the plane.
 

PsyBorg

Wake up! Time to fly!
Oh this most certainly needs to be documented and posted. I have a huge problem trying to hand launch planes and a portable system to do so may help to actually get me in the air past the launch process. On the other hand it could also speed up the destruction of planes between Bills Law and no plank skills hehe.
 

Hai-Lee

Old and Bold RC PILOT
I will go through what I built and the scrap materials I used when I return from flying as it is early morning here now and it is time to load up and get rugged up for the mornings flying.

What is important to note is that the bungee cord was the main part as the rest can be made from almost anything including recycled fence palings. In my case I used a plywood bed slat from a cheap and destroyed single bed.

More with pics later!

Have fun!
 

Hai-Lee

Old and Bold RC PILOT
Here are the details of the launcher and bungee setup. I will add the pics as an edit when the sun rises and I can take pics of the construction.
I will be building a second version for a club member here who lost his EDF due to a very poor hand launch!

Herein I will be describing the build of a foot launcher and ground bungee system.

Before proceeding I will say that a bungee launch system will NOT make a poorly built plane fly properly and it will also not
fix a control reversal issue or structural weakness. ALL it WILL do is to drag what ever you have built across the ground and
into the air. Build it poorly and it will still perform poorly albeit at higher speed initially.

Materials:
Bungee:- 10 metres of 5mm dia shock cord or anything similar in function
Leader:- 2 metres of 3mm braided cord for any other very strong and light cord.
Anchors:- 2 required I used tent pegs but some rope tied to fixed points on the field is OK.
Launcher:- 928mm x 54mm length of 10mm plywood, (any plank of timber similar would suffice).
A large washer, (I used a 27mm Galvanised washer with a central hole of 13mm - 3mm thickness)
A 10mm dynabolt 55mm long with 2 matching nuts. (any smooth shank bolt of similar size would suffice
2 countersunk wood screws - 20mm long
A piece of scrap 13mm wood - 100mm x 38mm
A 40mm length of 2mm craft wire or a split pin of similar dimensions - this is the safety lock!

Launcher build:
1. Mark in from the ends, of the 10mm plywood, 30mm and drill a 10mm hole at each end centrally on the 30mm mark
2. Cut the board to the length of 390mm. (this is now the thread piece). The remaining piece 538mm is the anchor piece.
3. Drill a 7mm hole centrally 30mm from the undrilled end of the anchor piece.
4. Cut a broad channel in the 13mm scrap wood to the width of the tread piece (54mm) to a depth of 10mm. This piece is
the rocker piece.
5. Mount the rocker piece on the anchored piece 150mm from the end with the 7mm hole. Use the 2 x 20mm wood screws
from the underside of the anchor piece to secure the rocker.
6. Cut the bulbous end from the dynabolt or cut the head off of the bolt used.
7. Drill a 2mm hole in the dynabolt 4mm from the cut end, (this is to take the safety lock pin).
8. Fit the dynabolt into the 7mm hole and tighten using the 2 nuts, (one above the board and one under). ensure that the
locking pin hole is aligned cross wise as this makes its removal easier.
9. Fit the tread piece on the rocker so that the 10mm hole fits over the dynabolt and Test fit the washer and locking pin.

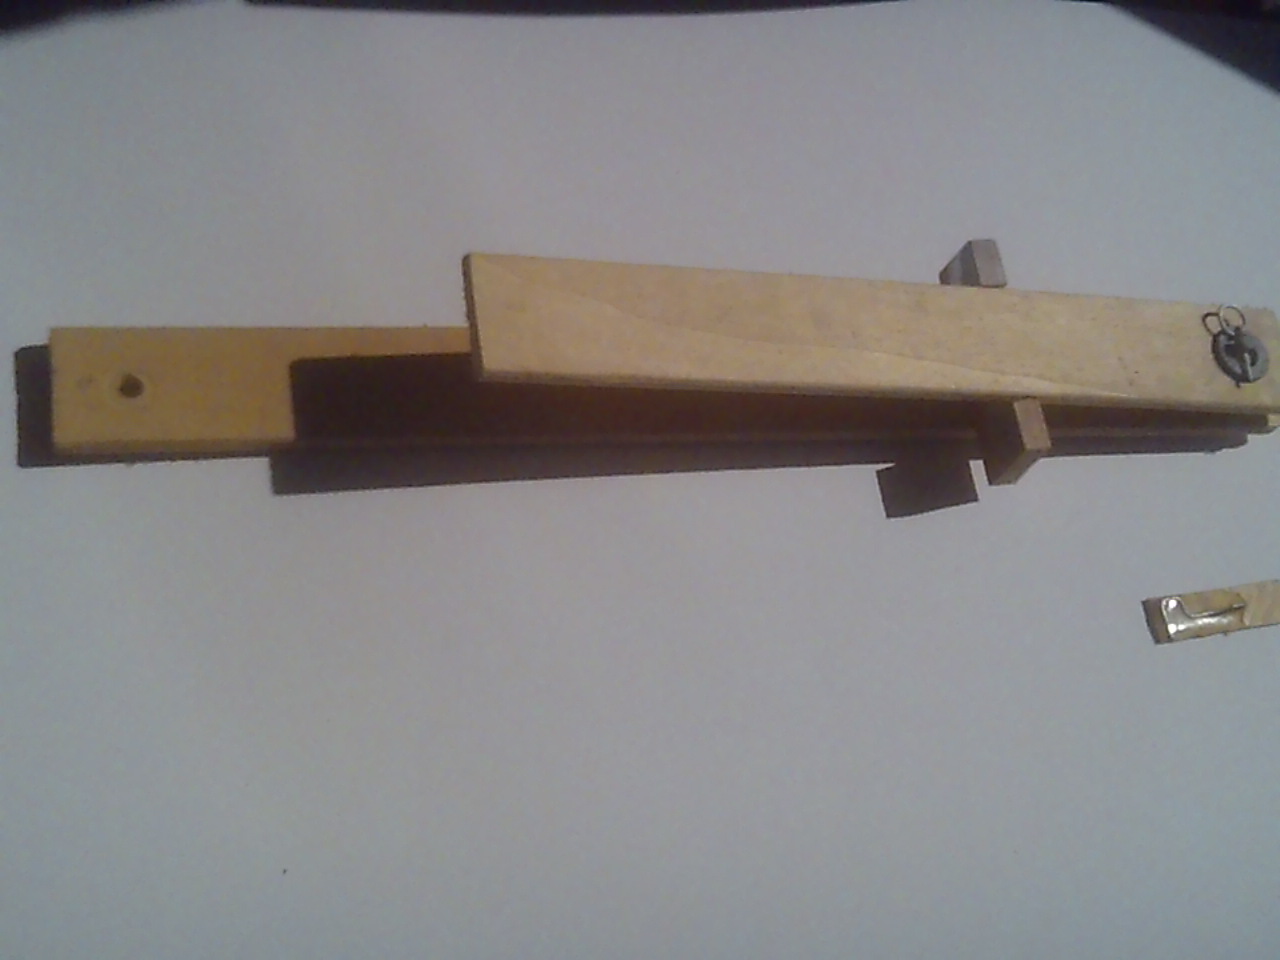
BASIS PARTS:
Basic parts.JPG


PRIOR TO ASSEMBLY:
Prior to Assembly.JPG


ASSEMBLED:
Ready to go.JPG


READY TO GO:
Assembled.JPG


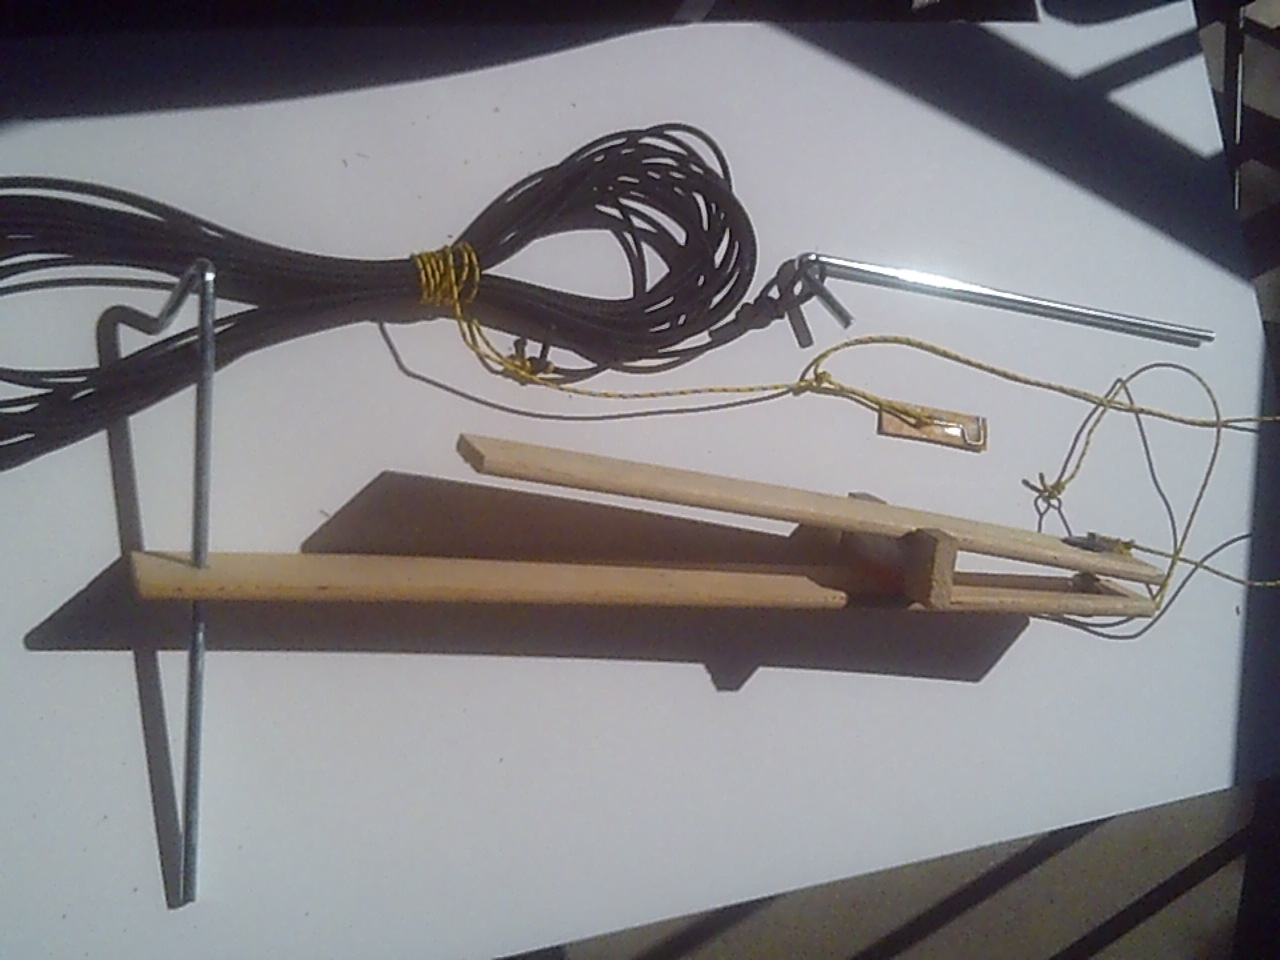
FULL KIT:
Full Kit.JPG


Bungee:
1 Tie a loop is one end. (this is the anchored end).
2 Tie the leader cord to the other end this goes to the launcher.
3. Securely tie the leader free end to the safety locking pin
4. Tie the washer onto the leader cord 200mm from the safety locking pin, ensuring that you leave sufficient clearance for
the dynabolt to fit through the washer hole without contacting the leader.
5. Tie a 50mm long loop into the leader 500mm from the washer. (this is the loop that fits onto the models launch hook.

Setup:
1. locate the launcher where it is to be set up and anchor in position with tent peg, rope or other mechanism.
2. Fit tread plate to launcher base and fit washer and locking safety pin to secure the bungee to the pedal launcher.
3. Walk bungee in desired direction of launch. Stretch to required tension and secure using tent peg or similar device or
method.
4. Locate plane over bungee and ensure that the tow loop is securely fitted into tow hook. place aircraft on the ground and
pull rearwards until the tow loop is tight.
5. Grab Tx, remove safety, stomp and fly!

Tips:
Do not apply throttle on EDFs until after the launcher has been activated.
For prop driven aircraft do not open throttle until the bungee has dropped clear of aircraft.
A gentle "UP" on the elevator control will give a rather steep and high launch.
A control neutral launch will give a low altitude launch around 1 metre high on release.
Tow hook should be fitted on the underside of the plane in a location which is 60% of the distance from the cg to the
aircraft nose.
A longer bungee will supply greater and more even acceleration especially to larger aircraft.
 
Last edited:

DamoRC

Elite member
Mentor
Great info Hai-Lee. I will seriously consider this, particularly for the Canuck. The darn thing is 4lbs all up and I have to have a lie down every time I hand launch it (a) because my arm and back are tired and (b) because of the sheer stress induced butt crunching that I suffer from at launch!

DamoRC
 

Hai-Lee

Old and Bold RC PILOT
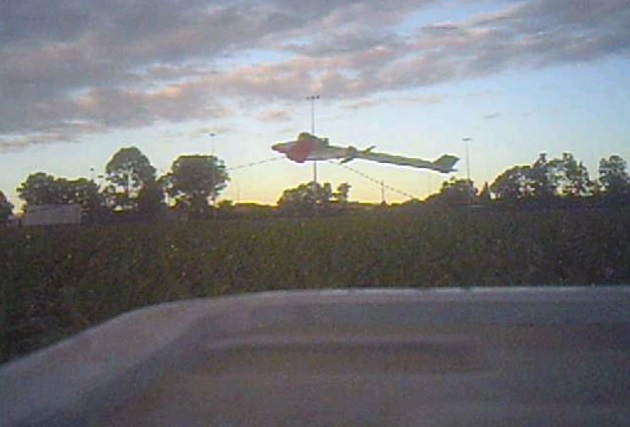
For those who are interested and as a way of renewing the post after the editing of the original parts list and procedure I managed to get a couple of pics taken MID launch.

My KFM wing using a permanently fitted hook, (note the taught tow line and the trailing line which is dragging the washer and the locking pin.
KFM WING LAUNCH.jpg


This next pic is my Bixler clone which has just been released from the bungee. This time I used the temporary or removable hook as shown above in the full kit picture. It is just a piece of craft wire joined to a scrap of 1/16 inch ply with a pool of epoxy. The temporary hook is just taped to the bottom of the plane at the 60% point as mentioned above.
Bixler Launch.jpg


If you have any questions just ask away!

The taped temporary hook survived 3 take offs and landings without any obvious tape or hook movement even though the ground was soaking wet after the heavy rain over night.

Have fun!
 

Michael9865

Elite member
Bungee:- 10 metres of 5mm dia shock cord or anything similar in function

Setup:
1. locate the launcher where it is to be set up and anchor in position with tent peg, rope or other mechanism.
2. Fit tread plate to launcher base and fit washer and locking safety pin to secure the bungee to the pedal launcher.
3. Walk bungee in desired direction of launch. Stretch to required tension and secure using tent peg or similar device or
method.

If you start with a 10 meter length of shock cord how far do you stretch it? Or in other words what is the "required tension" you speak of?
I don't want to rip the hook out of the bottom of my jet or my glider nor do I want to make the wingtips clap together. :)
 

Hai-Lee

Old and Bold RC PILOT
The rough formula is to a tension of 5 times the weight of the aircraft.

With the 10 metre length of cord I am using that equates to around that equatess to around 2 metres for the lightest (500Gram) plane.

As for ripping the hook from the model I used the taped on hook with the plywood strip to a tension of around 15 kilograms and did 3 successive launches without the slightest issue with my foam Bixler clone, (around 850 grams). The tape did not move, there was not even a mark left on the foam fuselage and the launch was very rapid, (explosive?)..

The wings cannot fold unless the launch force is extremely high because the force applied is to drag the plane forward from a point forward of the CG it is your application of elevator which applies a force to change incidence for increased lift.

For a slower acceleration on bigger models you just increase the length of the shock cord. As this example was designed primarily for models upto around 1.5 kilograms is might have insufficient ground run for some heavy models so you could use a shock cord length of 20 metres to give the required slower and longer ground run. The actual ground run of my version was only about 2 metres as the rest of the pull of 3 metres was applied whilst the plane was airborne.

Rather than modify your planes I suggest that you try the tape on hook and use only enough tape to allow the hook to be ripped off if the launch forces are too high, (some trial and error might be required here).

Finally I will say that as the distance between the anchor points for the bungee anchor and the release is set by you and the tension is controlled by the distance between the two points you can set the actual tension maximum when you set up the launcher. Trial and error would soon give you an idea of what strength you require to launch your bird.

This system can be used with a separate launch ramp if required but as described here it just drags the plane along the ground at high speed with the only upwards force being applied by dragging from a point below and forward of the CG point. Without pilot input the plane is launched at a maximum height of around 1 metre.

It works, the forces are under your control, you do not need a ramp but it will work with one.

Have fun!
 

sprzout

Knower of useless information
Mentor
Hmm...We may have to implement something like this at our field. Our club meeting last night brought up the issue of hand launches for EDFs and wings that were going awry. Apparently, people have issues with the planes "boomeranging" back into the pit area and the pilot line because the launches were either discus throw style launches that were released late or by very inexperienced pilots who are trying to learn to fly a wing, and are waggling it all over the place. I don't know if we've got room for a long bungee tow launch, like what you're describing, but maybe we can work a PVC catapult of some sort that pilots can do from near the pilot's box.

I know our field has some thoughts on catapult launches; maybe we'll do something from that.
 

Hai-Lee

Old and Bold RC PILOT
Well I was going to give an update anyway!

We now have three users with various versions of the launcher shown in this thread. One particular person was on the verge of giving up on the cheap EDFs because they were forever damaging the landing gear or having other problems on take off including the "Boomerang" launches. The same person now has changed his mind on getting out of EDFs and now spends almost all of his field time launching his EDF with the bungee launcher and is planning to buy more batteries for the same.

On a side note I just finished a rebuild of a FB TFW that I had gifted to another club member which sadly was crashed in a poor hand launching. I put the plane on the bungee and with some trepidation I slammed down on the release pedal. Away!!!! It took off to a, (wings level(, height of around 30ft in almost an instant and only then did I open the throttle! It flew well and whilst the owner will need to do his own tinkering and setup the plane is very flight worthy!

I still wonder why I did not make one, (a bungee launcher), earlier! I would have saved myself a countless number of repairs!

Have fun!
 

Idahomoe

New member
In the past I have built and flown many mighty minis and other small planes like the bloody baron as well as attempted a few of the smaller funfighters but sadly my launching technique was variable to say the least and I kind of lost interest in things that were effectively difficult to get flying with their increased risk of a failed maiden due to my inability to launch them properly.

Anyway I witnessed a club member hand launching a ducted fan while the owner manned the transmitter controls. The throttle was running flat out and the plane was thrown. Sadly the release was a little late and the hand drag turned the plane so that it was flying sideways. It took some skill to keep the wings level but it pancaked HARD and exploded removing the nose, and also ripping the wing LE out of the fuselage.

I had been considering a bungee launcher but I just never got around to it. I spotted some shock cord in a local camping supplies shop so I purchased 10 metres of it and 2 metres of braided cord as a leader. I raced home and dug out a large washer and some old heavy 8ply, (ex furniture), and made up a foot release for the shock cord and this morning I went to the local field to test if it would work without a launch ramp. I had previously fitted a tow hook on my KFM wing.

Pegged down the shock cord and the foot release, stretched and locked the shock cord to the foot release, and applied the safety lock. Placed the wing on the ground over the leader and slipped the tow hook onto the launcher tow loop. Checked that everything was working on the plane correctly. Removed the safety and held the transmitter looking at the far end of the shock cord. I could not apply throttle as the prop would strike the ground or foul the shock cord. I stomped on the release pedal and the wing launched forward and flew over the anchored end of the shock cord at a height of about 1 metre. I had not touched the controls so it was launched with the elevons in neutral. After the plane was clear of the anchor point I slammed the throttle and actually watched the wing slowly slow down to its normal flying speed.

After a short flight I landed and retried the procedure for various control inputs and wing directions. Full up saw the wing soar to a height of around 7 metres without the motor thrust being applied and in a strong crosswind the wing did roll very slowly on launch but flew straight and gathered straight line speed like a missile.

When I think of the cost of all of the planes I have damaged or destroyed trying to perfect hand launched maidens I could almost cry, especially when $20, (less than the cost of a single motor or repair), could have saved me all of the troubles. For those who struggle to hand launch and cannot find a strong reliable arm to help them I suggest you buy yourself a bungee launcher or at least make one. This opens up an entire range of mini and micro models which I was hesitant to try before! (Here $20 is the cost of 4 cups of retail coffee and I must have drunk gallons of coffee discussing why I crashed my latest attempt at a mini).

If you want the details of my foot release just post and I will supply details and maybe a few pics, (when the paint is dry that is).

Happy boy today!
This sounds great. Especially if one doesn’t have help for launching and minis don’t handle landing gear that well.
Thanks.
Btw the pt19 maiden was about 30 feet. I need to add thrust angle and possibly some slight downward angle. Any suggestions?
Have fun!
Well I was going to give an update anyway!

We now have three users with various versions of the launcher shown in this thread. One particular person was on the verge of giving up on the cheap EDFs because they were forever damaging the landing gear or having other problems on take off including the "Boomerang" launches. The same person now has changed his mind on getting out of EDFs and now spends almost all of his field time launching his EDF with the bungee launcher and is planning to buy more batteries for the same.

On a side note I just finished a rebuild of a FB TFW that I had gifted to another club member which sadly was crashed in a poor hand launching. I put the plane on the bungee and with some trepidation I slammed down on the release pedal. Away!!!! It took off to a, (wings level(, height of around 30ft in almost an instant and only then did I open the throttle! It flew well and whilst the owner will need to do his own tinkering and setup the plane is very flight worthy!

I still wonder why I did not make one, (a bungee launcher), earlier! I would have saved myself a countless number of repairs!

Have fun!
 

Hai-Lee

Old and Bold RC PILOT
Still using it! I recently was asked to do a test build for the SpiTTT by Mayan. After the build I needed to launch it for the maiden. Not sure how well it would fly and how good my build was I decided to use a Bungee launcher.

The pics below were taken on the maiden launch. Used another club members version of the launcher design of this thread. He uses a 1.5 metre length of PVC pipe as a launch ramp.

Positioned on the ramp
Ready.jpg

And AWAY!

AWAY.jpg

The maiden went well as did the launch. having all hands on the transmitter was invaluable!

Have fun!