basslord1124
Master member
https://www.flitetest.com/articles/the-galaxy-v2-the-better-huuuuuuuge-glider
-Article on the Galaxy v2 glider by @Planiac01
I really haven't been to open here on the forums regarding my experiences with building the Galaxy glider....just made small remarks/questions here and there about its progress. Been doing a lot more conversing about the plane with its designer @Planiac01 . So anyways thought I would finally open up and share some things.
First off, I have always wanted to have a good size glider in my collection as 1) it's something I've never done, and 2) looks like something that I'd be interested in...nice, relaxing, long flight times. I had thought of the FT Simple Soarer but I remember reading about some horrible CG and weight issues PLUS I wanted something a little bigger. Now the problem with that too, is I wanted something that I could break down into smaller pieces to make it easy to transport. What a combo eh...I want a big glider, but I want to be small for transporting, lol. So anyways, I browsed for articles on the FT site and came across the one for the Galaxy. And the story, specs, and everything drew me in moreso than the other glider articles on the site.
The Wing
Not sure about others who have tried this build, but I wanted the glider to have a wing that broke in half for transporting. I have NEVER attempted a wing that could be split in 2, assembled and disassembled...so this was new territory. Plus, this was the largest wing I had ever built! The wing itself is 3 sheets of foamboard wide...a center section and 2 outer sections. The center one is of course what went over the fuselage. So the center section would be the split. Now the Galaxy uses foam box spars throughout the wing. To accomplish the split, and how the wing was going to break down, I figured to add some wood to the equation. This was basically my plan:
-cut foamboard sheet and box spar in half at the split
-insert a paint stick onto each wing half located and glued on the box spar
-use a wooden yardstick as my joiner for the 2 halves...this would lay on the paint sticks/box spar where...
-a hole was drilled on each wing half that would go through the foam, paint sticks, and yardstick
-Finally 2 screws (going to use nylon screws) would be used to secure each side.
So this was my plan for joining the wings...in the end, both wing halves would be almost 4 feet each. And then the final steps I would add some paint sticks or something to the leading and trailing edge wing halves to keep the wing from flexing and rotating (as of right now, this is one of the only steps I have left for the wing)
Now a few things I had came across in assembling the wings is that my extension on the bottom of the wing was greater than the 3 inches mentioned in the original plans. Mine ended up being closer to 5 inches. I honestly think it could've been an error on my part BUT I am not bothered just b/c that will increase the wing area and hopefully make it even more floaty. Guess we shall see when I fly it. Another thing too, once I had the basic measurements for the wing down (measurements between the different score cuts, bevel cut for the leading edge, etc), I found that to be much easier than working with the plans. So I really didn't hardly use the plans for the wing. Just a ruler, yardstick, and a pencil to make my marks to cut.
Fuselage:
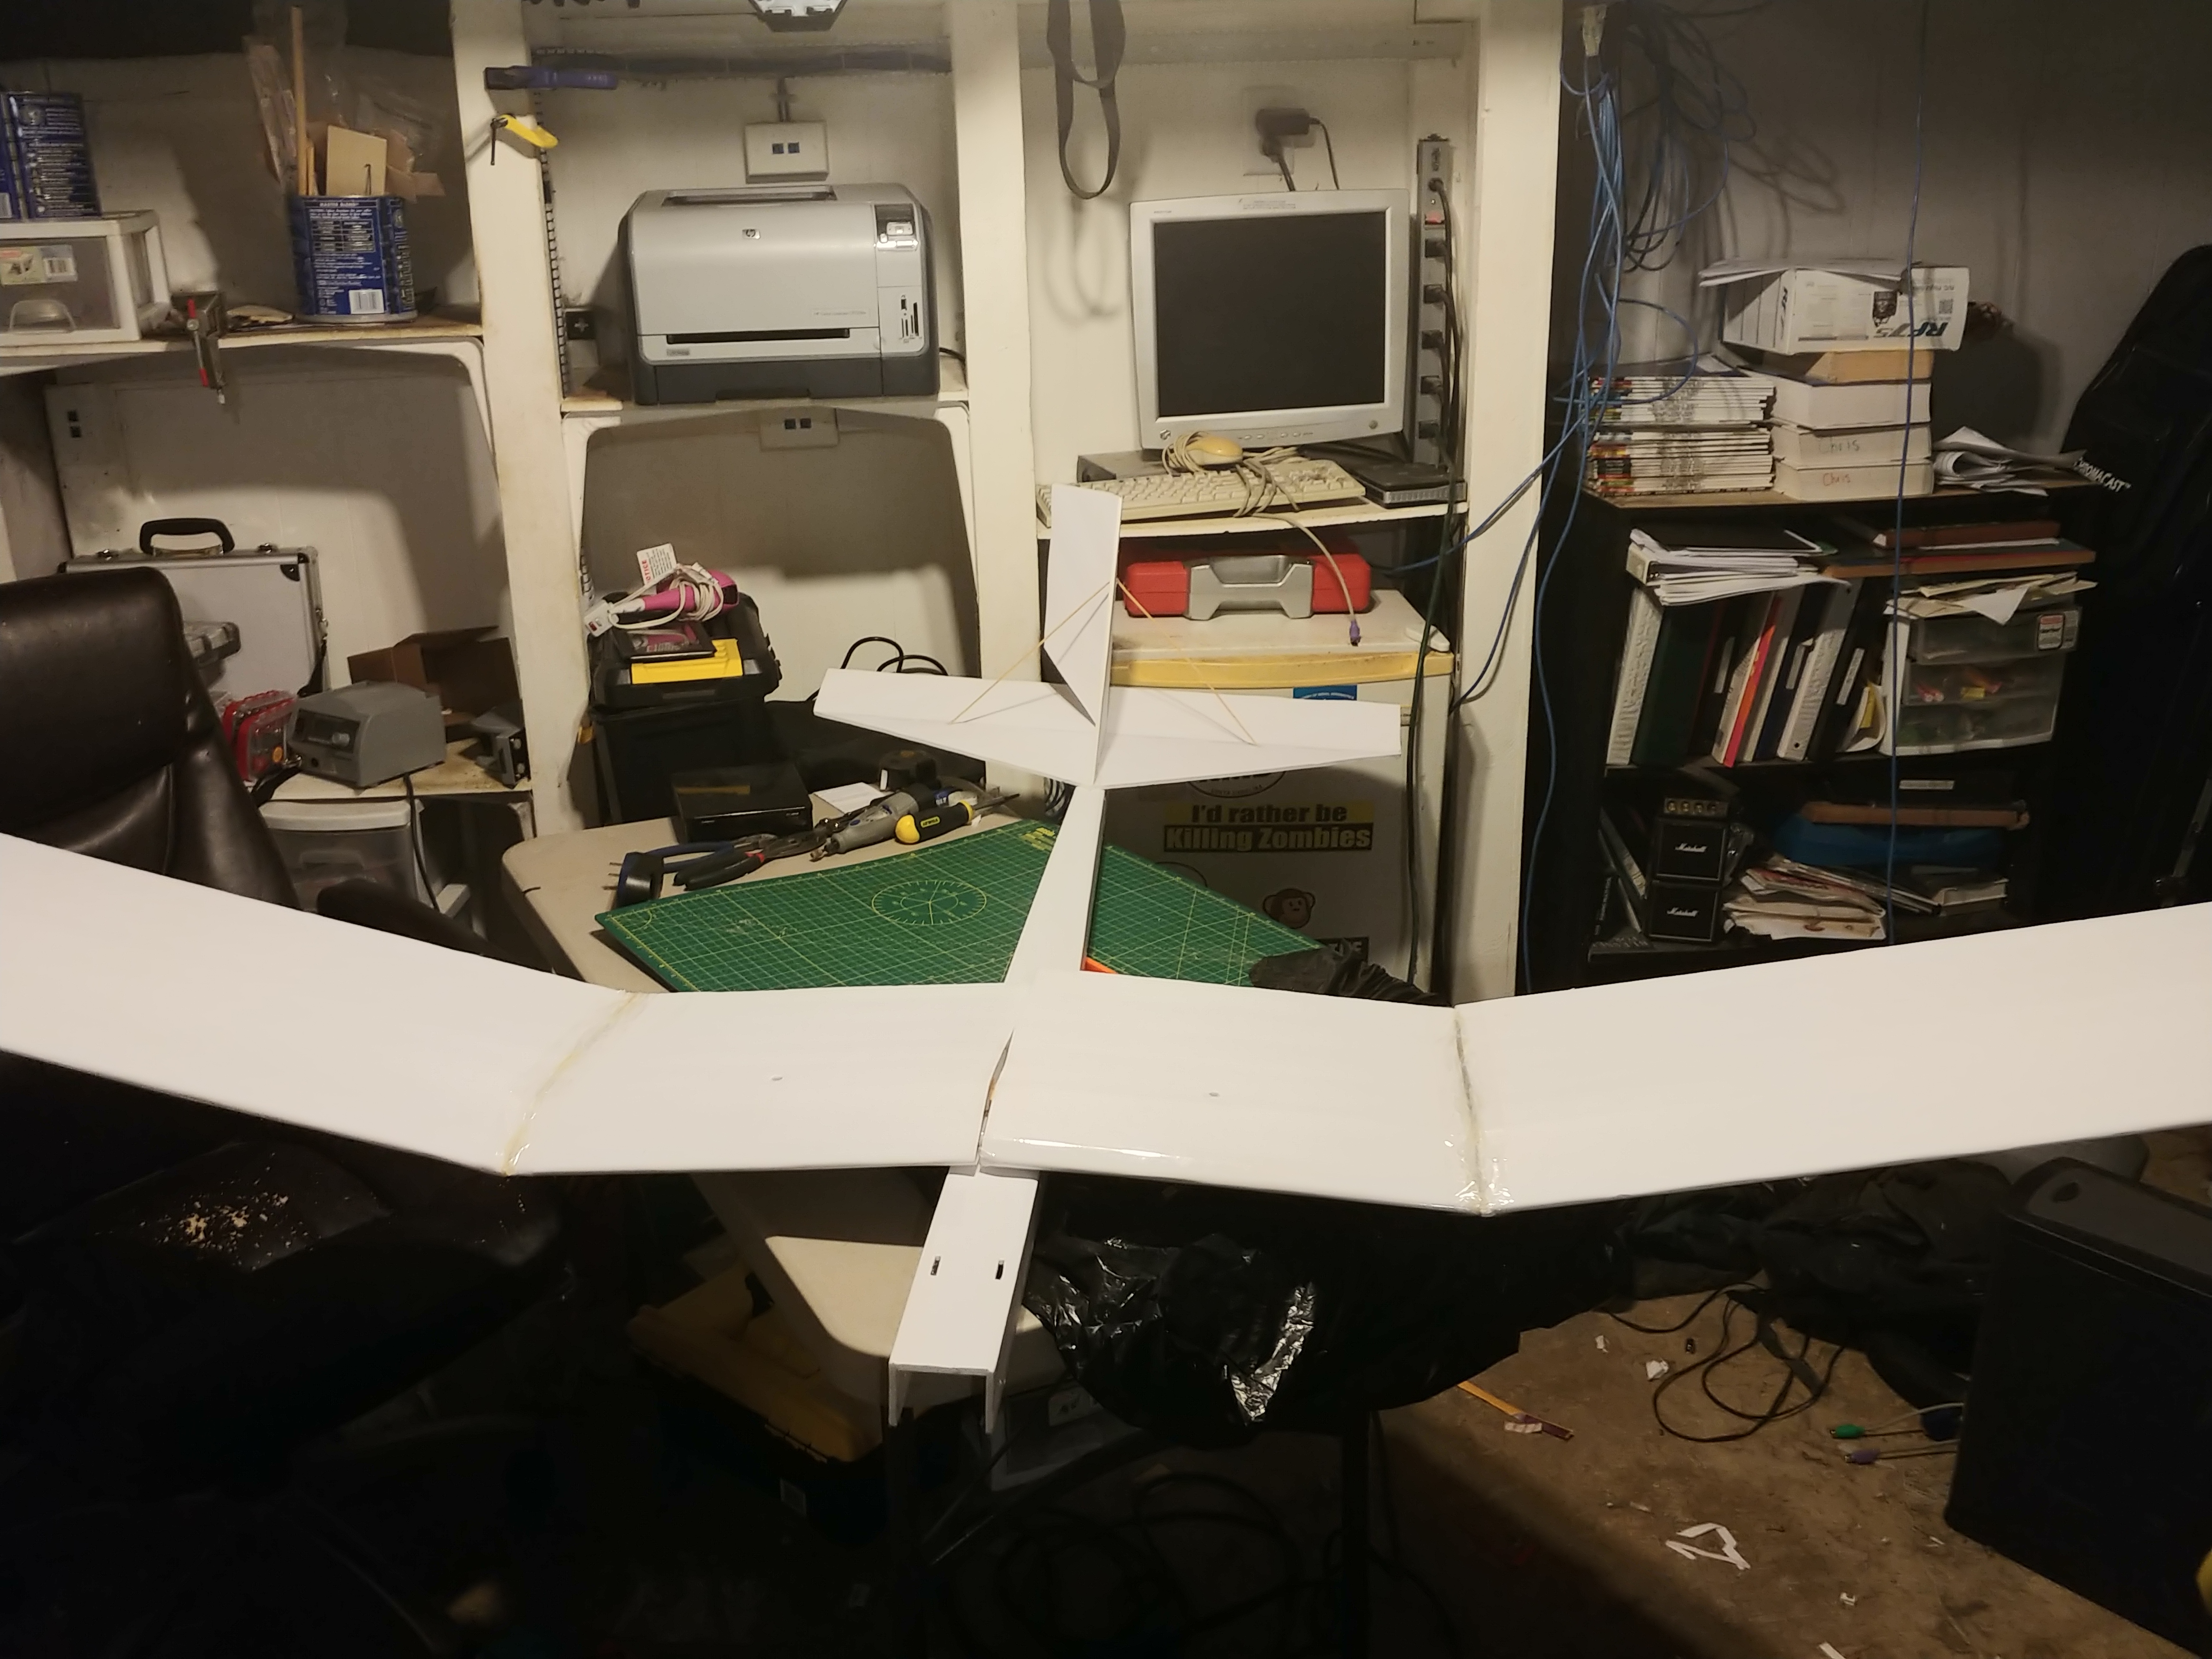
Not much to say on the fuselage as it was all pretty straightforward. Tail section went on very easy and is very big as well. It's hard for me to believe that the fuse of this glider is as big as the wingspan for some of my other planes! As of right now, the fuse needs the motor, ESC and servos/linkages installed. This is why I haven't put a bottom on the fuse yet as I am waiting to install some of those parts first.
I posted some recent pics below and will be updating this thread with more progress, pics, and probably some youtube goodness. Huge thanks to Planiac01 for such a cool design.
-Article on the Galaxy v2 glider by @Planiac01
I really haven't been to open here on the forums regarding my experiences with building the Galaxy glider....just made small remarks/questions here and there about its progress. Been doing a lot more conversing about the plane with its designer @Planiac01 . So anyways thought I would finally open up and share some things.
First off, I have always wanted to have a good size glider in my collection as 1) it's something I've never done, and 2) looks like something that I'd be interested in...nice, relaxing, long flight times. I had thought of the FT Simple Soarer but I remember reading about some horrible CG and weight issues PLUS I wanted something a little bigger. Now the problem with that too, is I wanted something that I could break down into smaller pieces to make it easy to transport. What a combo eh...I want a big glider, but I want to be small for transporting, lol. So anyways, I browsed for articles on the FT site and came across the one for the Galaxy. And the story, specs, and everything drew me in moreso than the other glider articles on the site.
The Wing
Not sure about others who have tried this build, but I wanted the glider to have a wing that broke in half for transporting. I have NEVER attempted a wing that could be split in 2, assembled and disassembled...so this was new territory. Plus, this was the largest wing I had ever built! The wing itself is 3 sheets of foamboard wide...a center section and 2 outer sections. The center one is of course what went over the fuselage. So the center section would be the split. Now the Galaxy uses foam box spars throughout the wing. To accomplish the split, and how the wing was going to break down, I figured to add some wood to the equation. This was basically my plan:
-cut foamboard sheet and box spar in half at the split
-insert a paint stick onto each wing half located and glued on the box spar
-use a wooden yardstick as my joiner for the 2 halves...this would lay on the paint sticks/box spar where...
-a hole was drilled on each wing half that would go through the foam, paint sticks, and yardstick
-Finally 2 screws (going to use nylon screws) would be used to secure each side.
So this was my plan for joining the wings...in the end, both wing halves would be almost 4 feet each. And then the final steps I would add some paint sticks or something to the leading and trailing edge wing halves to keep the wing from flexing and rotating (as of right now, this is one of the only steps I have left for the wing)
Now a few things I had came across in assembling the wings is that my extension on the bottom of the wing was greater than the 3 inches mentioned in the original plans. Mine ended up being closer to 5 inches. I honestly think it could've been an error on my part BUT I am not bothered just b/c that will increase the wing area and hopefully make it even more floaty. Guess we shall see when I fly it. Another thing too, once I had the basic measurements for the wing down (measurements between the different score cuts, bevel cut for the leading edge, etc), I found that to be much easier than working with the plans. So I really didn't hardly use the plans for the wing. Just a ruler, yardstick, and a pencil to make my marks to cut.
Fuselage:
Not much to say on the fuselage as it was all pretty straightforward. Tail section went on very easy and is very big as well. It's hard for me to believe that the fuse of this glider is as big as the wingspan for some of my other planes! As of right now, the fuse needs the motor, ESC and servos/linkages installed. This is why I haven't put a bottom on the fuse yet as I am waiting to install some of those parts first.
I posted some recent pics below and will be updating this thread with more progress, pics, and probably some youtube goodness. Huge thanks to Planiac01 for such a cool design.