- Type
- 3D Print Files (STL, G-code, etc.)
InqCutter is for people (like me) that had trouble coloring inside the lines  or not as skilled as Josh in his videos (probably most of us).
Please be careful - I really don't want one of your children (or you) to get hurt with the upturned blade! Assume it is as dangerous as a powered table saw without a guard!
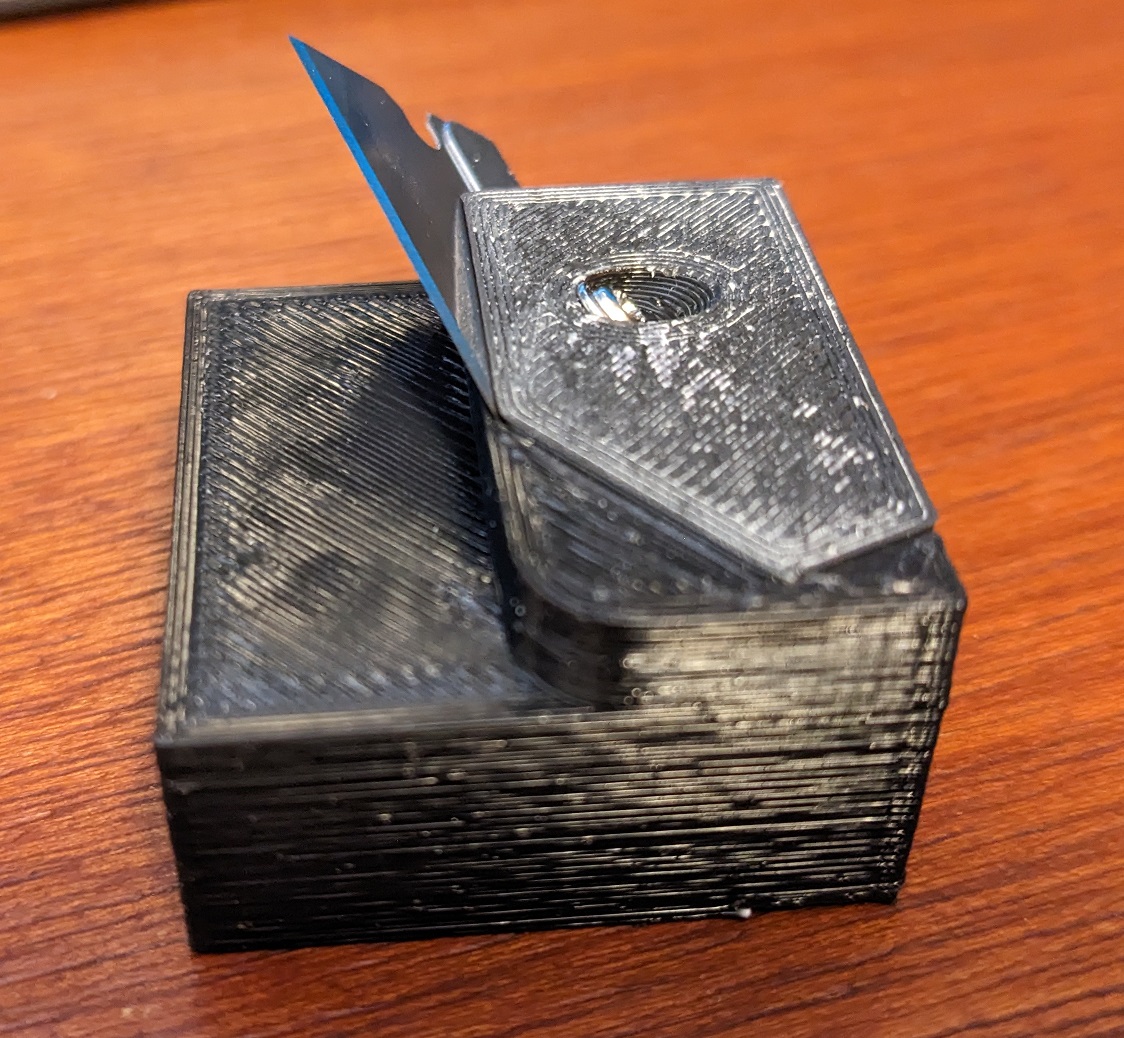
This is a simple 3D printed part made up of two pieces. It holds the razor blade in such a way that it cuts a 45° bevel in a foam board. It also holds it at 30° relative to your cutting direction for easy/clean cuts. It also has a thickness guide of 5mm so that used on a folded back piece of DTFB it cuts just above the fold to remove a 45° slice on the top piece. It uses one of the screws we have left over from our Servos to clamp the razor blade between the two 3D printed pieces.


Here is a before and after... (and obvious why I think I needed this!) On the top was my attempt at cutting the rudder (~3") free handed. Underneath, is the wing trimmed using the InqCutter.

Please be careful - I really don't want one of your children (or you) to get hurt with the upturned blade! Assume it is as dangerous as a powered table saw without a guard!
This is a simple 3D printed part made up of two pieces. It holds the razor blade in such a way that it cuts a 45° bevel in a foam board. It also holds it at 30° relative to your cutting direction for easy/clean cuts. It also has a thickness guide of 5mm so that used on a folded back piece of DTFB it cuts just above the fold to remove a 45° slice on the top piece. It uses one of the screws we have left over from our Servos to clamp the razor blade between the two 3D printed pieces.


Here is a before and after... (and obvious why I think I needed this!) On the top was my attempt at cutting the rudder (~3") free handed. Underneath, is the wing trimmed using the InqCutter.

