SSgt Duramax
Junior Member
Ok, I had promised that I was going to not only build the 13th squadron F6f by @Niez13 but I would make a build log. When I was researching the plane, I didn't find one, and I had seen some folks say they want one so here we are. The 13th squadron site has some amazing plans and I have also built the zero too!
https://www.13thsquadron.com/f6f-hellcat.html
If this is your first master series type build, do yourself a favor and watch the P-47 build video by FT/John Overstreet.
So I had been procrastinating on this for a while. I finally got most of the parts cut out aside from the skins. Cutting out all of the formers was agonizing and tedious, but necessary (PS does anyone in San Antonio have a laser cutter? )
I also use different types of glue throughout the build. Sometimes I like a longer set time, and sometimes another option is lighter and stronger. You can complete this build using explicitly hot glue.
My parts pile so far.

First up, put a score in the wing and fold it according to the templates.
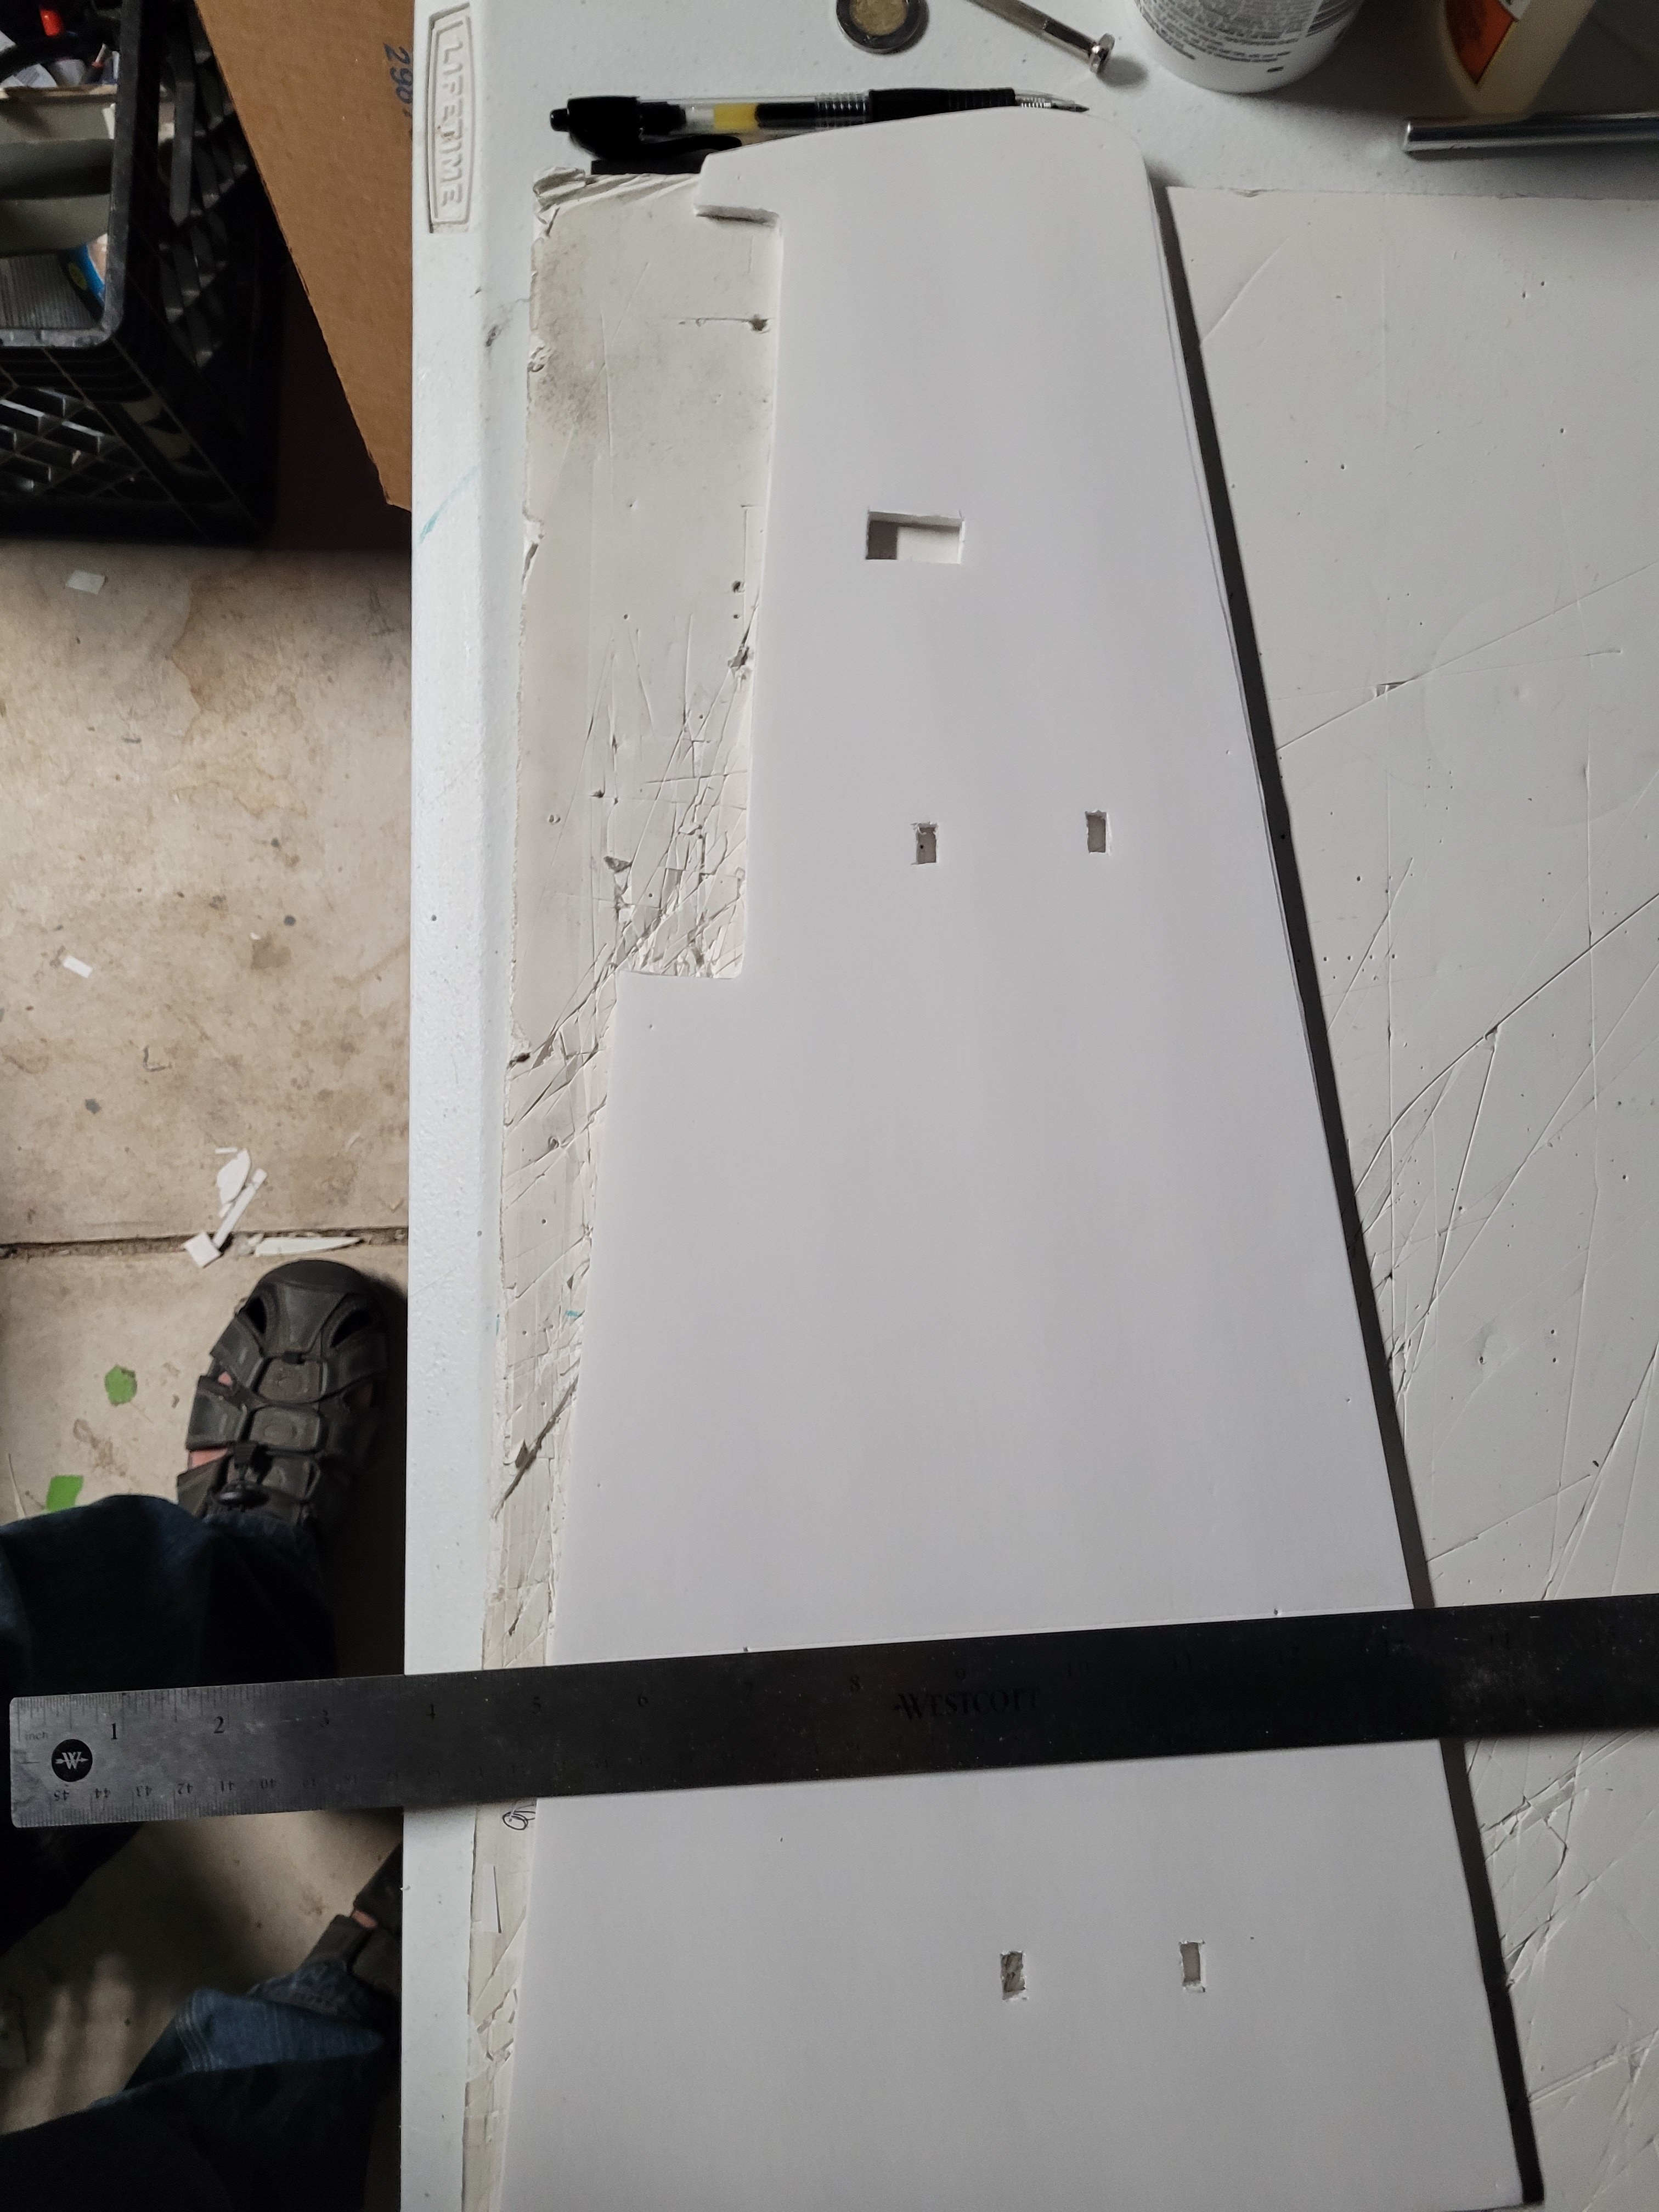
Here it is, I used a ruler to ensure that it folded straight. I just barely scored it to help guide the fold. Repeat for other side.
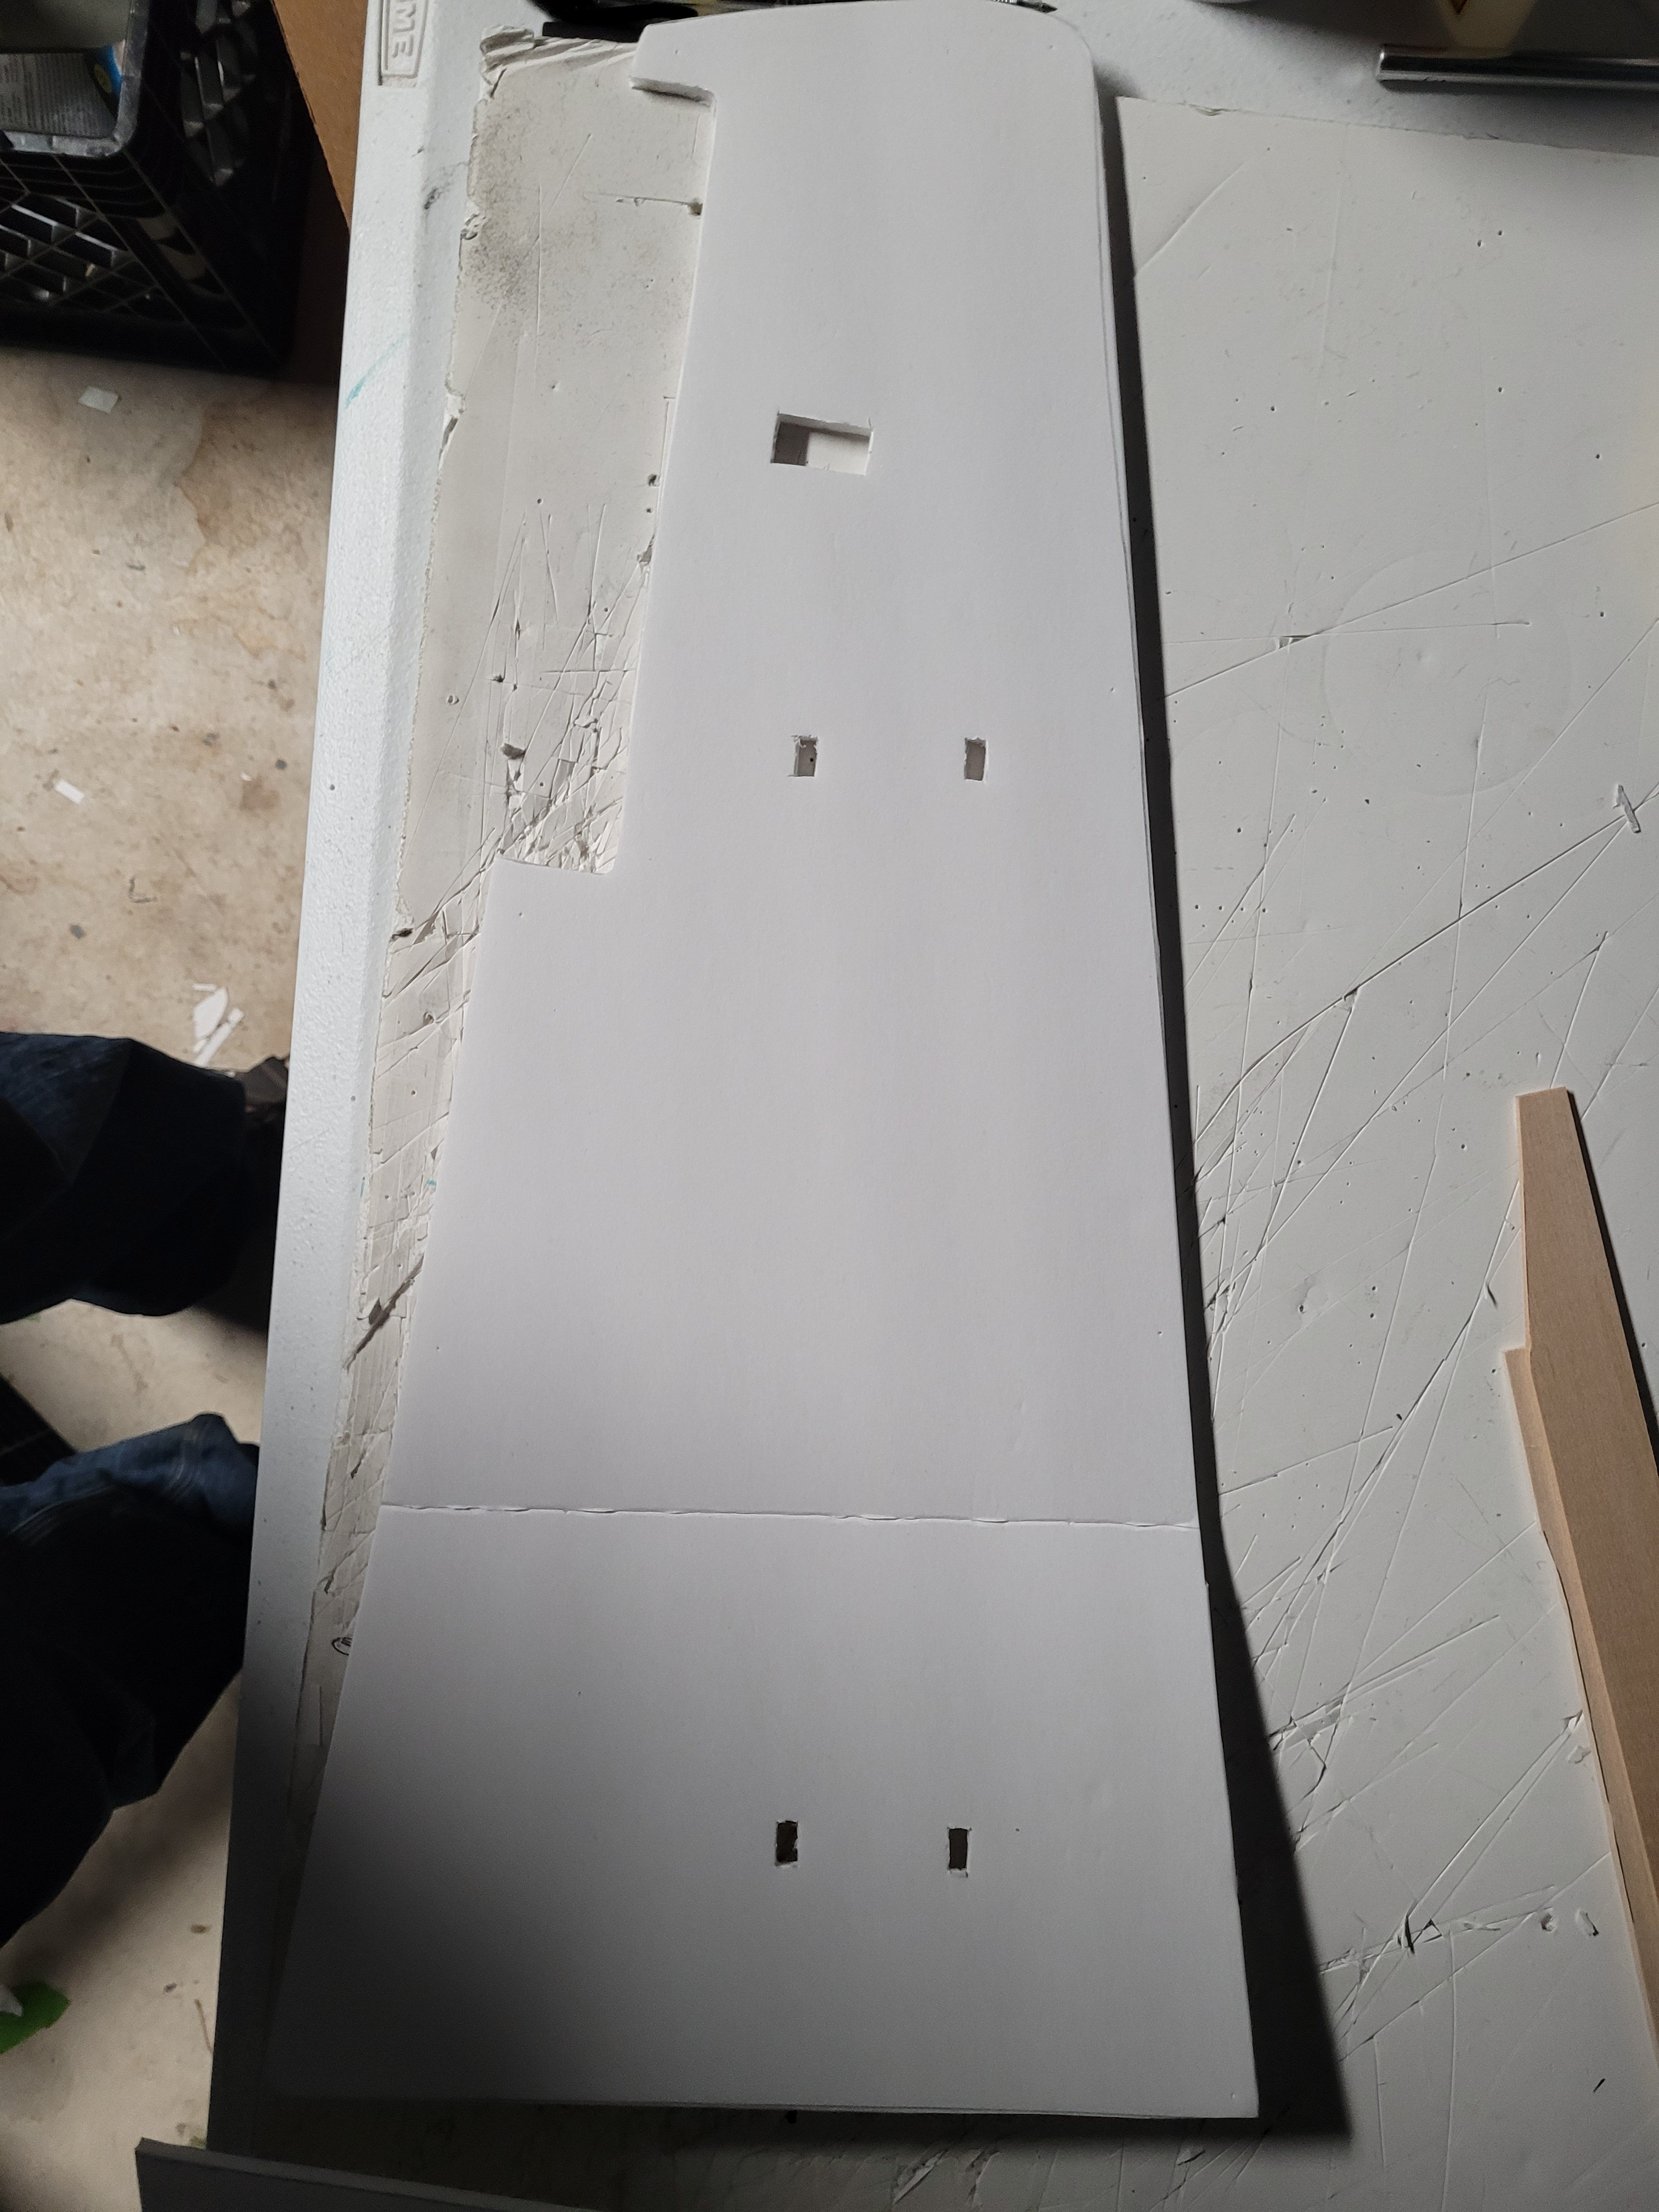 Next Install your spars, I used a combo of hot glue and wood glue (hot glue keeps it in place while the wood glue dries). Repeat for both sides.

Then glue in your wooden spars. I think this is some 1/16x1 birch I found on sale at hobby lobby. Glued in place with wood glue, and clamped until dry.

I installed/routed the servos and wires. You need 2 6 inch extensions, and a Y harness, unless you are doing dual ailerons, then I guess you would just need 2 12 inch extensions. I did not glue the servos in, which ended up paying off. So don't glue them in yet!

Start with your inner upper wing skins, first start by removing the inner paper, and sculpting the whole skin master series style over a table corner (Watch the P-47 video!)

Then move your focus to the front of the wing skin, it should start to look like an airfoil.
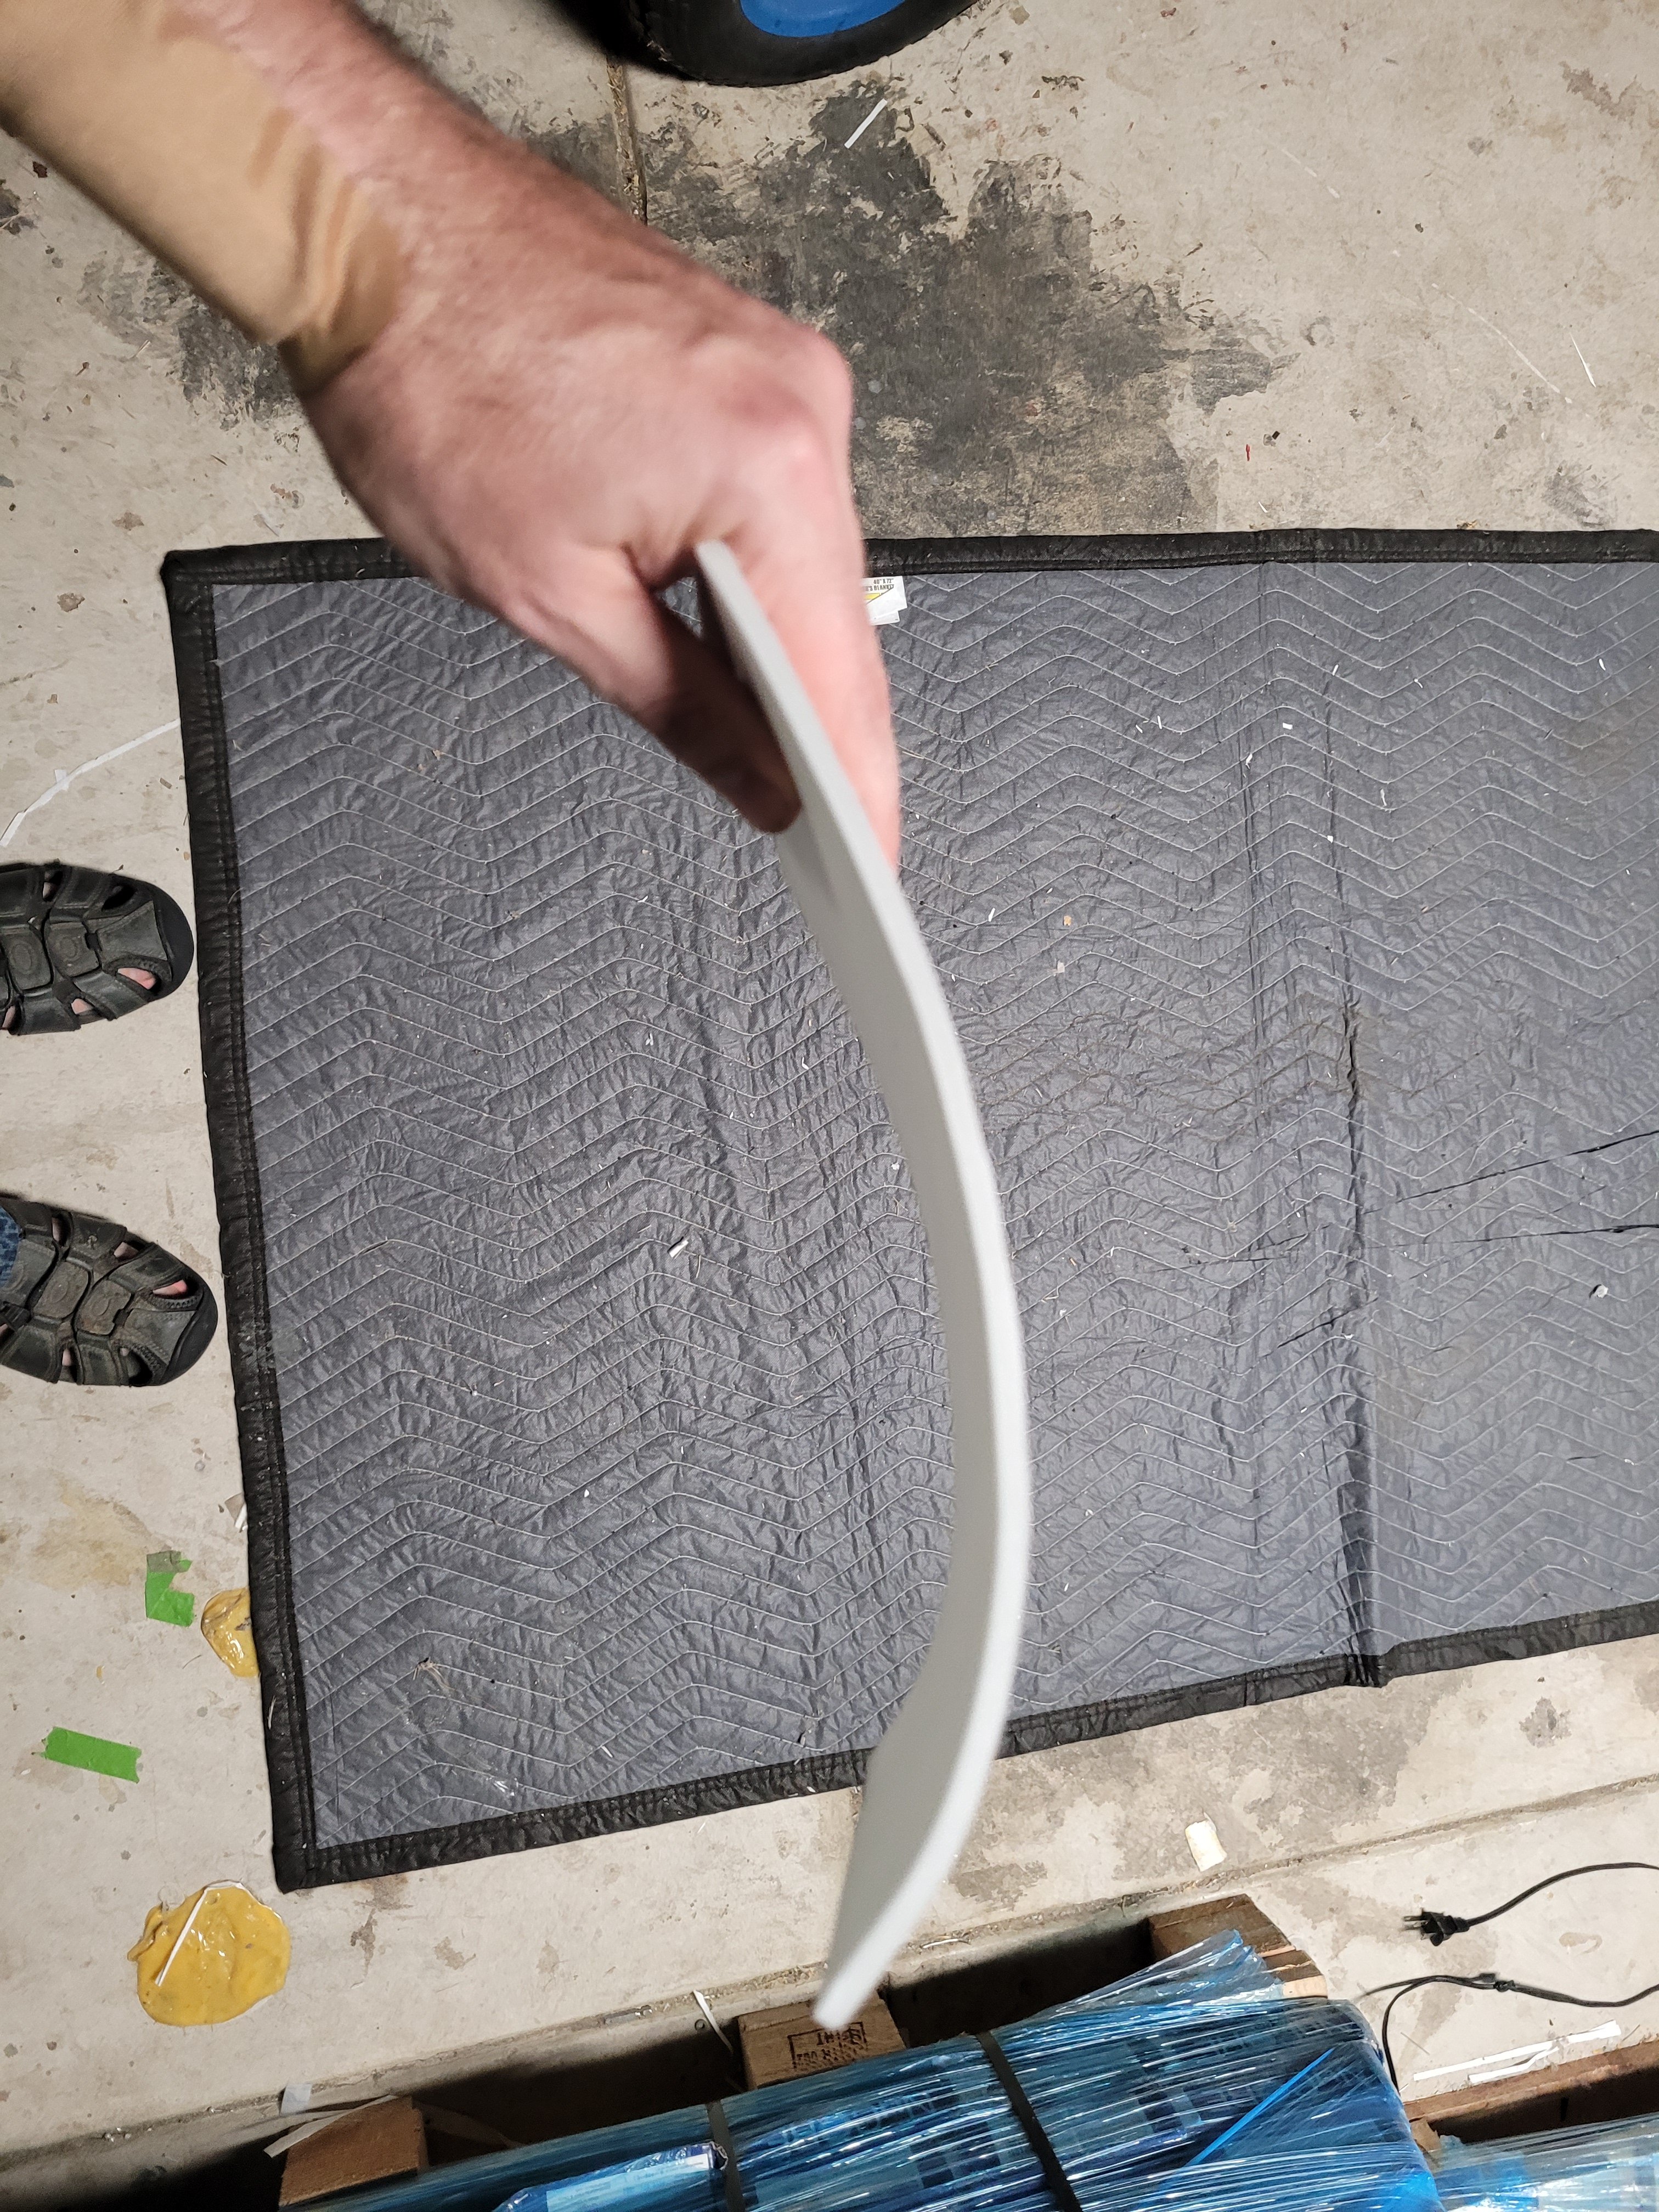
They should easily fit over just like such.

Optional: Bevel the leading edge of your skin. The official masters style build technique doesn't require this, but I think it looks better and gives the glue more area to bite. I just used a 150 grit sanding block.

I dampened one surface, taped down the leading edge tightly (be sure to line it up perfectly) applied a little water and some white gorilla glue. I weighted it down and let it sit for about 30 minutes. I only did the leading edge and spar, and came back later and did the trailing edge. After about 5 minutes, come back and if any glue has oozed out the front trailing edge, wipe it off, it is easier now than to try to cut/sand it off later.
Also, don't use paint cans, I got lucky my first time, but my other side has two little circle indents on it. Yuk! I use jugs of oil or coolant typically. Anything heavyish that will distribute weight evenly and not have stress risers.

Repeat the process for the outer skins. Be sure to bevel your aileron hinges and treat them with glue to ensure they don't delaminate. The servos had to be pushed down a little, if I had glued them in, I wouldn't have been able to close my wing. Run the glue along the leading edge and spars, as well as the inside of the skin where it butts up to the inner wing span. The white gorilla glue will expand. If you have any little gaps from your shaky hand cutting the foam, the gorilla glue will totally expand and cover your mistakes! Wipe off any oozing out after about 5 minutes (it seems to expand the most during the first 5-10 minutes).

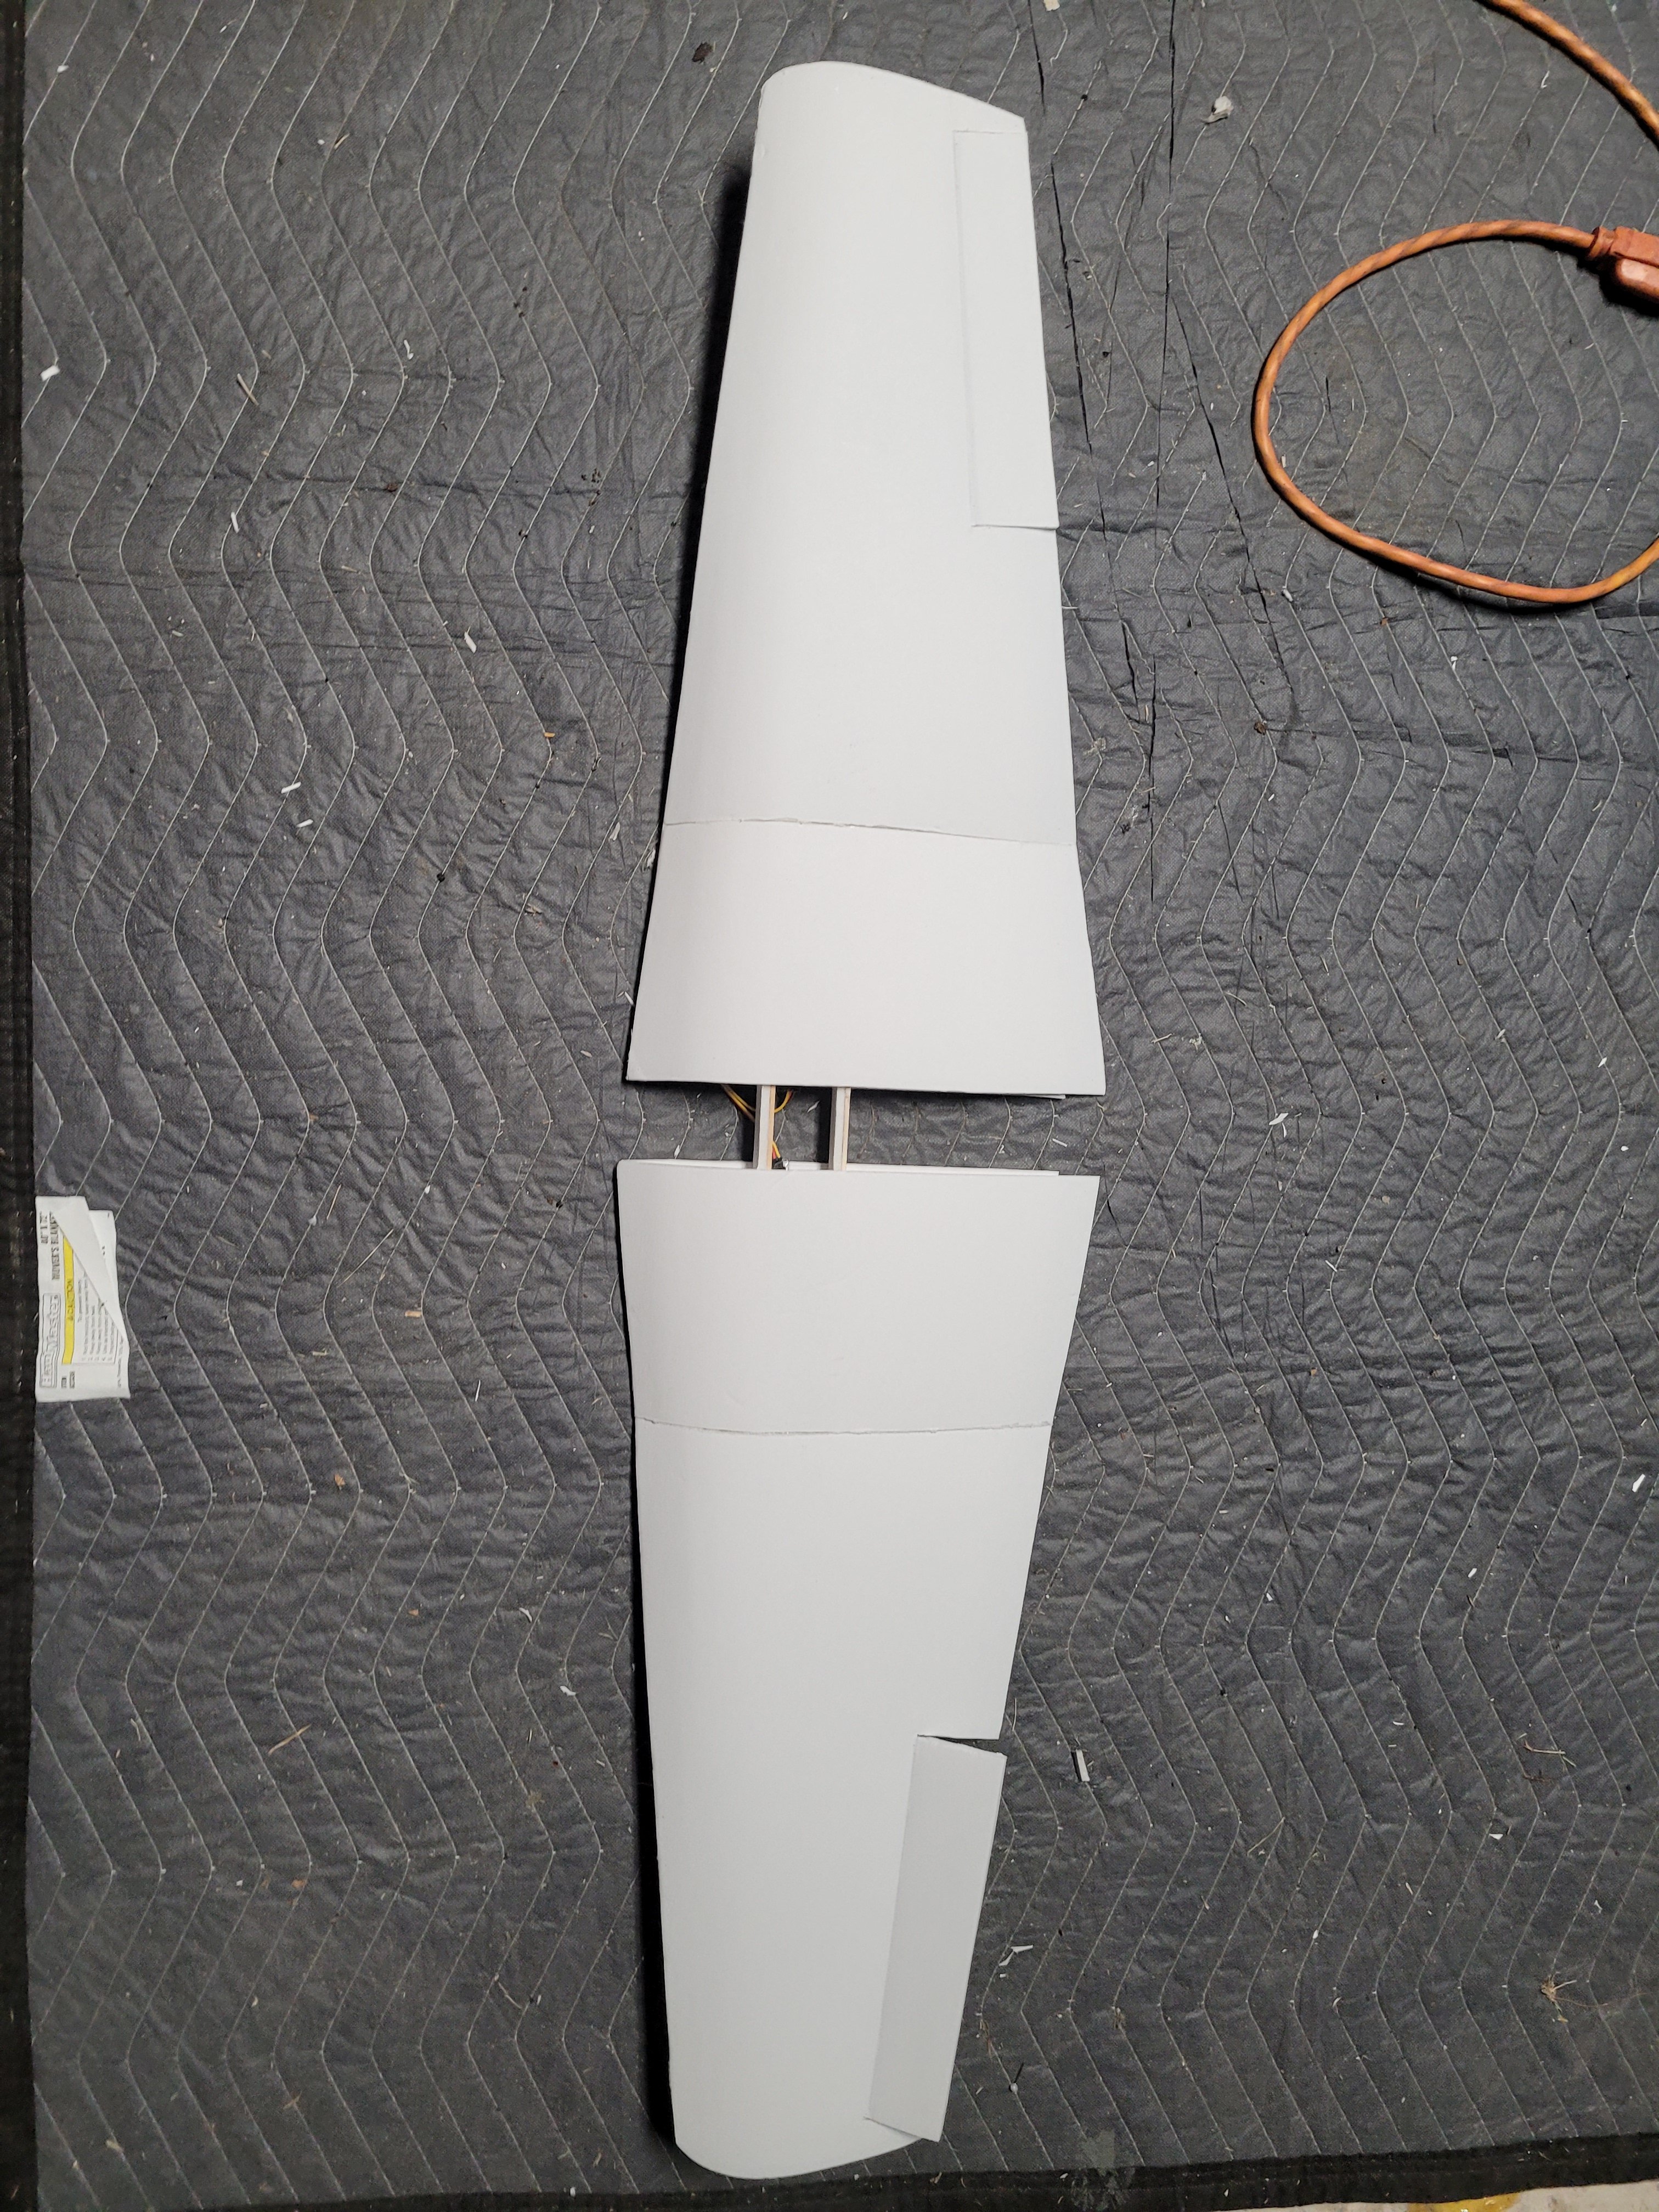
Completed wing assembly. This wing is big, with a thick root, and relatively light. I have zero doubts this plane will fly well on this wing. I still need to trim up some edges. Yes, there will be a gap between the wings.
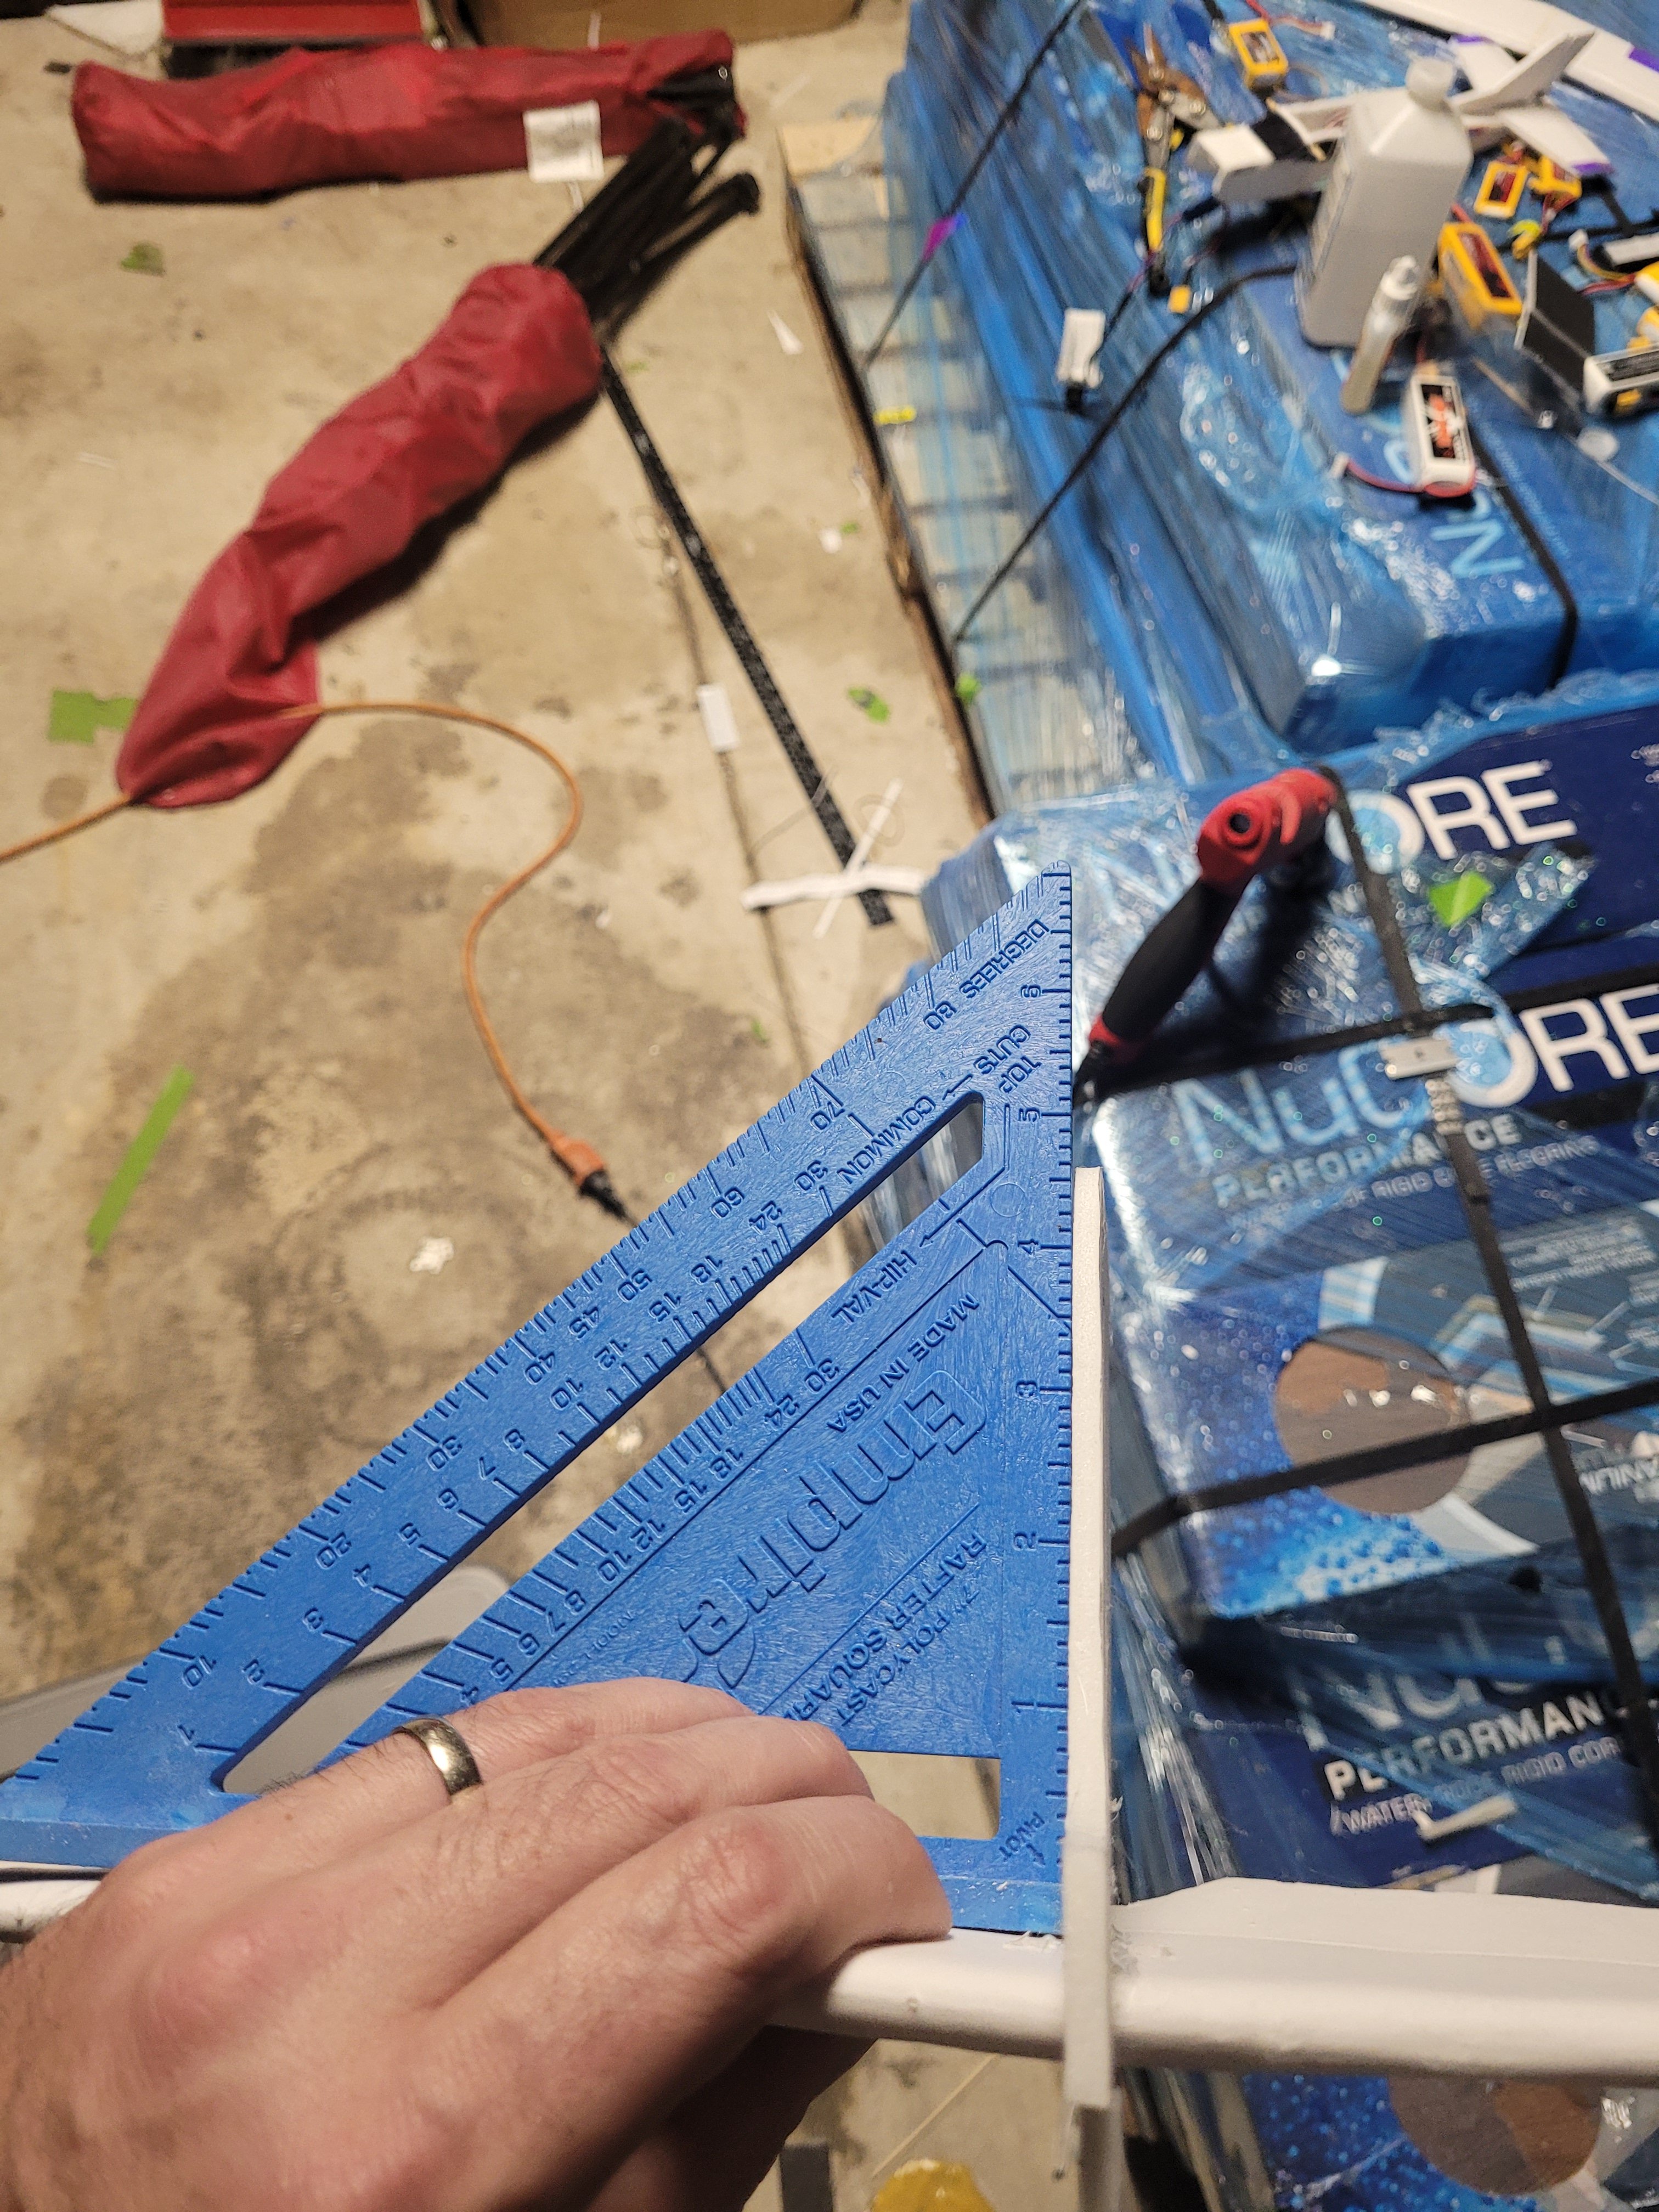
Next up, fold your body, it is a B Fold on the top, and a quasi A fold on the bottom. Make sure it is nice and square. I like to wood glue one side, and tape it down to a 90 degree aluminum L angle stock. It will hold it a perfect 90 degrees flush while drying. Hot glue works here as well and would be quicker. You can still do a variation of the aluminum angle move too.
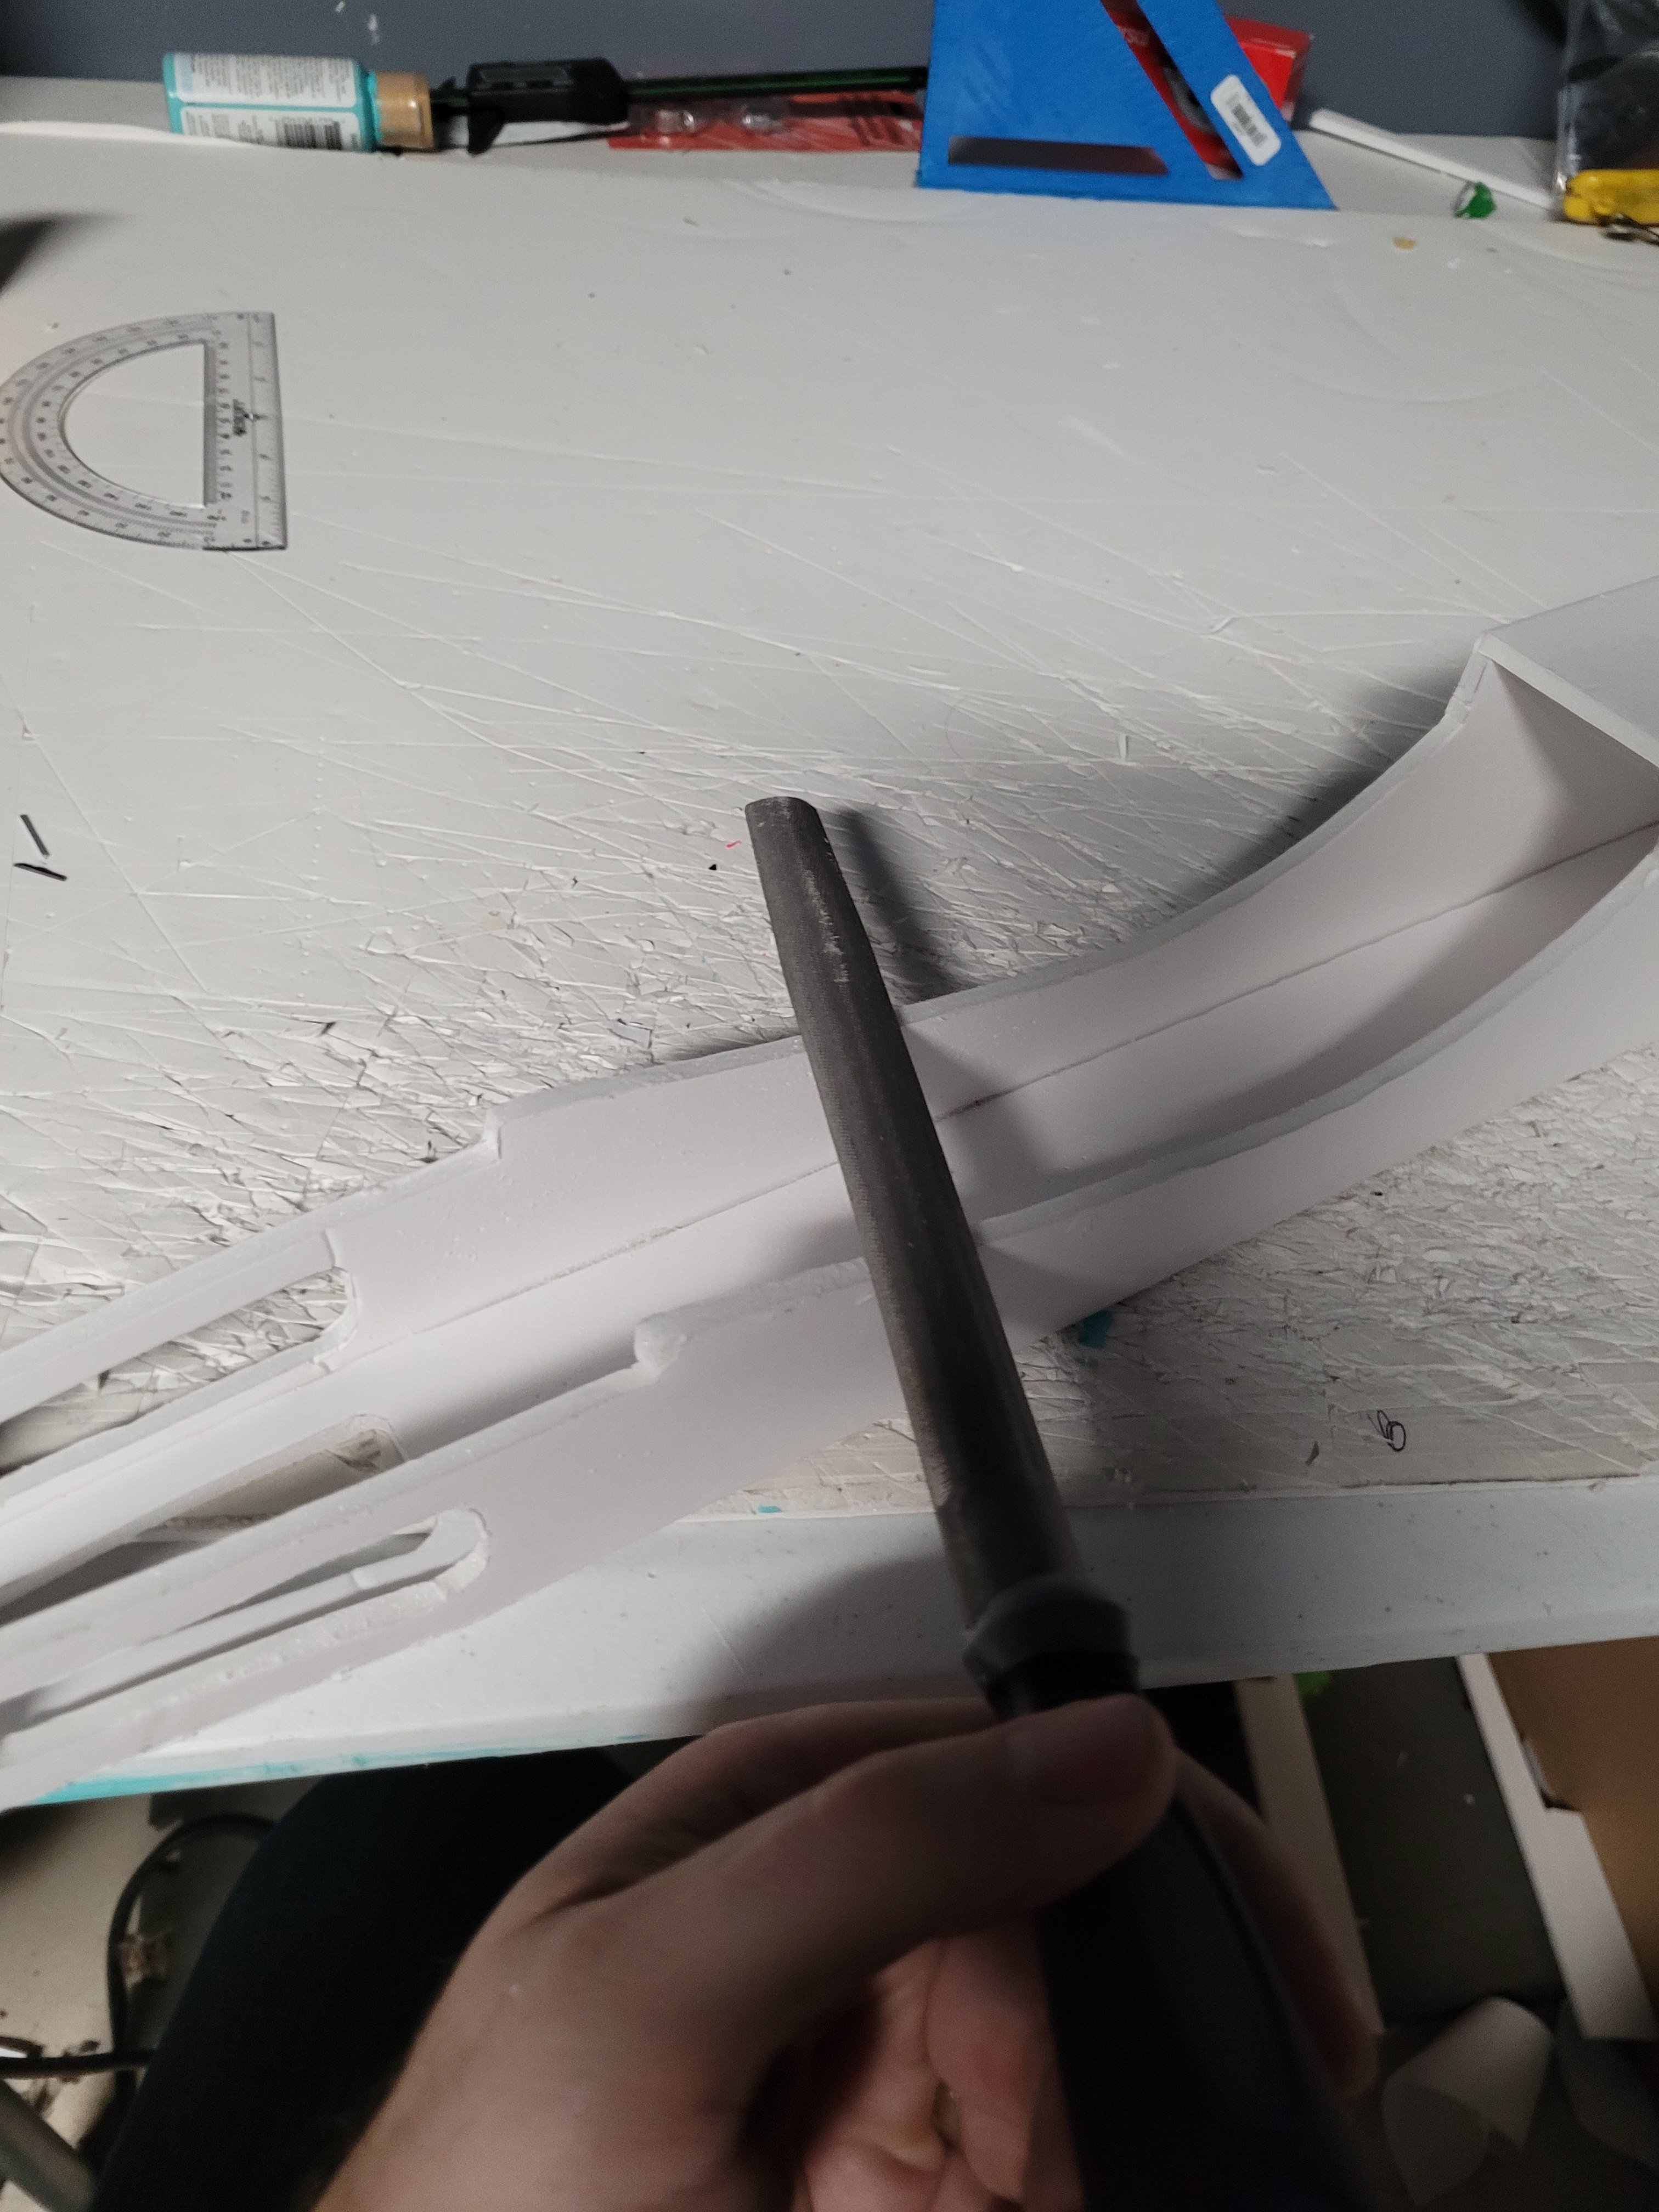
 Unfortunately, half of the time when I build these low wing planes, the wings don't quite line up perfectly. Which means you have to d some adjusting.

I like to take one of these half round bastard files and sand it down slowly. They're only $3 at Harbor freightYou can go in guns ablazin with a razor, but this is easier and slower, but more accurate .
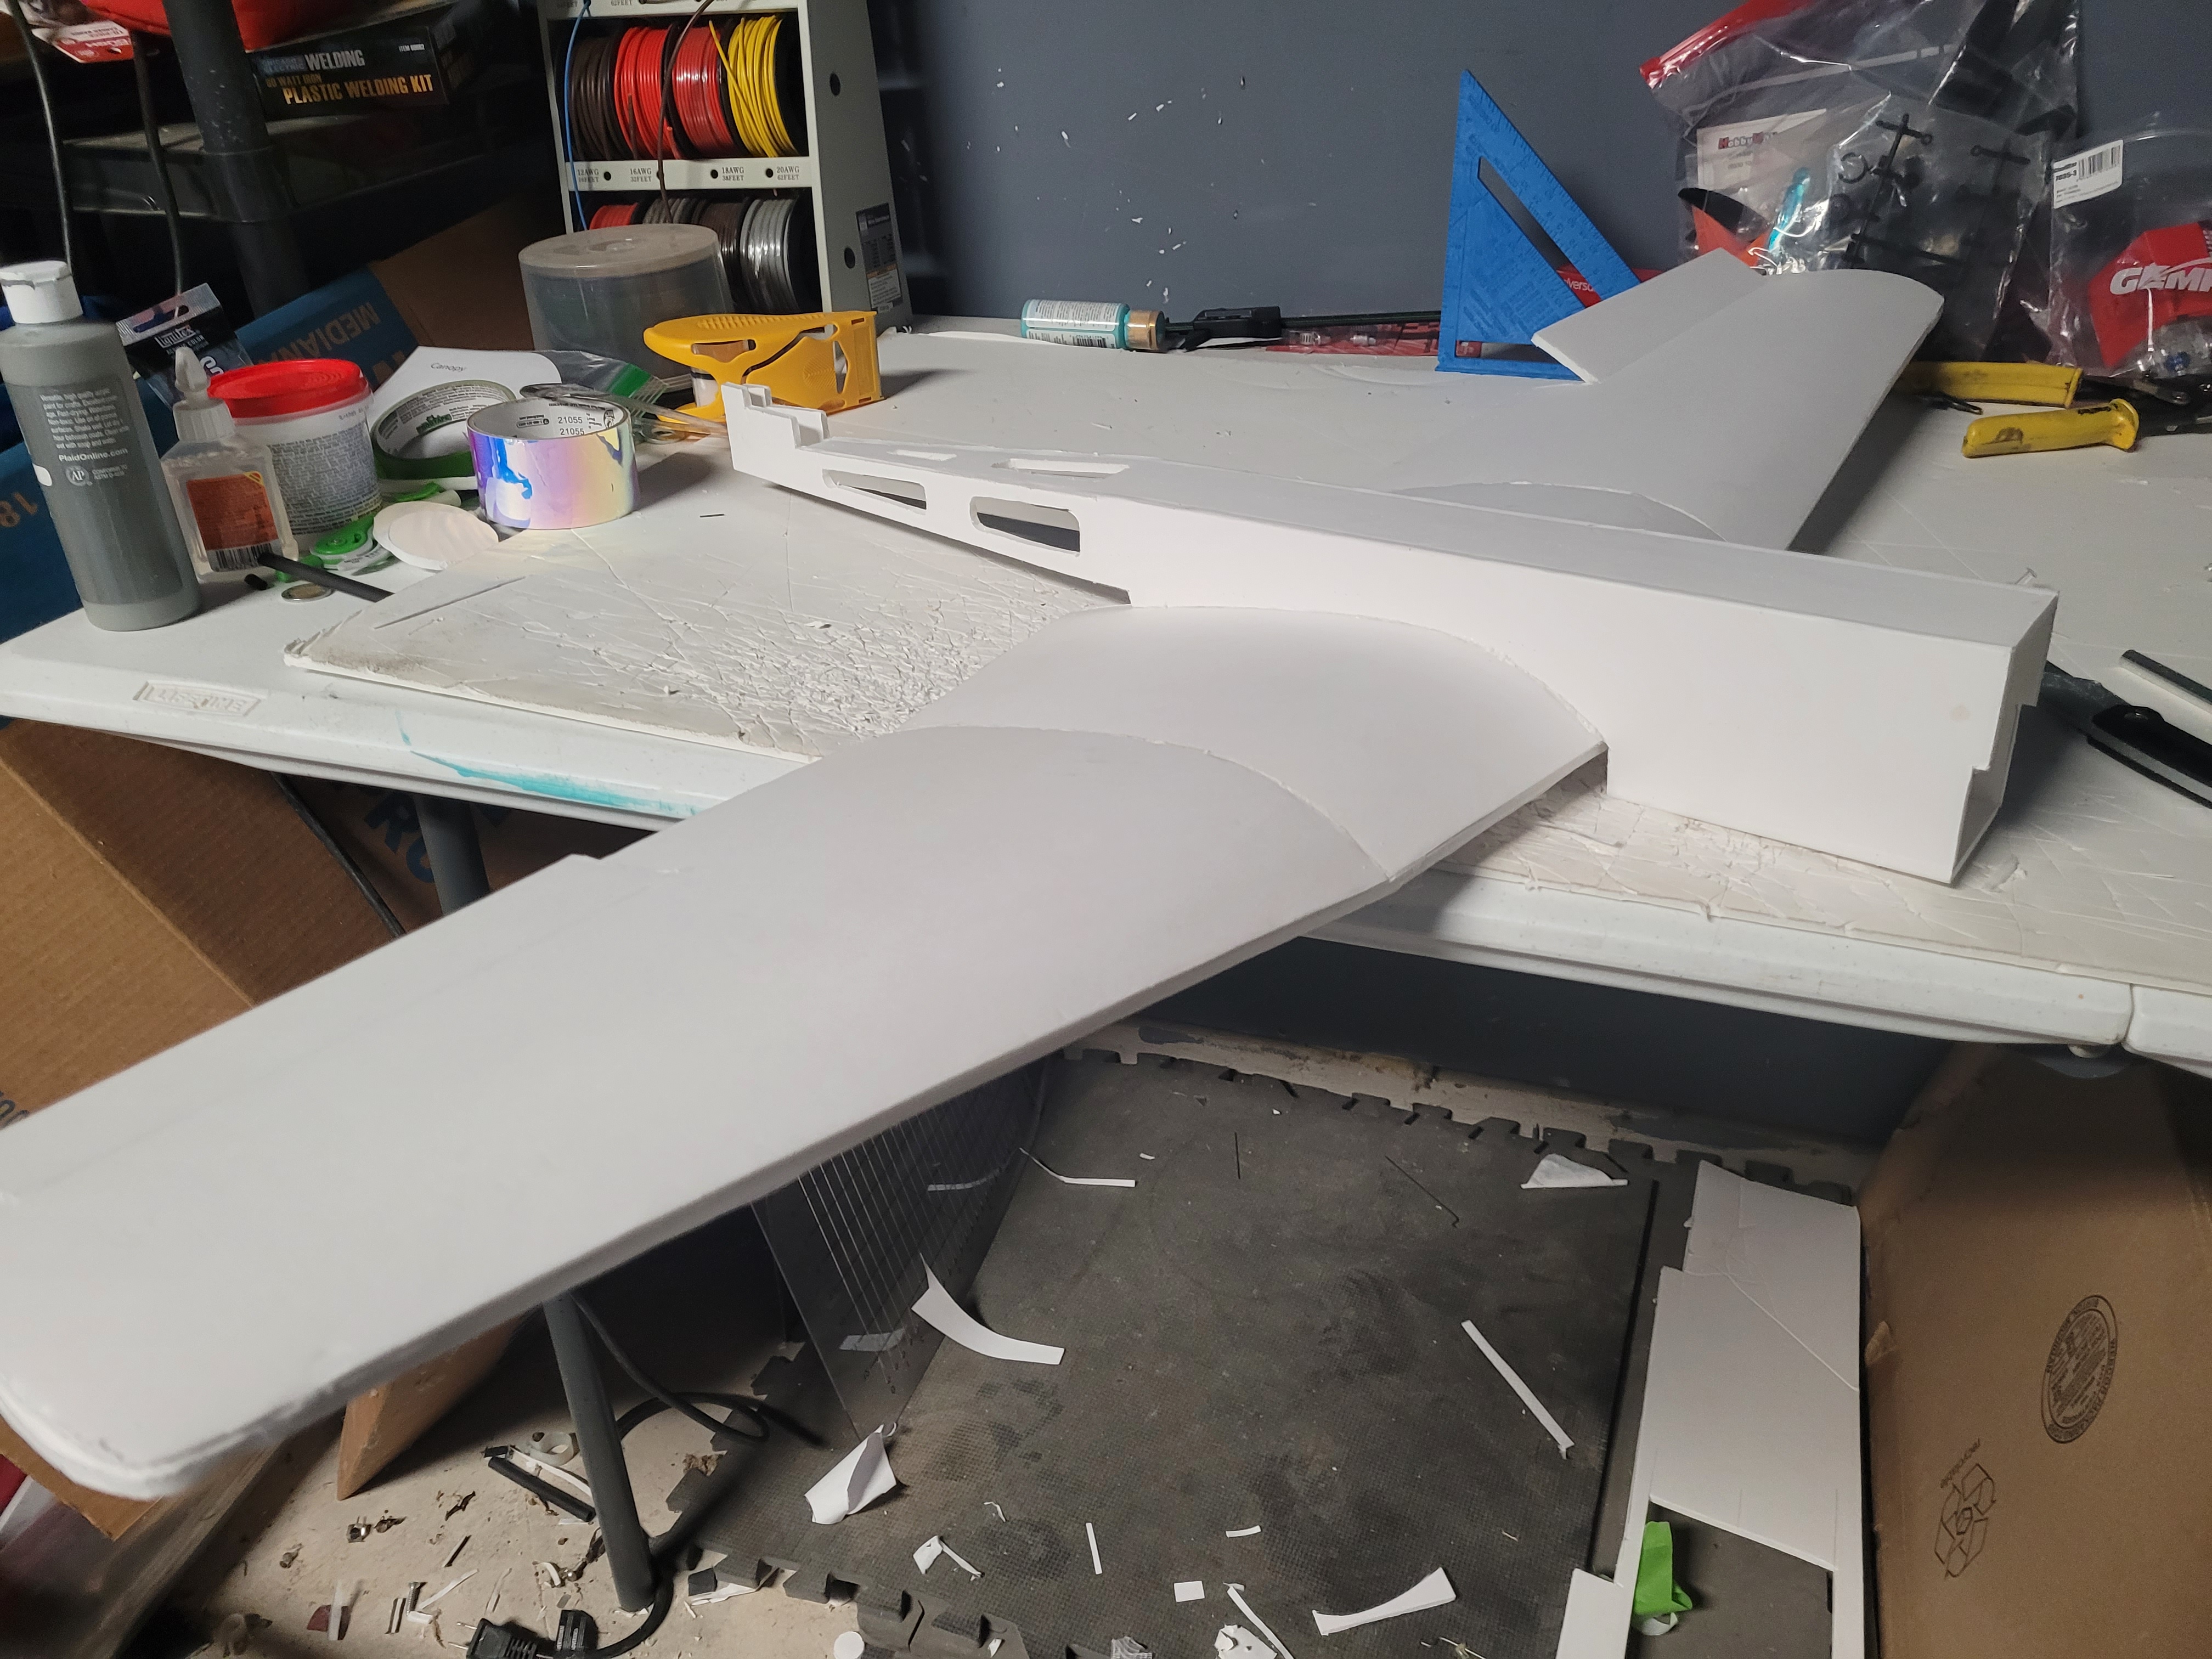
The fuselage frame is glued securely to the wing good n straight with the gorilla glue.
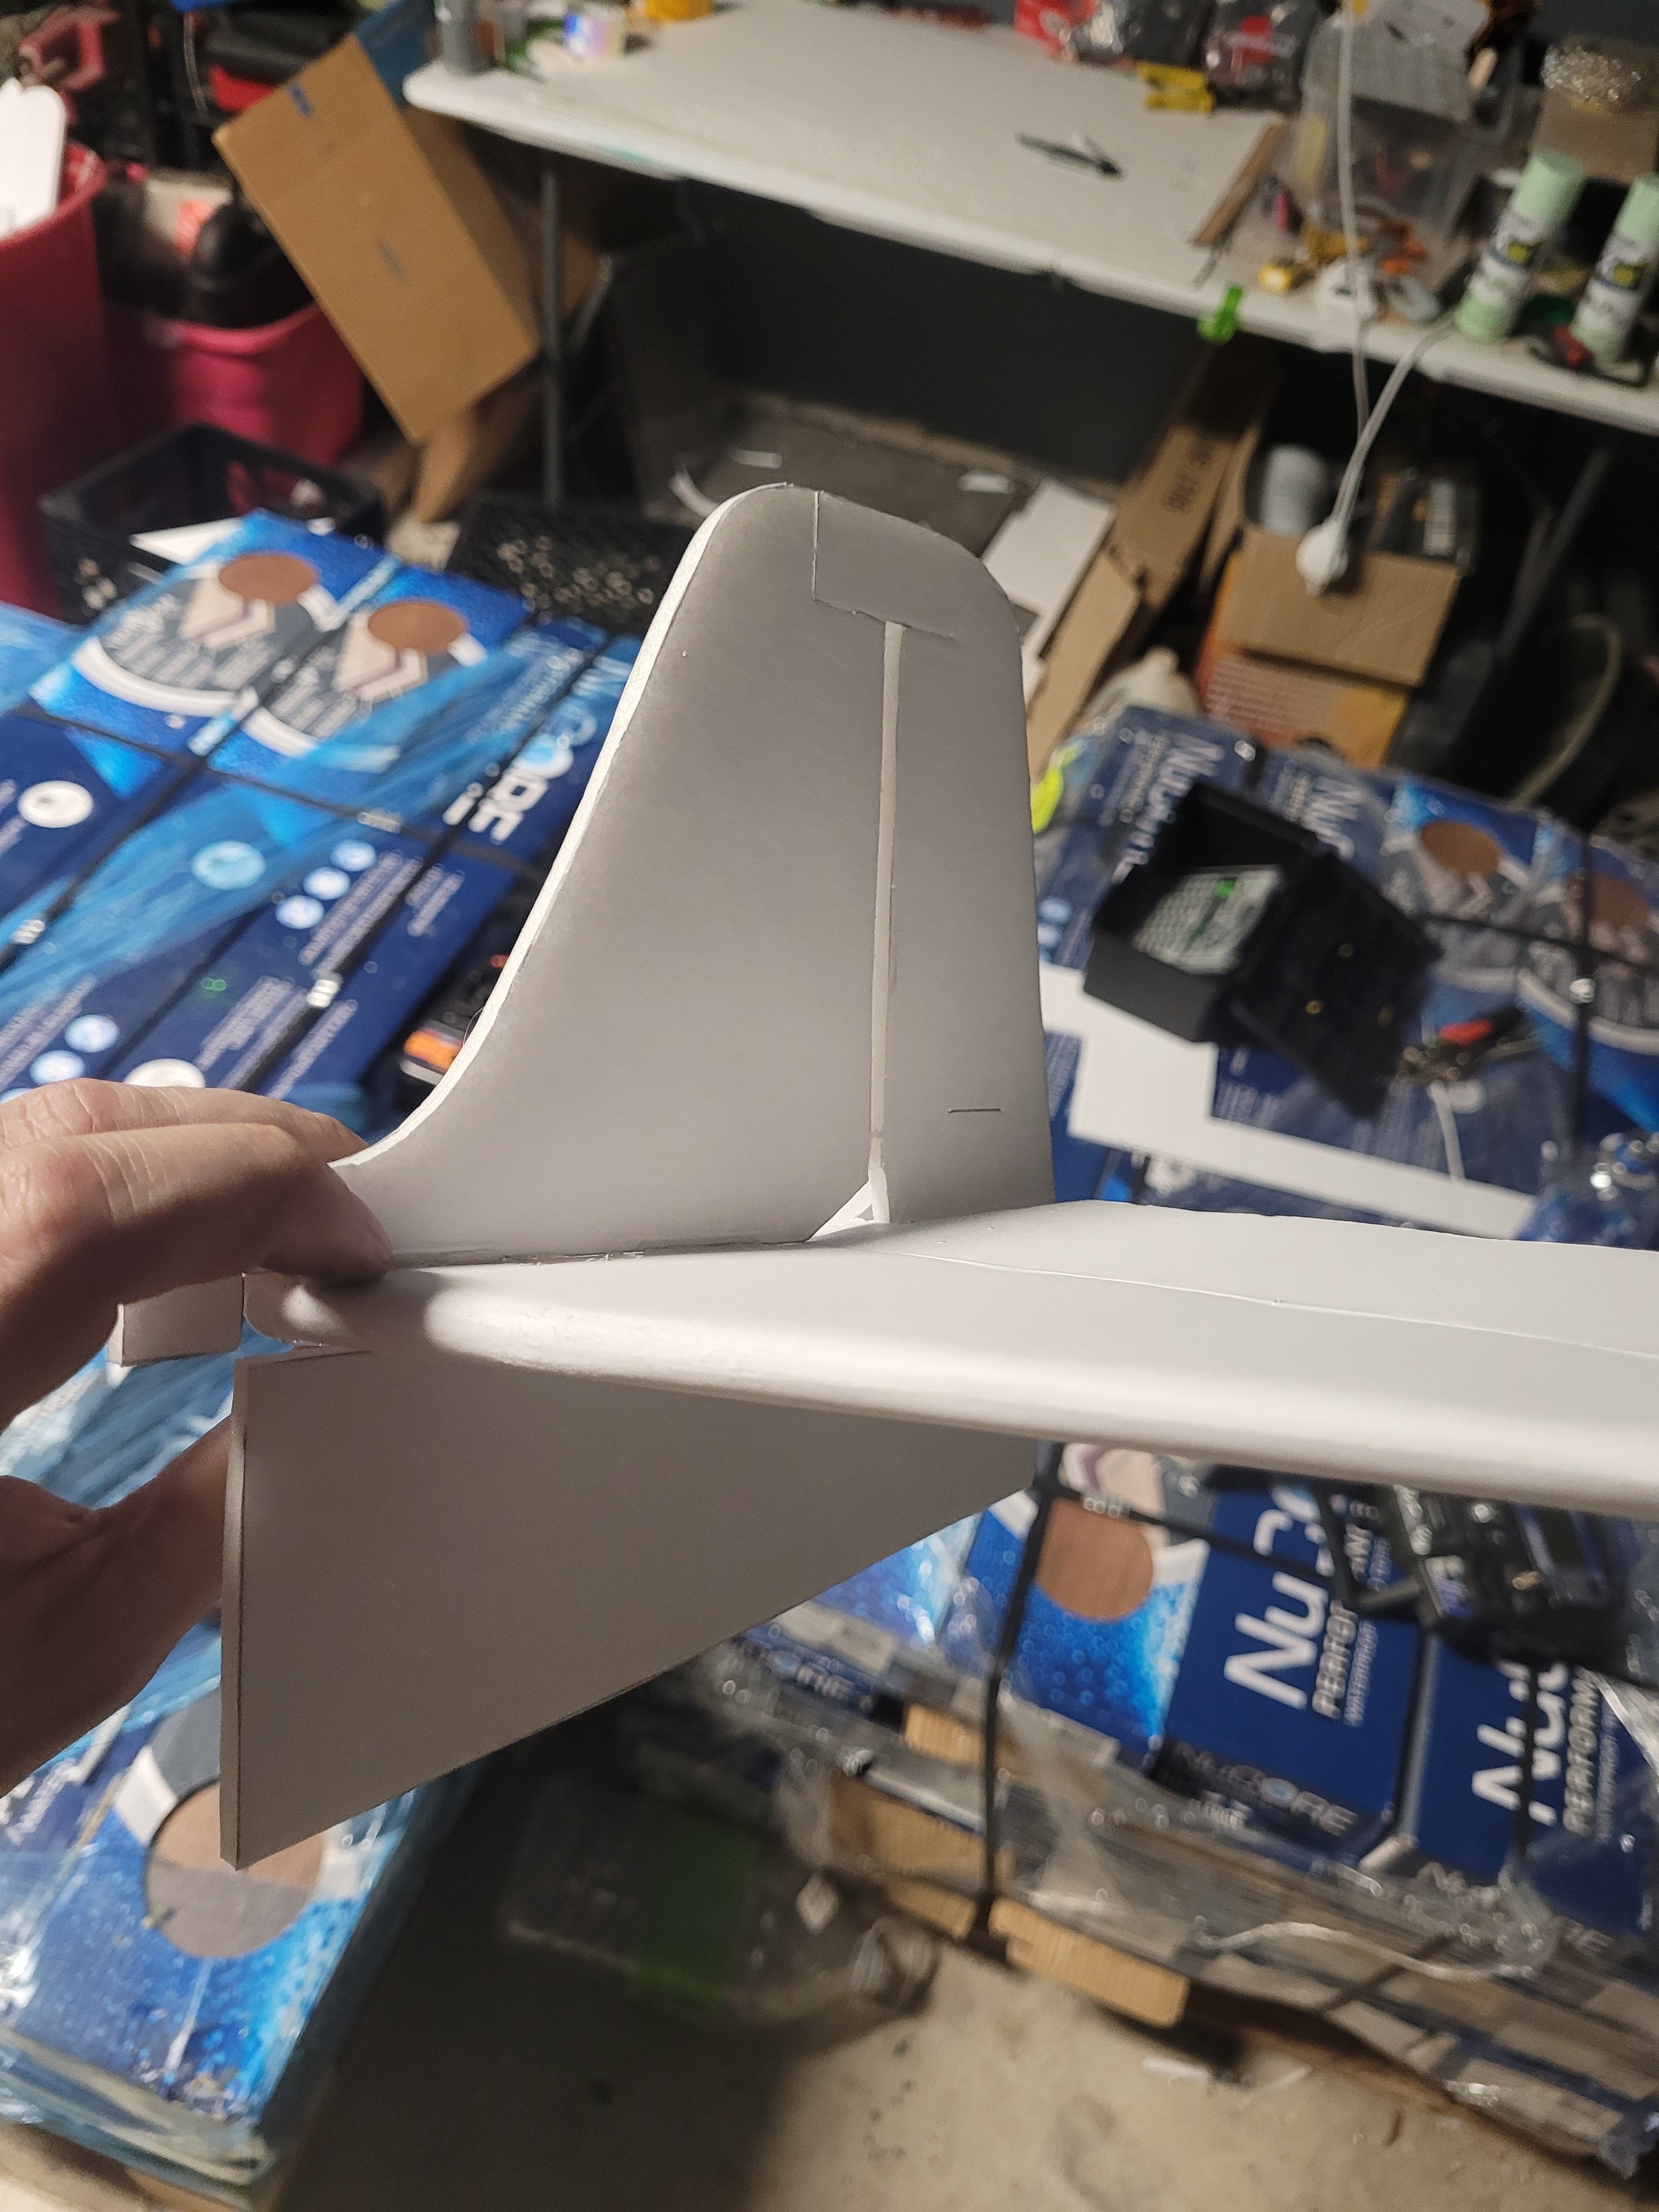
Next up the H stab. Get your score cuts done.

Then make sure that both sides are able to fold over without interference. Mine wouldnt line up so I had to trim.

Next get your bevels going. Double bevels for the leading edge. I beveled the elevator and not the H stab which seemed right seeing how the parts fit.
You want to be careful not to cut through your paper. You dont want unsightly tape on your master series plane. I accidentally messed mine up trying to do the "sharpie bevel" which when it didnt work i tried to razor it. I poked a sizeable hole in my paper, so I just made a new one. It was worth it making templates. Since i prioritized not cutting the paper my bevels were ugly. It is good to smooth it out so it folds easily.
 Be sure to bevel that little tip part too. I didnt on my first one and it wrinkled.

Then white gorilla glue to hold it closed and along the leading edge.

Then get your tailfeathers glued together. Finishing the vstab/rudder is just like any other FT build.
Then we need to get the formers on. It is common sense, but slide B on before A. Just line them up with the spots on the plans/templates. I put little pin pricks where the formers go. The formers are different colors just because I made them out of scrap foam, there is no particular reason. You can finagle former g on there tactically by sliding it on sideways then rotating, but you have to cut former H.
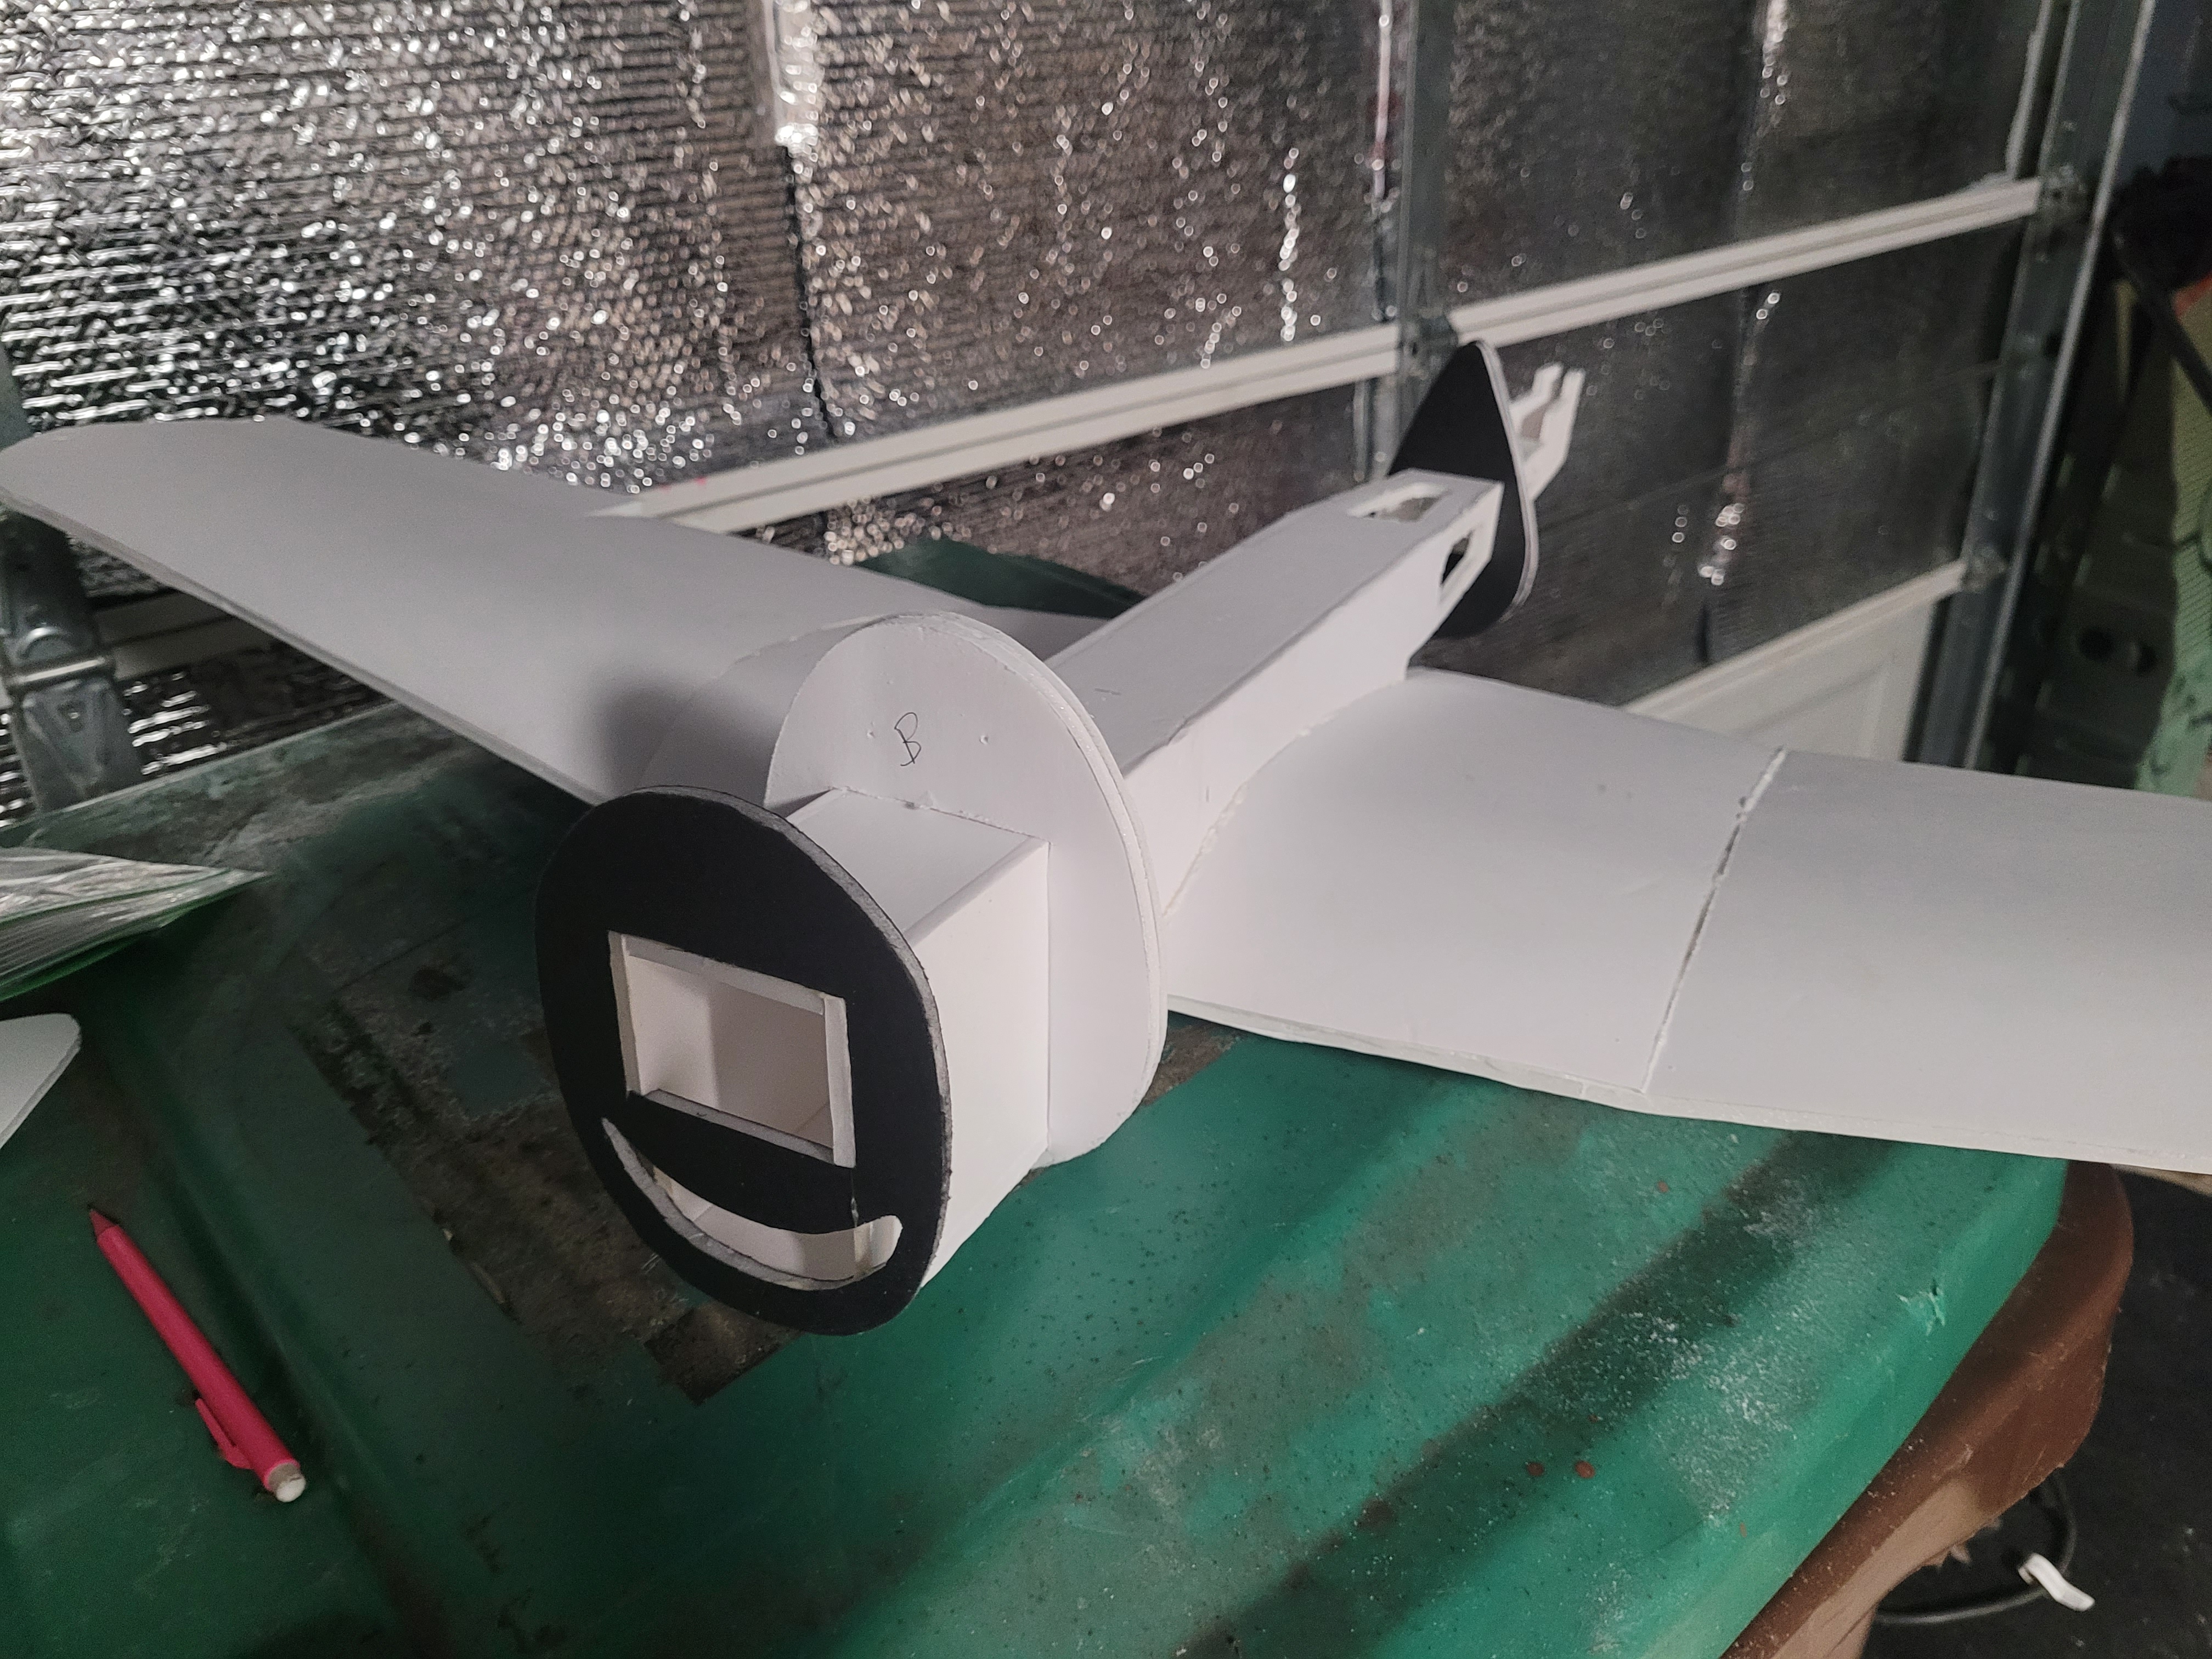
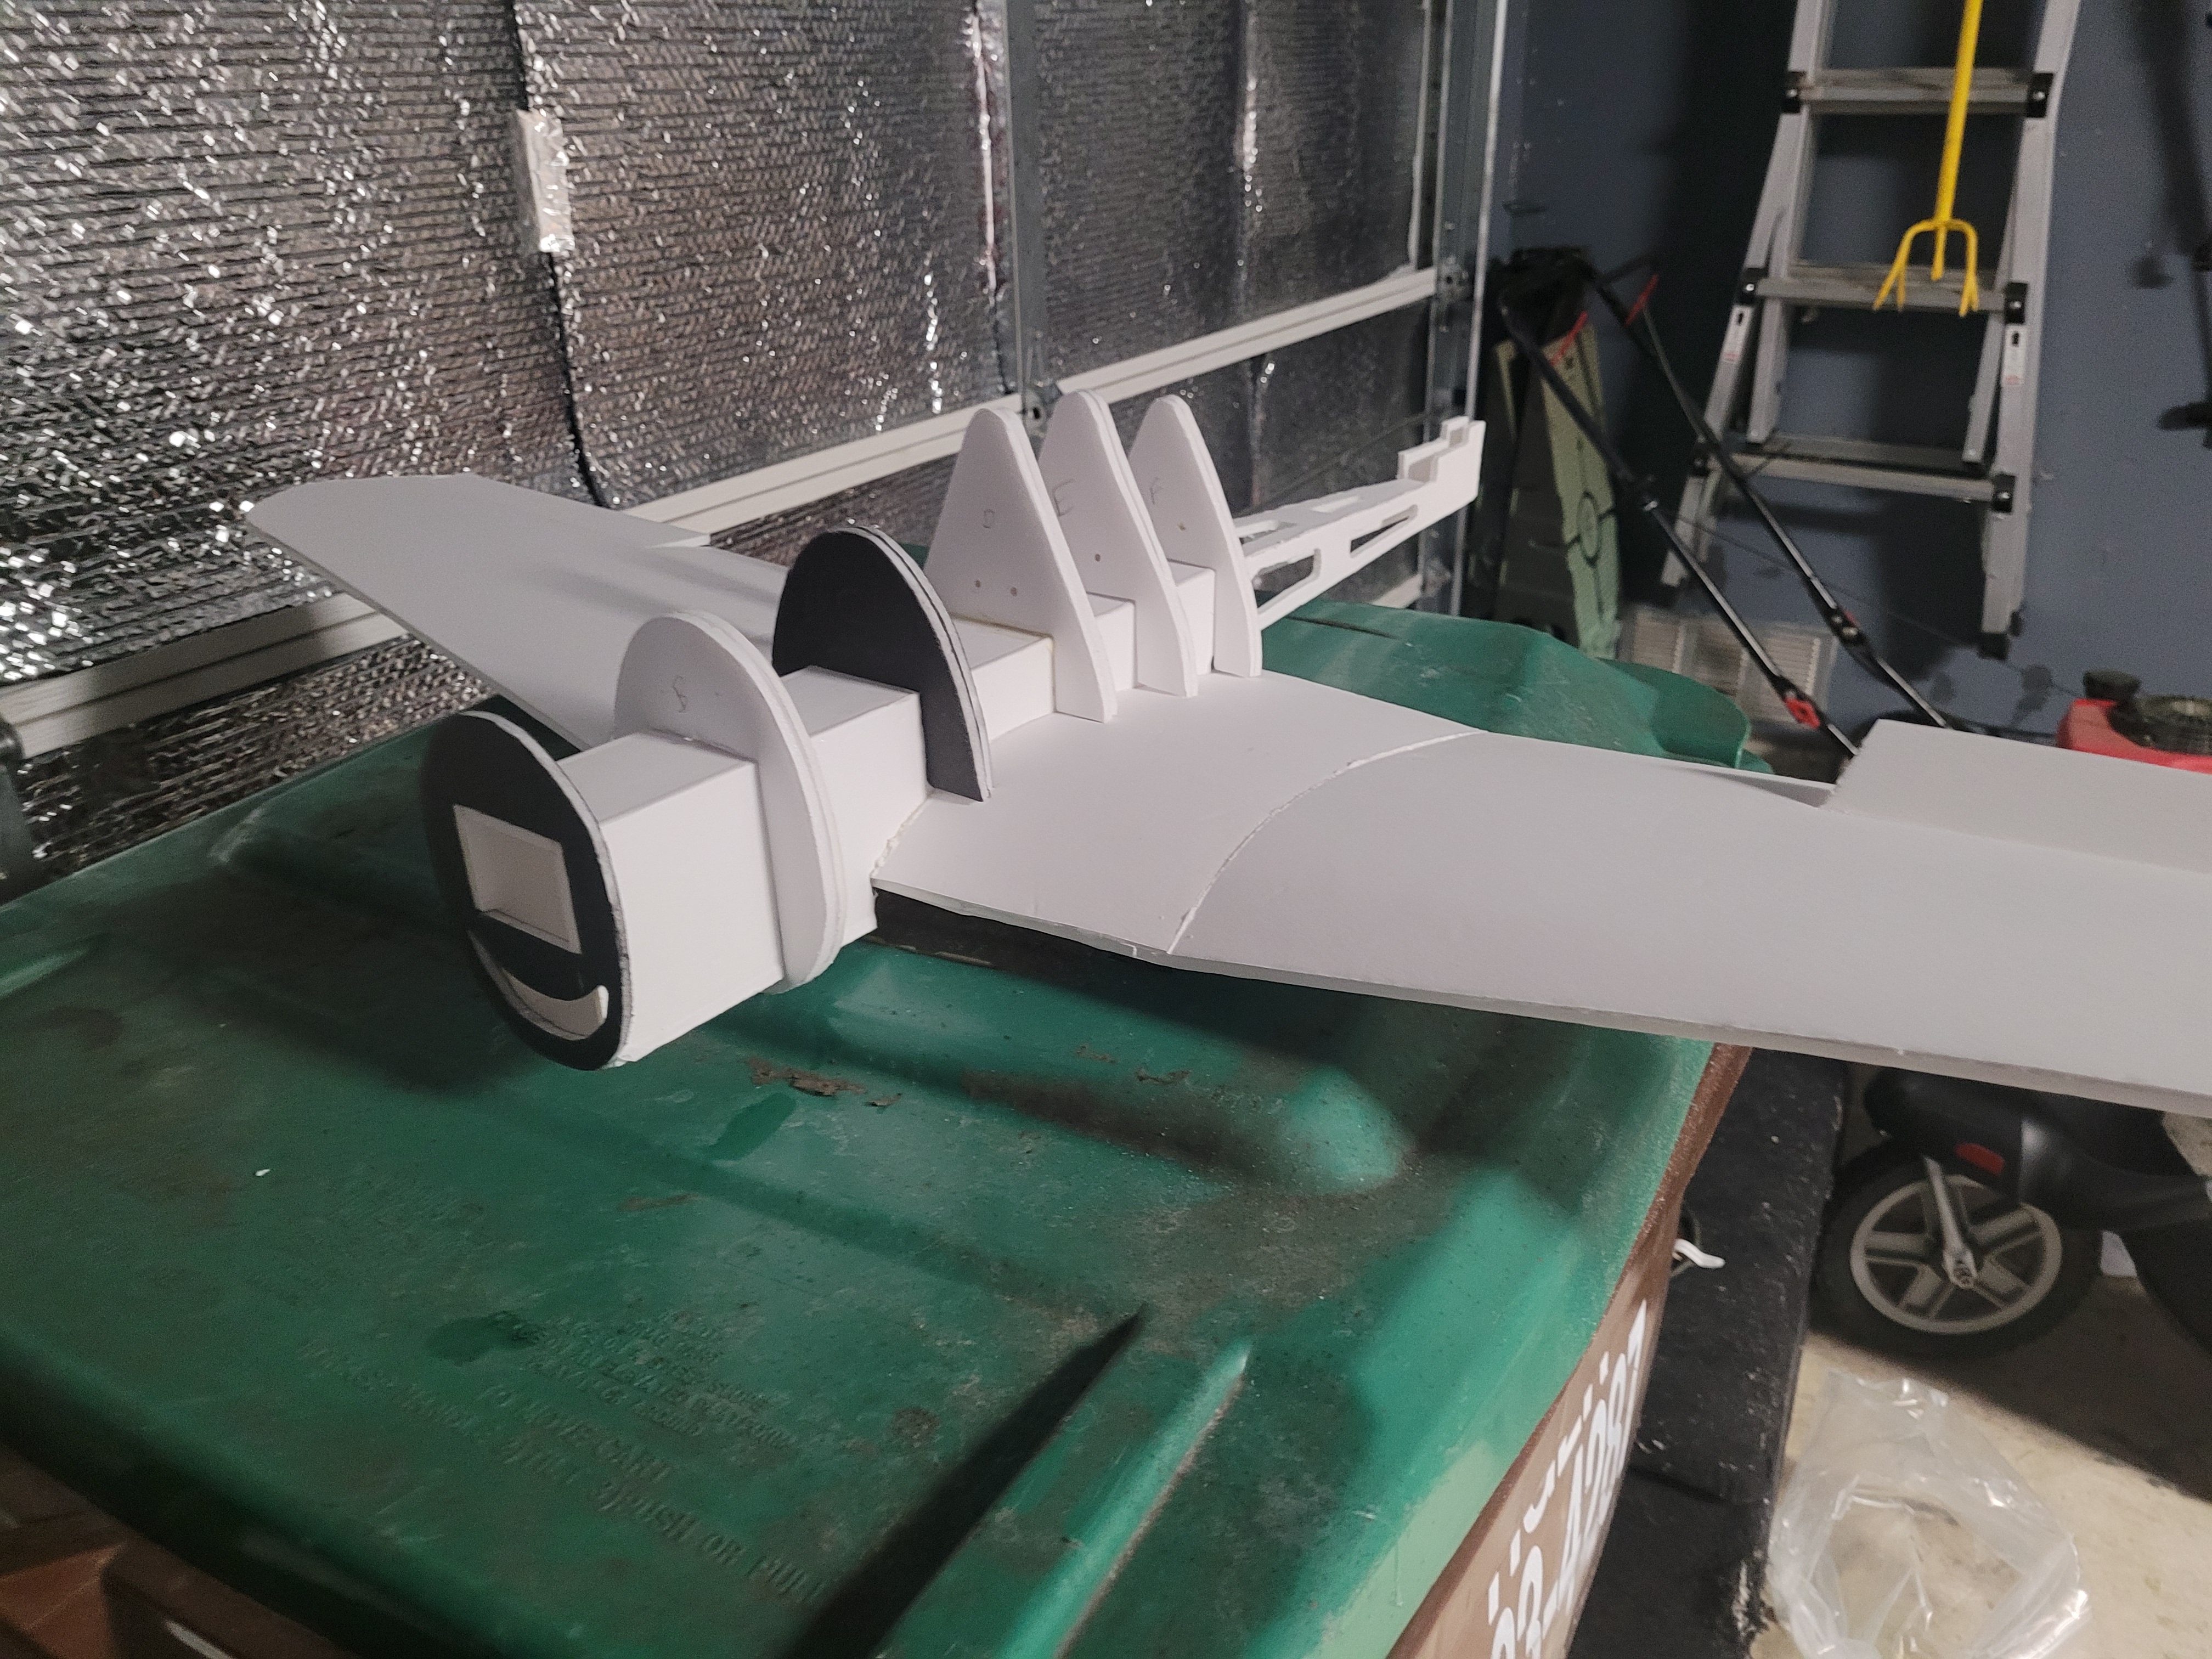
Then glue your tailfeathers on.

Run your coffee straws for your servos through formers D-H. Then mount servos and hook up your elevator and rudder like any other flite test build, or use linkage stoppers if you choose.
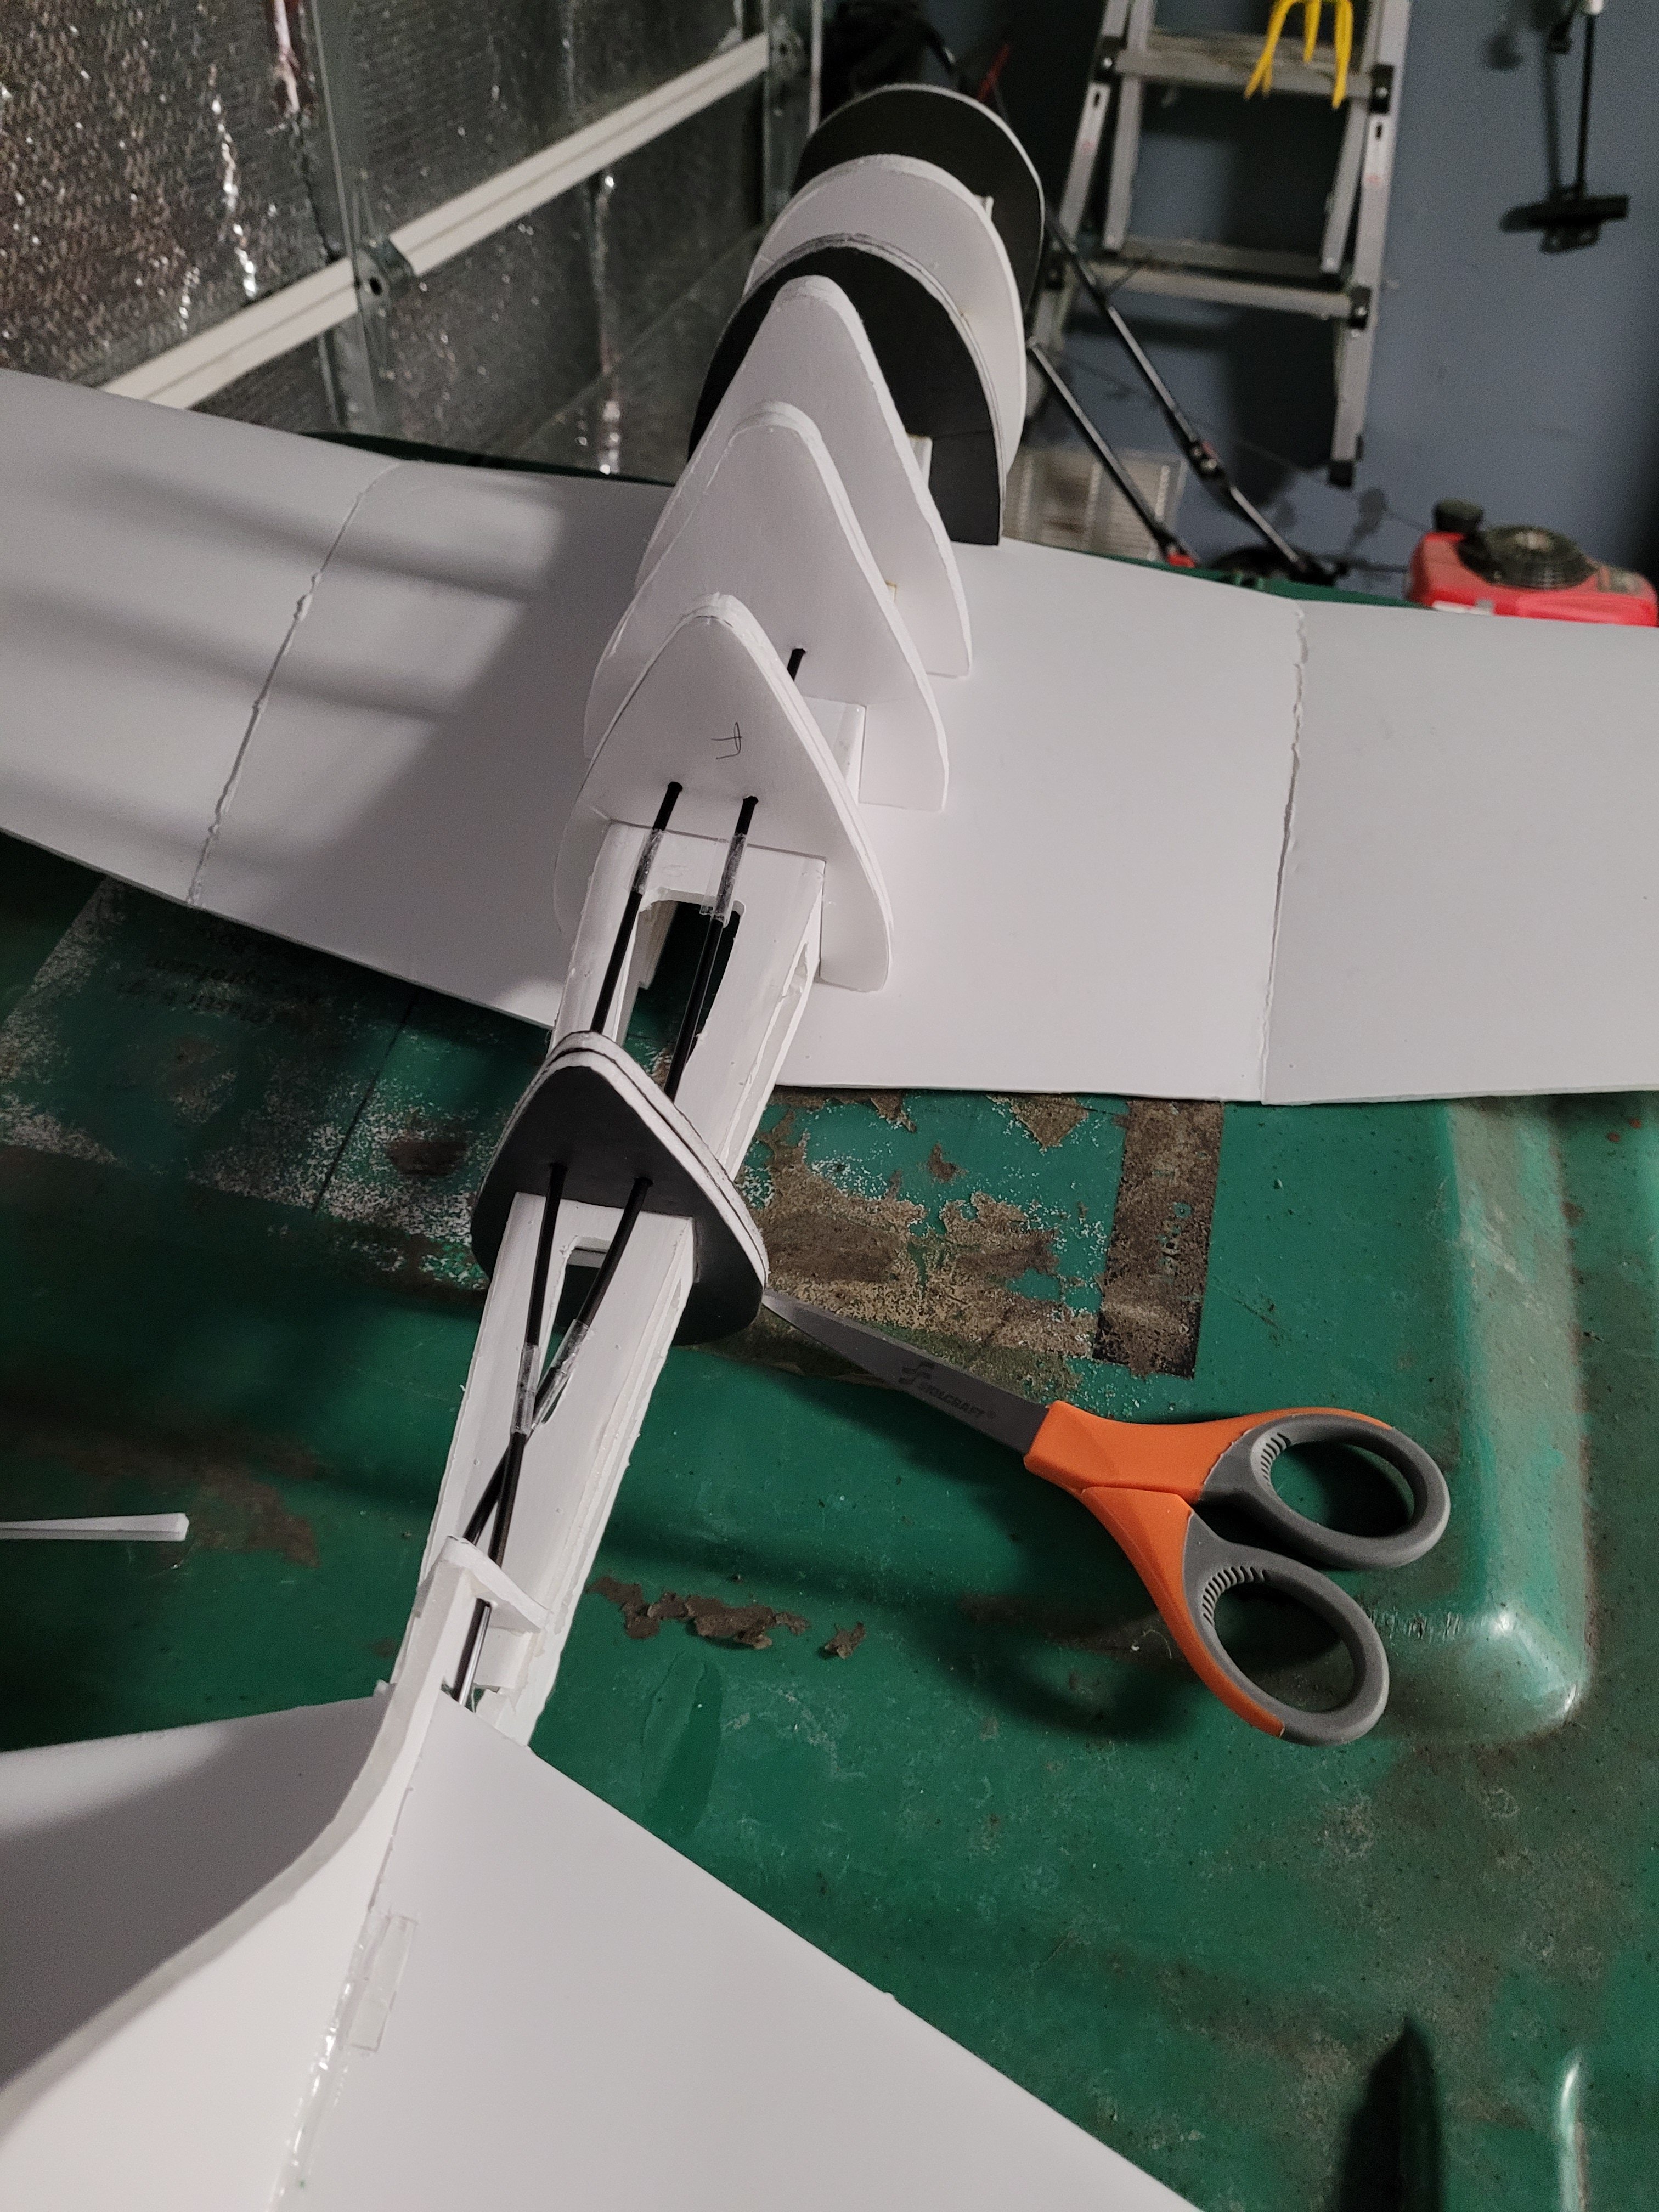
I put my servos between formers C and D.

I ran out of parts. Time to cut out skins.

Peel the paper off.
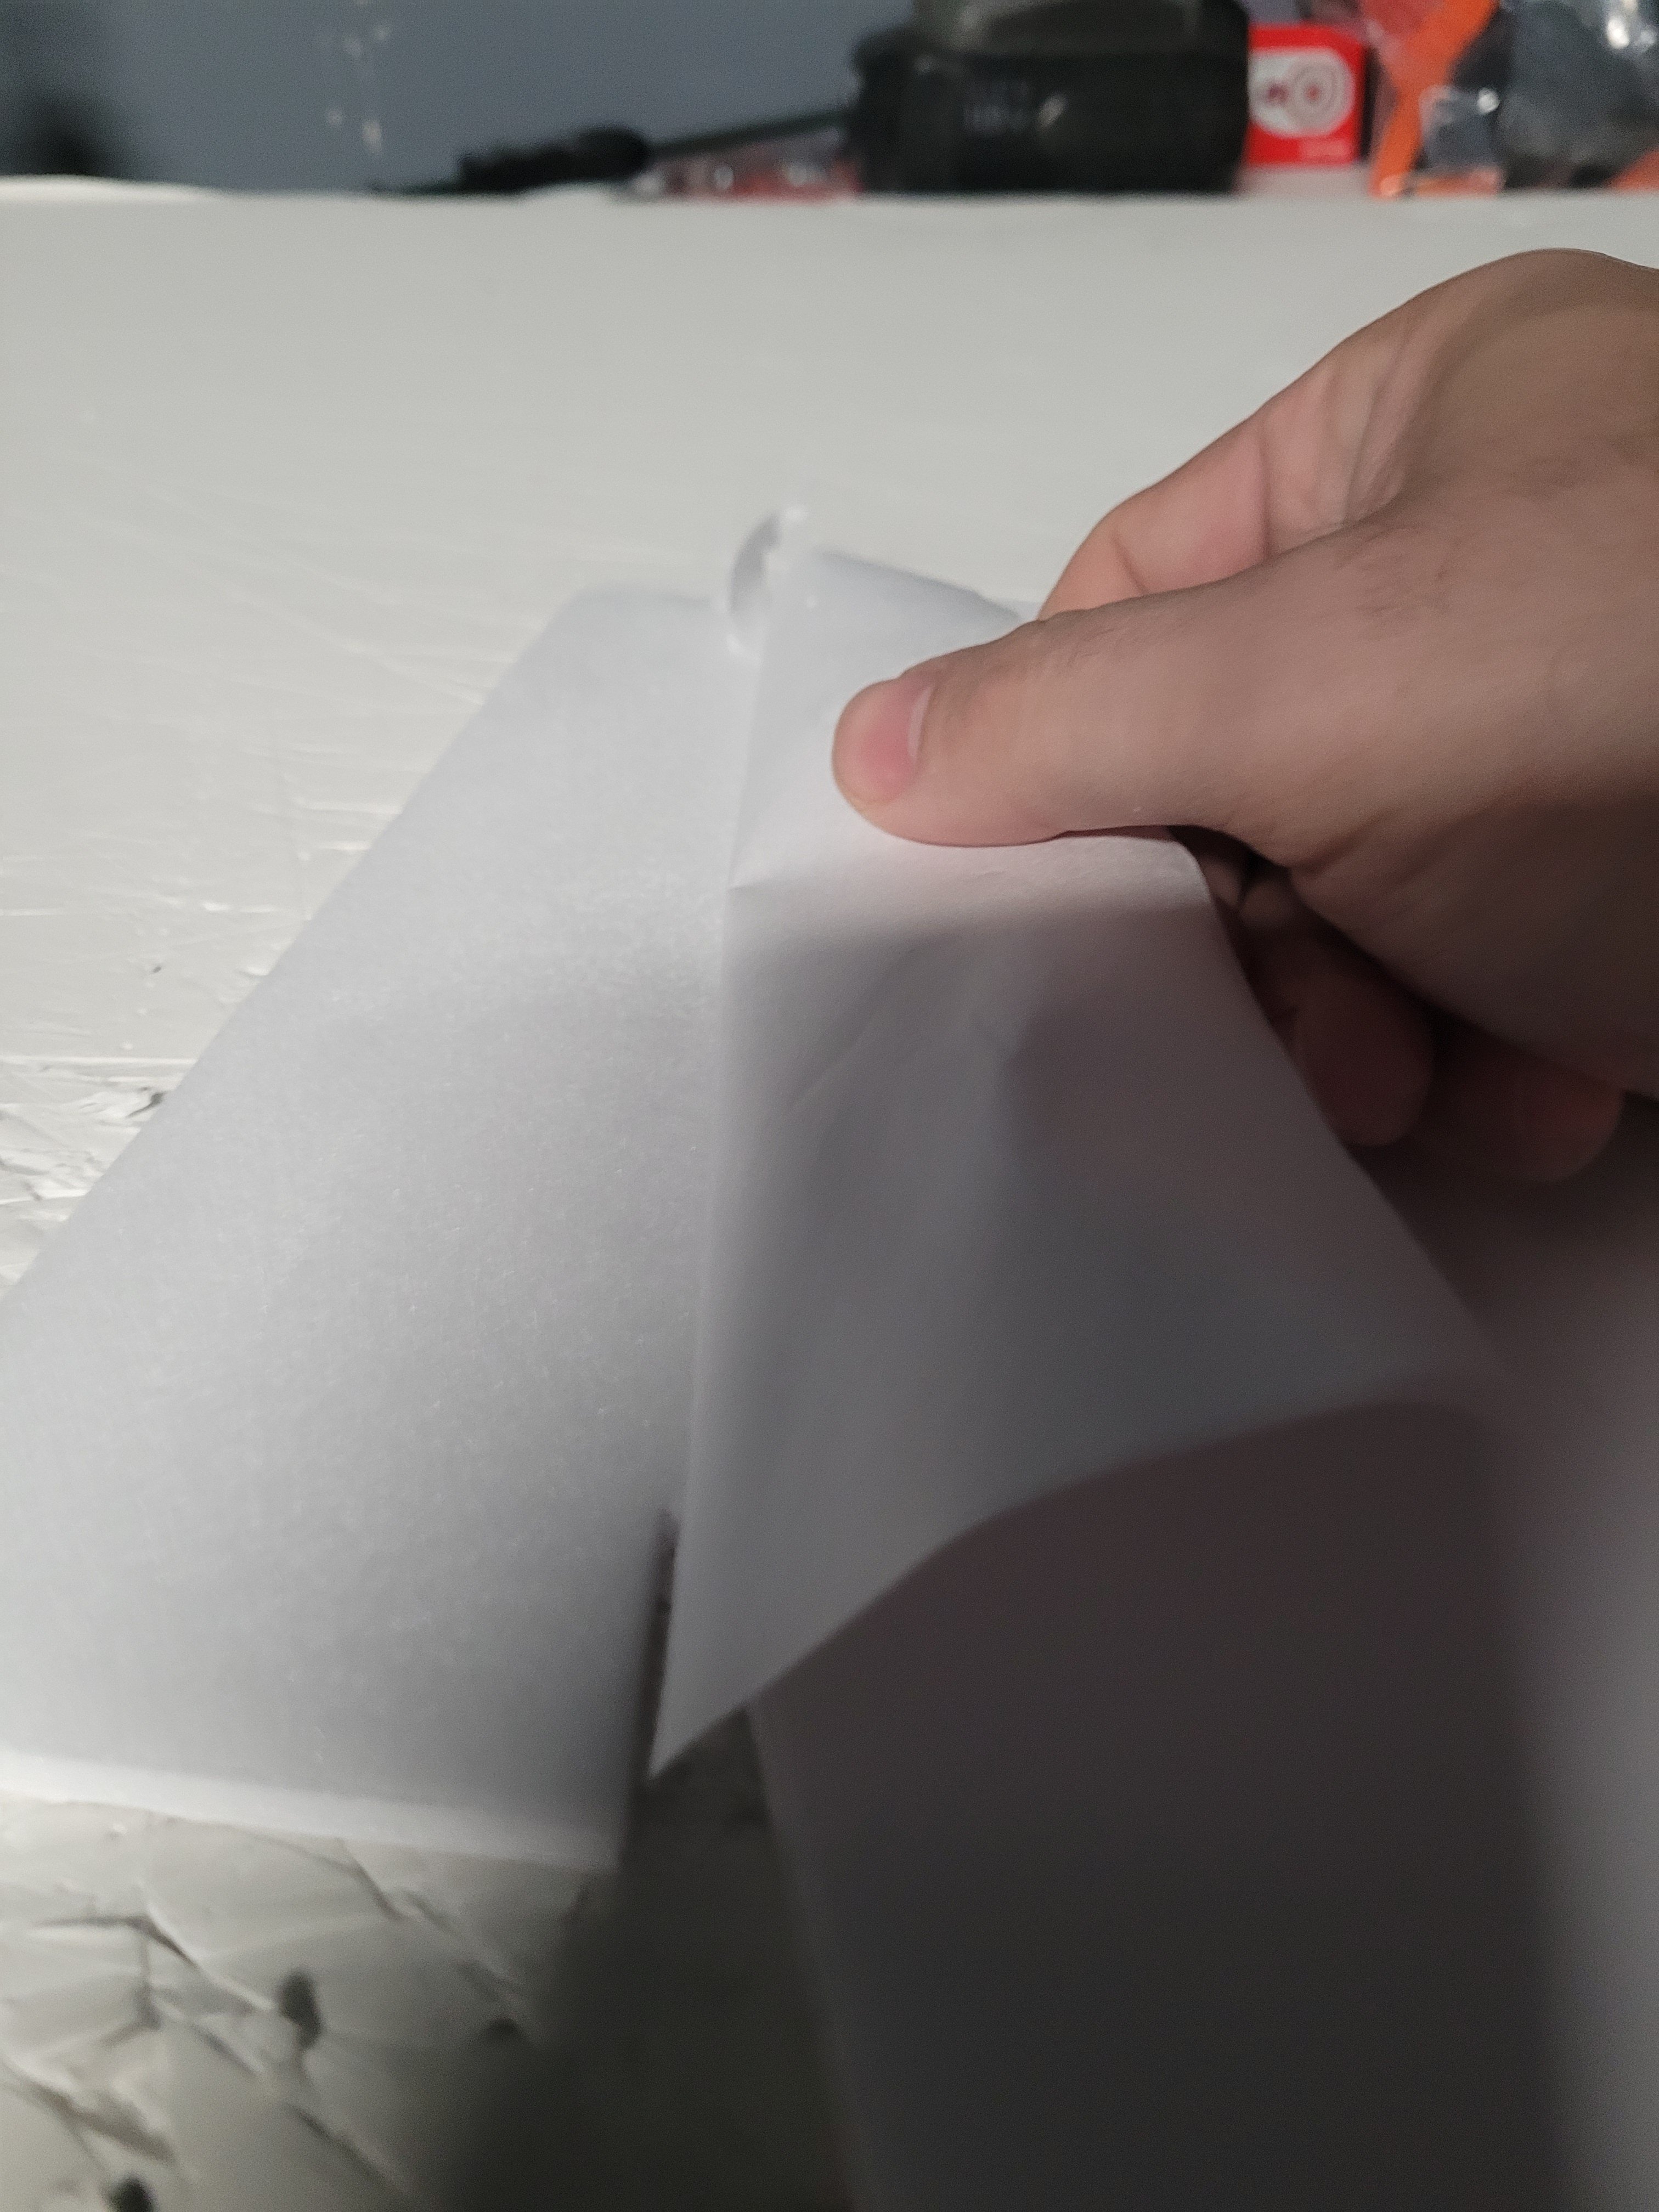
Start by working your foam and then tape it. I put a sharp crease in the top and taped it for about an hour.

A trick i figured too late for my zero, but if you tape the bottom lip where it folds under to a broom stick, then roll it and it puts a nice curve on the bottom.
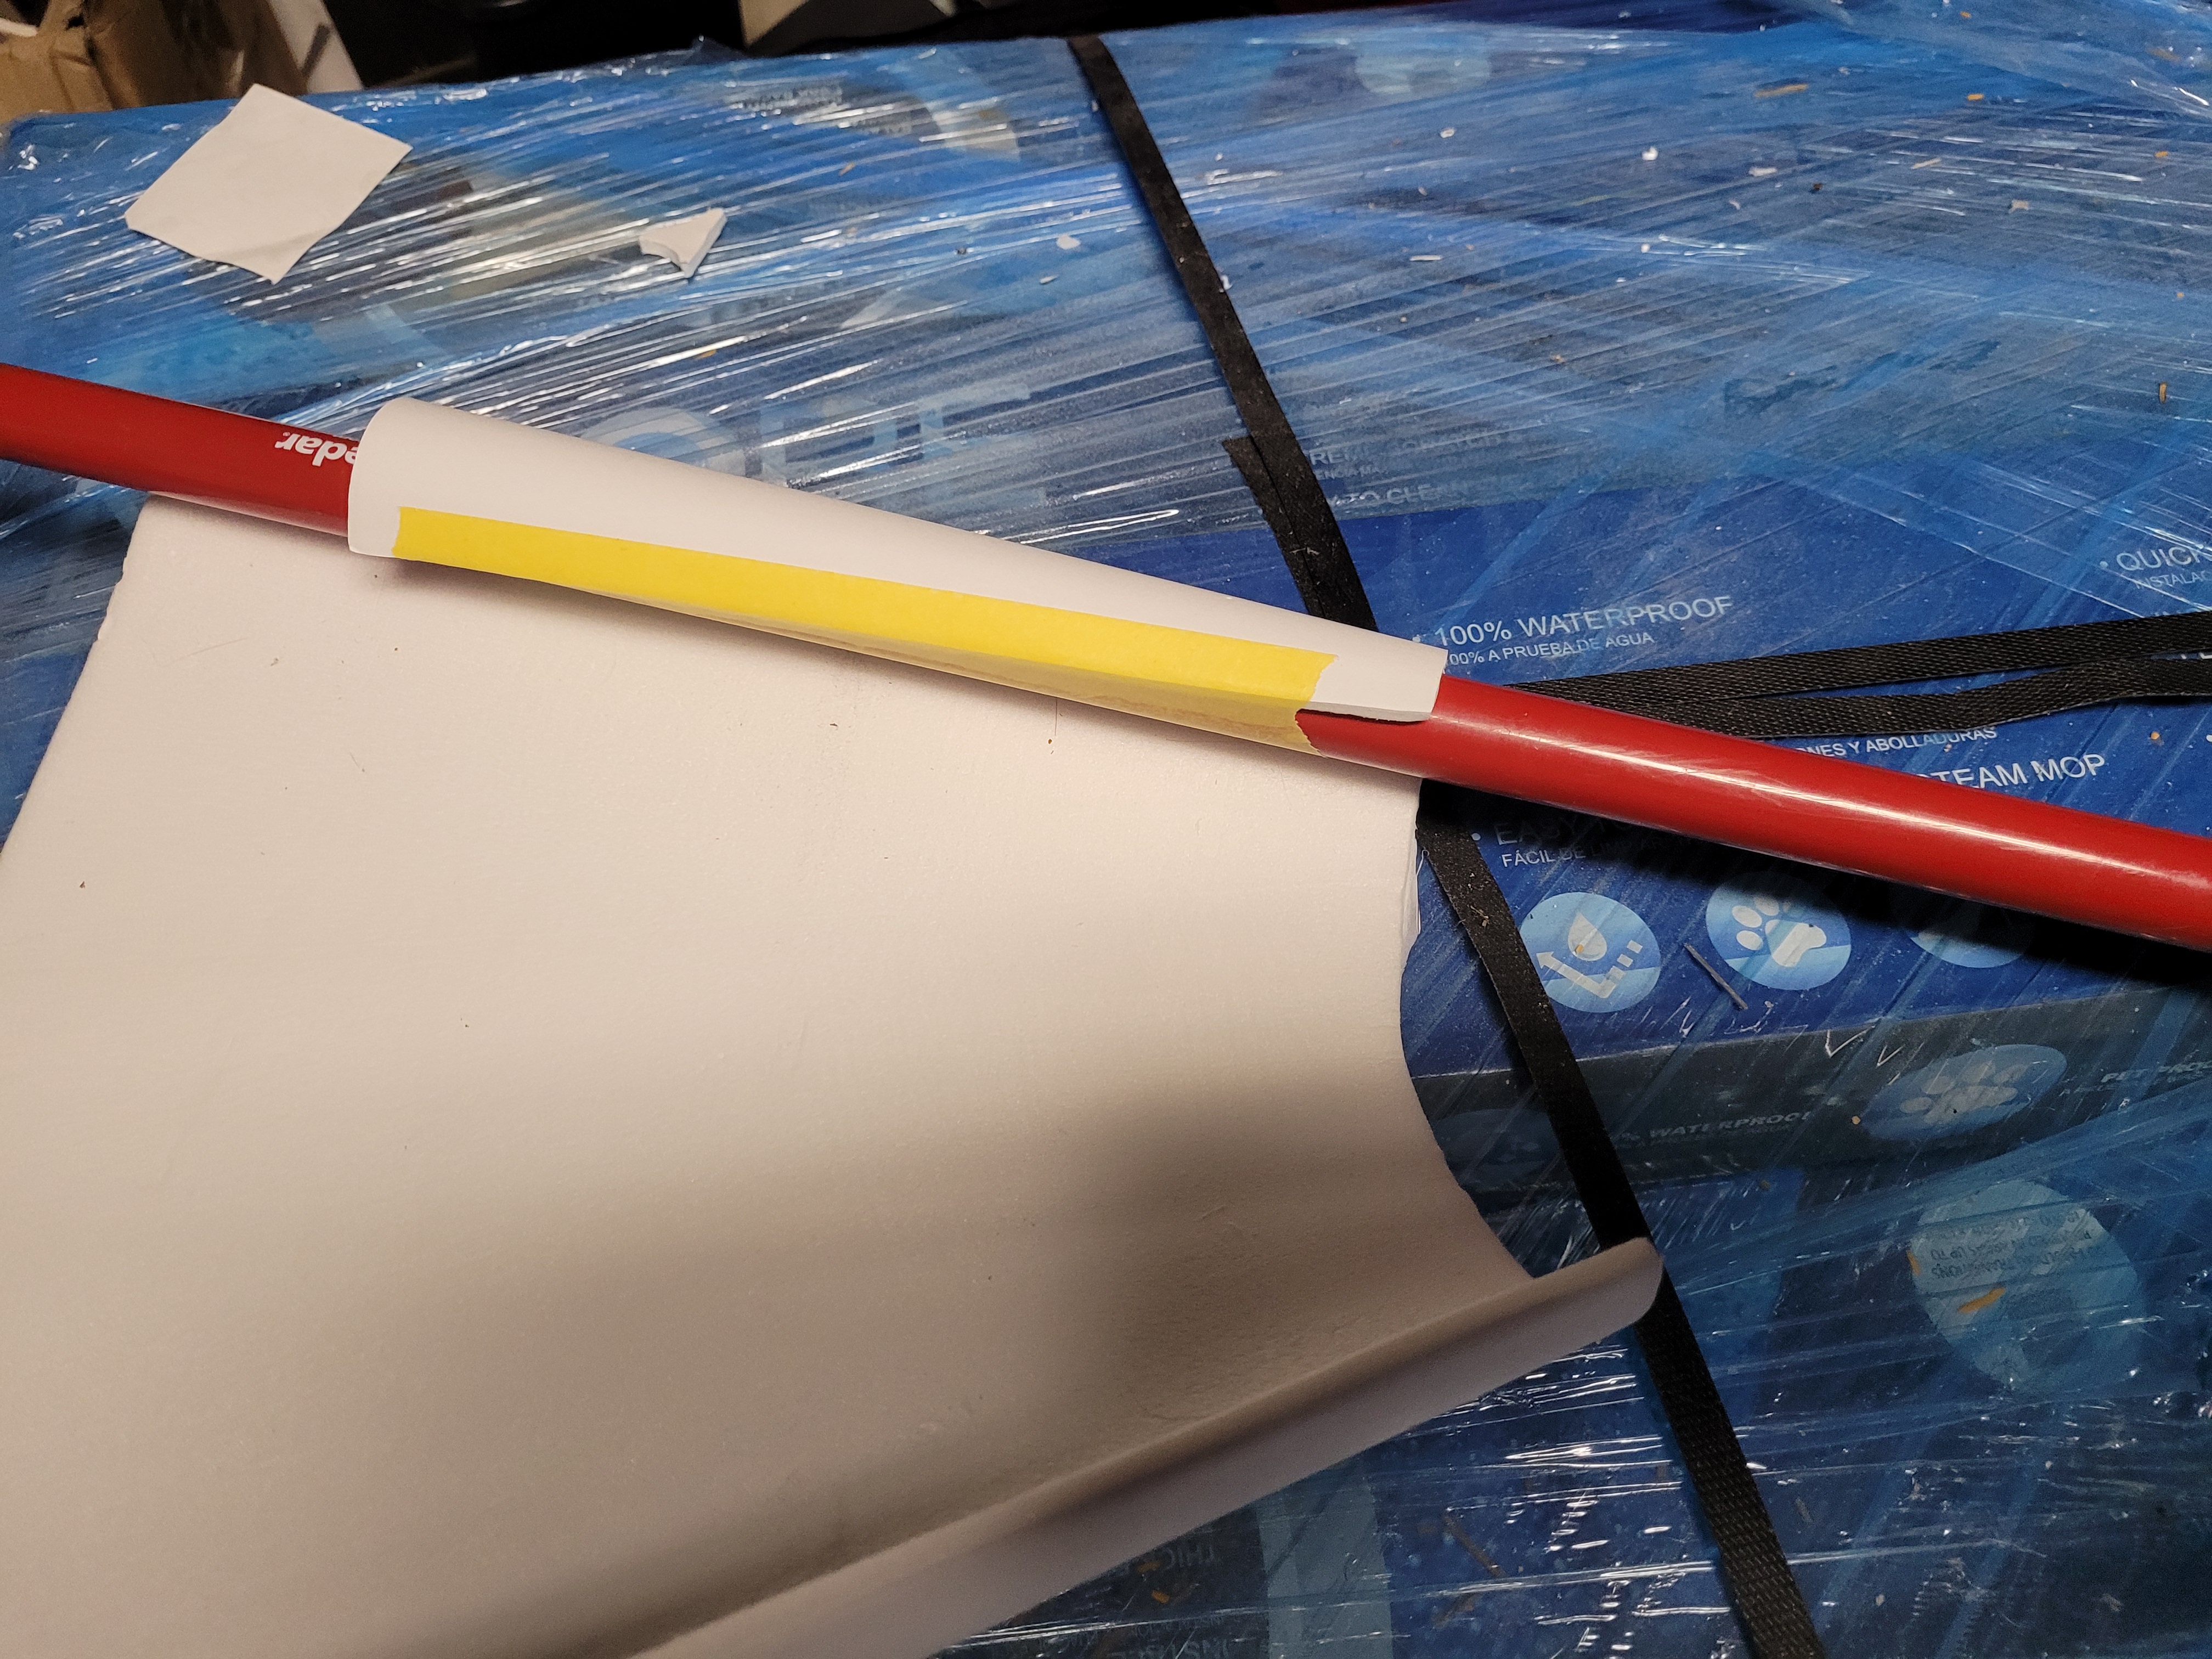
After some trimming, as the skin was too "tall (could have been my fault making templates or a printing error)
i applied white gorilla glue then taped it. MAKE SURE YOUR SERVOS ARE HOOKED UP RIGHT AND YOUR STRAWS ARE SECURED BEFORE PUTTING THE SKIN ON!

After trimming about a quarter inch off, you can still see there was too much skin material.
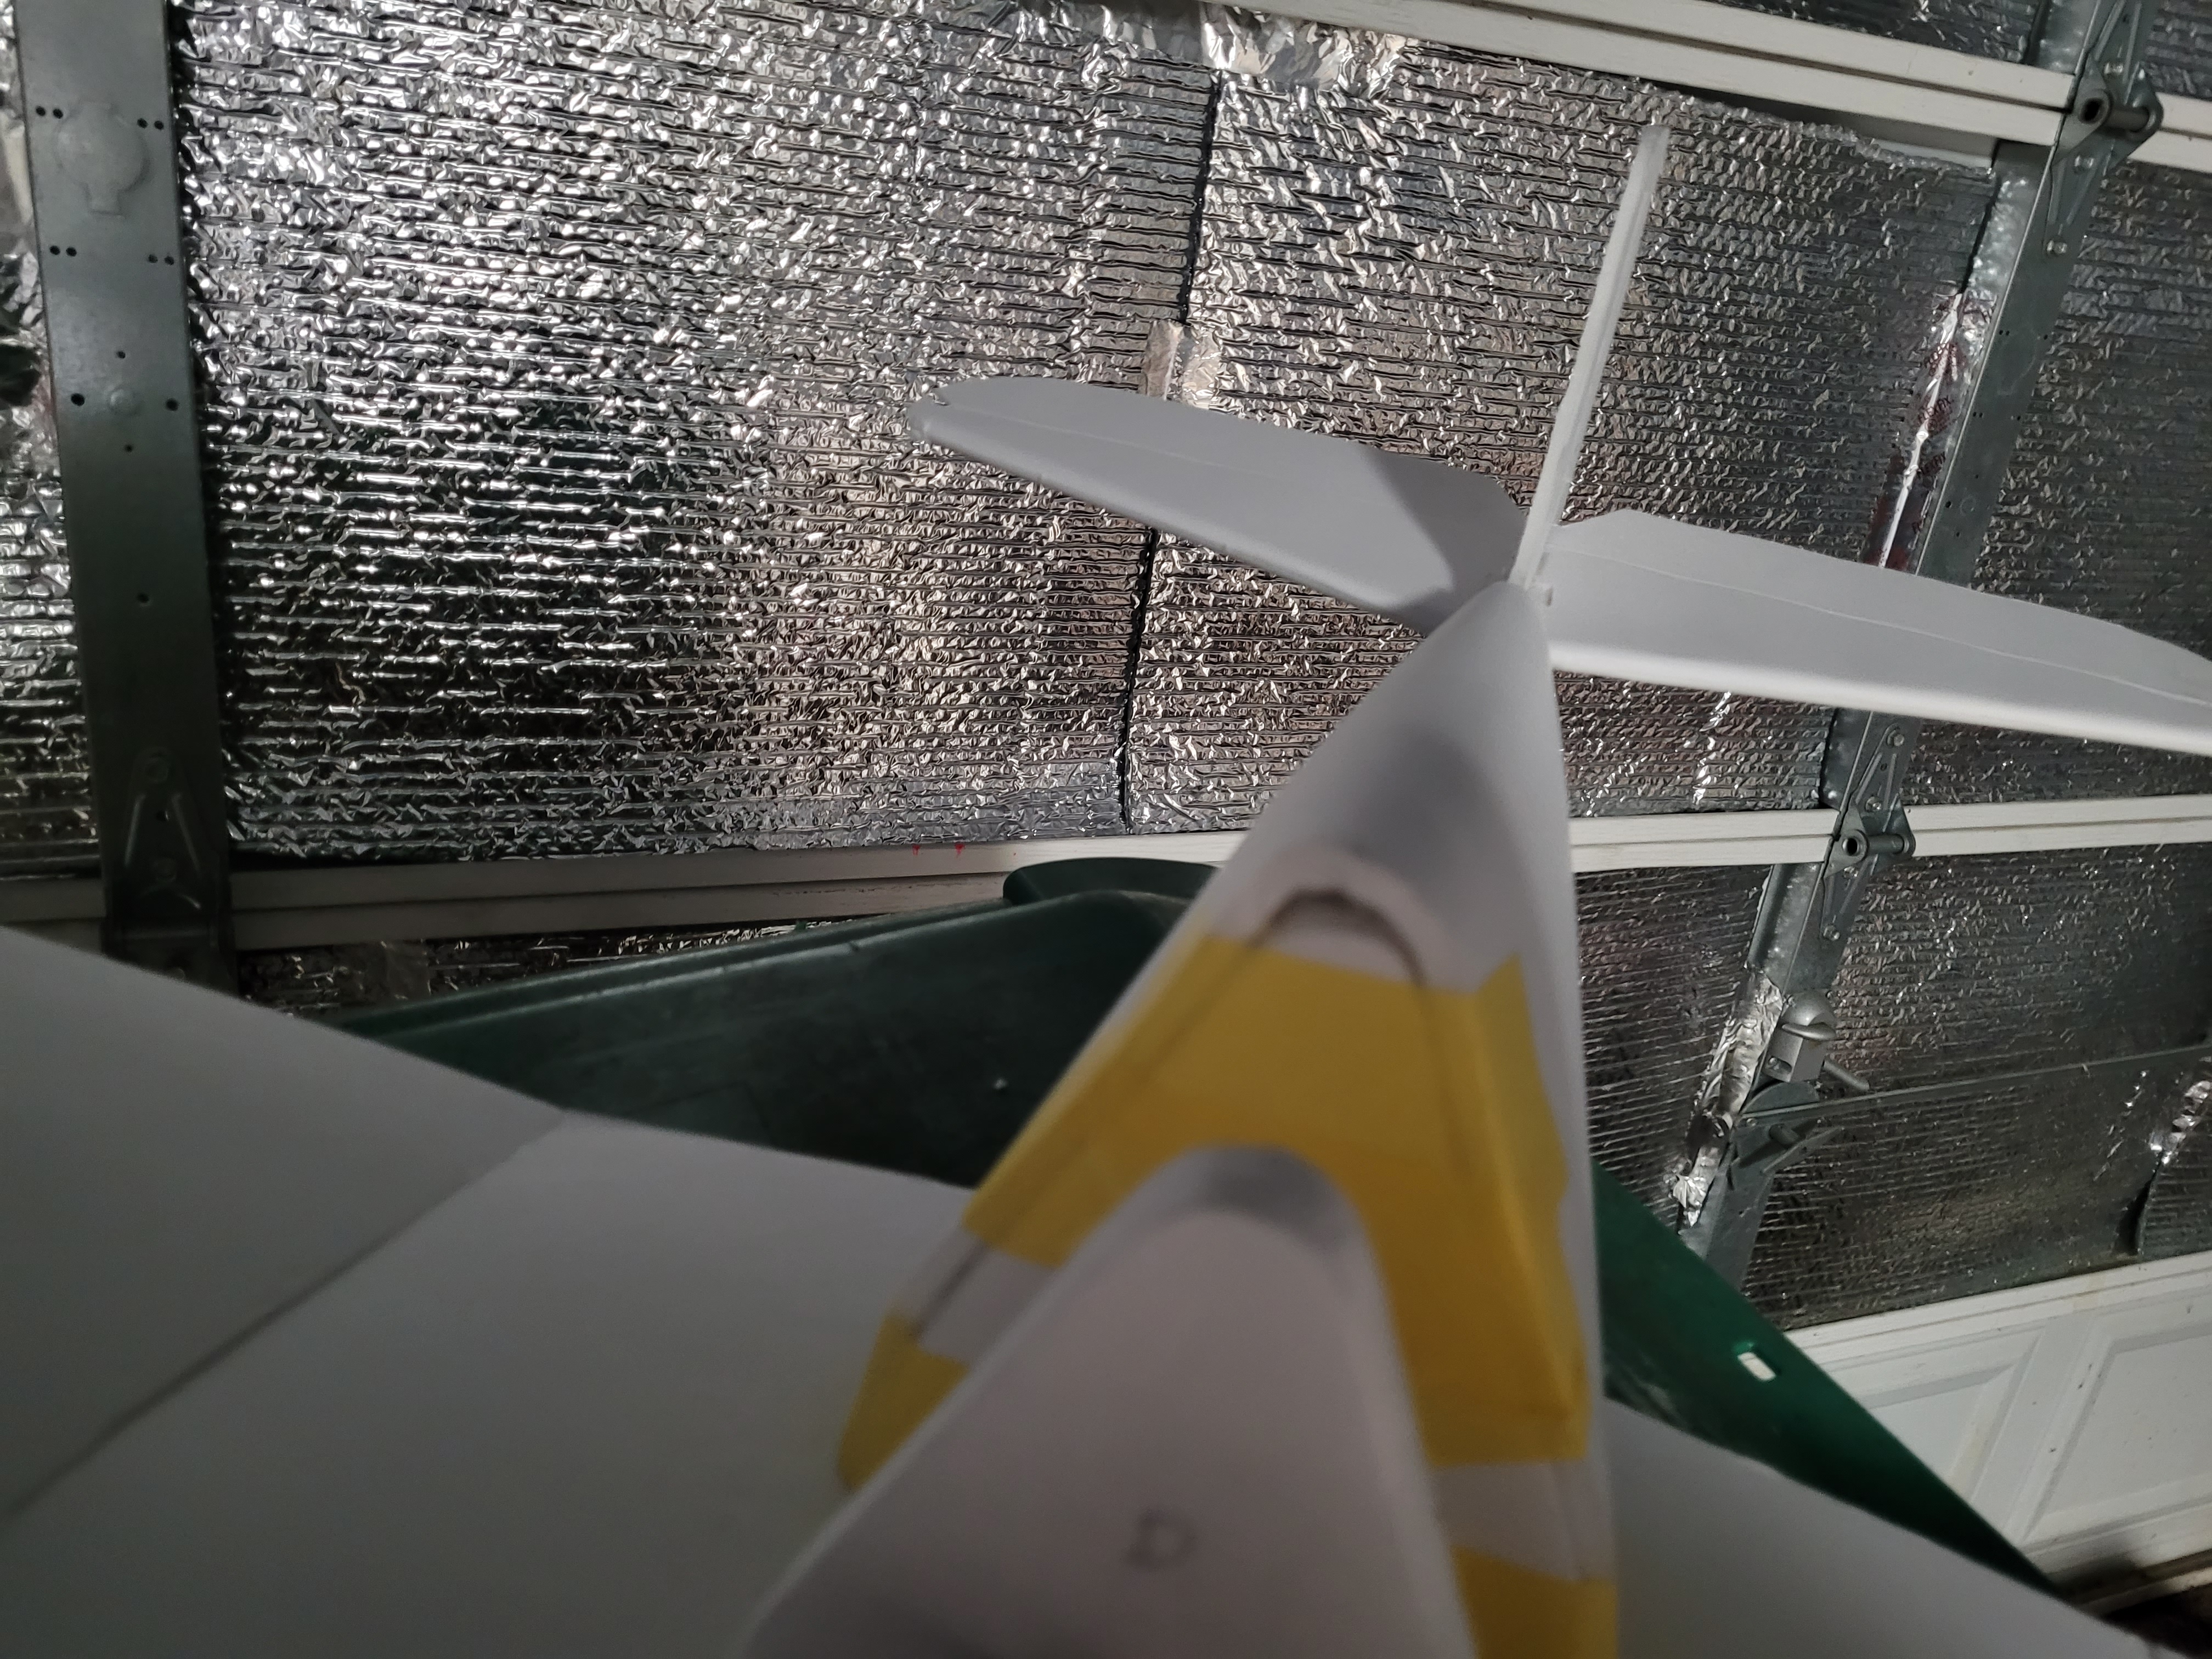
Same process for the next skin. I had to trim this down the same amount as well.

https://www.13thsquadron.com/f6f-hellcat.html
If this is your first master series type build, do yourself a favor and watch the P-47 build video by FT/John Overstreet.
So I had been procrastinating on this for a while. I finally got most of the parts cut out aside from the skins. Cutting out all of the formers was agonizing and tedious, but necessary (PS does anyone in San Antonio have a laser cutter? )
I also use different types of glue throughout the build. Sometimes I like a longer set time, and sometimes another option is lighter and stronger. You can complete this build using explicitly hot glue.
My parts pile so far.

First up, put a score in the wing and fold it according to the templates.

Here it is, I used a ruler to ensure that it folded straight. I just barely scored it to help guide the fold. Repeat for other side.


Then glue in your wooden spars. I think this is some 1/16x1 birch I found on sale at hobby lobby. Glued in place with wood glue, and clamped until dry.

I installed/routed the servos and wires. You need 2 6 inch extensions, and a Y harness, unless you are doing dual ailerons, then I guess you would just need 2 12 inch extensions. I did not glue the servos in, which ended up paying off. So don't glue them in yet!

Start with your inner upper wing skins, first start by removing the inner paper, and sculpting the whole skin master series style over a table corner (Watch the P-47 video!)

Then move your focus to the front of the wing skin, it should start to look like an airfoil.

They should easily fit over just like such.

Optional: Bevel the leading edge of your skin. The official masters style build technique doesn't require this, but I think it looks better and gives the glue more area to bite. I just used a 150 grit sanding block.

I dampened one surface, taped down the leading edge tightly (be sure to line it up perfectly) applied a little water and some white gorilla glue. I weighted it down and let it sit for about 30 minutes. I only did the leading edge and spar, and came back later and did the trailing edge. After about 5 minutes, come back and if any glue has oozed out the front trailing edge, wipe it off, it is easier now than to try to cut/sand it off later.
Also, don't use paint cans, I got lucky my first time, but my other side has two little circle indents on it. Yuk! I use jugs of oil or coolant typically. Anything heavyish that will distribute weight evenly and not have stress risers.

Repeat the process for the outer skins. Be sure to bevel your aileron hinges and treat them with glue to ensure they don't delaminate. The servos had to be pushed down a little, if I had glued them in, I wouldn't have been able to close my wing. Run the glue along the leading edge and spars, as well as the inside of the skin where it butts up to the inner wing span. The white gorilla glue will expand. If you have any little gaps from your shaky hand cutting the foam, the gorilla glue will totally expand and cover your mistakes! Wipe off any oozing out after about 5 minutes (it seems to expand the most during the first 5-10 minutes).

Completed wing assembly. This wing is big, with a thick root, and relatively light. I have zero doubts this plane will fly well on this wing. I still need to trim up some edges. Yes, there will be a gap between the wings.

Next up, fold your body, it is a B Fold on the top, and a quasi A fold on the bottom. Make sure it is nice and square. I like to wood glue one side, and tape it down to a 90 degree aluminum L angle stock. It will hold it a perfect 90 degrees flush while drying. Hot glue works here as well and would be quicker. You can still do a variation of the aluminum angle move too.


I like to take one of these half round bastard files and sand it down slowly. They're only $3 at Harbor freightYou can go in guns ablazin with a razor, but this is easier and slower, but more accurate .

The fuselage frame is glued securely to the wing good n straight with the gorilla glue.

Next up the H stab. Get your score cuts done.

Then make sure that both sides are able to fold over without interference. Mine wouldnt line up so I had to trim.

Next get your bevels going. Double bevels for the leading edge. I beveled the elevator and not the H stab which seemed right seeing how the parts fit.
You want to be careful not to cut through your paper. You dont want unsightly tape on your master series plane. I accidentally messed mine up trying to do the "sharpie bevel" which when it didnt work i tried to razor it. I poked a sizeable hole in my paper, so I just made a new one. It was worth it making templates. Since i prioritized not cutting the paper my bevels were ugly. It is good to smooth it out so it folds easily.


Then white gorilla glue to hold it closed and along the leading edge.

Then get your tailfeathers glued together. Finishing the vstab/rudder is just like any other FT build.


Then we need to get the formers on. It is common sense, but slide B on before A. Just line them up with the spots on the plans/templates. I put little pin pricks where the formers go. The formers are different colors just because I made them out of scrap foam, there is no particular reason. You can finagle former g on there tactically by sliding it on sideways then rotating, but you have to cut former H.


Then glue your tailfeathers on.

Run your coffee straws for your servos through formers D-H. Then mount servos and hook up your elevator and rudder like any other flite test build, or use linkage stoppers if you choose.

I put my servos between formers C and D.

I ran out of parts. Time to cut out skins.

Peel the paper off.

Start by working your foam and then tape it. I put a sharp crease in the top and taped it for about an hour.

A trick i figured too late for my zero, but if you tape the bottom lip where it folds under to a broom stick, then roll it and it puts a nice curve on the bottom.

After some trimming, as the skin was too "tall (could have been my fault making templates or a printing error)
i applied white gorilla glue then taped it. MAKE SURE YOUR SERVOS ARE HOOKED UP RIGHT AND YOUR STRAWS ARE SECURED BEFORE PUTTING THE SKIN ON!

After trimming about a quarter inch off, you can still see there was too much skin material.

Same process for the next skin. I had to trim this down the same amount as well.

Last edited:


