Horseman3381
Well-known member
This is my design for a foamboard P-38. There are other P-38 plans people have posted, but one of the things I enjoy the most about this hobby is designing and building planes (almost more they flying them), so I decided to design my own. For this plane I wanted something that was comparable in size to the FT Sea Duck, and could be built in approximately the same amount of time. It didn’t need to be terribly detailed, but I wanted it to look good enough that people instantly knew what it was.

History:
This plane is version #2 of my P-38 design. My original design was more squared off, did not have the “radiators” on the sides of the nacelles, and was unnecessarily complicated to build. With what I have learned over the past year I was able to fancy up the design while cutting the build time and complexity. I brought this to Flite Fest 2018 where several people asked for the plans, and you can find them below.
You may notice the nose is a bit smushed, and the right wingtip is bent. The nose is from a taxi test of the plane before I added a servo to steer the nose wheel. I originally planned to control it on the ground with differential thrust, however if you need to turn to avoid something quickly, applying more power doesn’t work great. As for the wingtip, I wasn’t paying attention and walked into a door while carrying the plane.
Specifications:
Preliminary Design:
When I started on this project I knew I wanted to use FT C-Pack motors. I used the FT Sea Duck plans as a start since it has twin booms and runs off twin C-pack motors. I brought the plans for the Sea Duck into AutoCAD and using the drawing below started to make modifications to make it look more like a P-38. This included tapering the wings and adding dihedral. The nacelles are stretched forward of the wing more, made taller and radiators added. The tail modifications are minor, simply reshaped vertical and horizontal stabilizers. The fuselage is drastically different and I started from scratch on that.

The plane has ailerons, elevator and differential thrust. The rudder is used for the nose wheel only as I did not design actual rudders into the plane. I decided to keep things simple and use fixed landing gear with no flaps, however it would be easy to add them (maybe in version 3).
As I said, this is my version #2. Version #1 I had a fake “Grill” built into the nacelles below the motor, and did not include radiators on the back of the nacelles. The problem with this is that the large flat surface below the motor gave the same effect as flaps when throttling up and the plane would climb drastically. To address this, in version 2 I left the area below the motor open, and cut vent holes in the side of the nacelles under the radiators for air to escape. When initially test flying the plane with a 2-blade 10.5” prop this eliminated the climbing issue. However, when I put the 3-blade 8” prop on the climbing issue returned. I hope to find a 9” 3-blade prop for the plane that may help the issue.


When designing the fuselage I went through a few different designs of the nose trying to build it more geometrically and give a more overall roundedness appearance to it. However none of them looked great, so in the end I decided to go with a rounded nose and tapered sides which I think turned out pretty good.

After I had the plane together and a few test flights in something seemed missing. It finally dawned on me, spinners. I don’t use them on most of my planes, but I purchased 2” spinners hoping it would bring the plane together, and in my opinion they really did.

(Note: The plans have been fixed so the nacelles should be square with the fuselage)
Landing Gear:
The main landing gear is 2 1/2” wheels I bought from a local hobby shop. They are anchored into the wing with the wire bent into a C shape for inside the wing with a matching pattern cut into a piec of foamboard to match. Then there is one more piece on top of that to hold it into place.

Note: This image is from a previous writeup, in this plane the wheel axel is rotated 90 degrees
The nose gear uses a 2” wheel with a question mark bend. There are pieces of paint stick mounted inside the nose to reinforce where the landing gear mounts to the fuselage. A wheel collar on the outside of the plane (recessed in the foam) and a steering arm inside keep the gear in place. The arm is connected to the steering servo that is mounted to the side of the fuselage.


Paint:
After a few successful test flights it came time to paint. I based the paint scheme on the plane Happy Jacks’s Go Buggy leaving off the D-day stripes. As a base I used my favorite paint which is Rust-Oleum Metallic Aluminum. I love the look of this paint, it goes on easy and smoothly with a light coat, and it dries to the touch in 2-3 min.

Performance:
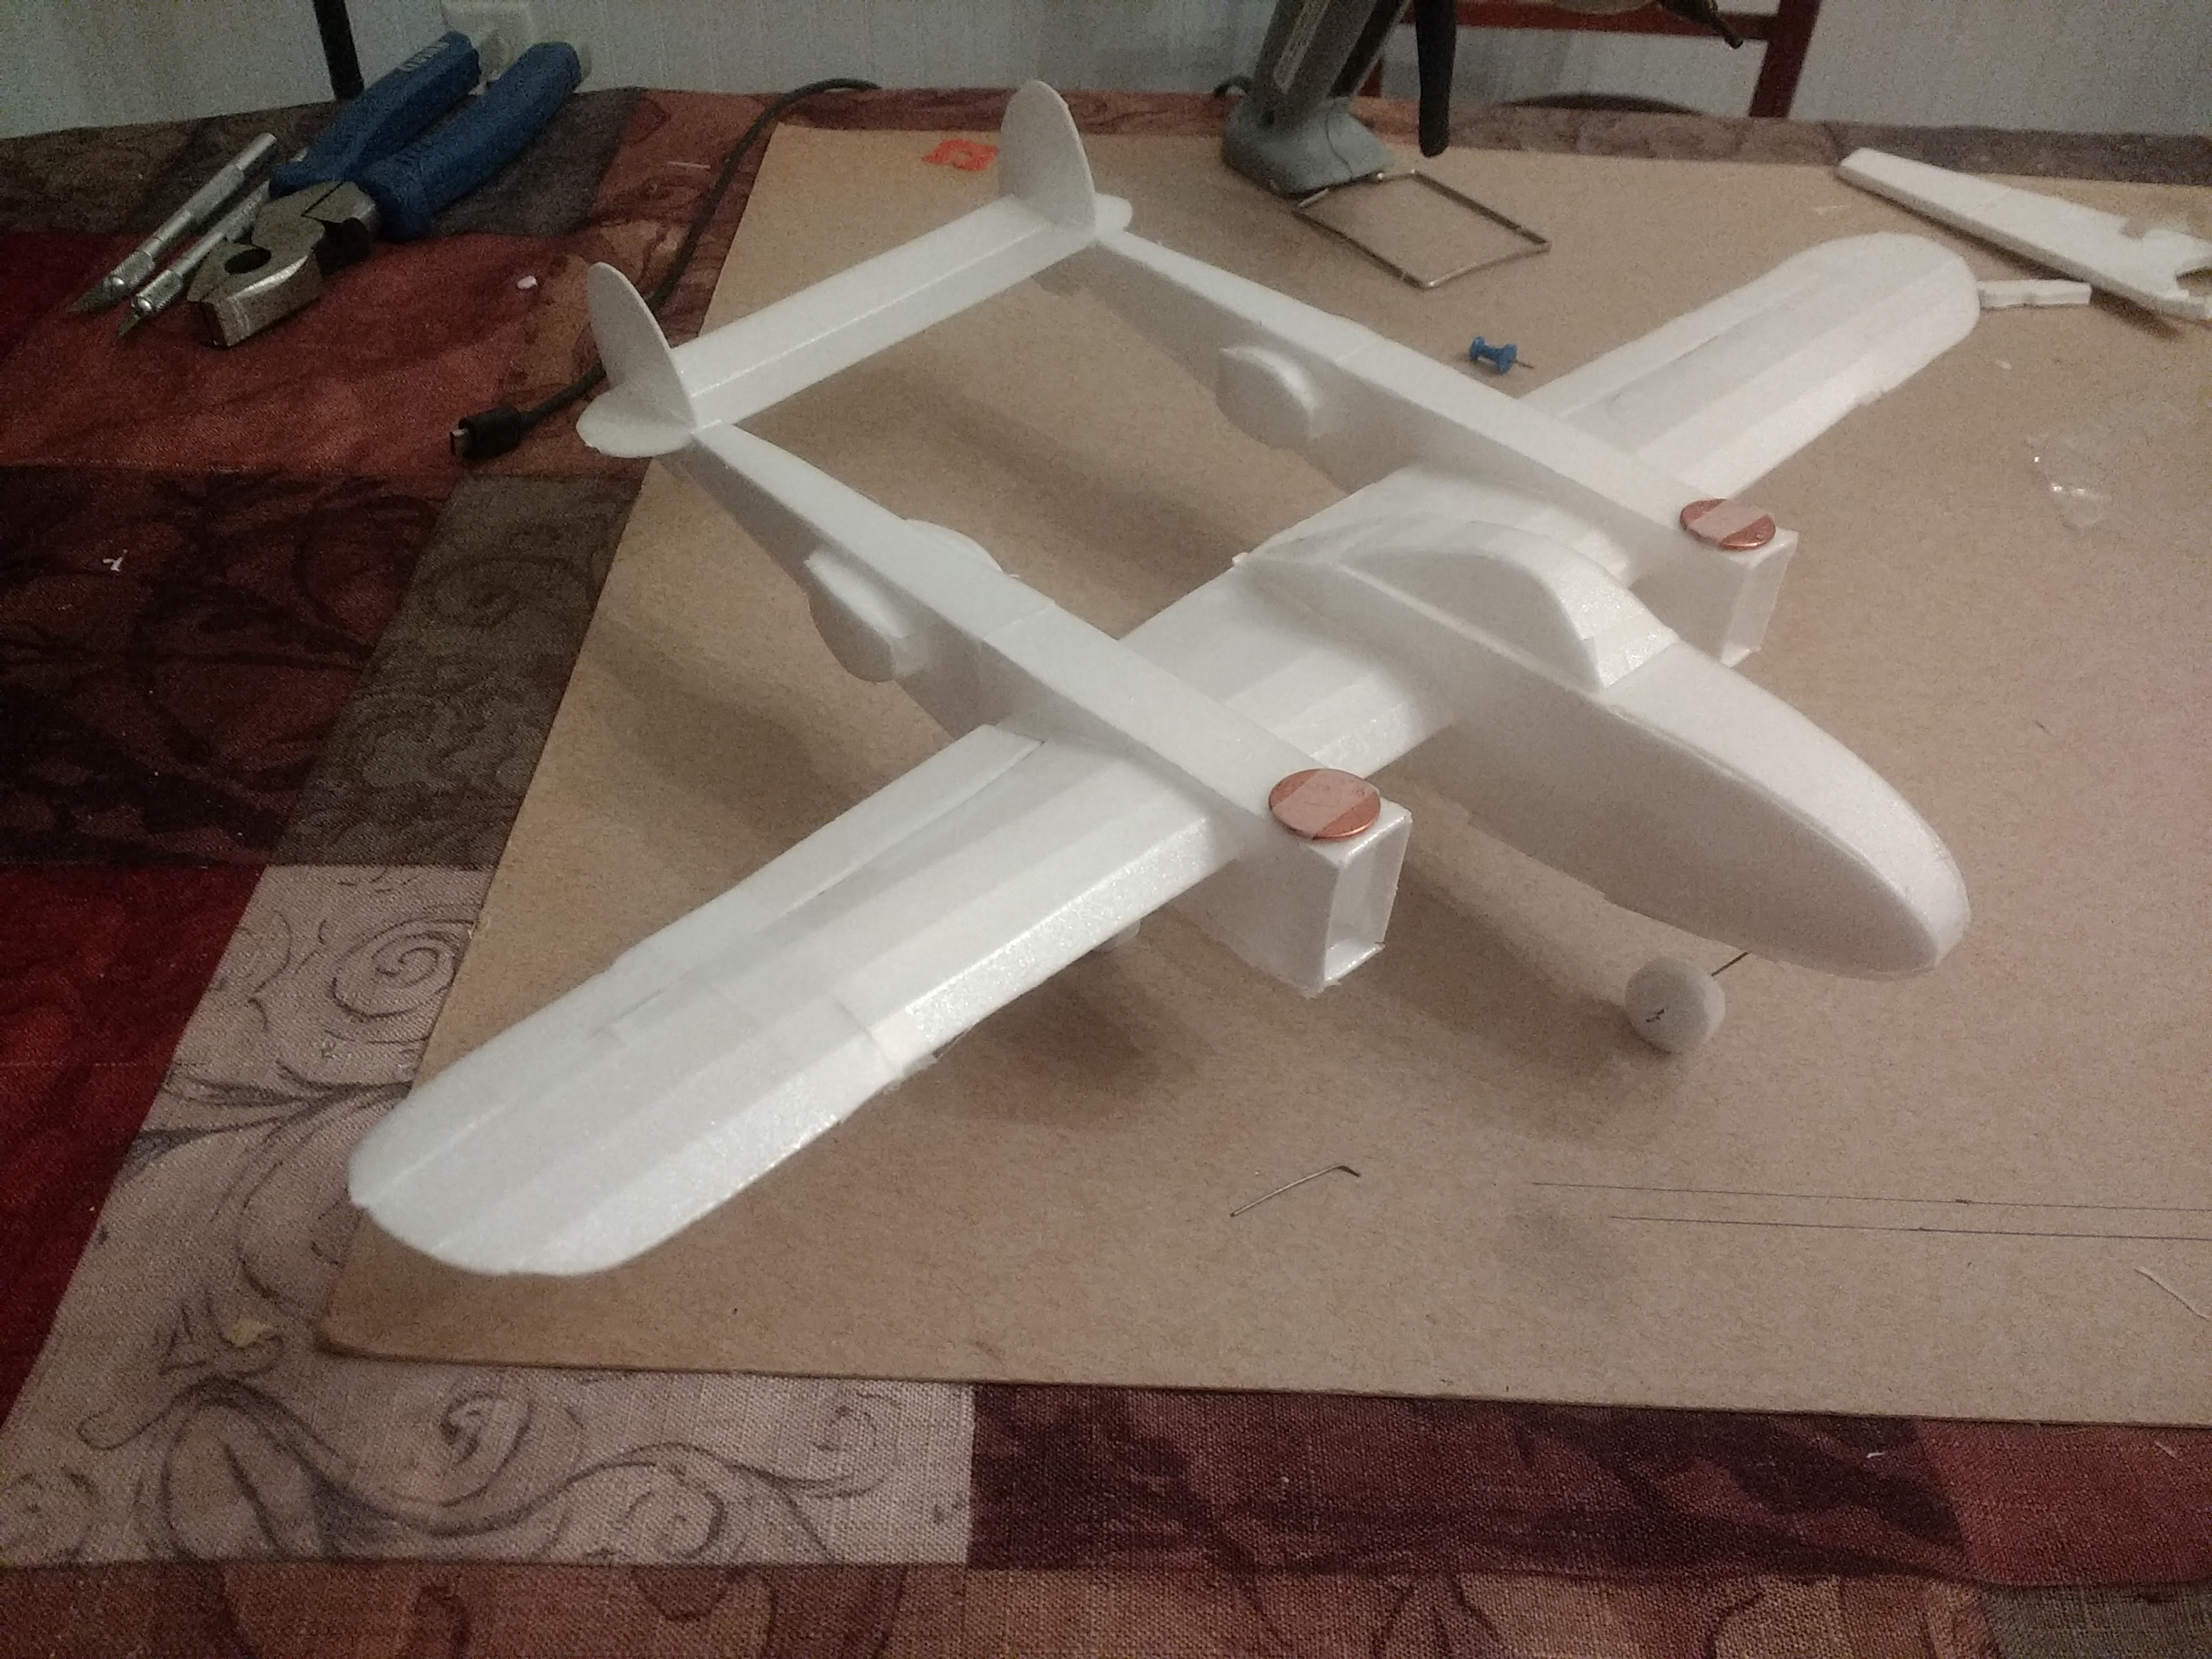
The CG is around 2 ½” from the leading edge of the wing. On order to achieve this the batteries sit centered just forward of the CG. This puts them in the bottom of the fuselage under the wing which has the added bonus of adding weight to the lowest part of the plane. That combined with the dihedral of the wings makes it a very stable flyer.

It has a lower wing area to weight ratio than most FT planes, so it cruses around ¾ throttle. This is still better than many other foam warbirds out there. Its top speed is a little better than the FT Sea Duck’s, but not quite as fast as the FT Spitfire or Mustang.
I can’t speak much to the planes acrobatic performance as I tend to fly slow circles, and generally if the plane is upside down while I am flying something has gone terribly wrong. I did however pull off a decent hammerhead turn and something that vaguely resembled a loop and roll. They looked as good as they have in any other plane I have attempted them. When I get video of the plane flying I will have my buddy who spends more time flying upside down than right-side up fly it to see how it does.

Plans:
History:
This plane is version #2 of my P-38 design. My original design was more squared off, did not have the “radiators” on the sides of the nacelles, and was unnecessarily complicated to build. With what I have learned over the past year I was able to fancy up the design while cutting the build time and complexity. I brought this to Flite Fest 2018 where several people asked for the plans, and you can find them below.
You may notice the nose is a bit smushed, and the right wingtip is bent. The nose is from a taxi test of the plane before I added a servo to steer the nose wheel. I originally planned to control it on the ground with differential thrust, however if you need to turn to avoid something quickly, applying more power doesn’t work great. As for the wingtip, I wasn’t paying attention and walked into a door while carrying the plane.
Specifications:
- Wingspan – 56”
- Fuselage Length – 40 1/2”
- Motor – (2) Emaxx GT2215/09 (FT C-Pack)
- ESC – 30A
- Prop – 8x6 3-blade or 10.5x4.5 2-blade (If you can find 9x4 or 5 3-blade let me know)
- Battery – 3s 2200mah (I use 2, but it will fly and balance with 1)
- Servos: (4) 9g
- 6 sheets of foamboard
Preliminary Design:
When I started on this project I knew I wanted to use FT C-Pack motors. I used the FT Sea Duck plans as a start since it has twin booms and runs off twin C-pack motors. I brought the plans for the Sea Duck into AutoCAD and using the drawing below started to make modifications to make it look more like a P-38. This included tapering the wings and adding dihedral. The nacelles are stretched forward of the wing more, made taller and radiators added. The tail modifications are minor, simply reshaped vertical and horizontal stabilizers. The fuselage is drastically different and I started from scratch on that.
The plane has ailerons, elevator and differential thrust. The rudder is used for the nose wheel only as I did not design actual rudders into the plane. I decided to keep things simple and use fixed landing gear with no flaps, however it would be easy to add them (maybe in version 3).
As I said, this is my version #2. Version #1 I had a fake “Grill” built into the nacelles below the motor, and did not include radiators on the back of the nacelles. The problem with this is that the large flat surface below the motor gave the same effect as flaps when throttling up and the plane would climb drastically. To address this, in version 2 I left the area below the motor open, and cut vent holes in the side of the nacelles under the radiators for air to escape. When initially test flying the plane with a 2-blade 10.5” prop this eliminated the climbing issue. However, when I put the 3-blade 8” prop on the climbing issue returned. I hope to find a 9” 3-blade prop for the plane that may help the issue.
When designing the fuselage I went through a few different designs of the nose trying to build it more geometrically and give a more overall roundedness appearance to it. However none of them looked great, so in the end I decided to go with a rounded nose and tapered sides which I think turned out pretty good.
After I had the plane together and a few test flights in something seemed missing. It finally dawned on me, spinners. I don’t use them on most of my planes, but I purchased 2” spinners hoping it would bring the plane together, and in my opinion they really did.
(Note: The plans have been fixed so the nacelles should be square with the fuselage)
Landing Gear:
The main landing gear is 2 1/2” wheels I bought from a local hobby shop. They are anchored into the wing with the wire bent into a C shape for inside the wing with a matching pattern cut into a piec of foamboard to match. Then there is one more piece on top of that to hold it into place.
Note: This image is from a previous writeup, in this plane the wheel axel is rotated 90 degrees
The nose gear uses a 2” wheel with a question mark bend. There are pieces of paint stick mounted inside the nose to reinforce where the landing gear mounts to the fuselage. A wheel collar on the outside of the plane (recessed in the foam) and a steering arm inside keep the gear in place. The arm is connected to the steering servo that is mounted to the side of the fuselage.
Paint:
After a few successful test flights it came time to paint. I based the paint scheme on the plane Happy Jacks’s Go Buggy leaving off the D-day stripes. As a base I used my favorite paint which is Rust-Oleum Metallic Aluminum. I love the look of this paint, it goes on easy and smoothly with a light coat, and it dries to the touch in 2-3 min.
Performance:
The CG is around 2 ½” from the leading edge of the wing. On order to achieve this the batteries sit centered just forward of the CG. This puts them in the bottom of the fuselage under the wing which has the added bonus of adding weight to the lowest part of the plane. That combined with the dihedral of the wings makes it a very stable flyer.
It has a lower wing area to weight ratio than most FT planes, so it cruses around ¾ throttle. This is still better than many other foam warbirds out there. Its top speed is a little better than the FT Sea Duck’s, but not quite as fast as the FT Spitfire or Mustang.
I can’t speak much to the planes acrobatic performance as I tend to fly slow circles, and generally if the plane is upside down while I am flying something has gone terribly wrong. I did however pull off a decent hammerhead turn and something that vaguely resembled a loop and roll. They looked as good as they have in any other plane I have attempted them. When I get video of the plane flying I will have my buddy who spends more time flying upside down than right-side up fly it to see how it does.
Plans: