FTFC25: Build-ruary by Mr Man

Mr Man

Elite member
FT Goblin Build Log:

Printed and stitched together plans.

Do’s and Don’ts: Do cut out the spar further for the servo, as it will sink in more reducing drag and will increase ease of assembly.
IMG_4453.jpeg
IMG_4455.jpeg

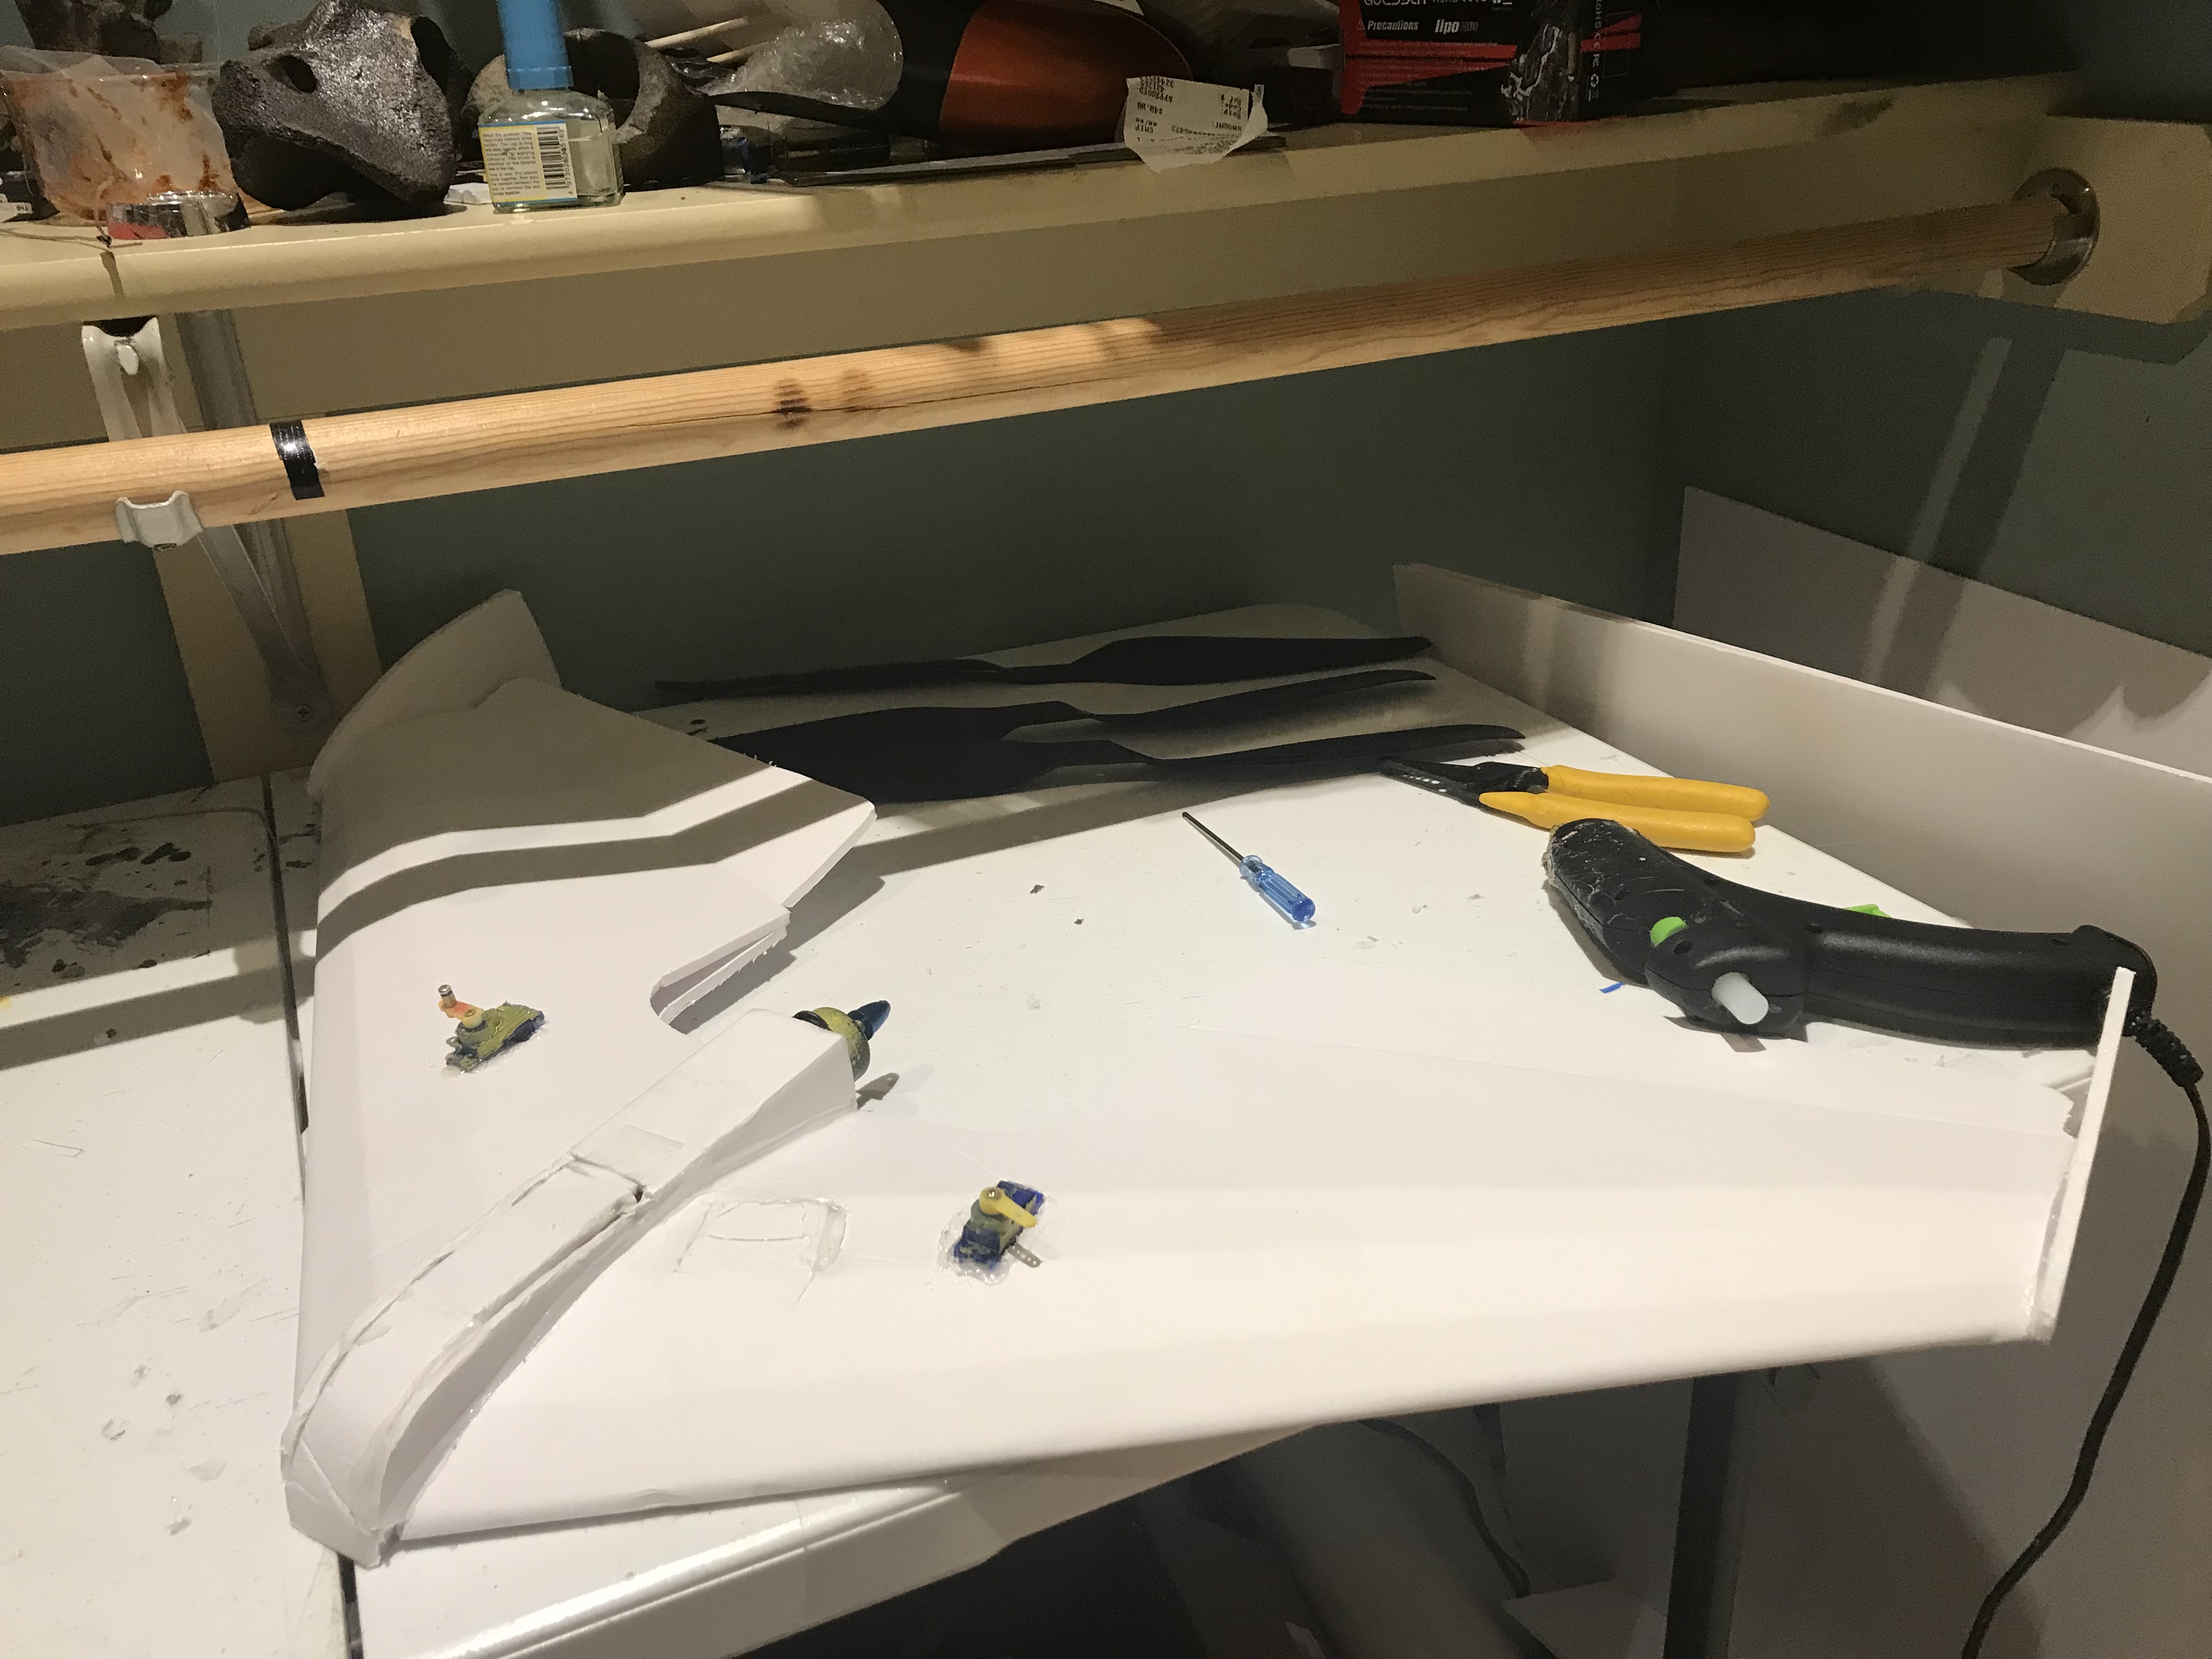
‘Started on wings. I sunk the servos down further so they are flush with wing.
IMG_4487.jpeg
IMG_4488.jpeg

Fuselage assembly.
IMG_4489.jpeg

Everything is now dry fitted.
IMG_4490.jpeg

Alright! Nose made and everything glued.
IMG_4491.jpeg

I’ve got a 70a bi-directional esc in there.
IMG_4494.jpeg

There’s a Detrum 2815 2700kv in the fuse.
IMG_4495.jpeg
IMG_0362.jpeg
IMG_0361.jpeg
 
Last edited:

Mr Man

Elite member
MS Gee Bee by @Mr Man ,

Do’s and Don’ts: Do hunk out some foam where the aileron servos go, otherwise it won’t work, Don’t glue anything in upside down like I did, I had to cut it off and redo it.

Internal structure
IMG_5010.jpeg


Tail feathers glued together
IMG_5011.jpeg


F6 former cavity shown.
IMG_5012.jpeg


Tail feathers glued on.
IMG_5013.jpeg


Elevator servo installed
IMG_5014.jpeg


Skins started
IMG_5015.jpeg


Skins glued on.
IMG_5037.jpeg
IMG_5038.jpeg


Picture of rear skins.
IMG_5039.jpeg
IMG_5040.jpeg
IMG_5041.jpeg


Canopy glued on.
IMG_5042.jpeg
IMG_5043.jpeg


Wing started, spar in.
IMG_5045.jpeg
IMG_5046.jpeg


Servo cavity.
IMG_5047.jpeg


Both servos in.
IMG_5048.jpeg


Wing glued on.
IMG_5049.jpeg


All pushrods in (not pictured)
IMG_5050.jpeg
IMG_5146.jpeg
 
Last edited:

Mr Man

Elite member
@Grifflyer Hotliner.
Printed and stitched together plans:


Do’s and Don’ts: Do use two servos for the wing, just hunk out some foam so they are flush, Do install the elevator servo in the bottom of the fuselage, it makes it very accessible. Don’t use one servo for the wing like I did, it made it very difficult to install the battery.

.
IMG_4450.jpeg
IMG_4451.jpeg


Fuselage glued up.
IMG_4886.jpeg


Horizontal stabilizer on.
IMG_4887.jpeg


Elevator finished.
IMG_4888.jpeg
IMG_4889.jpeg


Starting on wings, that’s a fiberglass spar from a kite.
IMG_4900.jpeg


Fuselage finished, I needed to custom make front nose top piece, as well as motor mount.
IMG_4918.jpeg


Wing finished as well, I used the chart below to figure out single servo ailerons.
IMG_4919.jpeg
IMG_4920.jpeg


It’s finished! Just needs paint.
IMG_4921.jpeg
 

Attachments

  • IMG_4890.jpeg
    IMG_4890.jpeg
    41.7 KB · Views: 0
Last edited:

Mr Man

Elite member
Mini Arrow build log.

Spars built, interesting how everything is an A folds in this.

Do’s and Don’ts: Do install the receiver inside the wing spar, as it will free up a ton of room in the fuselage, Also, cut out a hole for esc and glue it in, it will have amazing airflow. Don’ts, Don’t forget to cut out the small hatches in the underside of the wing.

IMG_4861.jpeg


Wings joined, I’m starting to like the arrow!
IMG_4862.jpeg


Spars in and wings glued down.
IMG_4863.jpeg


Centerpod installed.
IMG_4864.jpeg


Electronics in.
IMG_4874.jpeg
IMG_0359.jpeg
IMG_0360.jpeg
 

Attachments

  • IMG_4870.jpeg
    IMG_4870.jpeg
    1.8 MB · Views: 0
Last edited:

Mr Man

Elite member
FT Spitfire with speedwing.

Motor compared with power pack C equivalent.
Do’s and Don’ts, Do add a speedwing, your performance will increase drastically, and also upgrade your spar with the one @nerdnic uses in his planes, Don’ts: Don’t glue the wingtips till last.

IMG_5082.jpeg


Fuselage started.
IMG_5086.jpeg


Formers and wing.
IMG_5105.jpeg


Speedwing mod.
IMG_5106.jpeg


A closer look.
IMG_5107.jpeg


Servo cutout.
IMG_5108.jpeg


Swappable power pod.
IMG_5109.jpeg
IMG_5149.jpeg
IMG_5150.jpeg
 
Last edited:

Mr Man

Elite member
That’s the gee bee, didn’t work, any ideas for a new plane? (Preferably Extremely fast)

I’m running a 3536 and a 60a esc, a 10x7 prop FOR STARTERS.