General 3D Printing Parameters?

breedatrad

New member
Good day, all,

I've had an FLSUN QQ-S 3D Printer for a year now and really like it. It's fast and makes great parts. Here's some sample parts I made with stock machine settings. They printed first time with no stringing or adjustments necessary.
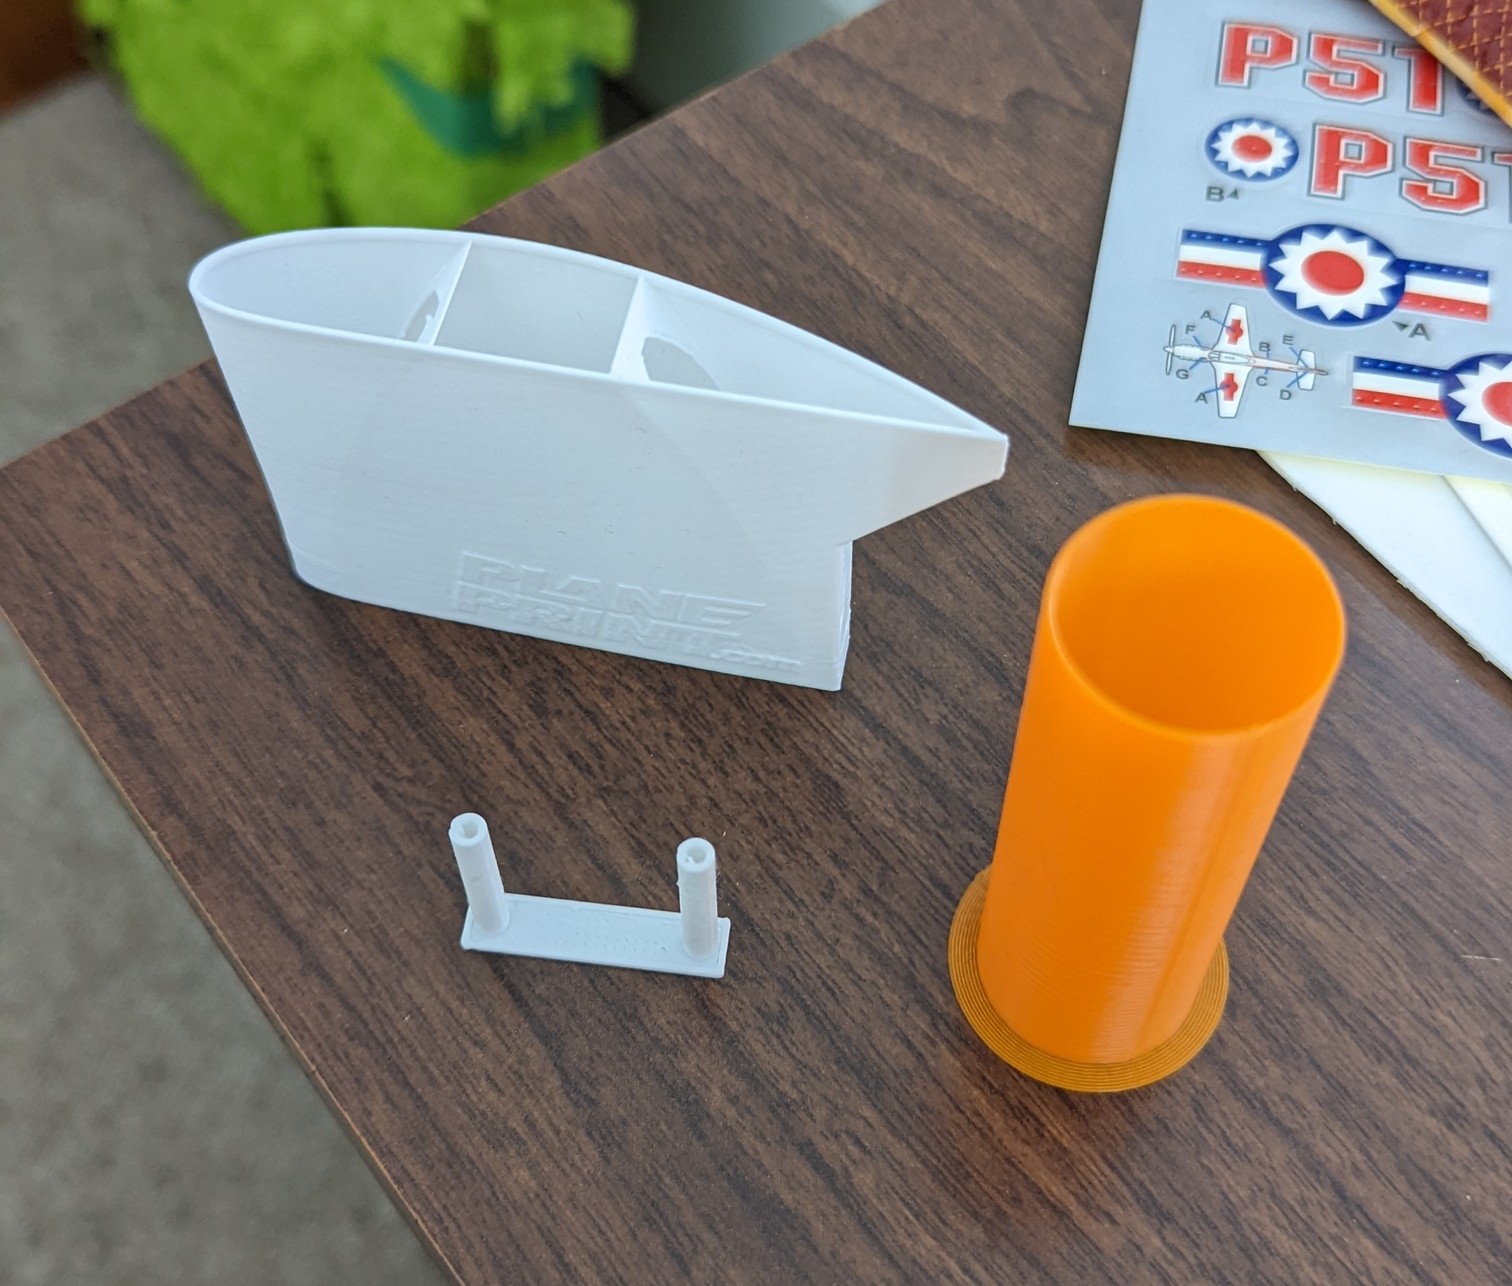
PXL_20220206_195427605.jpg


Now, I'd like to start printing some of my own designs. What wall thickness have you guys been using for wing skins, airfoil ribs/supports, fuselage sides, etc?

Is there a thread that addresses these things or... How do I find out the current state of the art in 3D Printed, aircraft design?

Thanks!

Brian
 

Matagami Designs

Master member
What will you be trying to print? I've designed a few parts for foamboard aircraft and have designed 2.5ish fully printed designs. If its fully printed in my experience things will get heavy fast and this type of design requires a different approach in CAD than just modeling the final part's geometry. To get things as light as possible my general approach is to have a main solid body with reinforcement bodies offset from the outer surface 0.6mm. When loaded into the slicer with single 0.4mm walls the edges where these bodies meet become fused while printing.

Tom Stanton does a insightful video and this is fairly close to what I do with my design with the exception being the cuts that he is doing are separate bodies nested inside the main body.

1644186152493.png


1644186051199.png


Anyway this is my approach. I believe you can do things even lighter by using Cura's surface mode but i don't have any experience with this. I believe @Dr. Looping Looie has done his Start Up! plane with this method though.
 

breedatrad

New member
Thanks for the reply.
I've got a couple of different biplane designs to try out. The Turbine Toucan, Ultimate 300KS and an original twin with the top wing "drooped" like a gooses when they're landing.
I've printed a solid version of the twin and it came out pretty well. Maybe I just need to buy the Eclipson Pitts S12 and convert it into a Turbine Toucan. That's the way I made one from an ARF, previously.
 

Attachments

  • raceyd.jpg
    raceyd.jpg
    90.2 KB · Views: 0
  • kervinen-5047dba111b288a.jpg
    kervinen-5047dba111b288a.jpg
    210.9 KB · Views: 0
  • Twin Engine Biplane Layout-a.JPG
    Twin Engine Biplane Layout-a.JPG
    224.1 KB · Views: 0
  • TT Surface Planform- Iso Front.jpg
    TT Surface Planform- Iso Front.jpg
    175 KB · Views: 0
  • Pv52990.jpg
    Pv52990.jpg
    92 KB · Views: 0

Matagami Designs

Master member
Thanks for the reply.
I've got a couple of different biplane designs to try out. The Turbine Toucan, Ultimate 300KS and an original twin with the top wing "drooped" like a gooses when they're landing.
I've printed a solid version of the twin and it came out pretty well. Maybe I just need to buy the Eclipson Pitts S12 and convert it into a Turbine Toucan. That's the way I made one from an ARF, previously.

That twin looks pretty wild. If you already printed as a solid your about half way there. What program are you doing your CAD in?
 

breedatrad

New member
SolidWorks.

Seems like just getting it printed solid is only about 15% of it. I've still got to shell it out, divide it into pieces, etc.

When you get an airplane file from Eclipson or, whoever; What kind of file is it? A solid, a surface, STL, STEP...?

My 3D Printer can make 14" high parts, and I have. Do you see any problem with joining wing sections to make fewer, longer parts or will it collapse if it's too tall?

Brian
 

Matagami Designs

Master member
SolidWorks.

Seems like just getting it printed solid is only about 15% of it. I've still got to shell it out, divide it into pieces, etc.

When you get an airplane file from Eclipson or, whoever; What kind of file is it? A solid, a surface, STL, STEP...?

My 3D Printer can make 14" high parts, and I have. Do you see any problem with joining wing sections to make fewer, longer parts or will it collapse if it's too tall?

Brian

Yeah it is still a bit of work but doesn't have to be difficult. Don't make a shell, this will cause the slicer to want to give it 2 walls.
My general workflow is to create the plane as a solid. I then shell about the center plane as a quick way to get an offset body 0.6mm from the original. After shelling I delete the face that connects the inside from the outside and redraw this face to create the two bodies. Here is what it looks like with a simple wing profile. The outer body is shown transparent.
1644464588533.png


Next I draw what I want the "infill" to be as another body.

1644464864383.png

From here you can combine the inner body with the "infill" with a Boolean common combine to create the wings internal structure:

1644465023489.png

Once you do this you just need to add the holes to each rib. You will want to have all your servo cutouts and everything 1st before you do this "infill" workflow. This way all internal structures will be 0.6mm from the outer walls. If internal structure touches the outer walls this will create a hole in Cura. Last feature will then be splitting the model up into printable sections. Of course this is all very simplified.

It wont let me share the . SLDPRT but the .STL is in the attachments so you can see what it looks like in Cura.

As for the files from Eclipson I'm not sure, 3dlab print models I have done appear to be surfaces when I open the .STL but when looking at the G-code in a previewer it is very similar to what I show above.

I personally wouldn't do 14" sections. This limits the number of printers the design can work for and creates longer prints and increases the chance it will fail since its printing for a longer amount of time. I actually prefer to break up the fuselage into nice 6 inch chunks so that the the 1st two layers can print a nice hoop around the perimeter for strength. This keeps the fuselage light compared to the wing with the diamond infill. If you want to look at the printed F-82 mustang in the resources section that was done with the methods above.
 

Attachments

  • Wing Example.STL
    124.4 KB · Views: 0