Sendhendrix
Member
After the wall of text below, I promise to be less wordy!
It is my hope to inspire others to build something to fly, not necessarily with balsa. I think if a person enjoys flying model airplanes, then the attempt to build one should be made at least once, because I want everyone else to experience the peculiar satisfaction that can be found in flying something that was self-constructed.
Back in the day, successful builders and pilots existed at about a 1:1 ratio. “Build threads” existed in the form of print magazine construction or kit review articles. Photographs of the important stuff were small, grainy, greyscale, and lacked sufficient detail to be helpful.
Most internet build threads I see tempt me to be secretly ashamed of myself at my lack of skill. Hopefully, as I truthfully depict my journey through this build, I will learn a lot from those who chime in, but I want anyone who doesn’t think they have “what it takes” to perhaps reconsider. I am about to show you how I make mistakes, fix them, ignore them, miss them entirely, and still end up with an okay-looking, fine-flying machine.
My choice for this project came about because I wanted a rickety-looking 1918-1925 era biplane with docile but sporty flying characteristics that could feasibly use a currently unemployed Saito .45 MKII for power. Having recently completed one of Fred Reese’s later designs, a Cloud Dancer 40, his Golden Oldie seems a natural choice.
I have some personal self-imposed challenges for this build, mostly to reduce expense or increase efficiency:
1.) No physical printed copy of full-size plans. Accomplished by importing PDF into Gimp or Inkscape and using the measuring tool to help plot major dimensions like rib spacing, or to trace templates for printing onto letter paper or card stock.
2.) Keep a log of time and materials used for the build. I am working from a stock of balsa that I have on-hand, and I would like to maintain the size of the hoard, so I need to keep track of what goes under the knife.
3.) Do not let the build space expand beyond the 8-foot folding table. If the extra table comes out, it gets put away within 24 hours. (Prevent “project sprawl” and “project blending“ with other unrelated projects.)
4.) Stop and clean up every 1 hour of build time in anticipation of interruption. If interrupted while building, take 10 seconds to leave my future self a note, no matter how seemingly mundane. Sometimes what seems like a quick interruption ends up lasting weeks!
5.) Take lots of pictures as the project progresses and post them on the internet.
****
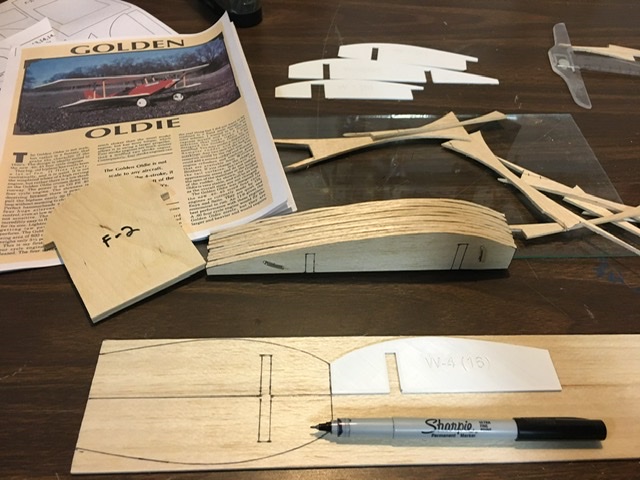
Here’s the first photo I took. I’ve generated 3D printed templates for the wing ribs, which was sort of worth the trouble. I’m tracing and cutting wing ribs:

Also visible in the picture is F-2. I failed to photograph the process. I traced it on a “new layer” in Inkscape (freeware) and printed it on letter paper. I roughly cut the template out with scissors, pasted it onto lite-ply, and cut it out on the scroll saw.
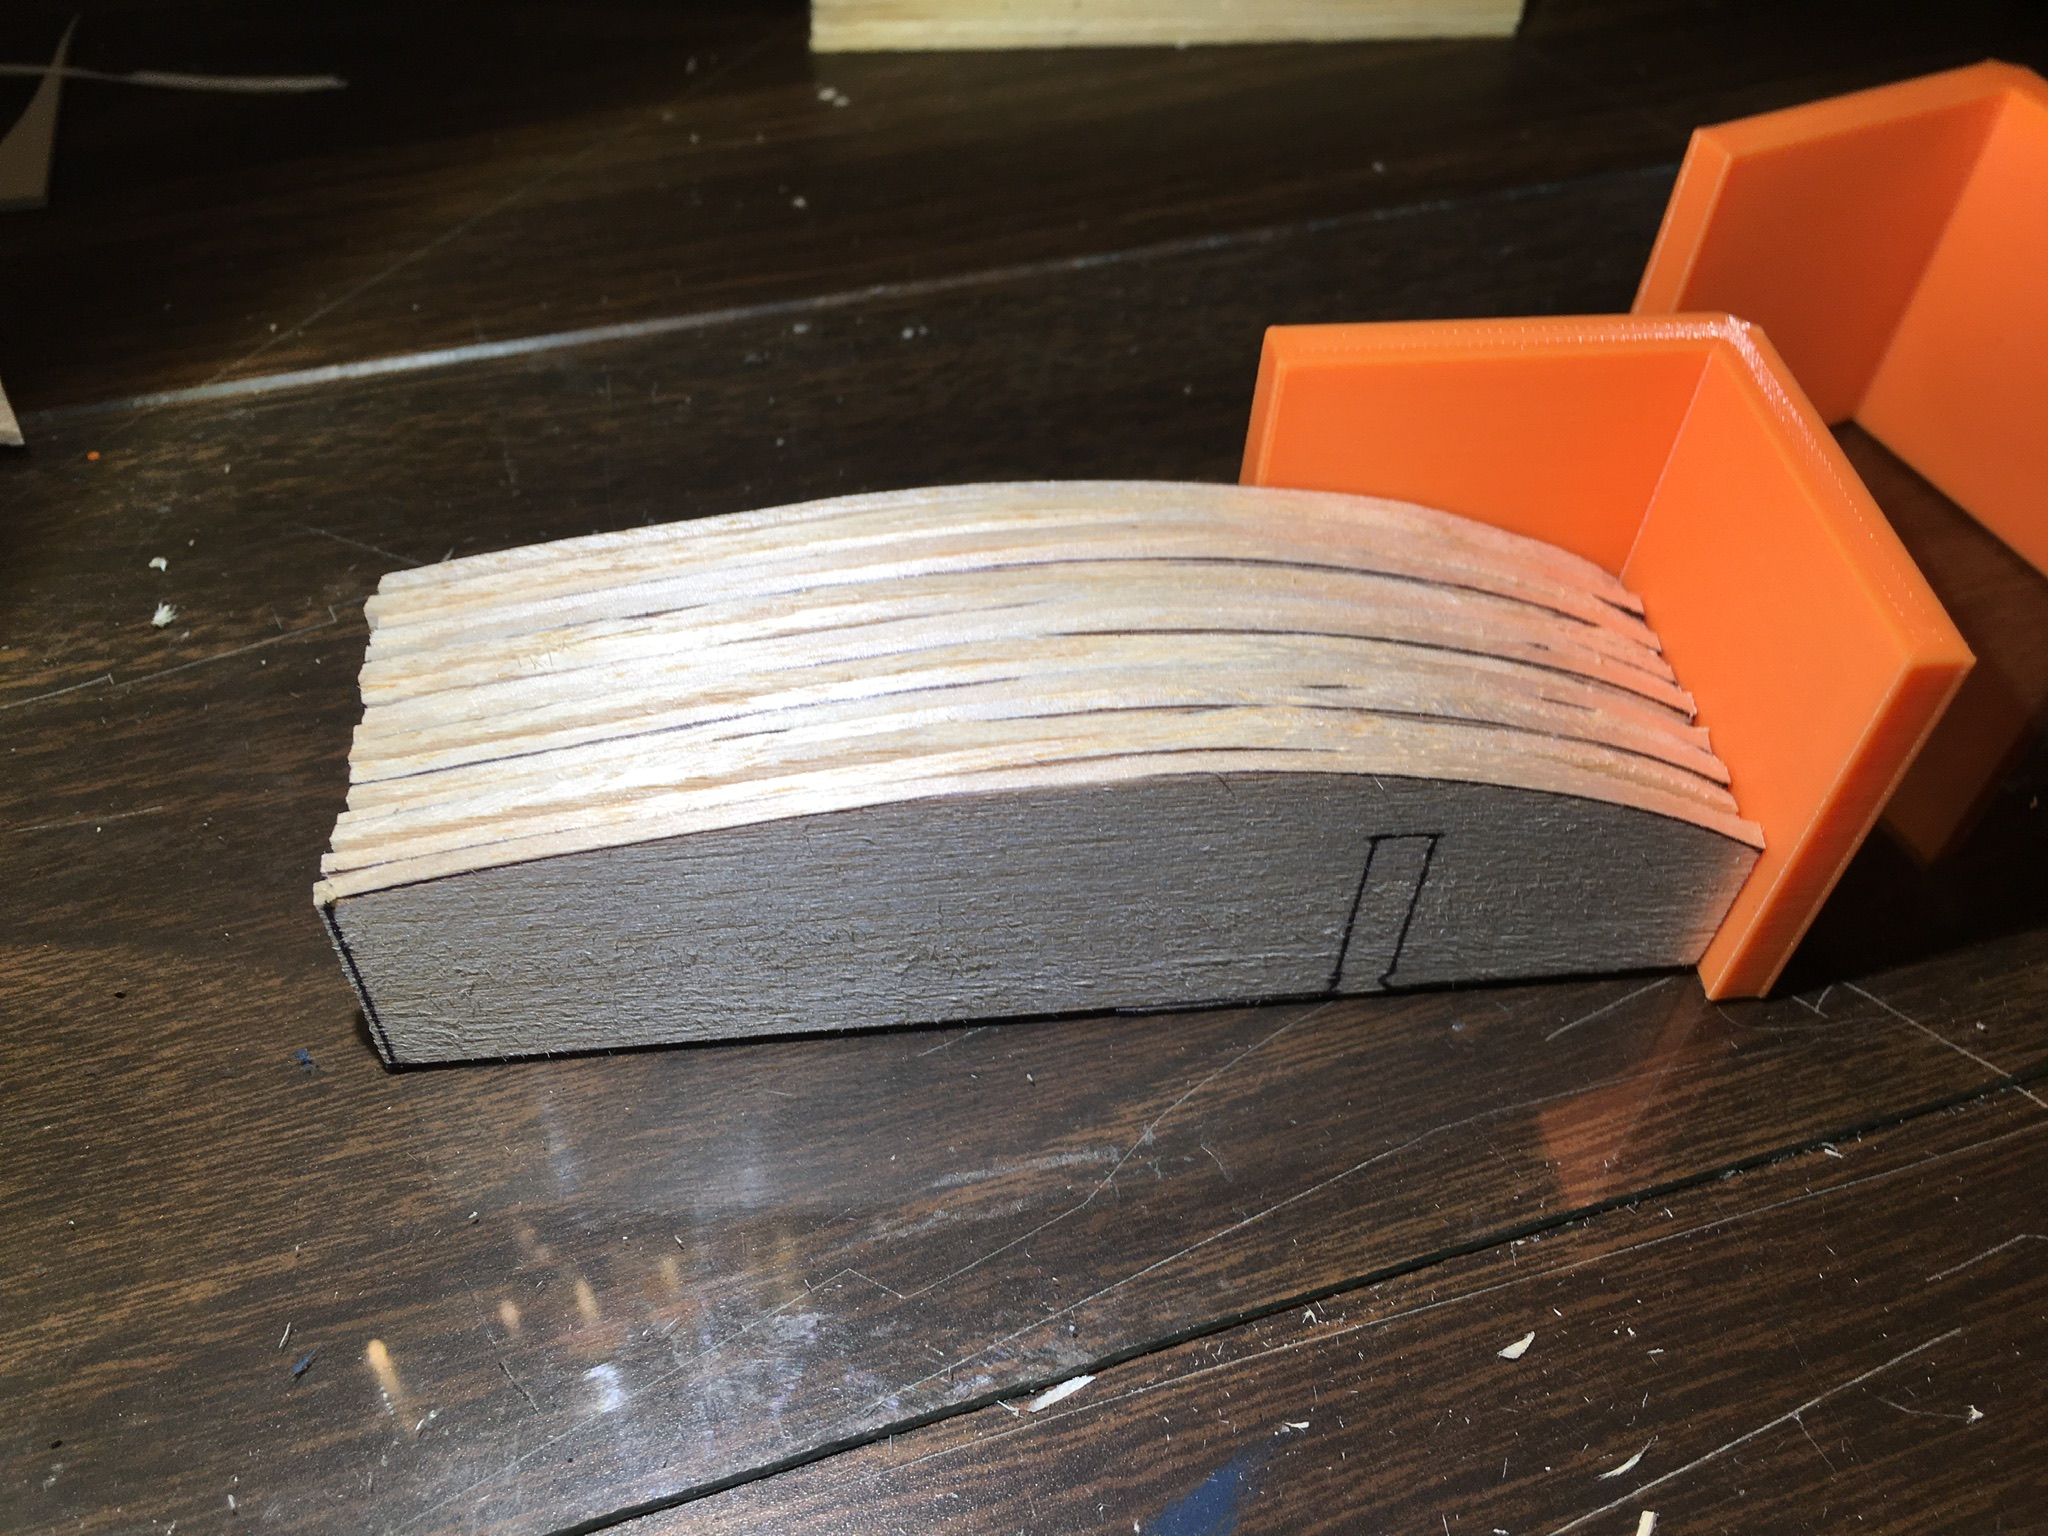
Below, I’m preparing ribs for gang-sanding. I want them as perfectly stacked as possible on the leading edge and bottom, so I’m using that right-angle-corner doodad and the table top to align before pinning. Then they get dressed up along the curved edges and trailing edges with a sanding bar. I don’t go crazy trying to make them all perfectly identical, but get rid of humps and bumps and obvious defects.

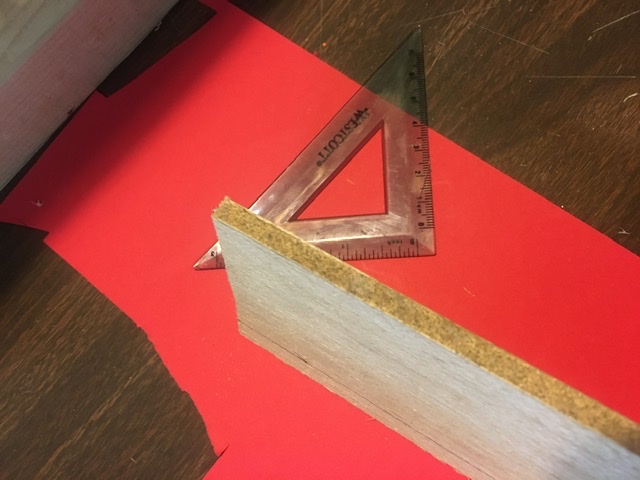
More to come, but I can’t find the pictures showing how I do spar notches. Edit: here are some quick photos after the fact. First, while still pinned from gang sanding, shallow v-notches are cut at the spar notch location on the scroll saw. Then, I use this tool:


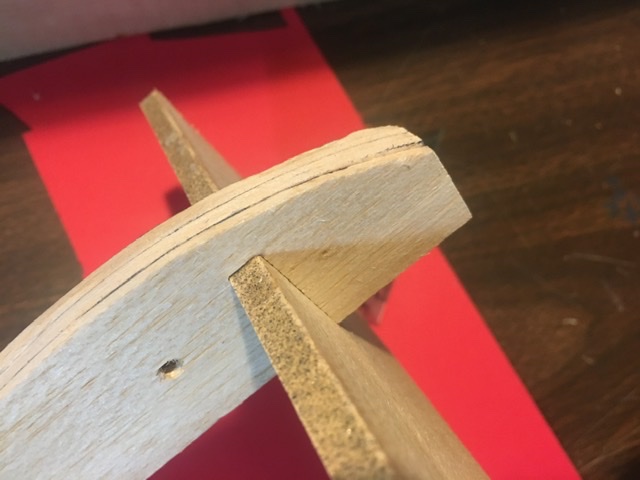
It’s a piece of sheet of the same thickness as the spar, with sandpaper glued along the edge. It makes quick work of a nice tight-fitting spar joint that is uniform to all the ribs. I use a piece of actual spar stock to check the depth.
I should add that balsaworkbench.com has a laser-cut short kit available for this model. It is very well-priced, and I can attest that his products are top notch! If I hadn't had all the wood I needed, I would have had him send me all these pieces cut out for me.
It is my hope to inspire others to build something to fly, not necessarily with balsa. I think if a person enjoys flying model airplanes, then the attempt to build one should be made at least once, because I want everyone else to experience the peculiar satisfaction that can be found in flying something that was self-constructed.
Back in the day, successful builders and pilots existed at about a 1:1 ratio. “Build threads” existed in the form of print magazine construction or kit review articles. Photographs of the important stuff were small, grainy, greyscale, and lacked sufficient detail to be helpful.
Most internet build threads I see tempt me to be secretly ashamed of myself at my lack of skill. Hopefully, as I truthfully depict my journey through this build, I will learn a lot from those who chime in, but I want anyone who doesn’t think they have “what it takes” to perhaps reconsider. I am about to show you how I make mistakes, fix them, ignore them, miss them entirely, and still end up with an okay-looking, fine-flying machine.
My choice for this project came about because I wanted a rickety-looking 1918-1925 era biplane with docile but sporty flying characteristics that could feasibly use a currently unemployed Saito .45 MKII for power. Having recently completed one of Fred Reese’s later designs, a Cloud Dancer 40, his Golden Oldie seems a natural choice.
I have some personal self-imposed challenges for this build, mostly to reduce expense or increase efficiency:
1.) No physical printed copy of full-size plans. Accomplished by importing PDF into Gimp or Inkscape and using the measuring tool to help plot major dimensions like rib spacing, or to trace templates for printing onto letter paper or card stock.
2.) Keep a log of time and materials used for the build. I am working from a stock of balsa that I have on-hand, and I would like to maintain the size of the hoard, so I need to keep track of what goes under the knife.
3.) Do not let the build space expand beyond the 8-foot folding table. If the extra table comes out, it gets put away within 24 hours. (Prevent “project sprawl” and “project blending“ with other unrelated projects.)
4.) Stop and clean up every 1 hour of build time in anticipation of interruption. If interrupted while building, take 10 seconds to leave my future self a note, no matter how seemingly mundane. Sometimes what seems like a quick interruption ends up lasting weeks!
5.) Take lots of pictures as the project progresses and post them on the internet.
****
Here’s the first photo I took. I’ve generated 3D printed templates for the wing ribs, which was sort of worth the trouble. I’m tracing and cutting wing ribs:

Also visible in the picture is F-2. I failed to photograph the process. I traced it on a “new layer” in Inkscape (freeware) and printed it on letter paper. I roughly cut the template out with scissors, pasted it onto lite-ply, and cut it out on the scroll saw.
Below, I’m preparing ribs for gang-sanding. I want them as perfectly stacked as possible on the leading edge and bottom, so I’m using that right-angle-corner doodad and the table top to align before pinning. Then they get dressed up along the curved edges and trailing edges with a sanding bar. I don’t go crazy trying to make them all perfectly identical, but get rid of humps and bumps and obvious defects.

More to come, but I can’t find the pictures showing how I do spar notches. Edit: here are some quick photos after the fact. First, while still pinned from gang sanding, shallow v-notches are cut at the spar notch location on the scroll saw. Then, I use this tool:


It’s a piece of sheet of the same thickness as the spar, with sandpaper glued along the edge. It makes quick work of a nice tight-fitting spar joint that is uniform to all the ribs. I use a piece of actual spar stock to check the depth.
I should add that balsaworkbench.com has a laser-cut short kit available for this model. It is very well-priced, and I can attest that his products are top notch! If I hadn't had all the wood I needed, I would have had him send me all these pieces cut out for me.
Last edited:


