Matchless Juka foamie from Ross foamboard

rcfred

Member
Our local Wal-Mart finally started stocking the 88-cent Ross foamboard, so I picked up some sheets to try out. I decided to take off the paper and build a 3D profile plane. I found a cool design by a forum user called "Matchless" on flyinggiants.com. It's based on the JUKA, a full-scale aerobatic prototype designed by Lithuanian pilot Jurgis Kairys in 2004 and still flying today:
(photo by Flicker user joolsgriff, March 2019)

The plans I'm working from can be found here: https://www.flyinggiants.com/forums/attachment.php?attachmentid=80089&d=1198020057

The original plans were for an indoor plane made with 3mm Depron, with 33-inch wingspan and an all-up weight on the order of 145g. The Ross foamboard is 5mm and I don't have an indoor space, so I beefed everything up and went for a heavier outdoor build. The current version comes to 185g including a 2s 450mAh battery. Here's a photo:
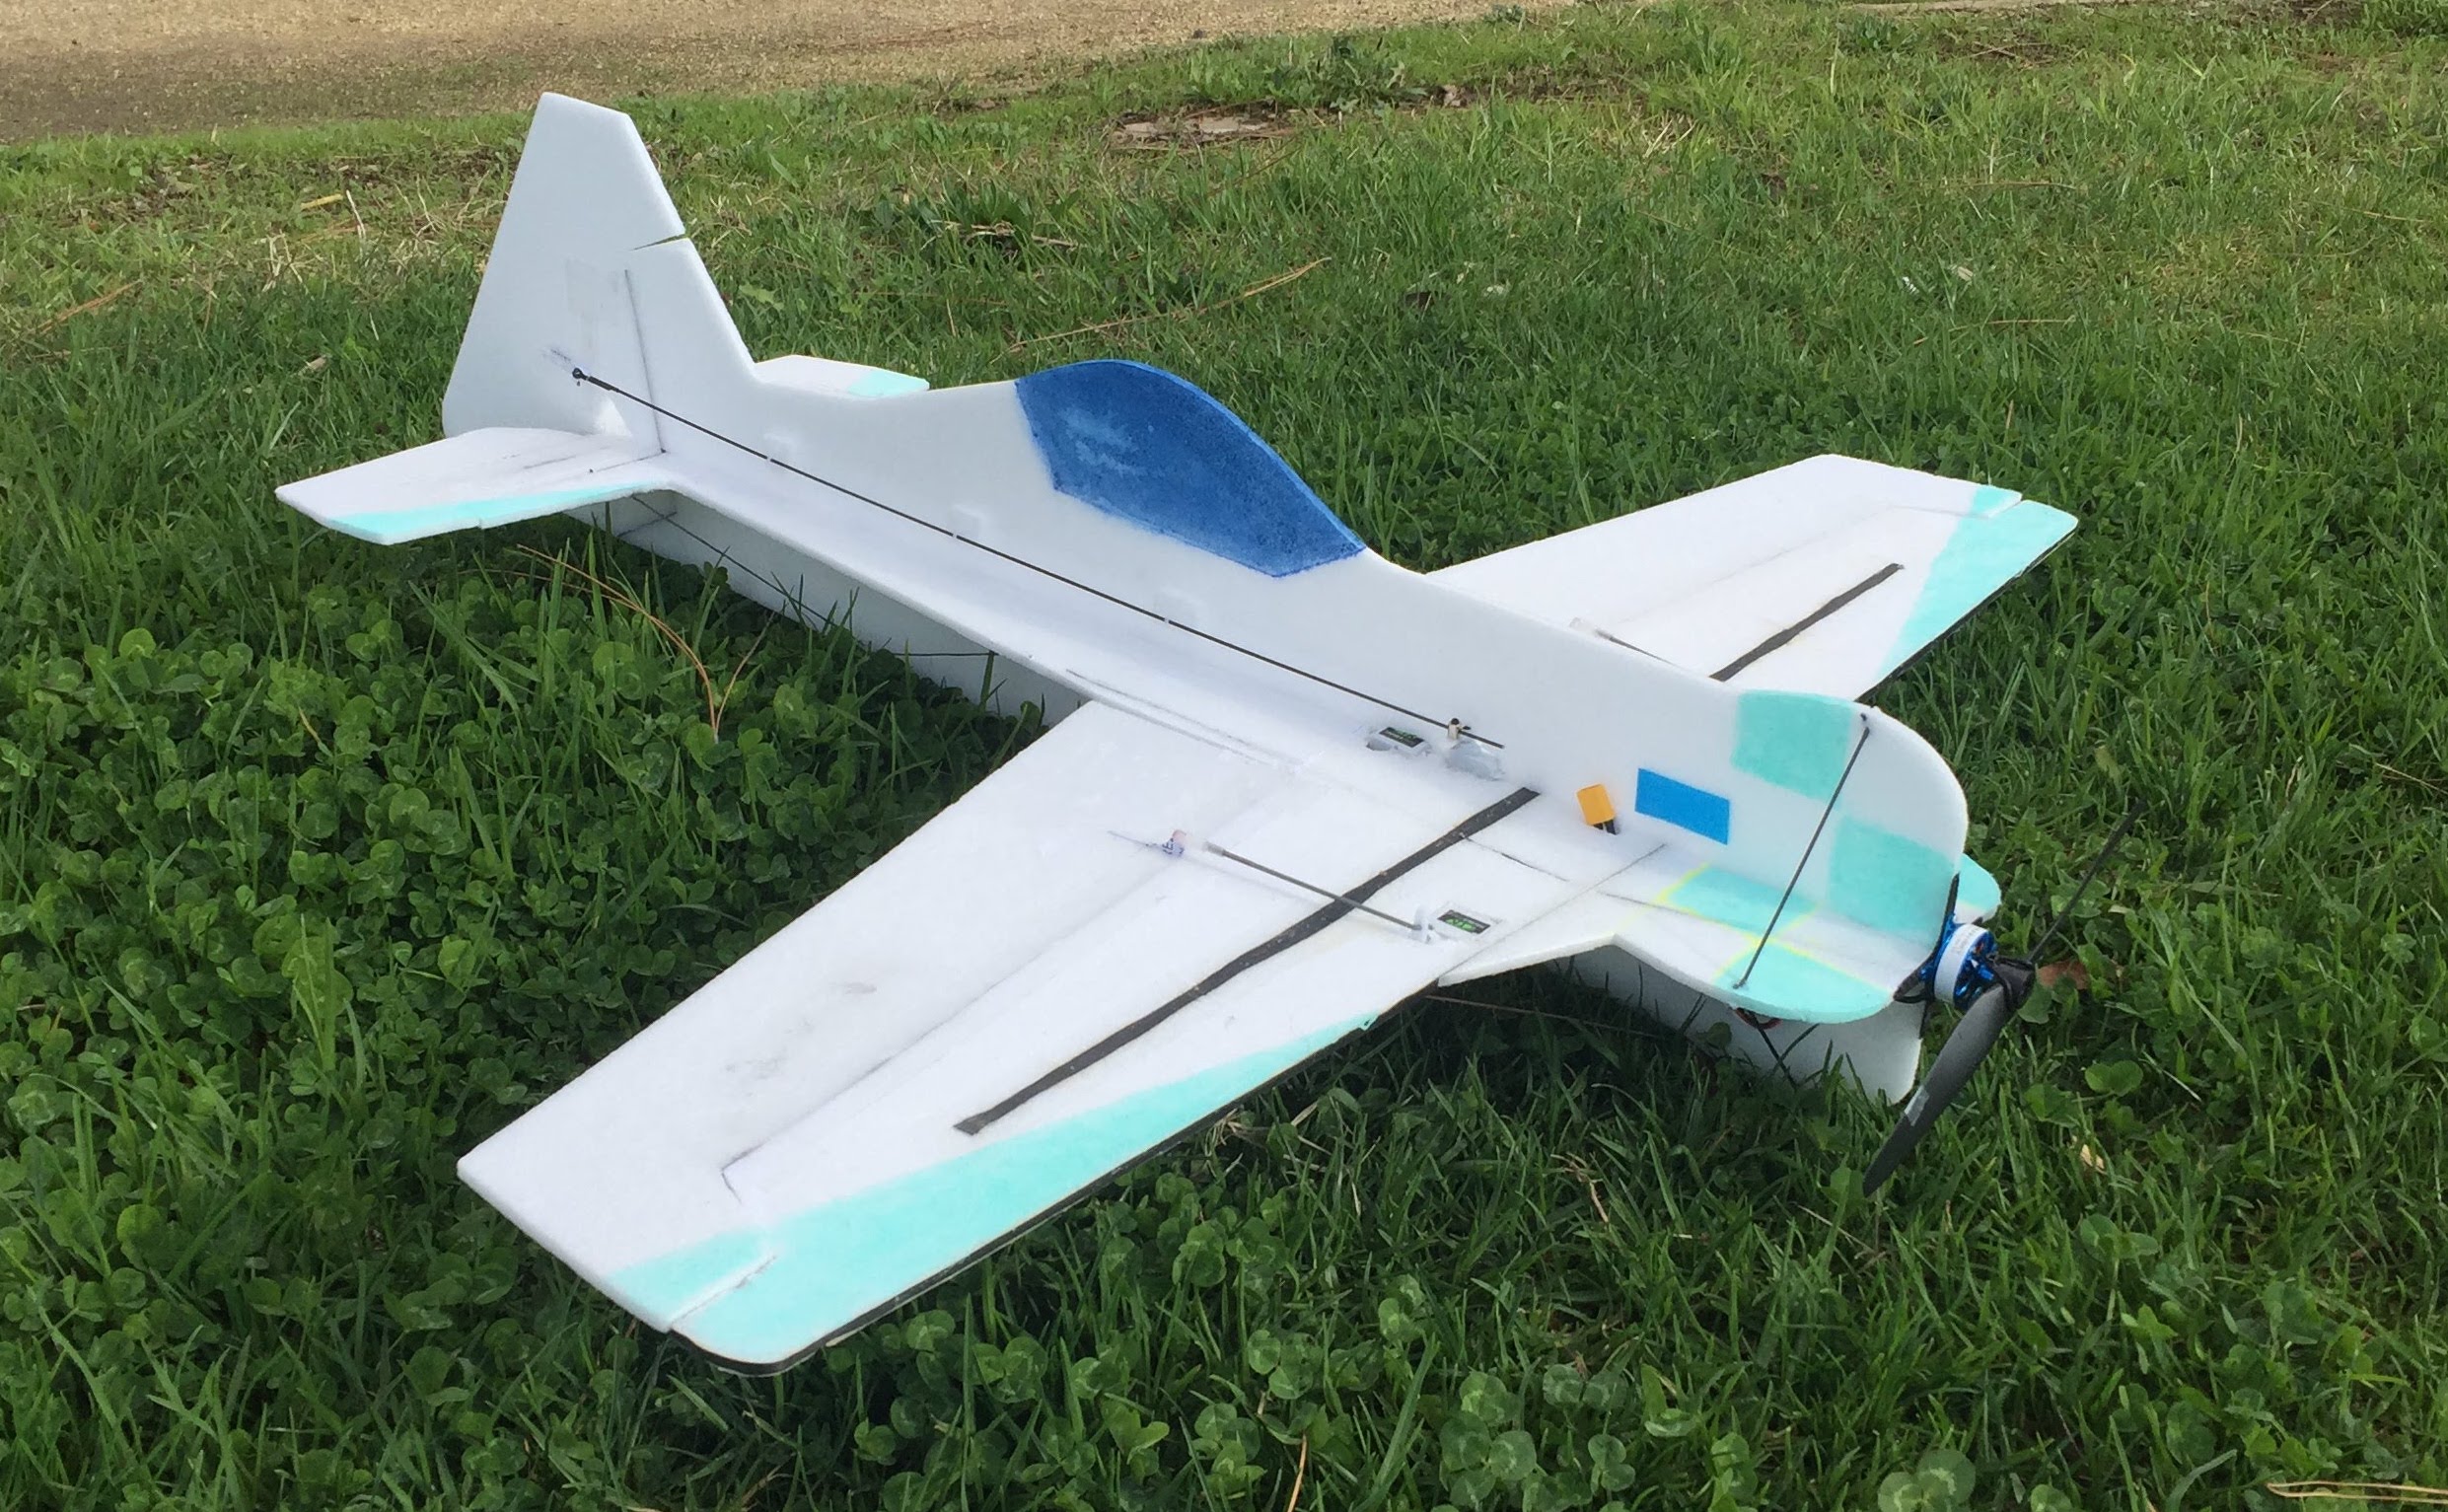
IMG_7979.JPG


The airframe is something of a work in progress at the moment. Results with the Ross foamboard have been mixed. On the positive side, it's very light and dimensionally consistent with the paper removed, unlike the wavy, unevenly-thick foamboard that Adams has been turning out in recent years. But unfortunately the Ross foam is quite floppy. It ends up needing as much carbon reinforcement as EPP, but without the durability of EPP. I decided to forge ahead anyhow. I figure once this one crashes, I can take the electronics and carbon bits and cut a new airframe out of 5mm EPP.

More to come!
 

Matagami Designs

Master member
Our local Wal-Mart finally started stocking the 88-cent Ross foamboard, so I picked up some sheets to try out. I decided to take off the paper and build a 3D profile plane. I found a cool design by a forum user called "Matchless" on flyinggiants.com. It's based on the JUKA, a full-scale aerobatic prototype designed by Lithuanian pilot Jurgis Kairys in 2004 and still flying today:
(photo by Flicker user joolsgriff, March 2019)

The plans I'm working from can be found here: https://www.flyinggiants.com/forums/attachment.php?attachmentid=80089&d=1198020057

The original plans were for an indoor plane made with 3mm Depron, with 33-inch wingspan and an all-up weight on the order of 145g. The Ross foamboard is 5mm and I don't have an indoor space, so I beefed everything up and went for a heavier outdoor build. The current version comes to 185g including a 2s 450mAh battery. Here's a photo:
View attachment 152193

The airframe is something of a work in progress at the moment. Results with the Ross foamboard have been mixed. On the positive side, it's very light and dimensionally consistent with the paper removed, unlike the wavy, unevenly-thick foamboard that Adams has been turning out in recent years. But unfortunately the Ross foam is quite floppy. It ends up needing as much carbon reinforcement as EPP, but without the durability of EPP. I decided to forge ahead anyhow. I figure once this one crashes, I can take the electronics and carbon bits and cut a new airframe out of 5mm EPP.

More to come!

Awesome build. I avoid removing the paper from the Ross brand it never seems to come off as nicely as DTFB. I agree the waves of DTFB is annoying. I wonder if the new maker foam is wavy or more smooth like the Ross brand?
 

rcfred

Member
Awesome build. I avoid removing the paper from the Ross brand it never seems to come off as nicely as DTFB. I agree the waves of DTFB is annoying. I wonder if the new maker foam is wavy or more smooth like the Ross brand?

I hope so! If Adams can get the waves out, the new maker foam would make a great substitute for Depron. Getting the paper off the Ross foamboard was definitely frustrating. I went through quite a few pieces of scrap foam (and about 1/3 of the actual airframe) figuring out how to get the paper off reliably. The process I eventually settled on was:
1. Hold the foamboard under the kitchen sink until the paper is thoroughly wet, all the way through.
2. Let the paper dry completely. Air-drying works, or you can use a heat gun if you're in a hurry.
3. Slowly peel off the dry paper, bending the foam away from the paper slightly as you peel. This gets nearly all the paper off cleanly.
4. For the remaining bits of paper, get them wet and rub them off with your thumbs.
 

rcfred

Member
If you look closely at the photo above, you might notice that the carbon reinforcement actually wraps around the wingtips:
IMG_7979_cropped.JPG


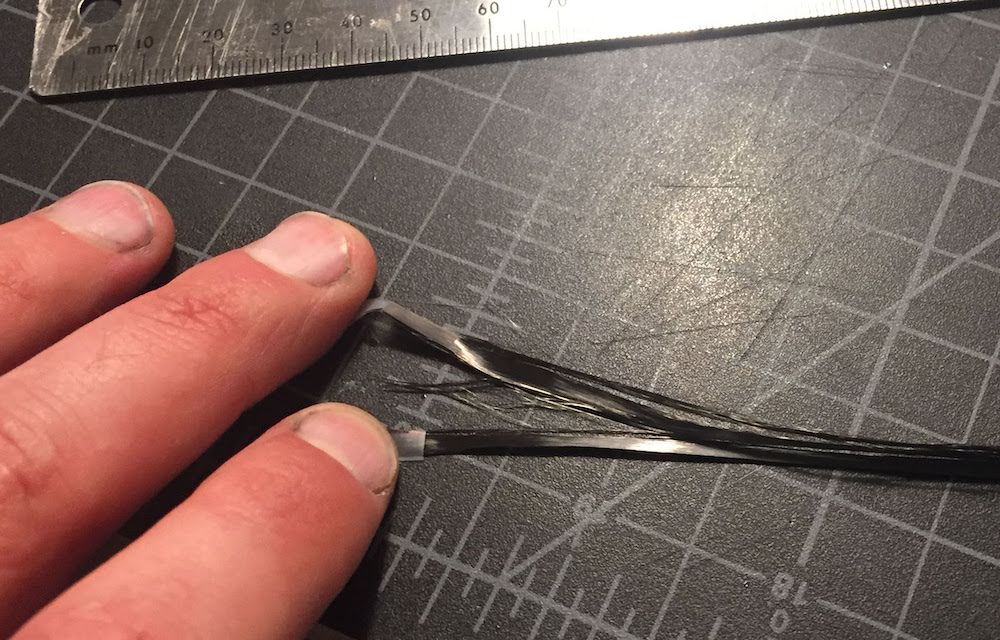
Matchless's plans call for gluing carbon strips to the leading edges of the wings, but I didn't have any carbon strips. What I did have was a roll of 24k carbon tow and some laminating epoxy. I cut off a length of 24k tow and split it into four pieces of 6k tow (24k tow looks like black tape, but it's actually made of about 24,000 tiny carbon strings):
IMG_7693.JPG


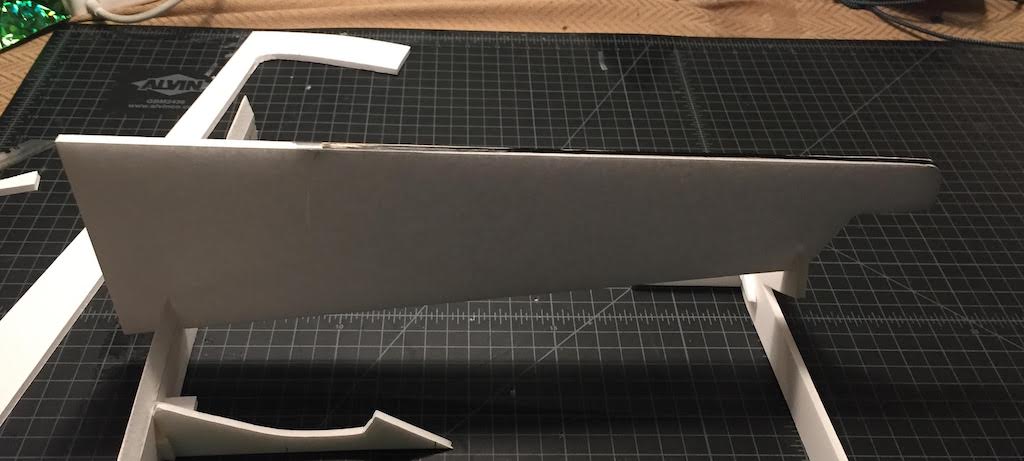
Then I propped up a wing with some scrap foam and taped one of the 6k strands to the leading edge:
IMG_7696.JPG

IMG_7694.JPG


Carbon fiber needs pressure to cure properly. I made the second half of a mold from the foam that I had cut the wing from. I lined it with tape to keep the carbon from sticking:
IMG_7699.JPG


Then I applied some laminating epoxy to the carbon tow and taped the mold in place:
IMG_7707.JPG


I left the paper on the foam throughout the process so that it would absorb the excess epoxy. Once the epoxy had set up, I glued the two wing halves together. Then I used a third piece of carbon tow to join the two leading edges together, with the front section of the fuselage applying pressure:
IMG_7712.JPG


Once this additional carbon had set up, I had a fully reinforced leading edge, all the way to the curved wingtips.
 

rcfred

Member
The plans also call for the rear of the fuselage to be braced with 0.8mm carbon rods. I didn't have any 0.8mm carbon rods, but I did have my roll of carbon tow, some clear 1mm heat shrink, and a package of craft sticks. I had recently read an article (https://www.pauzuolis-rc.com/how-to-tips/make-shaped-carbon-fiber-rods) about molding carbon rods for F3P airframes, so I thought I'd try and make my own bent carbon rods for the tail support.

The normal procedure is to tie end of the carbon tow to some Kevlar thread, then use the thread to pull the carbon tow through the heat shrink. I didn't have any Kevlar thread, so I superglued the end of the carbon tow to a piece of monofilament fishing line and used the fishing line to thread the carbon through the tube. I pulled it through once to verify that everything fit, then I wetted out the carbon with epoxy and pulled it through again. I'm afraid the process doesn't photograph terribly well, what with the clear fishing line and the clear tube and the clear plastic wrap and the black carbon, but here's what I managed to take:
IMG_7926.JPG


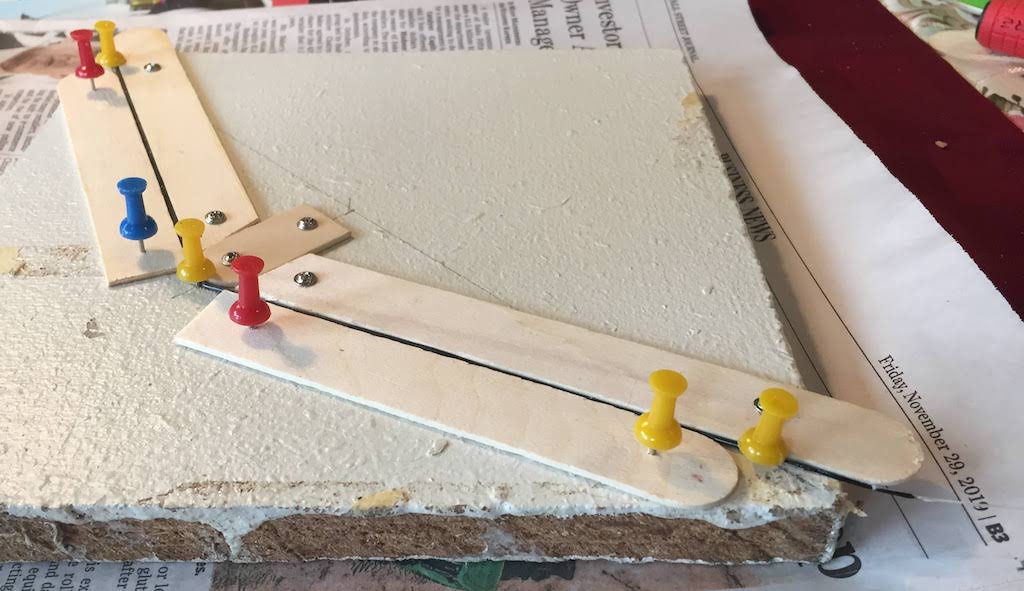
Next I pinned the heat shrink tube to a jig I had made with the aforementioned craft sticks and hit the heat shrink with a heat gun:
IMG_7928.JPG


I left the whole thing in the jig until the epoxy had set up, then I used a razor blade to slice the heat shrink tube off the carbon. This process left me with a roughly 0.8mm carbon rod with a bend in it. I repeated the process, but then I ran out of heat shrink tube. Then I used the two bent rods to reinforce the tail:
IMG_7948.JPG

IMG_7987.JPG


The tail could use another set of stiffeners, but those will have to wait for the next shipment of heat shrink tube to arrive.
 

rcfred

Member
The plans called for reinforcing the wings with 0.8mm carbon trusses and no spar. I decided to do a more conventional spar since I was doing a heavier build that would be belly-landing on grass a lot. The spar consists of three pieces of 12k carbon tow per side: a long one, a medium one and a short one:
IMG_7796.JPG

I stacked the lengths of carbon tow on top of each other to form a tapered spar whose thickness ranged from 36k strands at the center to 12k strands at the ends:
IMG_7798.JPG

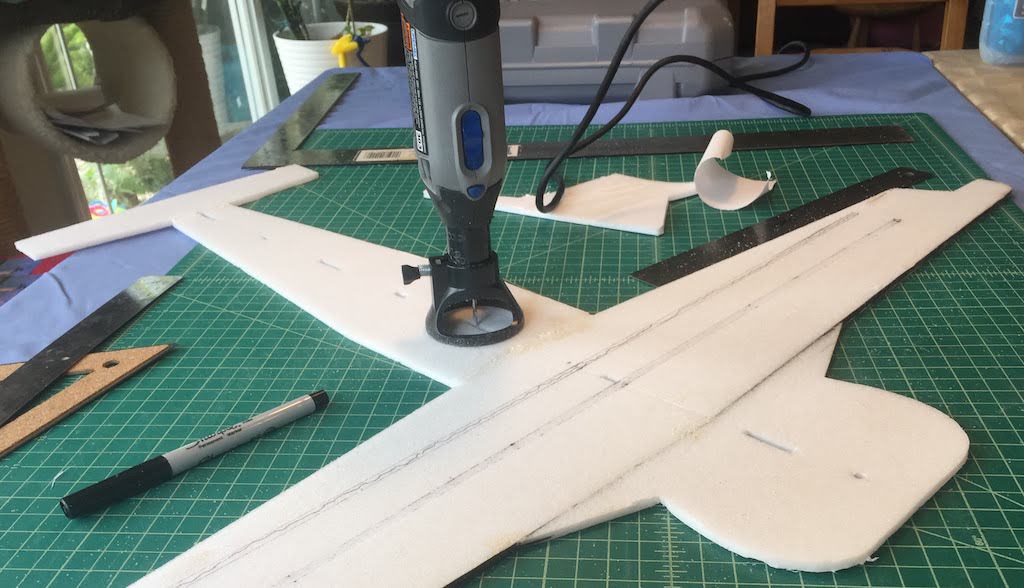
I started by marking the location of the spar on the top and bottom of the wing, then I routed out a very shallow channel into the surface of the foam with a Dremel:
IMG_7790.JPG

IMG_7791.JPG


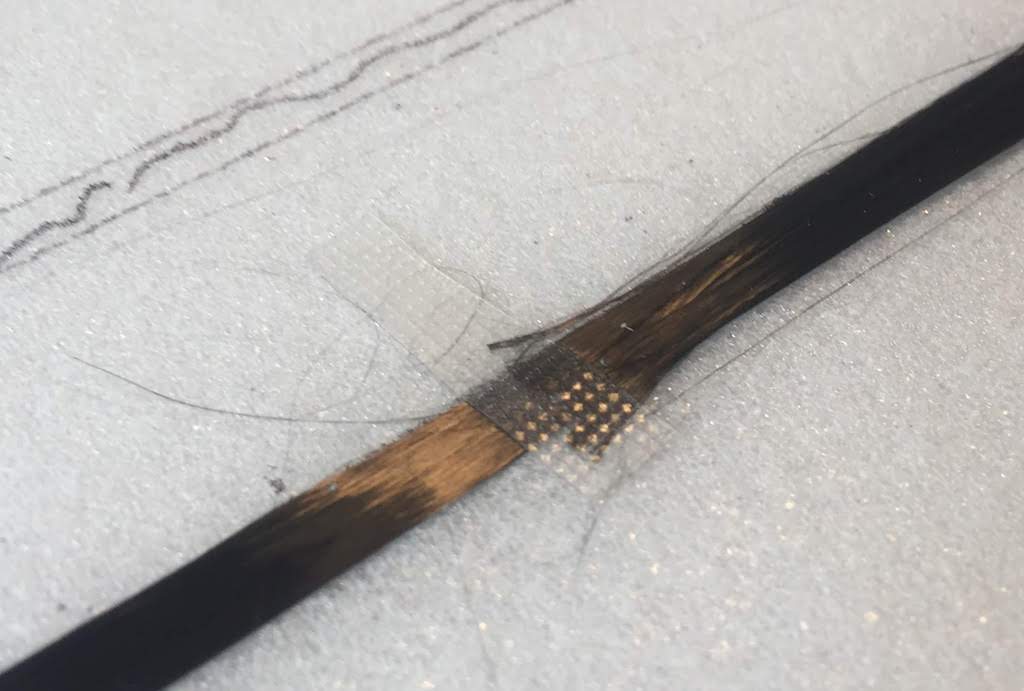
Then I tacked the carbon tow in place using small bits of perforated tape:
IMG_7799.JPG


The perforated tape came from the pharmacy department at Wal-Mart (where else?). The package it comes in looks like this:
IMG_7802.JPG

This tape is extremely useful for laying up carbon or glass fiber, because the tape itself doesn't stick to the finished part, but excess epoxy flows right through the perforations. The "pros" use something similar in sheet form when vacuum bagging carbon fiber parts to a mold.

Once the carbon was tacked in place, I wetted it out with epoxy:
IMG_7803.JPG

Then I put down a layer of perforated tape on top:
IMG_7800.JPG

Here you can see how the excess epoxy bleeds through the perforations in the tape:
IMG_7806.JPG

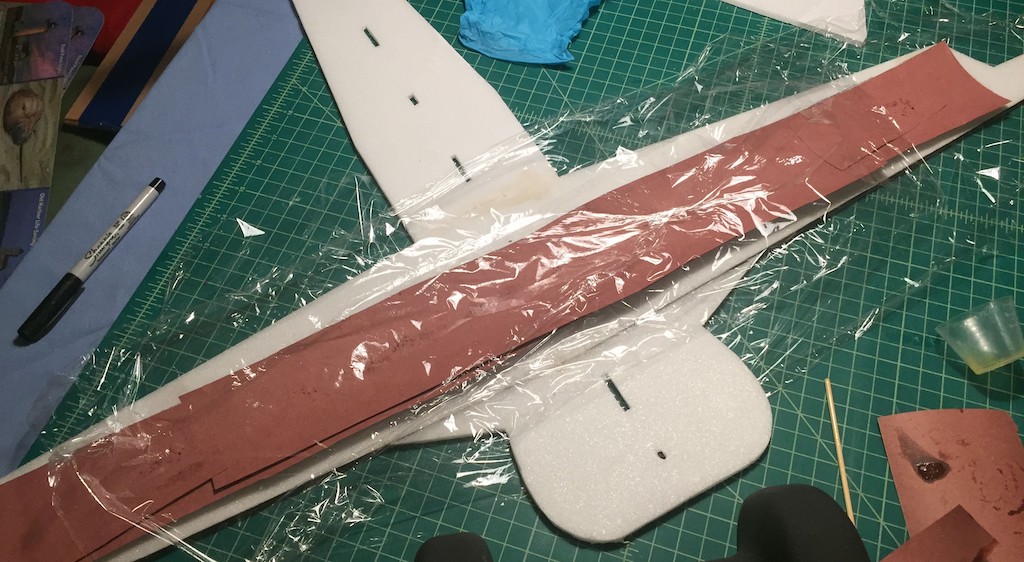
To absorb this excess, I put two layers of rosin paper on top of the tape, followed by a layer of plastic wrap:
IMG_7810.JPG

Then I weighed everything down with a board and some weights and let the epoxy set up:
IMG_7809.JPG


Once the epoxy had cured, it was time to peel off the layers, one by one. This is the most satisfying part of the process.
IMG_7812.JPG

IMG_7814.JPG
 

rcfred

Member
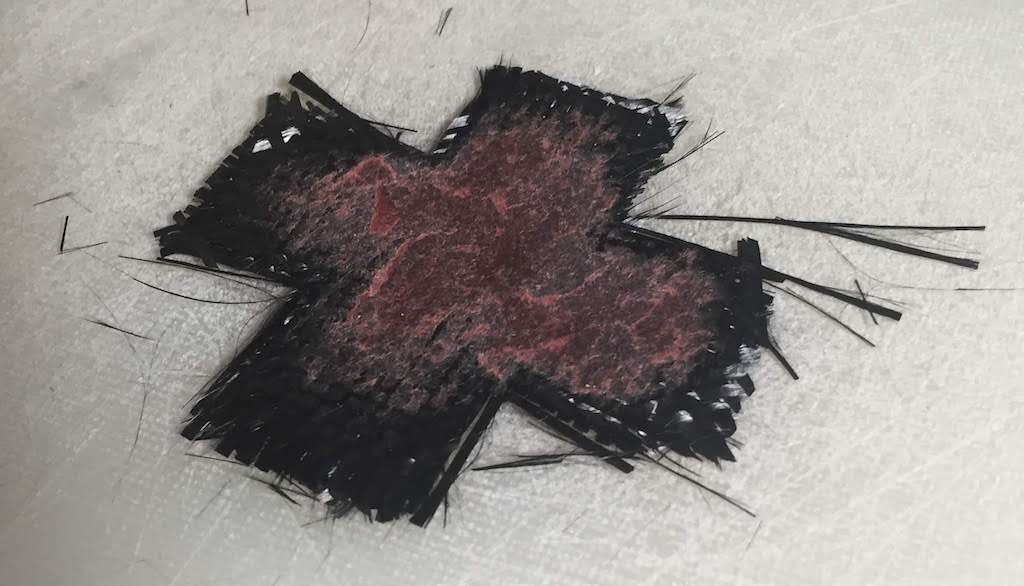
The original plans called for embedding an inch of square wooden dowel in the nose as a motor mount. That doesn't work so well for modern brushless motors, so instead I made an X mount out of carbon fiber. I started by laminating 5 sheets of 6k carbon cloth into a rough "x" shape:
IMG_7951.JPG

IMG_7953.JPG

IMG_7958.JPG

I marked the centerlines and drilled holes for the motor shaft and motor mounting holes:
IMG_7962.JPG

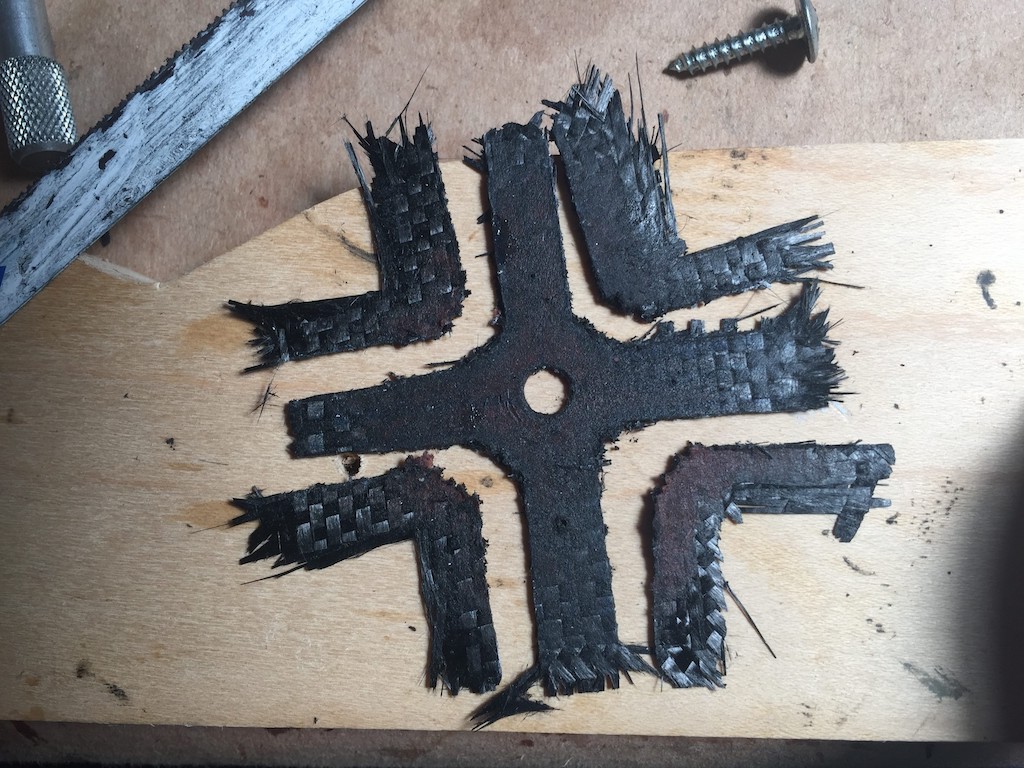
Then I further roughed out the shape with a coarse hacksaw blade:
IMG_7966.JPG


SAFETY NOTE: Cutting or shaping carbon fiber produces conductive, carcinogenic dust. I covered the part and my tools with lots of mineral oil to keep the dust from getting into the air.

I finished the part up with hand files under running water. Final weight was 1.1g.
IMG_7968.JPG