BATTLEAXE
Legendary member
I am fairly new to the model aviation hobby. I seem to be a better builder then a flyer for the fact that I have lawn darted quite a few DTFB planes. Some were my own designs and half a dozen or so FT planes as well. The University of YouTube has been a great help, along with the majority of my new found Knowledge from the FT community (I think I've seen almost every episode from FT).
Anyway I built the Spitfire using the plans from Dave The Swede, and from the build video it seemed it was a plane that was kind of quickly put together with less attention to the build and more to the flight characteristics. Given the reason I wanted to build this as my first large warbird was for the models forgiving flight style I made some nose mods for my own flight style of crashing on a regular basis.
In the build video and with the plans there wasn't much in the nose for protection from crashes, which is where most of my self induced damage comes from. The nose seemed floppy and weak compared to what could be done and Dave did mention in the video that any modification suggestions are welcome so here it is.

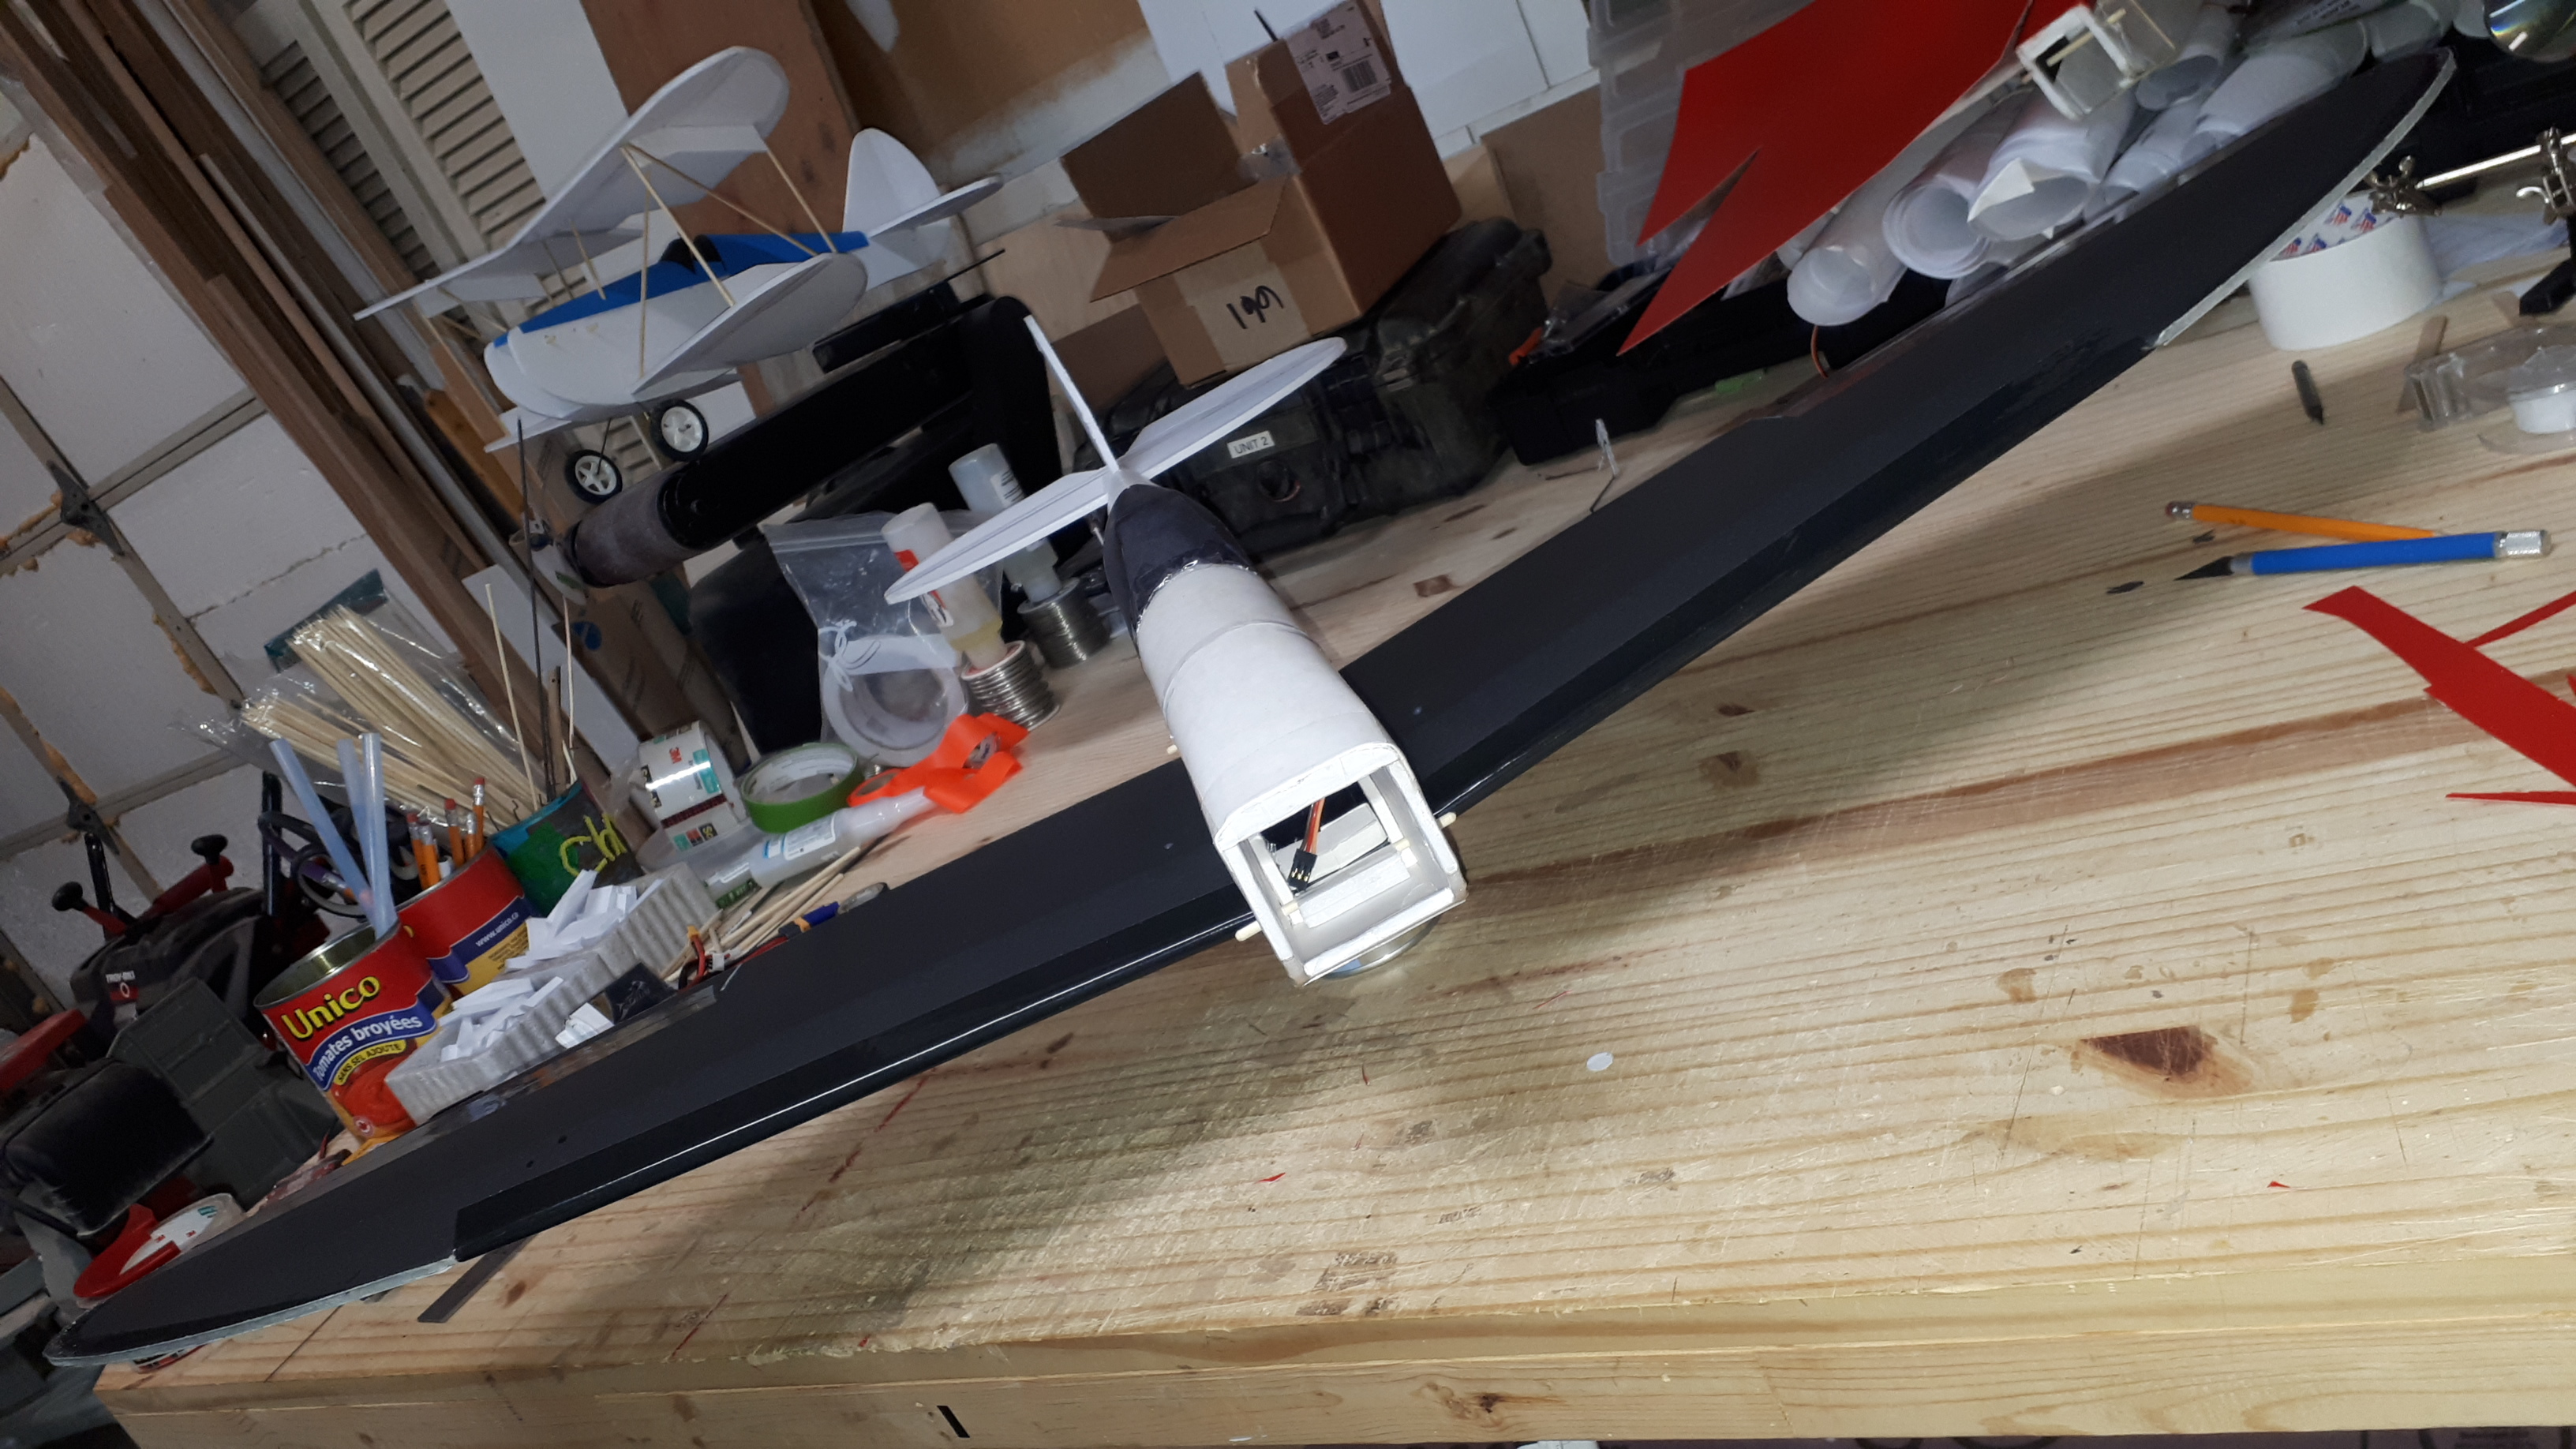
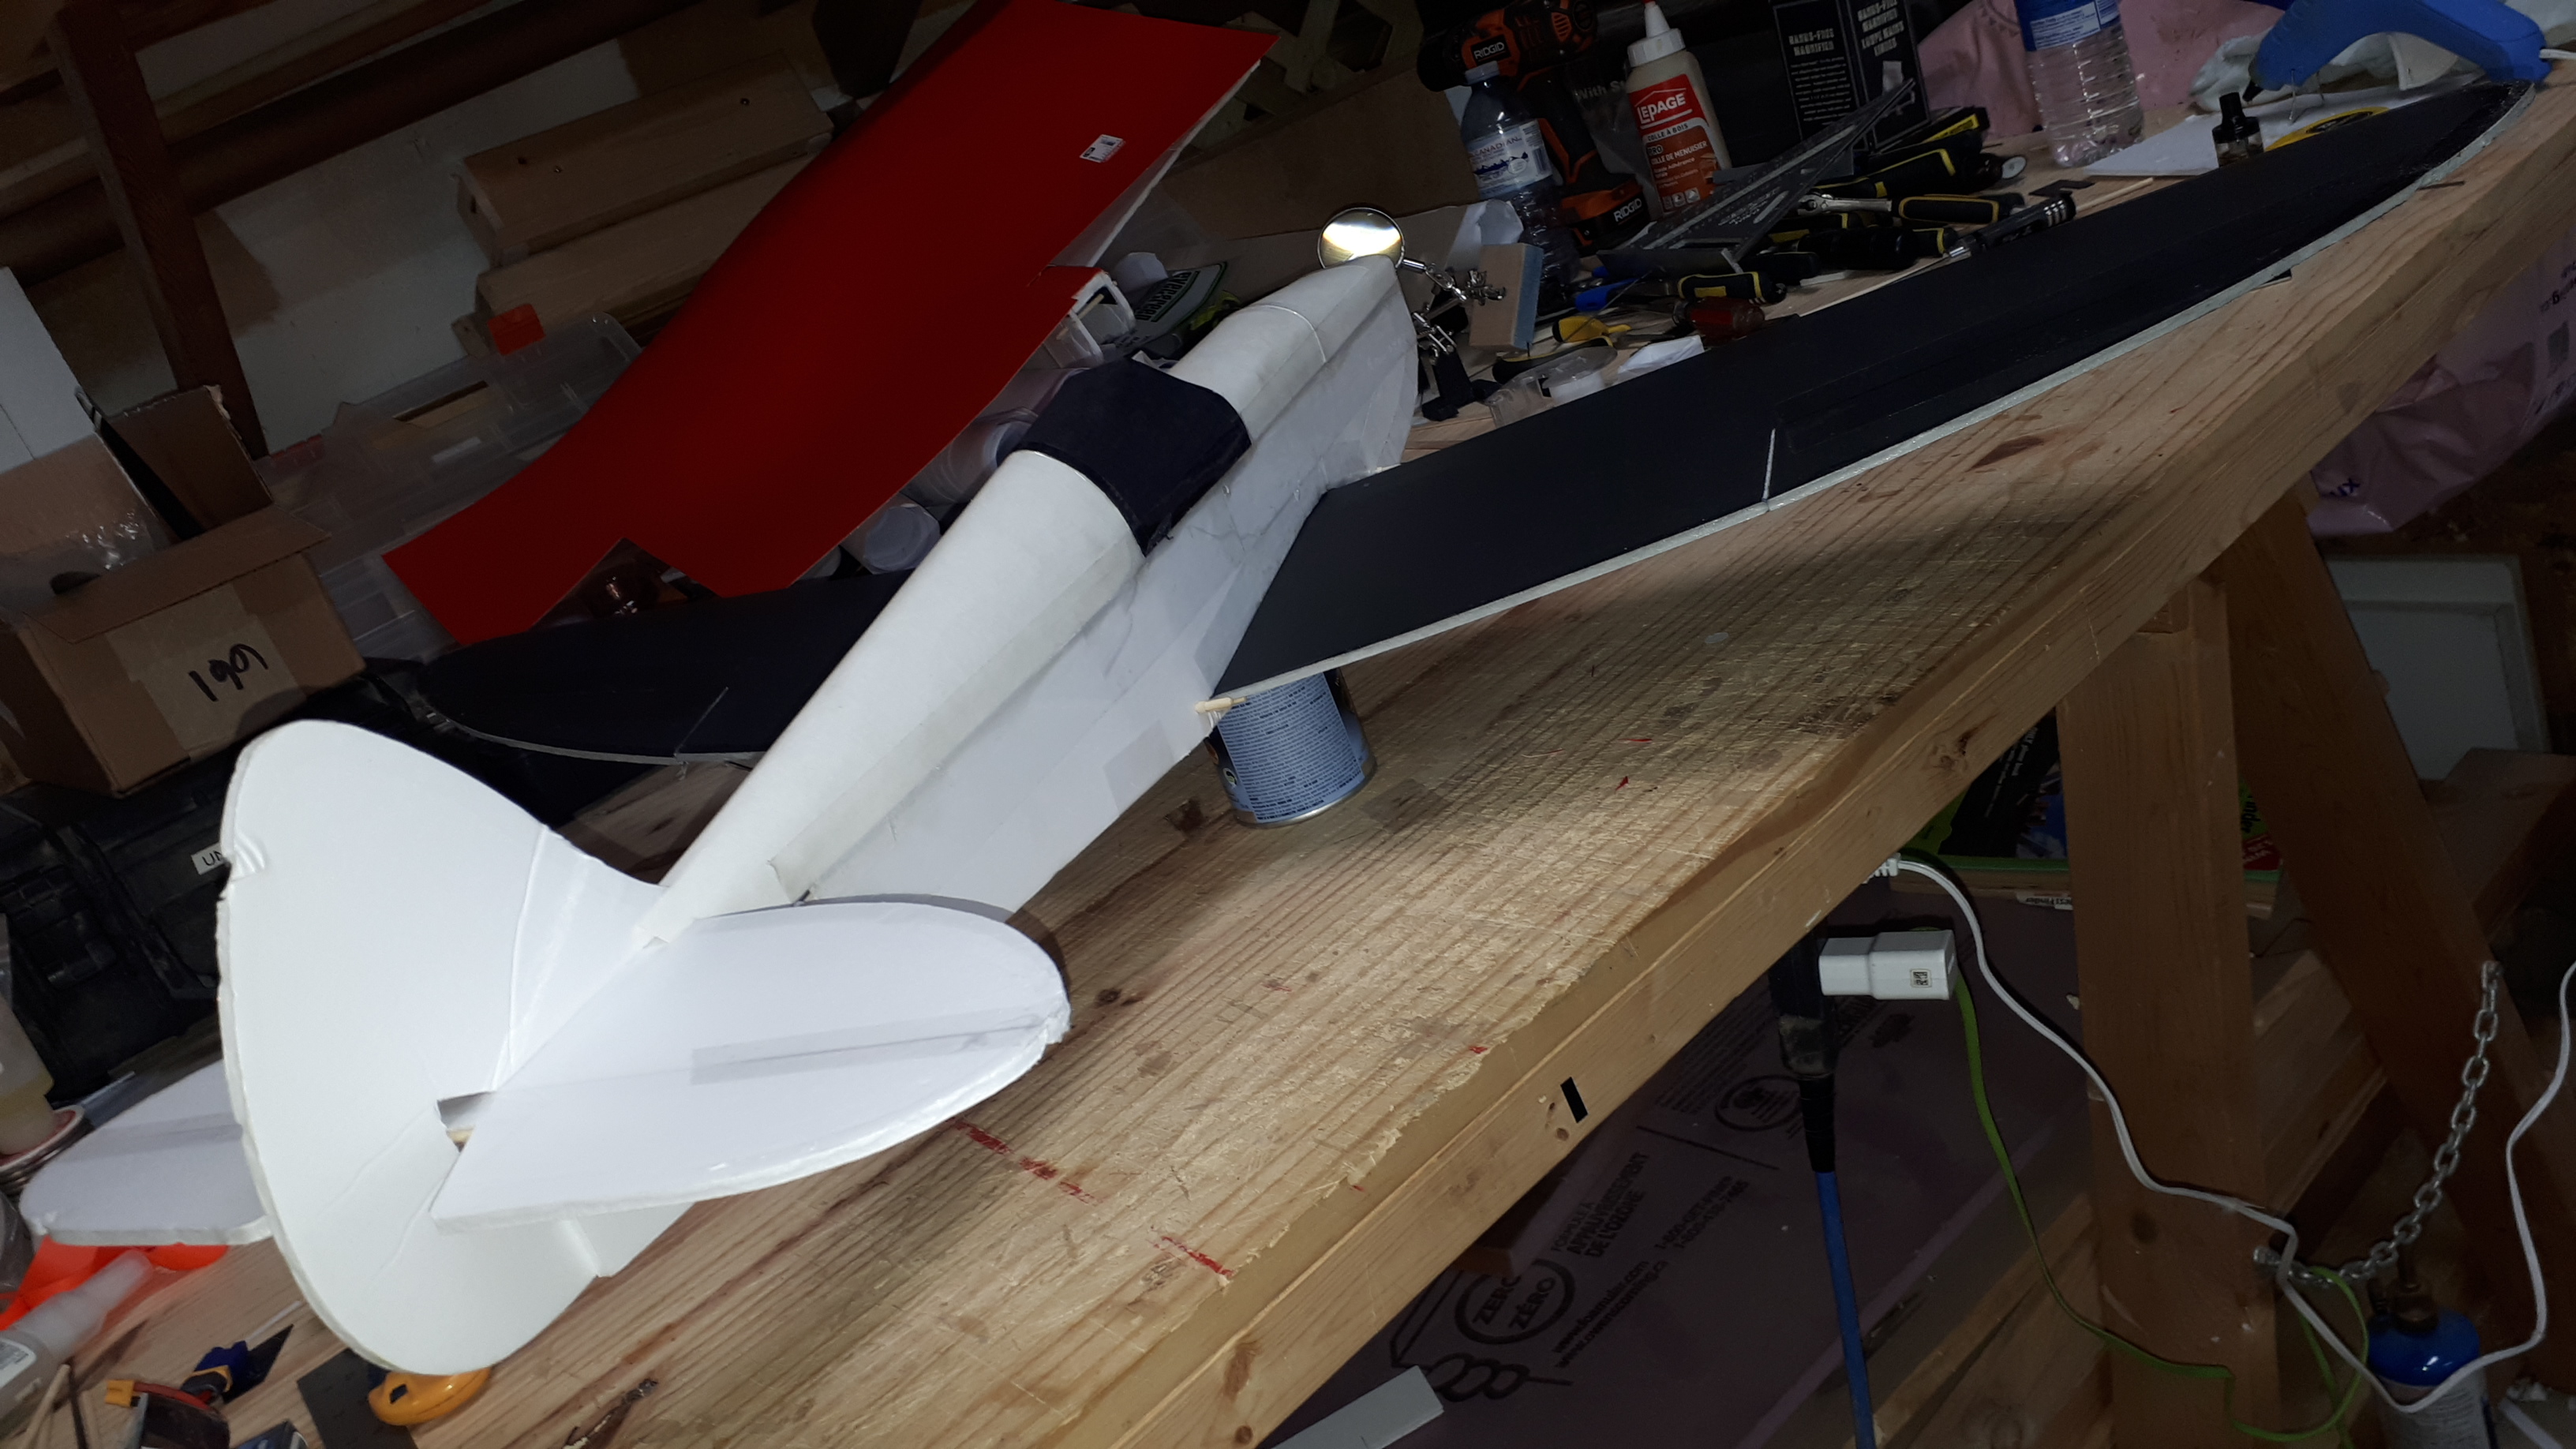
With the front end of the nose being open to the wind and elements (dirt, grass and foreign debris) I wanted to close it off with a stronger more streamline design. On the top of the fuselage I added an extra plate of DTFB that extended to the very front and covered up the open !.25" where the nose profile slightly slopes down. On that same added plate I did a C fold that same 1.25" back up and over the top front for added strength, plus that same piece made shaping the curve for the nose using 100 grit sandpaper. This was something Dave said he couldn't figure out how to complete this area. and to hold it all down I wrapped it in a layer of poster board for durability. From the picture you will also notice I cut and hot glued some small stringers in to help with strength in the front turtle deck covering. I tend to handle the planes a lot for removal of power pods and batteries so this is an area that needs to take the abuse.
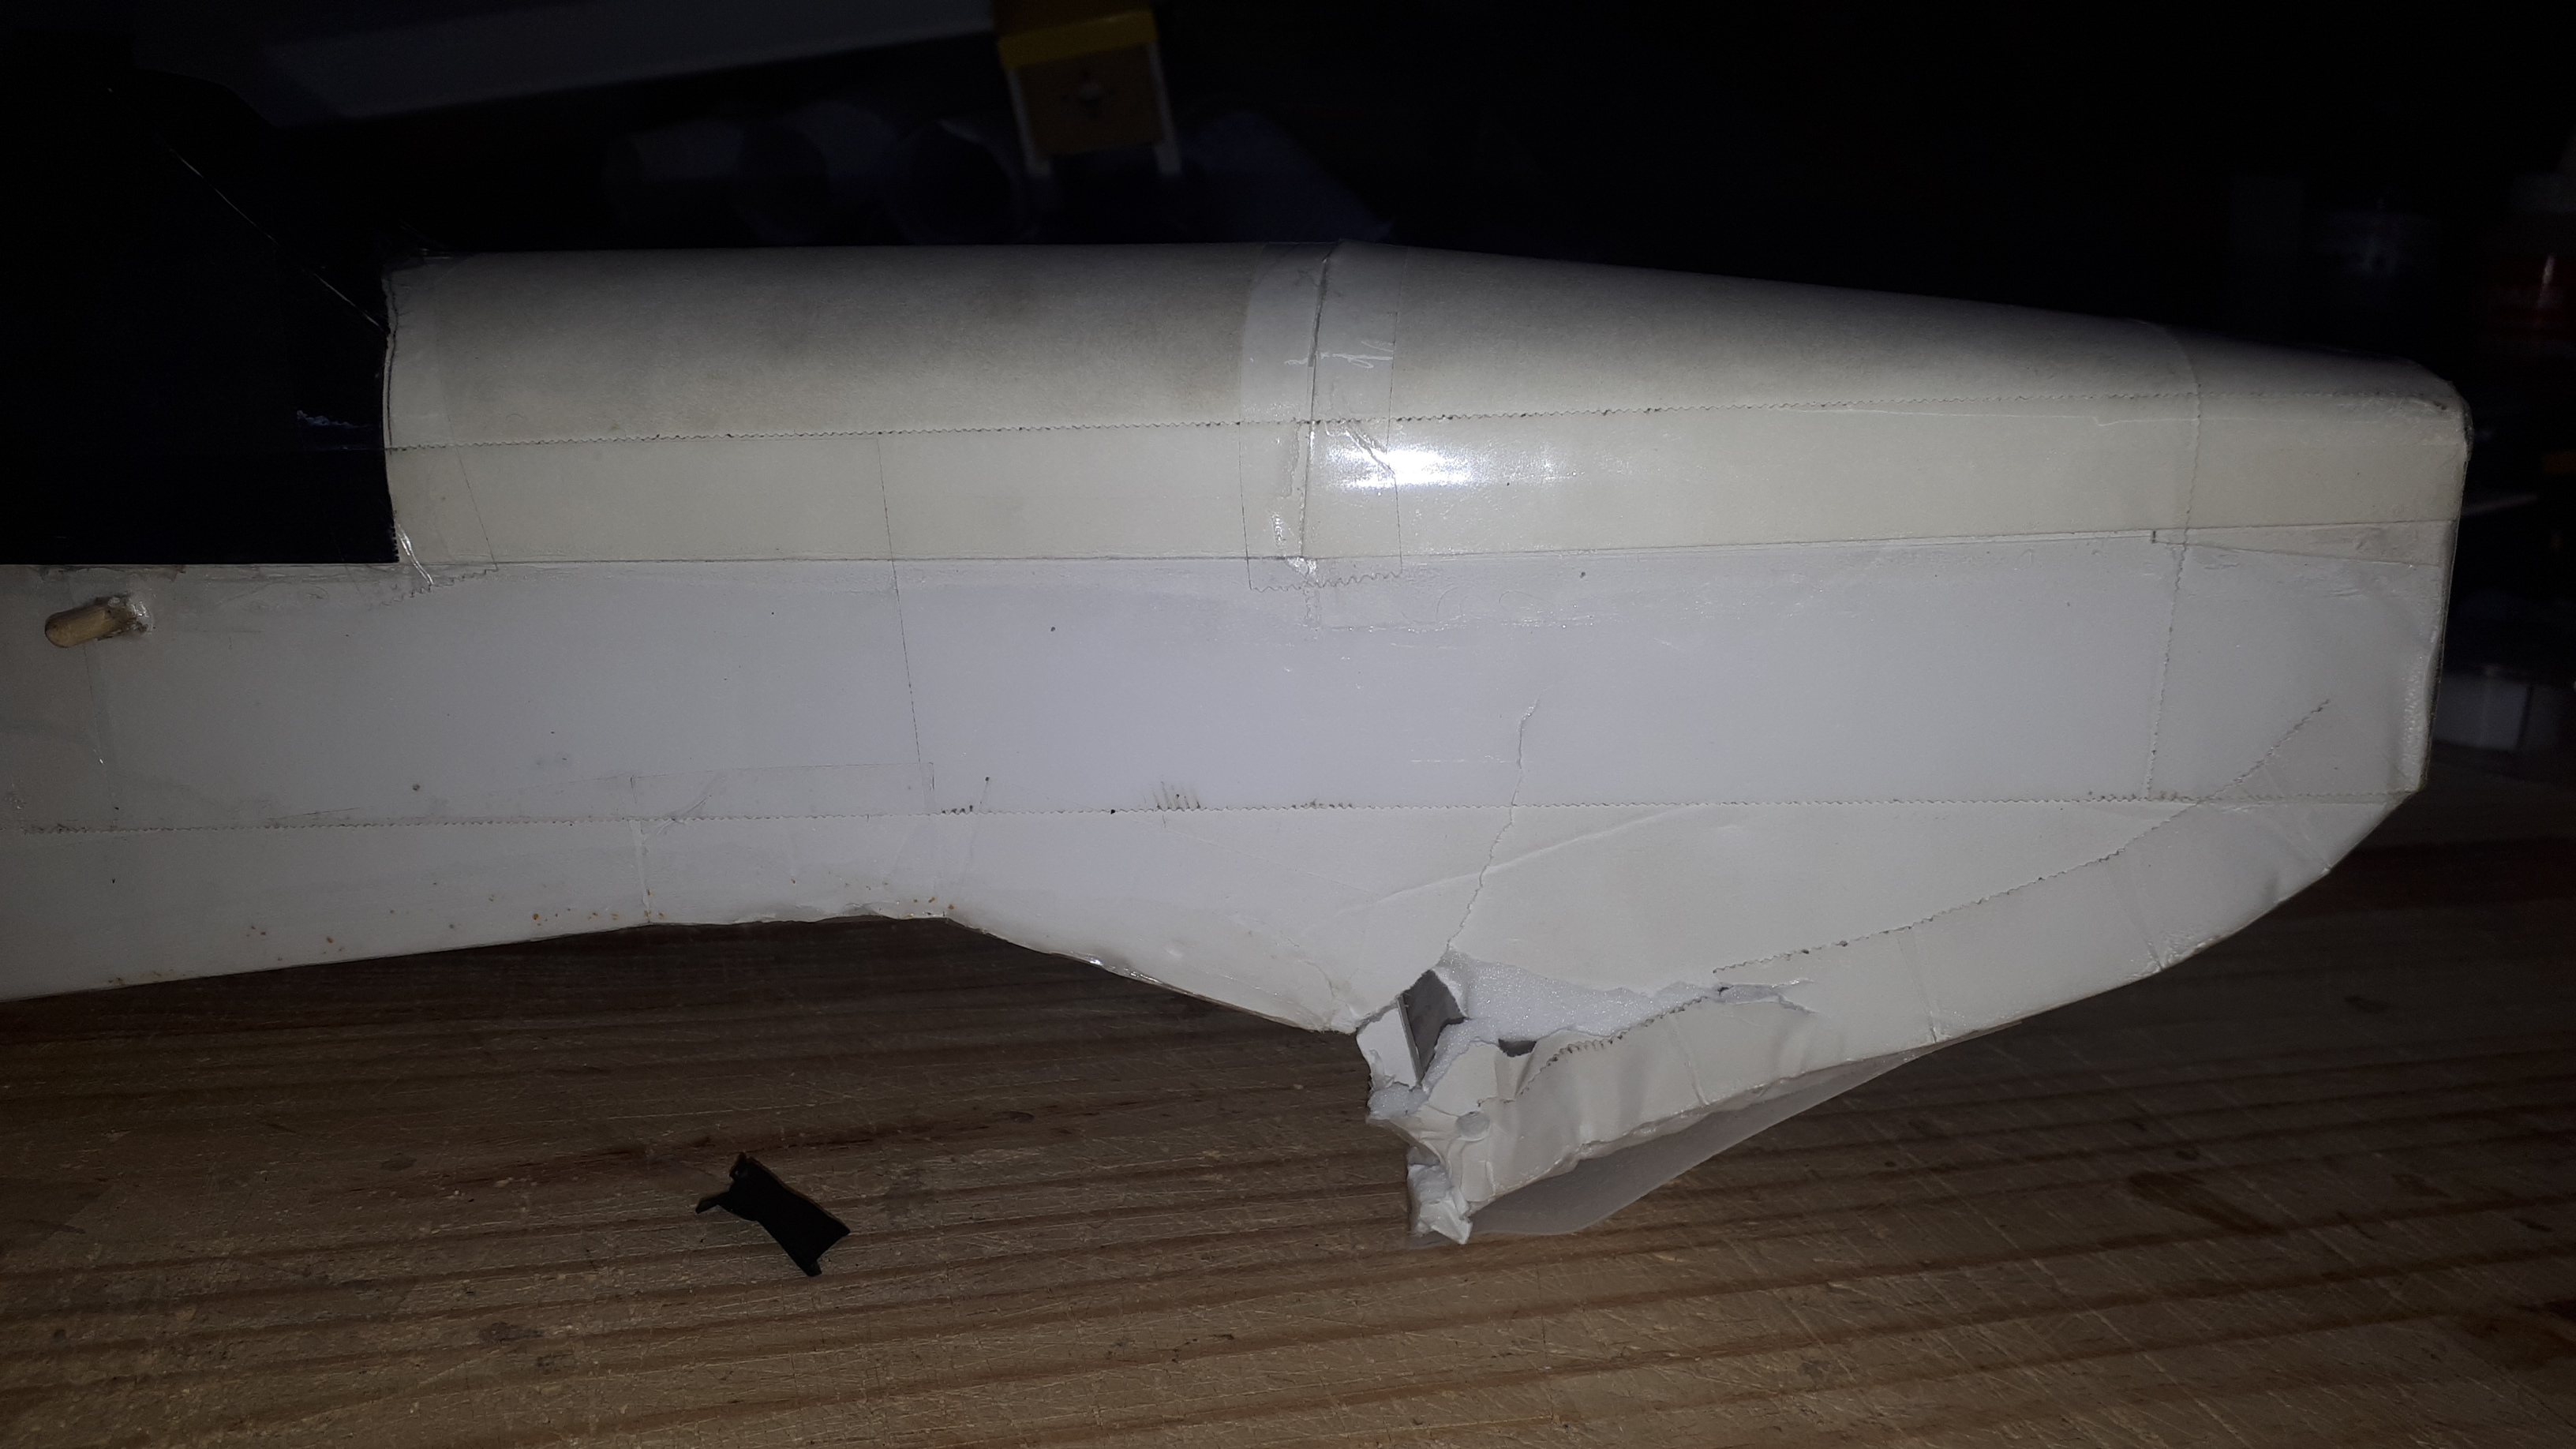
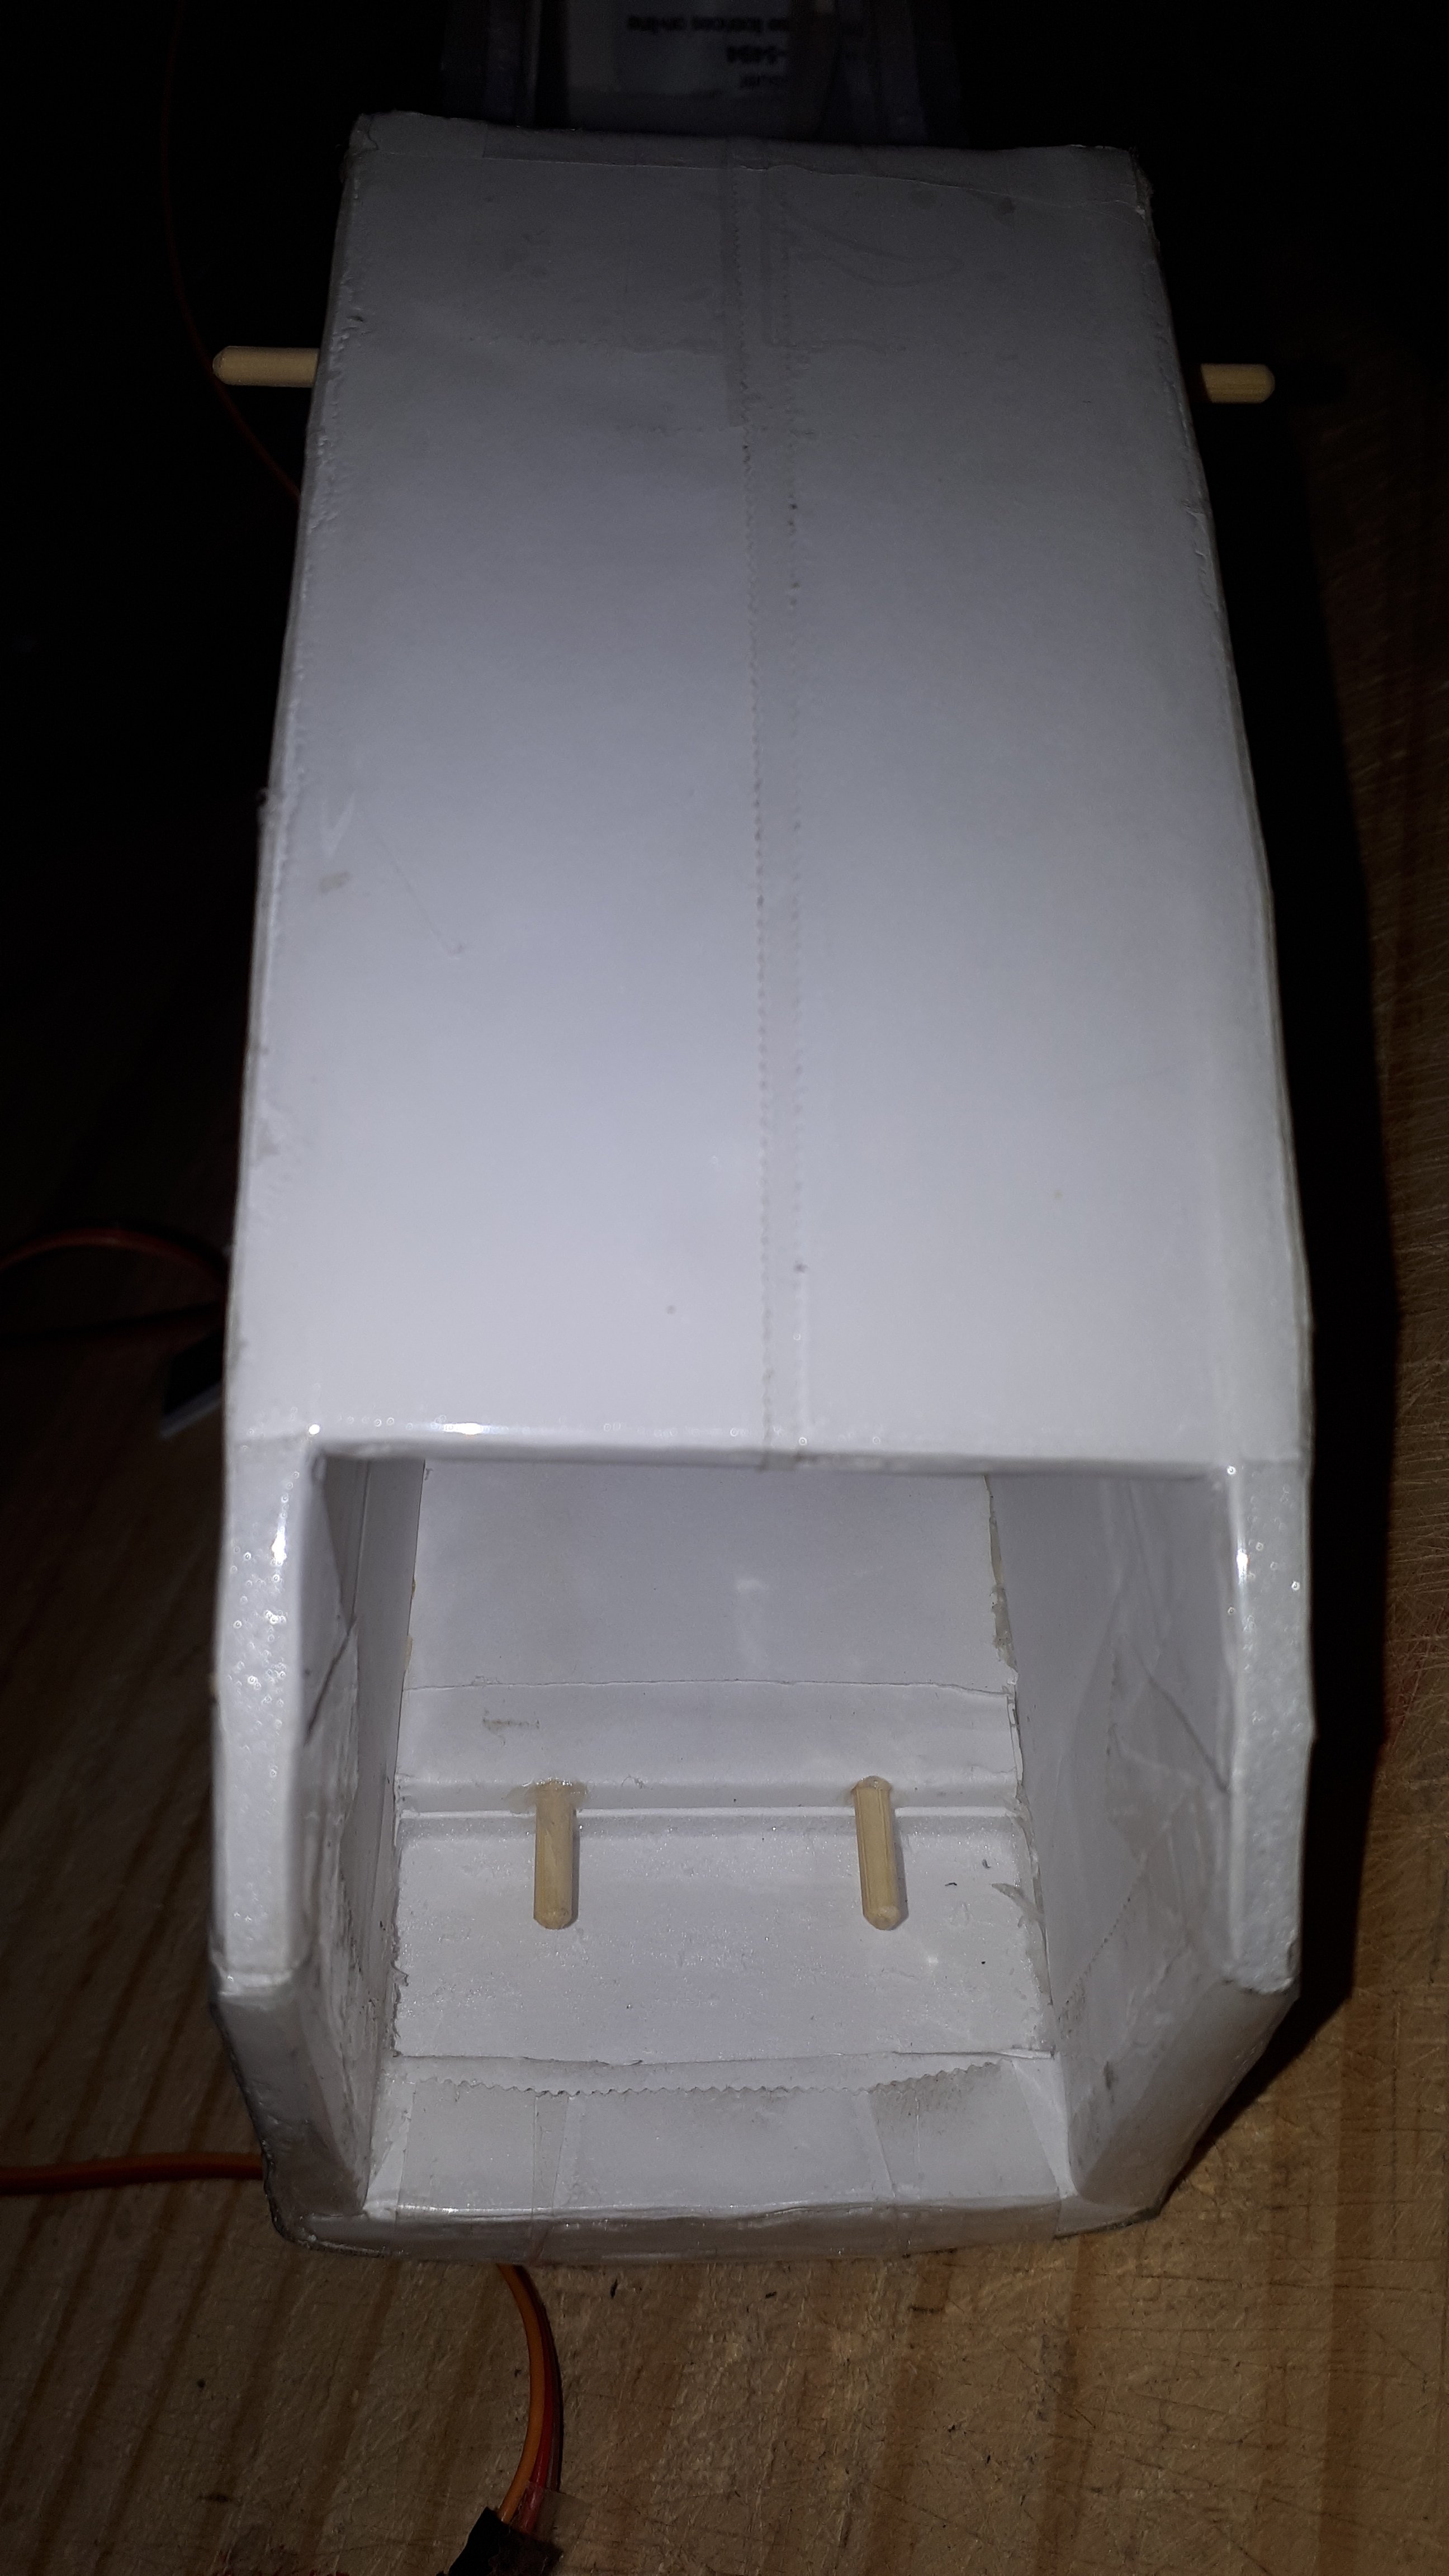 Turning it over I noticed that having this added plate on didn't give any room to index the 2 skewers into the firewall of the power pod so I made a small .75" cavity the width of the firewall (to the inner walls of the fuselage) to allow the power pod to slide in nice. It was just simple 50% score cuts in a rectangle shape leaving a .5" piece in the front for looks and strength. And you will also notice that I extended the front bottom panel from the wings LE to the front short 1" for crash protection as well. this still left plenty of room to easily slide the power pod into the fuselage.
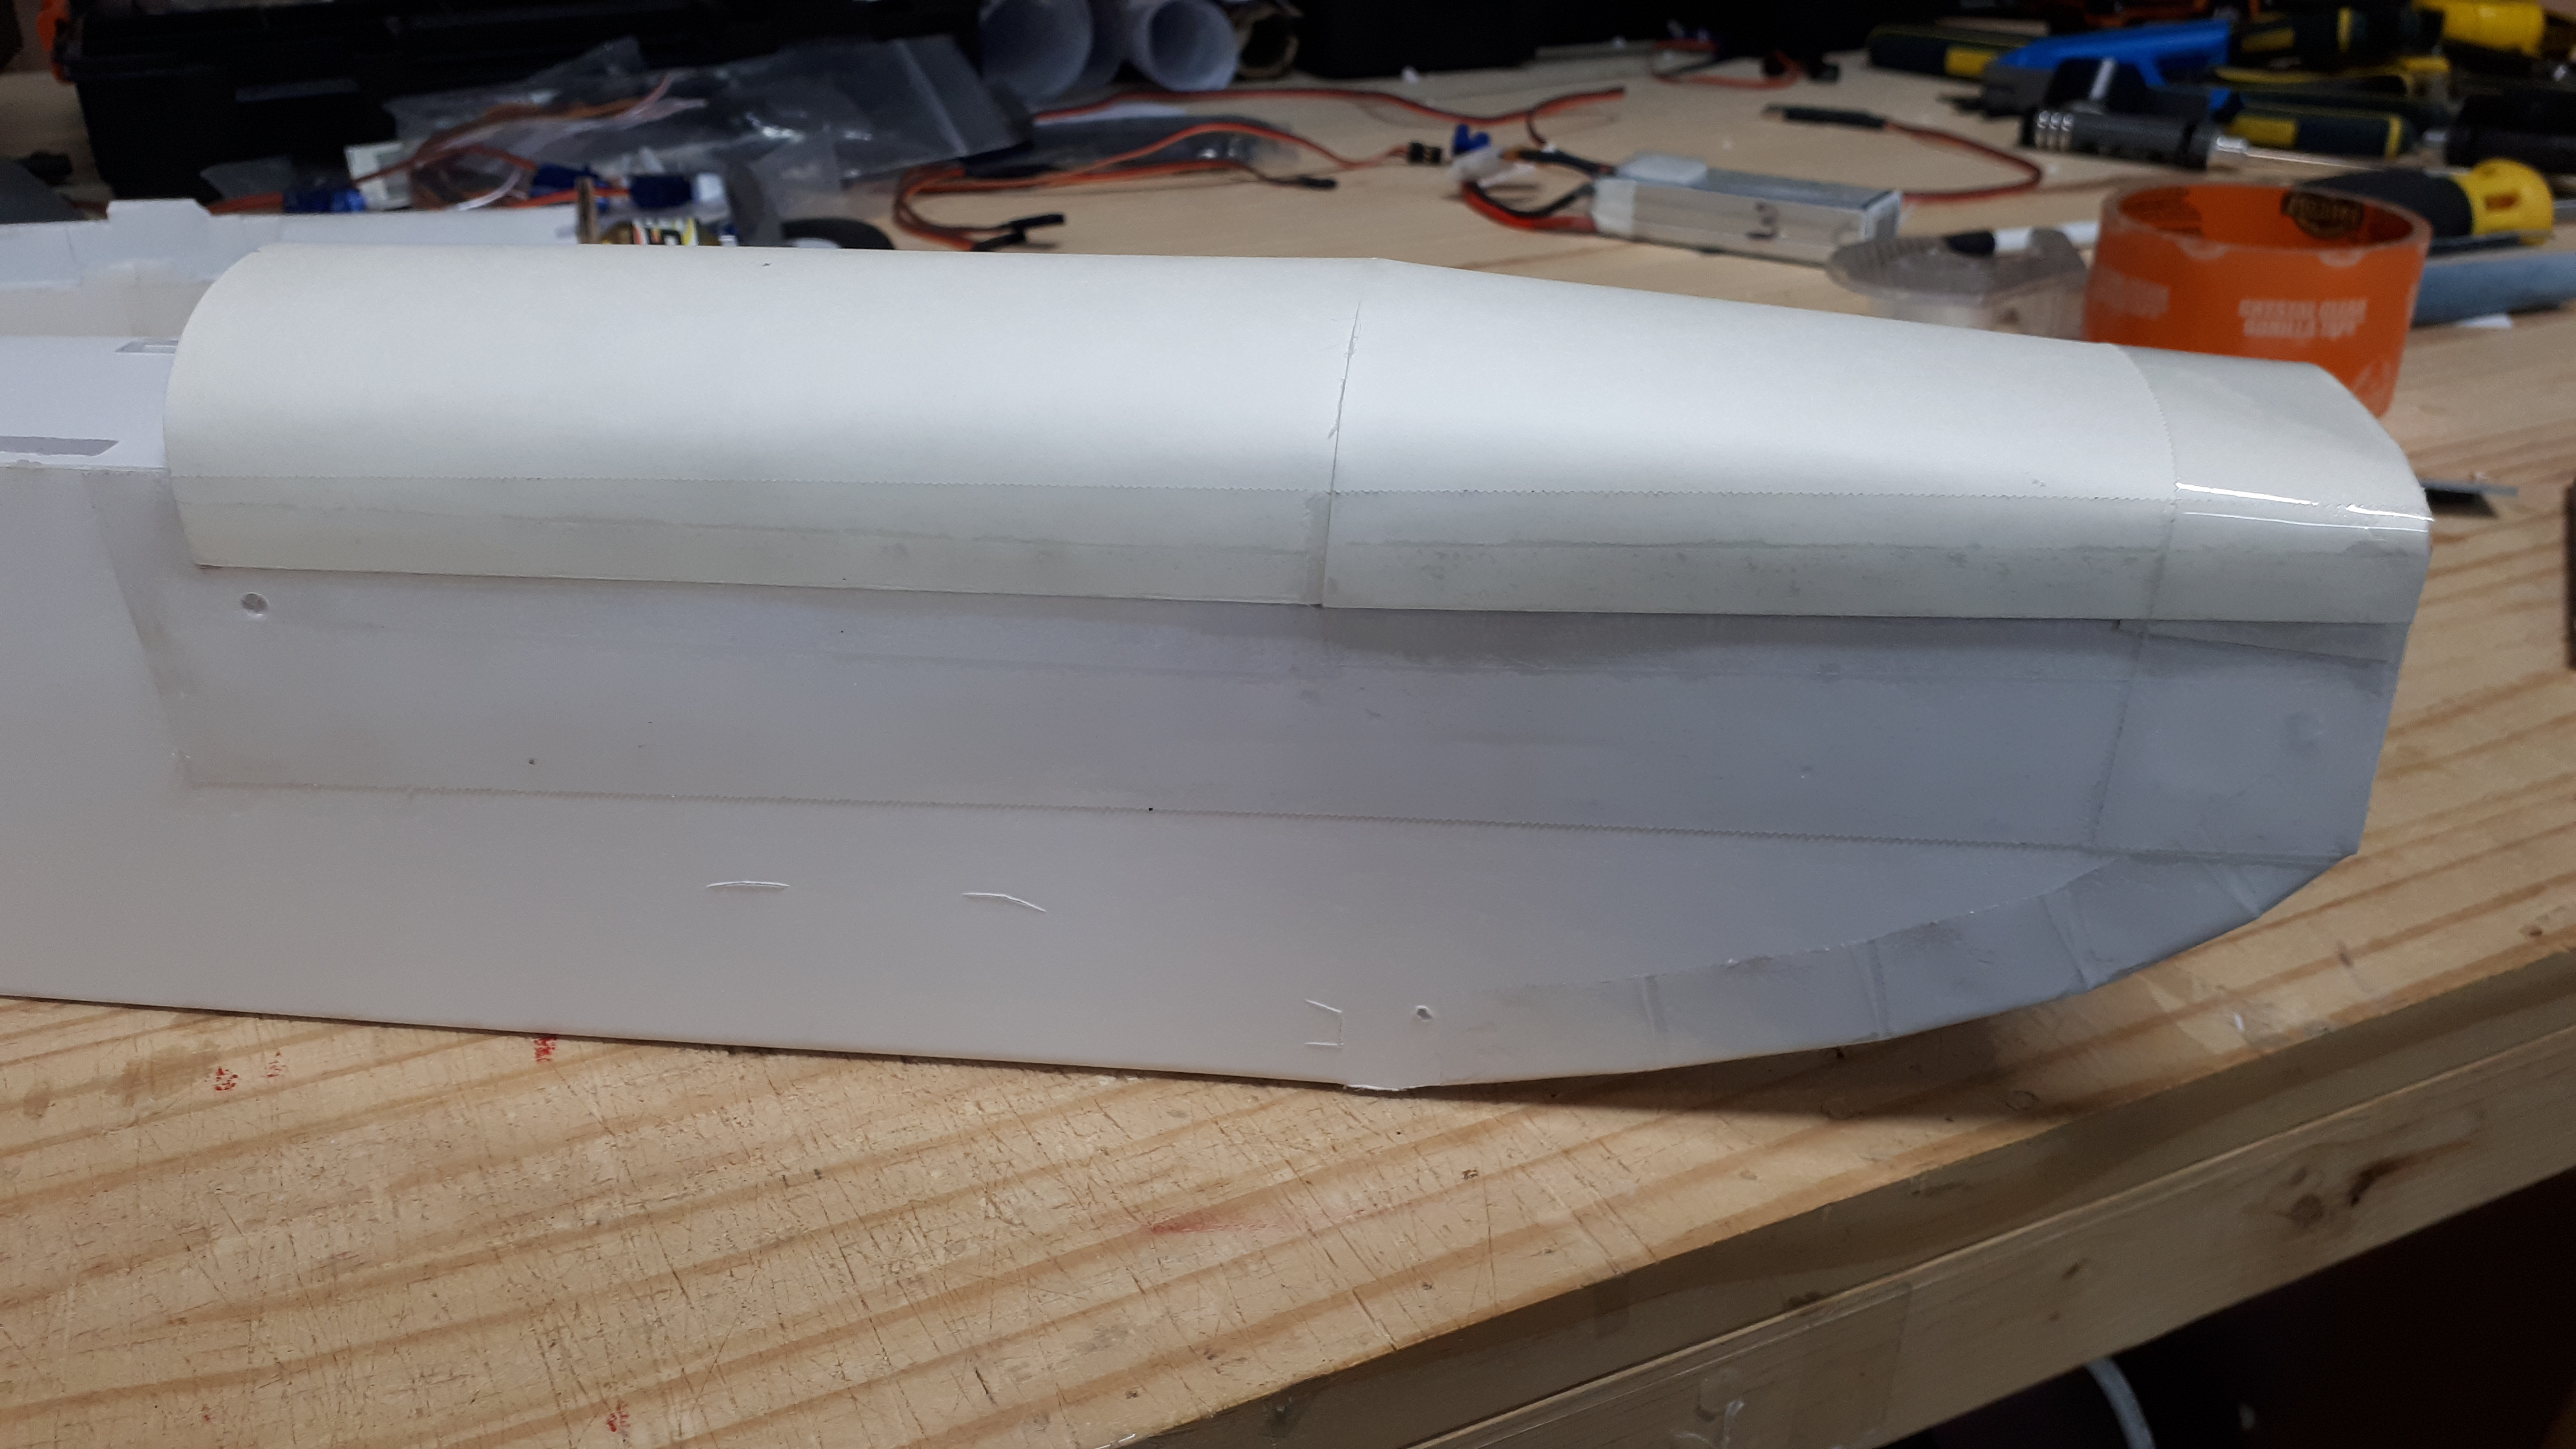 Once covered in the poster board you will see that it didn't change the profile much from the original design but made the internals a lot stronger. the fact that I have considerable crash experience and take a little pride in the how the planes look this is an idea that I took on for my own piece of mind. Oh and I added a stringer between the 2 rear turtle deck formers as shown in the pic below.
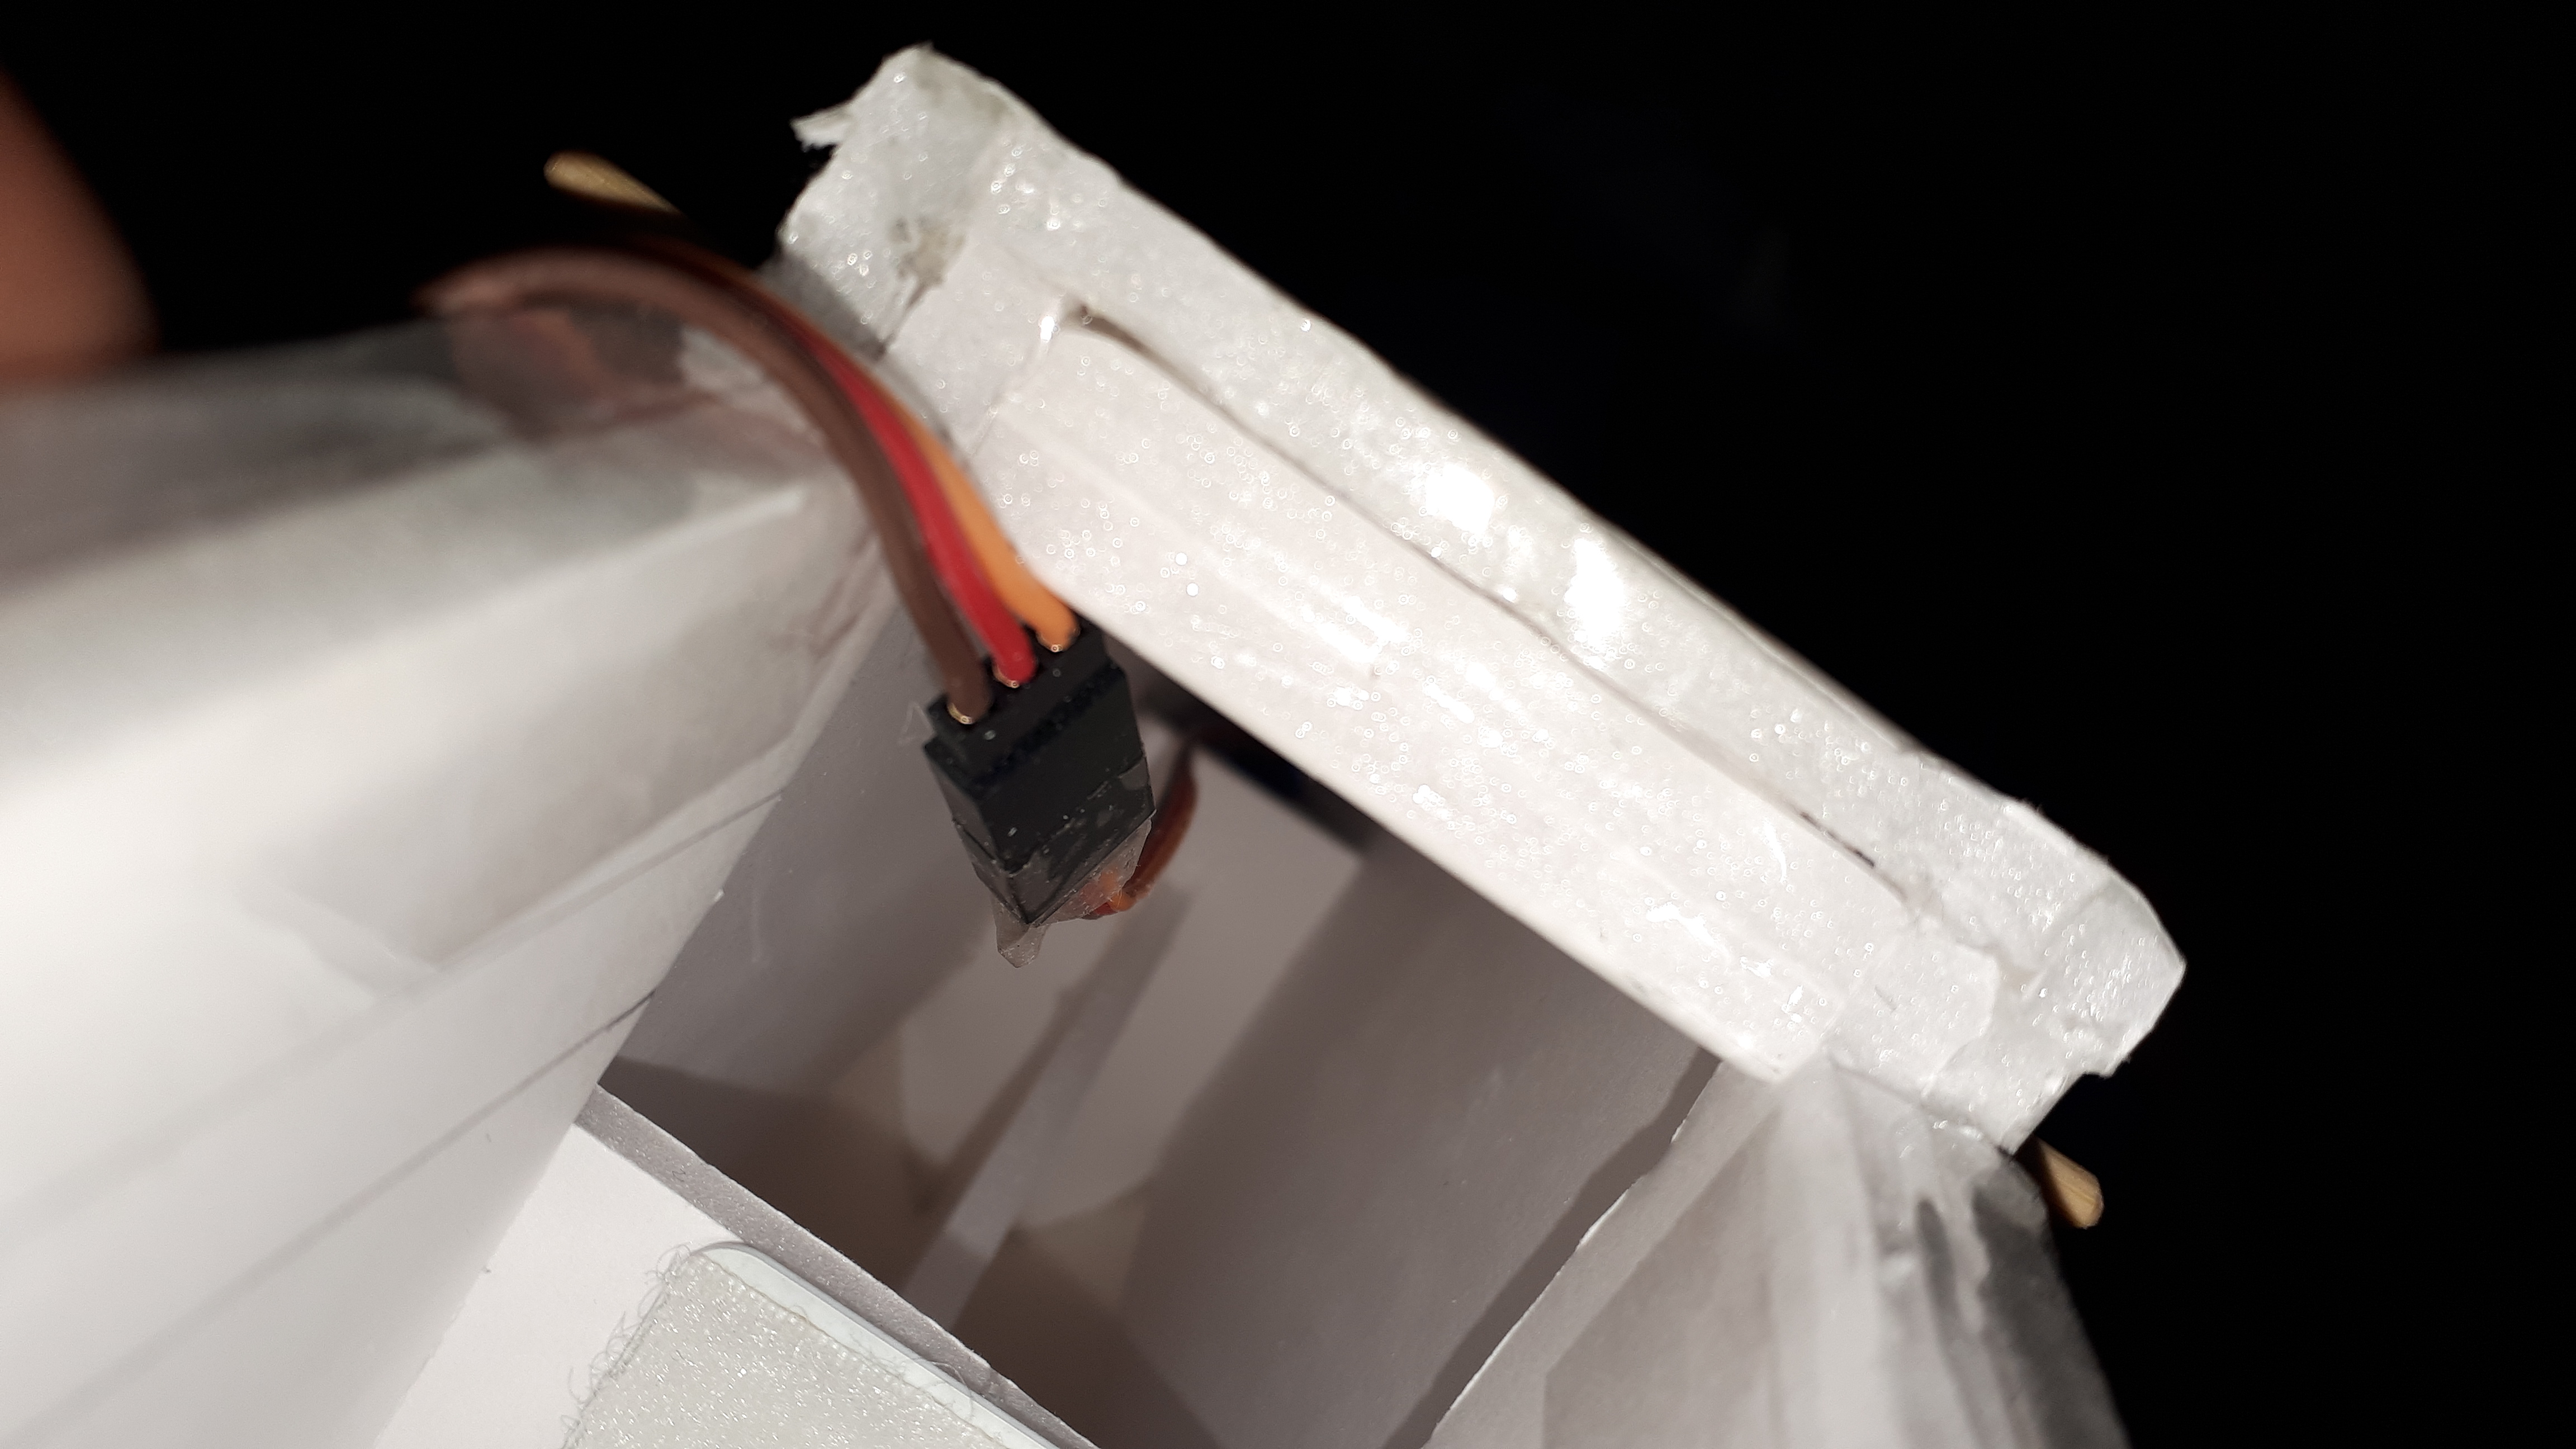
Another little issue that i was having in previous larger scale planes was that after a nose dive my power pod would shift back making sloppy slots on the fuselage walls or destroying the power pod where the skewers past through. I now reinforce the power pod itself with gift cards that have skewer holes cut through them glued and taped to the power pod, which works awesome. I've done the same trick to the fuselage before in other planes and it works just as good. I did see that there was the possibility to try something new here that will kill 2 birds with one stone. I developed a slide and lock system with a secondary layer of DTFB on the inside of the fuselage to help guide the power pod into place while pushing it up into position as it moves back into place, furthermore keeping it from sliding farther back in a lawn dart style crash. this is again a new trick so it hasn't been fully tested yet but you can try it out for yourselves and let me know what you think after field testing. It will work best with the models that have a similar fuselage width, might not work on something like the FT Racer, but more suited to models like the P40 Warhawk or P51 Mustang.

On this plane I went for the removable wing option for ease of access to the electronics and maybe when I clothes line trees with my wing like a WWE wrestler it wont completely year the plane apart. with the second layer of DTFB for the power pod slide doubling as extra strength for the wing centering blocks glued to the wing might help as well.
 As I was saying the power pod indexes really well into position just by pushing it into place from the front.
A couple of other tricks I learned the hard way by way of smashing a battery into the motor shaft by placing the battery into the power pod was to build a removable DTFB block into my power pod to stop the battery from launching forward in a crash. Each block will be of different lengths depending on the model you choose to use it in and that models CG and or the size of battery you use. but it has helped me with multiple trips back to the hobby store for new batteries. Note that I have the ESC located on the bottom of the power pod for airflow and space purposes. I am using a 9x6 ATC prop hooked to a Rimfire .15 35-36-1200 KV motor and a 40 amp ESC for those who are wondering. never had any overheating issues even with larger 11x7 props on other models

To conclude this is the plane in its full glory. I hope this has helped anyone out there to learn from my mistakes or just inspire them to do their own mods and let me know what you think. Happy flying

Anyway I built the Spitfire using the plans from Dave The Swede, and from the build video it seemed it was a plane that was kind of quickly put together with less attention to the build and more to the flight characteristics. Given the reason I wanted to build this as my first large warbird was for the models forgiving flight style I made some nose mods for my own flight style of crashing on a regular basis.
In the build video and with the plans there wasn't much in the nose for protection from crashes, which is where most of my self induced damage comes from. The nose seemed floppy and weak compared to what could be done and Dave did mention in the video that any modification suggestions are welcome so here it is.

With the front end of the nose being open to the wind and elements (dirt, grass and foreign debris) I wanted to close it off with a stronger more streamline design. On the top of the fuselage I added an extra plate of DTFB that extended to the very front and covered up the open !.25" where the nose profile slightly slopes down. On that same added plate I did a C fold that same 1.25" back up and over the top front for added strength, plus that same piece made shaping the curve for the nose using 100 grit sandpaper. This was something Dave said he couldn't figure out how to complete this area. and to hold it all down I wrapped it in a layer of poster board for durability. From the picture you will also notice I cut and hot glued some small stringers in to help with strength in the front turtle deck covering. I tend to handle the planes a lot for removal of power pods and batteries so this is an area that needs to take the abuse.


Another little issue that i was having in previous larger scale planes was that after a nose dive my power pod would shift back making sloppy slots on the fuselage walls or destroying the power pod where the skewers past through. I now reinforce the power pod itself with gift cards that have skewer holes cut through them glued and taped to the power pod, which works awesome. I've done the same trick to the fuselage before in other planes and it works just as good. I did see that there was the possibility to try something new here that will kill 2 birds with one stone. I developed a slide and lock system with a secondary layer of DTFB on the inside of the fuselage to help guide the power pod into place while pushing it up into position as it moves back into place, furthermore keeping it from sliding farther back in a lawn dart style crash. this is again a new trick so it hasn't been fully tested yet but you can try it out for yourselves and let me know what you think after field testing. It will work best with the models that have a similar fuselage width, might not work on something like the FT Racer, but more suited to models like the P40 Warhawk or P51 Mustang.

On this plane I went for the removable wing option for ease of access to the electronics and maybe when I clothes line trees with my wing like a WWE wrestler it wont completely year the plane apart. with the second layer of DTFB for the power pod slide doubling as extra strength for the wing centering blocks glued to the wing might help as well.

A couple of other tricks I learned the hard way by way of smashing a battery into the motor shaft by placing the battery into the power pod was to build a removable DTFB block into my power pod to stop the battery from launching forward in a crash. Each block will be of different lengths depending on the model you choose to use it in and that models CG and or the size of battery you use. but it has helped me with multiple trips back to the hobby store for new batteries. Note that I have the ESC located on the bottom of the power pod for airflow and space purposes. I am using a 9x6 ATC prop hooked to a Rimfire .15 35-36-1200 KV motor and a 40 amp ESC for those who are wondering. never had any overheating issues even with larger 11x7 props on other models

To conclude this is the plane in its full glory. I hope this has helped anyone out there to learn from my mistakes or just inspire them to do their own mods and let me know what you think. Happy flying


