You are using an out of date browser. It may not display this or other websites correctly.
You should upgrade or use an alternative browser.
You should upgrade or use an alternative browser.
Scrach building plan transfer tips
- Thread starter Newme
- Start date
There are a number of helpful things on the FT website. There are tips for printing the plans correctly. Some like to glue them on poster board with spray glue and make a template. I prefer to print the "A" plans 8.5X11and tape them together. Then cut out each part leaving a 1/4 inch edge. Then I use thin strips of blue painter's tape to tape the parts efficiently on a piece of poster board. Then I cut the plans out through the paper. If you start with the red dotted lines (not cut completely through both sides of the foamboard) then retape the line so it doesn't come apart it goes pretty easy. Make sure to put marks on all the green placement marks. Finish with the solid lines (cut all the way through). This also allows me to use up all the larger scrap from earlier builds too.
Thanks i like your methodThere are a number of helpful things on the FT website. There are tips for printing the plans correctly. Some like to glue them on poster board with spray glue and make a template. I prefer to print the "A" plans 8.5X11and tape them together. Then cut out each part leaving a 1/4 inch edge. Then I use thin strips of blue painter's tape to tape the parts efficiently on a piece of poster board. Then I cut the plans out through the paper. If you start with the red dotted lines (not cut completely through both sides of the foamboard) then retape the line so it doesn't come apart it goes pretty easy. Make sure to put marks on all the green placement marks. Finish with the solid lines (cut all the way through). This also allows me to use up all the larger scrap from earlier builds too.
Make sure when copying from adobe you choose "auto" and copy at 100%. Took me a little to figure out how to print in the center of the paper. LOL. I've made templates from the kits as Josh had sugested where there are no plans (Trojan and Hellcat), and these are also nice. However, if I had access to plans, I would print them and use the method above.

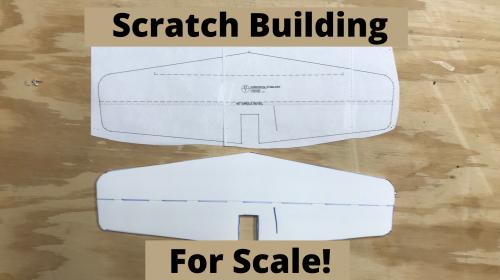
Scratch Building for Scale
This article covers my personal technique for scratch building. Hopefully some of you guys will find this helpful!
Above is the thread on scratch building from another on the forum.
Have fun!! My one son and I like building as much as flying!
Thank youMake sure when copying from adobe you choose "auto" and copy at 100%. Took me a little to figure out how to print in the center of the paper. LOL. I've made templates from the kits as Josh had sugested where there are no plans (Trojan and Hellcat), and these are also nice. However, if I had access to plans, I would print them and use the method above.
Here is the method I used to use, and it still works very well. I have switched to printing the tiled sheets on card stock now which also works very well for a reusable template.Anyone have any tips on transferring the build plans to the foam board for cutting
DIY Poster Board Templates
Make your own reusable templates for all your favorite foam board planes.
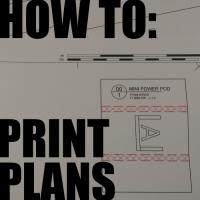
And here are my tips for printing the plans:

Print Flite Test Plans
This article provides detailed instructions on how to achieve the best results when printing a set of Flite Test plans.
Foamforce
Elite member
If you only use a set of plans a couple times, the fastest and most accurate way that I’ve found is…
- Print 11x17 (B size) if you can, 60% less trimming. Big office printers can do this.
- Use a framing square to trim both edges at once. If you have 11x17, this means you only have to line up your cut once per sheet of paper, then cut both edges.
- Tape the sheets together.
- Use a kid’s glue stick to go around the edges of the parts on the back of the printed plans, then stick the plans to the foam board.
- Cut right through the plans. Do inner cuts on each piece first because they’re only glued around the edges, so if you cut the outside first, the inside will become separated and move.
Xamith
New member
I'd be worried about it being too heavy but could be worth a shot! Just need to fly faster and adjust your CoG to accommodate a heavy tail.Has anyone used the foam board for grease markers it looks the same but one side has a clear plastic coating .the other side is paper like normal.it is the only thing i have available in my small town.not sure about the durability. Seems like it should work what do you think.
Thanks I'll give it a tryI'd be worried about it being too heavy but could be worth a shot! Just need to fly faster and adjust your CoG to accommodate a heavy tail.
Just a heads up do not use Readi Board Readi Erase.this type of board has a plastic coating on one side I thought it may be more durable but whenever you make a 50% cut it delaminates from the plastic side almost immediately and with little to no effort. Luckily I tested it before I got to far into build.
Attachments
Had trouble with center of gravity then read that it was common with this aircraft. My solution was to build a hatch so i could get my battery as far forward as possible i then secured it with a bbq skewer sits in there rock solid but not sure how the bump will effect performance may paint it up to look like a radiator


I print directly on card stock. Once everything is tiled and taped its easy to just lay the card stock on foam board. I usually use small strips of tape to hold the card stock in place. When I'm finished the card stock templates get paper clipped together. I save them in a big folder made of FT cardboard cutting boards.There are a number of helpful things on the FT website. There are tips for printing the plans correctly. Some like to glue them on poster board with spray glue and make a template. I prefer to print the "A" plans 8.5X11and tape them together. Then cut out each part leaving a 1/4 inch edge. Then I use thin strips of blue painter's tape to tape the parts efficiently on a piece of poster board. Then I cut the plans out through the paper. If you start with the red dotted lines (not cut completely through both sides of the foamboard) then retape the line so it doesn't come apart it goes pretty easy. Make sure to put marks on all the green placement marks. Finish with the solid lines (cut all the way through). This also allows me to use up all the larger scrap from earlier builds too.
Thanks i like your method
Foam Folder
Active member
I use the foamboard marker boards for fuselage, covered with hobby vinyl, makes a smooth finish.Has anyone used the foam board for grease markers it looks the same but one side has a clear plastic coating .the other side is paper like normal.it is the only thing i have available in my small town.not sure about the durability. Seems like it should work what do you think.
Attachments
Similar threads
- Replies
- 18
- Views
- 804


