Sea Duck removable wing

Professeur Tang

Junior Member
I'm still in the process of building and finishing a sea duck with removable wing and i'm very happy with this plane so i have decided to share this "journey" with you, happy modelers community.
First of all, i'm far away from most of you guys because i live in France close to "le mont saint michel".
Here, it is not easy to buy decent light foamboard so most of my builds are depron based.
I have ordered a big box from flitetest store with 2 FT kits (edge 540 and sea duck) to get the smell of the original and now famous FT brown foamboard ;-) OMG, i paid it twice thanks to shipping and customs costs
I have build the edge and give the sea duck to a friend to have a buddy to fly with on water.
Decided to build my Sea Duck from scratch at my taste to compare the weight and flight caracteristics with the original FB sea duck.
As i wanted it durable, i used some heavier materials : depron, kraft paper, carbon fiber spars, fiberglass + epoxy resin and covering film.
The second more important aspect of this build is that i wanted the plane to fit on the ceiling of my car so that i can bring it with the family during the weekends or holiday trips.

First of all, i printed the tiled plan, glue the sheets together, sprayed super77, paste it on 4mm depron, cut it, built the wing mostly the same way as on the FT build video
P_20181109_135742.jpg
The bare depron wing is 115g where the FT foam board kit wing is 202g but the depron is way weaker at this stage...
P_20181109_135642.jpg
 
Last edited:

Professeur Tang

Junior Member
Then, i covered my depron wing with kraft paper and a glue mixture made of wood glue, water and wallpaper glue.
The kraft layer was doubled at the center section of the wing because it will be removable and i plan to use screws to attach it on the fuse.
P_20181110_152930.jpg

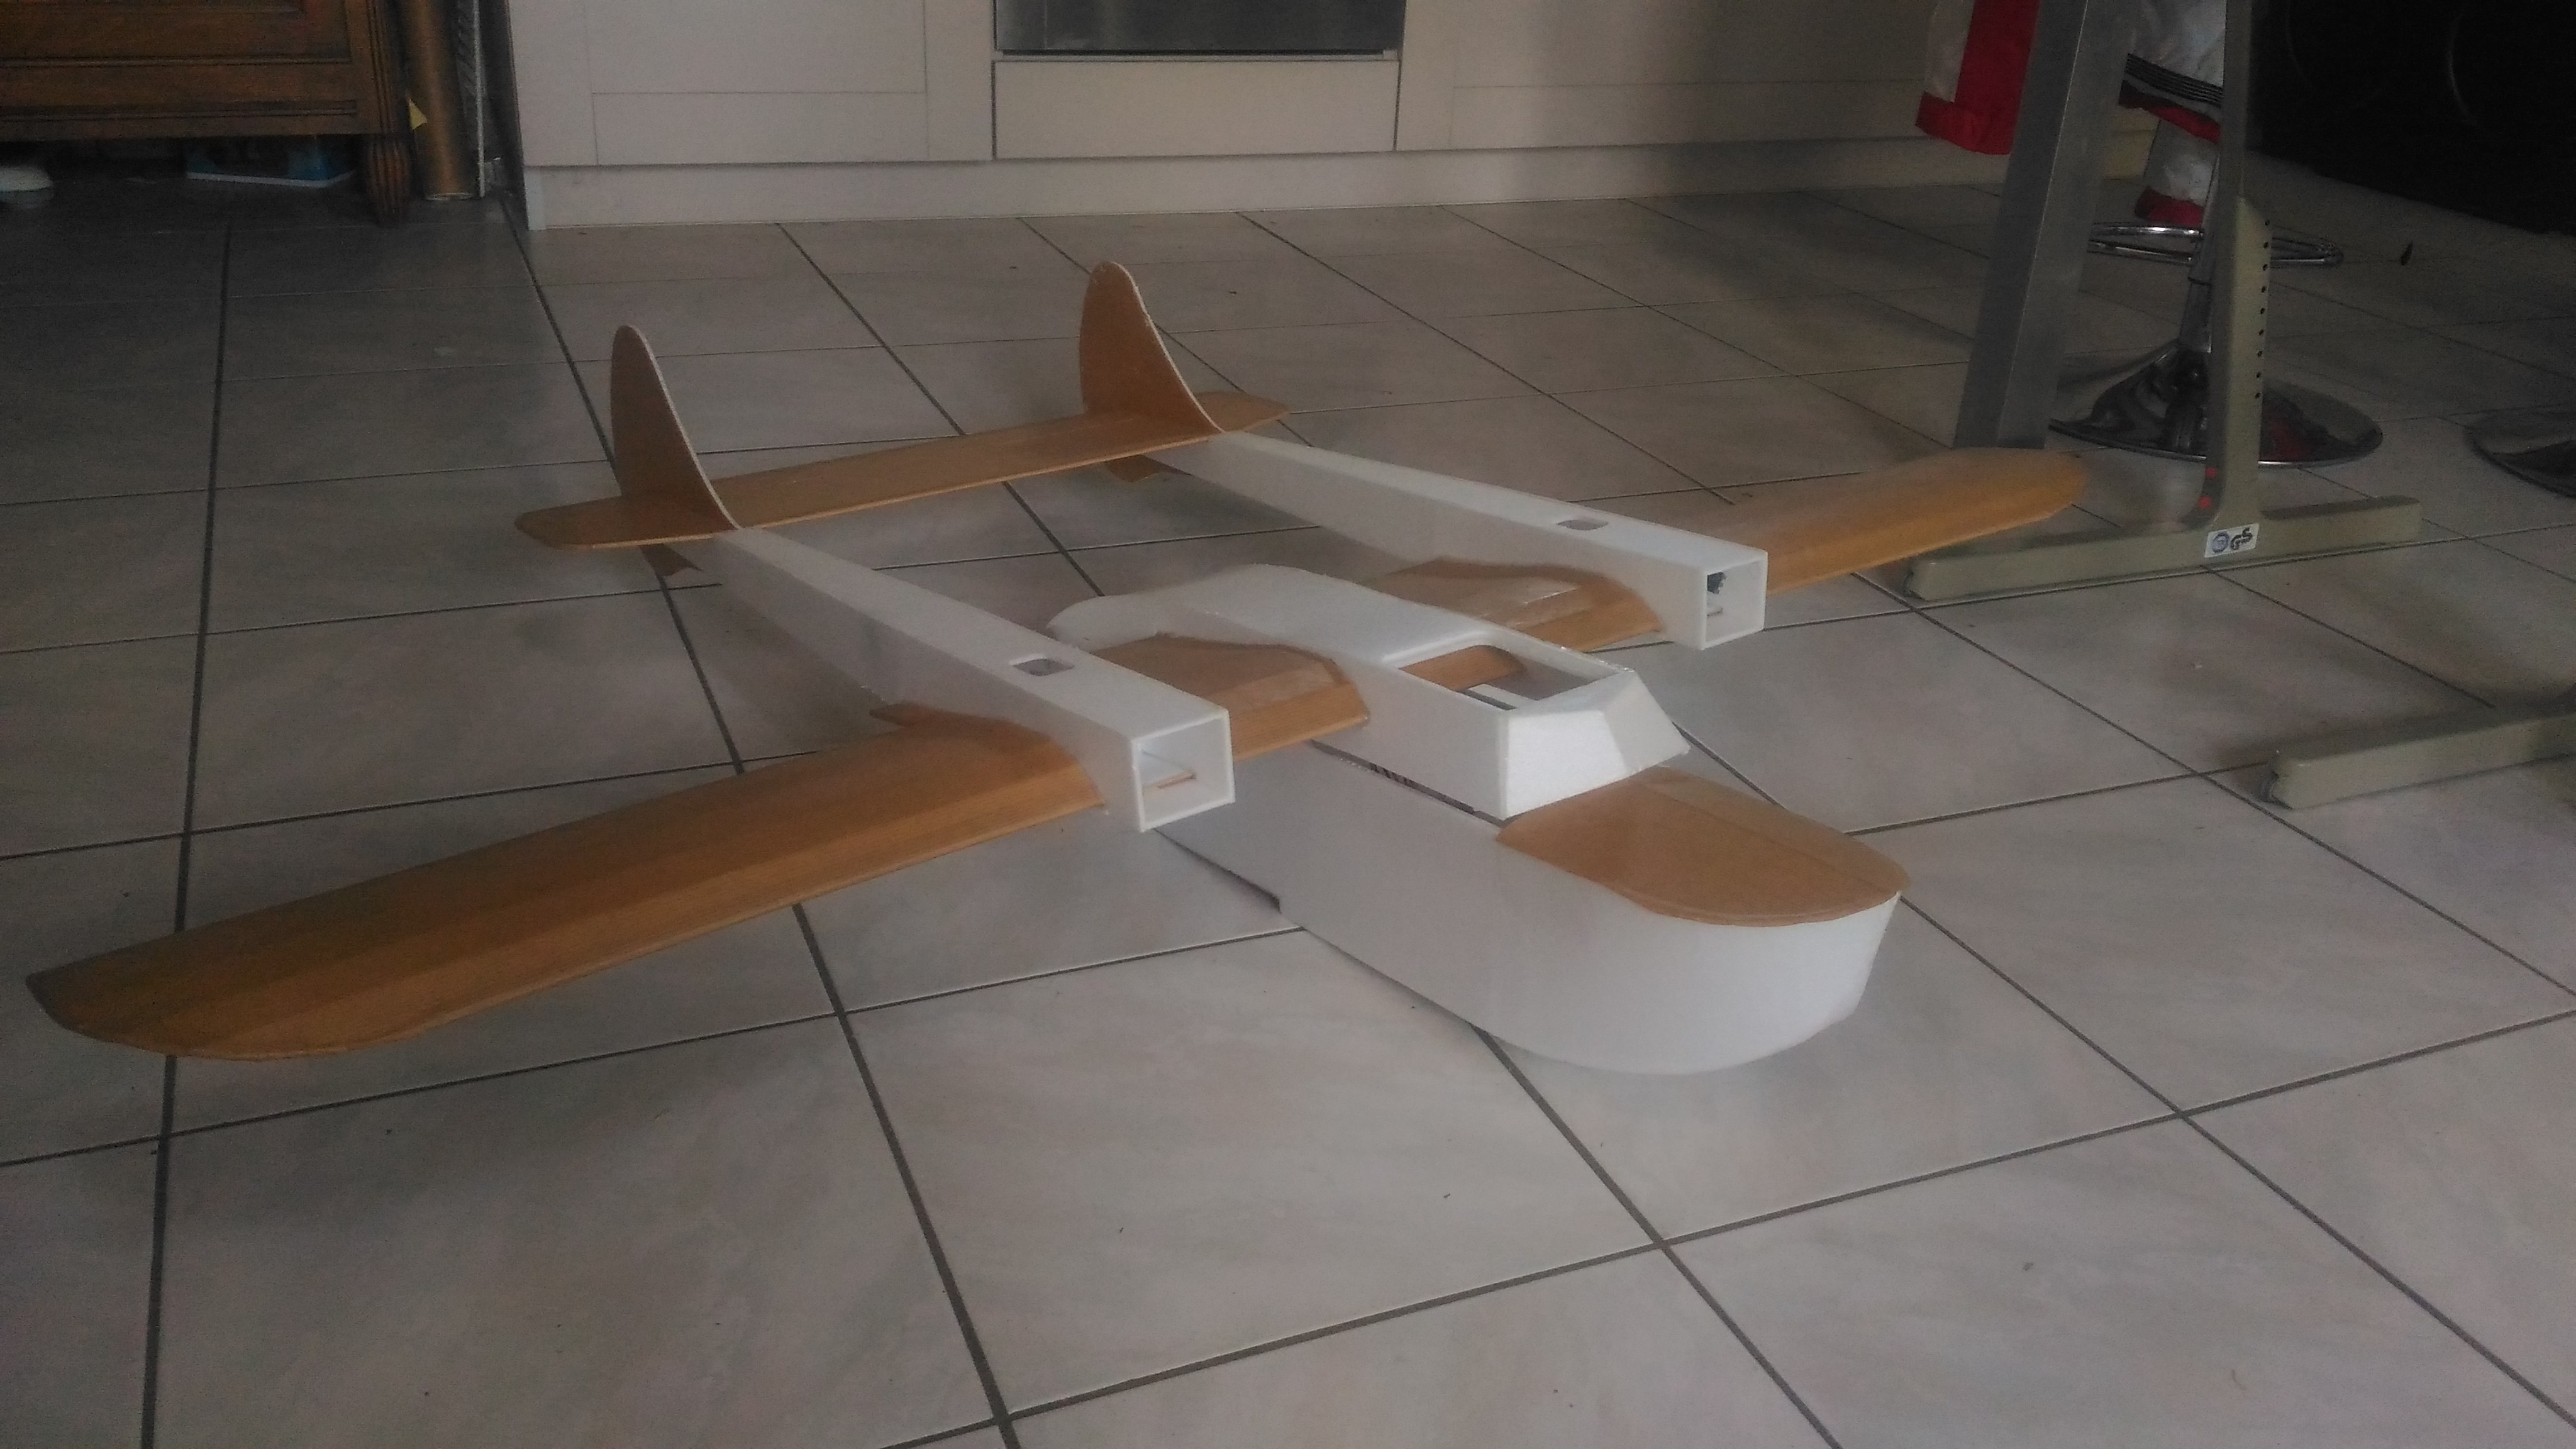
Then i cut the other parts out of Depron and glue everything together with hot glue exactly as the FT build video except i didn't glue the upper part on the "boat" part
P_20181120_121953.jpg
P_20190511_154211.jpg

It is very much fragile than the FB kit at this point but i will reinforce everything later on...
 

Professeur Tang

Junior Member
Then comes the first "heartbreaking" part:
As hot glue comes off with alcohol, use an alcohol syringe with a needle to unstick the wing from the upper carriage, then cut out the depron where it is needed to detach the wing from the boat part.:cry:
P_20190531_230118.jpg

The second heartbreaking part comes now:
Grab a good cutter and cut the wingtips off of the nacelles :cry: again !
These steps seems like the build process gone 2 weeks backwards !!
P_20190615_205359.jpg

By the way, in the mean time, i have installed all the electronics. Motors are mounted on 3D printed powerpods (more robust than depron)
 

Professeur Tang

Junior Member
Now the plane fits perfectly at the ceiling of my car :love:, i will be allowed to bring it with us during holiday trips
P_20190615_213409.jpg
This is a short time comfort, back to work because it fits well in the car but it doesn't fly well... yet ;)

I ordered some good quality carbon spar tubes including tubes that the corresponding inner and outer diameters allow a perfect sliding fit with minimal clearance.
Carbon spar tube excludes the carbon tubes with linear unidirectionnal fibers. It requires crossed woven carbon fiber built spars.
Use epoxy to glue the spars to the depron. The center part spar is in one piece all the way through the center section of the wing. I probably could sit on it without breaking it.
P_20190810_112720.jpg
3D printed it some small triangles to align the trailing edge spars and to incorporate some magnets.
P_20190810_112734.jpg
As i glue everything with epoxy resin at the same time, i held it in place while it cured with a slight dihedral, it will help with stablility.
Unfortulately, the epoxy resin was very liquid and soaked between the carbon spars that were supposed to slide so i had to butcher the spars out of the wings to glue new ones with more precaution.
P_20190812_105100.jpg
Yes, i used the extra epoxy to repair some playmobil toys of my kids. No waste !
Now the plane weights 820g
 

Professeur Tang

Junior Member
Now, time for some reinforcement and create the linkage between the wing and the fuse.
As the depron is only 4mm thick, i added some chicks to the fuse (2 times 7mm Depron layers on each chick)
P_20190812_214453.jpg
Here is a closeup
P_20190812_214507.jpg
I have red that the weak part of this plane was its nose so i have doubled the bow from the inside with 4mm Depron.
You can notice that i have added a bulkhead behind the nose because i have also filled up this "bow room" with polyurethane insulation foam. Now, the weight has increased but the plane has more probability to have a longer life.
P_20190812_174657.jpg
I haven't doubled the battery tray except with a 3d printed part for the velcro not to damage the depron but i know i will have to do that soon because it seems fragile.

In order to attach the wing to the fuse, i have designed and printed 2 plates with holes to glue some nuts underneeth.
P_20190813_223156.jpg
Fuse weight: 216g.
I have decided to close the rear part of the fuse. I don't know why the FT crew has designed it as it is in the kit. If someone has a clue about this, let me know.
P_20190829_193303.jpg

The fuse is now going to gain in weight because i have decided to fiberglass it with 45g/m² fiber cloth. This process is making the fuse branchproof.
After this treatment, the fuse weight is 280g.

As it seems to be a success, i do the same fiberglassing to the center part of the wing because this will recieve the screws, keeping it tight to the fuse.. Hopefully...
P_20190814_103341.jpg
Weight of the center wing + booms + tail:
Before FG: 485g
After FG: 537g
Edit: after yellow film covering: 650g

Note: with the experience i have with this plane now, i'm not sure i would do it this way if i had to build a new one, i would rather have doubled or tripled the kraft layer instead of fiberglassing

I'm starting to be nervous about the total weight of the plane
 
Last edited:

Sero

Elite member
I'm really liking what you're doing here. The back of the fuse looks real clean!

I'm glad you strengthened the nose and yes, add some support to the battery tray. If the front of the tray is attached to the bulkhead then all you should need it a beam spanning the width at the back of the tray, the tray likes to sag from the battery weight on rough landings

Your doing fine with the weight. My current SeaDuck weighed 1000 grams without electronics and currently sits at 1760 without the battery. No issues flying.
 

Professeur Tang

Junior Member
Thanks Sero,
I will reinforce this battery tray this week.

So, let's go on with this build.
After this fiberglassing, i had to reinforce the 2 booms because they seemed to me really fragile (a simple depron box, only held by hot glue...)
I used the Kraft paper technic. This add a lot of strengh with a slight gain on weight. I had used this technic on my Depron superbee too. It has 60 flight and is as good as new !
P_20190829_193324.jpg
After Krafting this, i noticed my elevator piano string was too flappy so i had to open the right boom to add a second guide. That's why you can see a white part on the right boom on the picture: it is light filler.
I Krafted the ailerons and double-Krafted the elevator control surface because the control horn is completly on the right side which tends to twist this control surface during hard elevator manoeuvres. This double kraft stuff made a huge difference in rigidity. This added 10g to the control surface.

About the wing, as you noticed, i used carbon fiber tubes which slide inside each other for spars. For holding them together and avoid loose a wing during flight, i drilled a 3mm hole in the carbon spars while the wings in place and glue a M3 nut on the biggest tube so that i can fit a screw from under the boom.
P_20190901_164051.jpg
You can see here behind the motors, there is one hole per boom in which i fit the M3 screw.

So without suspense, as you can see, i didn't paint this airplane but i used a yellow covering film. I choose this because i think this is more durable than paint and it add some rigidity.
I hope it will be water tight.
Compared to painting the airplane, this was a time-consuming task.
I had to sand the whole airplane perfectly otherwise it would end up being ugly.
P_20190907_143832.jpg
Unfortunately, the covering film doesn't stick well on fiberglass so i had to lay packing tape on the fiber glass (hopefully not everywhere) so that the covering film sticks to the airplane.
And then, covering such a quirky plane, making sure it will be watertight is a pain. But at the end, the final result is quite rewarding.
P_20190908_152751.jpg


All up weight with the pantoons and cowings is 1370g. That's 24% heavier than the original flite test kit but i think it worth it. It is way more durable, and i can bring it everywhere with me.
I'm just a bit concerned with the use of hot glue melting if i leave it in the car during a summer day.

If i had to do it again, i would use PU wood glue which is lighter, water resistant and doesn't melt in warm atmosphere.
 

Professeur Tang

Junior Member
This afternoon, i went to the flying field and maindened it. Differential thrust makes it spinning in place like a skid steer !!
CG: 64mm from the leading edge.
Battery: 245g 4 cell 2200 mAh. I had to place it quite at the front of the opening bay on the battery tray but still in the range but not very convenient. I have some heavier batteries that will be easier to install.
Control surface throws: on low rate, i went 75% of FT advised max throw and on high rates, i went 125% of FT max throw. (reached the mechanical servo stops).
I added some flaps mix to the aileron but it needs some compensation on the elevator which i have to programm for next time.

After all the checks, i gave 3/4 throttle and the plane slid like a charm on the field short lawn then took off after a 10m run.
What a presence in the air !!
It is not fast and can be slown down to almost running pace to appreciate low and slow passes at sunset.
Loops and rolls, torke roll, immelman, cuban 8, steep turns, flat spins and so on can be done easyly. It's quite unusual for such a plane but it's "scale" to the talespin sea duck ;)
I flew 3 packs this afternoon and did a dawn flight. I'm really liking this plane a lot.
After landing, i took some pictures. You can see le mont saint michel in the distance.
P_20190908_195611.jpg

Next improvements:
- Install the pantoons
- Install the cowings
- Install the lights to fly later when the light is orange then dark and the atmosphere is fresh and calm.

If you have any question, don't hesitate, it is a pleasure to help people building.