
coldbloodedtx
Junior Member
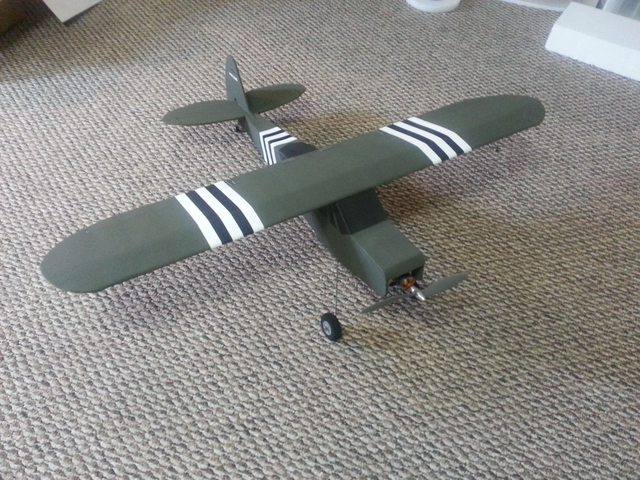
This is a quick look at my latest (and first!) Flitetest swappable build. It's essentially a finished product of RAMartinJr@live.com's article on the Super Cub. It's a great set of plans, but there's not much instruction around the build, so I thought I'd highlight the tricky areas of my build.
The paint scheme was a hats off to my son, who loves anything remotely warbird-related. The L4 is just a Super Cub adapted for the military. As such, I removed the dihedral, clipped the wings to 40" (it was supposed to be 42", but I just ate the mistake, figured it's enough). I also added two epoxy laminated 1/4"x1/2" balsa square stock spars for the wing, rather than the foamboard.
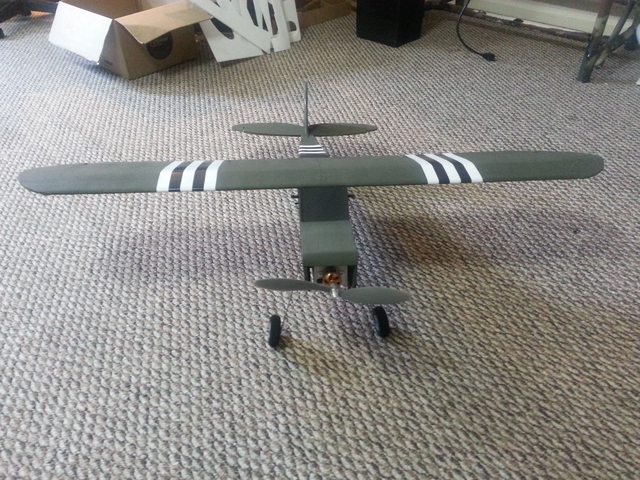
After flying it this weekend (and snapping my zip tied gear off way too easy), I added a piece of 1/32 balsa under the belly (and inside) and attached it with rubber bands & dowels, standard FT protocol.
One area I struggled with on the installation was getting the servo setup right. I ended up attaching two small strips of 1/4" lite ply under the servo mounts, to keep the servo from hitting the top sheet of the wing. The 2mm carbon rods are attached with the HobbyKing alloy clevises (much tougher than the basic linkage stoppers).
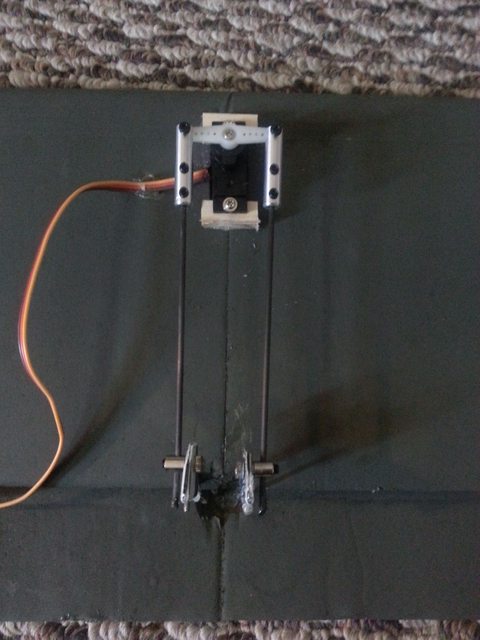
The other end of the aileron linkage is attached with some folded gift card epoxied onto a small "L" in the linkage. I drilled a small hole in the center of the gift card fold to 'lock-in' the gift card horns onto the linkage. The linkage is made from survey stake wire (from the local hardware store). I then used standard linkage stoppers drilled through both sides of the folded gift card to attach the other end of the carbon rods.
To get the linkage through the wing, I torched a piece of the survey stakes to just below red hot, and slowly moved them through the part of the wing (to the edges of the ailerons). This burned a nice channel in the inner foam, where I epoxied in some coffee stirrers. Proper piano wire might be a bit stiffer, as these have a fair bit of give to them.
At the end of the ailerons, the piano wire/survey stake is bent 90 degrees, to run alongside the aileron. To take out the play, I used another section of folded gift card with plenty of 1 min epoxy to fill in any gaps. This took out all of the slop, except the flex in the piano wire.
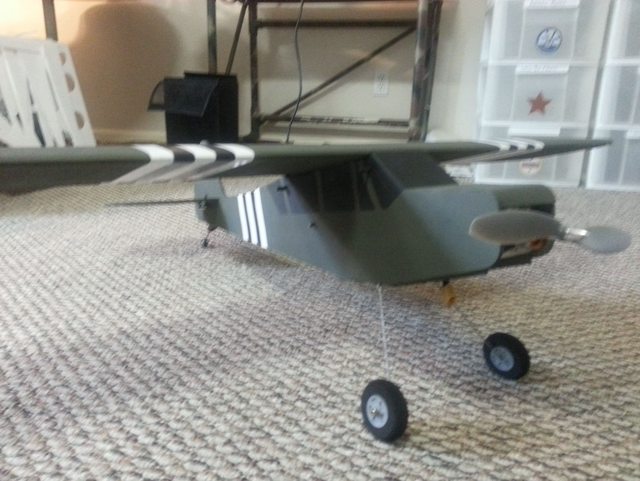
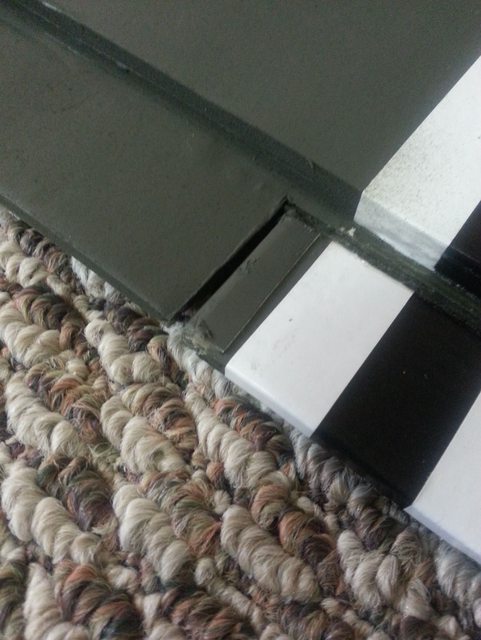
While I like my windows, this pic is to show the dowel placement for locking in the swappable power pod. This was not detailed in the build plans, so I had to guess...thankfully I eyeballed it pretty well, and it's locked in nicely.
Other tips:
- After I took these pics, I reinforced the center section of the wing by peeling some paper, gluing on some posterboard with epoxy, and then extreme packing taped the heck out of it. Touched it up with more flat green...scratches easy, but whatever.
- Peel the rear top inner paper off. I didn't, and it was a huge pain to get glued on, and has quite a few creases on the top paper.
- Add some wire or popsicle stick across the elevator sides to stiffen them up.
- Add a dab of glue to the aileron servo wire to keep it out of the way of the elevator/rudder linkage
- Glue an servo extension between the rudder and elevator servos, so you don't have to snake it in & out when swapping the power pod.
- 2200mah 3s batteries will fit in belly, but don't use too much velcro on the bottom of the power pod, or it's really tough to get them out without removing the whole pod.
I have some more detail, namely the "A" and "41" stenciled letters on the side, but those things will have to wait until I get some smaller stencils!
Turnigy 2826 1400kv, F-30A ESC, 9x4.7 APC prop for power. Definitely flies like a cub, and has respectable power. Rolls are a long, slow, measured thing, but it's a cub, that's not what it's for. Rudder and elevator have some serious authority, and rudder turns are a blast.
We flew it over the weekend, I'm planning on catching some video next go-round.
The paint scheme was a hats off to my son, who loves anything remotely warbird-related. The L4 is just a Super Cub adapted for the military. As such, I removed the dihedral, clipped the wings to 40" (it was supposed to be 42", but I just ate the mistake, figured it's enough). I also added two epoxy laminated 1/4"x1/2" balsa square stock spars for the wing, rather than the foamboard.
After flying it this weekend (and snapping my zip tied gear off way too easy), I added a piece of 1/32 balsa under the belly (and inside) and attached it with rubber bands & dowels, standard FT protocol.
One area I struggled with on the installation was getting the servo setup right. I ended up attaching two small strips of 1/4" lite ply under the servo mounts, to keep the servo from hitting the top sheet of the wing. The 2mm carbon rods are attached with the HobbyKing alloy clevises (much tougher than the basic linkage stoppers).
The other end of the aileron linkage is attached with some folded gift card epoxied onto a small "L" in the linkage. I drilled a small hole in the center of the gift card fold to 'lock-in' the gift card horns onto the linkage. The linkage is made from survey stake wire (from the local hardware store). I then used standard linkage stoppers drilled through both sides of the folded gift card to attach the other end of the carbon rods.
To get the linkage through the wing, I torched a piece of the survey stakes to just below red hot, and slowly moved them through the part of the wing (to the edges of the ailerons). This burned a nice channel in the inner foam, where I epoxied in some coffee stirrers. Proper piano wire might be a bit stiffer, as these have a fair bit of give to them.
At the end of the ailerons, the piano wire/survey stake is bent 90 degrees, to run alongside the aileron. To take out the play, I used another section of folded gift card with plenty of 1 min epoxy to fill in any gaps. This took out all of the slop, except the flex in the piano wire.
While I like my windows, this pic is to show the dowel placement for locking in the swappable power pod. This was not detailed in the build plans, so I had to guess...thankfully I eyeballed it pretty well, and it's locked in nicely.
Other tips:
- After I took these pics, I reinforced the center section of the wing by peeling some paper, gluing on some posterboard with epoxy, and then extreme packing taped the heck out of it. Touched it up with more flat green...scratches easy, but whatever.
- Peel the rear top inner paper off. I didn't, and it was a huge pain to get glued on, and has quite a few creases on the top paper.
- Add some wire or popsicle stick across the elevator sides to stiffen them up.
- Add a dab of glue to the aileron servo wire to keep it out of the way of the elevator/rudder linkage
- Glue an servo extension between the rudder and elevator servos, so you don't have to snake it in & out when swapping the power pod.
- 2200mah 3s batteries will fit in belly, but don't use too much velcro on the bottom of the power pod, or it's really tough to get them out without removing the whole pod.
I have some more detail, namely the "A" and "41" stenciled letters on the side, but those things will have to wait until I get some smaller stencils!
Turnigy 2826 1400kv, F-30A ESC, 9x4.7 APC prop for power. Definitely flies like a cub, and has respectable power. Rolls are a long, slow, measured thing, but it's a cub, that's not what it's for. Rudder and elevator have some serious authority, and rudder turns are a blast.
We flew it over the weekend, I'm planning on catching some video next go-round.
.JPG")
.JPG")
.JPG")