3D Printed Hughes P21-J Devastator

localfiend

I like 3D printers...
Mentor
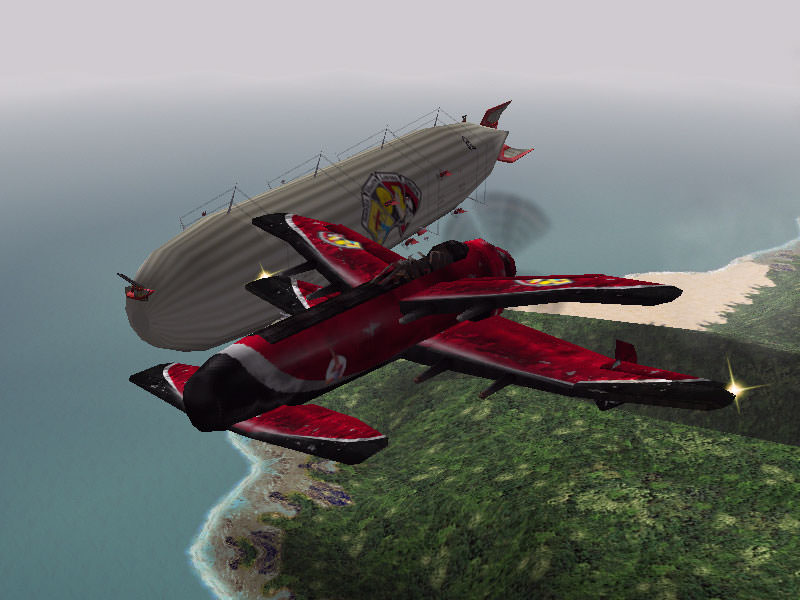
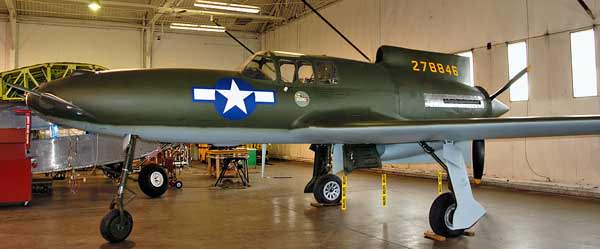
http://crimsonskies.wikia.com/wiki/Hughes_P21-J_Devastator

Zy3zTtW.jpg


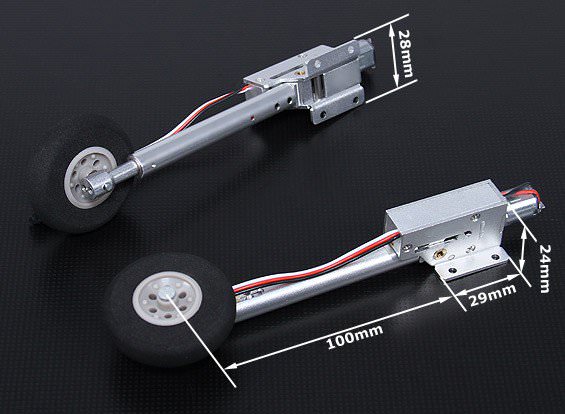
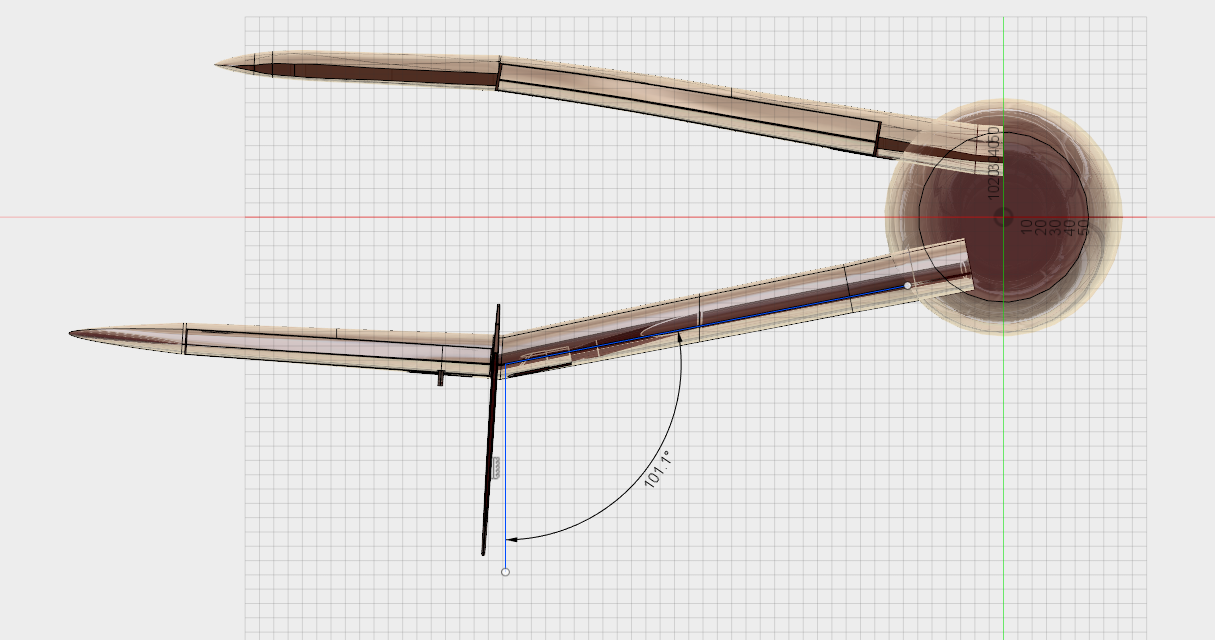
So, I was making landing gear for the Flapjack this weekend, then some wheels for a corsair, and needed to get better loft profiles. Started watching youtube videos on rails for lofts, and thought it would work good for wingtips.

Also been messing with updating the foamboard version of the Devastator, and couldn't resist trying it on something I already had a bunch of stuff drawn up for in 2D.

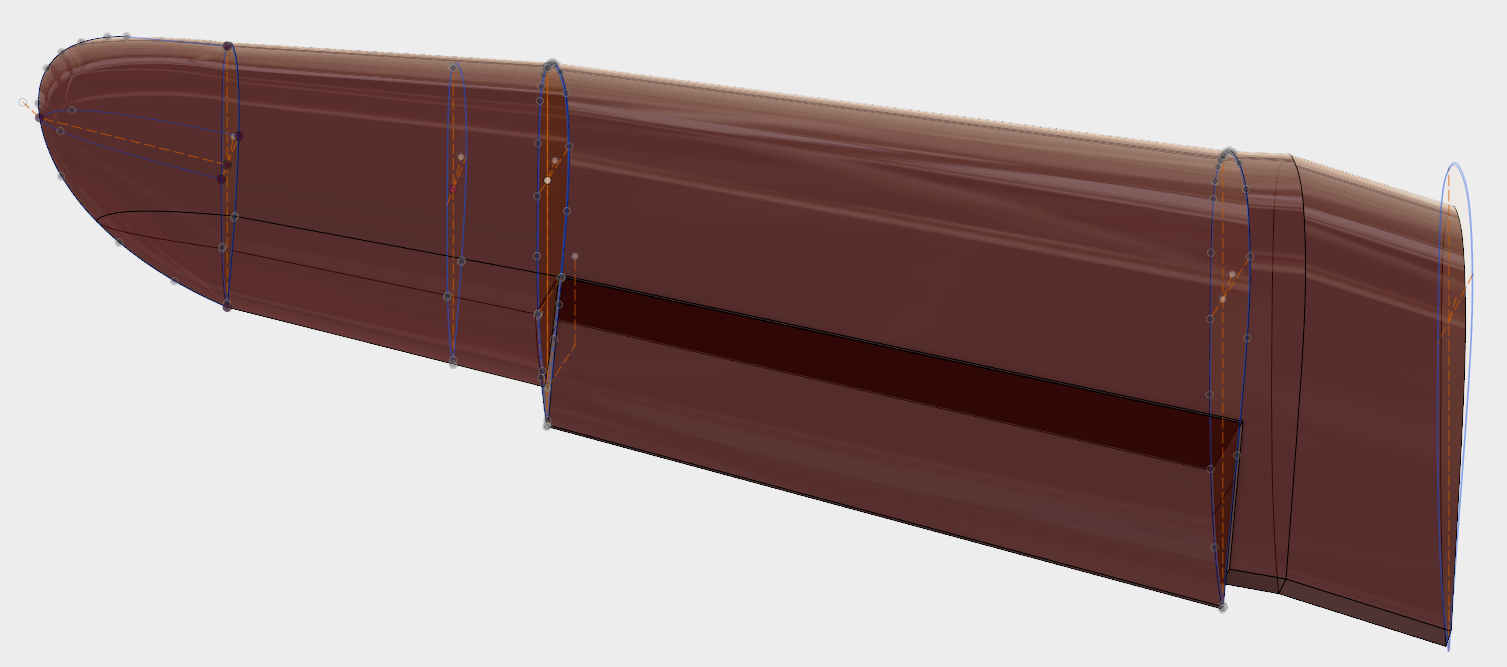
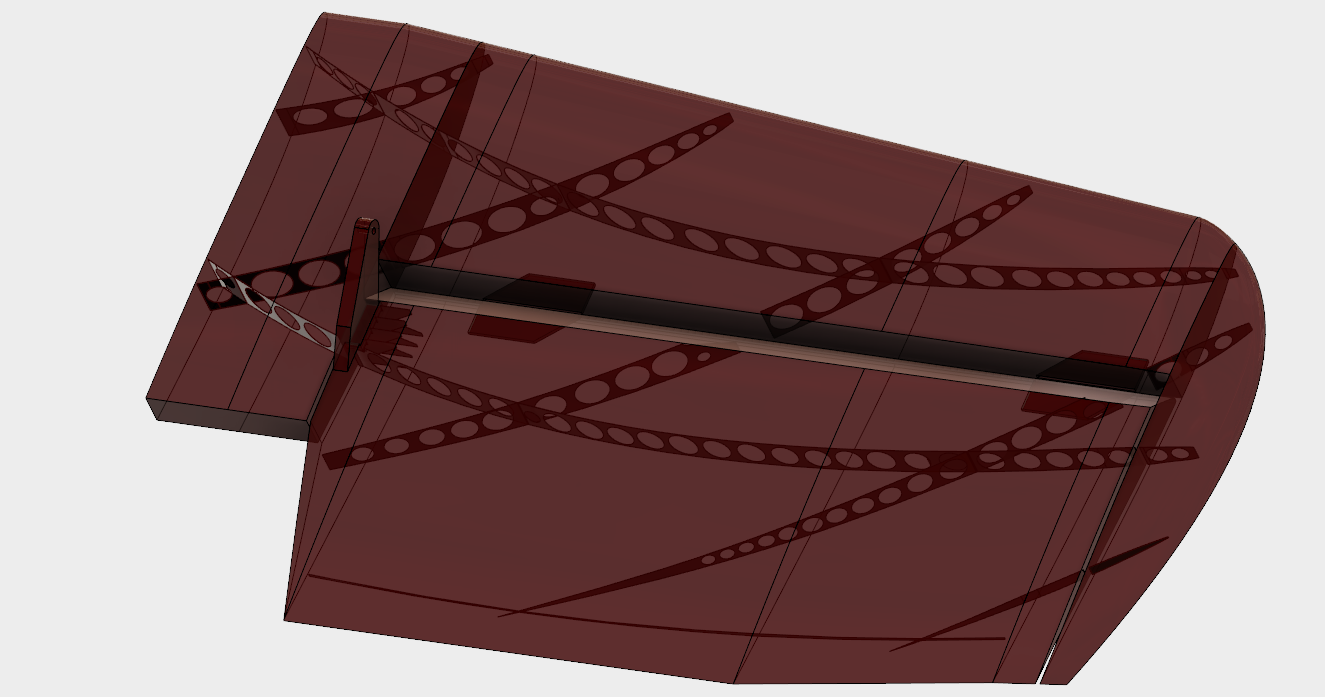
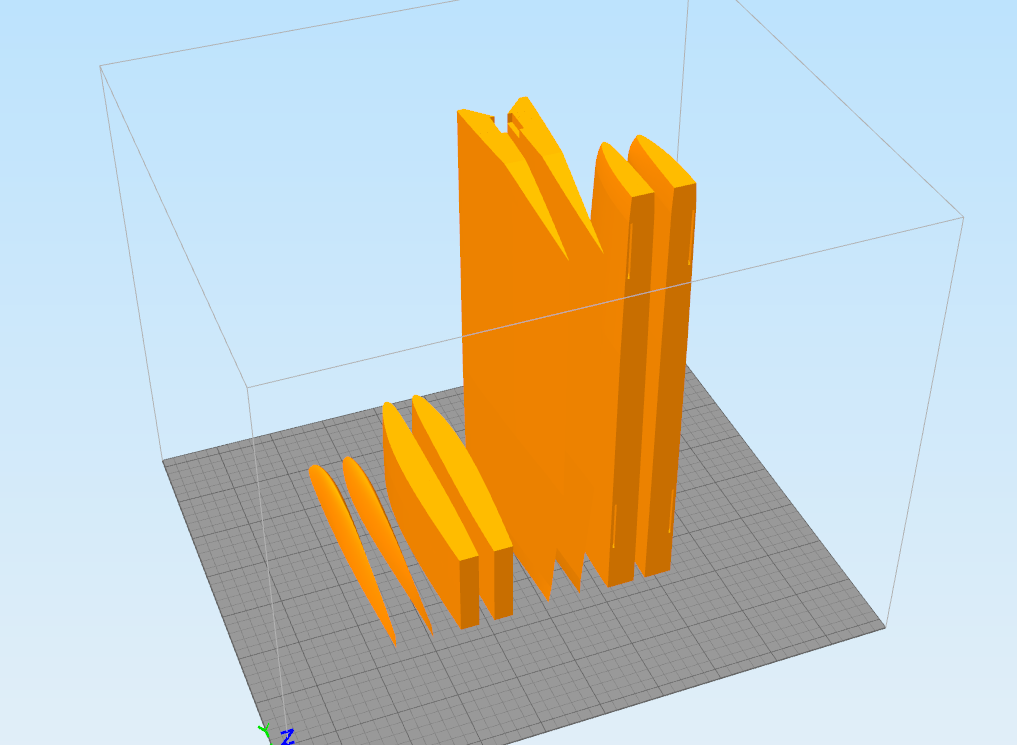
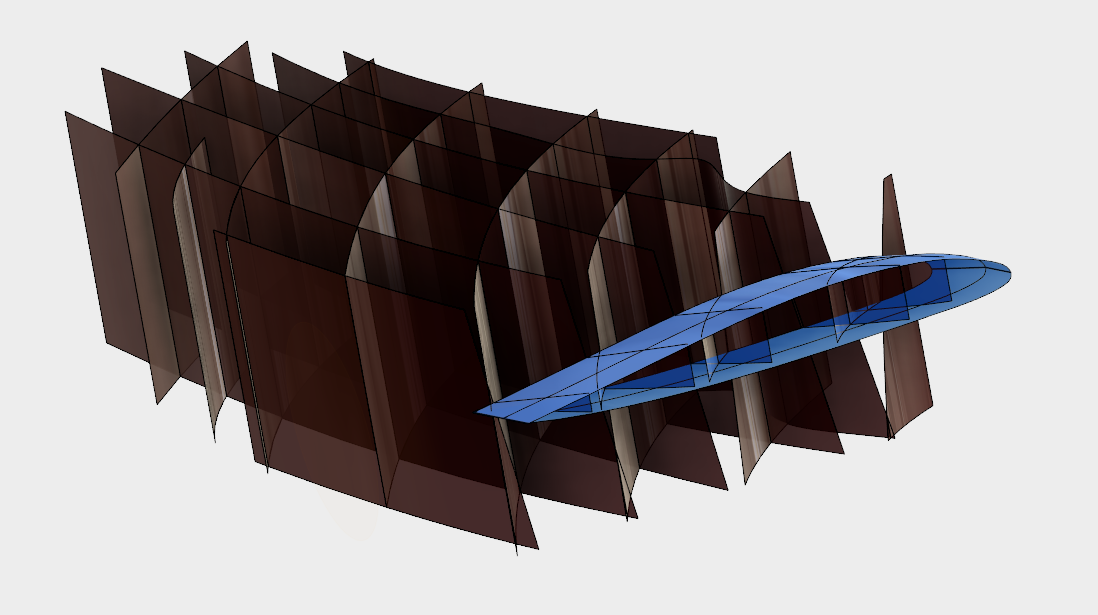
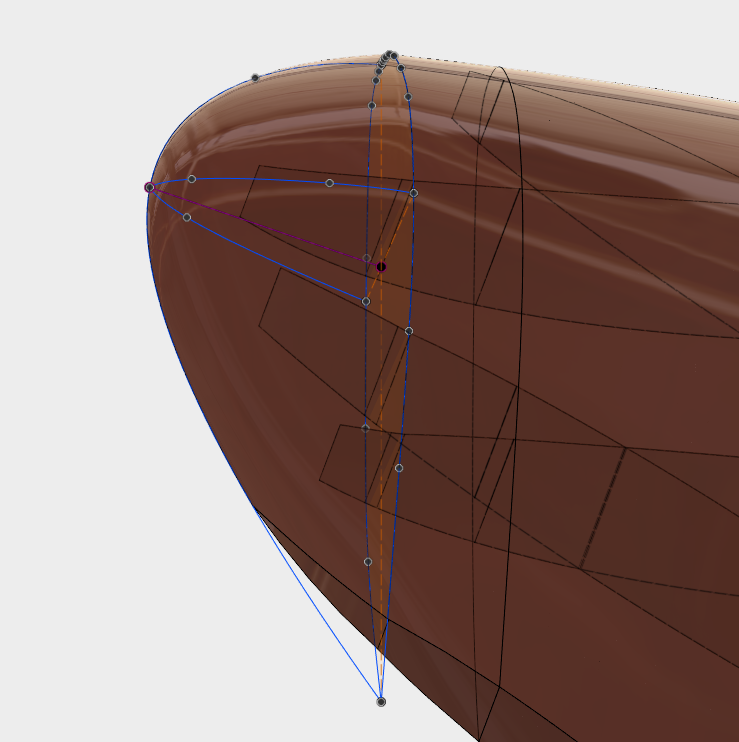
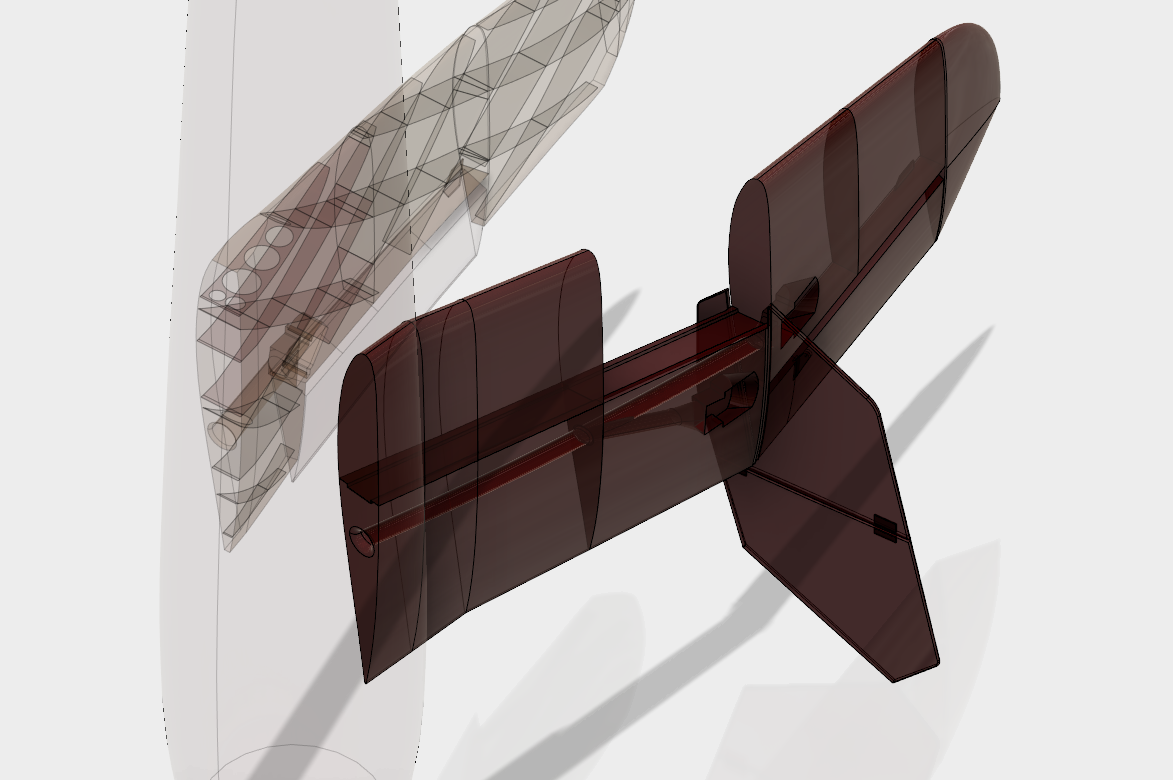
Here's a lofted wingtip with rail guides. Much cleaner that stuff I was getting before.

cMhVz4X.png


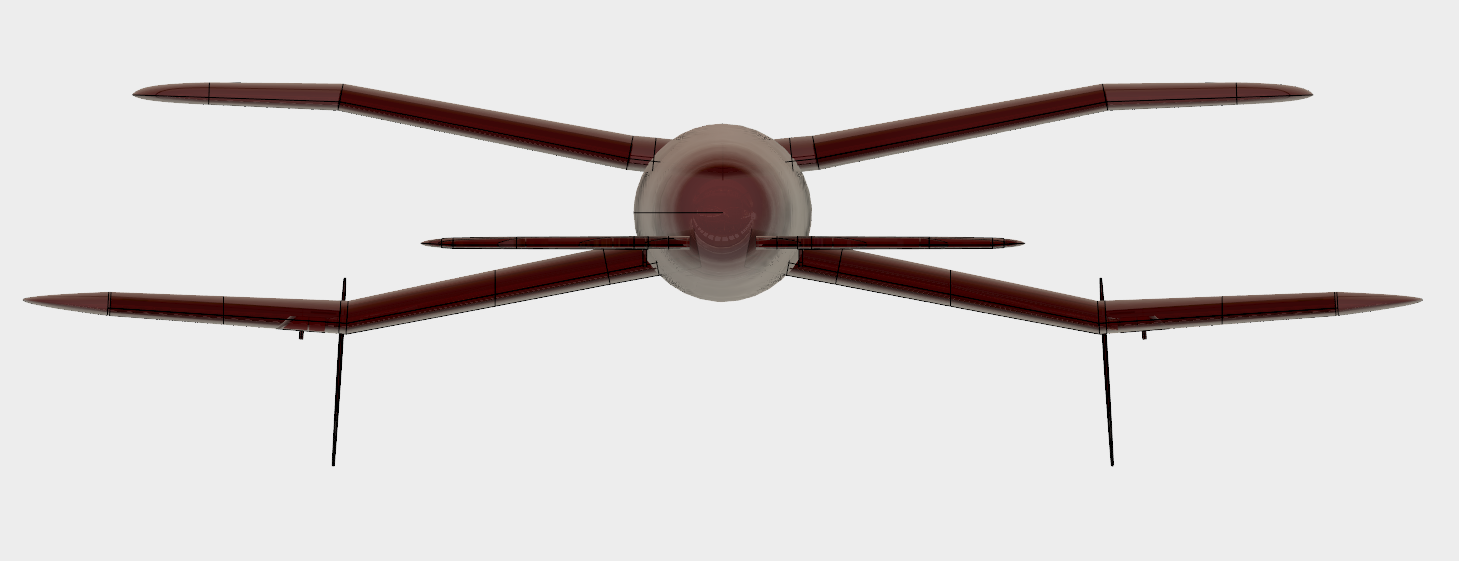
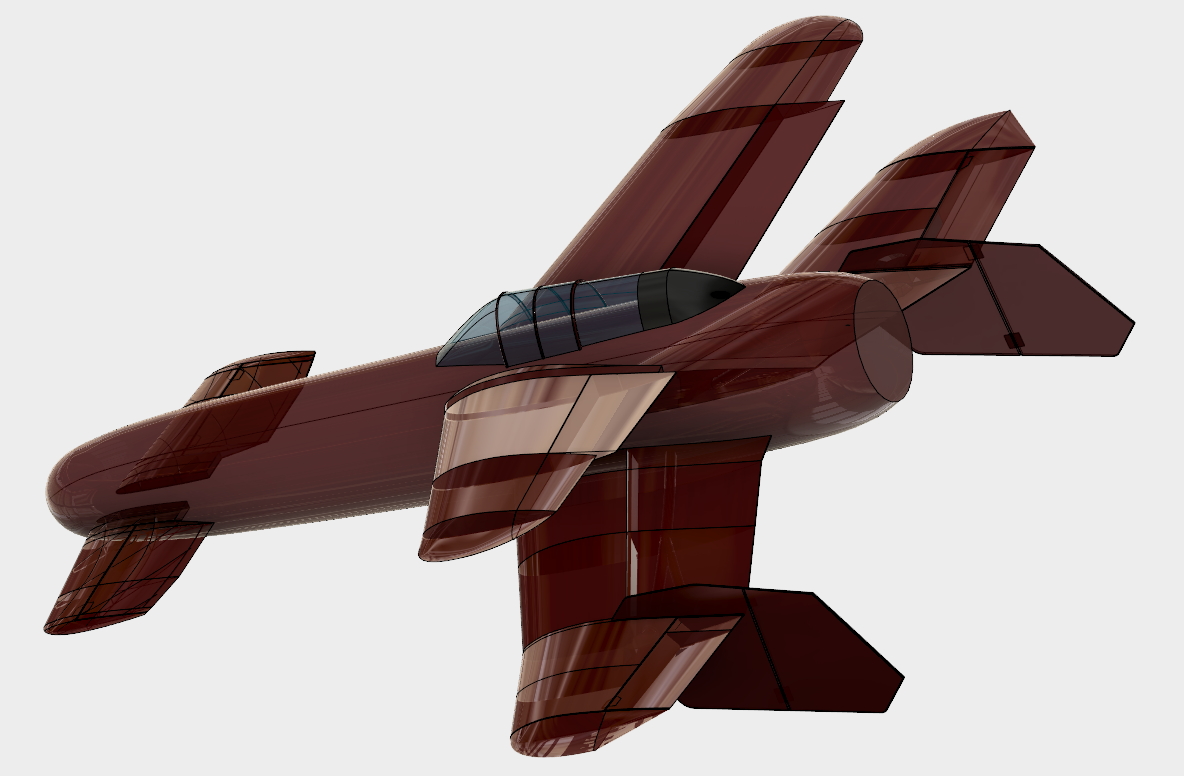
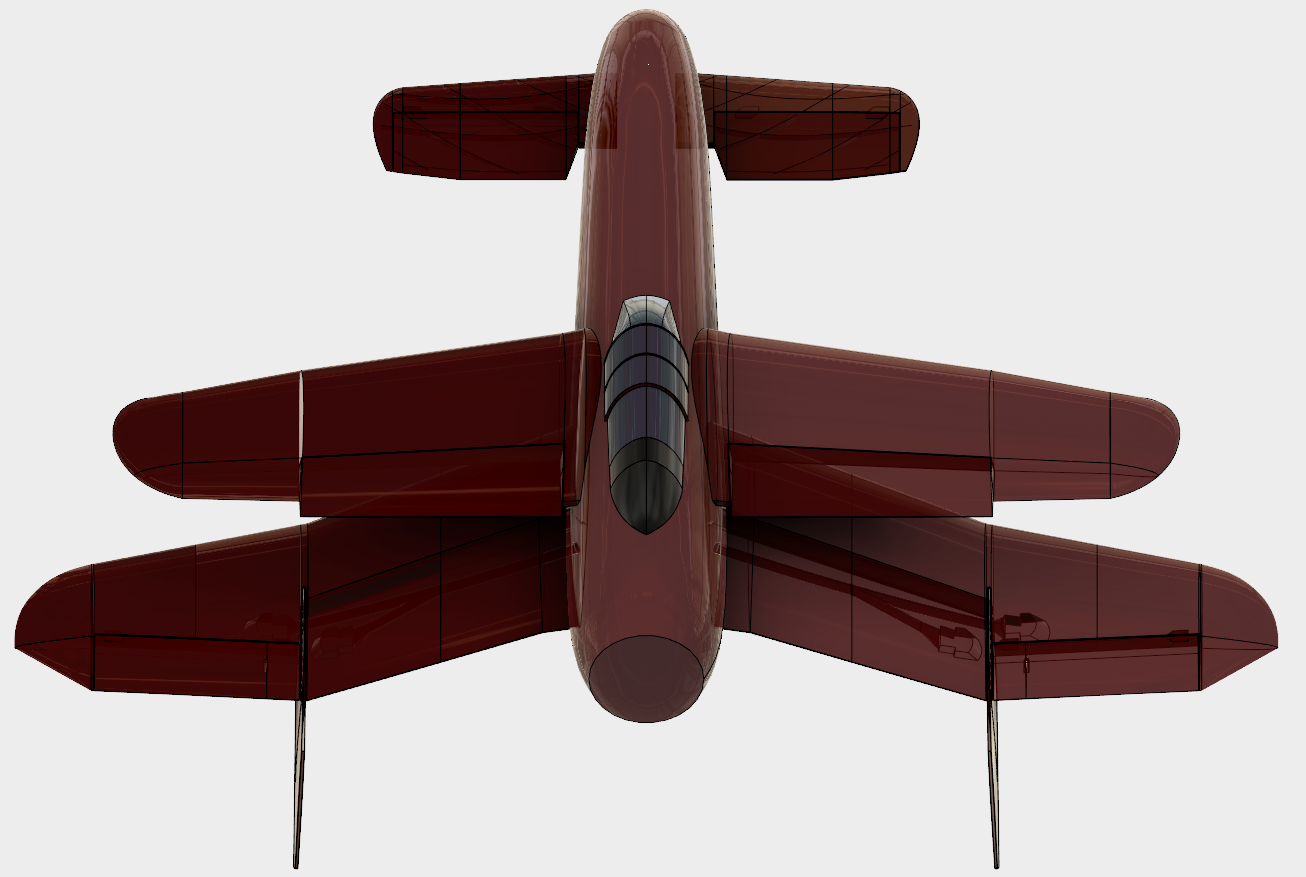
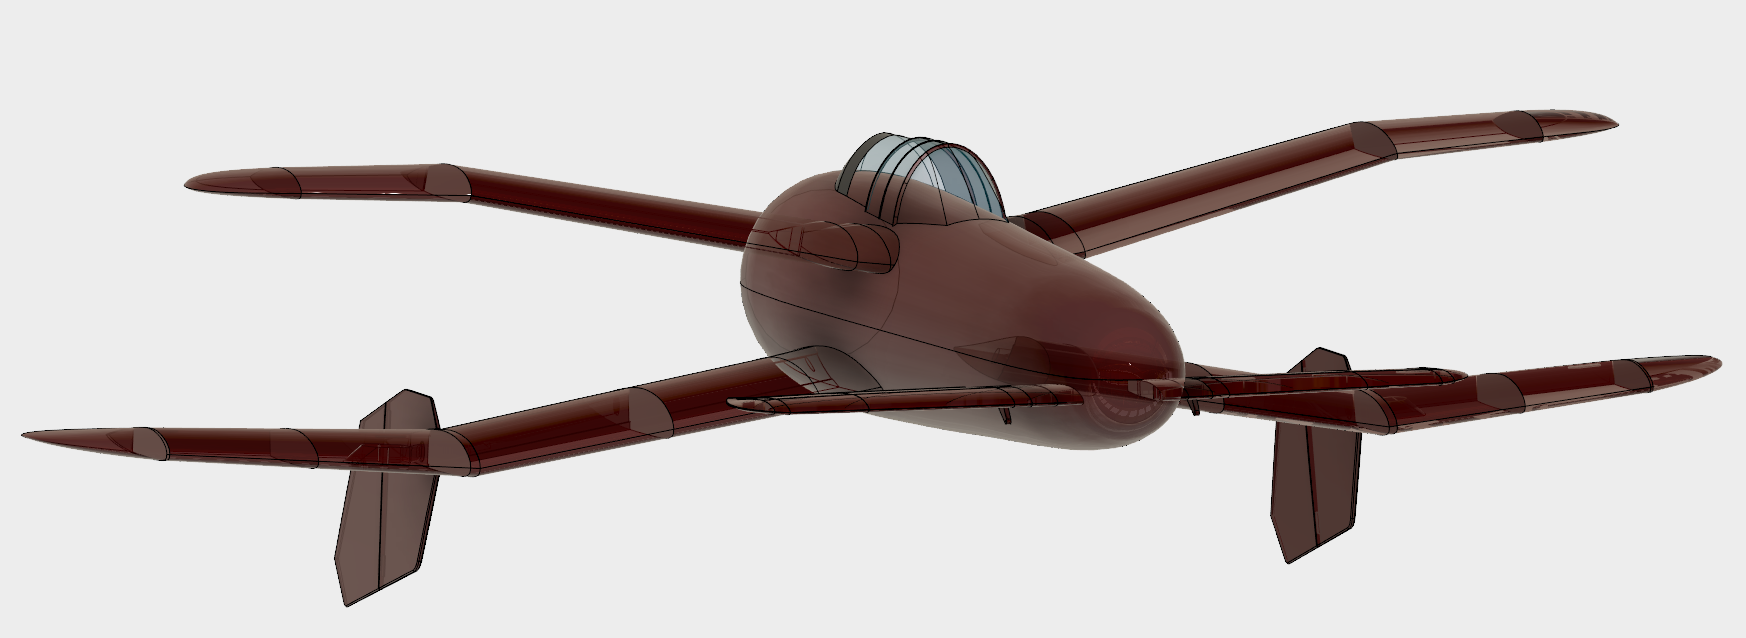
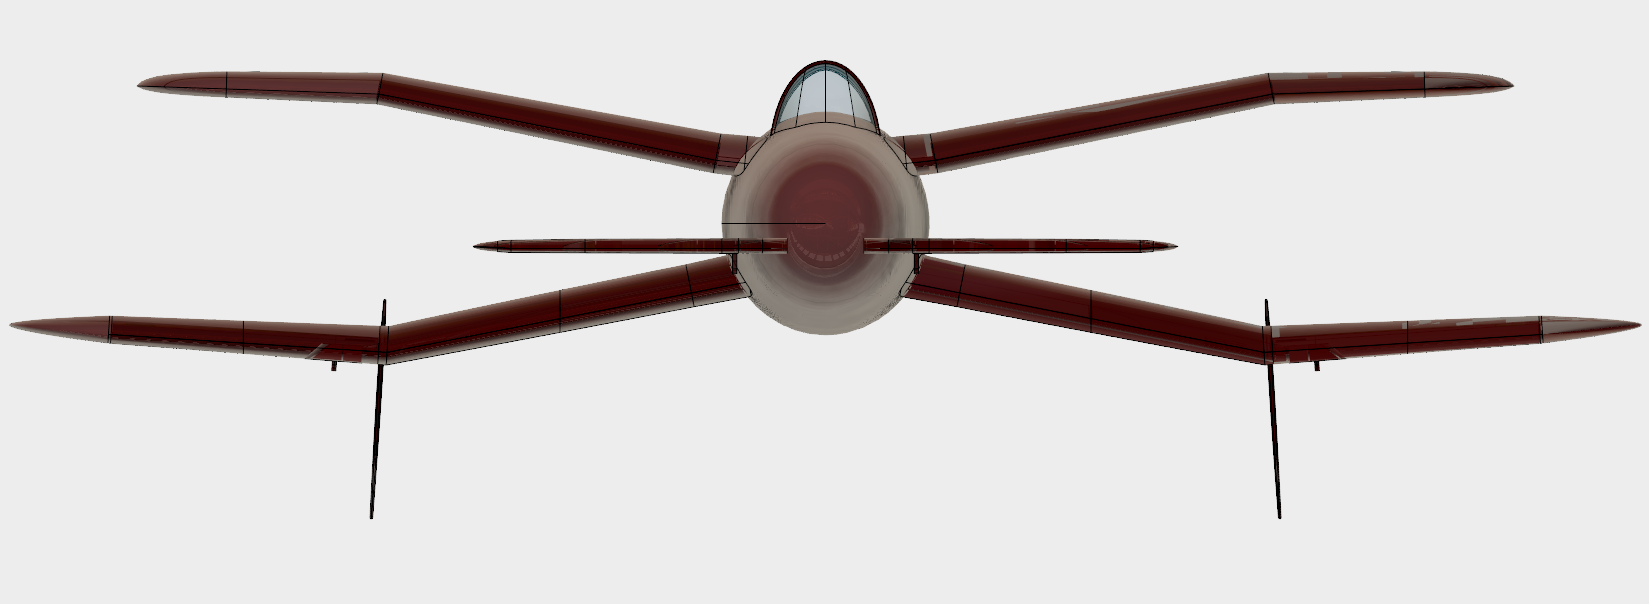
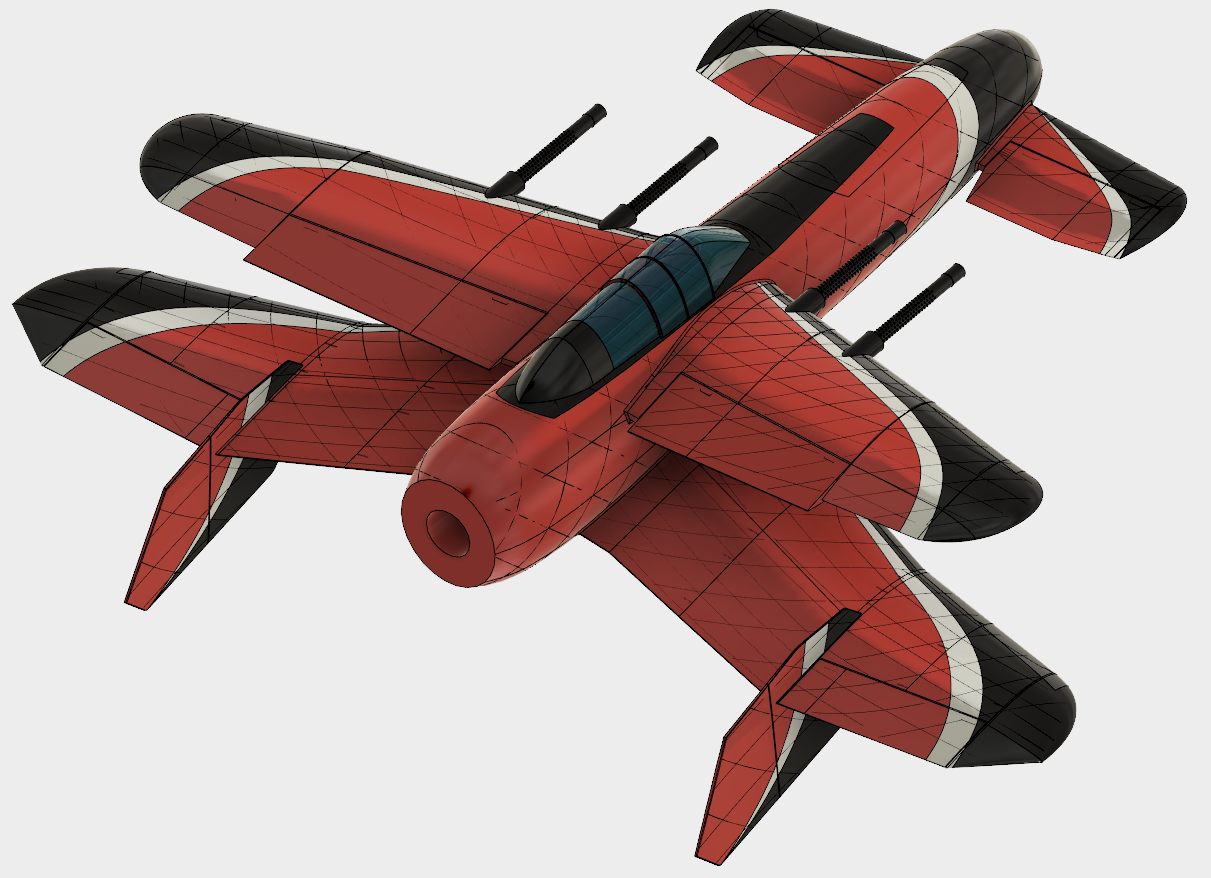
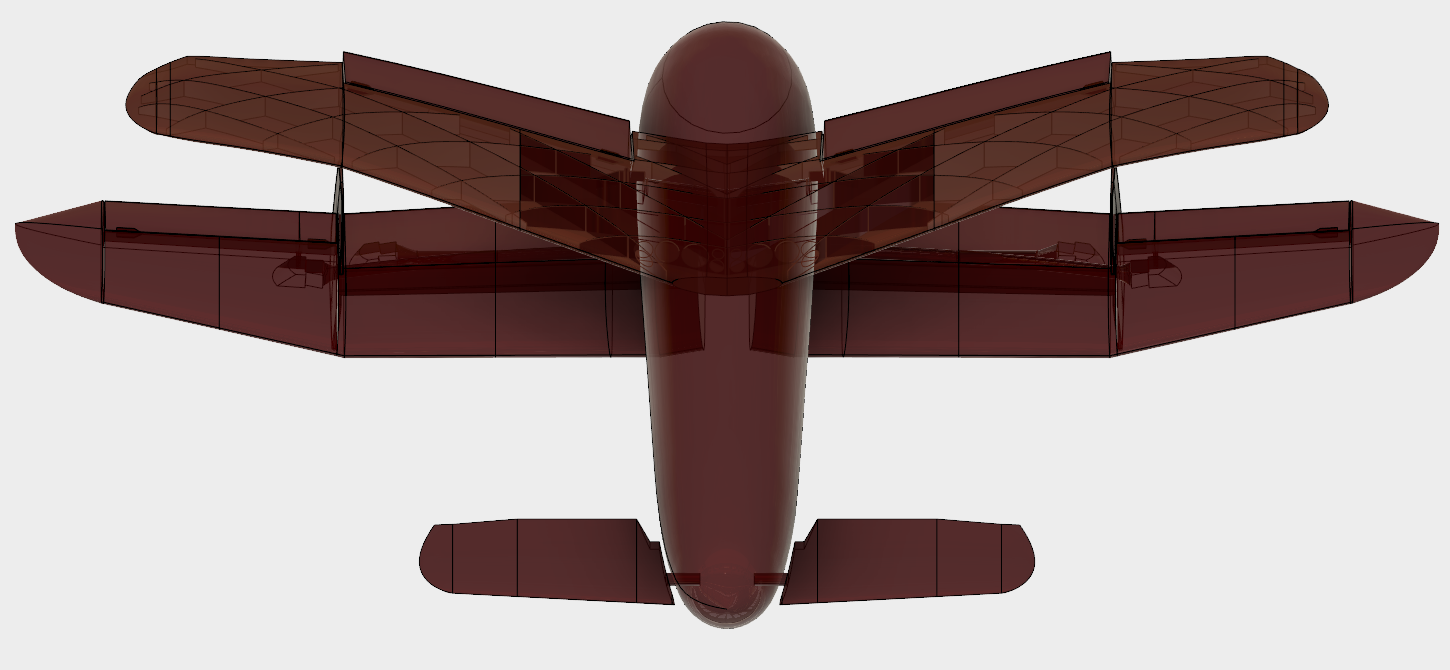
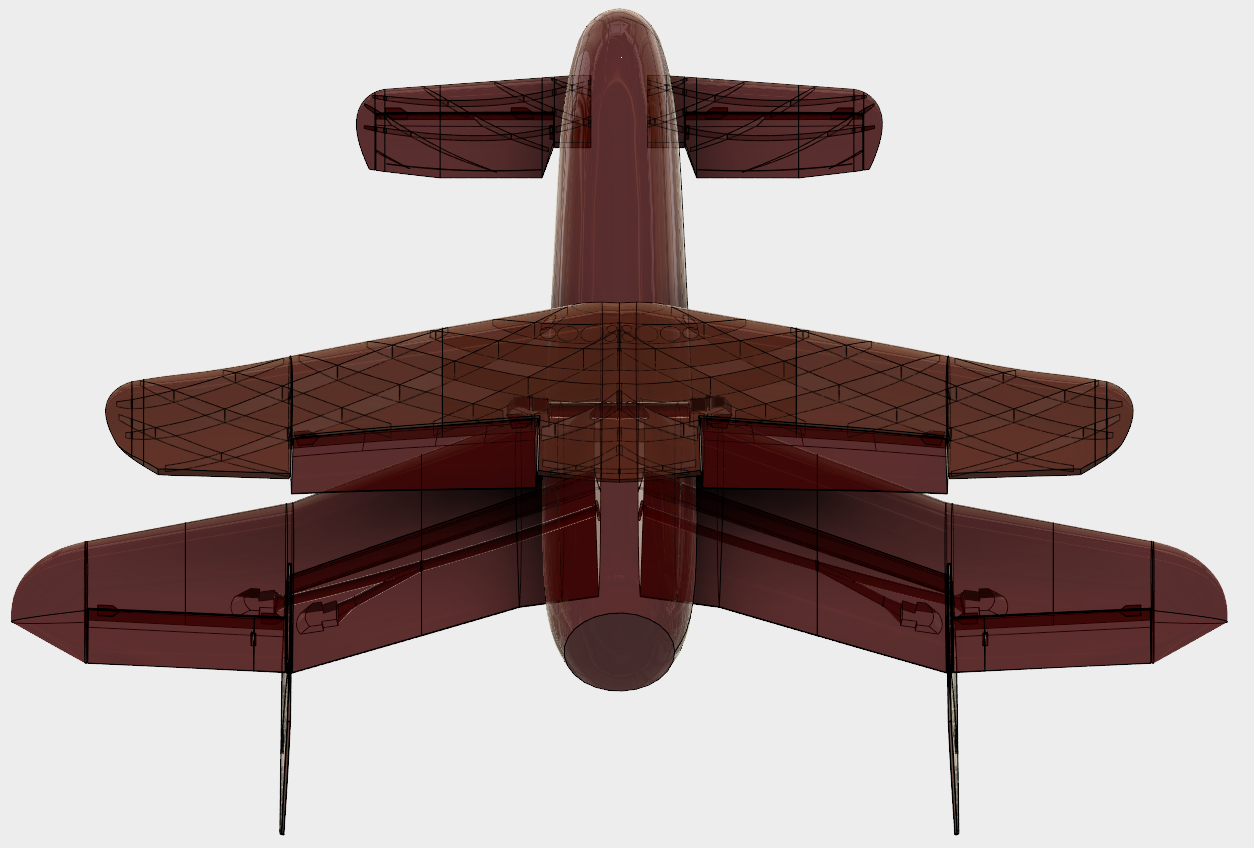
Kinda went overboard as I usually do. I'm too easily distracted. Testing lofts and rails kinda started turning into a whole plane.


ybUMncs.png


oNV3exr.png


Bwgy8YB.png


TX69lfT.png


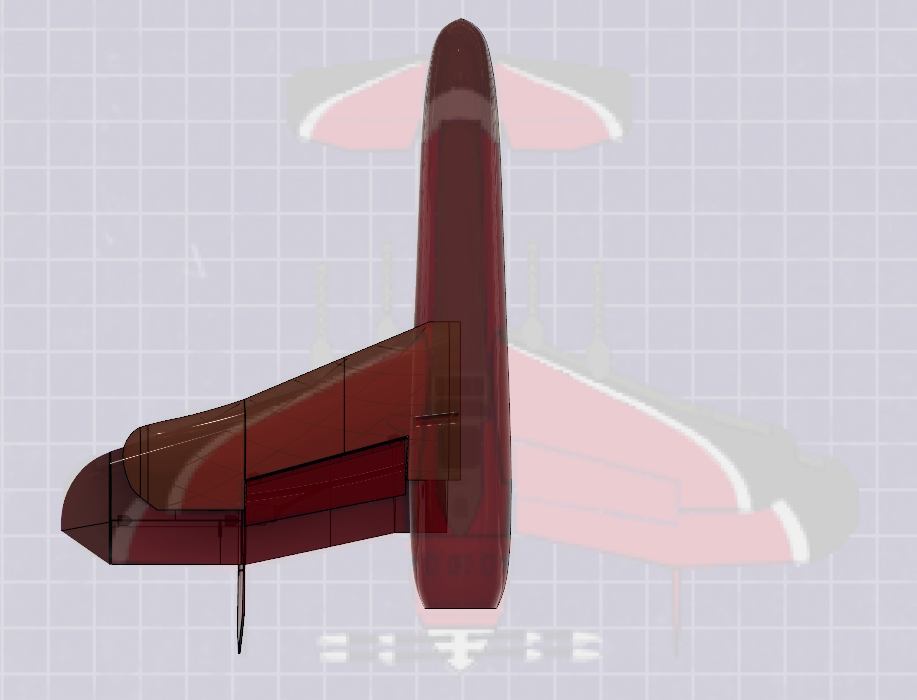
It's decently sized as well. 50" Wingspan. 873.43 sq in of wing area, so I don't think 3D printing weight will be an issue on this plane.


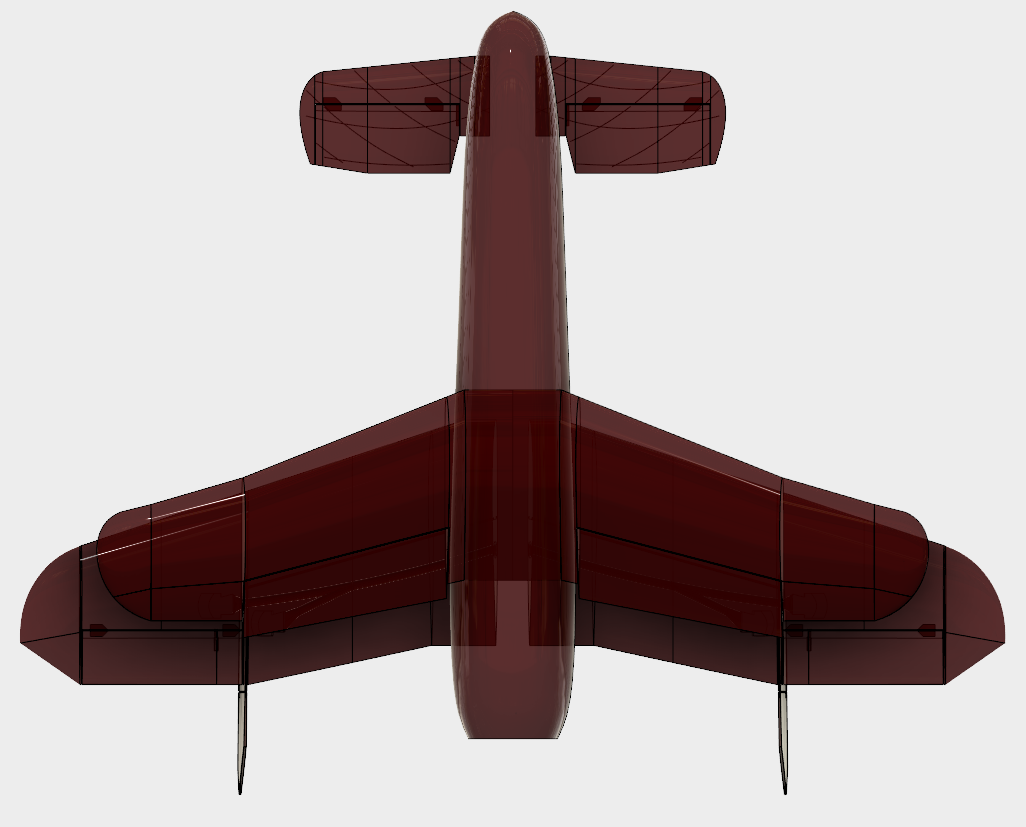
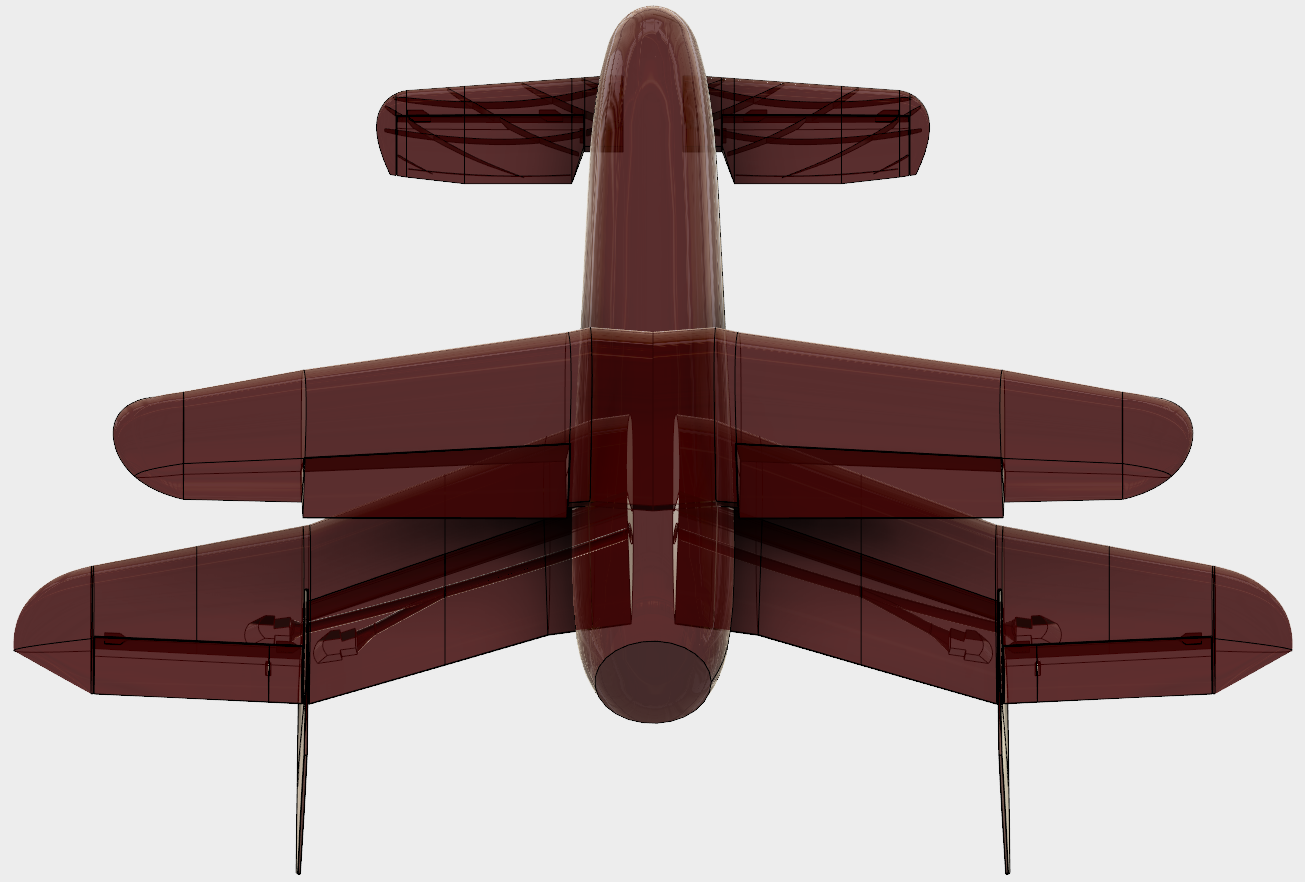
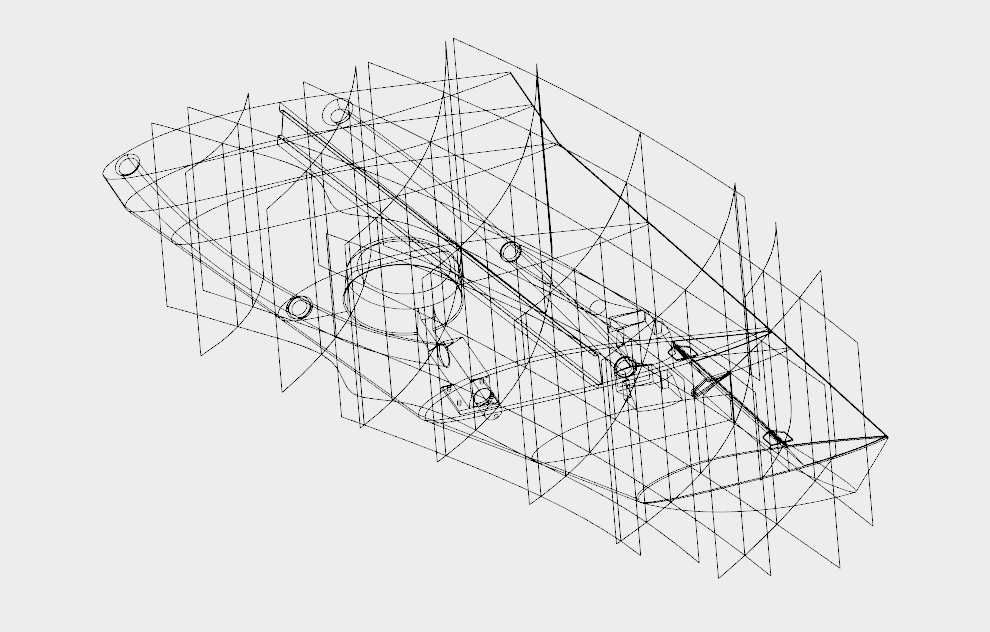
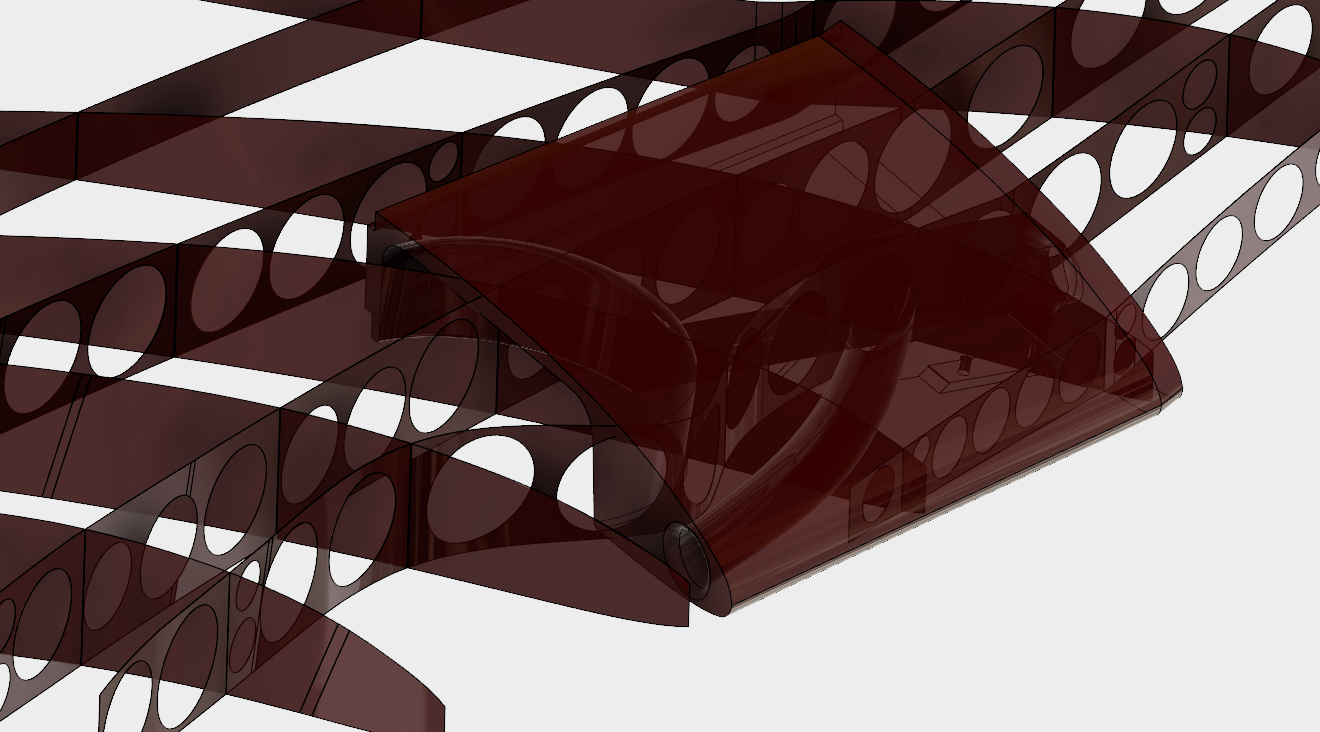
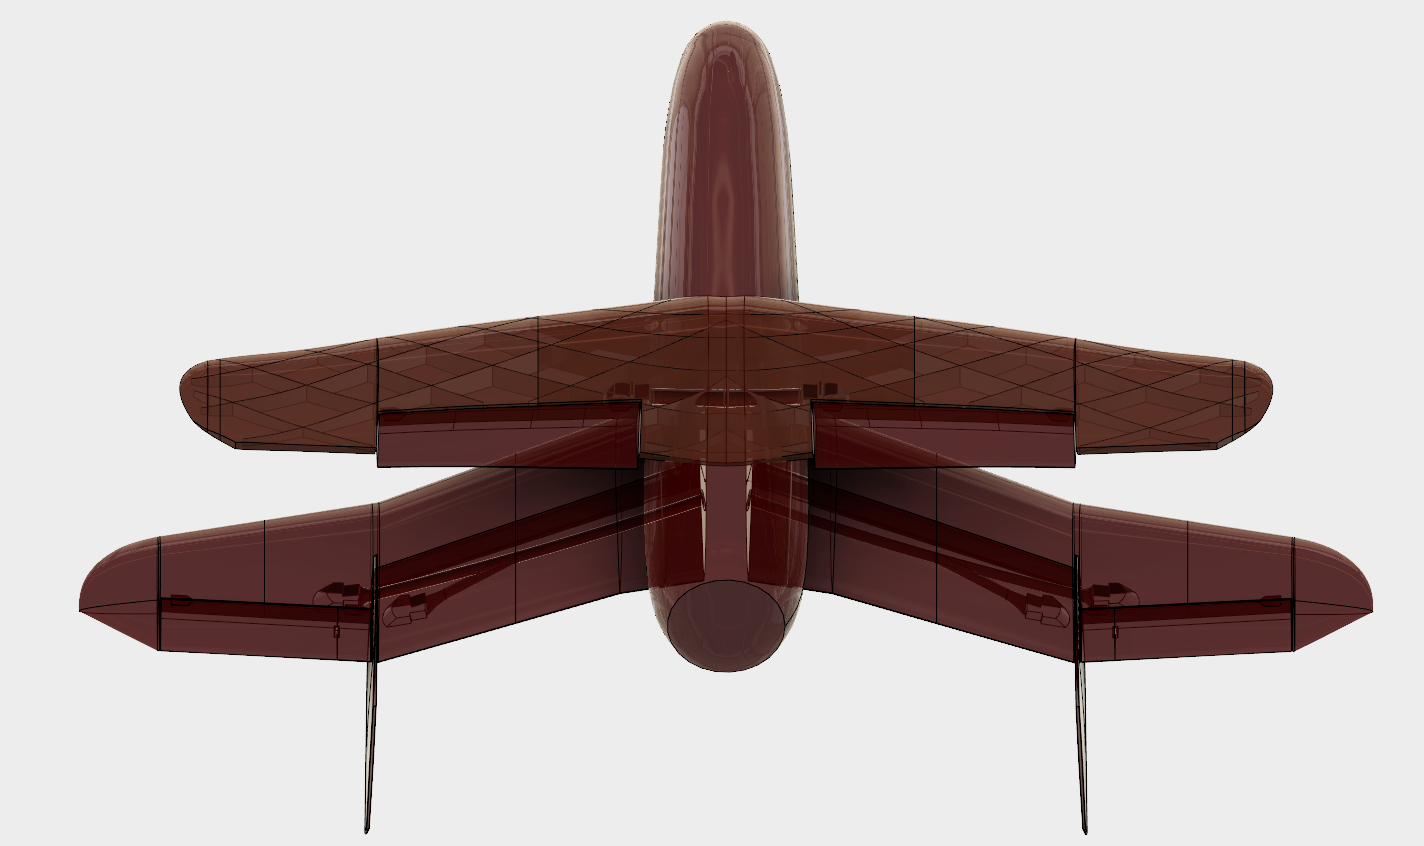
I may redraw the top wing, I did a much better job with the bottom. Still have the Canard at the front to do, then a bunch of internal structure stuff which is getting easier. Also gonna need a canopy, and maybe an airscoop under the engine in the back similar to a P-51. We'll see how quickly stuff goes. I've solved a lot of problems that were giving me tons of grief on the Hall Bulldog I was working on last year and things are progressing smoothly so far.


*********************************************************************

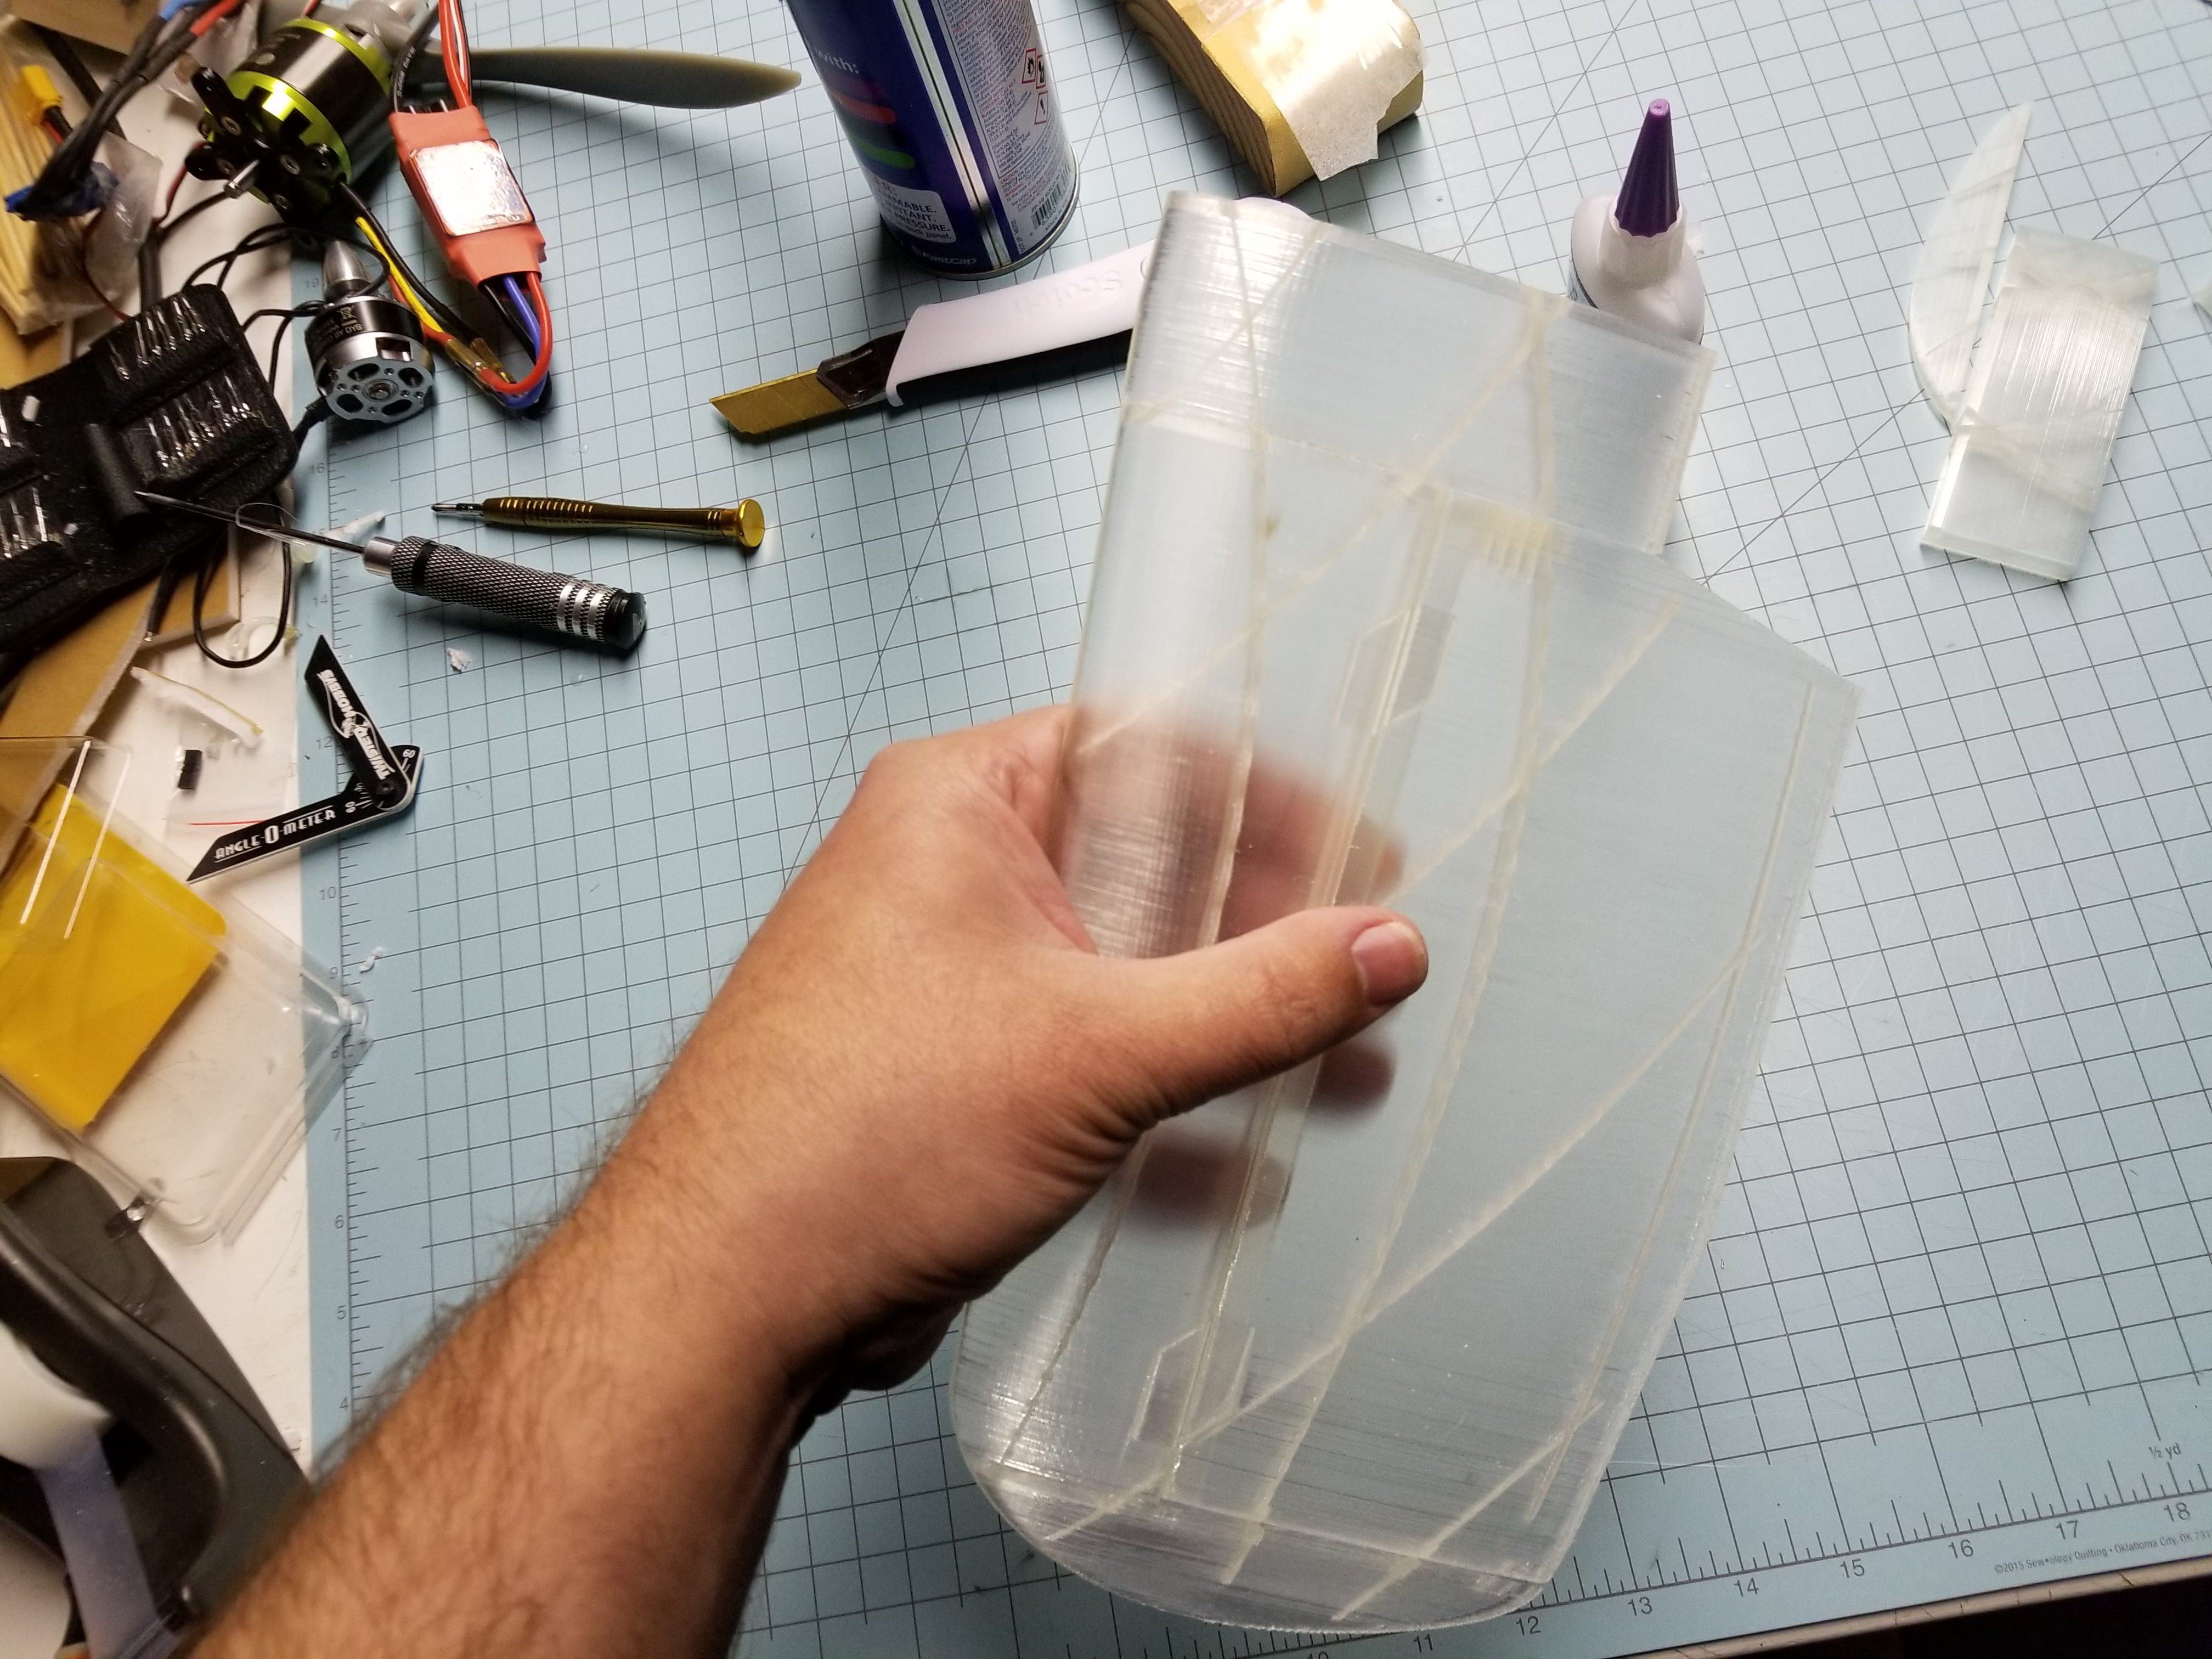
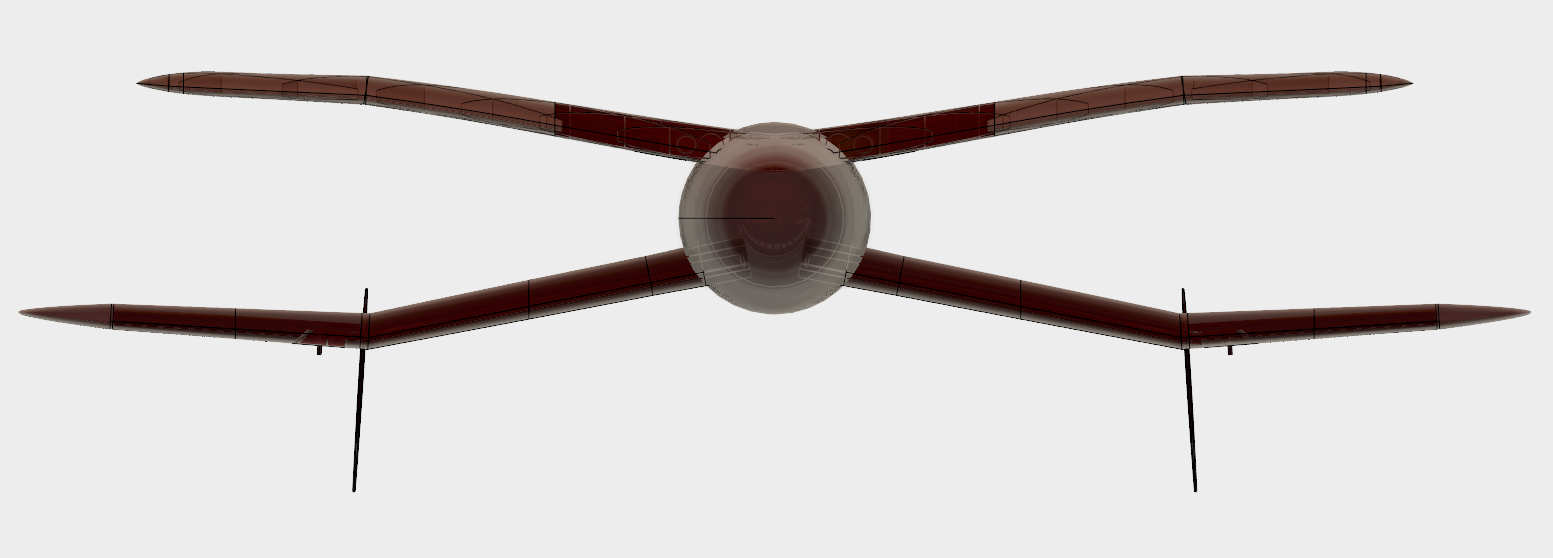
Current Model status:

cQhhyY0.png
 
Last edited:

AkimboGlueGuns

Biplane Guy
Mentor
I don't think you understand how excited I am for one of these things! 3D printing it should make it much more scale than you can do with foam, and it's going to be much easier to do a detailed and dirtied fortune hunters paint scheme on.
 

localfiend

I like 3D printers...
Mentor
I don't think you understand how excited I am for one of these things! 3D printing it should make it much more scale than you can do with foam, and it's going to be much easier to do a detailed and dirtied fortune hunters paint scheme on.

Yeah, that's one of the big reasons I made it bigger. Want the wing loading to be able to easily accommodate some paint and decals.

I'm also adding in slots to insert carbon fiber strips to stiffen the plane up.

https://hobbyking.com/en_us/carbon-strip-1x6x750mm-5pcs-set.html

It's cheap, strong, light, and the added stiffness should allow for PETG printing. Don't want a plane I spend a lot of time on melting in the heat.
 

localfiend

I like 3D printers...
Mentor
Playing with the Canard. Here's how it looks in the game scale location and appearance.

duohwY8.png


e7GHMEh.png


If it's going to be full flying like the Ascender, and keep the scale location of the canard being low on the fuselage centerline, I'm going to have to clearance a good bit of the surface.

P8uObk8.jpg


cZFXD4r.png


Got a few options, could move it to the centerline like the Ascender, use the clearanced version as drawn, or make it fixed. If it's fixed, size will need to increase some to get enough elevator authority if my foam versions tell me anything correct about this.
 

PsyBorg

Wake up! Time to fly!
This looks really cool Mate. I can't wait to see this and the Bull Dog fully done up and ready to fly. Good to see you back and active again.
 

localfiend

I like 3D printers...
Mentor
This looks really cool Mate. I can't wait to see this and the Bull Dog fully done up and ready to fly. Good to see you back and active again.

Thanks, this plane is going much more smoothly than the bulldog did towards the end when I didn't have time to work on it anymore.

I'll resurrect the Bulldog project after this is done, it needs to be started over from the beginning. Learned a lot from a ton of failures on that plane, and a few on this one.

Got the canard all drawn up last night. After going over my foamboard plans a bit more I remembered that I was a able to get away with a fixed canard with elevator in the scale size by short coupling the plane a bit. That is what I will be attempting to do here.

I think it will look more true to the in game plane and still have the flight characteristics I want.

IelkidY.png


Found a set of retracts that I think will work for the rear wings.

https://hobbyking.com/en_us/turnigy-full-metal-electric-retract-100-degree-warbird.html

I need 100 degrees of travel to account for the wing anhedral and these retracts should do the job. I may have to modify length, but it should work out. 120 grams of weight for the pair, but I know the plane will carry that just fine. Just hope I'll have room in the nose for a big enough battery to balance stuff out.

n0fPqei.png


Gonna do some more drawing on it this evening. Trying to decide if I should re-draw the top wings, or start working on the cockpit.
 

rockyboy

Skill Collector
Mentor
Wow - this looks amazing!

I finally ordered an extended set of beams and rods to increase the height on my 3DP so I can tackle one of the 3DLabPrints planes, but I think I'd rather do this one :)
 

localfiend

I like 3D printers...
Mentor
Wow - this looks amazing!

I finally ordered an extended set of beams and rods to increase the height on my 3DP so I can tackle one of the 3DLabPrints planes, but I think I'd rather do this one :)

Thanks. Should be a good plane to break in your 3D printer on. Probably gonna be a good amount of plastic :D. Should fly well too if the foamboard version is any indication.

Don't think I'm making any parts taller than 190mm, so most 3D printers should be able to handle this. Everything, even the bottom wing piece which had to be sliced and dovetailed should fit in a 200x200x200mm print area.


Got the new upper wing done, at least the outer surfaces. I need another space mouse before I tackle interior structure, left mine at my brothers and the new one I ordered isn't here yet. Without a space mouse, fiddly little things takes forever.

Might not seem significant, but this new upper wing is much cleaner, closer to scale, and should be easier to fit internal parts.

iKngKrA.png


fN1FUIh.png


kG4a1cQ.png


f2sYPfw.png


Gonna tackle the canopy and see if I can get that finished tonight. Think it will probably be a bit tricky.
 

rockyboy

Skill Collector
Mentor
Don't think I'm making any parts taller than 190mm, so most 3D printers should be able to handle this. Everything, even the bottom wing piece which had to be sliced and dovetailed should fit in a 200x200x200mm print area.

The 3DLabPrints stuff is the same height wise, but after I switched out my extruder for one that can handle flexible filament much better I ended up with a new Z height of about 175. Since I love the new extruder, the obvious solution is to replace the 300mm uprights with 500mm uprights and double my printable Z axis :)
 

localfiend

I like 3D printers...
Mentor
Got the cockpit done. I think I'm happy with it. We'll see if I decide to tweak it while working on fitting the retracts to the lower wings.


CaypoGe.png


tCIIJLV.png


zZBVeBi.png


wOwd079.png
 

AkimboGlueGuns

Biplane Guy
Mentor
Have you thought of importing the model into X-plane to see how it flies? It won't be a perfect simulation, but you should be able to get some idea of how it will fly.
 

localfiend

I like 3D printers...
Mentor
Have you thought of importing the model into X-plane to see how it flies? It won't be a perfect simulation, but you should be able to get some idea of how it will fly.

Wonder how accurate it would be, and if it would be able to predict what happens if the wings, canard, etc are at different angles of incidence.

I already have a fairly good idea of how it will fly, if it's anything like the foamboard model.


The major difference between that thing, and the 3D printed model so far are actual airfoils, zero incidence on both wings, and the forward canard is closer in shape to scale. It's also scaled up to 50 inches. Hopefully a bit more weight, and all of those other differences don't cause any problems.
 

localfiend

I like 3D printers...
Mentor
Now I know what was bugging me about the cockpit. Needed guns to complete the look lol.

XX1FlKs.png


fXAgNZV.png


aNSNjCi.png


mkxIcKC.png


I want a laser tag system really badly right now lol.
 

localfiend

I like 3D printers...
Mentor
Got the landing gear fitted in last night. Barely squeezed it in there in a way that will be printable. Would be nice if smaller retracts existed with a 100 degree travel, but these will work. Gonna 3D print larger tires for them to get the length needed to clear the large H-Stabs. It'l be easier than modifying the legs if more people than just me build one of these.

uBnAbc1.png


c2t6V66.jpg
 

localfiend

I like 3D printers...
Mentor
Awesome design, I'll definitely print one if you release the files :)

Thanks. I'll be releasing it somehow when it's all done.

Working on wing spars right now, but I got the Canard finished and have a set printing right now.

iYqRH7d.png


6EuOqBL.png


Here's the bottom wing. I've found that intersecting the spars with offset faces works best in chunks. Much better for avoiding errors getting spit out by Fusion.

xbkjQX8.png


FdUQHcb.png
 

JGplanes

Active member
When I ran across this post, I got a huge smile on my face. Not only did I beat the game, but I always wanted a model of this plane, let alone an RC version.

I haven't done anything this complicated in Fusion yet, but I'm wondering why you're intersecting the ribs instead of using the web tool? I usually build half the fuselage, shell it, and then use the web tool. Just curious what the benefits are to this method.

Also, what is the thickness of your walls in F360? Will it translate well into a thin wall printing?

Can't wait to see the final product fly!

JG
 

localfiend

I like 3D printers...
Mentor
When I ran across this post, I got a huge smile on my face. Not only did I beat the game, but I always wanted a model of this plane, let alone an RC version.

I haven't done anything this complicated in Fusion yet, but I'm wondering why you're intersecting the ribs instead of using the web tool? I usually build half the fuselage, shell it, and then use the web tool. Just curious what the benefits are to this method.

Also, what is the thickness of your walls in F360? Will it translate well into a thin wall printing?

Can't wait to see the final product fly!

JG

Man, if only I could do something as simple as using the web tool. I'm intersecting the ribs with an offset face from the main body, not the main body itself. In order to get lightweight thin wall prints you can't have any of the inner structural details touching the other skin surface. Well, they would still be lightweight, but the print quality of the outer skin would be horrible. You'd have a ripple everywhere a piece of the inner bits contacts the outer.

To make things even more annoying, the inner structure has to be the perfect distance away from the outer skin. Learned this through a lot of trial and error.

The perfect distance seems to be .7-.8mm. I use .8mm for everything. Further away than .8mm and your plane becomes weak because the bond between the inner spars and the outer skin is weak. Closer than .8mm or .7mm and you start get stringing, that little bit of extra filament used smears when it gets to close to the outer skin. Much closer than .6mm and you start getting ripples in the outer surface, and you can also start to confuse the slicer and it leaves gaps in the structures.

And if all that isn't annoying enough, you can't shell, or even offset a full wing of this complexity. Any gull wing shapes, or a wing where you add in washout gets too complex for fusion to shell, mostly around the bends or tips. It just can't handle the math. So you have to use offset faces in sections. So spars need to be split up until the sections are small enough that fusion can handle the math, and you can get an intersection or cut to work. Then you loft all the spar sections back together.

Maybe something like solidworks would have less errors and better calculation algorithms. But I'm too poor for that lol.

Dunno if you can see it or not, but the spars are .8mm away from the outer surface of the wing. When this is all done and ready for printing, the outer wall of the wing will actually be zero width, which allows for a single outline to be extruded by your printer.

W3b7x67.png


If your outer section is thicker than zero, you can set your slicer to print two skinnier outlines, but not just one. And even if those two skinnier outlines add up to the same thickness as the method I use, it won't be as strong.

I've actually got the canard all printed, here's what it looks like.

7rM1uL3.jpg


pwCRZaY.jpg


Just like the 3Dlabprint stuff.