3D Printed Hughes P21-J Devastator

localfiend

I like 3D printers...
Mentor
Got the final version of the bottom wing figured out and printed. Now I just need to print out the right side.

AIgxg4A.jpg


VUpkJkg.jpg


Also started playing with the last piece, the fuselage. Still trying to decide if it would be better to have stubbs coming off of it, or slots the wings will fit into.

If I do the slots, there may be a way to make the wings removable. Stubbs will need to have different spar patterns in order to be printable, which won't match the rest of the wing. I'm also a little concerned about how strong it will be. Decisions decisions lol.

zHGAu03.png
 

localfiend

I like 3D printers...
Mentor
Wow!

DamoRC

Thanks. I'm really pleased with how it's turning out so far.

Here's some weight estimates for those that are curious. I've been constantly doing weight calculation as I draw and print. Some of my estimates were a little lighter than reality it seems. I've crawled up from 2500 grams to 2700 grams. Good news is that my fuselage estimate may have been high. Won't know for sure until it's all done though.

KhJR6lw.png


Giving the biplane wings only 80% efficiency, and not counting the canard, the wing cube loading should be about 8.9. That's really not bad for 3D printed fantasy plane like this. :D


Currently working on the spar arrangement for the fuselage. Still have a bunch to add. All the wing and canard attachment points are figured out though, and the forward hatch is close. I'll probably be making the canopy removable as well. Will be good to have access to the ESC and wing wires from that spot.

Need to find my steerable nose retract setup and start fitting that to the model as well.

kaejnB3.png


5gnClei.png
 

localfiend

I like 3D printers...
Mentor
Fuselage is coming along. Can't find my nose wheel retract though. Might have to order another one...

TKuuYfj.png
 

PsyBorg

Wake up! Time to fly!
Just catching up with the latest on this thread mate. This is looking better n better each time I check in. Reading the spec sheet you posted I gather that this is looking more and more like it will really fly?
 

localfiend

I like 3D printers...
Mentor
Just catching up with the latest on this thread mate. This is looking better n better each time I check in. Reading the spec sheet you posted I gather that this is looking more and more like it will really fly?

Flying is the goal. :cool: Assuming higher wing loading and an actual airfoil don't cause me a bunch of stability problems it should fly. The foamboard version eventually flew quite well.

I've gotten the final versions of the bottom wings all printed out and am starting on the upper ones.

J85eDLm.jpg
 

localfiend

I like 3D printers...
Mentor
Uncle Manuel said:
Hi! (*the-Josh-Bixler-Hi!* :D)

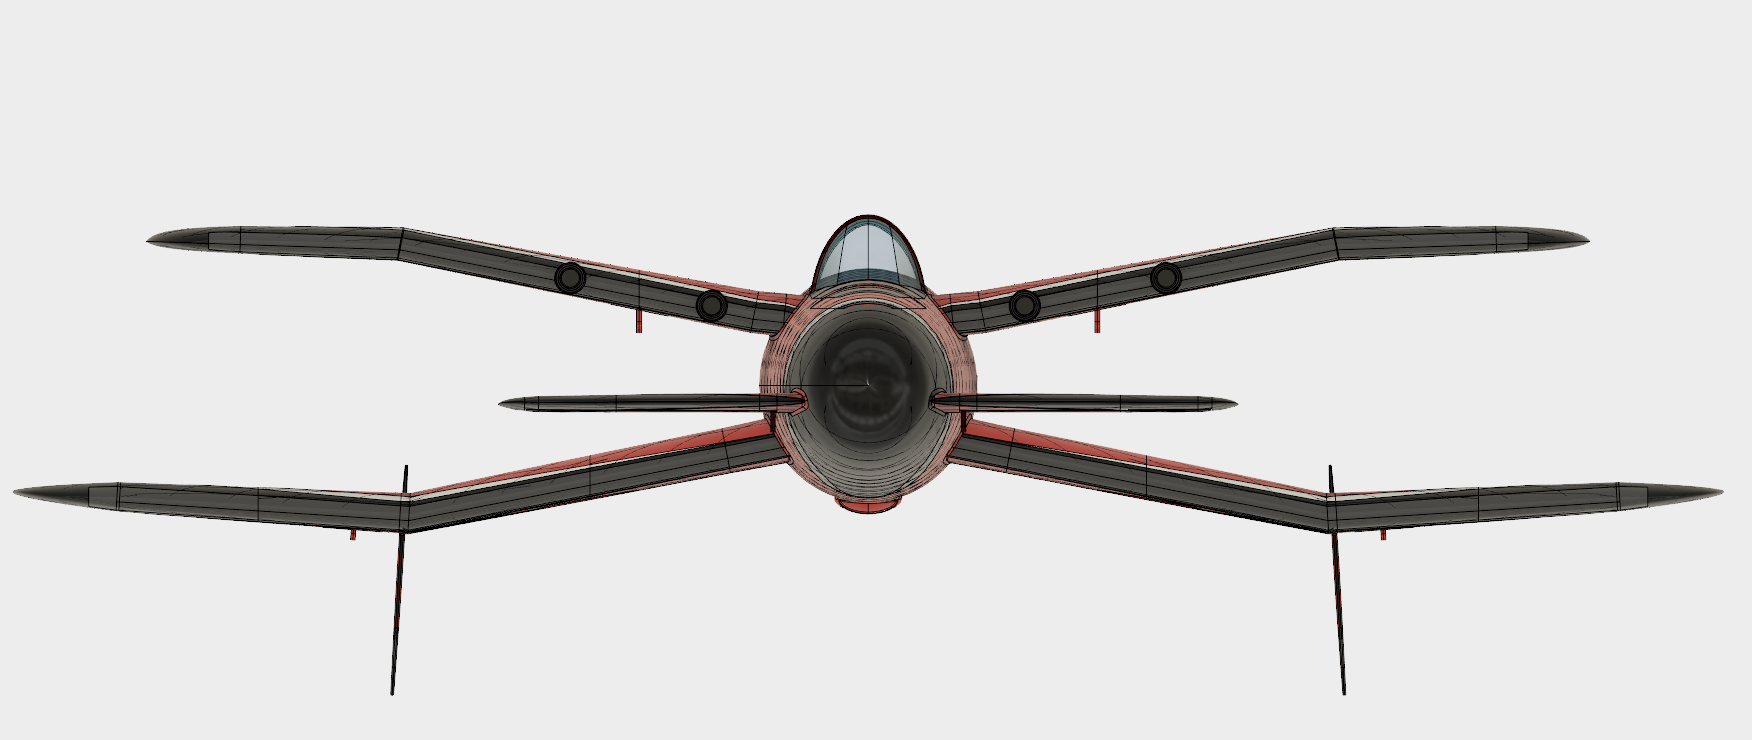
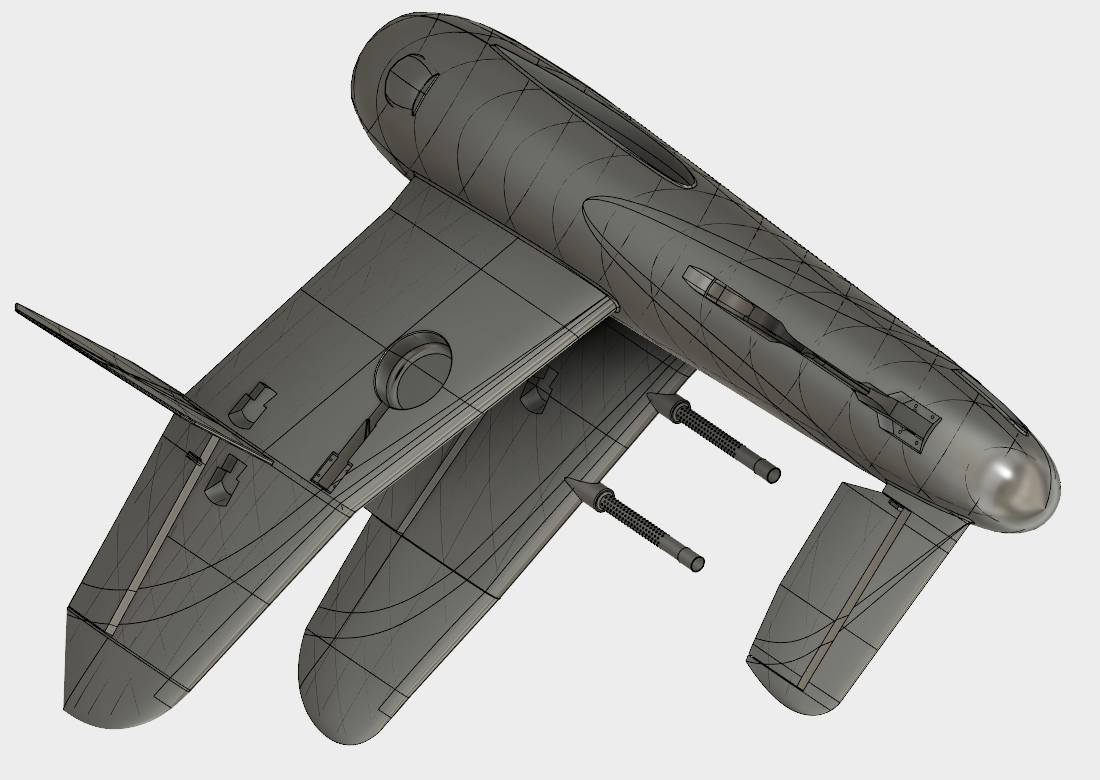
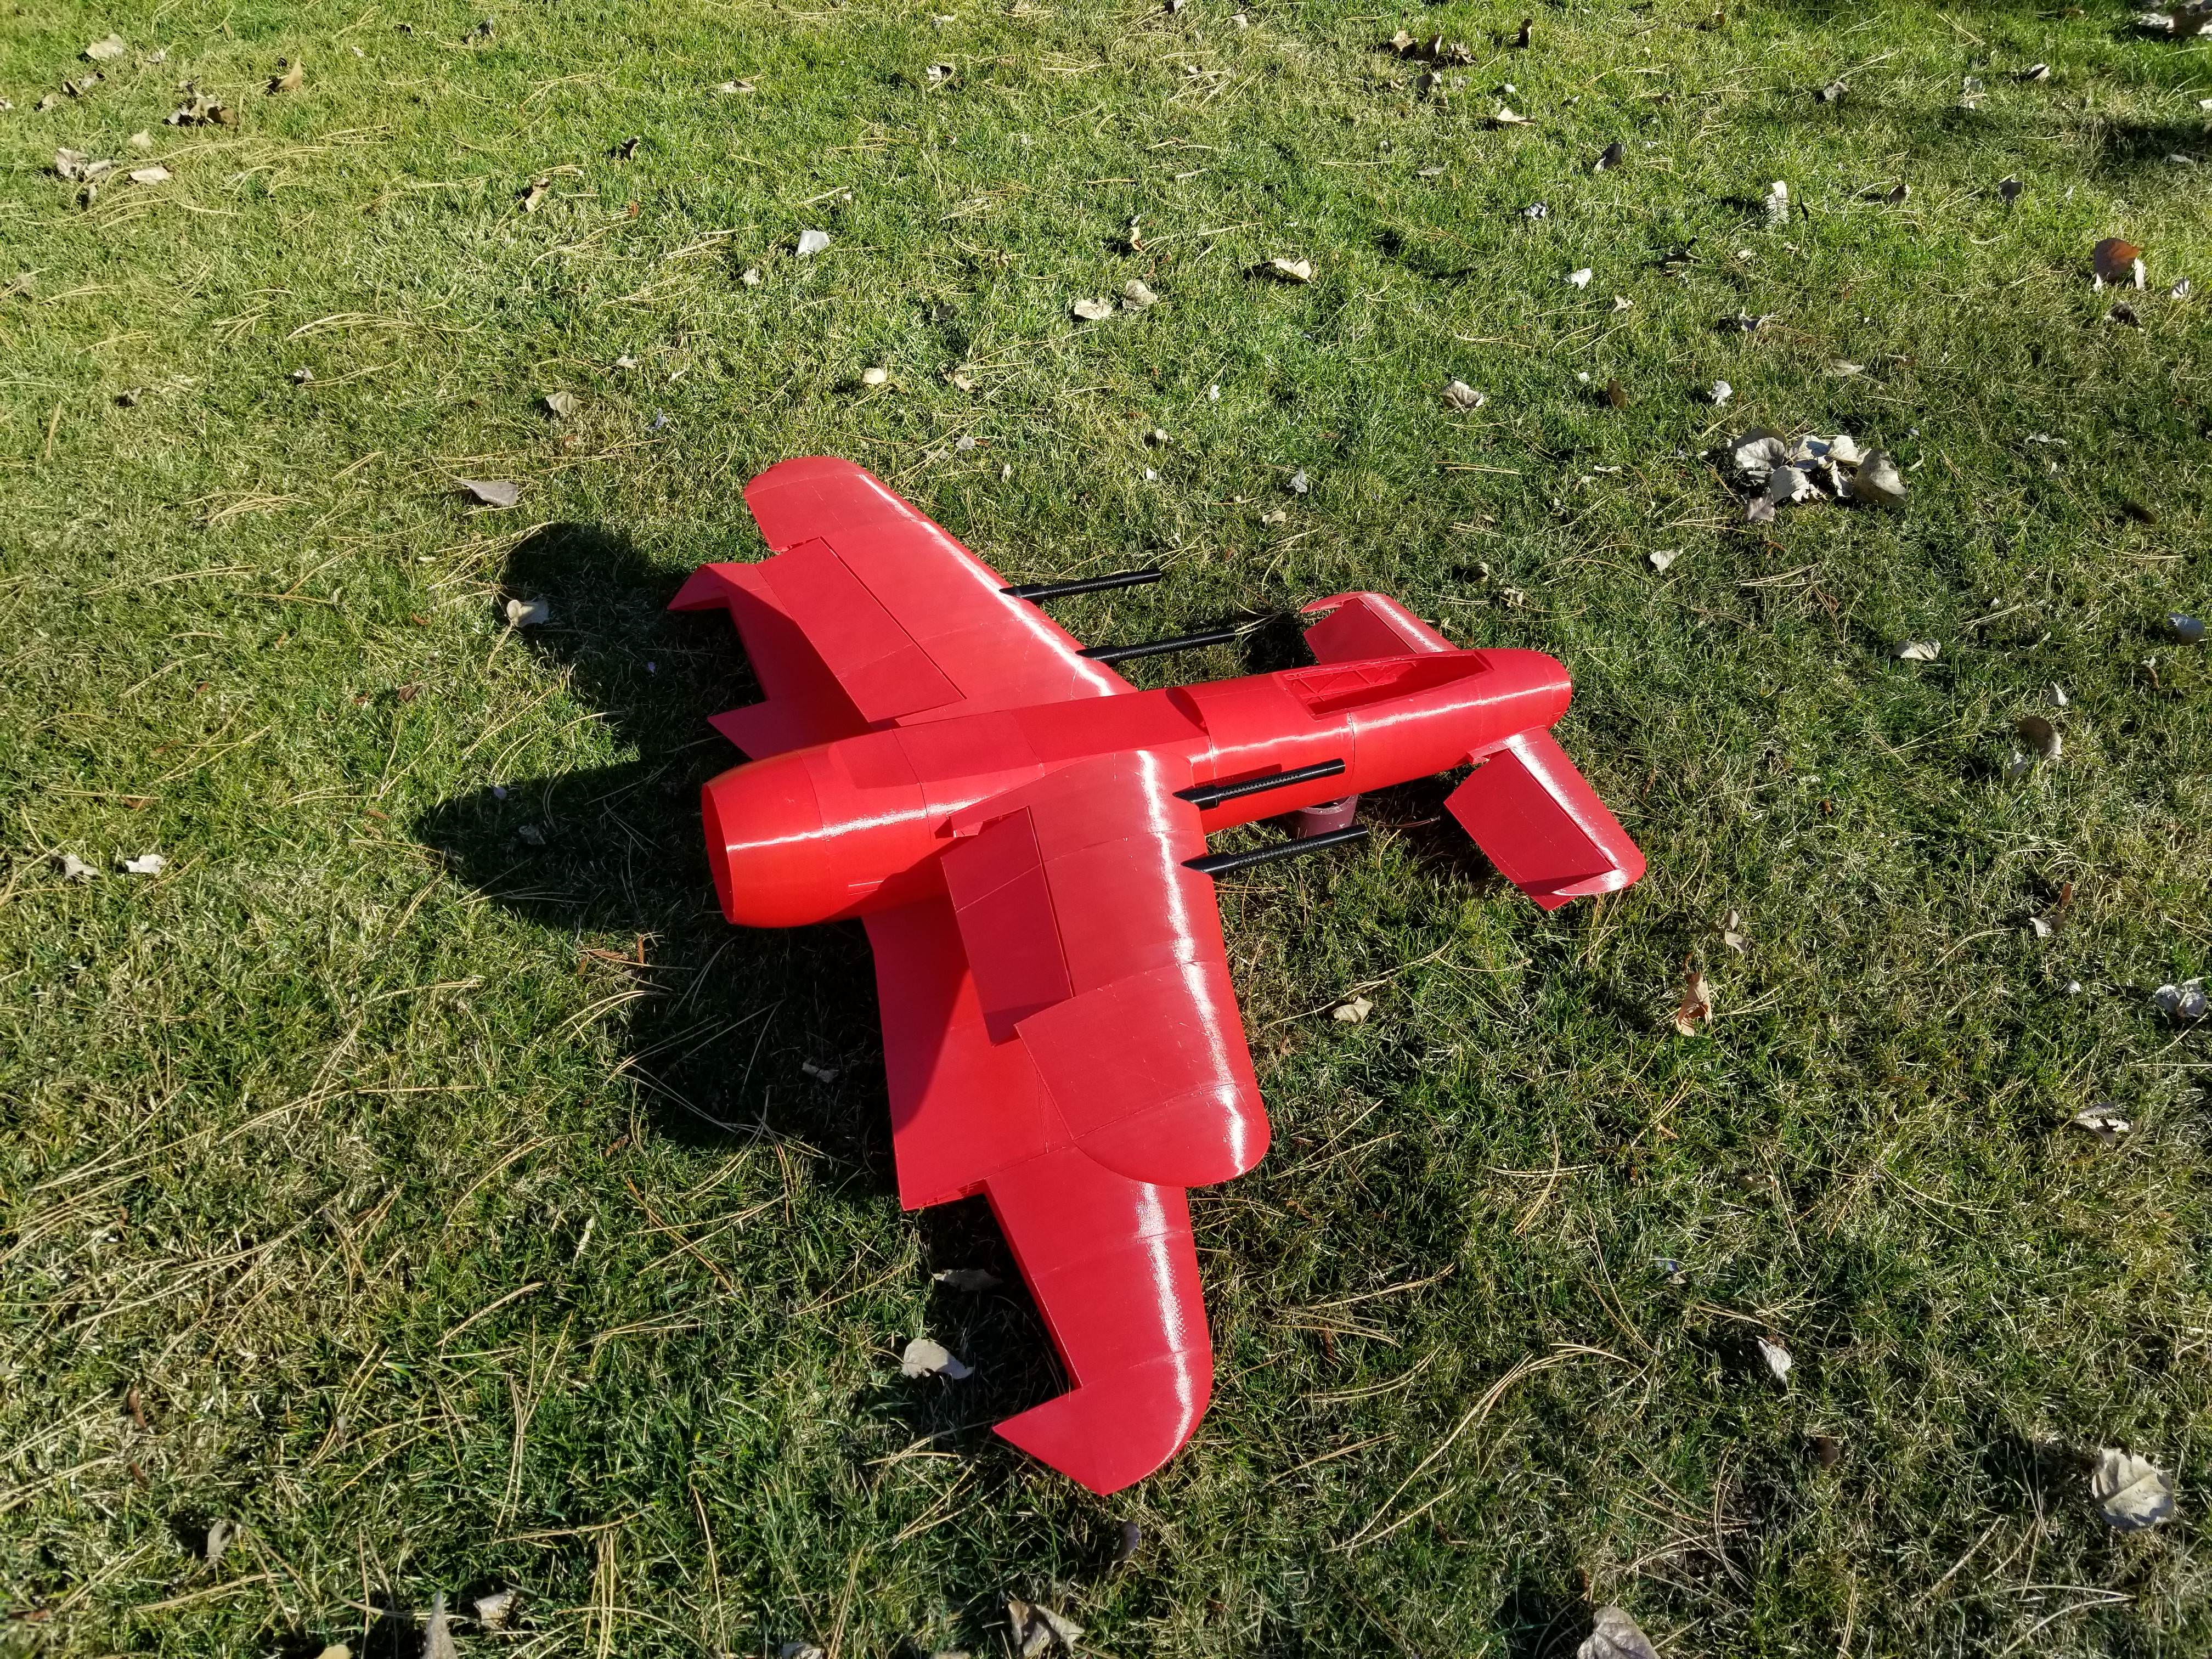
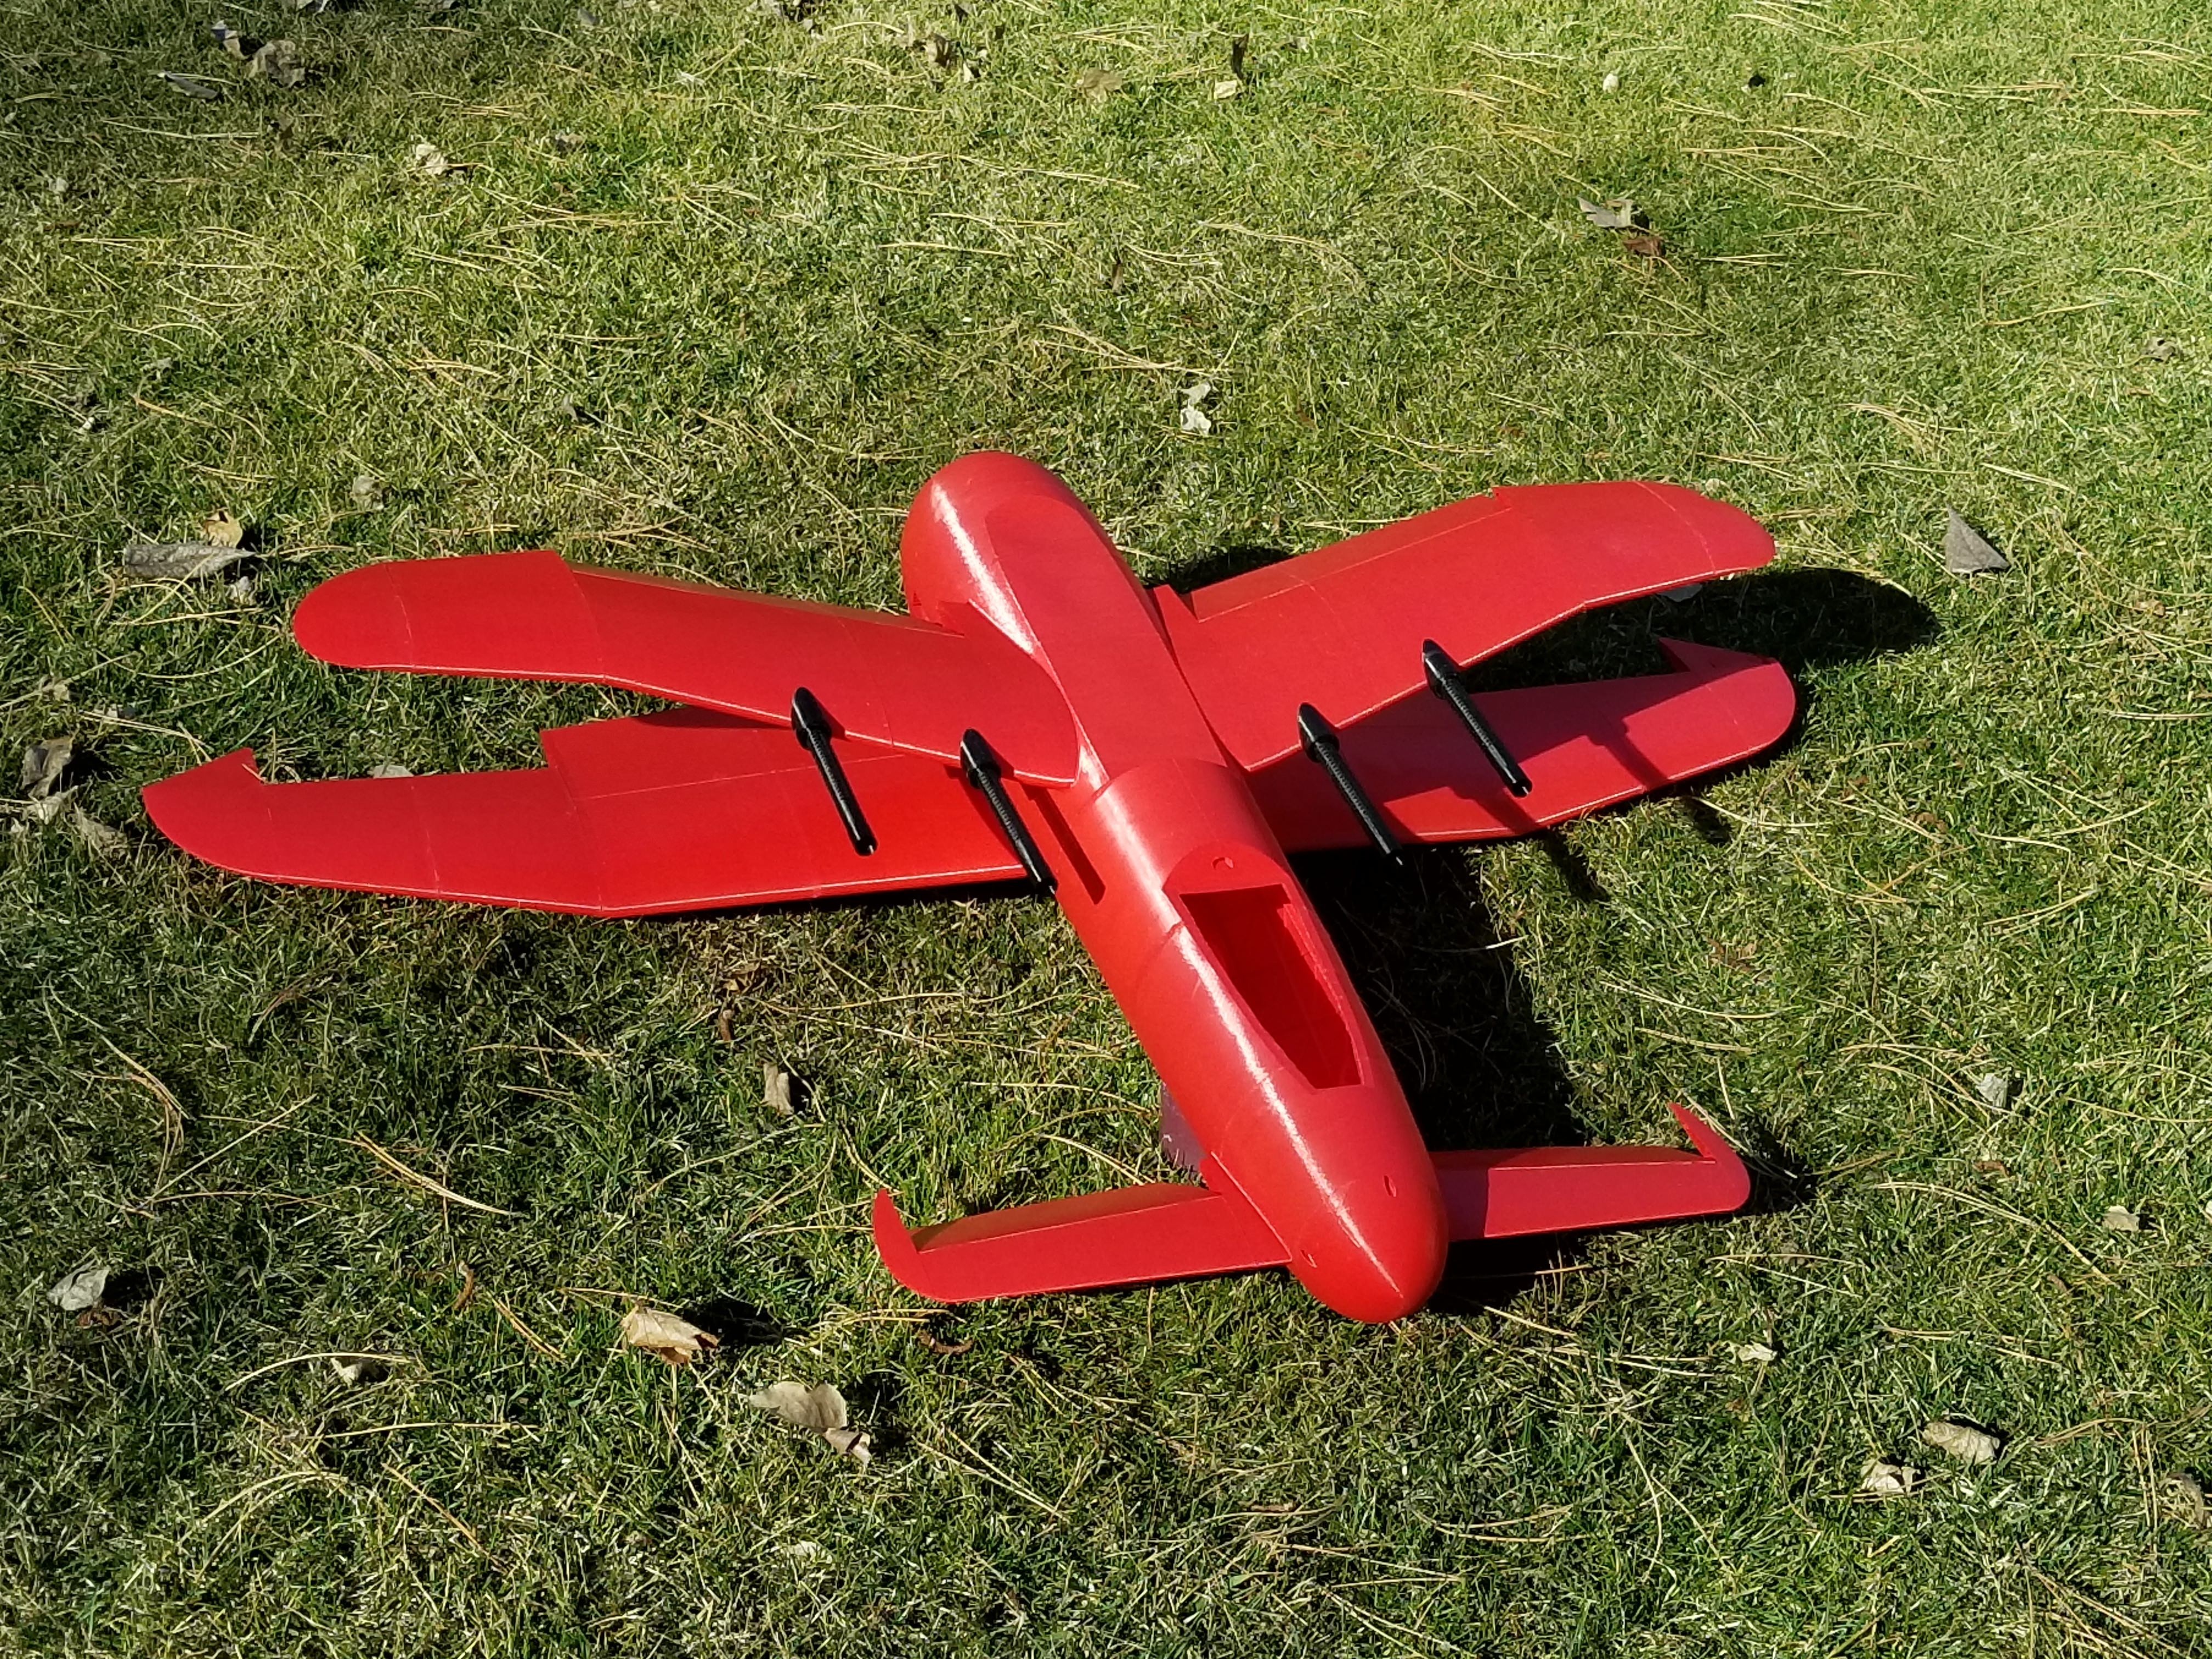
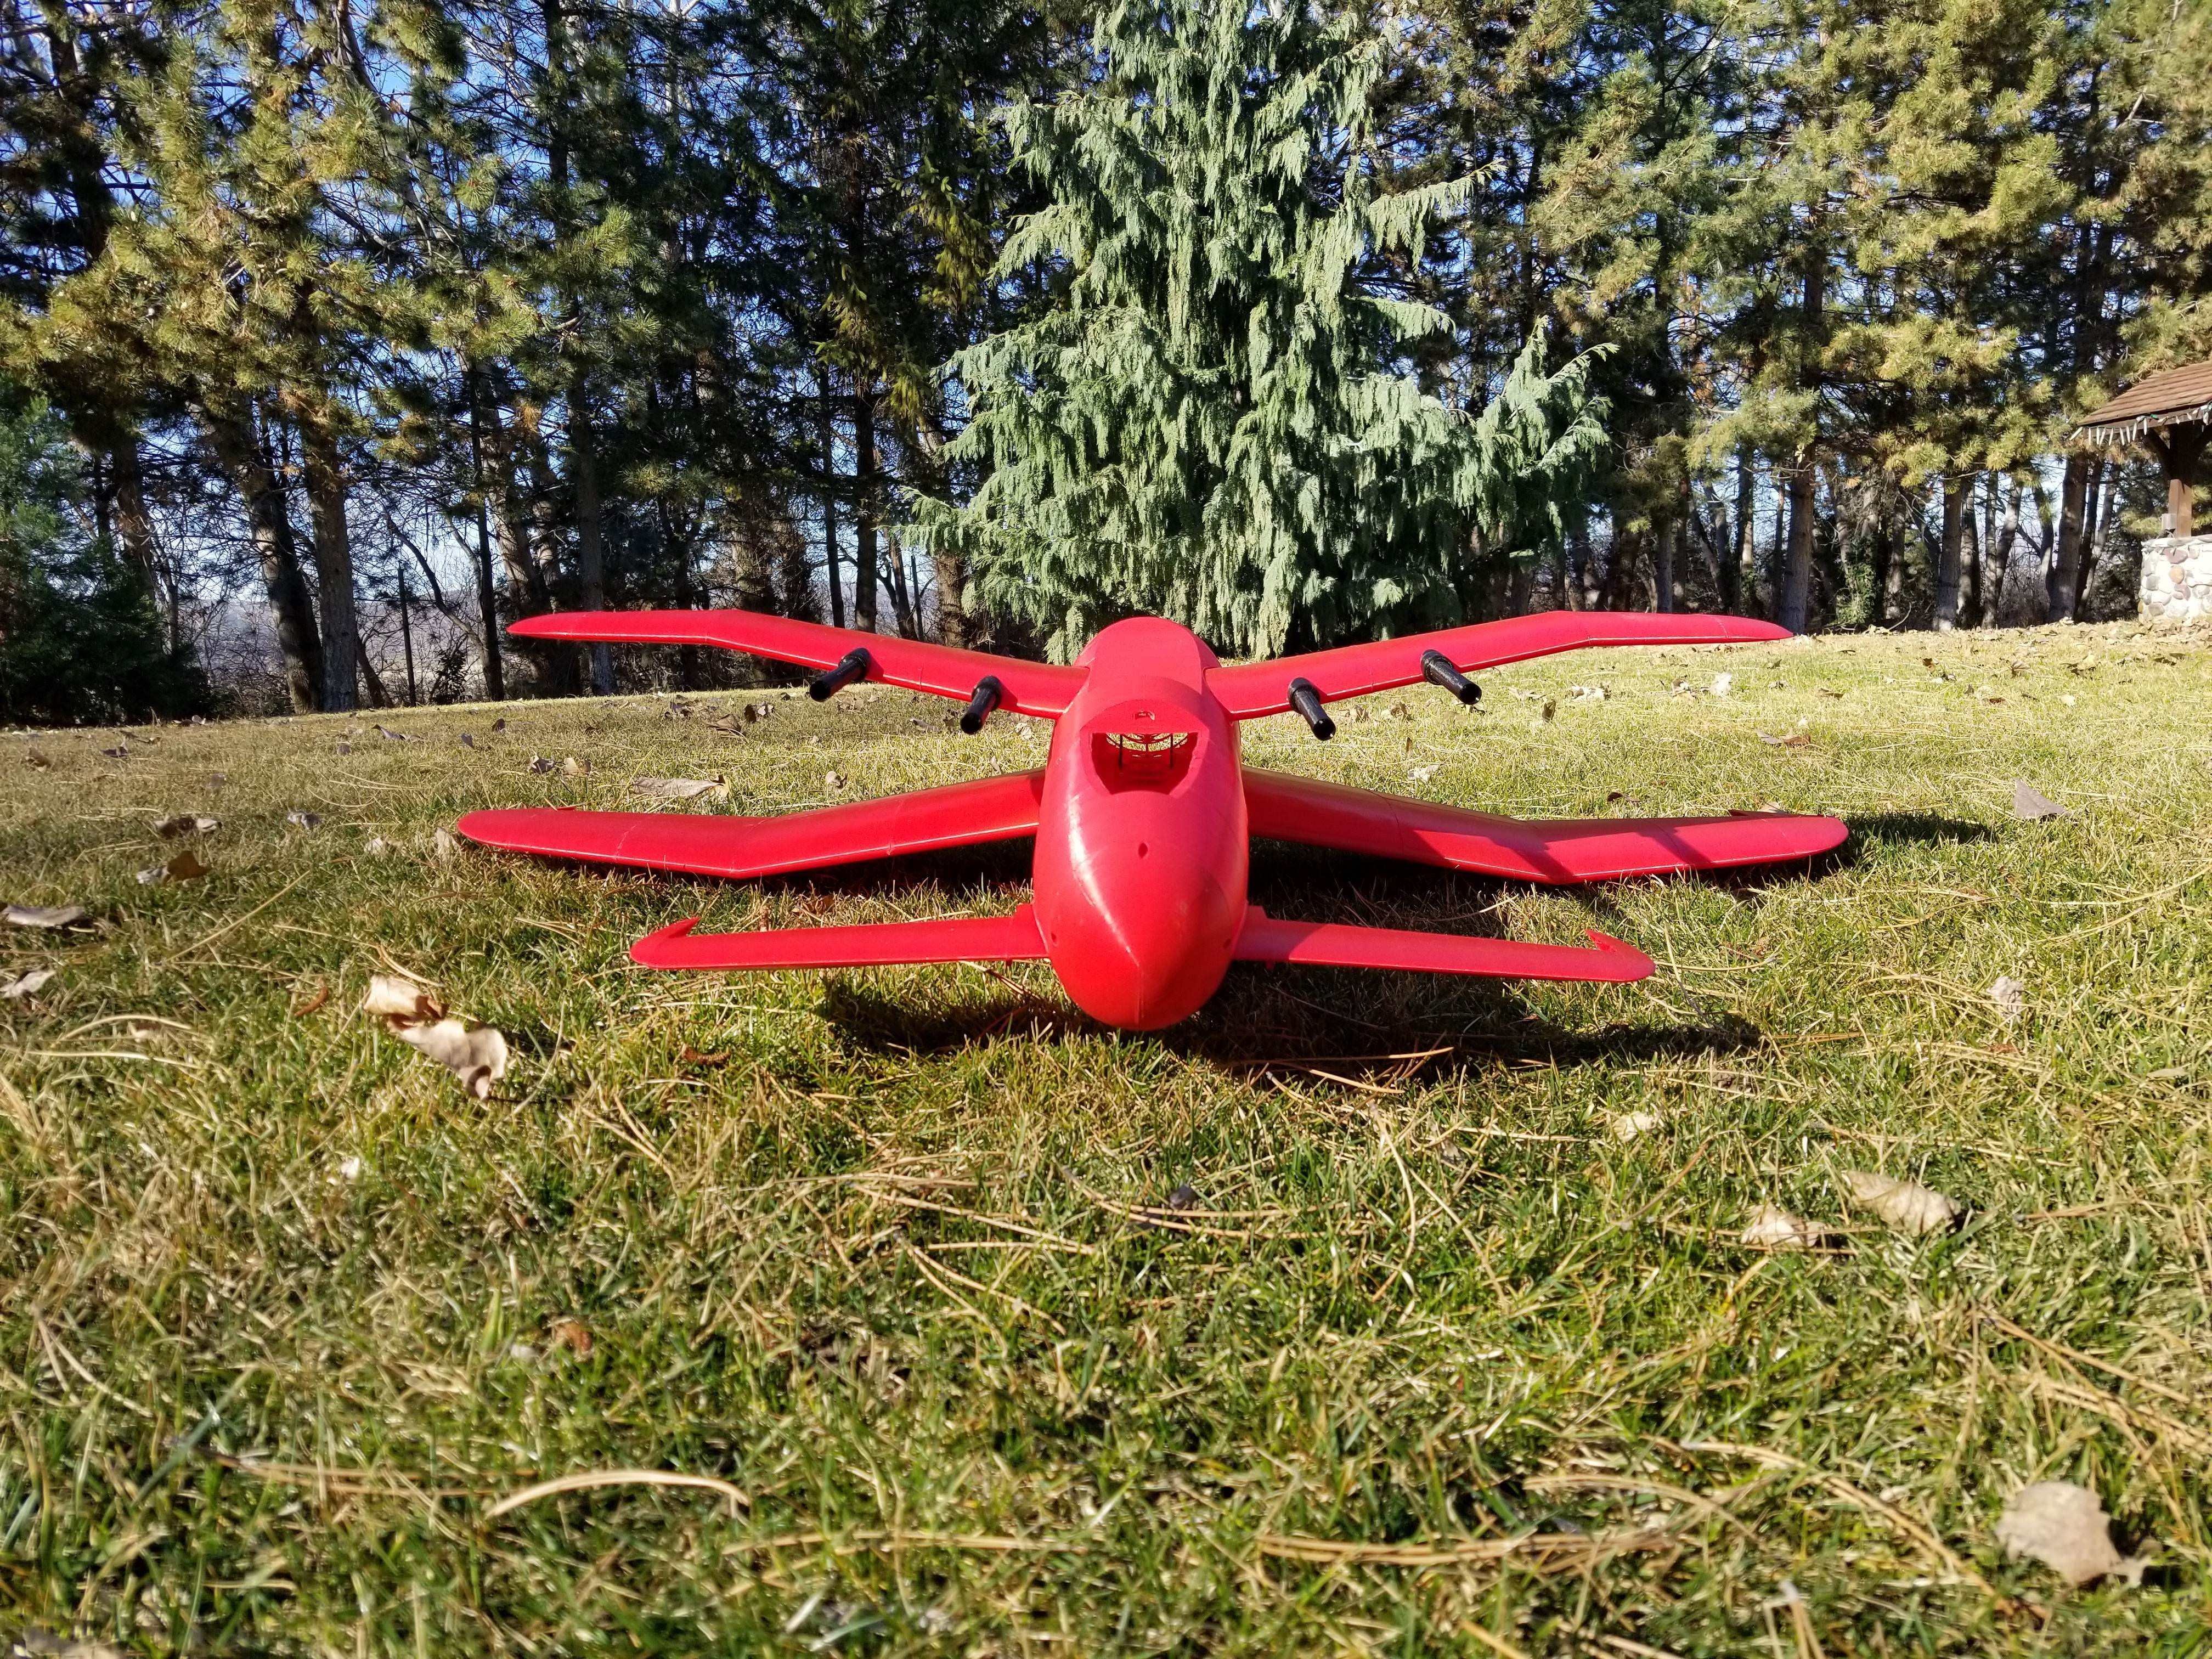
I stumbled upon your amazing Hughes Devastator build and I'm thinking about getting into 3D printing myself. I'm pretty much sold on a Creality3D CR-10S model, maybe the 4S (400 x 400 x 400 mm) or even the 5S (500 x 500 x 500 mm) for large wing sections or whole fuselage sections. Right now I'm having a twin-motor box-wing tailsitter VTOL with around 1 meter wingspan in mind. Ambitious goals, I know. But I'm basically sold on the whole 3D print idea and that you can make everything what you can draw in CAD... ;)

That brings me right to some questions:
1) what filament do you use and what's the structural limit in an airplane environment?
2) can you design integrated hinges for ailerons & flaps or does this not work with PLA? (tolerances/fitment, smoothness, wear,...)
3) what's the weight penalty over EPP or foamboard?
4) what nozzle size and feed rates do you run on large sections like for the Devastator?
5) what parameters do you run to archive a good print quality (temperatures, feed, return, jerk,...)
6) is the wing surface just made out of one layer PLA or do you run more material there?
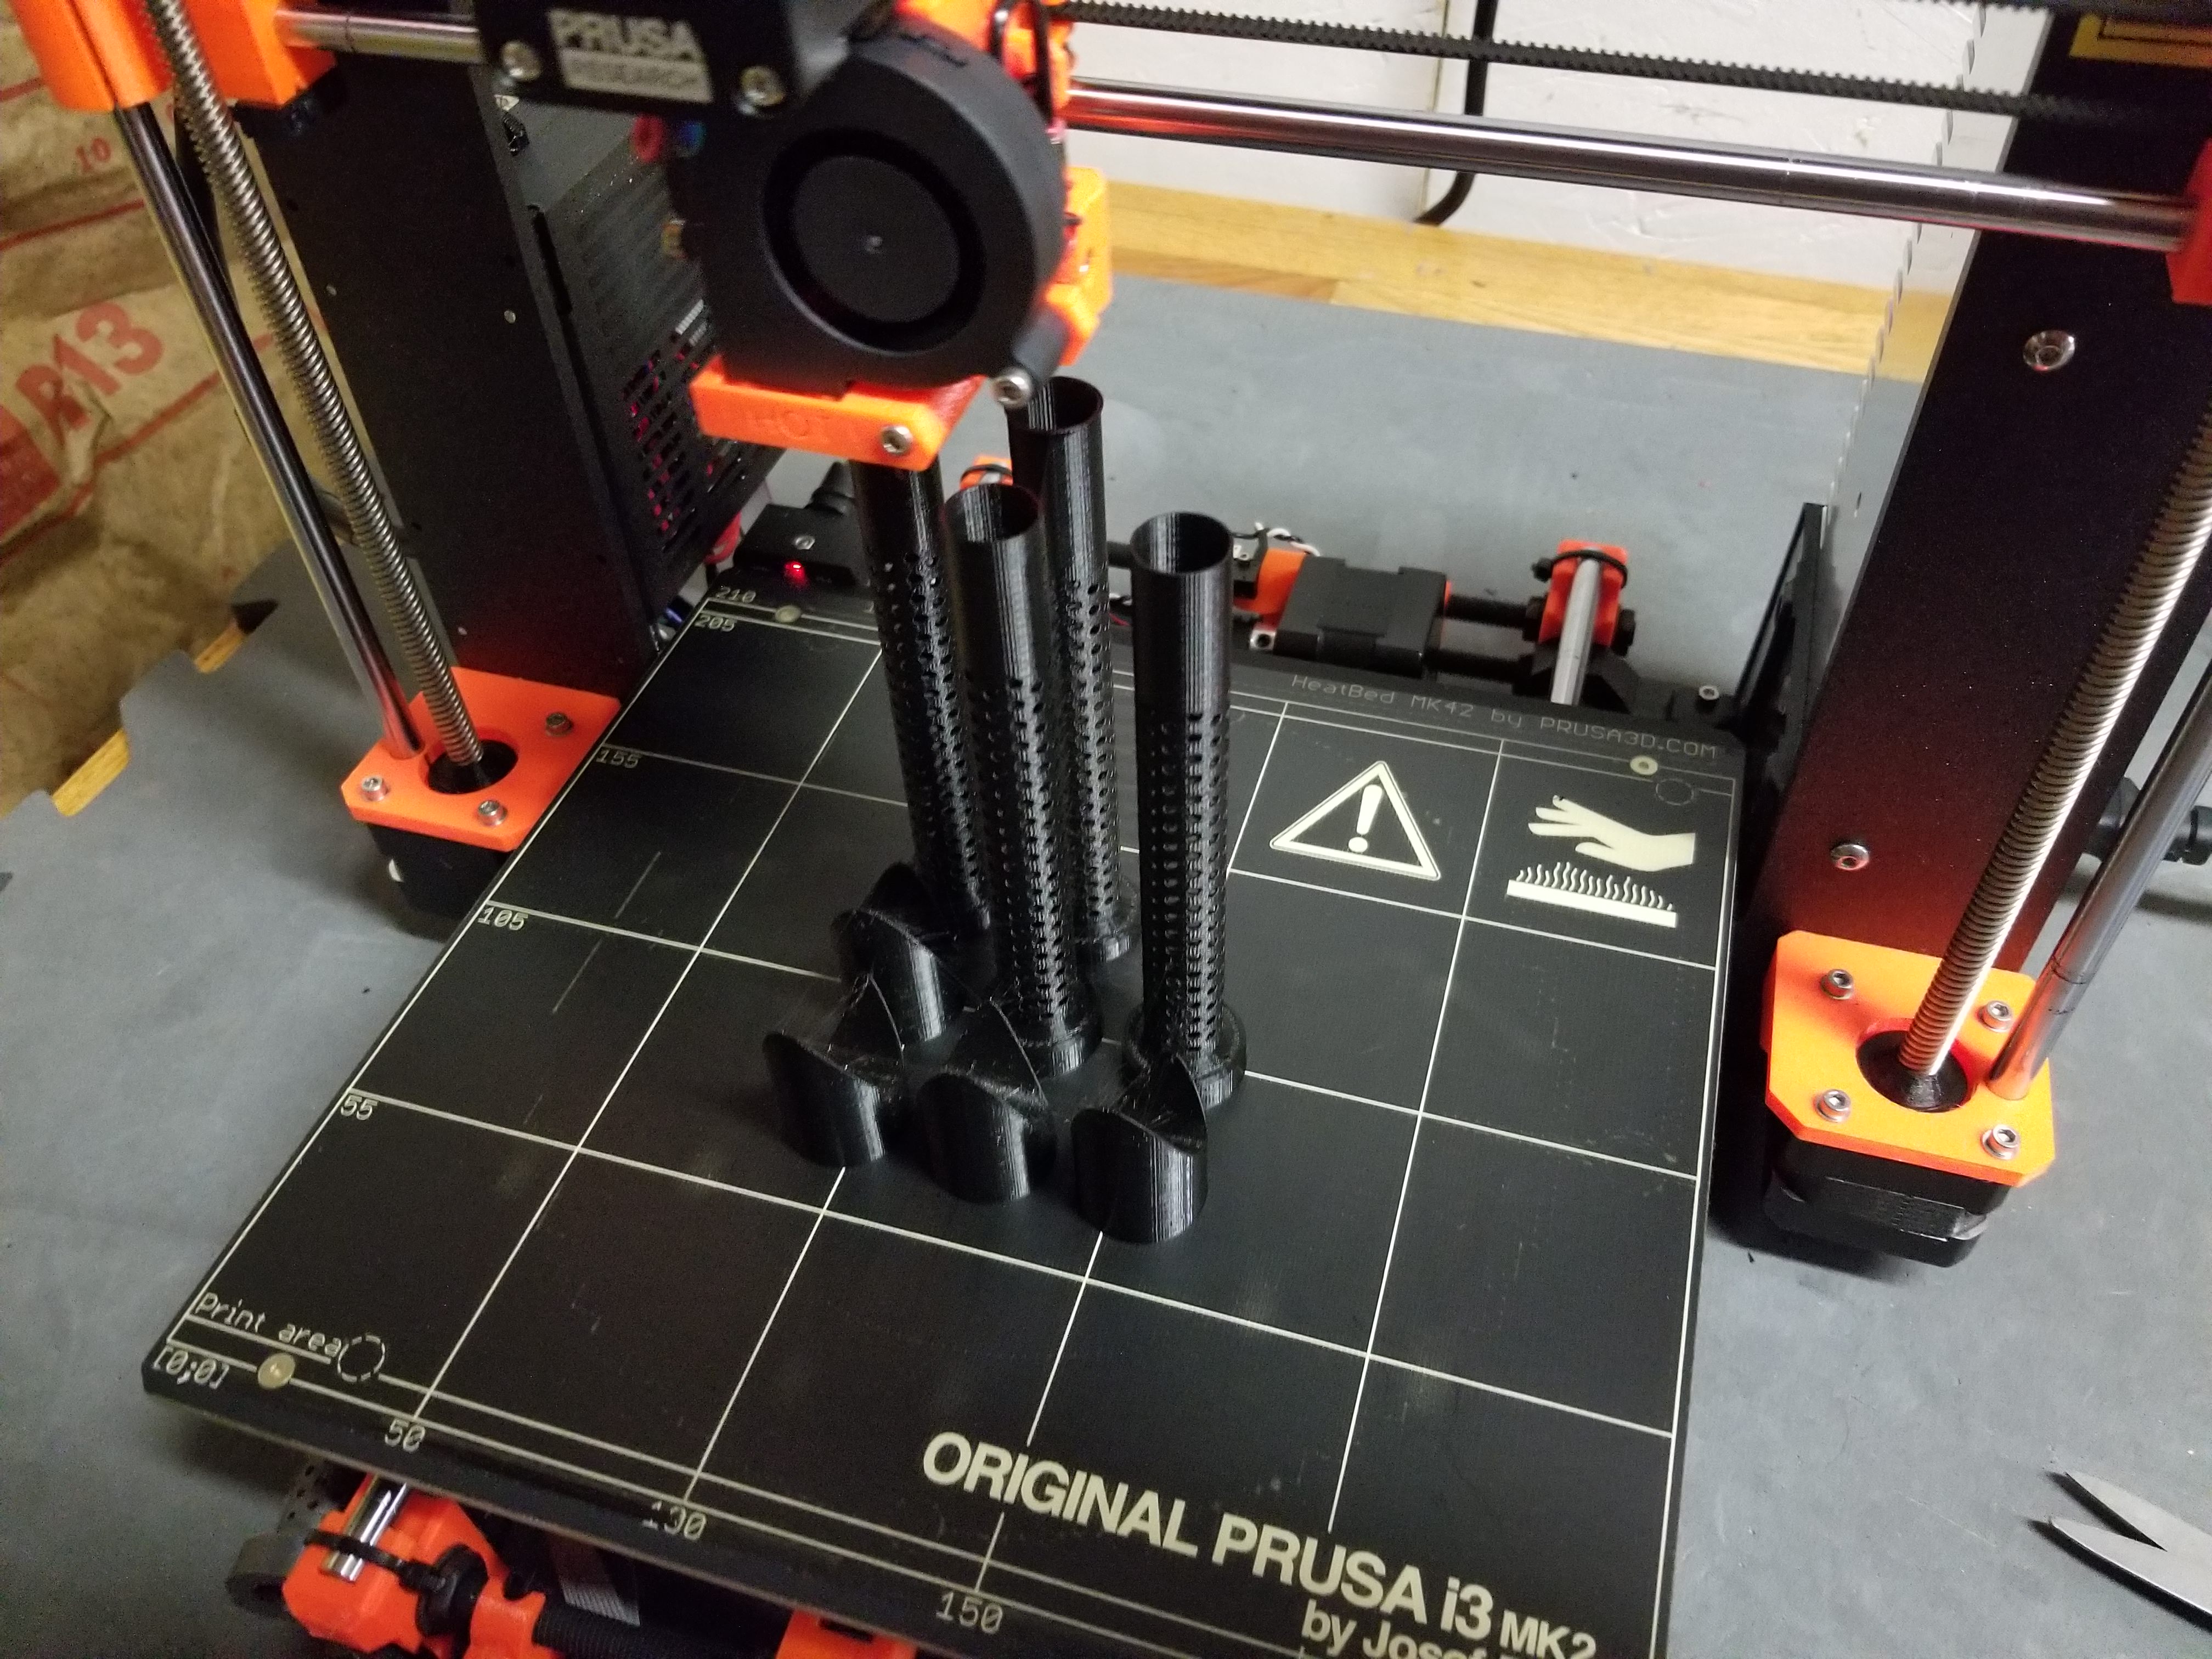
7) do you need carbon fiber spars or are integrated ones (PLA) sufficient?
8) what's your workflow from the idea for a part to the finished print?

Sorry for asking so much questions but I wanna know the practical strength for usage in a R/C model, especially with the wings and the high G-forces during hard pulls. I don't wanna baby the airplane around in fear of it breaking apart... :p

Software-wise: I guess you have to construct the part/section in a CAD program, create printable files from there and then setup the print in a slicer? I'm pretty much set on BLENDER and CURA, I guess. What do you use?


Many thanks in advance
Manuel

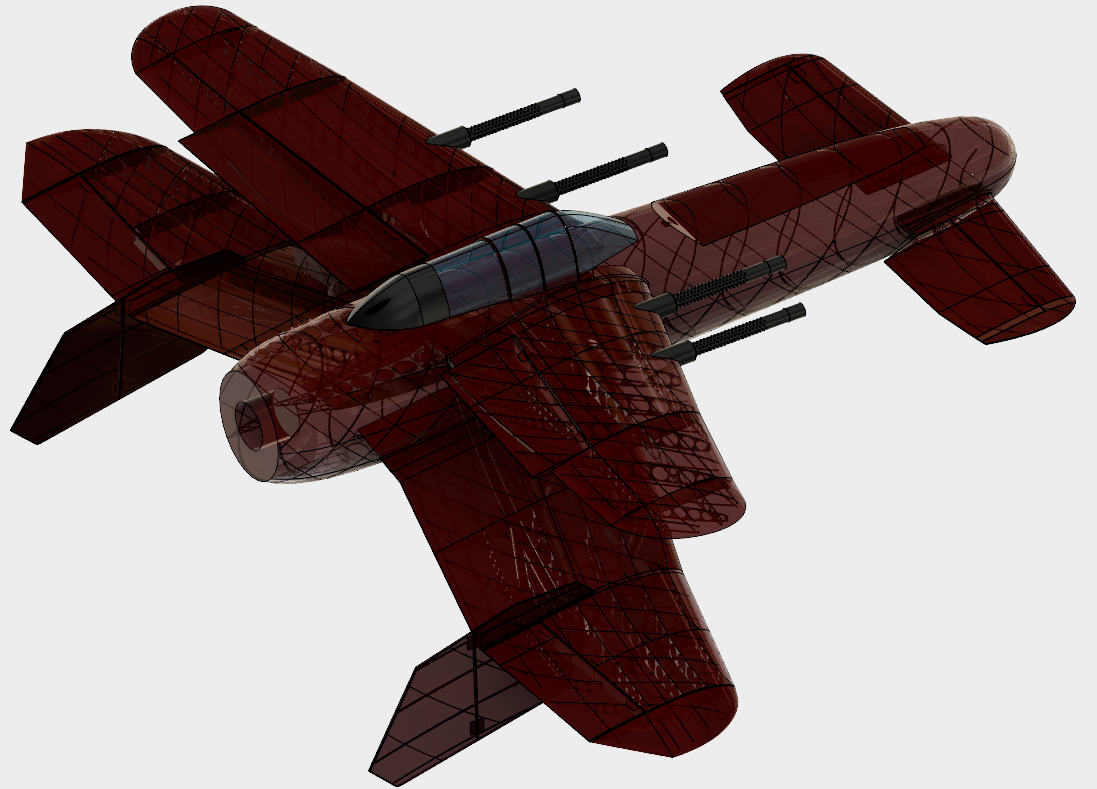
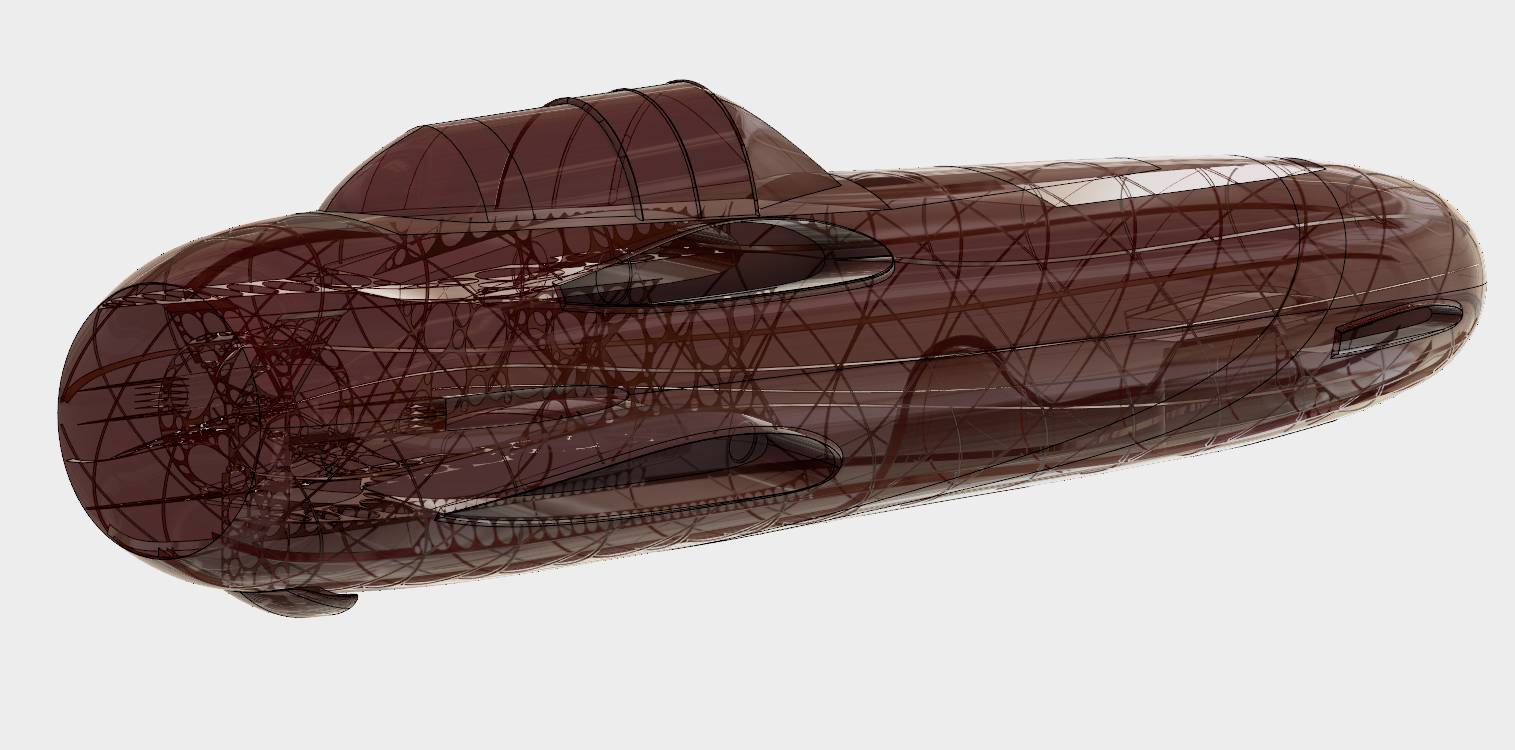
Uncle Manuel sent me a bunch of questions in a PM, and I asked him if I could answer them in the thread. Helps get the information out there for others that might also have the same questions. If people have questions in the future, don't worry about asking them in one of my threads, it's what they're there for.

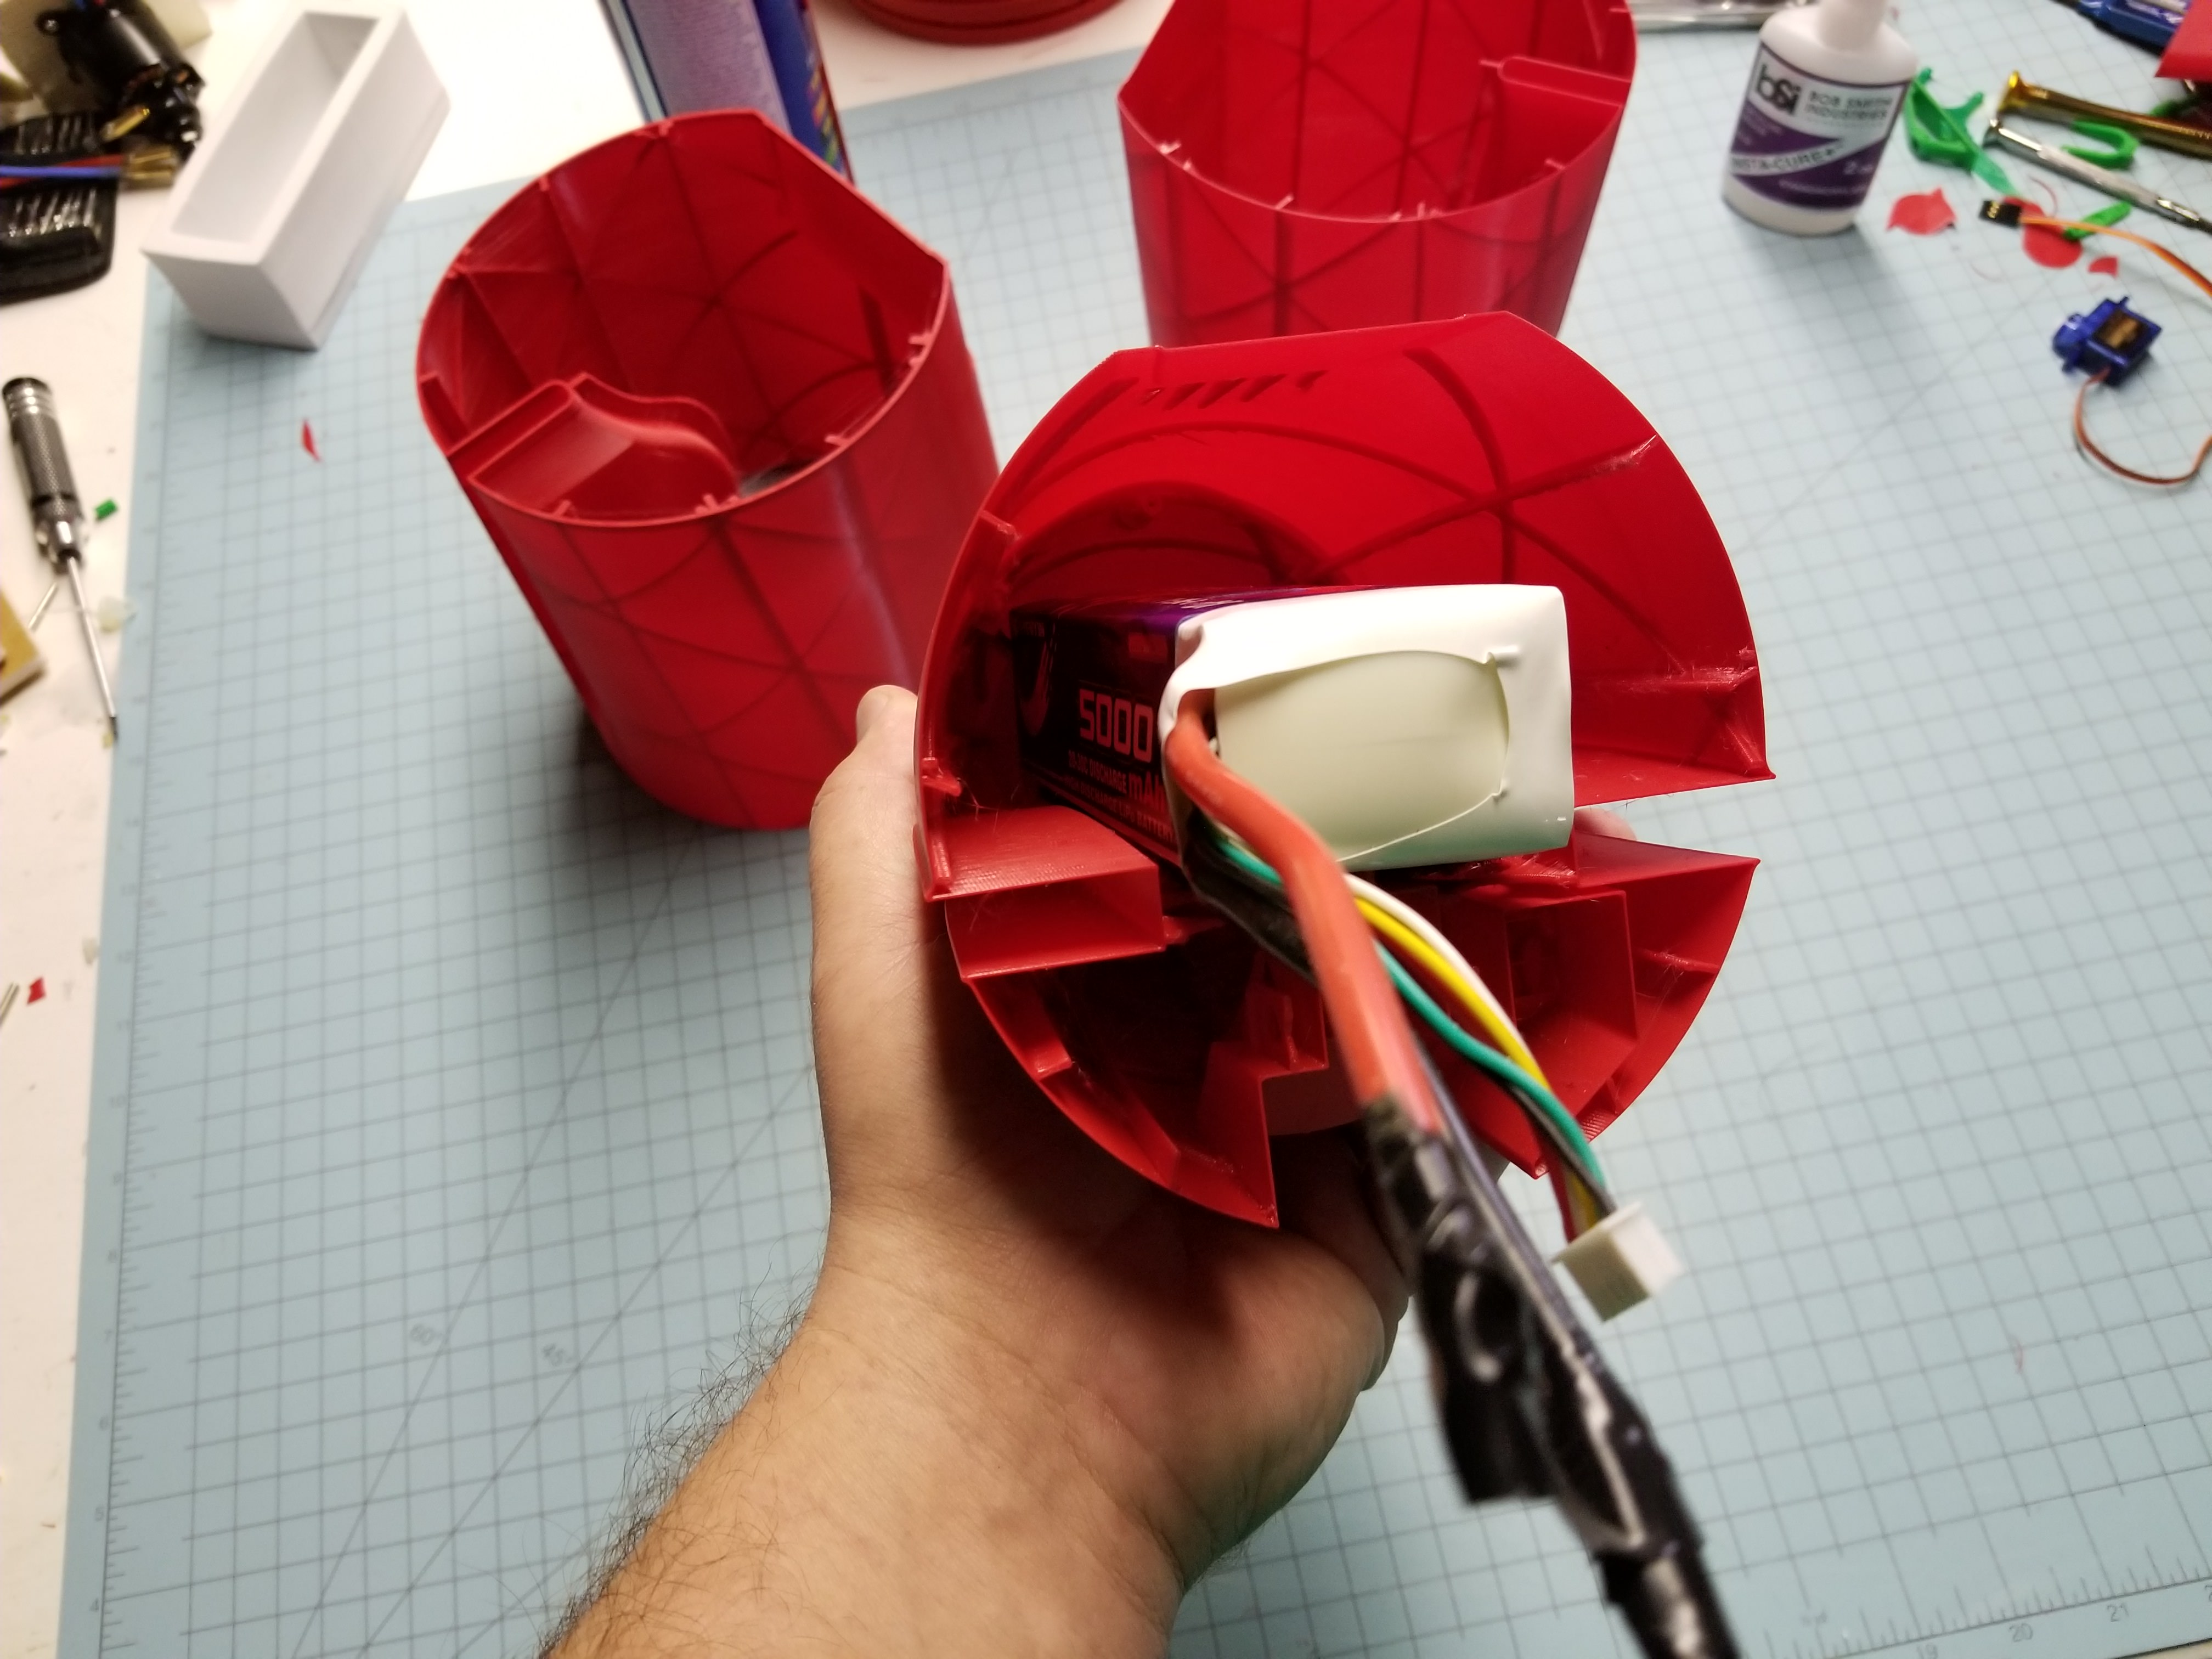
1.) I'm playing with several different filament types. PLA of course is the standard, but I'm also working on PETG and Polycarbonate filaments. PETG is more flexible, and will require stiffeners like carbon fiber rod. Polycarbonate is very strong, and I'm testing some lower warp stuff. A print chamber will probably be required (foamboard box lol).

2.) You can do integrated hinges. I'm using CA hinges on the Devastator, cause it's simple. Maybe I'll add some integrated ones later after I know it flies.

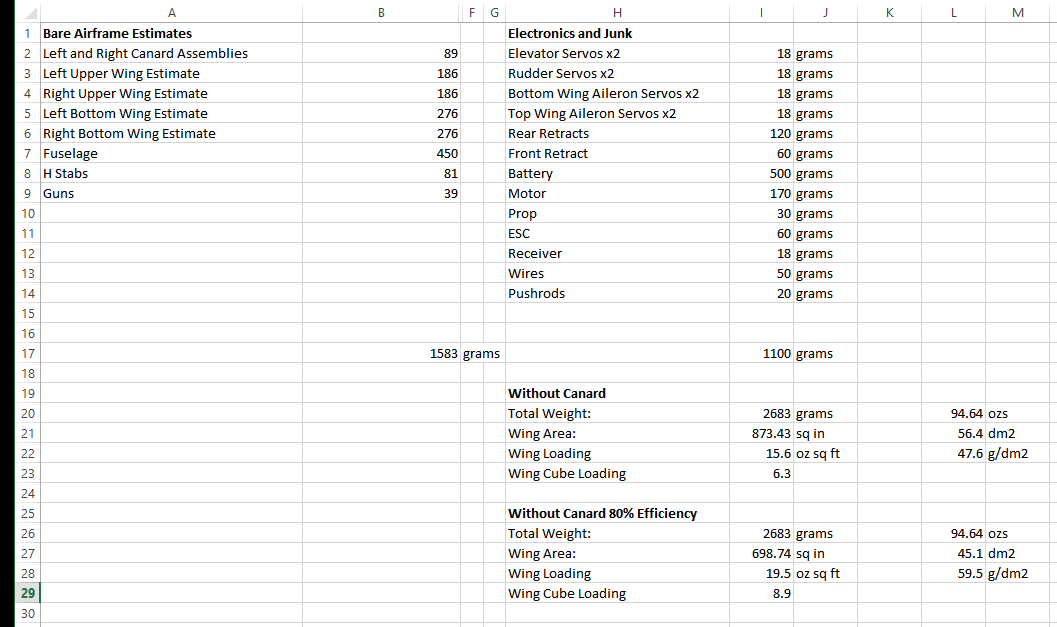
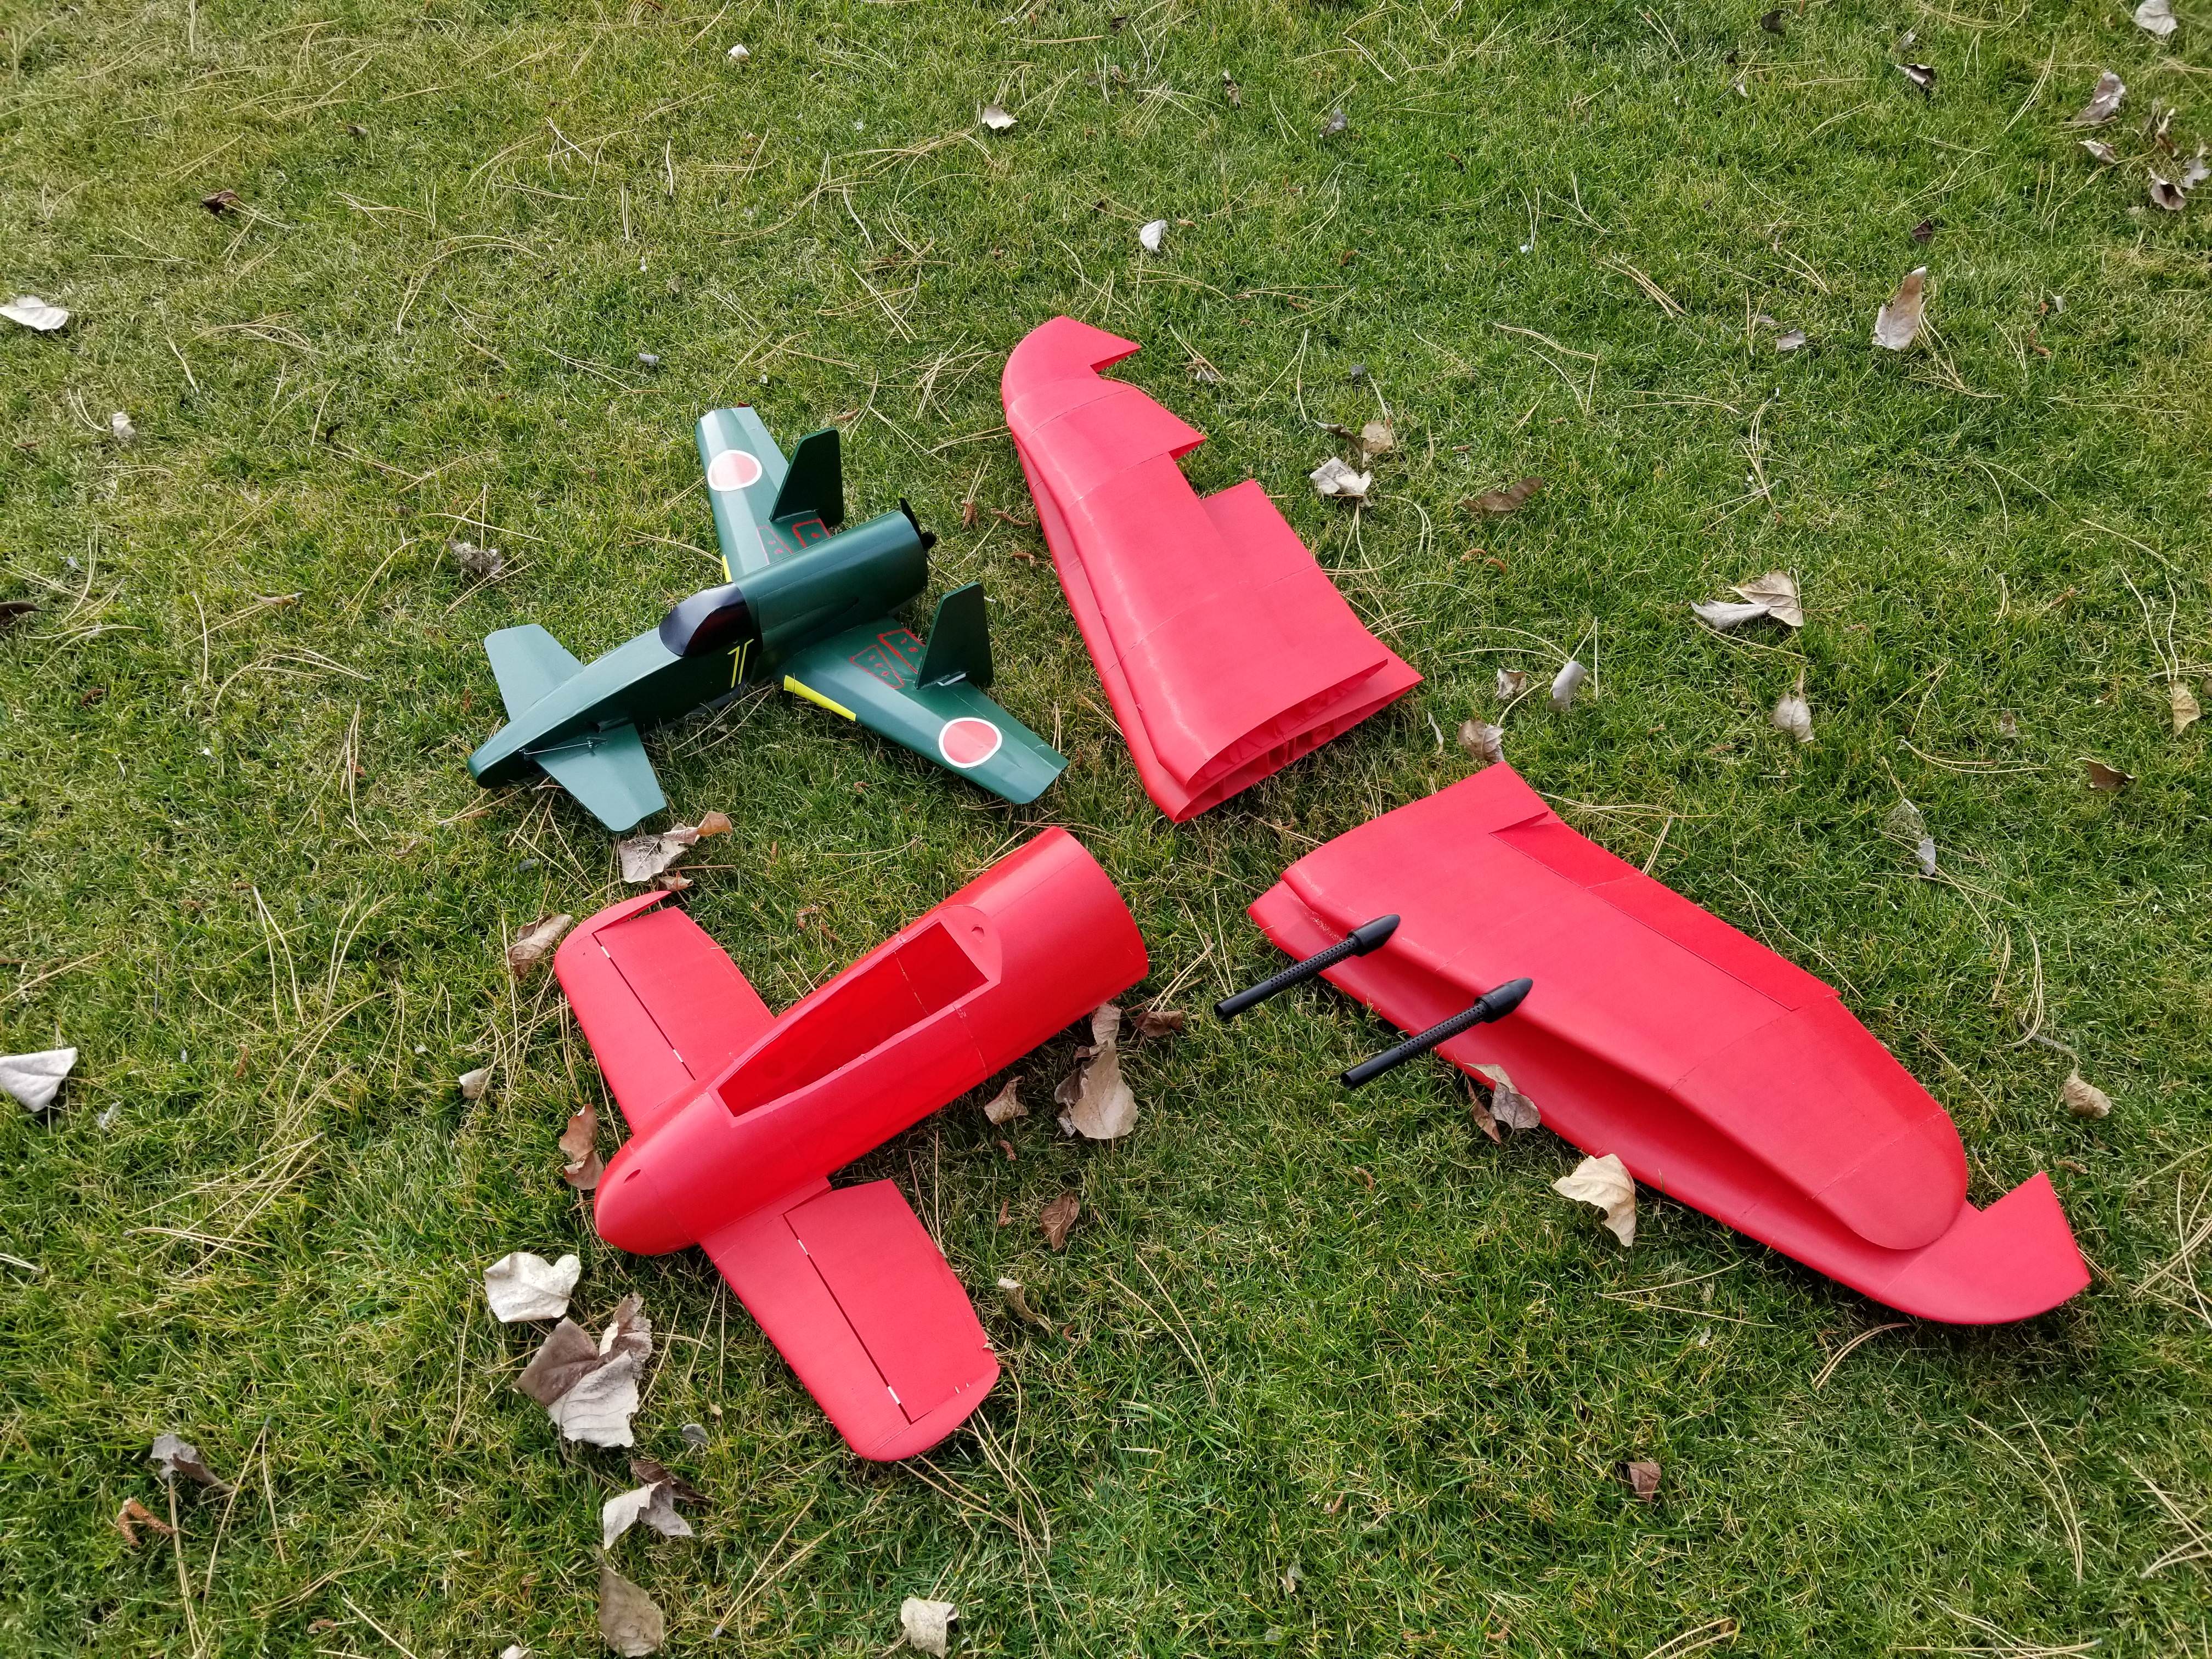
3.) It's quite a bit heavier, at least with the way I design foamboard planes. Of course, a lot of EPP ARF planes are heavier than foamboard, and end up closer in weight to 3D printed models. Basically you want your planes to have around 40in/1000mm of wingspan. Too much smaller than that, and your wing loading is pretty high.

4.) I'm using a standard .4mm nozzle, .25mm layer heights, and 60mm/s print speeds.

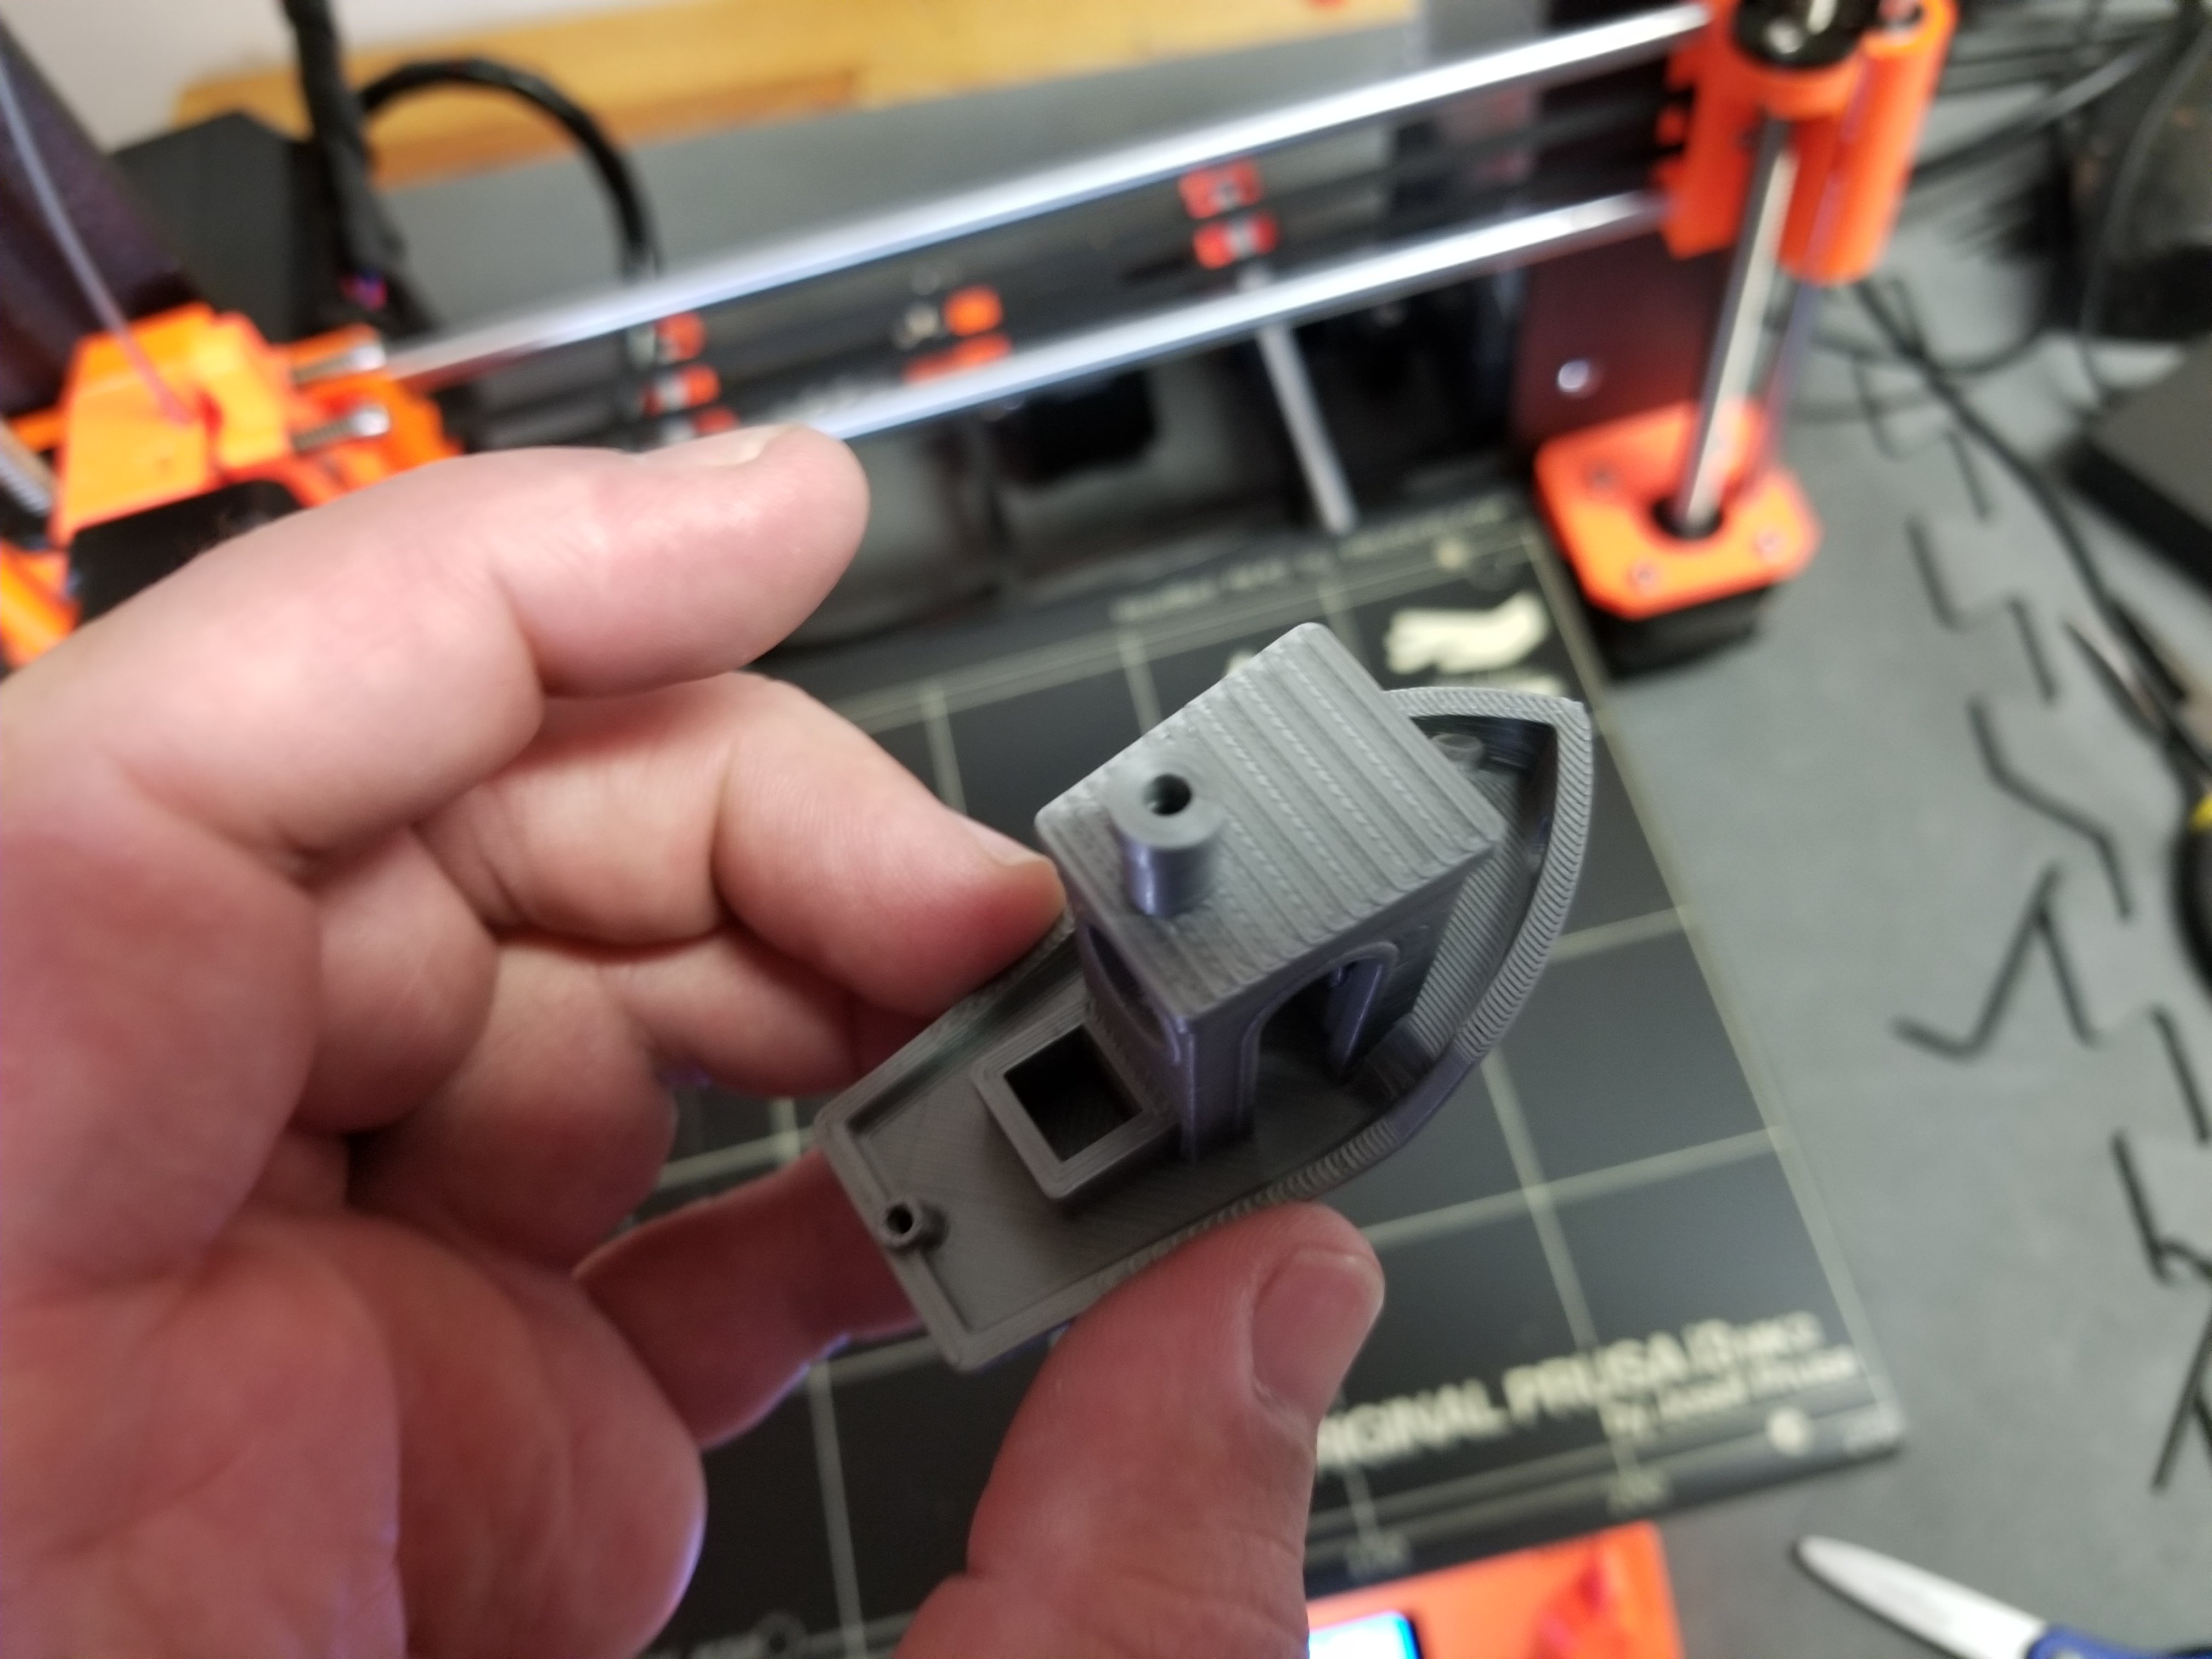
5.) I'm using a Prusa i3 mk2, so never needed to adjust return or jerk settings. On some cheaper kits, or if you compile you may be required to do that. Most 3D printers now are all setup for acceleration, and you don't have to do tuning on them like a CNC machine.

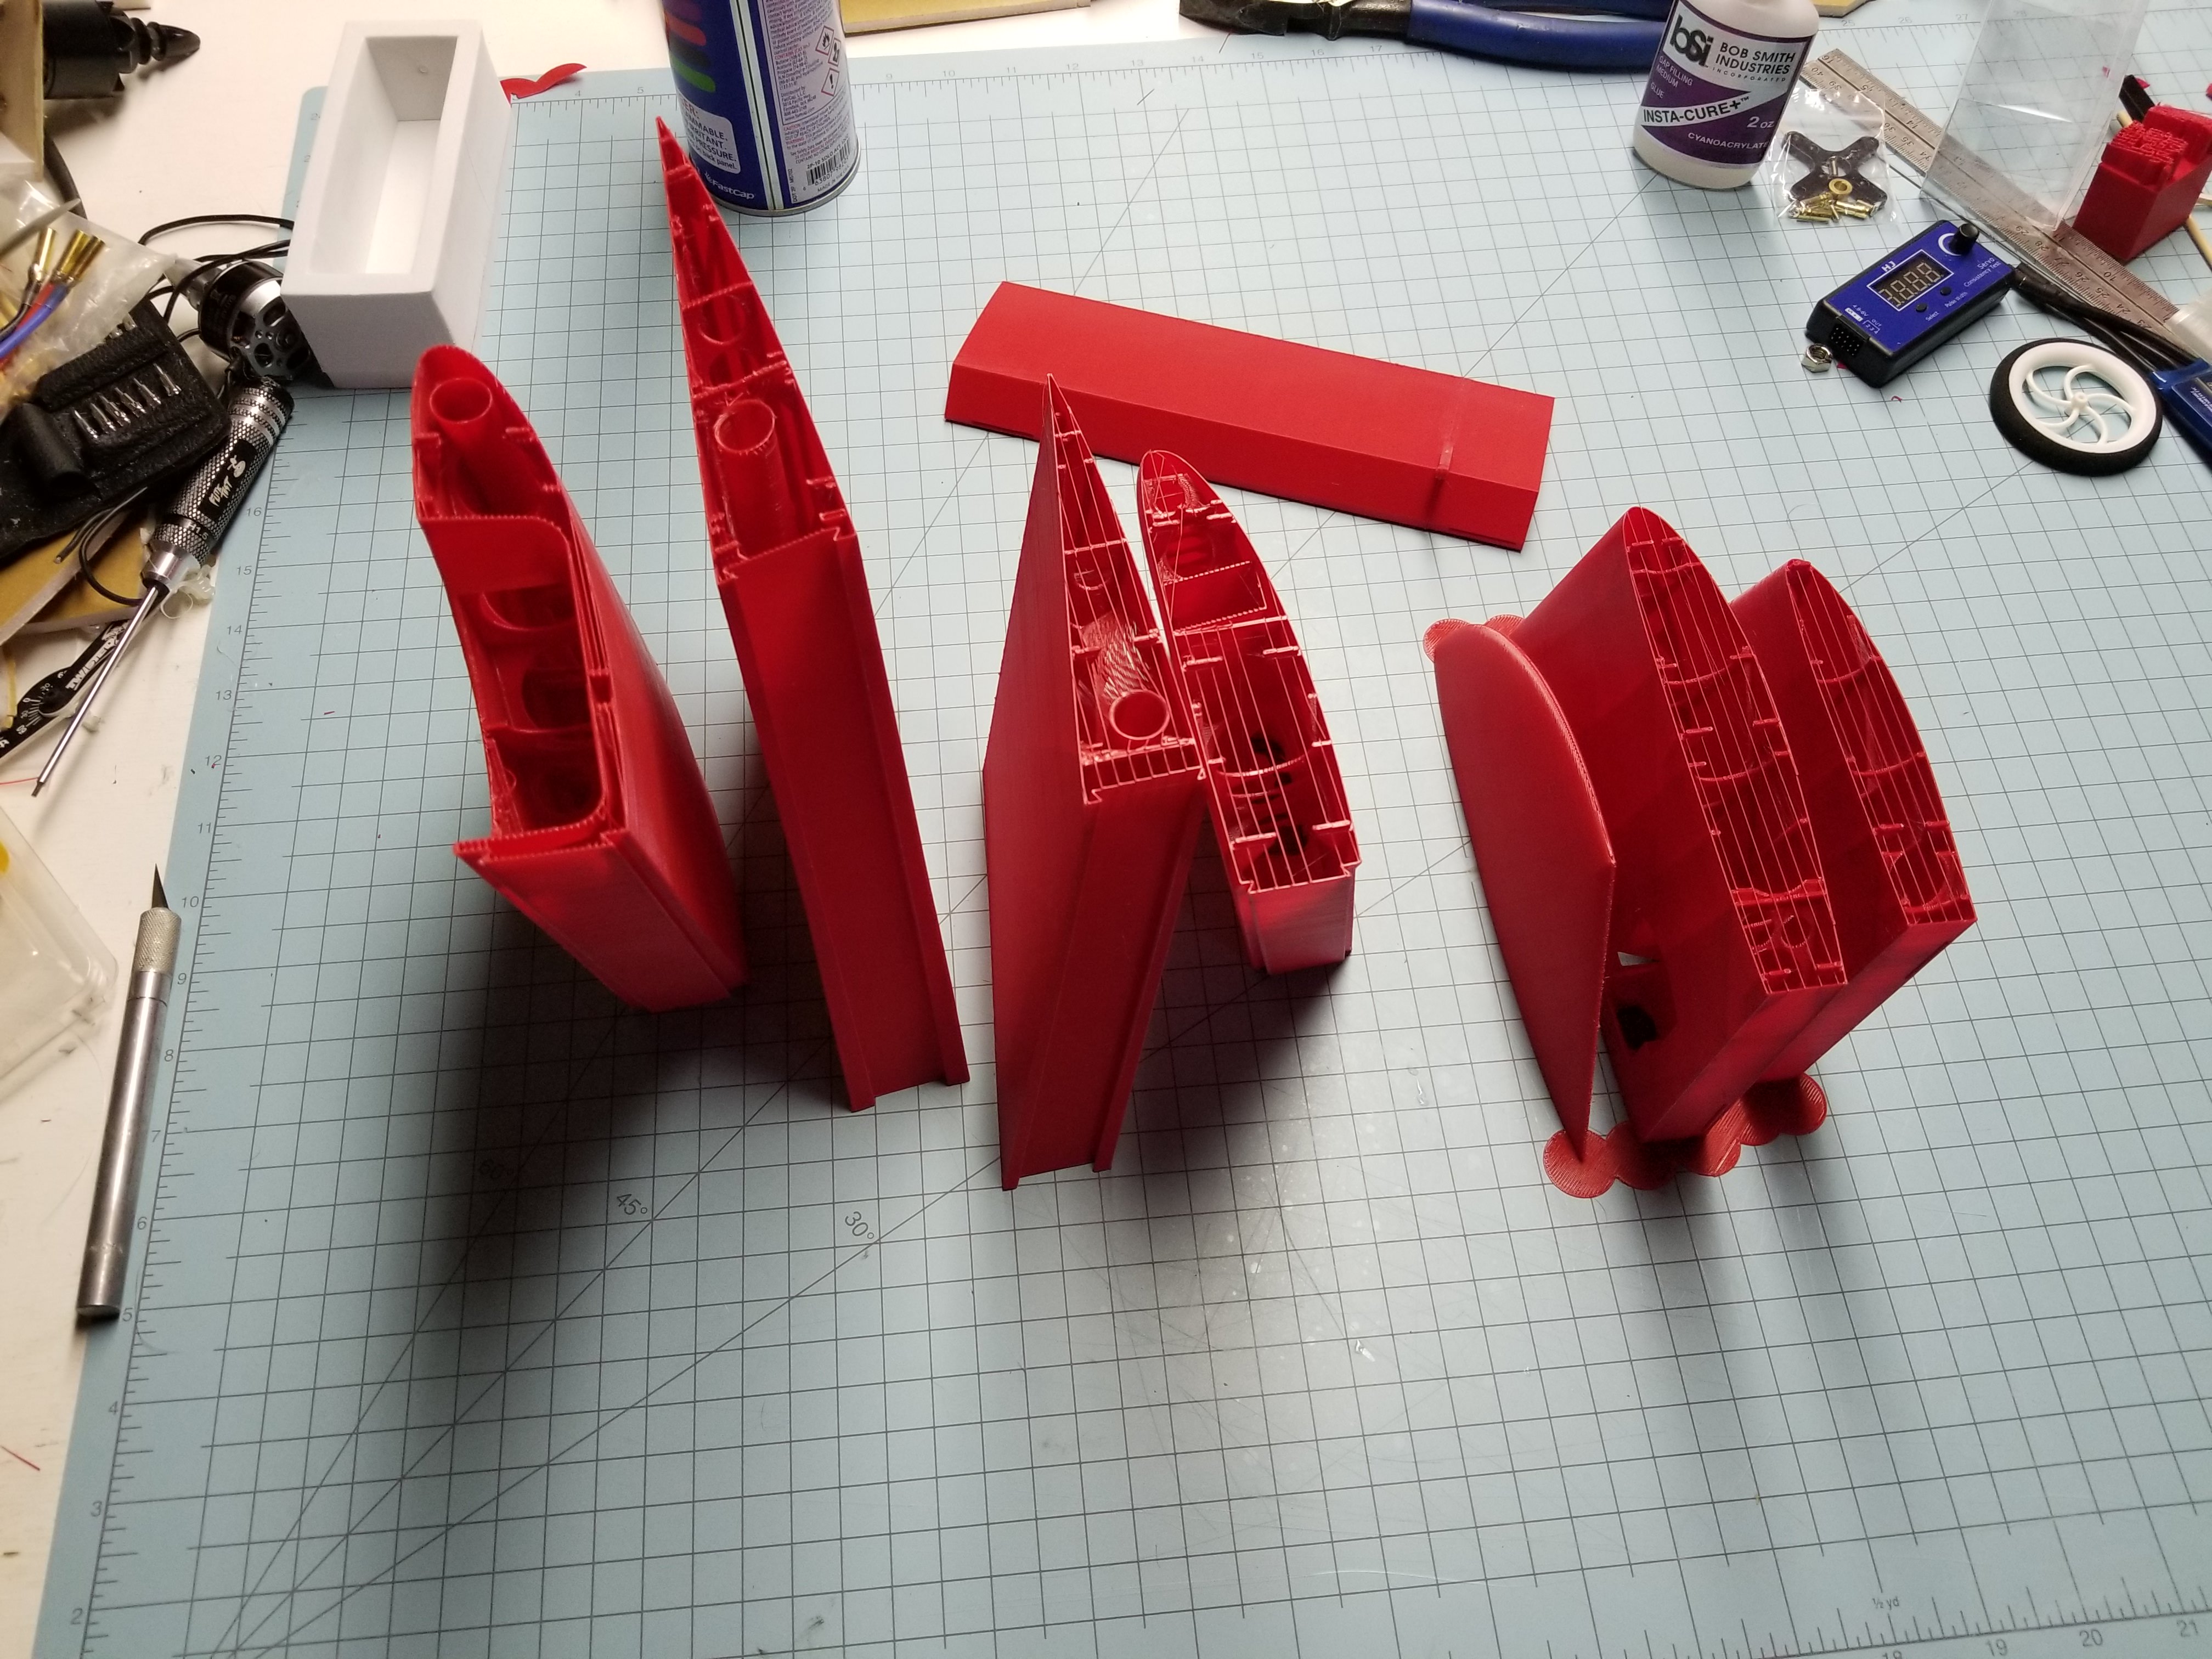
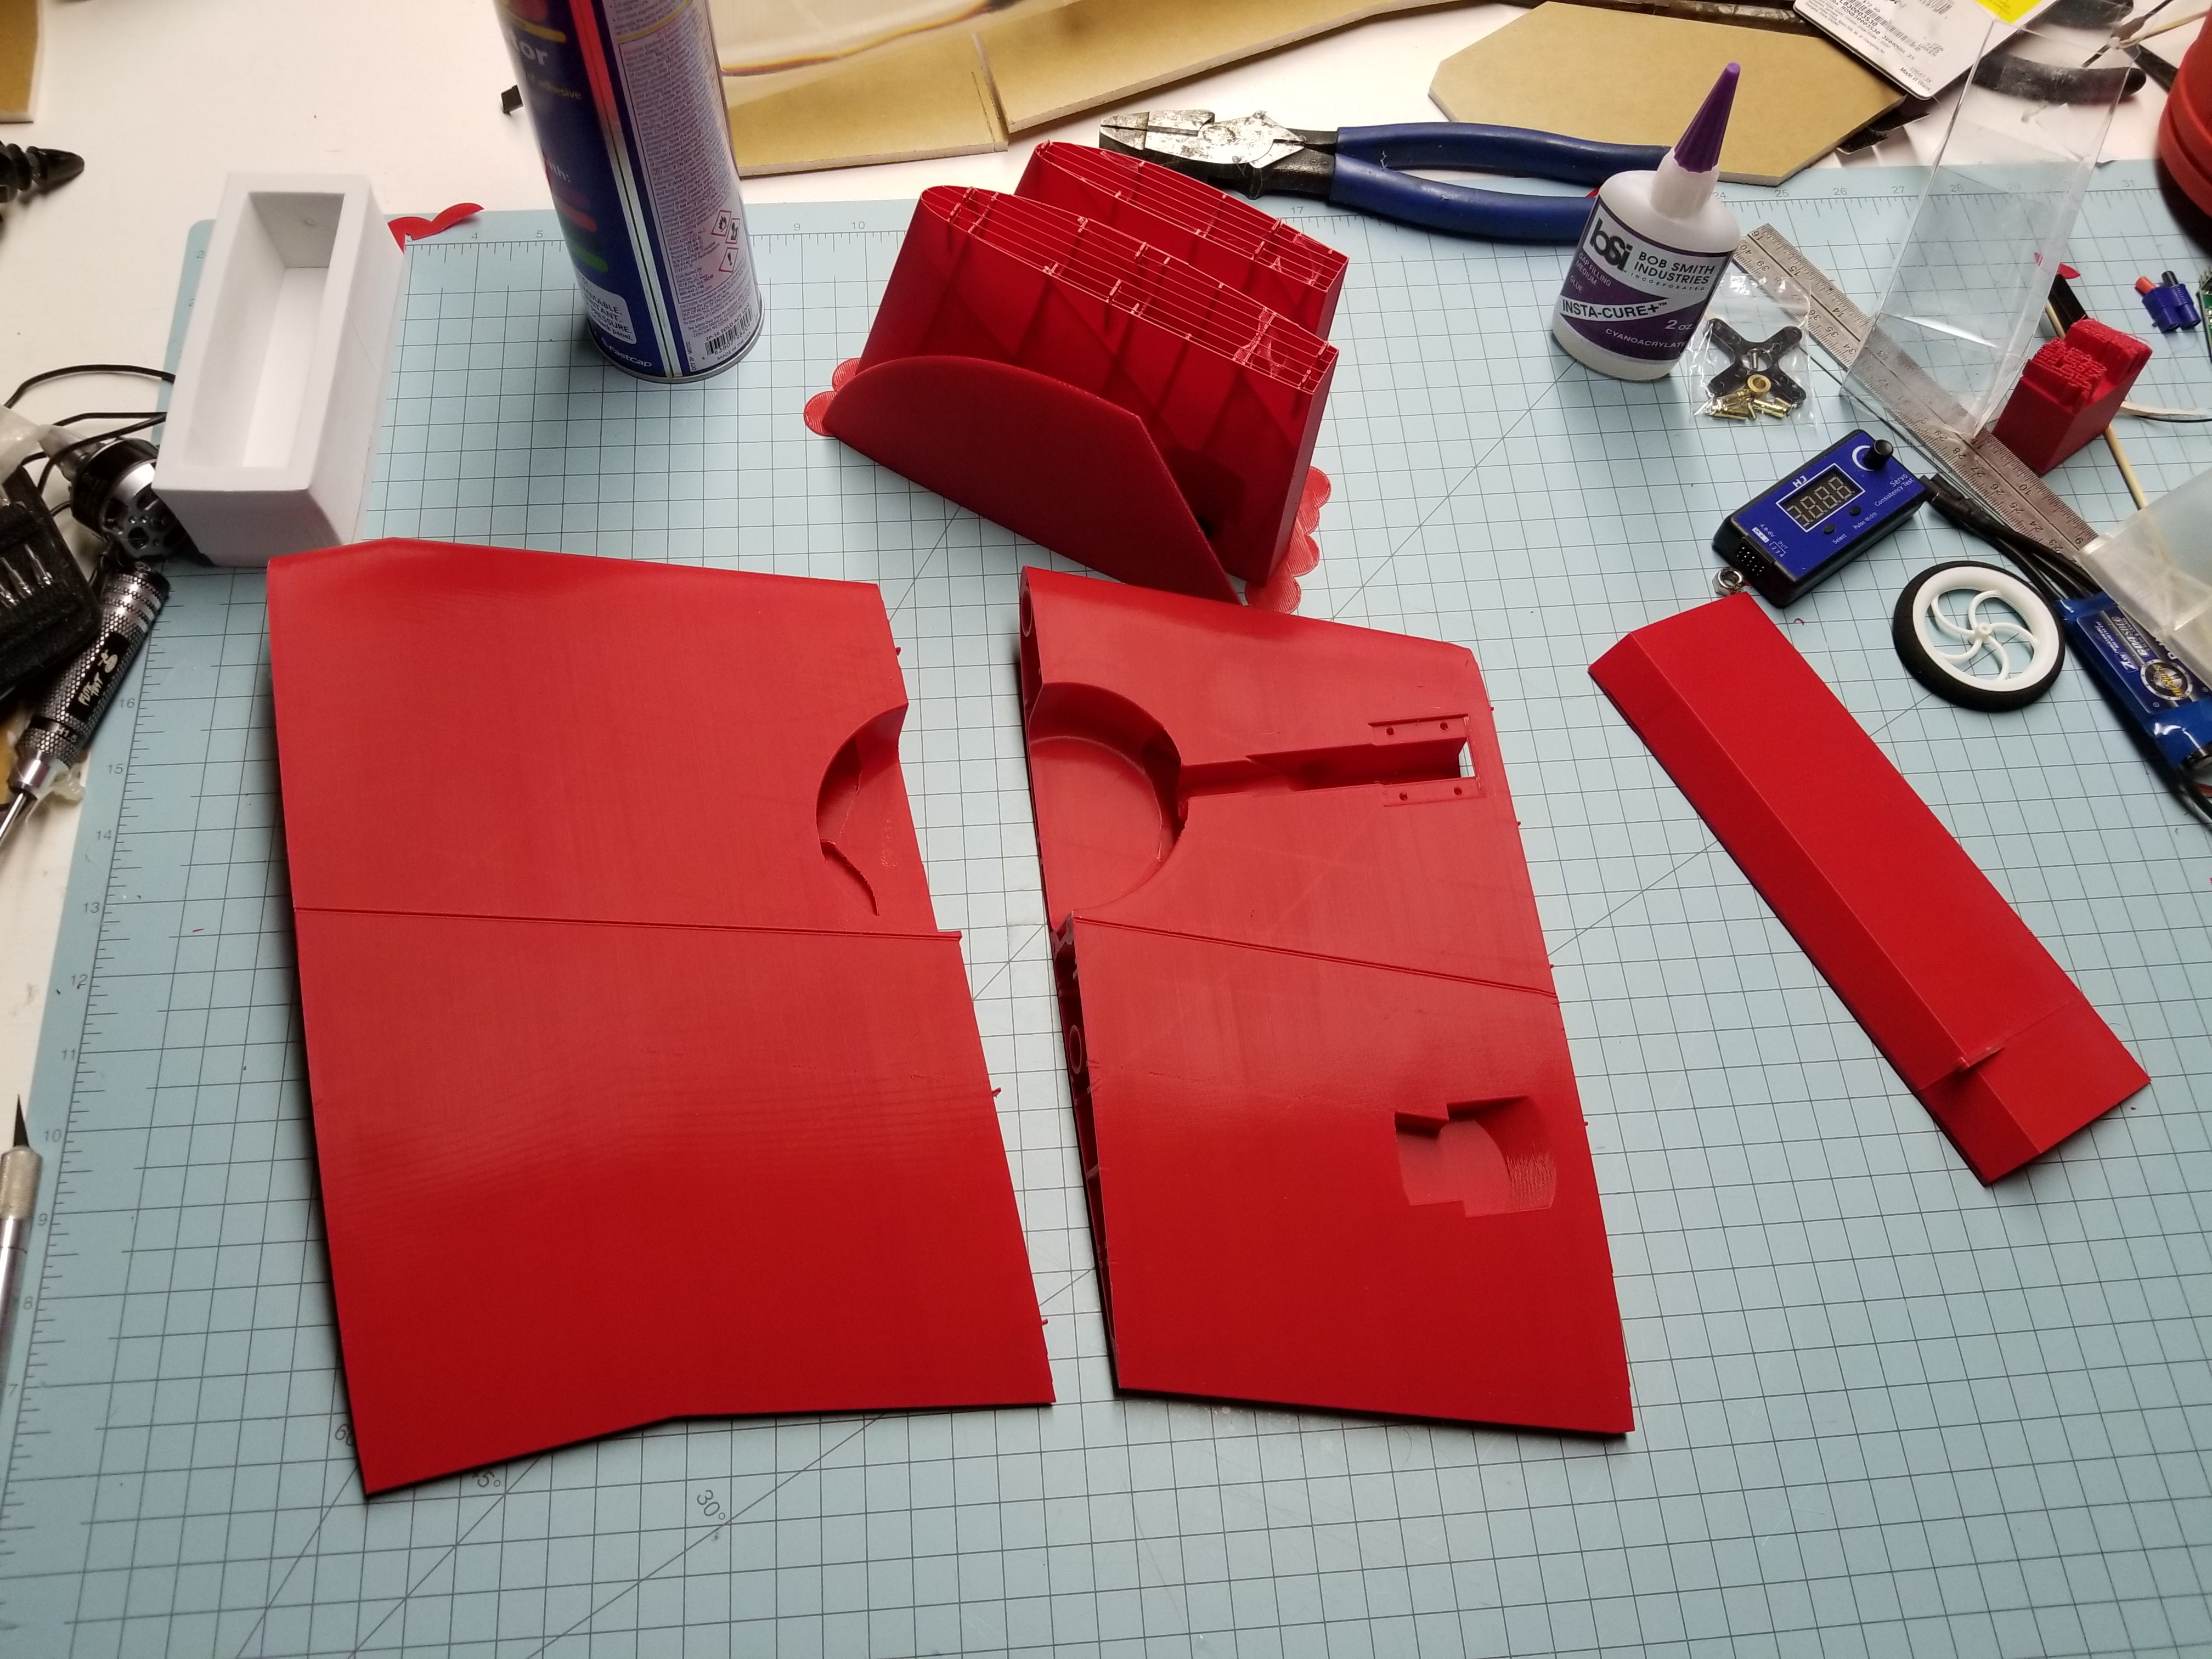
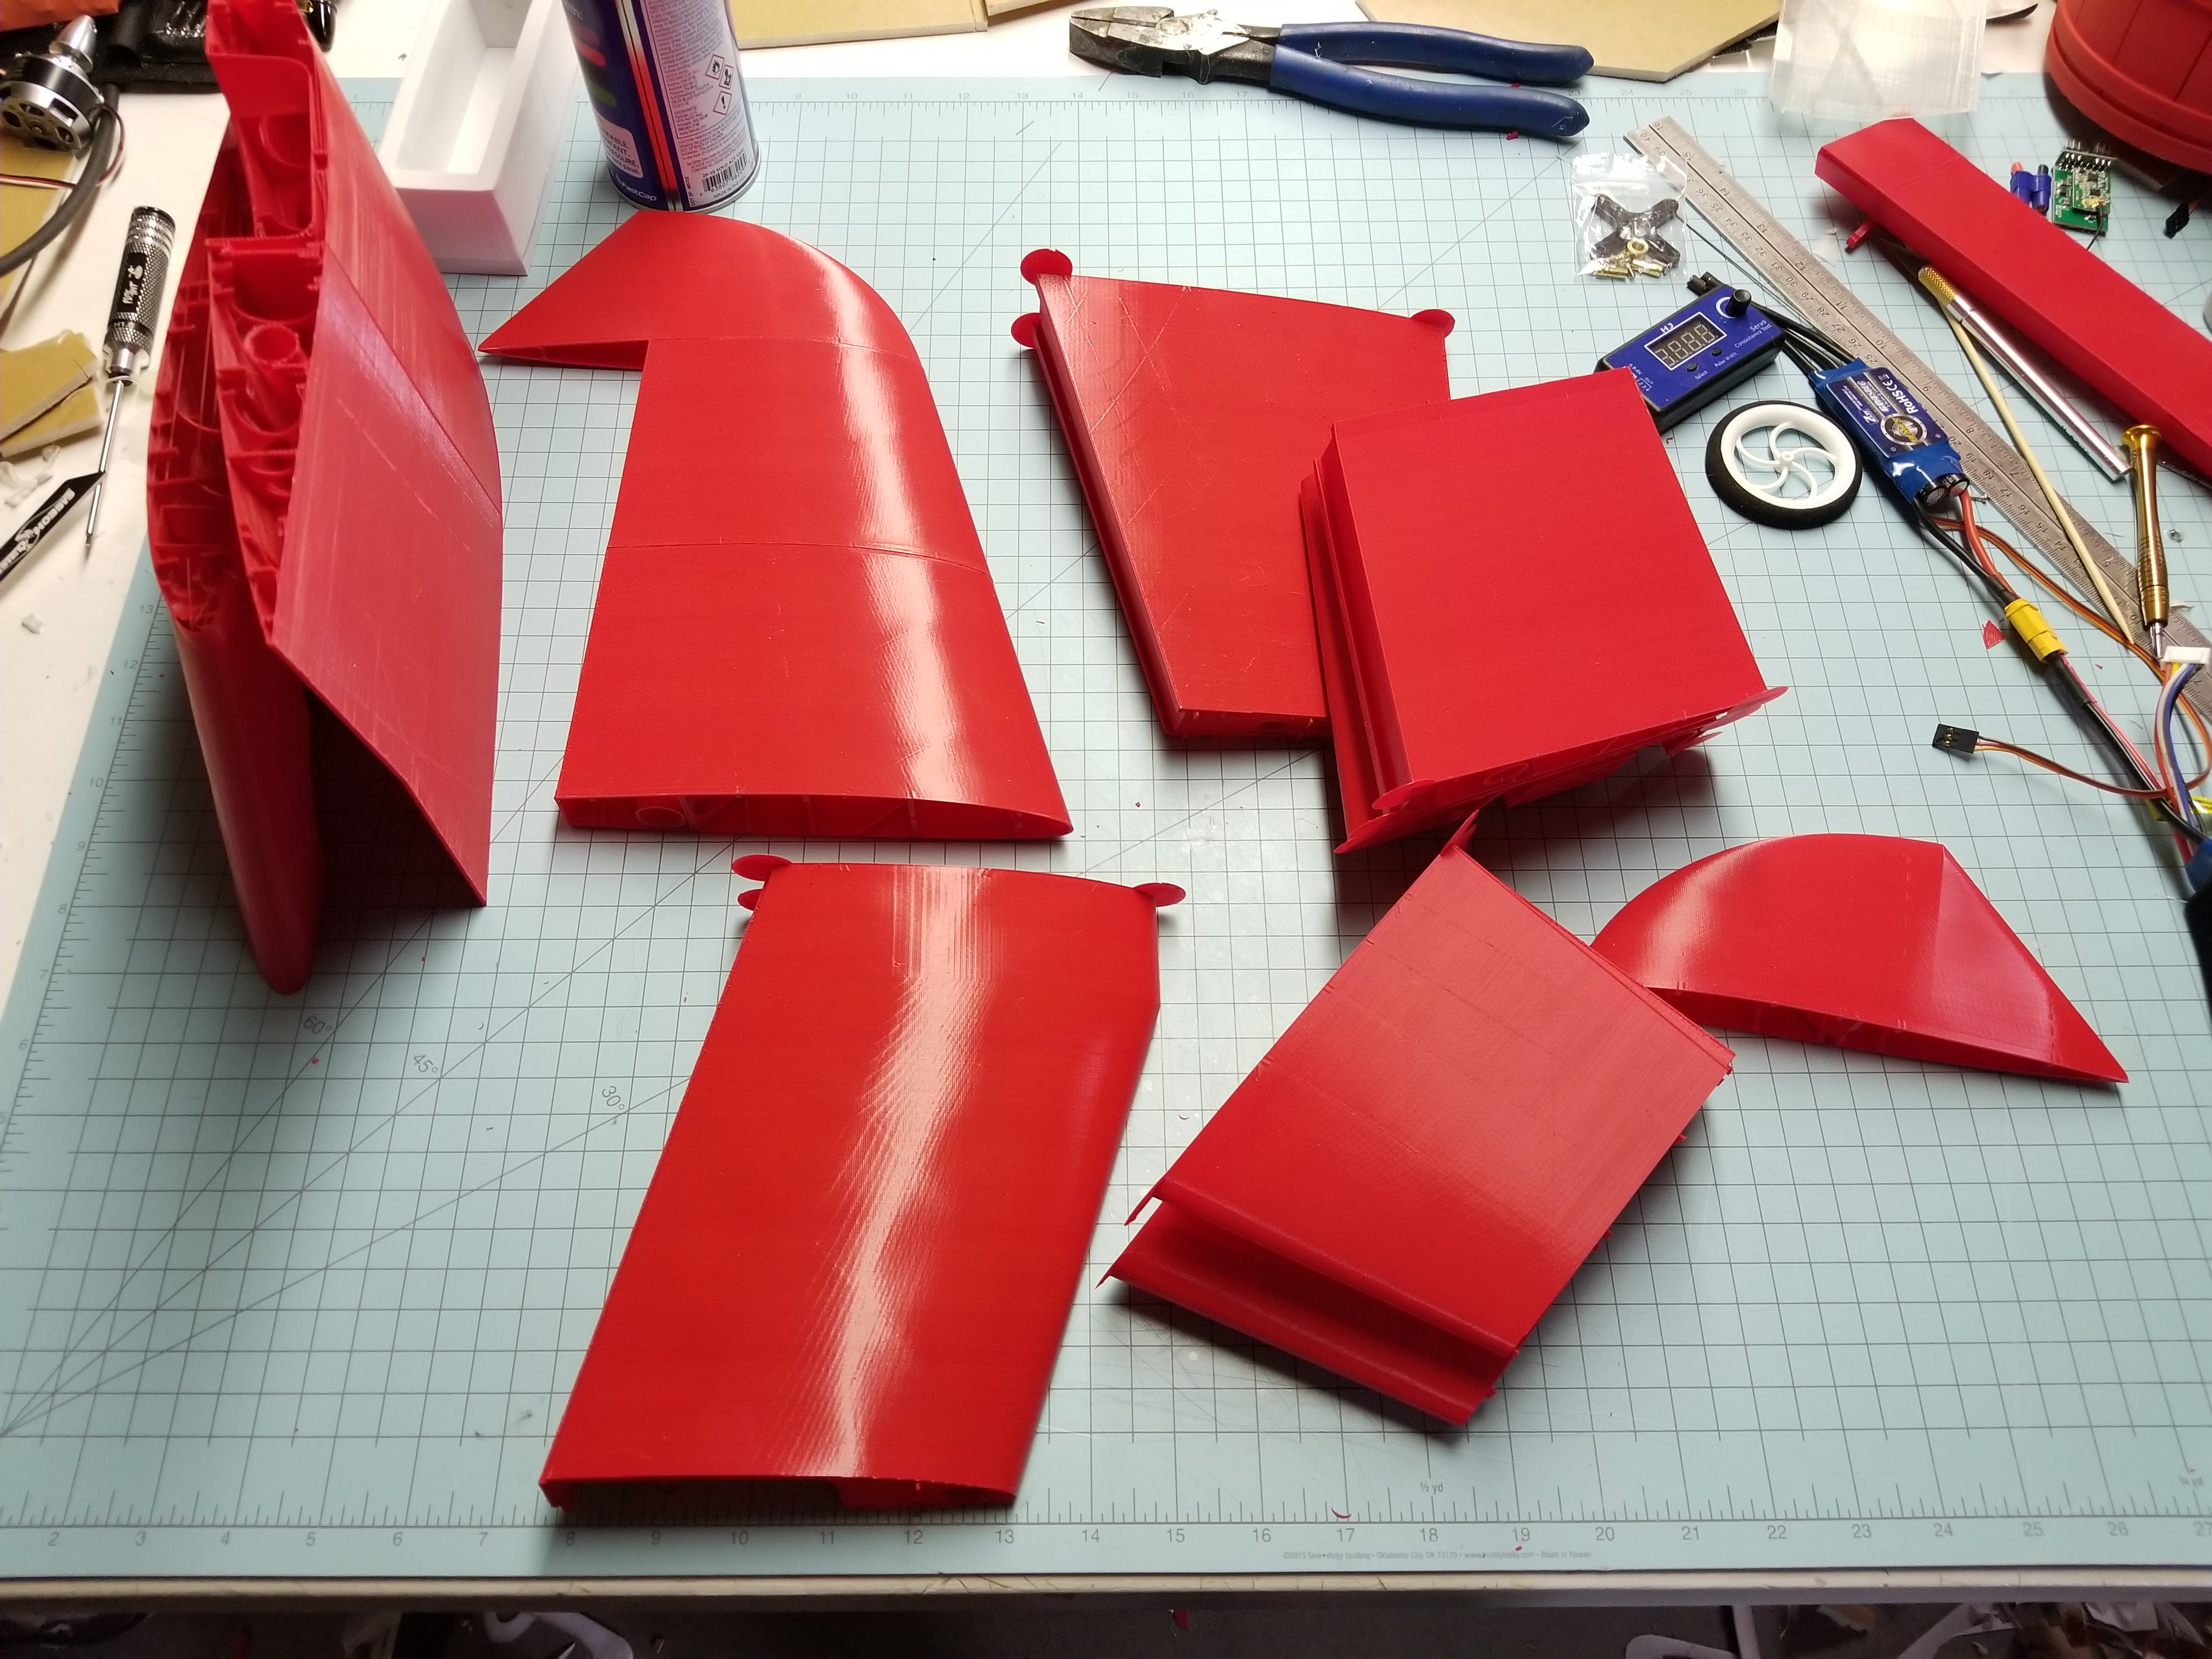
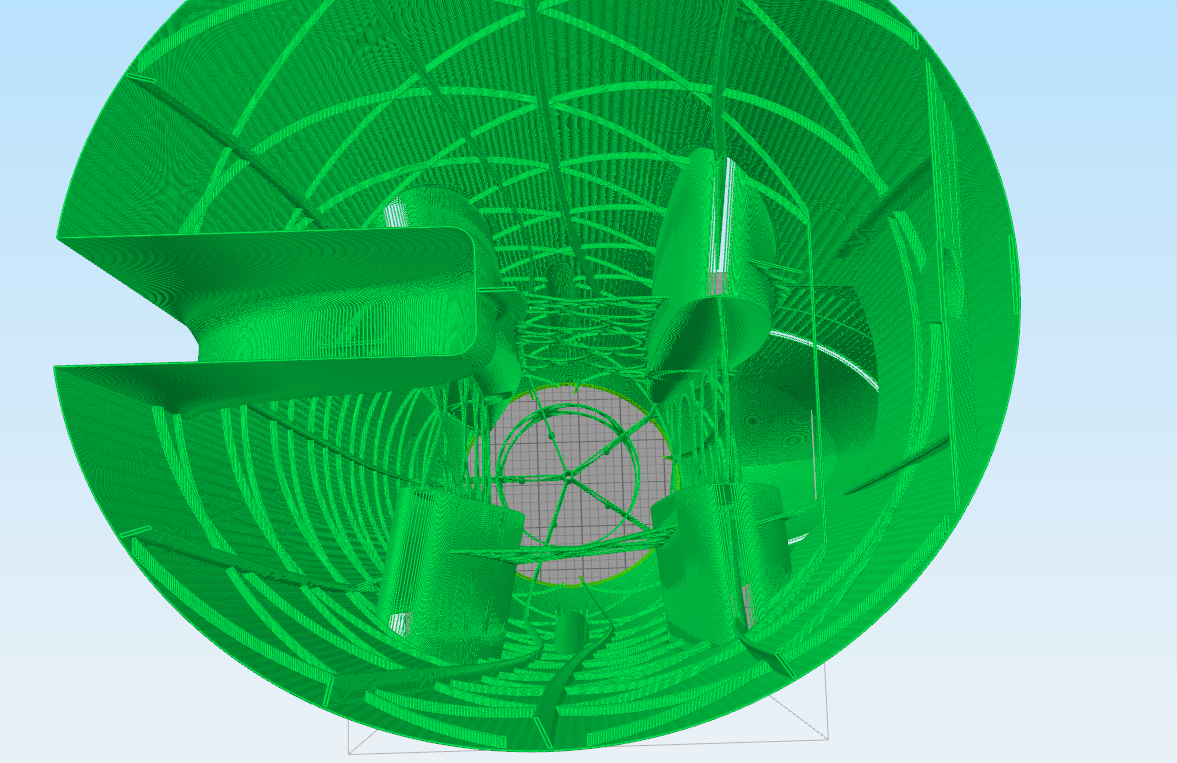
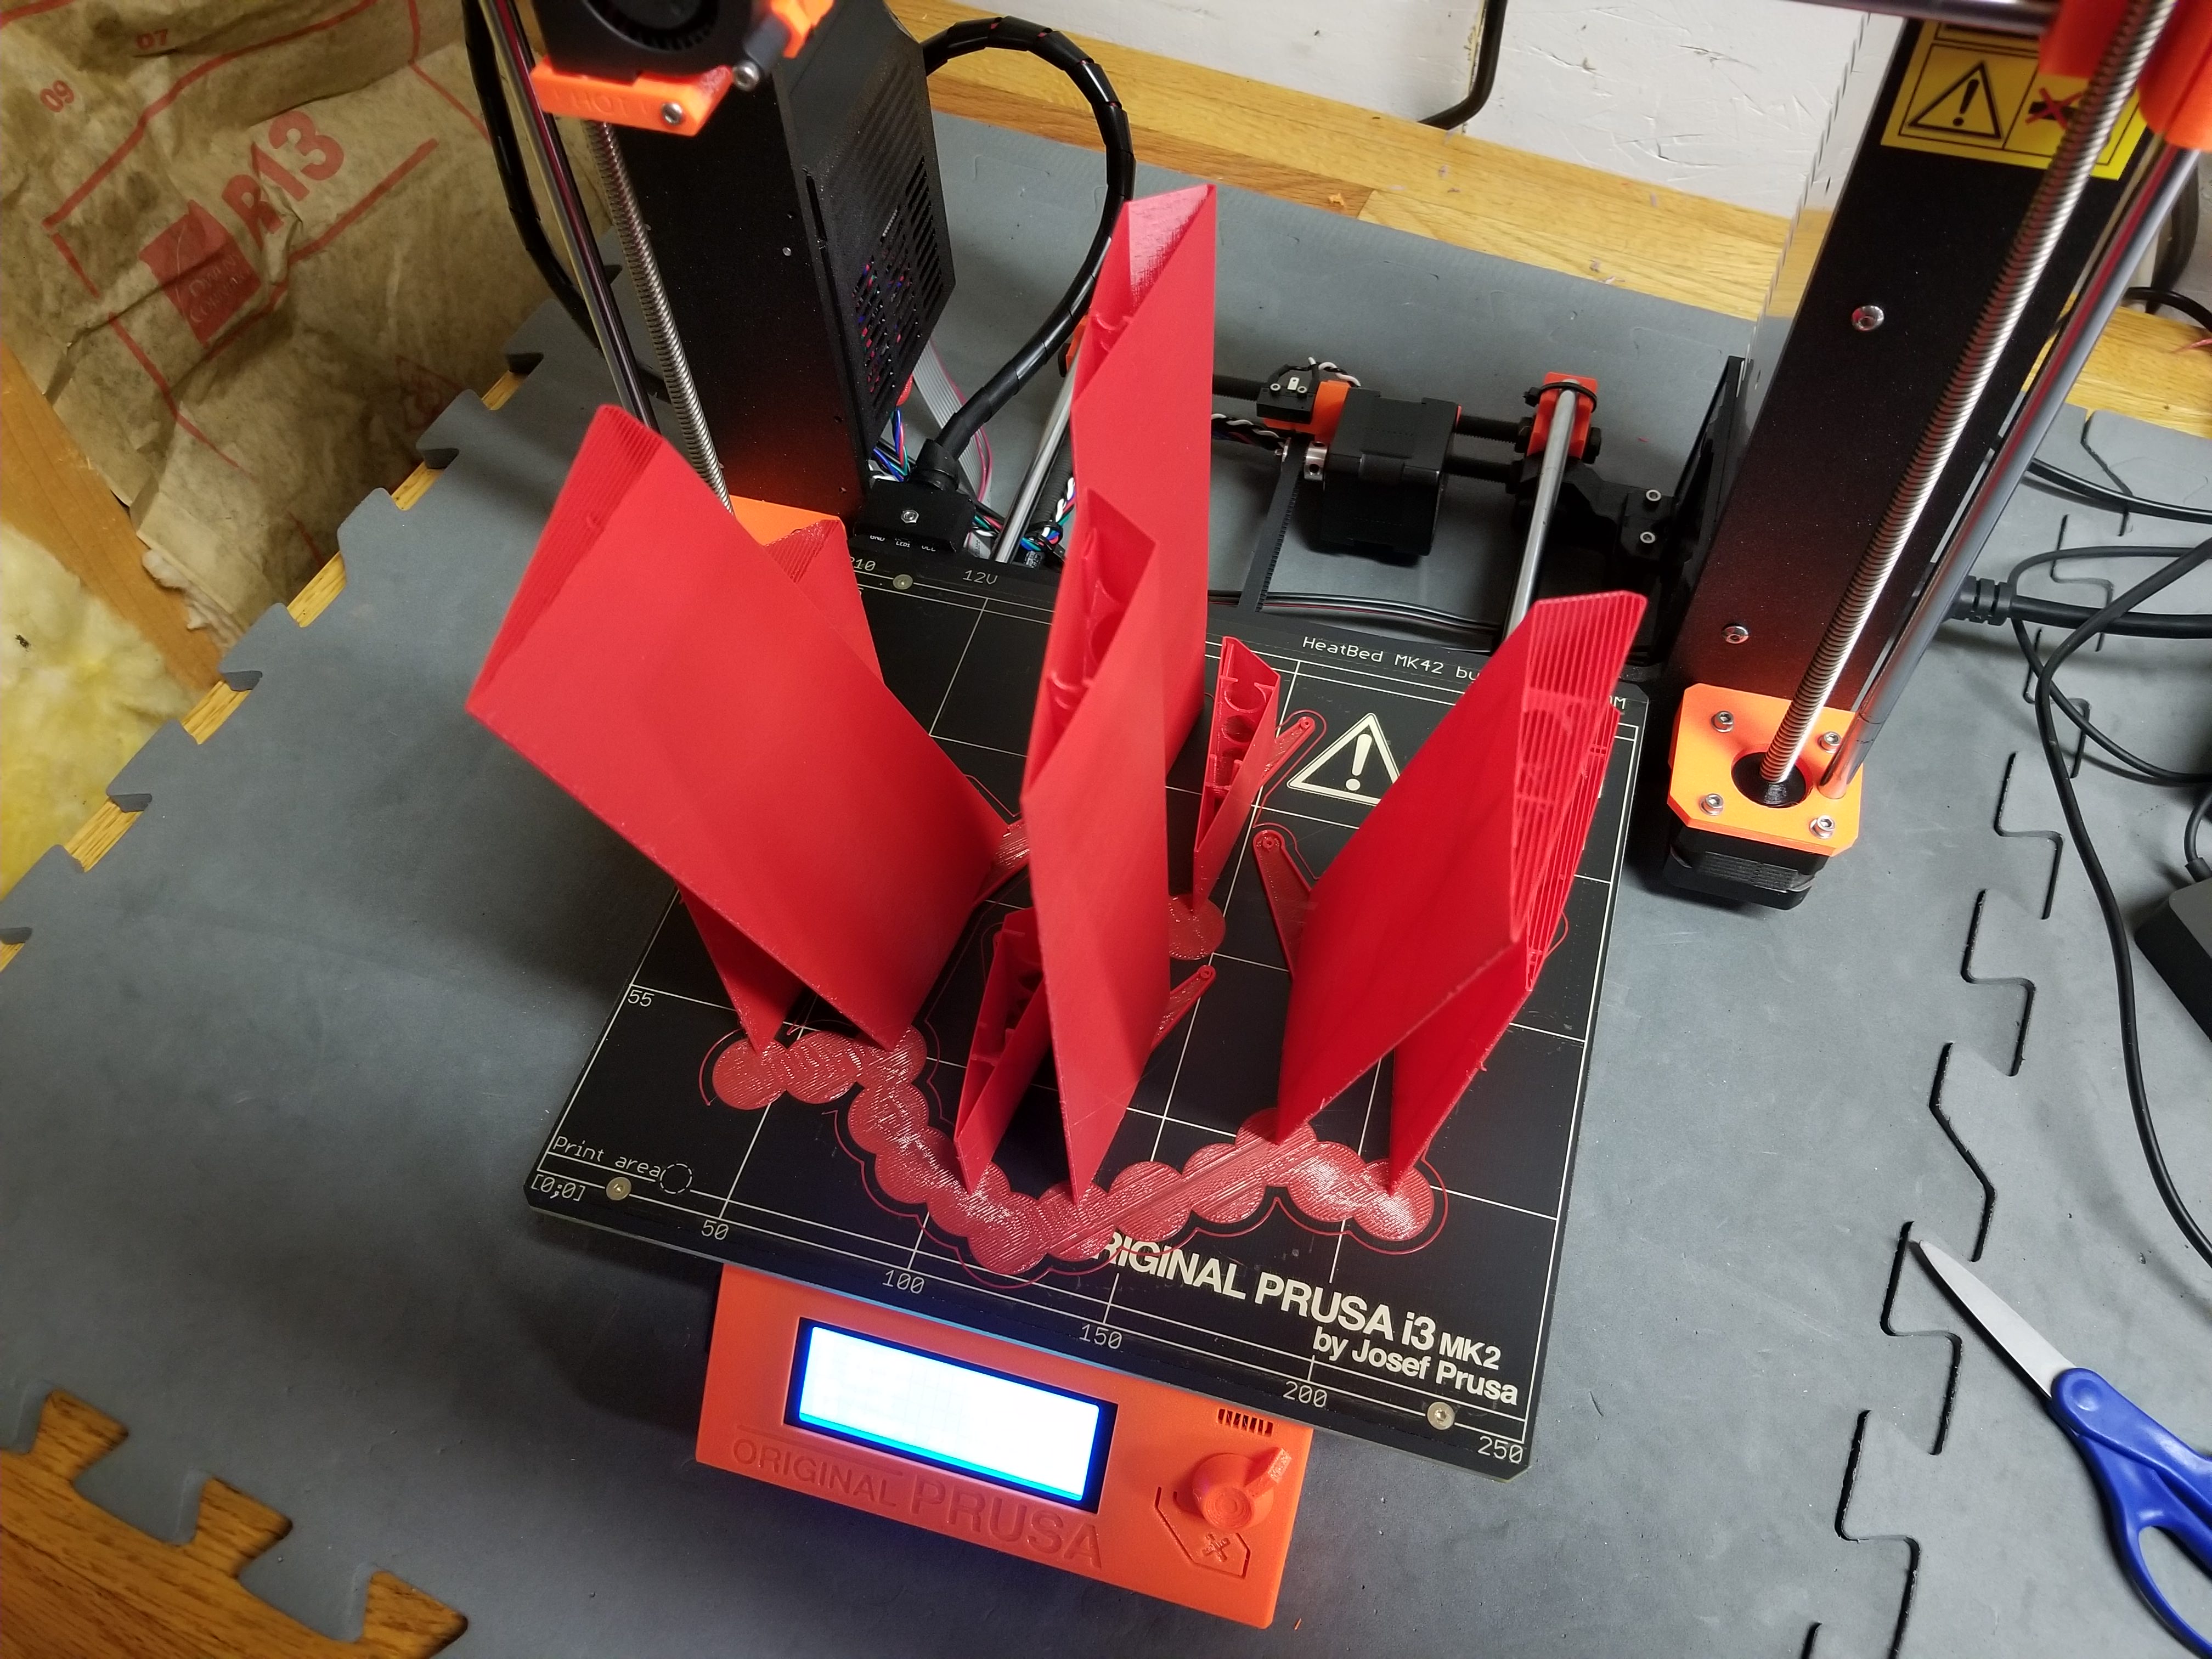
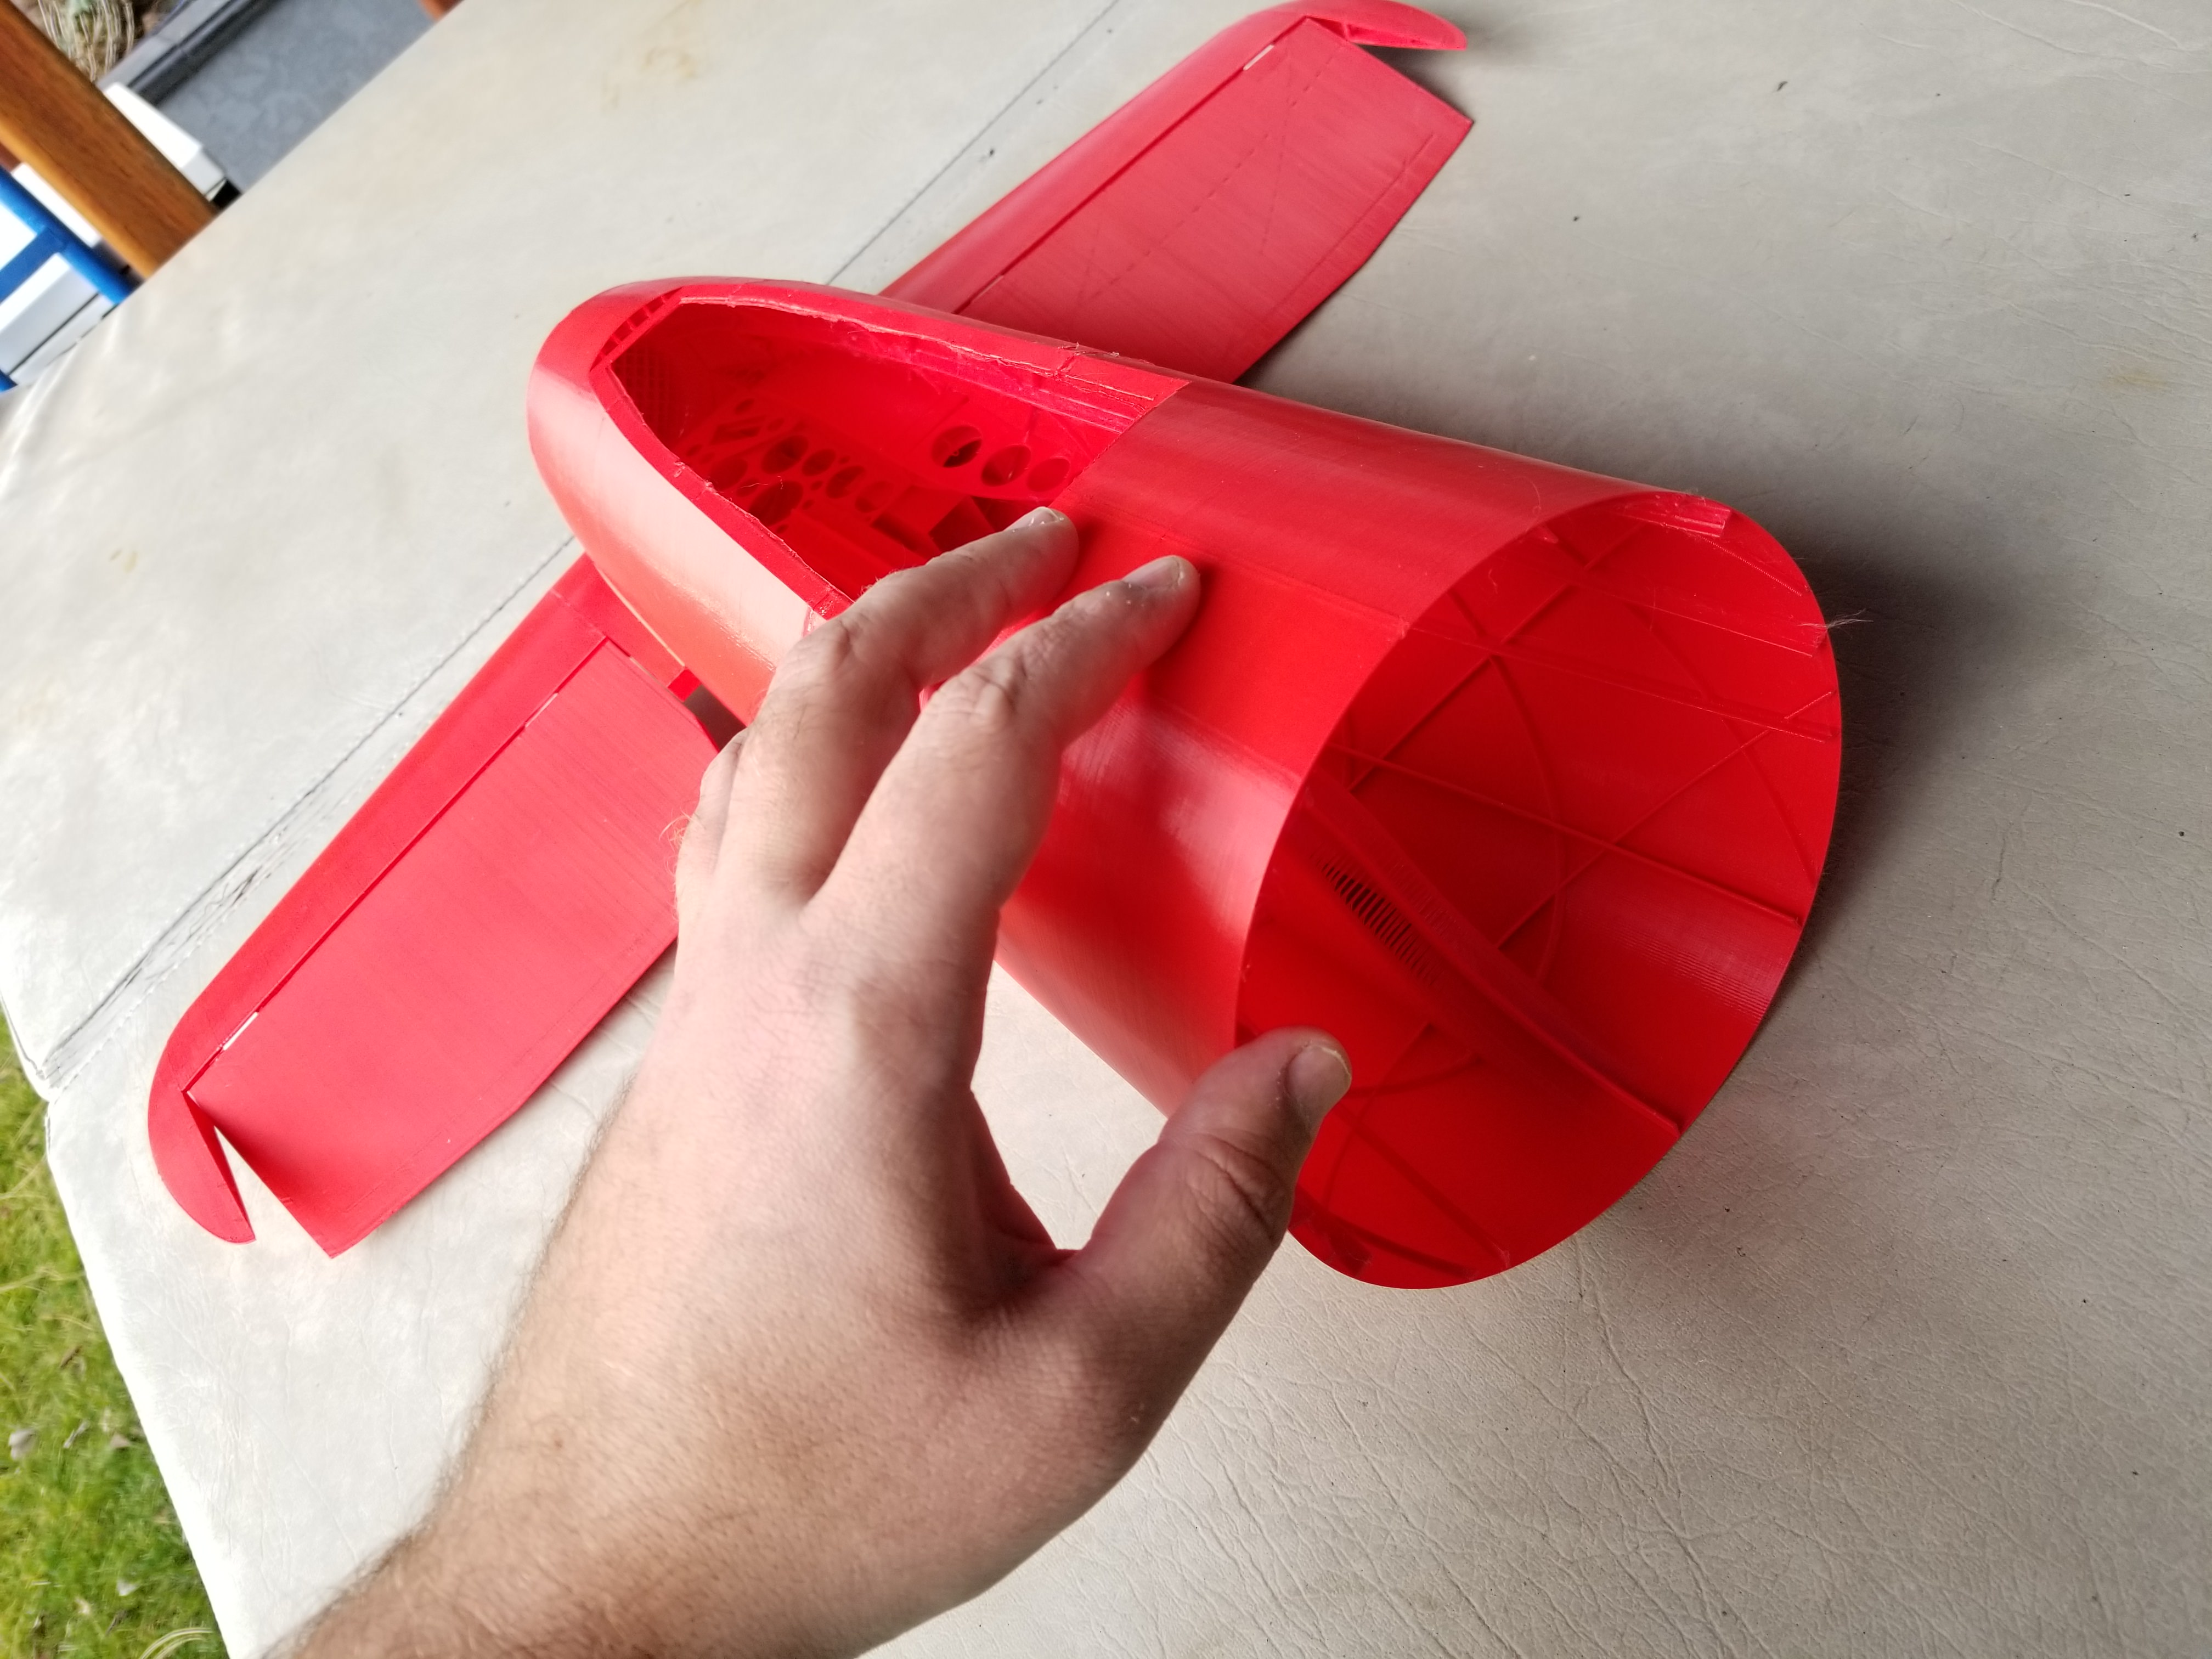
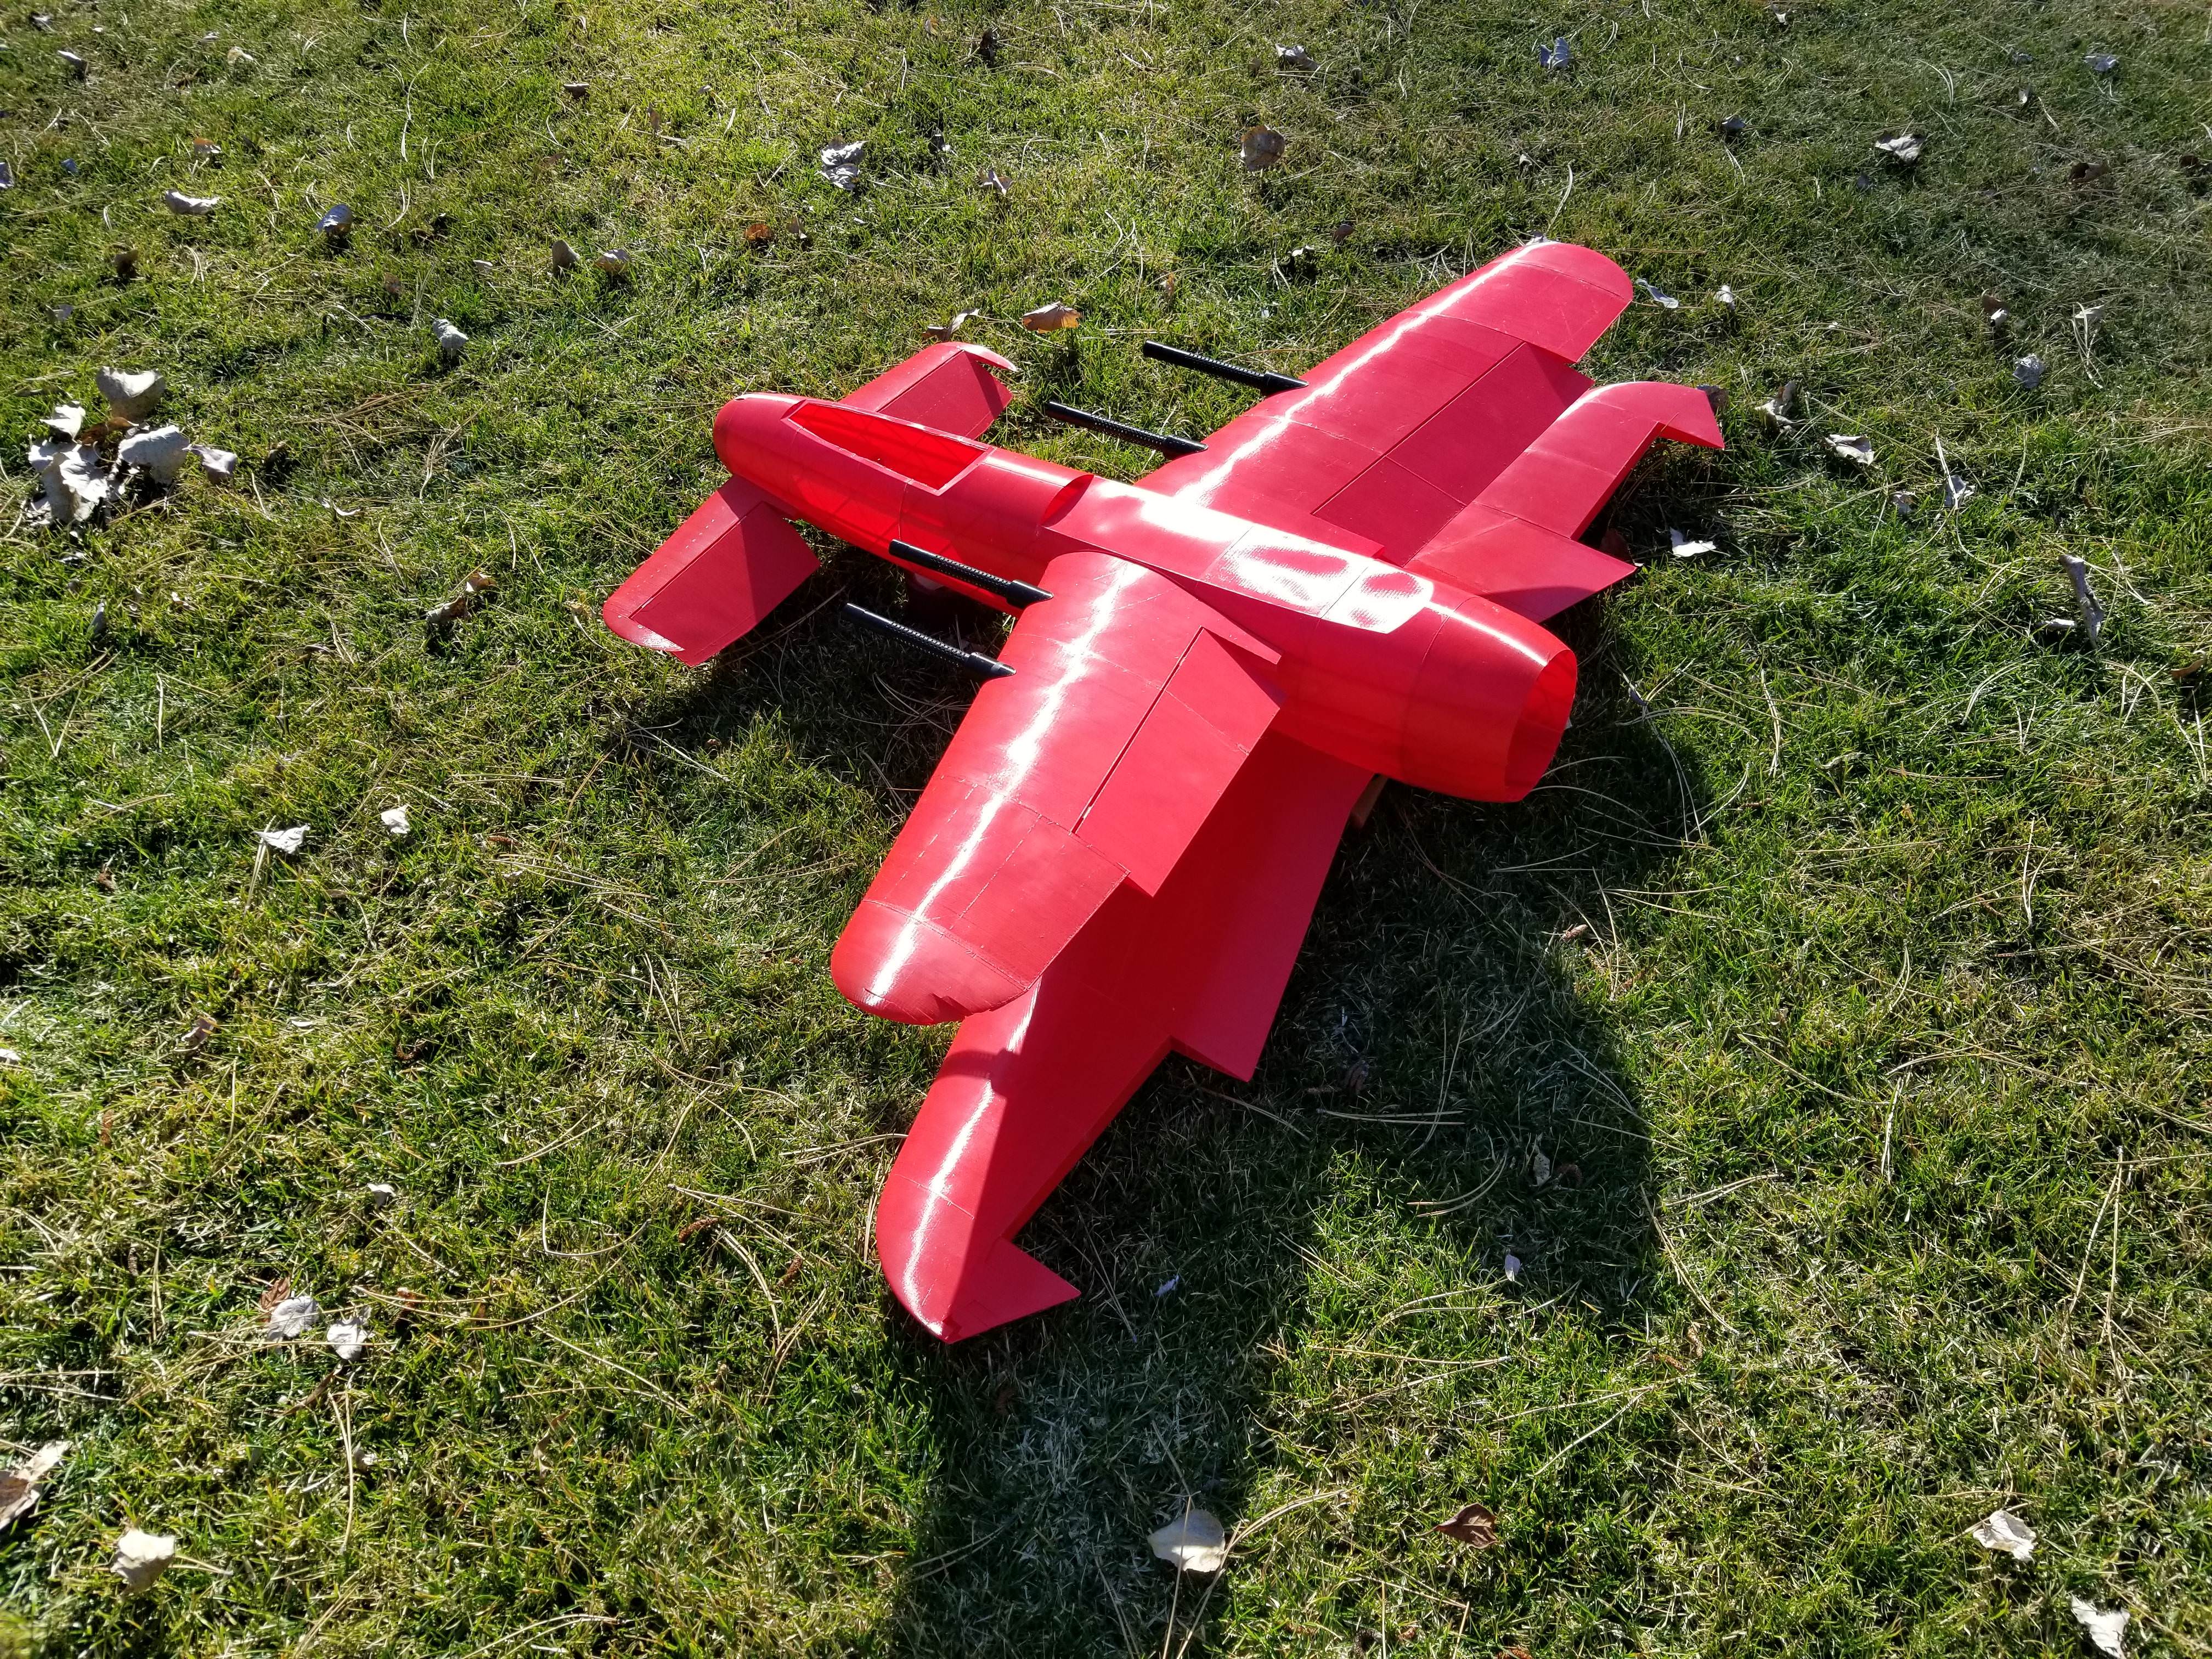
6.) For the size of the devastator, the outer wall is just one perimeter of PLA. More than that would be very heavy.

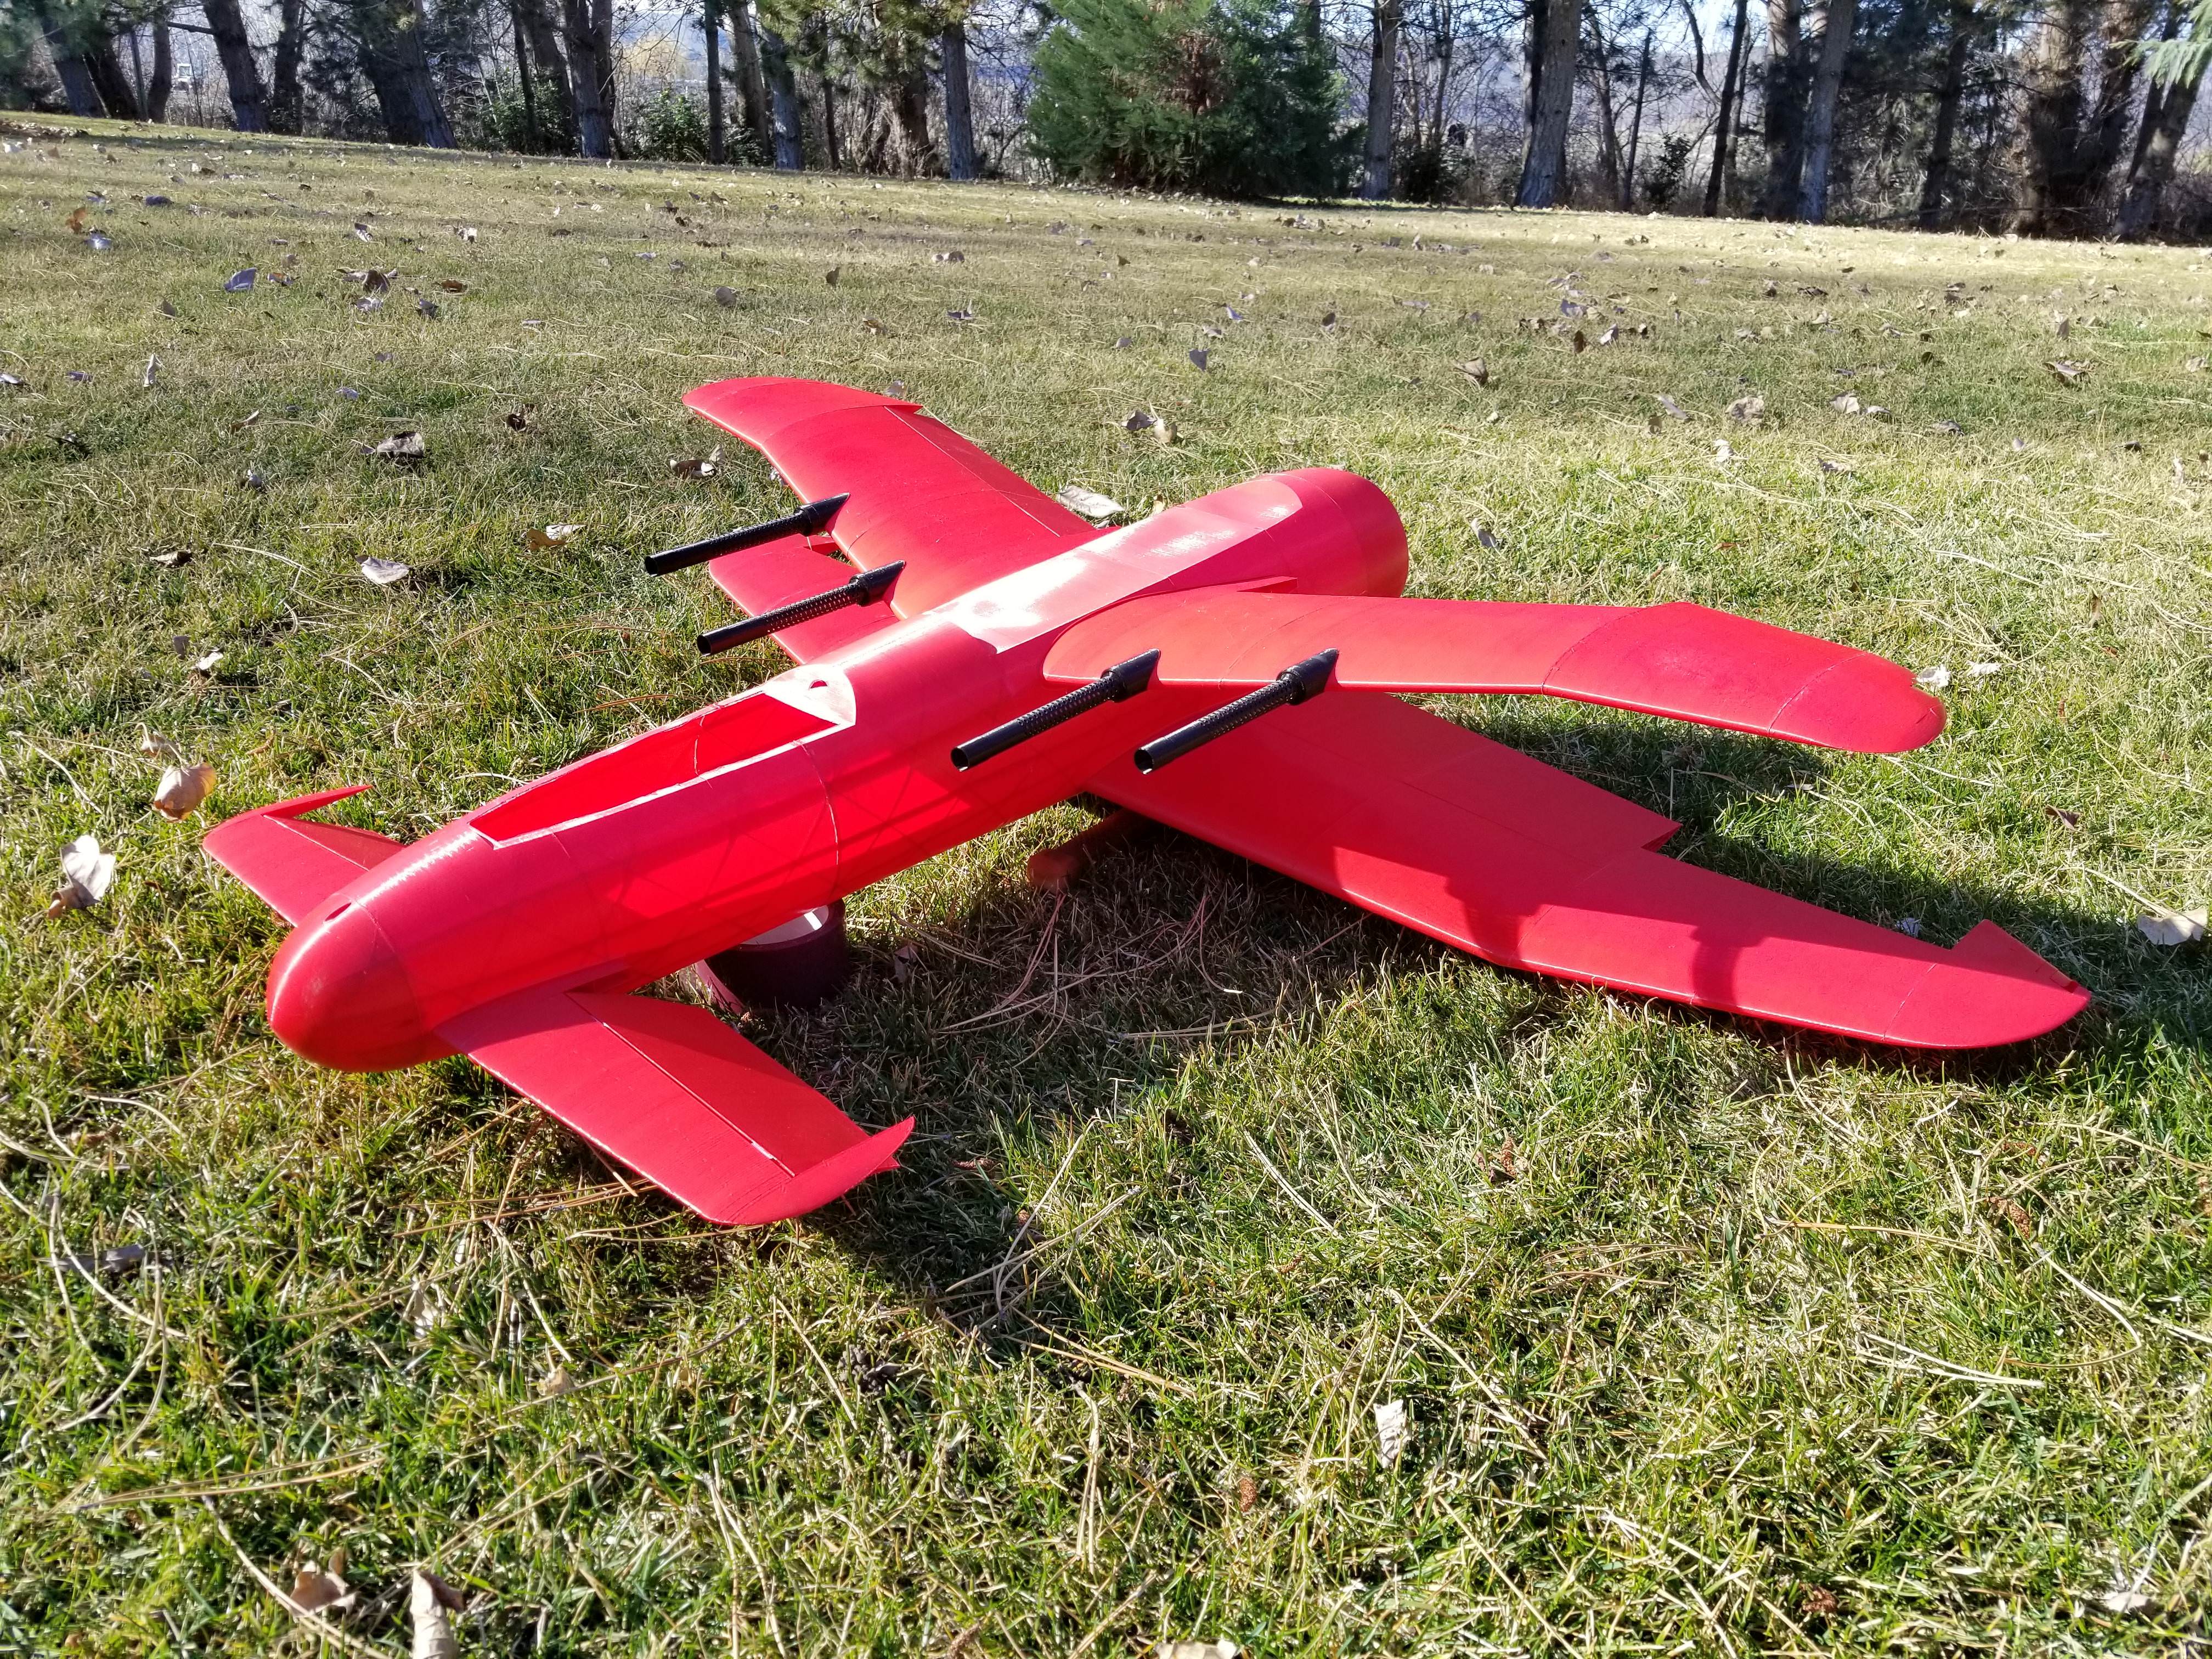
7.) PLA is fine as far as stiffness goes, and I think my wings will be strong enough. I bent a test over my knee and applied more force to it than a foamboard wing can handle and it didn't break. Guess we will find out if I have enough internal supports. :cool:

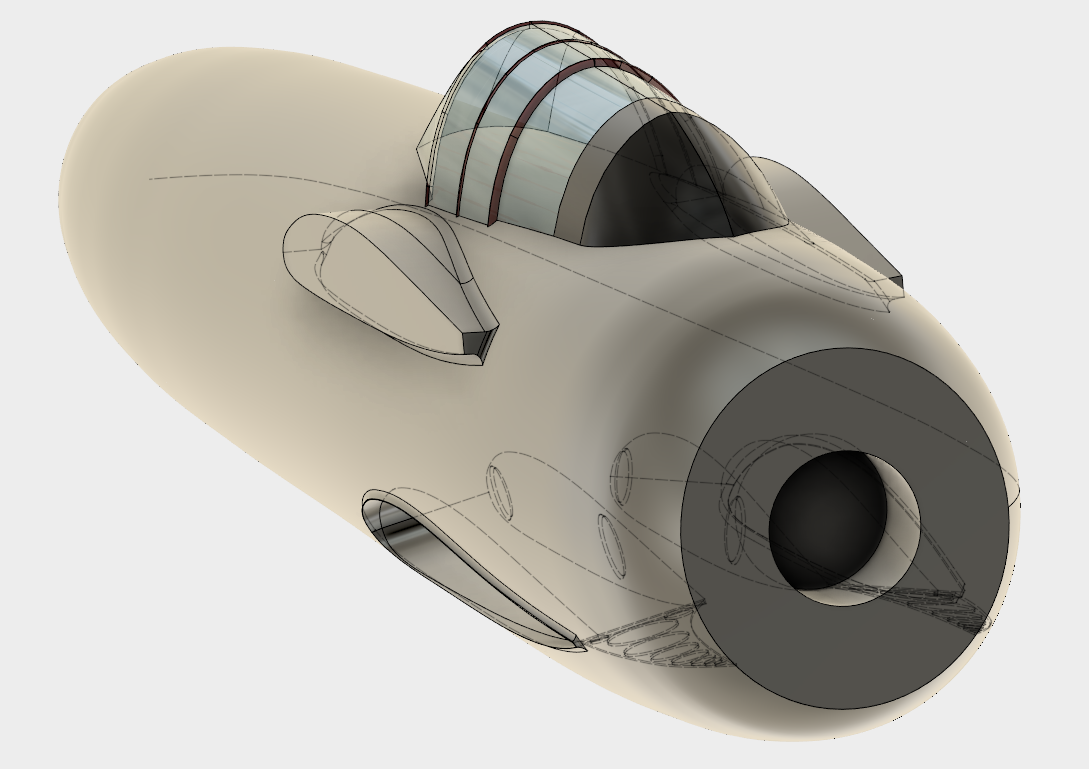
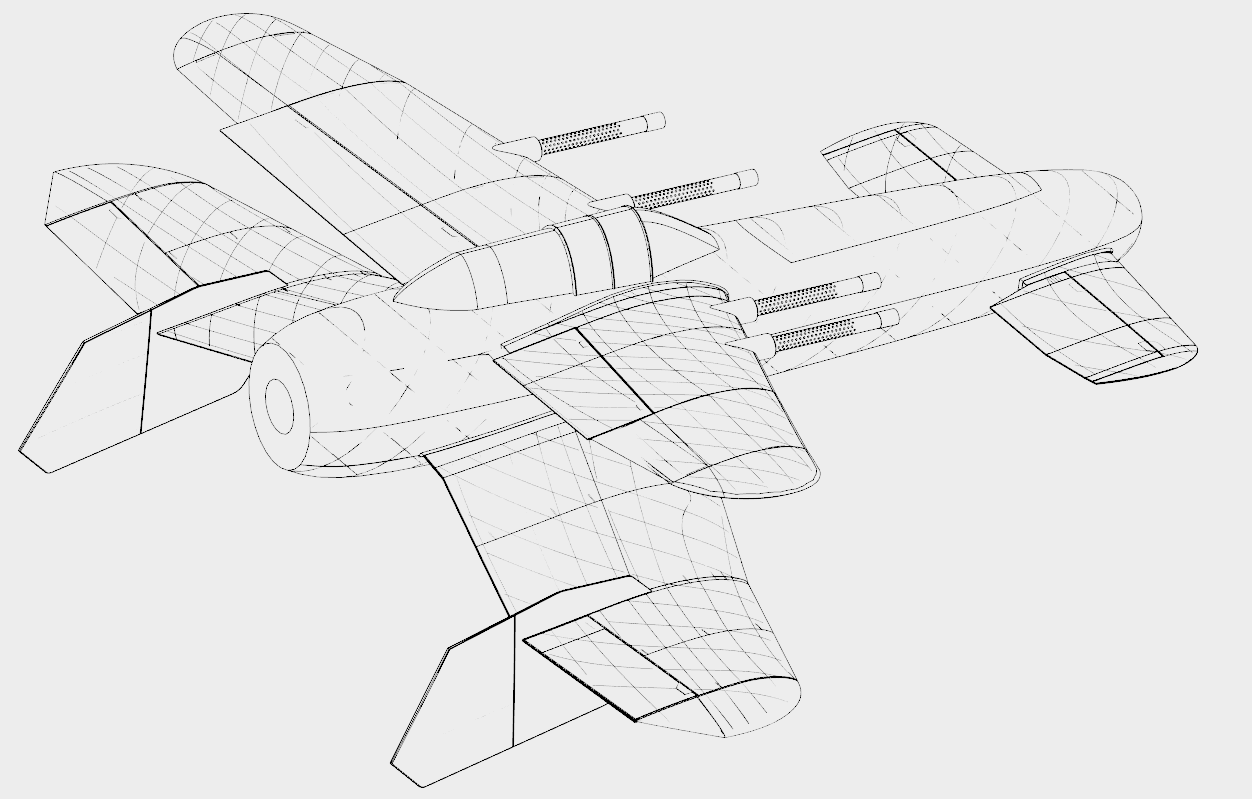
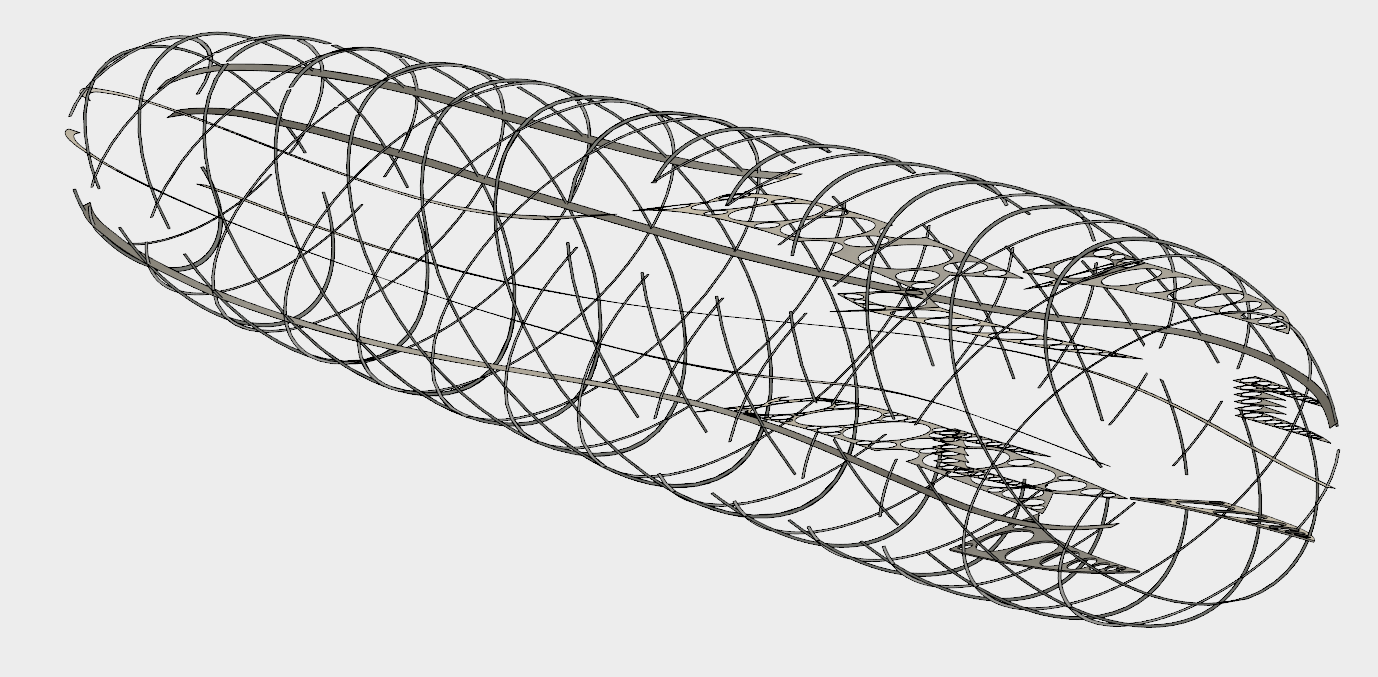
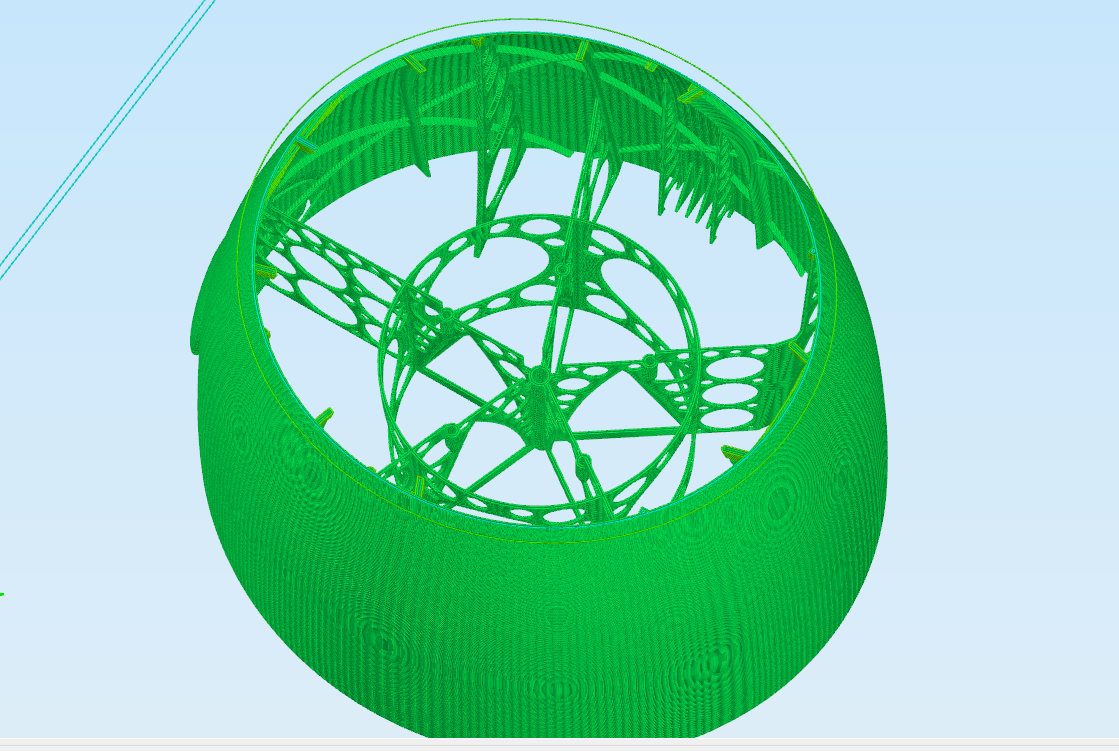
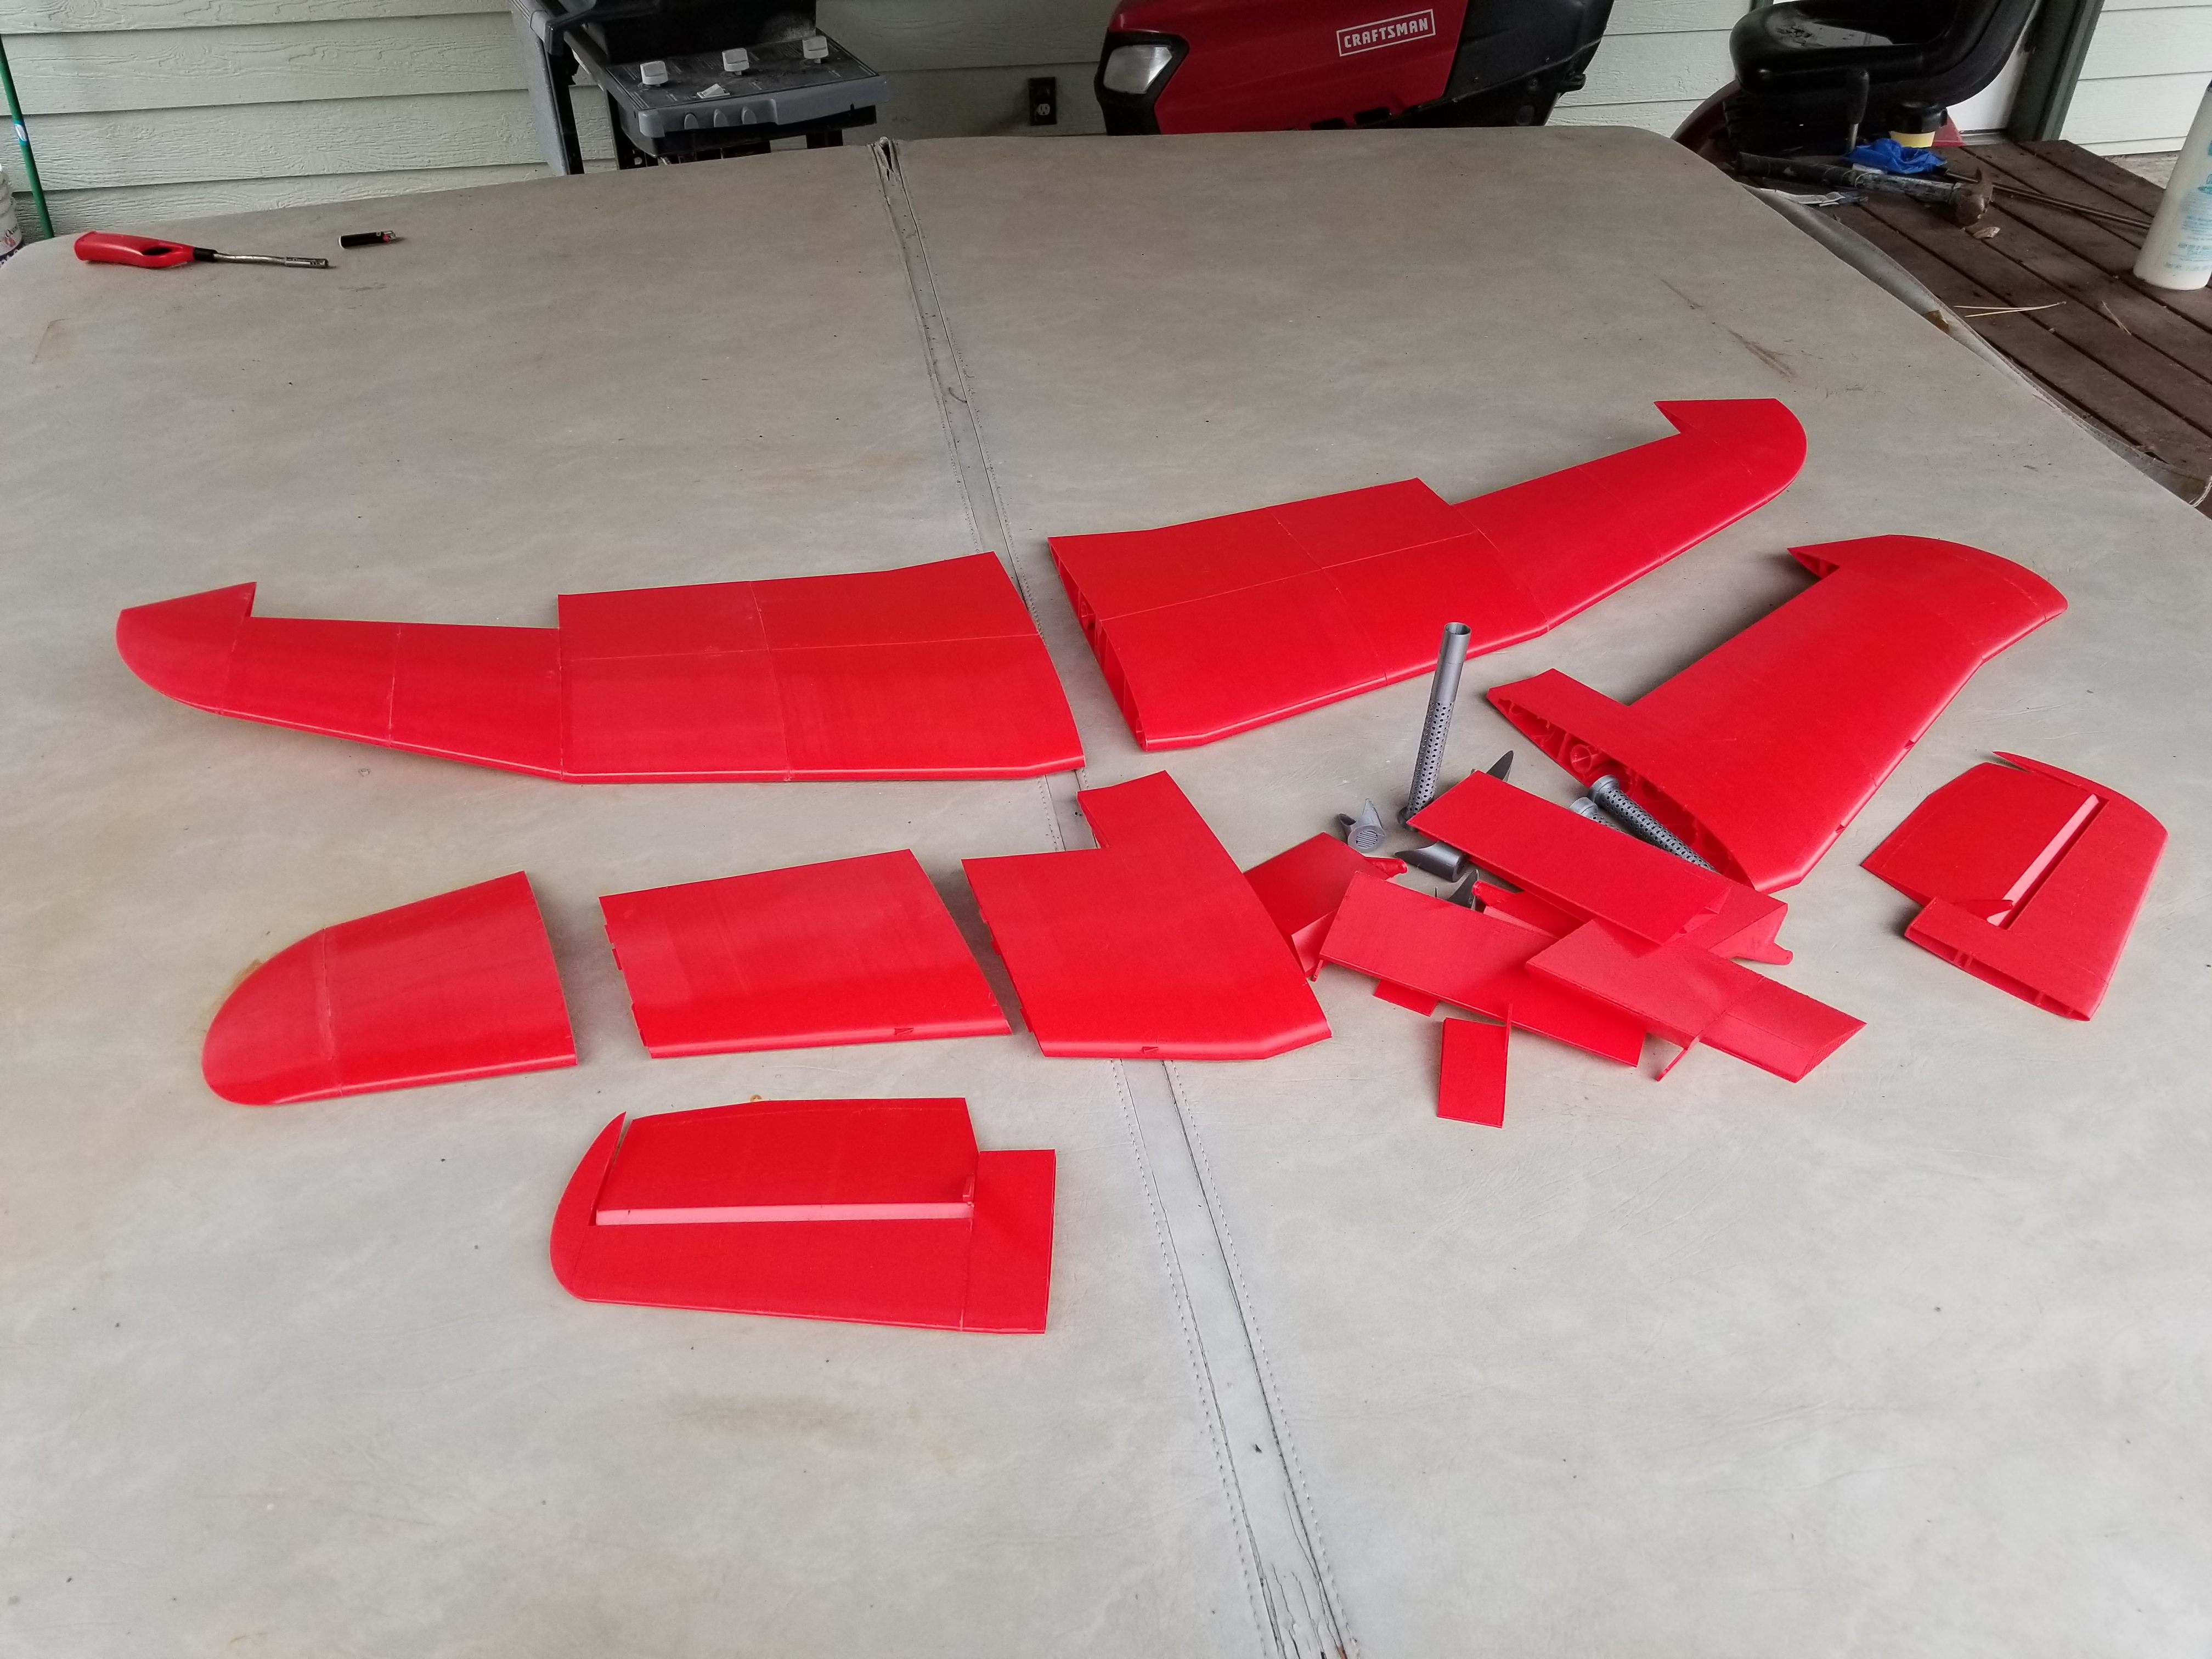
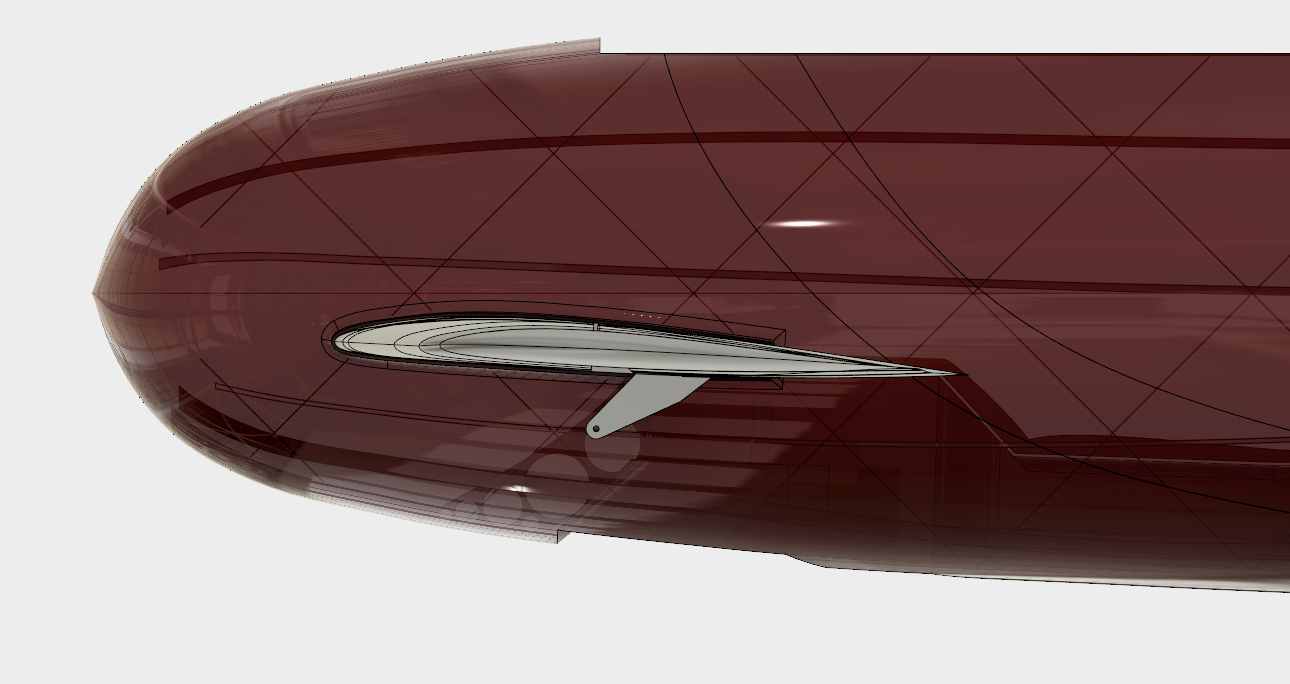
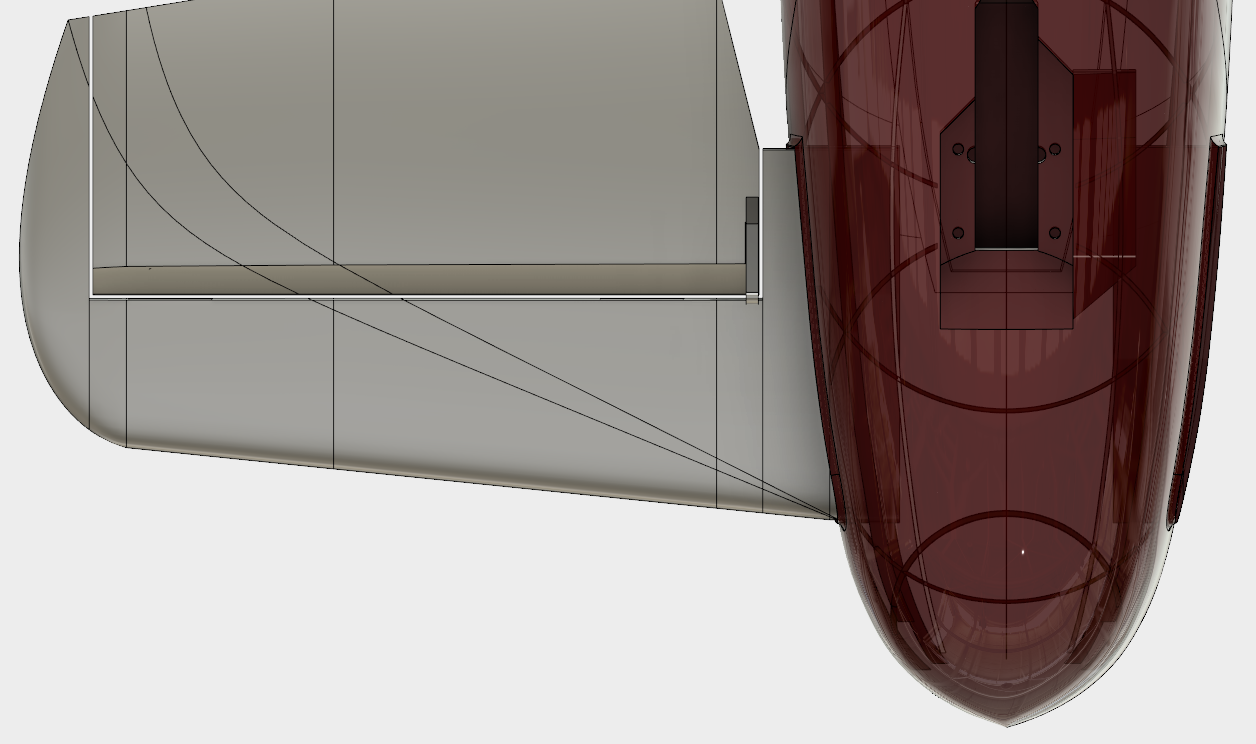
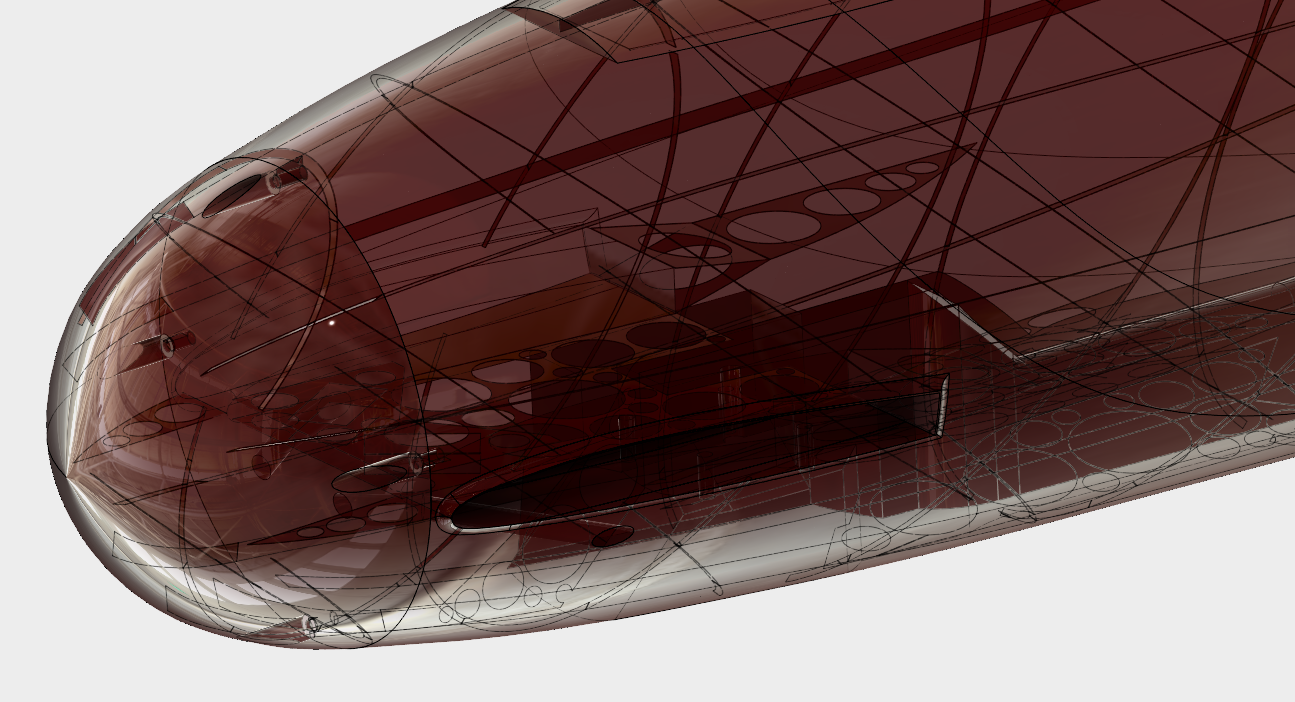
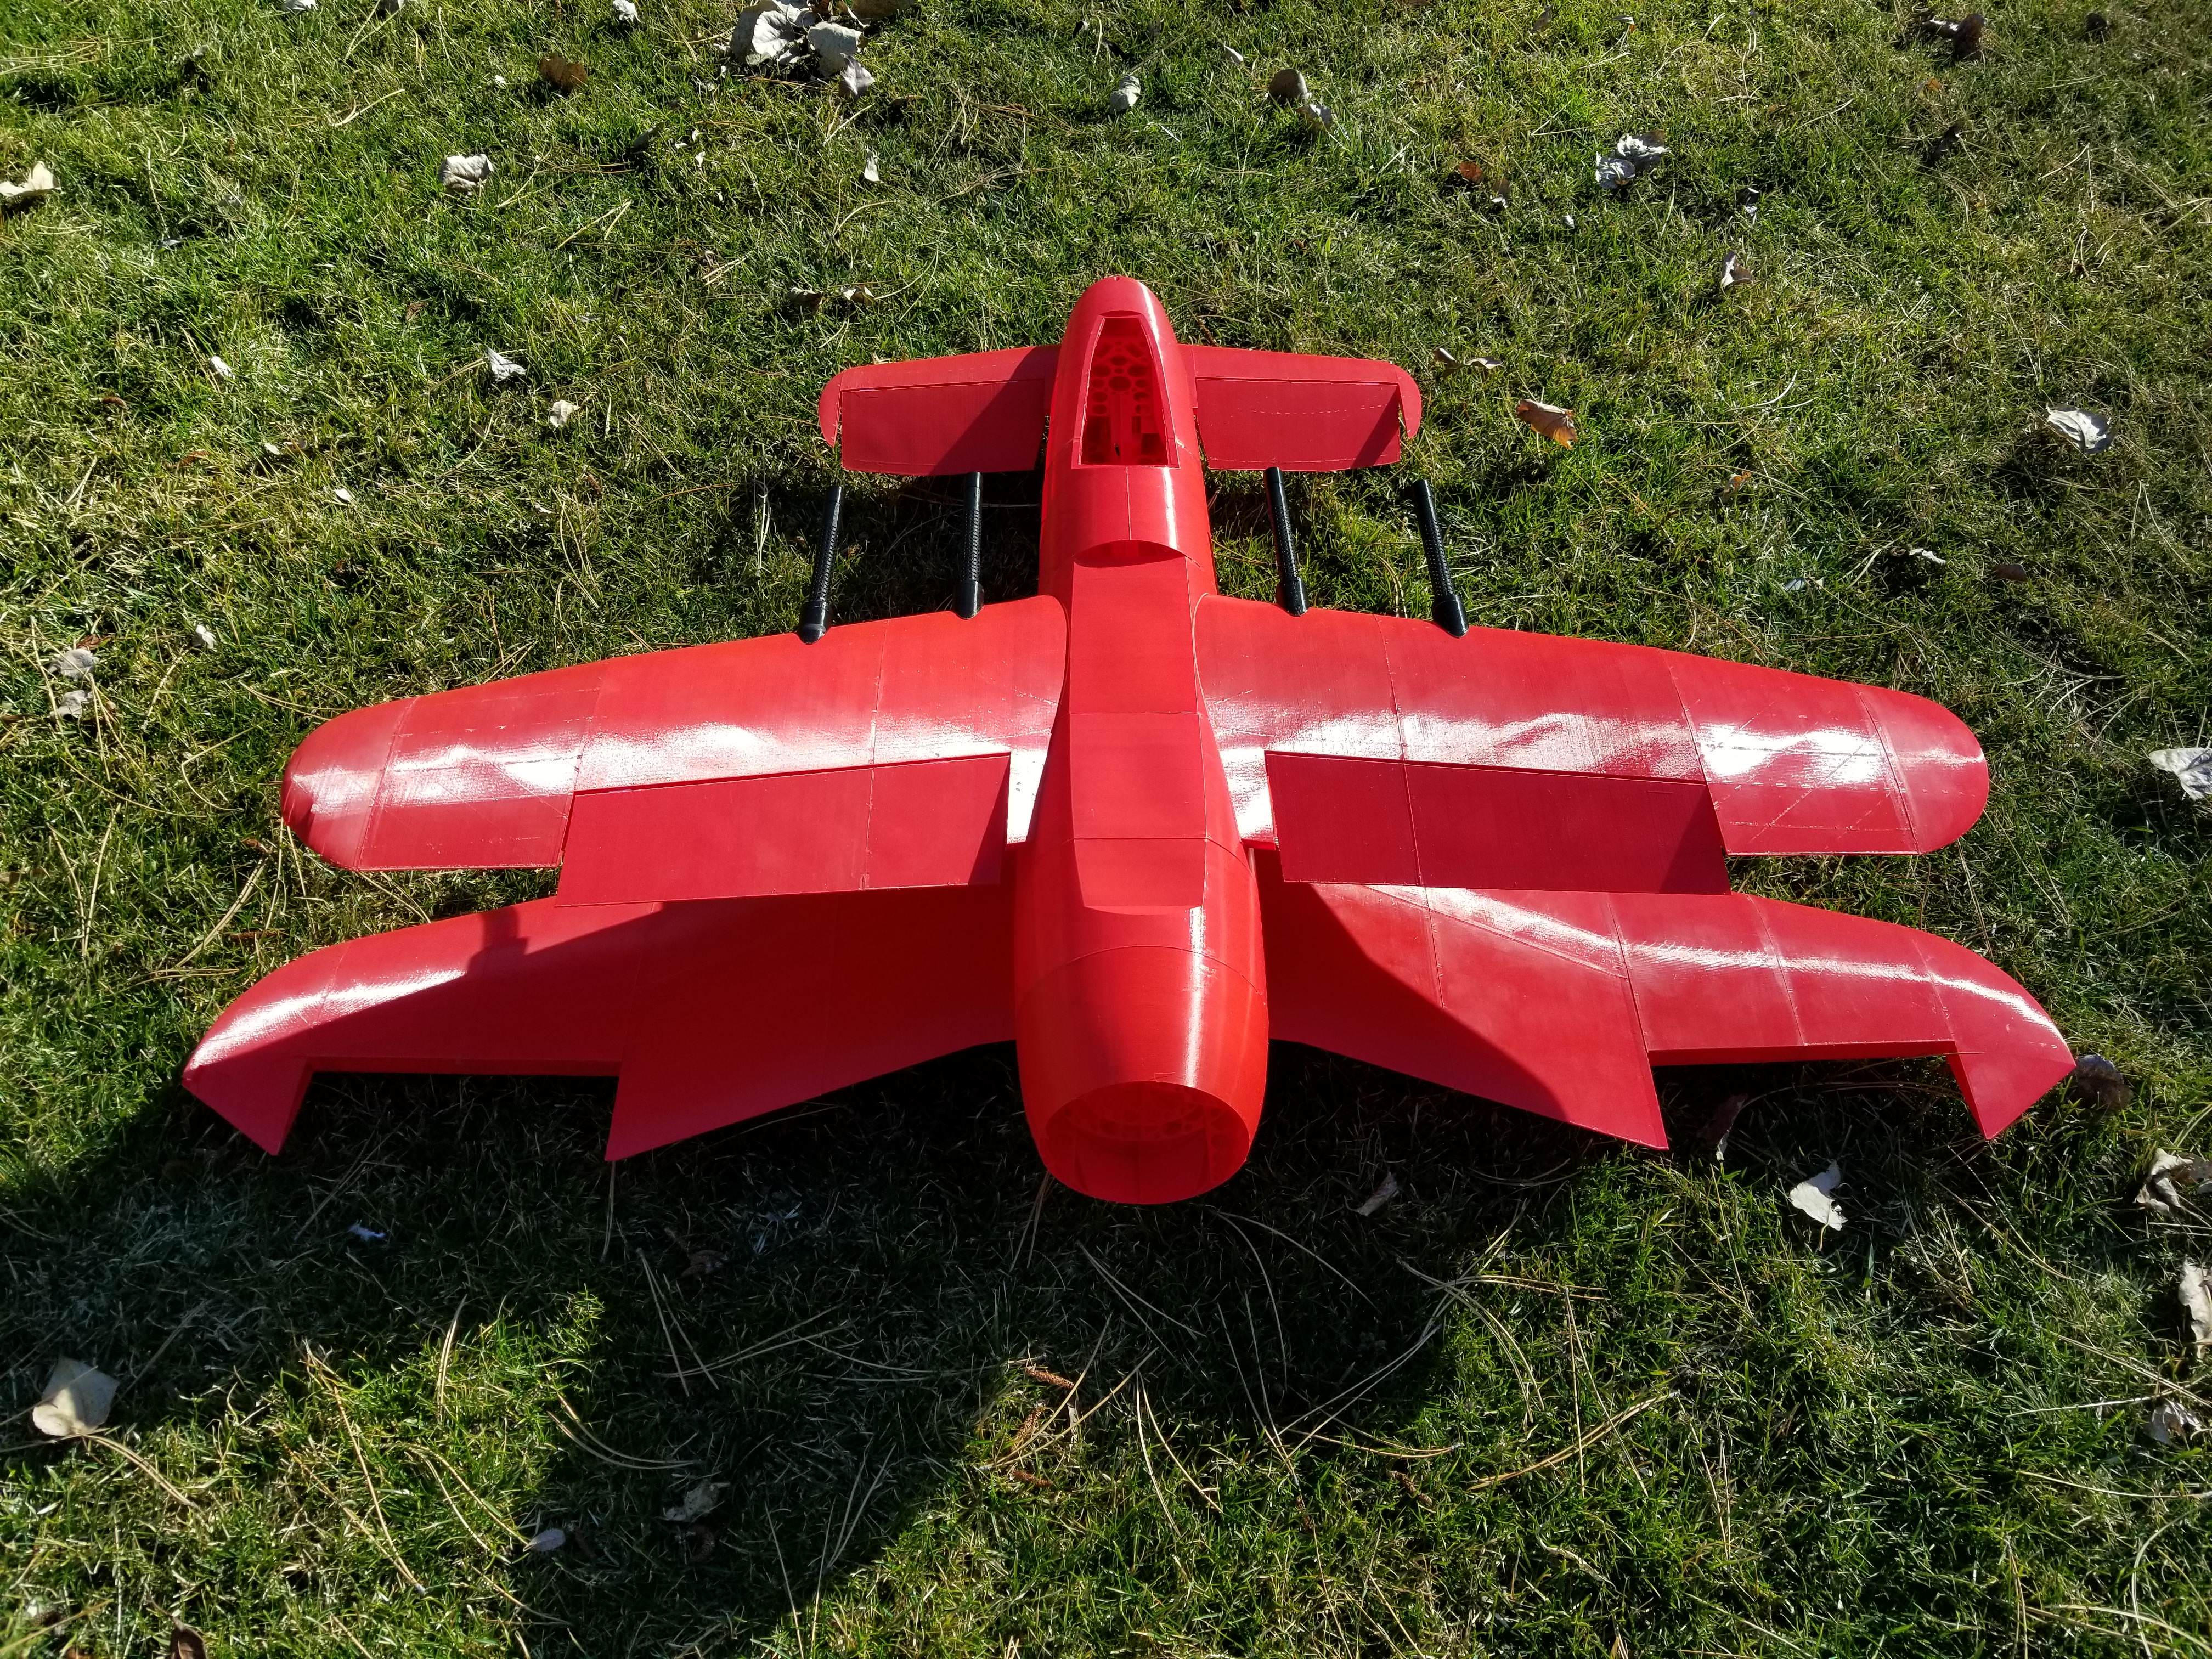
8.) Workflow is complex I've discovered. But essentially, what seems to work best is modeling the outer shape, and all the tools needed to offset the internal structure from the outer skin first. Once that's all done, you can cut out things like control surfaces, and start putting in internal structure. Once spars, servo wire runs, retracts etc are in place you can start slicing stuff up for printing. Once the model is in printable chunks you can add addition supports and mating surface aids.

I'm primarily using Fusion 360 for all my 3D parts. I use DoubleCAD XT for two dimensional work. Simplify3D is my slicer software of choice. It's far more powerful that a lot of others on the market, and has features that are needed if you want to get the best thin wall airplane prints.

I've been tempted to get a printer with massive build volume, but didn't do it from the start because my goal was to be able to share what I make with others. Not a lot of other people have big giant printers.

I'm also discovering that bigger sized planes require a lot more supports, so printing in smaller pieces and using dovetails or other methods of attachment can add a ton of strength, so a small printer doesn't matter much. For my purposes, I'd be better off with multiple smaller printers rather than one big one.

Of course, the cool thing you could do with a larger printer, is scale up the size of airplane parts designed using my or 3D labprints methods by 33% and use a .6mm nozzle. I have a feeling that the additional plastic from that might be strong enough for a plane to survive at the larger size.
 

localfiend

I like 3D printers...
Mentor
Got the front nose wheel mostly figured out. Still need to add some spars to it internally. Then I need to work out servos for the Canard, and for the nosewheel (forgot about that one). I'm gonna need a lot of RC channels for this thing lol.

hzwFmqt.png
 

Uncle Manuel

New member
Wow, you're the best! Thanks a lot for answering my many questions, this helps a lot! :cool:

So you're constructing from the outside in, interesting. I guess I have to try if that's doable with free software like BLENDER.


Hinges: in the manual for the 3D printed Strandbeest (Theo Jansen) I've read something about 0,5 mm clearance:

"Be sure to make hinges with clearances that will work with your 3d printer/material. I left a .5mm clearance around all moving parts.
I used a fillet on the inside contact area of the hinge so that if the parts did fuse, only a small part of the pieces would stick together and could be worked free."
http://www.instructables.com/id/3D-Printed-Theo-Jansen-Strandbeest/

I guess this will be a trial & error thing for integrated aileron/flaps hinges with PLA (the Strandbeest needs some slack/play in the linkage to work properly). Because the professional produced 3D Strandbeest uses Nylon powder and a laser 3D printer... ;)
 

localfiend

I like 3D printers...
Mentor
Wow, you're the best! Thanks a lot for answering my many questions, this helps a lot! :cool:

So you're constructing from the outside in, interesting. I guess I have to try if that's doable with free software like BLENDER.


Hinges: in the manual for the 3D printed Strandbeest (Theo Jansen) I've read something about 0,5 mm clearance:

"Be sure to make hinges with clearances that will work with your 3d printer/material. I left a .5mm clearance around all moving parts.
I used a fillet on the inside contact area of the hinge so that if the parts did fuse, only a small part of the pieces would stick together and could be worked free."
http://www.instructables.com/id/3D-Printed-Theo-Jansen-Strandbeest/

I guess this will be a trial & error thing for integrated aileron/flaps hinges with PLA (the Strandbeest needs some slack/play in the linkage to work properly). Because the professional produced 3D Strandbeest uses Nylon powder and a laser 3D printer... ;)

No problem. The more people trying to make these planes the better. :cool:

Fusion 360 is free, and in my opinion, way more suited to this kind of thing than Blender.

.5mm clearance isn't a bad place to start for hinges. Even some of the worst printers out there can handle that tolerance.


Got a preliminary motor mount setup worked up. I'll still need to make the actually firewall plate, but it will bolt to this structure. Probably gonna need to test print, add the motor, and do some strength tests to figure out if I need to add any material. Trying to keep this thing as light as possible.

ooKJF0C.png


J6a03NW.png


lanbXyV.png
 

localfiend

I like 3D printers...
Mentor
What's up? :popcorn:

Been a busy week, and I haven't had time in the evenings for drawing. My free evening time at the beginning of this week I used to assemble another 3D printer kit. 1st print was a 3DBenchy to test it out, then I started printing Devastator parts.

oJSs0jx.jpg


BSlut9j.jpg


Got pretty much everything printed up aside from the fuselage.

We8HXL7.jpg


I'm hoping to have a little time this evening to do some finishing touches on the fuselage design and get started on printing it. Got an RC club meeting, we'll see how long that takes. All that's left are some minor structural tweaks, and the addition of servo mounts. The nose wheel retract I needed came in this week, so I should have all the necessary electronics.
 

Uncle Manuel

New member
No problem. The more people trying to make these planes the better. :cool:

Fusion 360 is free, and in my opinion, way more suited to this kind of thing than Blender.
Ok, you've convinced me. I sat through all of this 3-part beginners series from Lars Christensen and I can see the appeal for constructing things. I will definitely give it a shot... :cool:

Btw: I can't wait to see the Devastator fully assembled...:applause:


localfiend

I like 3D printers...
Mentor
Didn't get a ton don this weekend. Printed out the guns in black though. :)

547MDle.jpg


Got stuck on what I want to do with the Canard servos. Played around a bit with various thicknesses of push rod wire, and I think it will need to be some hefty stuff if the servo is behind the canard. Don't want it bending when I'm trying to get full elevator.

Suppose I could tweak things and put the servo on top to avoid that problem, but don't really want to. Wondering if it wouldn't be too ugly to have the nose cone attached with some screws, that way the servos could be up in the tip and still be accessible.

yKOIp3l.png


vESr2oT.png


Vzq2SSl.png
 

localfiend

I like 3D printers...
Mentor
Got it worked out. Canard servo mounts and holes, as well as the nosewheel servo bits are all in place. Gonna start printing fuselage sections tomorrow, it's too late tonight.

mU4m6ft.png


For now, the nose will use some small screws to attach. If I find that it's too ugly when printed, and if I need more nose weight anyway, I'll come up with some sort of snap on/twist on arrangement. Could be handy if you're trying to fill the nose cap with lead to achieve the proper CG.
 

localfiend

I like 3D printers...
Mentor
Finally got some fuselage sections printing. After getting those done, you start to realize how big a 50" biplane is. Maybe I'm just used to little foamies.


RPeIMW6.jpg


lwC93Ec.jpg


I will need to reprint the entire fuselage, as there are a bunch of little things I want to change, however this will be very handy for figuring out CG and overall fitment. I can get a 5000mah4s battery all the way up into the nose, so I've got a ton of room in the fuselage to move the battery back and forth to get the proper CG.

0PqNY32.jpg
 

localfiend

I like 3D printers...
Mentor
Wow! That's looking pretty awesome!

Thanks. It's been a massive time sync, but I think all the work is starting to pay off.

I munched a couple wingtips last night while checking balance. Dropped them right onto the tile floor from head hieght. :rolleyes:

Oh well, guess I'll see how easy they are to replace.

Starting to look pretty cool. Gotta stick the vertical stabilizers on it then add electronics so I can get an idea of CG and battery placement. Then I need to make all the changes I want for the fuselage and reprint.

pdHnXPI.jpg


r42mN84.jpg


UrYisrI.jpg


Wnue59T.jpg


xBuugFK.jpg


x63UNWW.jpg