FlyingTyger
Elite member
For the last 6-7 years, I have been hauling around a makeshift charging box made from an old aluminum case. Back when my original chargers were the size of a World Book Encyclopedia, it worked very well. But now it's just big, clunky, and looks pretty ragged. So it is time to update my equipment.

I purchased an Apache 2800 waterproof case from Harbor freight then gathered all the goodies that will be installed in it. I replaced my old Hobbyking 200W charger with a nice new and much more compact ISDT Q6 Nano. I had previously replaced my other old charger with an ISDT Q6 Lite. For now, will keep that charger active. Eventually, I plan to update it to a matching Q6 Nano.

I designed and 3D printed fittings for the connections through the case itself, and a charge block that holds an XT30, 60, and 90 charge port. These are the 3 most common connectors I use and will carry adapters for any others I may need.
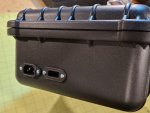


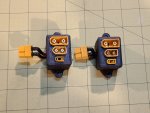
I knew that trying to solder connectors once installed in a 3D printed part would be tough to do without distorting the printed piece. I made as many solder joints as possible prior to installing the connectors in the brackets. I still had to make a couple of connections on the charge block after the connectors were in place. It can be done without overheating the printed part, you just have to be careful.
The AC input connector mounted on the side of the box I robbed from an old computer power supply I had.
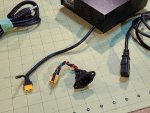
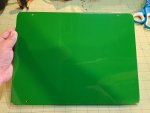
The chargers are mounted on a plate that will sit above the power supply. I cut this from a piece of 1/4" craft ply. I screwed a couple of hardwood blocks along the front and back sides of the case that this plate sits on. Then a couple of screws down from the top were used to make sure it cannot move. I finished this plate with some scrap film covering I had.
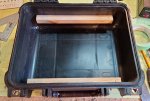

The power supply is mounted in the bottom of the box using some plastic hanger wrap. The bolts from the bottom are flat head 8-32 bolts counter-sunk into the bottom of the box so that it will still sit solidly on a flat surface.


All the fittings and wiring were assembled for the final time. The chargers and balance boards are attached to the plywood plate with some Scotch brand Extreme Hook & Loop Fasteners.
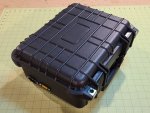
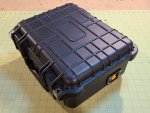

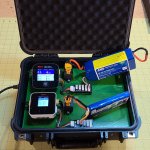
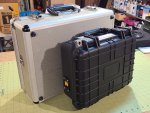
I tried to make this project as quick and simple as possible so I could get back to building planes as soon as possible. There are probably better ways to do some of this, but I am happy with the way it turned out. And it is definitely better than what I was hauling around previously.
Below are links to the components I used and to the STL files for the 3D printed parts I created. Enjoy!
Apache 2800 case: https://www.harborfreight.com/2800-weatherproof-protective-case-medium-black-63926.html
ISDT Q6 Nano charger: https://www.buddyrc.com/products/is...-for-1-6s-lipo-battery?variant=32636734079062
Power Supply: https://www.amazon.com/dp/B07GFKHLJ1/?tag=lstir-20
AC Input socket: https://www.amazon.com/dp/B01N2T2N1W/?tag=lstir-20
Scotch Extreme Fasteners: https://www.menards.com/main/paint/...-c-13186.htm?tid=7704731861554686060&ipos=113
3D PRINTED PARTS
XT90 Male panel mount bracket: https://www.thingiverse.com/thing:5020587
XT60/90 Female panel mount bracket: https://www.thingiverse.com/thing:5020216
XT30/60/90 Charge Block: https://www.thingiverse.com/thing:5020205

I purchased an Apache 2800 waterproof case from Harbor freight then gathered all the goodies that will be installed in it. I replaced my old Hobbyking 200W charger with a nice new and much more compact ISDT Q6 Nano. I had previously replaced my other old charger with an ISDT Q6 Lite. For now, will keep that charger active. Eventually, I plan to update it to a matching Q6 Nano.

I designed and 3D printed fittings for the connections through the case itself, and a charge block that holds an XT30, 60, and 90 charge port. These are the 3 most common connectors I use and will carry adapters for any others I may need.


I knew that trying to solder connectors once installed in a 3D printed part would be tough to do without distorting the printed piece. I made as many solder joints as possible prior to installing the connectors in the brackets. I still had to make a couple of connections on the charge block after the connectors were in place. It can be done without overheating the printed part, you just have to be careful.
The AC input connector mounted on the side of the box I robbed from an old computer power supply I had.

The chargers are mounted on a plate that will sit above the power supply. I cut this from a piece of 1/4" craft ply. I screwed a couple of hardwood blocks along the front and back sides of the case that this plate sits on. Then a couple of screws down from the top were used to make sure it cannot move. I finished this plate with some scrap film covering I had.


The power supply is mounted in the bottom of the box using some plastic hanger wrap. The bolts from the bottom are flat head 8-32 bolts counter-sunk into the bottom of the box so that it will still sit solidly on a flat surface.


All the fittings and wiring were assembled for the final time. The chargers and balance boards are attached to the plywood plate with some Scotch brand Extreme Hook & Loop Fasteners.


I tried to make this project as quick and simple as possible so I could get back to building planes as soon as possible. There are probably better ways to do some of this, but I am happy with the way it turned out. And it is definitely better than what I was hauling around previously.
Below are links to the components I used and to the STL files for the 3D printed parts I created. Enjoy!
Apache 2800 case: https://www.harborfreight.com/2800-weatherproof-protective-case-medium-black-63926.html
ISDT Q6 Nano charger: https://www.buddyrc.com/products/is...-for-1-6s-lipo-battery?variant=32636734079062
Power Supply: https://www.amazon.com/dp/B07GFKHLJ1/?tag=lstir-20
AC Input socket: https://www.amazon.com/dp/B01N2T2N1W/?tag=lstir-20
Scotch Extreme Fasteners: https://www.menards.com/main/paint/...-c-13186.htm?tid=7704731861554686060&ipos=113
3D PRINTED PARTS
XT90 Male panel mount bracket: https://www.thingiverse.com/thing:5020587
XT60/90 Female panel mount bracket: https://www.thingiverse.com/thing:5020216
XT30/60/90 Charge Block: https://www.thingiverse.com/thing:5020205
Last edited:
