CranialRectosis' Twitchity Mini-Hex build

Twitchity

Senior Member
Tritium, I just emailed you the files for all 4 frame pieces, the long arm, short arm, and camera mount. Good luck with your build, and post pictures of the progress!

Ooooowwww now dats wat um talkin bout! :D

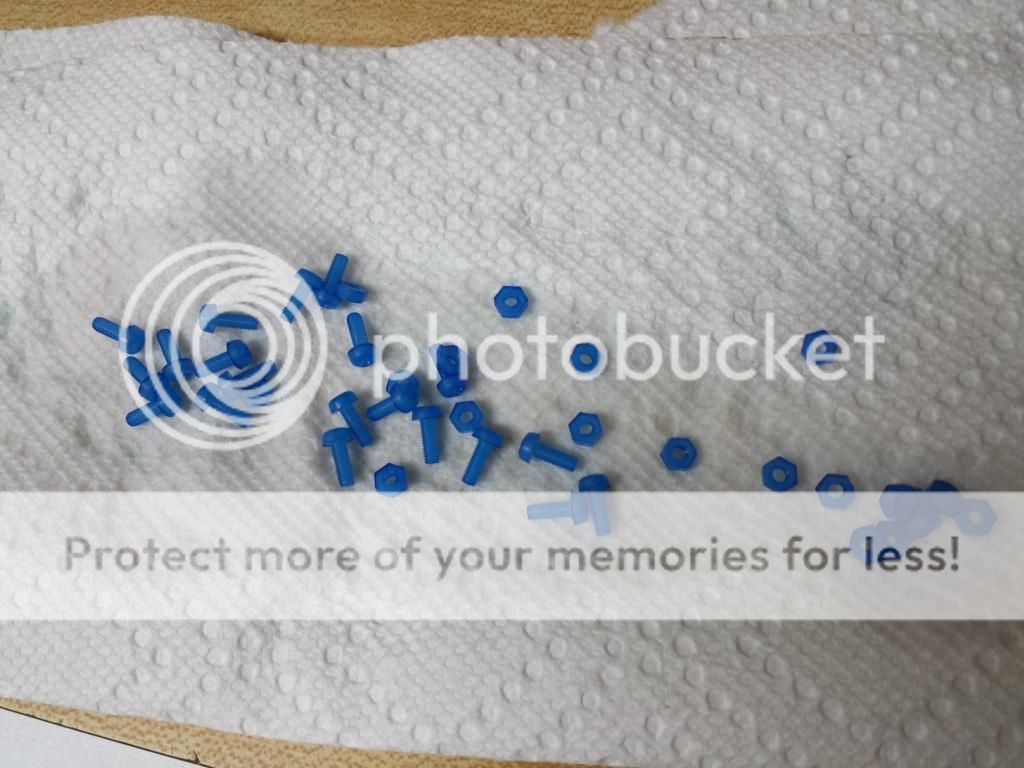
All frame pieces are cut! The power went out as it was making its 3rd pass around the perimeter of the top piece so the cut got reset :mad: Thankfully I had a nice guide line so I just used a cutoff wheel on a dremel to finish the cut, and then sanded it smooth. Won't even be able to tell.

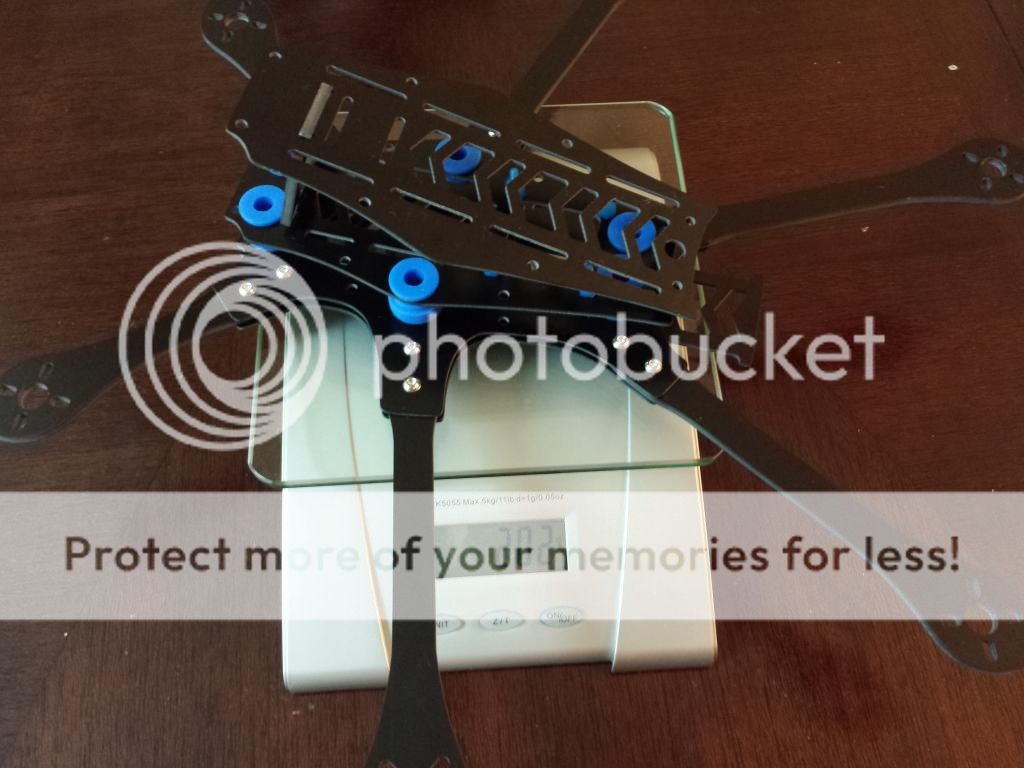
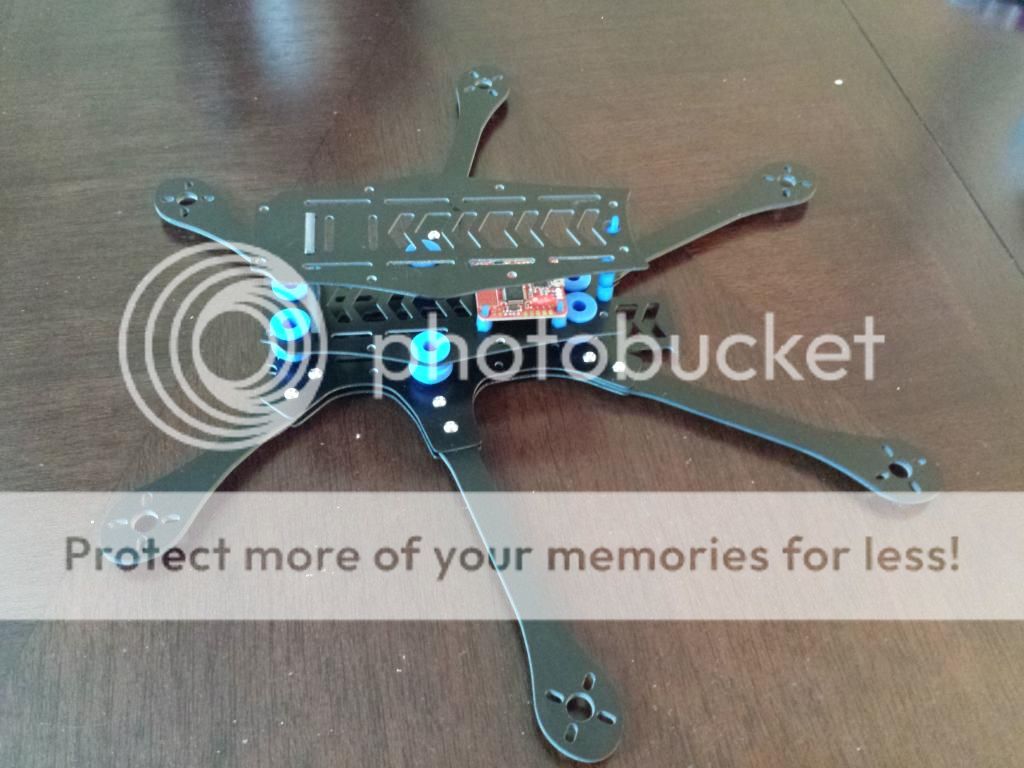
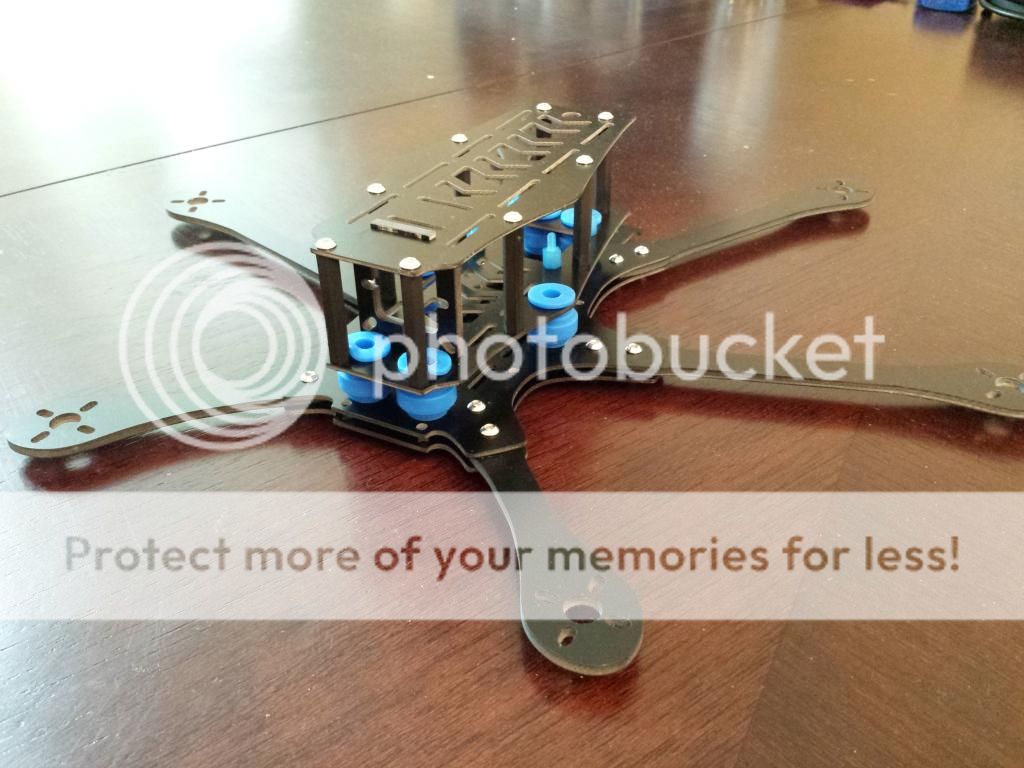
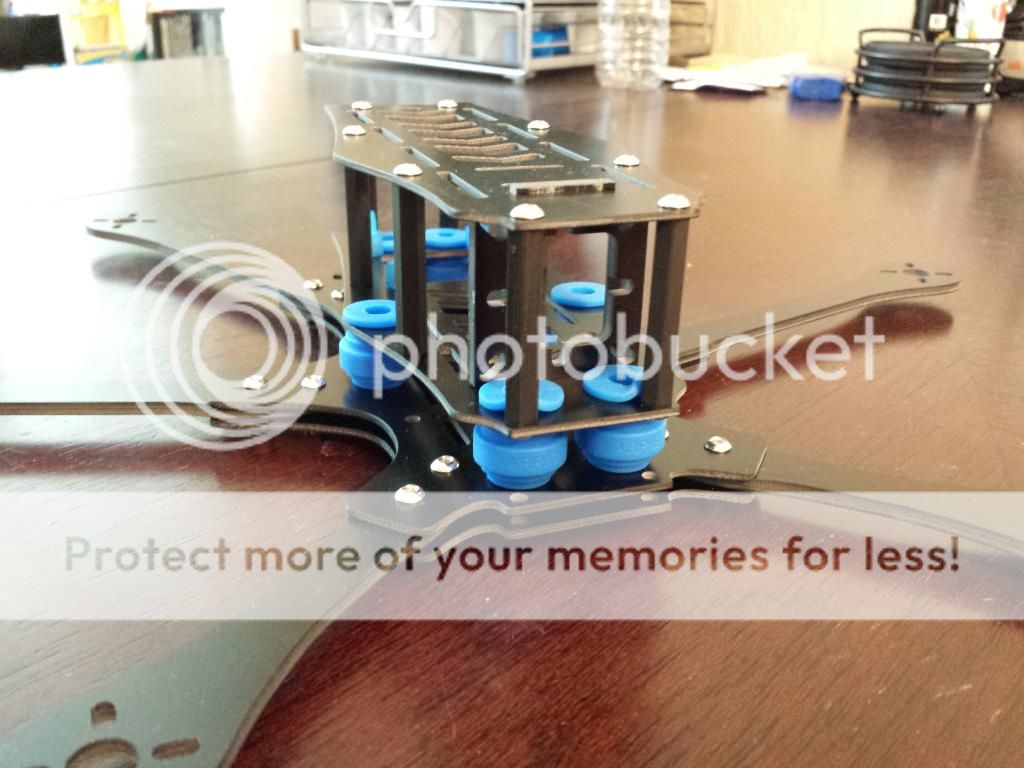
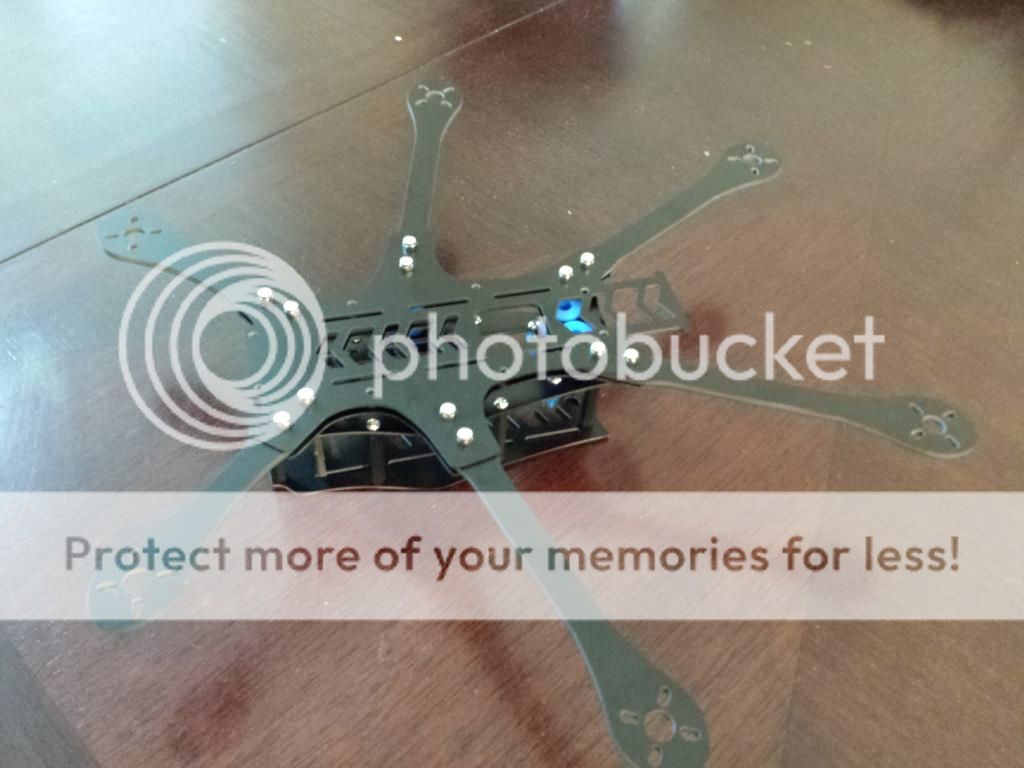
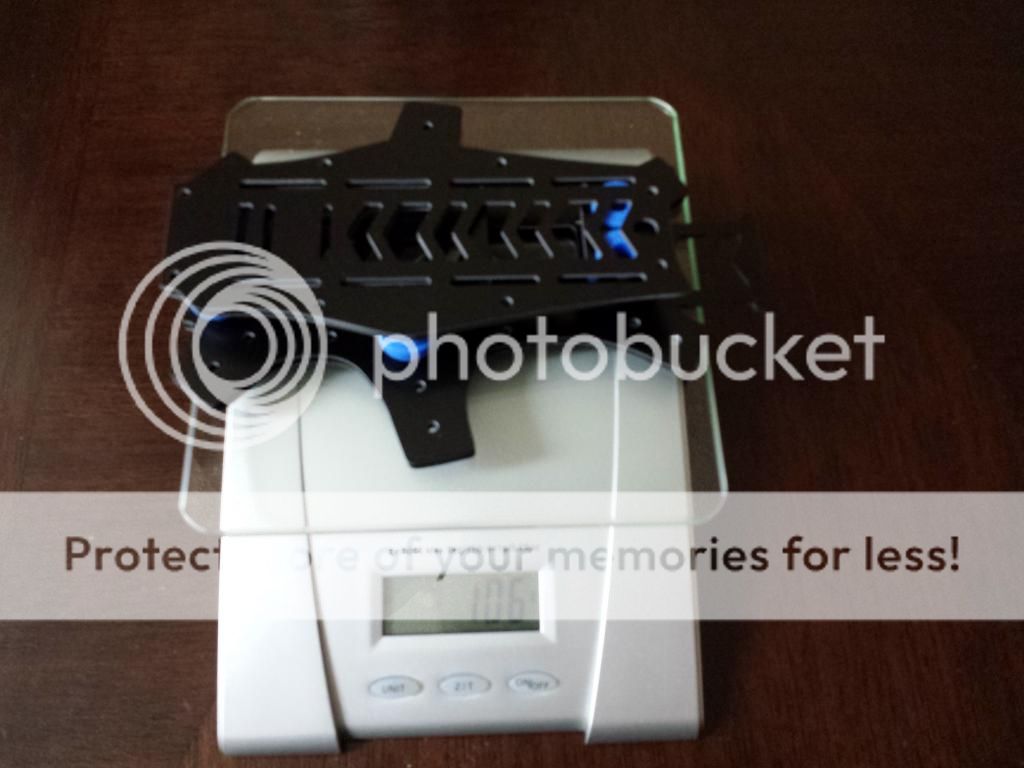
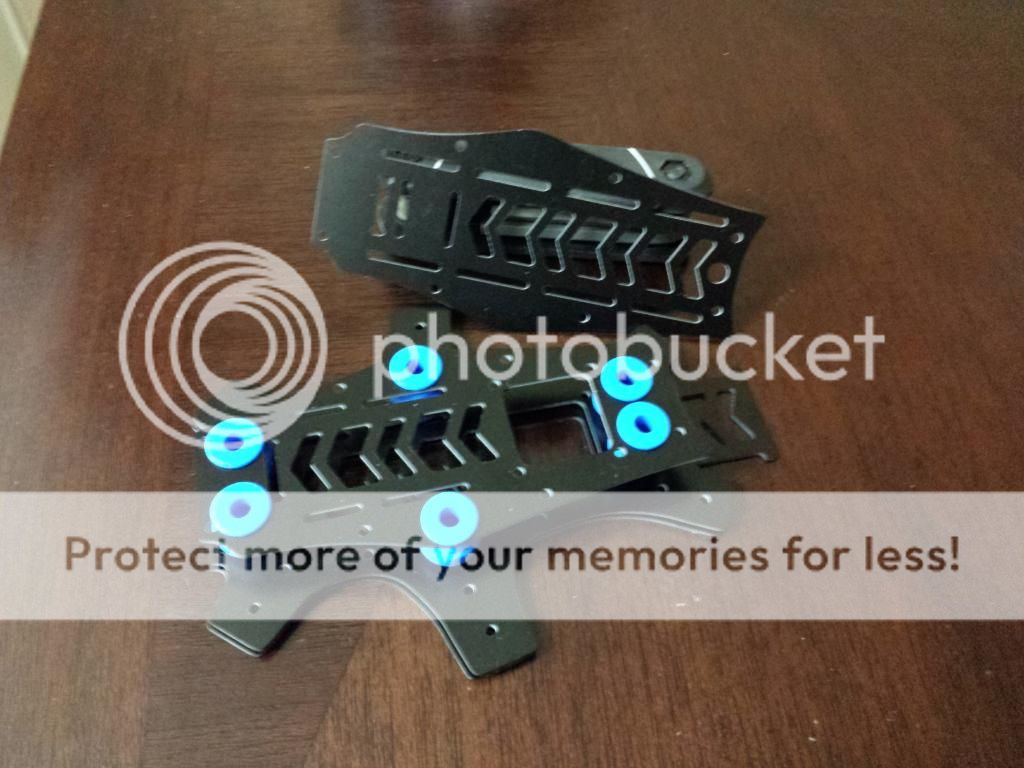
Anyways, pictures! All frame pieces with the anti-vibration balls came in at 106g. I must say, this black and neon blue go good together :cool:

IMG_20140708_200311_zps859dd12c.jpg


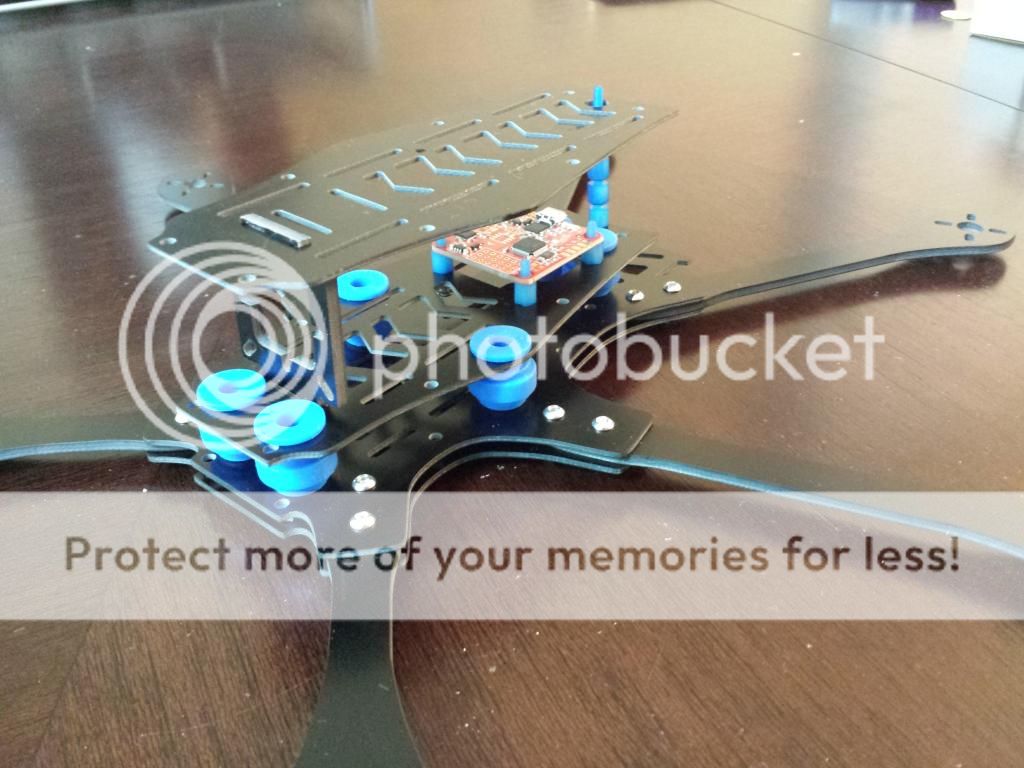
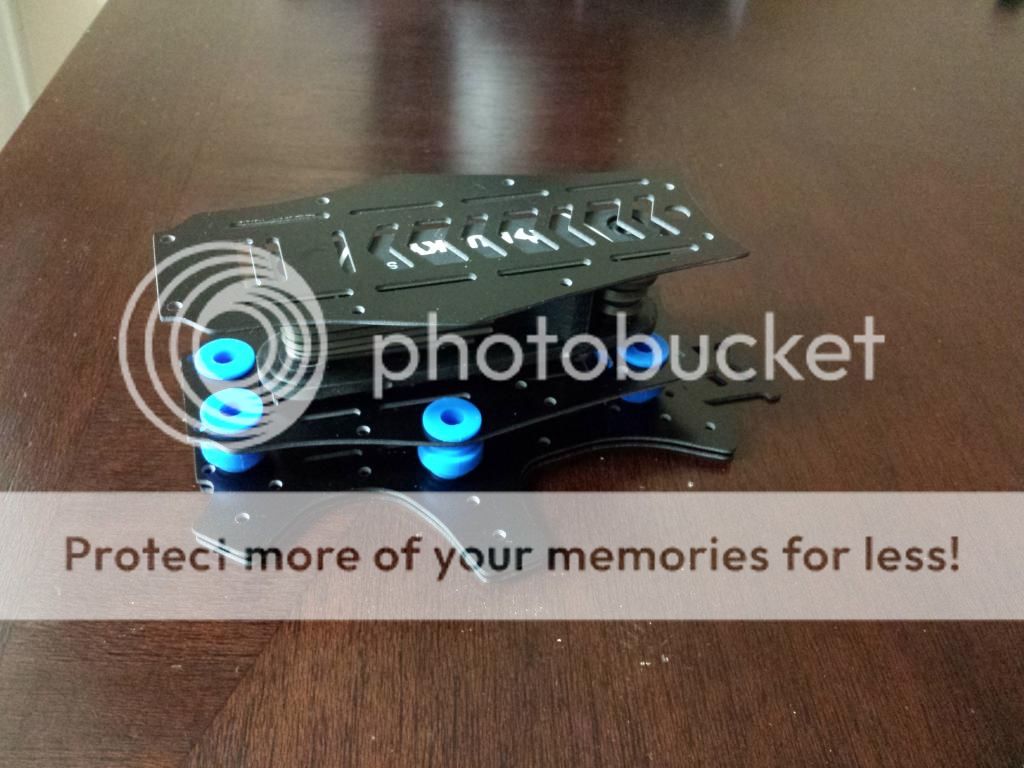
A little idea of what it will look like once the standoffs arrive:

IMG_20140708_200416_zps93b1fd75.jpg


IMG_20140708_200437_zps0cba0763.jpg
 

Tritium

Amateur Extra Class K5TWM
Thanks Twitchity,

I will certainly have a learning experience. I do have 6 12A ESC's, 6 Hoffman Magnetics MiniMite motors, AfroMini FC and some RC Timer 5" CF props that may work well with this design.

I also have a piece of nice 2mm CF from Aloft Hobbies that should work well for the plates.

Thurmond
 
Last edited:

Twitchity

Senior Member
Frame pieces are all cut out now. Hex weighs in at 202g minus the standoffs which are still on order. I almost don't want to sell this one :)

IMG_20140709_183450_zpsc2864ad4.jpg


IMG_20140709_183632_zps32cc6be7.jpg


IMG_20140709_183644_zpsa7f47ad3.jpg
 

Invid

Member
Frame pieces are all cut out now. Hex weighs in at 202g minus the standoffs which are still on order. I almost don't want to sell this one :)

IMG_20140709_183450_zpsc2864ad4.jpg


IMG_20140709_183632_zps32cc6be7.jpg


IMG_20140709_183644_zpsa7f47ad3.jpg

Looks great! What are the recording camera sight lines? I'd only be flying this FPV so it's important to know what the recordings would look like.
 

Twitchity

Senior Member
Invid,

I know this probably isn't going to be much help, but here is the layout of the hex that shows where 6" rotors will sit in relation to the frame of the hex. I'm new to the FPV scene so I have a feeling the design might need to change 1 or 2 more times. I have a strong feeling the rotors will be in view of the FPV camera, but I do not know how much. Cranial will be posting some videos from his Mobius soon, so hopefully those will give me, and you, and idea the FPV flying will look like.

I may end up extending the middle and front arms out and back a little to move the FPV camera further forward and have the rotors out of the cameras LOS. As stated before, this is a learning experience for me in regards to frame design. I've been getting feedback from members of the community as I go, and have been trying to incorporate them into the hex while maintaining the smallest size possible to keep 6" rotors. I know the Blackout hex has the front motors spaced further apart than the rear motors, but I wanted my motor layout to remain symmetrical.

On a side note, I just ordered the Fat Shark Predator V2 kit to get into FPV. Once I get it in, I plan to mount it to the hex to get a better understanding of what the camera will see.

Hopefully this helps in addition to the pictures of the actual hex. I'm pretty sure the rotors will be visible on camera, I just don't know how much will be visible. I apologize if any of this doesn't answer your question in the least bit, but I'm still learning my way around the design of multirotors :)

hexacopter2_zps4d434538.jpg
 

cranialrectosis

Faster than a speeding face plant!
Mentor
I had a chance to get to the park and fly today.


I may try again later if the storms clear up this afternoon. This video is from a Mobius placed on the top plate with 0 mitigation for vibration. Part of the reason for this is to help me see and hear vibration on the copter as I am having a little trouble tuning this one. After watching and listening to this video, I believe the rattle and much of the vibration is caused by the C clip and washer under the SunnySky motors hitting the edges of the center holes in the booms.

I need to ream out the center holes to fix that. Twitchity has remedied this with his second generation booms. Again, this is G10 so a drill will do the job.

I also plan to put some zip tie landing gear under the booms so I can put the battery and Mobius under the lowest plate. This will allow me to run the camera further forward and the battery further back to balance.


I will also consider running 5030s on 4S as a battery and rotor in the camera view option.
 

FinalGlideAus

terrorizing squirrels
I have an idea how to get rid of the props in camera view without changing the layout which I will play with in time.
 

Twitchity

Senior Member
Thank you for the update with the Mobius, Cranial.

The V2 hex pictured above will be on its way to its new home tomorrow evening; I can't wait to see what that little monster will turn into :cool: If anyone else is interested in one of he V2 hex's, shoot me a PM. I have enough material to make two more kits.
 

Mustang7302

Senior Member
Thank you for the update with the Mobius, Cranial.

The V2 hex pictured above will be on its way to its new home tomorrow evening; I can't wait to see what that little monster will turn into :cool: If anyone else is interested in one of he V2 hex's, shoot me a PM. I have enough material to make two more kits.

Your PM quota is full and cannot accept more. Please PM me the cost on a black G10 kit.
 

Twitchity

Senior Member
Mustang,

Your kit is on the machine right now being cut :) I should have all the pieces cut by tomorrow evening at the latest, so I'll be able to ship it out Wednesday for you.

FinalGlide,

Your kit is all boxed up and will be shipped out tomorrow.

Here is the final pictures of the frame completely assembled with standoffs and camera mount in place.

IMG_20140714_164119_zpsb786c972.jpg


IMG_20140714_164215_zps7644f9ff.jpg


IMG_20140714_164146_zps37763c1c.jpg


And here are the nylon fasteners I'm using to mount the FC standoffs. They are white nylon nuts/bolts that I wanted dyed to match the blue of the anti-vibration balls and standoffs. I previously dyed the standoffs and forgot to get pictures of the process. I took an old soda can, cut it open, and drilled holes in the bottom for water to enter and exit.

b4a7903f-639c-48e9-9494-2cbbae7e7052_zpsa9f1e52a.jpg


I places the can with the fasteners into a pot of hot water with Rit Dye and let sit for 10 minutes. I would periodically check the fasteners to ensure they were removed when they became the right color.

rit-dye.jpg

IMG_20140714_171332_zps53af02a3.jpg


Once they became the right color, the soda can was removed from the dye and the pieces were rinsed off in the sink and placed on a paper towel to dry.

IMG_20140714_171413_zps052243f8.jpg


Very simple process and for someone who likes things to match, this is a must.
 

cranialrectosis

Faster than a speeding face plant!
Mentor
Excellent. I love the dyed, nylon hardware. I thought I was retentive when I used green and purple Arduino wires for the ESC to FCB wires. I have painted nylon standoffs in the past but the paint chips off. I am putting purple dye on the shopping list.

I am glad to see Mustang (friends don't let friends use the NAZA FCB) and FGA and Thrurmond getting in on the action. I think it is testament to the fine build that Twitchity has done that there is such interest in this grass roots frame. I like my Polakium, but this frame is tougher and just a touch larger and handles 6" rotors. This copter is one of my favorites to fly and I think you guys are gonna love it too.

My new KISS 12a ESCs are here. They fit the slender booms on this copter perfectly and shouldn't have de-synching issues. I will be rebuilding to get the jello out of the copter and will likely add these when I do.
 

cranialrectosis

Faster than a speeding face plant!
Mentor
I am waiting for a ubec for the KISS ESCs. In the meanwhile, I have turned this copter into a convertible and added some landing gear to keep the lipo and camera out of the dirt.

Convertible_Underside.JPG
Convertible_top.JPG

One thing I notice with this flight is the new Nanotech 45-90C 1300s last longer and have WAAAYYYY more punch in a punchout than my 35C 1300s from MRSS or the Zippy 1800 at 35C.


I also reamed out the center holes on the booms and that seems to have got rid of most of the vibration. With the camera attached to the underside of the copter the rotors are mostly out of view.

The little knot of wires at the back of the copter was for LEDs and will now be for a ubec so I can use the KISS ESCs. I am also considering trying out the NanoWii on this copter. Not only would I have a black FCB for my copter, I would get to play with Oneshot...

Convertible_Boom.JPG

Dang this copter is fun to play with. Thank you Twitchity. :)
 

Cyberdactyl

Misfit Multirotor Monkey
Yes sir, I got a 3S 1300 45-90c and a 4S 1300 25-50c for my mini, but I'm still a ways off finishing it, so I tried them out on my tri and hex. The 50% drop in weight is a nice pep. The flight time is a big drop, but it's like they got a shot of crack. :p
 

cranialrectosis

Faster than a speeding face plant!
Mentor
I have a 2200 3S 45-90 I will try in the morning. I plan to pull the camera off and just see what she will do.
 

FinalGlideAus

terrorizing squirrels
I'm not sure if you are going to run the Pololu 5v regulator with your hex but something to keep in mind that I finally discovered today.
My BO mini H has KISS esc's and the 5v Pololu regulator. The regulator was directly underneath the FC and the receiver was just at the back of the FC and a little underneath. The TX control range on my Spektrum for FPV was acceptable but I was still searching for more. When I went 4s the range became a real issue with failsafe's at short range. I concluded that because the Pololu regulator was a switching regulator it was producing noise that was upsetting the receiver so I moved the Pololu to the front and the receiver to the back. I also covered both with aluminum tape and today I managed 700-1000m aprox before hitting failsafe so am back to being confident in the system again.