IT'S HERE!! THE F-4 IS FINALLY HERE!!
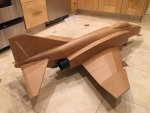

This is one project that I've actually been working on for quite a while, without posting ANYTHING about it here. I built #1 at Flite Fest Ohio, 2017, and it flew AWESOME. Flite Test even featured it a bit in their recap video. Ever since then, I've probably gotten more requests for plans for this jet than any other - which puzzles me because it's clearly NOT a trivial build!
But you all asked for it, and I promised I'd post plans when I finally flew my second build at home, so here you go! I'll put up as many build-pics as possible, but fair warning; they're not comprehensive. O_O So please ask questions as you go, I'll try to answer them as best I can, and hopefully others can learn along at once.
Details:
F-4 Phantom II
Power: 2 x 70mm 12-blade EDF
Battery: 5000-6000mAh, 4S
Wingspan: 36 inches
Length: 54 inches
Weight: 85 ounces - (5lb, 5oz) - (2.4Kg)
DISCLAIMER: As of this post (11/2/2017), the plans are posted in "AS-IS" condition....meaning I still need to make some updates, but it flies, but be warned. Mostly, I need to move the motor-mounts BACK to make room to move the battery and ESC's back as well. If you build it per-plans, most likely it'll be nose heavy - which isn't bad, just not ideal. But I've kept this to myself long enough, I feel like it just needs to be out there for everyone to have fun with.
Also, you do NOT have to build the all-flying "Stabilator", you can get away with traditional elevators on a fixed horizontal stab. However, you will need two servos; one for each elevator.
PLANS:
https://forum.flitetest.com/index.php?resources/f-4-phantom-ii-twin-70mm-edf-monster.274/
Build pics below:
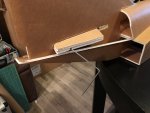
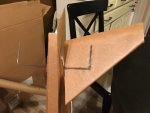
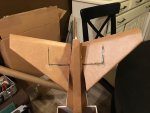
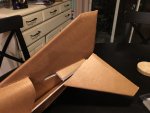


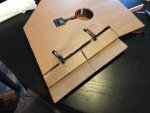
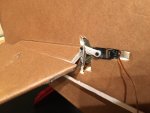


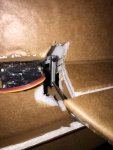


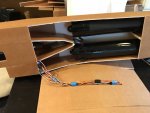
Sorry there aren't more details on the build. If I find more, I'll post them. If you DO attempt this plane, PLEASE ask questions here so everyone can benefit from the answers!


This is one project that I've actually been working on for quite a while, without posting ANYTHING about it here. I built #1 at Flite Fest Ohio, 2017, and it flew AWESOME. Flite Test even featured it a bit in their recap video. Ever since then, I've probably gotten more requests for plans for this jet than any other - which puzzles me because it's clearly NOT a trivial build!
But you all asked for it, and I promised I'd post plans when I finally flew my second build at home, so here you go! I'll put up as many build-pics as possible, but fair warning; they're not comprehensive. O_O So please ask questions as you go, I'll try to answer them as best I can, and hopefully others can learn along at once.
Details:
F-4 Phantom II
Power: 2 x 70mm 12-blade EDF
Battery: 5000-6000mAh, 4S
Wingspan: 36 inches
Length: 54 inches
Weight: 85 ounces - (5lb, 5oz) - (2.4Kg)
DISCLAIMER: As of this post (11/2/2017), the plans are posted in "AS-IS" condition....meaning I still need to make some updates, but it flies, but be warned. Mostly, I need to move the motor-mounts BACK to make room to move the battery and ESC's back as well. If you build it per-plans, most likely it'll be nose heavy - which isn't bad, just not ideal. But I've kept this to myself long enough, I feel like it just needs to be out there for everyone to have fun with.
Also, you do NOT have to build the all-flying "Stabilator", you can get away with traditional elevators on a fixed horizontal stab. However, you will need two servos; one for each elevator.
PLANS:
https://forum.flitetest.com/index.php?resources/f-4-phantom-ii-twin-70mm-edf-monster.274/
Build pics below:


Sorry there aren't more details on the build. If I find more, I'll post them. If you DO attempt this plane, PLEASE ask questions here so everyone can benefit from the answers!
Last edited:


