HUJ-G : 191% (ish) FT Guinea Pig build log

thenated0g

Drinker of coffee, Maker of things
Mentor
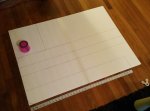
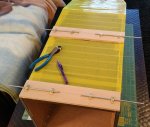
For a while i have been wanting to build a guinea pig. At some point after reading about a possible FliteFest west just a couple hours from my side of the county, I decided to go large and started playing around with different size increases in inkscape. 191%, it turns out, is exactly the percentage that gets the wing plans to 30". That is when the wing is opened up flat, the distance between the 2 trailing edges is 30". As i began working on it i adjusted this slightly to make things easier but basically its a 190-200% build. The picture below was my original idea, but i decided to just make use of all the foam board, so now its wingspan is 120", not 111".
20150824_103909.jpg

The construction is going to stick to the flitetest build with the addition of reinforcements and double thick foamboard.
The wingspan is going to be 120" and split into 3 sections for easier transport. Each section is 16.5"x40" and is made up of 4 pieces of foamboard. At this scale i figured it would be easier to just make measurements instead of printout out 100 pages and taping them together. With this mind i have adjusted all my plans so that they round to the nearsest quarter of an inch.
20150825_070711.jpg 20150827_194909.jpg

I really am just "winging it" here. Taking things slow and trying to figure out where loads are going to be and how to make things connect up. Double laminated foam board is crazy strong. I am laminating with a thin layer of gorilla glue. This combination makes for a crazy strong bond that adds a ton of strength in all directions. This leads to some fun time when comes to forming the airfoil. It takes almost every heavy object in my office to hold it down to glue.
20150817_201821.jpg 20150822_081618.jpg

Again i am following the build pretty much just like you do the regular size. With gorilla glue though you have a lot more time in between applications. But that means you can also setup a ton of glue joints at the same time. The part that actually is taking the longest is just figuring out the cross bars and how the wings will connect into eachother and remain strong. Just like Peters large cargo plane is designed for G's in mostly one type of flying i decided to focus all the strength in the wings to fight them folding upwards. No inverted flight here.

One concern i had initially was because gorilla glue is activated by water. I was afraid it would have a negative impact but it hasnt caused any issues. In fact i have found that the gorilla glue will go thru the paper and get a good hold on the foam. Also, as i know from my epp builds, scratched up metal and gorilla glue become one. Incredible bond. So i got some aluminim pieces to use as the internal structure and glued it to the top and bottom along with some foamboard. Very strong wing so far.
20150821_071438.jpg 20150821_071447.jpg 20150821_223801.jpg 20150822_081126.jpg 20150822_081130.jpg


The root chord or distance from leading to trailing edge of the wing is 16.5"
20150822_081746.jpg

I wanted to have plywood in strategic places to help distribute weight and force. So for instance where the wings will attach to the body, where the motors will be applying force, and where the wings will join. I went with a "use what you have" approach which is why they are somewhat large. In hindsight i am happy with this because this will give me a ton of places to attach hooks and accessories for towing, lights, and whatever crazy stuff we want at flitefest.

Here are the center and right wingtip side by side. This is 80" of the 120" total.
20150829_211656.jpg

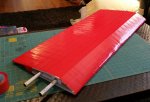
While waiting for some glue to dry i taped up the center wing section. While the wing tips will be mostly hollow with only the internal structure, the center section i am going to fill with expanding foam to help distribute forces.
20150830_164809.jpg


This will be a slow build. Mostly to give myself time to think and analyze stuff.

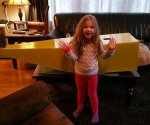
Being that this is so huge (HUJ) i decided to keep the removable nose. Even doing this it is still going to be close to 60" from just behind the nose to the tail. I often think of Gibbs on NCIS and how is he going to get his boat out of his basement ha!

The fuselage is mostly to scale but i decided to make the body a little bit taller. The usable storage space, from just behind the nose to the beginning of the door is 13.5x13.5x20.5 inches.

The tail feathers will be removable in a very similar fashion to Peters.

The Ailerons will be the entire length of the wingtip area. So each one will be around 40" x 4-4.25". I am going to have flaperons in the mix to help slow it down.

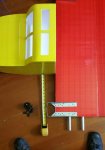
I am currently finishing the right wingtip and have the wing joining mechanics mostly finished. Just looking at whether a cotter pin setup or maybe some rubber bands will be better/easier.

Will update as i work on it.
 

thenated0g

Drinker of coffee, Maker of things
Mentor
Figured out how the two wing "tips" are going to connect to the center wing section. Have some servos on order and i am almost done with one of the wingtips. Now that i know how i want the connections to work the second wing tip should go pretty quickly.

20150831_175228.jpg 20150903_231454.jpg 20150903_231500.jpg

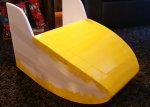
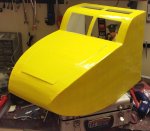
One thing i want to do is make a nice cockpit with some scale parts. I started building the nose so i would have something to work on in between the glue drying on the other parts of the plane. Again this is 190%, but I made the width match the 190% height. The internal dimensions are 13.5x13.5 (wxh). As the nose will not hold any structural or mechanical parts i decided to use hot glue for ease of construction.

20150906_154453.jpg 20150906_163435.jpg

The cockpit area is double foamboard thick. The forward compartment is single foam thick with the paper removed. I reinforced with pieces of foamboard to make it stronger. In some places around curves i smeared hot glue to hold the shape. I plan on adding some aluminum and wood to strengthen it and so that i can put something in the nose. Maybe batteries if i need to adjust cg. Extreme tape was used on the outside and than covered in 2mil tapebrothers box tape. Thats a 12" GiJoe doll.

20150907_164822.jpg 20150907_164830.jpg 20150907_164849.jpg 20150907_164859.jpg 20150908_204456.jpg 20150908_204503.jpg 20150908_204523.jpg
 

thenated0g

Drinker of coffee, Maker of things
Mentor
I hope you have a big van to carry it around in. Or maybe you could just climb inside and fly yourself to FliteFest. Hahahaha

Seriously. I "think" i can fit it in my jeep if i put my seats down. For flitefest i will be renting a little moving trailer. Actually i just joined a club specifically so i can practice takeoffs without worrying about killing somebody.
 

thenated0g

Drinker of coffee, Maker of things
Mentor
Update:

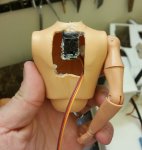
Worked a little bit on my pilot. I am going to have his head on a mix with rudder and ailerons so he looks in the direction he is turning

20150926_203233.jpg 20150926_203240.jpg
Video of it working: https://instagram.com/p/8RvNdixbAZ/?taken-by=thenated0g


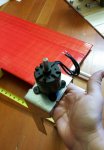
Here i am trying some home building supplies out to see how it would work for a motor mount. The motor is a Emax gt4020/09 47kv motor. Capable of around 9lb of thrust on 6s
http://www.headsuphobby.com/Emax-GT4020-09-470kv-Outrunner-Brushless-Motor-G-820.htm

Motor mount is probably heavier than it needs to be, but i know nose weight is going to be an issue and this will be forward of CG. I would rather have weight working for me instead of useless nose weight added later.

20151003_152254.jpg 20151003_152301.jpg 20151003_152318.jpg


Decided to go with 3/8" thick balsa for the ailerons. I wanted something stiff that will not fail. I wrapped them in laminate first and than used extreme tape and colored tape to connect to wing. The servos are Hobbyking brand standard metal gear servos. $7, no bad reviews, and 9kg fail torque. Thats 20lb's !!!
I have two of them mainly for failover in case one dies.
http://www.hobbyking.com/hobbyking/..._Servo_BB_MG_51g_9kg_0_20s_US_Warehouse_.html
20151015_201129.jpg

20151012_201227.jpg 20151012_201244.jpg 20151015_200125.jpg 20151015_200133.jpg 20151015_200158.jpg 20151015_200249.jpg


Here is what 2,000 sq inches of wing looks like. 3x 40" sections for a total of 120". Wing chord is about 16.75". Feels really solid. Not flimsy. Still freaking over maiden though lol. This weighs close to 10lbs without motors on yet.
20151015_203029.jpg 20151015_203526.jpg
 

thenated0g

Drinker of coffee, Maker of things
Mentor
Not really sure on total weight yet. But if i can keep it in the 30-40lb range the cubic wing loading will be in the 9-13 range which is considered "scale". Stall speed of 29-33mph. At least i know it "might" fly ha!
 

Thorsclaw

Member
that wing looks ridiculously strong! I'm excited to see how this turns out this would be a great plane to try JATO on
 

thenated0g

Drinker of coffee, Maker of things
Mentor
ha! that would be awesome. I do have some crazy stuff i want to do to this thing once it is up and flying. With two of those motors i have selected i should have 18lbs of thrust, so even hitting the ama's 55lb max weight it should still take off just fine. But rockets are always awesome lol
 

smithhayward

Large Child
If this is going to make it to FTFFW then I'm just going to have to come to check it out. It's all going to depend on where in CA it's held (or you can all come to the East Valley of Phoenix, Hint Hint).

Sorry if you did, but i didn't see mention of the propeller you plan on using, care to share if you even know yet....
 

thenated0g

Drinker of coffee, Maker of things
Mentor
If this is going to make it to FTFFW then I'm just going to have to come to check it out. It's all going to depend on where in CA it's held (or you can all come to the East Valley of Phoenix, Hint Hint).

Sorry if you did, but i didn't see mention of the propeller you plan on using, care to share if you even know yet....

If i have time i want to take the 70mm edf i have in my viggen and make a matching 200% Pun jet to go in this thing.

Prop will can be anywhere from a 14x7 to a 16x10. Depending on how much thrust i need. http://www.emaxmodel.com/gt4020.html
 

thenated0g

Drinker of coffee, Maker of things
Mentor
New Foam

I was taking a little break from the guinea pig but i am back on it, so here is a little update.

One of the big differences between this large scale and the regular is how much time goes into fabricating the parts you need before you can make something that looks like a plane. So i stepped back and worked on some other projects for a while. While working on other things i happened upon some 1/2 inch elmers board on amazon that comes out to around $6 a sheet shipped. 20x30, just like the dollar tree stuff, but thicker foam that is stronger and more bendy and paper that is much thicker and stronger. They weigh about 288g per sheet. Or 1/2 a gram per square inch.
20151215_123743.jpg
The time difference over laminating the white sheets together is really great. I did an entire box of 10 sheets in 5 minutes which would have take me several evenings previously. Just some gorilla glue on the ends, spray some water on it and extreme tape both sides. Let it sit over night.
20151216_195420.jpg 20151216_195646.jpg 20151216_195723.jpg
Using what i had on hand, i decided to give the internal front area of the fuselage some strength by gorilla gluing some thin "door ply" to it. This is the sides and top in the pictures. I am going to add some internal bulkheads of just foam for strength. After it is proven airworthy i will add the working cargo door. For now it will be solid.
20151217_102200.jpg 20151224_082955.jpg 20151224_111858.jpg 20151224_111909.jpg 20160101_145914.jpg
 

thenated0g

Drinker of coffee, Maker of things
Mentor
Had a chance to finally match up some of the parts. This thing is going to be "fun" to transport.
20160104_181244.jpg 20160104_194637.jpg 20160104_194649.jpg 20160104_194716.jpg
 

thenated0g

Drinker of coffee, Maker of things
Mentor
Recent work update:

I began mounting the motor mounts and the L brackets that will connect the wing to the fuselage. These are pretty strong structures. In the future i may switch them out for lighter wood frames but i am currently concerned about CG. In my experience these large scale planes tend to be very heavy in the opposite end from the motors. That is, that the original 100% planes were designed so that the weight of the motors counteracted the weight of the rest of the plane or batteries. Well when you scale up, the electronics weight does not even come close to scaling up. Meaning that the weight of the plane is significantly more than the weight of the electronics. To counteract this i am using heavier parts forward of cg, i moved the motors forward a few inches (they stick out from the wing farther) and i extended the length of the fuselage in front of the wing by 4 or 6 inches. I would like the slip on nose to be mostly cosmetic and not a needed part of cg. Once i get the plane together and see what cg will actually be like, hopefully i can remove these heavy metal parts and just use lots of battery. But for now i am concerned about getting as much weight forward as possible.

Being that the center of the wing will bear the most pressure and forces i decided to use expanding foam filler. This stuff is pretty nasty to work with but is really great. Once dried it hardens and adds a lot of rigidity and it is actually very sticky without adding very much weight. Without motors (300g each) the current weight of the center section is just under 7lb. Yeah...i know!

This is a lot of weight, but even if all 4 major parts of the plane weight that much, which they wont, than the plane would weight around 28lb which is well within the capabilities of the motor setup.
20160326_164249.jpg 20160326_164329.jpg 20160326_164345.jpg 20160326_170217.jpg 20160326_170222.jpg 20160326_170227.jpg 20160326_170703.jpg 20160326_203929.jpg

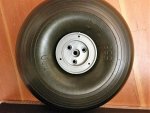
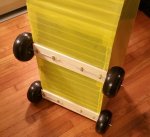
For landing gear i am going with a simple 4 wheel non steerable setup. These are 1/3 cub wheels and will be on a simple non moving axel. I have placed the rear axel right at cg and the front one as far forward as i can, to again, help with CG. Steering will be accomplished with differential thrust.
20160326_203900.jpg 20160326_204005.jpg


I have begun working on the tail feathers. The horizontal stabilizer has a wingspan of about 40". I put a couple fiberglass rods in it for reinforcement. It will have servos mounted in the vertical stabilizer so that the entire unit can be removed for transport.
20160330_183723.jpg 20160328_073423.jpg 20160328_073411.jpg 20160327_121036.jpg 20160330_184005.jpg
 

thenated0g

Drinker of coffee, Maker of things
Mentor
Sorry, missed that propeller question. I am going to be using the emax recommended prop for the GT4020 470k which is 16x10. Will be running 6s.

8579-t1.jpg
 

thenated0g

Drinker of coffee, Maker of things
Mentor
Finish line in site!!


Finished taping the fuselage and put in the hole for the wires from the main wing. On such a large surface i was worried about keeping the tape lines straight so i used a carpenters triangle. Worked really well.
20160410_175644.jpg 20160410_182202.jpg 20160411_182303.jpg


Next i got the landing gear installed. I used some 1/4" plated steel rod. This stuff is super rigid. Should handle most landings just fine. I purchased some 1/4" wheel stops from hobbyking to keep the wheels from rubbing against the fuselage and from falling off. Later i will add a stretched wheel pant to cover the tires.
20160411_185625.jpg 20160411_185635.jpg 20160411_195233.jpg 20160411_195457.jpg 20160423_105534.jpg 20160423_105539.jpg

For transportation i need the tail to be removable. I installed some plastic bolts. They are thru some thin ply and glued inside.
20160411_210250.jpg 20160416_155711.jpg 20160416_155716.jpg

I had previously decided to use some large metal parts for the motor mounts but i decided to construct some bass wood mounts instead to save weight. One thing i did during this process was to wire the servo extensions that go into the wings. I am going to have 2 sets of ailerons working in unison. The inner set of ailerons are going to be powered off of the motor ESC. So each esc powers the one servo closest to it. The outer ailerons are powered by a 5v ubec. This gives me some failover.
20160407_214902.jpg 20160408_203121.jpg 20160408_210747.jpg 20160408_210828.jpg

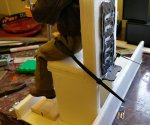
I reinforced the nose i had made so it would slide into and stay connected by wind and friction. I made a little cockpit area using some printed gauges i had made in inkscape from online pics and some armature wire. I have a little pedestal i made for a mobius to get some internal footage.
20160413_205019.jpg 20160423_171227.jpg 20160423_171235.jpg 20160423_171247.jpg 20160423_171346.jpg 20160423_203434.jpg 20160423_203442.jpg

And i was finally able to get the entire thing together to test CG. I was really worried about this, but it turned out to be not a problem at all. Using 6x 5000mah 3s batteries (will be 15,000mah 6s) i was able to get CG about 5" in front of the leading edge of the wing. This is great. This means i have a foot or so to move that weight forward, which is a huge amount. I can pretty much add whatever parts i want in the rear, like a cargo door and servos or bomb drops in the wings, and know that i have a ton of room to adjust for correct cg.
20160423_211948.jpg 20160425_205512.jpg

AUW is looking like 30lbs'ish and my motors can put out 23lb of thrust at max throttle (130a !!!). I have just a couple things left to do.
  • Get velcro installed to keep wing tips on.
  • Install bolts/nuts to keep wing on fuselage.
  • Make an adjustable/sliding battery box and finish wiring harness.
  • Install radio.
  • Amp meter testing.

I have a target of the first week in june for maiden.
 

CrashRecovery

I'm a care bear...Really?
Mentor
Here is a couple questions for you. First why velcro for the winds? Would drilling holes into your brackets for the wing spar be too difficult? You could use 4 sheet metal screws to secure them in. I would be worried the velcro would let loose and the wings would start to slide out. Second set of questions. Are you going to be using the inner ailerons as flaps?