Inq'd Turbo Storch

quorneng

Master member
Inq
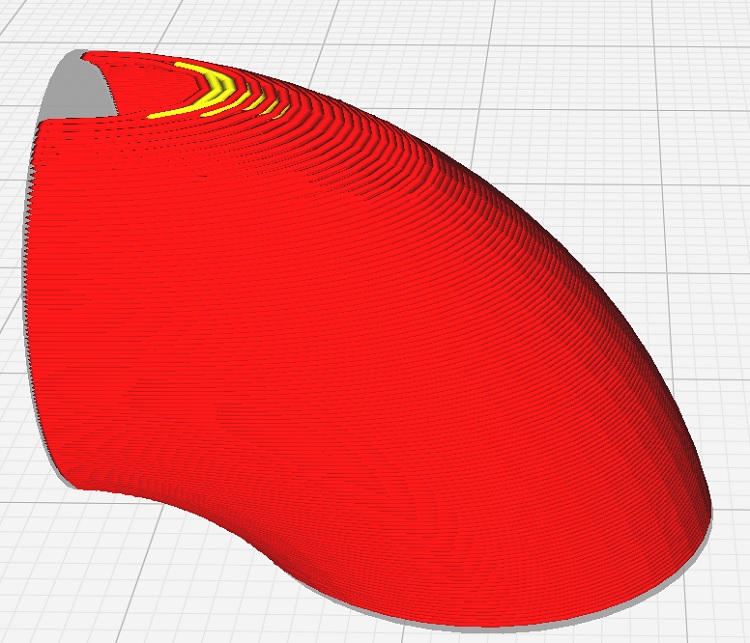
If you are vase printing there is nothing you can do apart from use a smaller layer height (0.15 or even less) but you have to accept the longer printing time. I believe there are slicers that allow the layer height to be varied during the print.

If you are not vase printing then add a top layer (or 2) and it will fill the holes but you might have to experiment with the top/bottom line direction to get the best result.
A 90 degree bend with 1 bottom layer to 'fill' the lower surface holes. 0.4 line width. 0.15 layer height
90Bend1.jpg

2 top layers to 'fill' the bigger top surface holes.
90Bend2.jpg

On such a print the extra weight from the extra print would be small and probably no greater than your 'glue' fill.
 

Inq

Elite member
If you are vase printing there is nothing you can do apart from use a smaller layer height (0.15 or even less) but you have to accept the longer printing time. I believe there are slicers that allow the layer height to be varied during the print.

Vase mode is not really usable on a print that has multiple footprints as is on Cowl-1. Having three different start positions basically breaks Vase mode. I've seen Cura try to print it, but it fails epically. And yes, the thinner layers help greatly improving overhangs in the areas having the problems. And yes... Cura has the variable layer height. That is the Adaptive layers I described and the pictured in that last post.

then add a top layer (or 2) and it will fill the holes but you might have to experiment with the top/bottom line direction to get the best result.

Yes, adding a "top" does add partial layers and would fill those areas nicely, but now it has to fill the large holes of the prop and intake because it is a shell model and not solid. As I was not expecting anyone else to print this, I was making it simple on myself. If I was doing it again, I'd likely add the interior wall and make it a solid. That way I could supply variable thickness walls, tops and bottoms in the areas needed. I probably could even taper built-in supports to avoid adding Cura supports.

On such a print the extra weight from the extra print would be small and probably no greater than your 'glue' fill.

I totally agree... as you have pictured, "paint filling" or "top filling" is likely to add less weight than my jewelers 0.1 gram resolution scale can measure.

1671330841294.png
 
Last edited:

Inq

Elite member
Part - Cowl 4
Cowl 4.png


Introduction
Cowl 4 is primarily a small piece to help give bond strength to the foam board sides of the FT Simple Storch. After Gorilla gluing the whole Turbo Storch assembly onto to the foam board Storch, I needn't have worried. The aft fuselage or the 3D printed part will disintegrate long before that lap joint fails. Another main requirement is to have a 3D printed frame around the removable cowling top instead of the top just butting up against the foam board fuselage that might get damaged and out of alignment over time and abuse. Really, it could have been integrated into Cowl 3, but then it would require a lot of support just to hold it up. This print weighs 5 grams.

1671367672280.png


Printer Settings
These are the primary setting necessary for this print. By all means use them or don't. It's just what I used. All printers are different and you might have zero'd in values on some aspect or another. Share with us you opinions. I believe they are the only settings that are different than the defaults.
  • Quality
    • Layer Height = 0.25
    • Initial Layer Height = 0.25
    • Line Width = 0.4
  • Walls
    • Wall Thickness = 1.2
  • Top/Bottom
    • Top Thickness = 1.0
    • Bottom Thickness = 0.5
    • Top/Bottom Pattern = Concentric
  • Infill
    • Infill Density = 15%
    • Infill Pattern = Cubic - I've found this to be far stiffer than the plain "Grid" pattern.
    • Infill Line Directions = [30]
  • Material
    • Printing temperature is highly material specific. 3DLabPrint recommends running PLA hotter than normal to give better interlaminar strength. They suggest nozzle = 230°C, bed = 56°C
  • Speed
    • Print Speed - is mostly tied to material used and even printer design. I use 60 mm/s.
  • Cooling
    • Enable Print Cooling - Off. Cosmetically, having it on is better, but 3DLapPrint recommends turning this off to keep more heat in the plastic to cause it to fuse better giving more strength between layers.
  • Support - Off
  • Build Plate Adhesion
    • Type = Brim
    • Brim Width = 5
  • Special Modes
    • Spiralize Outer Contour = Off
Link to Resource is available at - https://forum.flitetest.com/index.php?resources/inqd-turbo-storch-cowl-4.362/
 
Last edited:

Inq

Elite member
Part - Cowl 5
Cowl 5.png


Introduction
Cowl 5 incorporates the forward windscreen and "bonnet" for access into the battery and motor location. It also incorporates the spring and the slide for the latch. I've made a few structural changes, but outwardly, it's the same as the one printed on my Turbo Storch. This print weighs 15 grams in ABS.

Printer Settings
These are the primary setting necessary for this print. By all means use them or don't. It's just what I used. All printers are different and you might have zero'd in values on some aspect or another. Share with us your opinions. I believe they are the only settings that are different than the defaults.
  • Quality
    • Layer Height = 0.25
    • Initial Layer Height = 0.25
    • Line Width = 0.4
  • Walls
    • Wall Thickness = 0.4
  • Top/Bottom
    • Top Thickness = 0.0
    • Bottom Thickness = 1.0
    • Top/Bottom Pattern = Concentric
  • Infill
    • Infill Density = 15%
    • Infill Pattern = Cubic - I've found this to be far stiffer than the plain "Grid" pattern.
    • Infill Line Directions = [30]
  • Material
    • Printing temperature is highly material specific. 3DLabPrint recommends running PLA hotter than normal to give better interlaminar strength. They suggest nozzle = 230°C, bed = 56°C
  • Speed
    • Print Speed - is mostly tied to material used and even printer design. I use 60 mm/s.
  • Cooling
    • Enable Print Cooling - Off. Cosmetically, having it on is better, but 3DLapPrint recommends turning this off to keep more heat in the plastic to cause it to fuse better giving more strength between layers.
  • Support - Off
  • Build Plate Adhesion
    • Type = Brim
    • Brim Width = 5
  • Special Modes
    • Spiralize Outer Contour = On
Link to Resource is available at - https://forum.flitetest.com/index.php?resources/inqd-turbo-storch-cowl-5.363/
 
Last edited:

Inq

Elite member
Final Parts
Latch.png


Introduction
These are the final two parts. The left part is clued to Cowl-5 and is a lip that tucks in under Cowl-4. The right part is the latch that holds the door down during flight. There is a tunnel within Cowl-5 to use a clicker-pen's spring to keep the latch pushed forward. These parts weight 1

Printer Settings
These are the primary setting necessary for these prints. By all means use them or don't. It's just what I used. All printers are different and you might have zero'd in values on some aspect or another. Share with us your opinions. I believe they are the only settings that are different than the defaults.

Lip
1671406367274.png

  • Quality
    • Layer Height = 0.25
    • Initial Layer Height = 0.25
    • Line Width = 0.4
  • Walls
    • Wall Thickness = 0.8
  • Top/Bottom
    • Top Thickness = 0.0
    • Bottom Thickness = 1.0
    • Top/Bottom Pattern = Lines
    • Top/Bottom Line Directions [90,45,-45]
  • Infill
    • Infill Density = 20%
    • Infill Pattern = Cubic - I've found this to be far stiffer than the plain "Grid" pattern.
    • Infill Line Directions = [30]
  • Material
    • Printing temperature is highly material specific. 3DLabPrint recommends running PLA hotter than normal to give better interlaminar strength. They suggest nozzle = 230°C, bed = 56°C
  • Speed
    • Print Speed - is mostly tied to material used and even printer design. I use 60 mm/s.
  • Cooling
    • Enable Print Cooling - Off. Cosmetically, having it on is better, but 3DLapPrint recommends turning this off to keep more heat in the plastic to cause it to fuse better giving more strength between layers.
  • Support - Off
  • Build Plate Adhesion
    • Type = None
  • Special Modes
    • Spiralize Outer Contour = Off

Latch
1671406320616.png

  • Quality
    • Layer Height = 0.25
    • Initial Layer Height = 0.25
    • Line Width = 0.4
  • Walls
    • Wall Thickness = 2.0
  • Top/Bottom
    • Top Thickness = 0.0
    • Bottom Thickness = 1.0
    • Top/Bottom Pattern = Concentric
  • Infill
    • Infill Density = 0%
  • Material
    • Printing temperature is highly material specific. 3DLabPrint recommends running PLA hotter than normal to give better interlaminar strength. They suggest nozzle = 230°C, bed = 56°C
  • Speed
    • Print Speed - is mostly tied to material used and even printer design. I use 60 mm/s.
  • Cooling
    • Enable Print Cooling - Off. Cosmetically, having it on is better, but 3DLapPrint recommends turning this off to keep more heat in the plastic to cause it to fuse better giving more strength between layers.
  • Support - Off
  • Build Plate Adhesion
    • Type = None
  • Special Modes
    • Spiralize Outer Contour = Off
Link to Resource is available at - https://forum.flitetest.com/index.php?resources/inqd-turbo-storch-final-parts.364/
 
Last edited:

Inq

Elite member
Spinner
Spinner.png


Introduction
The Turbo Storch is designed to use these simple/cheap kits that are right around $20. It uses an A2212, 1000KV motor, 30A ESC and 10x4.5 propeller. All dimensions for clearance are specifically set up for this set so I can just bolt my stuff right on. If you want to explore bigger or different sets, I've made the front-end so that it can supposedly handle up to a D4215 which can swing a huge propeller. You will likely require modifications to both the engine mount and/or spinner for anything different from what I've spec'd out. You're all craftpersons, so I'm sure it won't be difficult for you. I've still saved you from all the complex 3D curves.
1671553192947.png


Goldilocks and the Three Bears
The spinner caused a lot of troubles trying to optimize it to:
  • minimize weight
  • minimize thickness between the prop and aluminum
  • the right design to just snap together instead of using screws
  • not too thick that it can't un-snap
  • not too thin so that it flexes and comes apart.
  • minimize seams for cosmetics
A few iterations were required.
Goldilocks.jpg


Post Processing
For post processing, I use some ABS melted down to about the consistency of 2% milk and painted it on to fill the layer lines. Then, I chucked it up on a drill and sanded it up to 400 grit. After painting, it should rival any Dubro, injection molded spinner. As you can see the closing is very tight and will only fit the 10x4.5 prop as it comes. Using something else, you'll need to get your files and Dremel out. ;) After post process, but before painting, it came out to 7.3 grams.

Sanding.jpg


1671554307828.png

Printer Settings
  • Quality
    • Layer Height = 0.166 - This is to optimize the number of layer in the critical area between the propeller and the aluminum back mount.
    • Initial Layer Height = 0.166
    • Line Width = 0.4
  • Walls
    • Wall Thickness = 0.8
  • Top/Bottom
    • Top Thickness = 1.0
    • Bottom Thickness = 0.5
    • Top/Bottom Pattern = Lines
    • Top/Bottom line directions = [90,30,-30]
  • Infill
    • Infill Density = 20%
    • Infill Pattern = Cubic - I've found this to be far stiffer than the plain "Grid" pattern.
    • Infill Line Directions = [0]
  • Material
    • Printing temperature is highly material specific. 3DLabPrint recommends running PLA hotter than normal to give better interlaminar strength. They suggest nozzle = 230°C, bed = 56°C
  • Speed
    • Print Speed - is mostly tied to material used and even printer design. I use 60 mm/s.
  • Travel
    • Enable Retraction = On
    • The rest of the setting are very printer specific. My direct drive Prusa uses a retraction distance of only 0.8 mm. It is my understanding that Boden type printers have a much larger retraction distance. Hopefully you have those kind of setting tuned in for your printer.
  • Cooling
    • Enable Print Cooling - Off. Cosmetically, having it on is better, but 3DLapPrint recommends turning this off to keep more heat in the plastic to cause it to fuse better giving more strength between layers.
  • Support
    • Generate Support = On
    • Support Structure = Tree
    • Support Placement = Touching Buildplate
    • Support Overhang Angle = 55
  • Build Plate Adhesion
    • Type = Brim
    • Brim Width = 3 mm
  • Special Modes
    • Spiralize Outer Contour = Off
  • Experimental
    • Adaptive Layers = Off
Link to Resource is available at - https://forum.flitetest.com/index.php?resources/inqd-turbo-storch-spinner.365/edit
 
Last edited:

Scotto

Elite member
Wow. Thank you Inq for posting such organized and detailed settings suggestions. I had never tried Adaptive Layers before- that would have been nice to know on a few projects before.
20221220_233625[1].jpg

Inq has kindly sent me his files so I could test them out in PLA. My machine is an Ender 3 V2 with an aftermarket direct gear drive and a dual z screw kit. I have not been printing for long so I'm no expert by any means. The filament I'm using is Atomic brand (made in Indiana!) Turquoise color. I thought my wife would love this color, but she doesn't. However, it does show imperfections better than most colors I have, so it's good for testing. I'm also using eSun "ePLA-LW." I kind of got sidetracked on that so I'll talk about it first. I'm no expert here but this is what looked good for me.

20221220_224029[1].jpg

LW-PLA Cowl 5 9 grams
  • Quality
    • Layer Height= 0.2
  • Walls
    • Z seam= user specified= Left
    • Seam corner preference = expose seam
  • Material
    • Printing temp= 255- different brands could be different
    • build plate = 60
    • Flow= 50
    • brim flow= 60
    • initial layer flow= 60
  • Speed
    • Print speed= 50
  • Retraction= off
  • Cooling
    • fan speed= 10
  • Build plate= 4mm brim. Mine is smooth side up and covered in "Magigoo"
  • Special mode= surface Spiralise= yes smooth= yes
  • Adaptive Layers on
    • max variation= .1
    • step size= .01
    • topo size= .2
  • Bridge settings on
    • min length= 3mm
    • bridge wall coasting= 200
    • bridge wall flow= 20%
    • bridge skin flow= 10
    • second skin flow= 20
    • third skin flow= 50 I don't know how much these helped because I made so many changes at one time, but here it is anyway.
Cowl 2 Is all the same other than "Adaptive Layers" was off, and the Z seam was in the back. 5 grams.

Cowl 1 made a valiant effort in vase mode, but I had to cheat and use 1 wall, 0 bottom, 2 tops, and 0 infill with vase mode back off. It took some extra work with the knife, but what a cool part! No bigger than it is, I'm sure the weight difference won't matter but I just wanted to try it in LW- PLA while the roll was hooked up. 2.5 grams.
20221221_013427[1].jpg
 

Inq

Elite member
Thank you Inq for posting such organized and detailed settings suggestions.

You are welcome and thanks for helping me out Beta testing it. Apologies for asking so many questions below... ;) How I got the name for being Inquisitive.

I'm also using eSun "ePLA-LW." I kind of got sidetracked on that so I'll talk about it first. I'm no expert here but this is what looked good for me.

I really need to explore the PLA-LW. The price has given me the most pause. (1) How much have you printed with it (rolls)? (2) Would you recommend the eSun? I'm also paused by the Internet saying it clogs the nozzle all the time. Saying that retraction=Off solves that. (3) Is that your experience?

LW-PLA Cowl 5 9 grams

NICE! Improvement over ABS of 15 grams. Do you have calipers? (4) Can you measure the layer wall width? (5) Do you have to enter the theoretical width into Cura somehow or is still the baseline of being the nozzle diameter? The extra width definitely would reduce/eliminate the oil canning I experience.

Cowl 2 Is all the same other than "Adaptive Layers" was off, and the Z seam was in the back. 5 grams.

Wow! That's less than half the ABS version at 11 grams.

Cowl 1 made a valiant effort in vase mode

Cowl 1 can't be done in vase mode. Note in the suggested printer settings that Spiralize Outer Contour = Off, but Adaptive Layer = On. Spiralize Outer Contour (Vase mode) can only be done on prints that have one and only one footprint. By having 3 separate footprints (Engine round and 2 exhaust tips) at the beginning of the print violates vase mode. There are several other limitations to what can be printed using it. Only Cowl 2 and 5 can be done in vase mode.

One observation of your Cowl 5...
1671620785795.png

... PLA-LW may be able to get around this, but later on when I post some of the assembly instructions, you'll be gluing a lip to this area and not having a "bottom" at this area might make this a little wobbly. Note in the Printer Settings that there is a bottom thickness = 1.0.

I tend to be the type that does the 90% and leaves the 10% to experts. I just applied the base coats of paint to the my Turbo Storch. I didn't do any post processing on the plastic parts except the filling on Cowl 1 I mentioned above. Will you be doing the hard-core finishing like people do on the balsa scale show models? Will you be doing things to fill the layering lines? I'm interested in what people do with PLA.

Thanks again for your help.
 

Scotto

Elite member
I really need to explore the PLA-LW. The price has given me the most pause. (1) How much have you printed with it (rolls)? (2) Would you recommend the eSun? I'm also paused by the Internet saying it clogs the nozzle all the time. Saying that retraction=Off solves that. (3) Is that your experience?
The price isn't that bad because you're actually printing twice as many parts per roll because the flow is half. I've only used about half a roll and that is a whole plane and about two more in wasted parts because I apparently can't follow directions:D. No, because the flitetest store sells Colorfabb. Ya I don't think it likes to retract and you can use the stringing to your advantage on tall parts especially. Like on these ailerons. This is one of my favorite tips someone had on 3d printing. Probably Dr. Looping Looie. These are for his Start UP plane.
20221221_230751[1].jpg
NICE! Improvement over ABS of 15 grams. Do you have calipers? (4) Can you measure the layer wall width? (5) Do you have to enter the theoretical width into Cura somehow or is still the baseline of being the nozzle diameter? The extra width definitely would reduce/eliminate the oil canning I experience.
Yes, it's 0.5 to 0.6 mm around the base of Cowl 5. I just realized the latch might not fit in there now.

That cowl 1 on the right did print in "surface" mode. Maybe my version of Cura let it go. But that was my mistake. I didn't double check your notes. Same for Cowl 5. :oops: I'm glad you caught that. My finished product will be translucent with LEDs inside for night flying.
 
  • Like
Reactions: Inq

Inq

Elite member
I just realized the latch might not fit in there now.

Let me know if you have troubles. I'd could make the latch a little smaller so it'll have more room. Let me know what size you need. I'm guessing you'd do the latch in normal PLA???

My finished product will be translucent with LEDs inside for night flying.

That is so cool! :cool: I'm having enough trouble in daylight... I can't imagine what its like at night.
 

Inq

Elite member
First Flight Debrief

Today was my first flight with the Turbo Storch. The day ended with only one flight, no crash and only a little drama.

I documented here where I learned about calibrating the ESC and got an almost 50% gain in static thrust. The plane now with calibrated ESC has enough power to take off in a couple of lengths and climbs quite well. It was a pretty windy and I had trouble coming back upwind to the field. I was using full power for too long and just barely got back to the landing field and the motor popped. With the head-wind, it pretty much just descended down, head into the wind like it was an elevator. I flared just right with a sweet 3 point landing. It didn't roll any. Of course, I attribute this totally to the FT Storch. I just didn't screw up any of its flying characteristics.

Actually I felt pretty good... I came home with a still flyable plane (if it had a motor). A first for me!

I have another of the same motor, and it looks like another warm fly day may be in order tomorrow. I was expecting the arrangement of the faux turbo-prop exhausts to form partial vacuum and thus suck some of the cold air coming in the chin intake over the motor.
OverHeat.png


If I do go out tomorrow, I'll also leave the spinner off and my foot out of the throttle. Also once I get good enough to consistently bring it home in one piece, I'll plan on instrumenting it and I'll add thermocouples to the areas to see if the flow is moving the way I expect.

Flight characteristics - The winds were gusting... not really that bad, but the plane is so lightly loaded. It wanted to flutter away like a leaf. The average was only supposed to be 5 mph, but we recorded gusts of 13.6 mph. I did not notice any torque steer, but on full throttle, it did want to climb to the point of stalling. It was easily controllable, but even I noticed it. If I have a more controlled day, I'll see if I can quantify it a little better. Unfortunately, I'm using all 3 of my mixes for Flaperons, so I don't have an extra to link the elevator to the throttle. I may see about taking some shims since I won't have the spinner anyway.
 

Scotto

Elite member
First Flight Debrief

Today was my first flight with the Turbo Storch. The day ended with only one flight, no crash and only a little drama.

I documented here where I learned about calibrating the ESC and got an almost 50% gain in static thrust. The plane now with calibrated ESC has enough power to take off in a couple of lengths and climbs quite well. It was a pretty windy and I had trouble coming back upwind to the field. I was using full power for too long and just barely got back to the landing field and the motor popped. With the head-wind, it pretty much just descended down, head into the wind like it was an elevator. I flared just right with a sweet 3 point landing. It didn't roll any. Of course, I attribute this totally to the FT Storch. I just didn't screw up any of its flying characteristics.

Actually I felt pretty good... I came home with a still flyable plane (if it had a motor). A first for me!

I have another of the same motor, and it looks like another warm fly day may be in order tomorrow. I was expecting the arrangement of the faux turbo-prop exhausts to form partial vacuum and thus suck some of the cold air coming in the chin intake over the motor.
View attachment 233356

If I do go out tomorrow, I'll also leave the spinner off and my foot out of the throttle. Also once I get good enough to consistently bring it home in one piece, I'll plan on instrumenting it and I'll add thermocouples to the areas to see if the flow is moving the way I expect.

Flight characteristics - The winds were gusting... not really that bad, but the plane is so lightly loaded. It wanted to flutter away like a leaf. The average was only supposed to be 5 mph, but we recorded gusts of 13.6 mph. I did not notice any torque steer, but on full throttle, it did want to climb to the point of stalling. It was easily controllable, but even I noticed it. If I have a more controlled day, I'll see if I can quantify it a little better. Unfortunately, I'm using all 3 of my mixes for Flaperons, so I don't have an extra to link the elevator to the throttle. I may see about taking some shims since I won't have the spinner anyway.
Nice! It might not be a cooling problem. If you were up on the throttle fighting the wind it could have just been to much for the little 2212 motor. A 10x4.5 is a little optimistic for it in my opinion. I think it would be happier with a 9x4.5. Also, if you haven't discovered yet, you might be surprised how much better an APC prop is than generic.
 

Scotto

Elite member
I am satisfied with my Cowl 1 settings now. I set it to Standard and did the changes in post 40. Then I added 1 bottom and 2 tops on Concentric to make it easier to remove where it isnt needed, but it fills in the pipes. With a bottom now it didnt need a brim. I made the adaptive layers max variation .15 and the print temp 200. It weighs 5.2g.
 

Attachments

  • 20221226_230247.jpg
    20221226_230247.jpg
    2 MB · Views: 0
  • Like
Reactions: Inq

Inq

Elite member
I am satisfied with my Cowl 1 settings now. I set it to Standard and did the changes in post 40. Then I added 1 bottom and 2 tops on Concentric to make it easier to remove where it isnt needed, but it fills in the pipes. With a bottom now it didnt need a brim. I made the adaptive layers max variation .15 and the print temp 200. It weighs 5.2g.

I didn't try that, but it makes perfect sense. @quorneng suggested that above and my initial response was the filling of the center hole. How was the post processing?
 

Inq

Elite member
I guess me filling with ABS/Acetone is so ingrained, I don't explore the settings as much as I used to make the print come out. BTW - A local artist uses PLA to print figurines because it does such a better job with fine details (he uses a stock Creality Ender 3) and then he fills with ABS/Acetone in consistencies of skim to whole milk and then paints and decorates them. He is quite accomplished.

Work of local artist Nicholas Longanecker
NLCastle.jpg

NLTurtle.jpg

NLNativeAmerican.jpg
 

danskis

Master member
There are other options to the 2212 - as you probably know by now they measure motor size 2 ways - one using stator dimensions (like the motor you're using) and the other using the can dimensions. You could use 2836 1200KV which will use the same mounting holes with the X adaptor and keep that prop - or go to a 10X5 APC. You should see another increase in power.
 
  • Like
Reactions: Inq

Inq

Elite member
There are other options to the 2212 - as you probably know by now they measure motor size 2 ways - one using stator dimensions (like the motor you're using) and the other using the can dimensions. You could use 2836 1200KV which will use the same mounting holes with the X adaptor and keep that prop - or go to a 10X5 APC. You should see another increase in power.

I had gotten used to the first designation type, but didn't know what the second type meant. Thanks! I went through all of the vendors on FlyBrushless.com and would pretty much skip anything that I couldn't recognized as being the first kind. There were some that just used fancy, catchy names... I passed on those as well.

Last night I was going through options available on Amazon. Most weren't going to arrive until 1/4/23, but there were several that were available for this Saturday (if I order within 54 minutes) ;) I finally settled on the D3536 - https://www.amazon.com/dp/B084QJTN83/?tag=lstir-20 It says it'll run on 2S to 4S.

I'm hoping I can get decent loading using my 3S batteries and 30A ESC. I'll put it on my load cell and set my max throttle position to draw only so many amps. I've seen posts on the forum about not using the full rating of an ESC... How much of the 30A, do you all think I can use safely?
 

Inq

Elite member
I have a few revisions planned.
  1. Since there are so many motor options - Some way to make a generalized mount so any reasonable motor can be used. It would incorporate:
    1. Different motor dimensions
    2. Down and angled thrust adjustment
  2. New spinner with active cooling of the motor behind it.
I'm still wrapping my head around the issue. The problem seems to be difficult... especially since I want a nice smooth transition for the spinner to cowling. I'm looking for any suggestions of angle limits, motor types I should be able to handle or have you seen a good way of handling variability.

At the moment, I'm might have to hard-set the down/right angle into the mount, modify the cowling and make the new spinner. Otherwise, a huge amount of post processing would be needed by anyone wanting one.
 

danskis

Master member
@Inq - Just an FYI a 3536 is the next can size up from the 22XX and the 28XX motor size. These two sizes have approximately the same size cans and stators. The 3536 might weigh a lot more than your 2212 (double) Take a look at Altitude Hobbies for motor specs.
 
  • Like
Reactions: Inq

Inq

Elite member
@Inq - Just an FYI a 3536 is the next can size up from the 22XX and the 28XX motor size. These two sizes have approximately the same size cans and stators. The 3536 might weigh a lot more than your 2212 (double) Take a look at Altitude Hobbies for motor specs.

I was going off just the specs on that Amazon page, so I'll definitely check out your Altitude Hobbies reference. I'm making plenty of assumptions in its selection. The 432W it can put out, I'm sure has to be at the 4S. That's 28 amps and too close for comfort to my 30A ESC. But... I'm assuming using 3S batteries should reduce that current draw significantly especially if I'm using the same 10x4.5 propeller. I'll definitely bench test it to confirm. Even with 3S, it'll be more powerful than the 160 watts the 2212 puts out. Although the 28xx motor probably would have been a better choice for the Storch, I wanted something that I could transplant into say an FT Spitfire (that will have to get the Inq treatment too :sneaky:) and upgrade to 4S and get the full 432W. This is also good enough to go into the 3DLabPrint planes I have gathering dust.

In the beginning the light wing loading of the Storch was slower and gave me more time to correct my mistakes, but this last time, it was a liability. The wind just blew it all over the place. I was constantly fighting it. The little more weight and speed might actually be helpful. I haven't actually augered-in yet, so I'm starting to get more comfortable flying. All my mishaps have been ground loops and landing stalls or overcontrolling. Most of that is because of the full length flaperons that I've dialed back using 80% exponential. The guys at the field are great and tease me about the landing gear/wheels... but on this last windy day. I was one the few that landed without incident. More than one other plane went home in multiple pieces. When I greased the dead-stick landing in gusty conditions, I got a few, "I was certain you were buying the farm when the motor popped!" type comments. :LOL: