Ki-46 “Dinah”

Robyle3

Active member
Hello! (Mad) Scratch builder here :)
The goal of this thread is to document my attempts at designing and building probably my favourite aircraft to come out of the (LARGE) WW2 lineup.
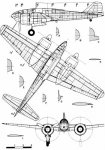
9C835016-1A08-42CE-9A3A-54B433F89A47.jpeg
The ki-46-III “Dinah”.

I’m being incredibly ambitious here, haha. My goal is to make the whole airframe out of dtfb (i get mine at the dollar store). It will have a ~60in span with flaps, and i havent decided on retracts yet. Is it worth the hassle? And if so, what brands would y’all recommend? I’m aiming for an AUW of below 3-4lbs (giving myself LOTS of wiggle-room).

More people are familiar with the other twins of ww2. The p-38s, the mosquitos, and the F-7Fs. While all of these are indeed amazing aircraft, they are late-war and armed to the teeth. The ki-46 was the plane that preceded all of that. Up until p-38s were brought to the pacific, orders for the Dinah were to punch it whenever they found themselves in a bind. No other planes were able to match it in terms of speed.

And IMHO no plane BUT the p-38 can match its looks.
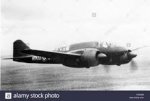

68E590A9-CEAE-4D47-8DE9-00DBBA1B5C1D.jpeg 7E12741E-2FD5-497A-BB78-D65982774B82.jpeg

I digress, though. I havent even ordered a power pack for it, so basically i’m making this post so that i can stay motivated to build it, haha. Are retracts worth the headache of setting up, or should i hope for the best while belly-landing?
 

FoamyDM

Building Fool-Flying Noob
Moderator
Ooh.
12039965-6874648414337709.jpg

I just pulled out my Boy Scout Popcorn bag. 'cause this will be worth it. I'm interested to see if you will do this Master Class style, or a hex/octo-walled setup. I did not know about this sexy bird. (reminds me of the Bugatti m100 lines.)
m100-plane.jpg
 

Robyle3

Active member
I was thinking masterclass-style. Setup an extra strip under all the panel joins so i can sand even those smooth and then paint over it. I love the bugatti, too! Sweet lines and who can resist y-tails, lols?
And you thought v-tails were the rage.

My big question is should i make a clear canopy? I could cut up a few pepsi bottles, or something else, i dunno. But right now just making everything solid is priority no. 1
 

Zephyr1

Elite member
I actually really love the Dinah. Ever since I saw it on the Long Odds episode of Dogfights when I was little, I've thought the curves and lines of the airplane are superb. I played around with designing a Dinah last winter but got distracted by other projects lol. I think you should make a solid canopy and retracts are way to heavy and barely ever work. I'm very excited to see this project moving forward. Good luck!
 

Robyle3

Active member
I actually really love the Dinah... Good luck!
Hehe, thanks a bunch! When i came across the Dinah i was actually just surfing through wikipedia’s list of japanese WW2 aircraft. I had to stop and go “wow” at the simplicity and beauty of the design. The military was drunk on power from the chinese war when they asked for new designs, but all the aircraft designers sure knew what was up.

It is truly a shame that the military had to stick to the mantra of maneuverability. If they had prioritized the development of engines and faster, durable airframes, the war would have been so very different. I find many allied/german designs very “boxy” and designed for combat. To pull from wikipedia: “The specification (for the type-100 reconnaissance aircraft) demanded an endurance of six hours and sufficient speed to evade interception by any fighter in existence or development, but otherwise did not constrain the design by a team led by Tomio Kubo, whose AESTHETICS are very significantly infused to the aircraft.”

Art is win.

As far as my re-design goes, a solid canopy it is, then! Some rough math puts a 60in-span at a1/10th scale. At the same time i’m building/designing the Dinah, i’ll be constructing nerdnic’s ki-61 to learn the “innards” of the speedwing (separate thread).

My main flying “field” is the off-hours parking lot of my old high-school (soccer field adjacent), so i think i can brave retracts. The only hassle should be getting them aligned. I have to re-read the manual for the lemon RX i have, but i’m pretty sure it said that i cant have SPLIT ailerons AND retracts if i want the included gyro. If so, then i already have a working y-harness so i should be fine. I’ll just have to re-assign the chanel on my DX8e.

I should get on to drawing formers and ordering electronics by next wednesday, so stay tuned!
 

Robyle3

Active member
I might be overconfident at the moment, but I REALLY want to shake the hand of whoever designed the Dinah. All these lines are beautiful, and when you break it down the design is soo simple it hurts haha. All the flying surfaces are angular with rounded caps, and the fuselage is just a bunch of ovals joined at the thrust line.
Using the drawings I have, i’ve Found some rough dimensions.
Span will be roughly 1.5m and length is 1.13m. If I can keep the weight down, the two turnigy 1500 kvs should be more than enough to keep it in the air.
Next post will be the fuselage formers being drawn.
 

Robyle3

Active member
Hmm, anyone want to chime in? The drawings show the main wing at a positive AOA. For my model, should I omit that, or keep it in true scale-modeler form?
 

Zephyr1

Elite member
I think omit the positive AoA but that's just me. So I got to fly the new C-47 and see the Mosquito at Edgewater yesterday and it's inspired me to attempt a twin A back WWII plane. What I'm trying to say is that I'm gonna try making a Dinah as well. I've loved the plane forever and I've got this 1/48 model for reference! I still can't wait to see how yours turns out @Robyle3 because it will be larger than mine.
 

Merv

Moderator
Moderator
i havent decided on retracts yet. Is it worth the hassle?
I think retract are very cool and add a lot to the flying experience. Are they worth it? It depends on your flying site and skills. For me, NO. My flying site has a crude runway. I don't care how good you are, the retracts will get torn off. Retracts are just not as robust as a fixed landing gear.

If you fly off a smooth runway and have some experience then, YES, retracts are worth it.
 

Robyle3

Active member
If you fly off a smooth runway and have some experience then, YES, retracts are worth it.
Thanks, that is what I needed to hear, haha. The parking lot I use for my flying Feild recently was re-paved, so the surface is pristine. But I have zero actual experience with retracts (simulator only), so I should use them on a plane I'm not emotionally attached to first to build some experience.

Edit (Nov 9,'19): re-reading all the posts, I realize I'm trying hard to give myself an excuse to buy retracts XD. I can't resist the "cool" factor, but until I can bring a finished plane to my LHS, it'll have fixed gear to ease the screaming builder in me. And keep weight down.
 
Last edited:

Robyle3

Active member
@Zephyr1 that sounds great! I'm going all out and making all the curves, but on a smaller model I don't think that it'd be practical. Using a physical model is such a better way to understand how the curves work (I'm stuck looking at hundreds of pictures, but they can't beat actually feeling it out).
Be sure to make a thread about it! I'd love to follow.
 

Robyle3

Active member
Process post #1
Ok, so two days late, but I kinda got sidetracked when my father brought home this adorable little stray:
20191107_151801.jpg
Stuffing itself right into my sweater was probably the cutest little thing it could've done.
*melts*


ANYWAY, back to the Dinah.

All the fuselage cross sections are done! The flying surfaces were easy since they contained lots of straight lines. Lots of ovals later....I realized I forgot to count in the foam thickness. But, since I had the guides, I just hand-drew an inner oval with the right radiuses. I'll use the large radius to make sure I have enough foam to make it around the fuse, then pop the ring off, and use the smaller radius to make sure the outside skin is the right diameter. "Is all that detail really important?" you may wonder.

Yes, yes it is.

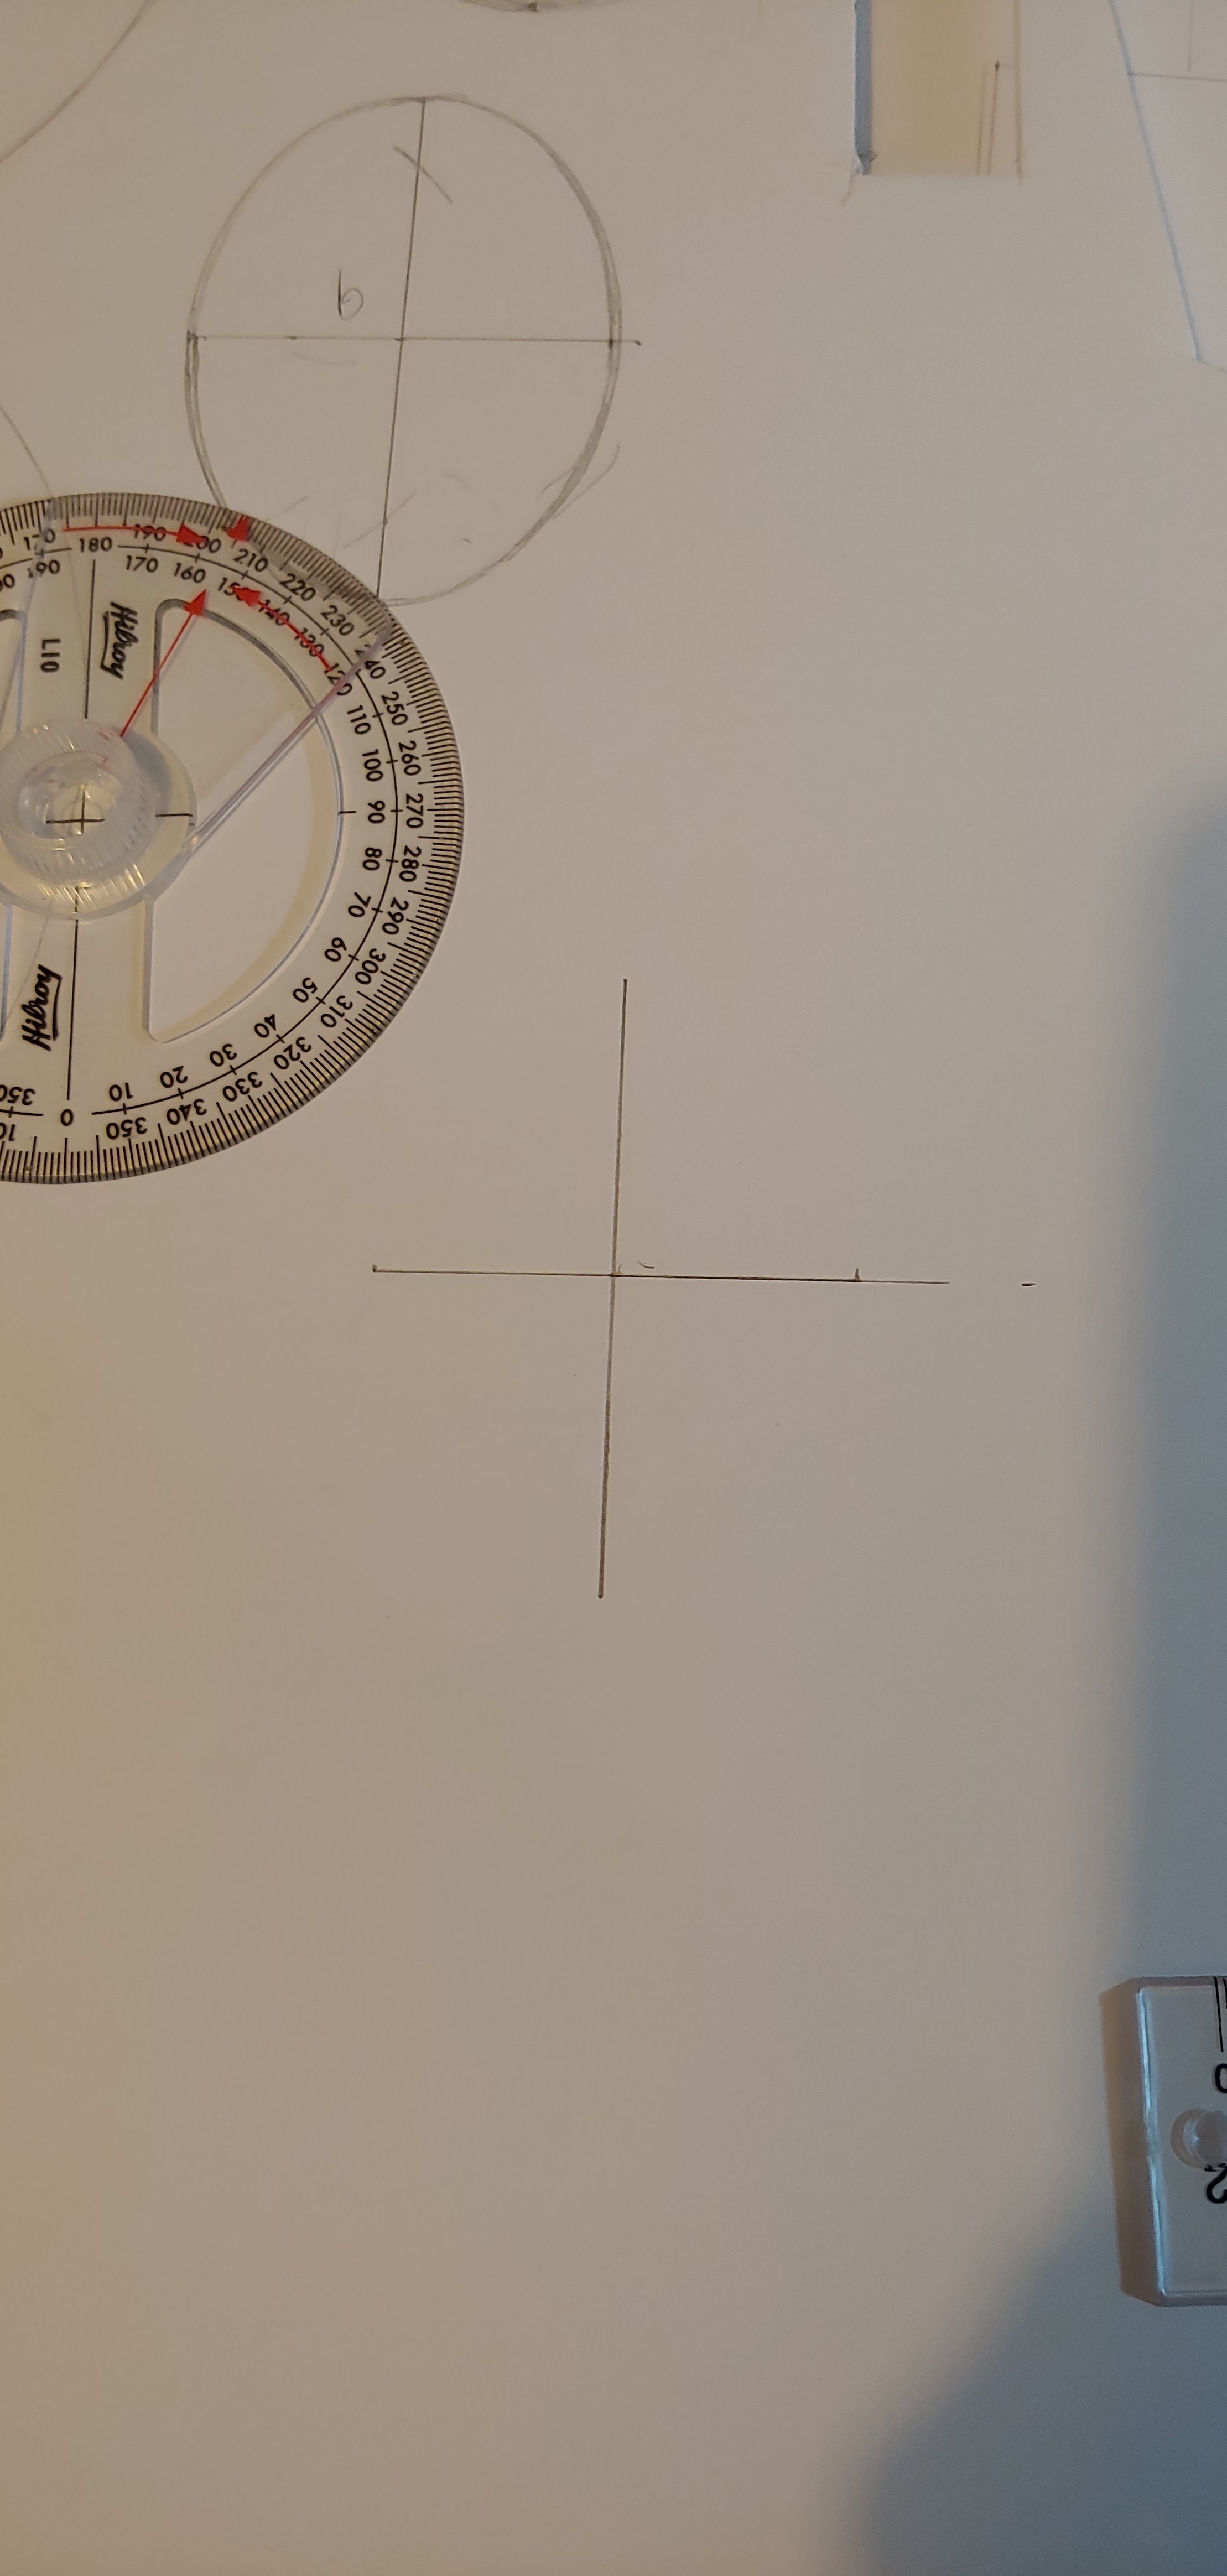
Note on drawing ovals:
Ovals are not the nightmares "ruler and compass" people like me at first imagine them to be. The steps are incredibly simple.

Measure out the width and height of your oval, making sure the lines intersect in the center of your oval.
20191108_205452.jpg

Set your compass point in the center, and stretch out to the end of the LONG radius.
20191108_205542.jpg

Now set your compass needle at the end of one of the SHORT radiuses, and turn it along, marking where the arm intersects the long radius.
20191108_205617.jpg

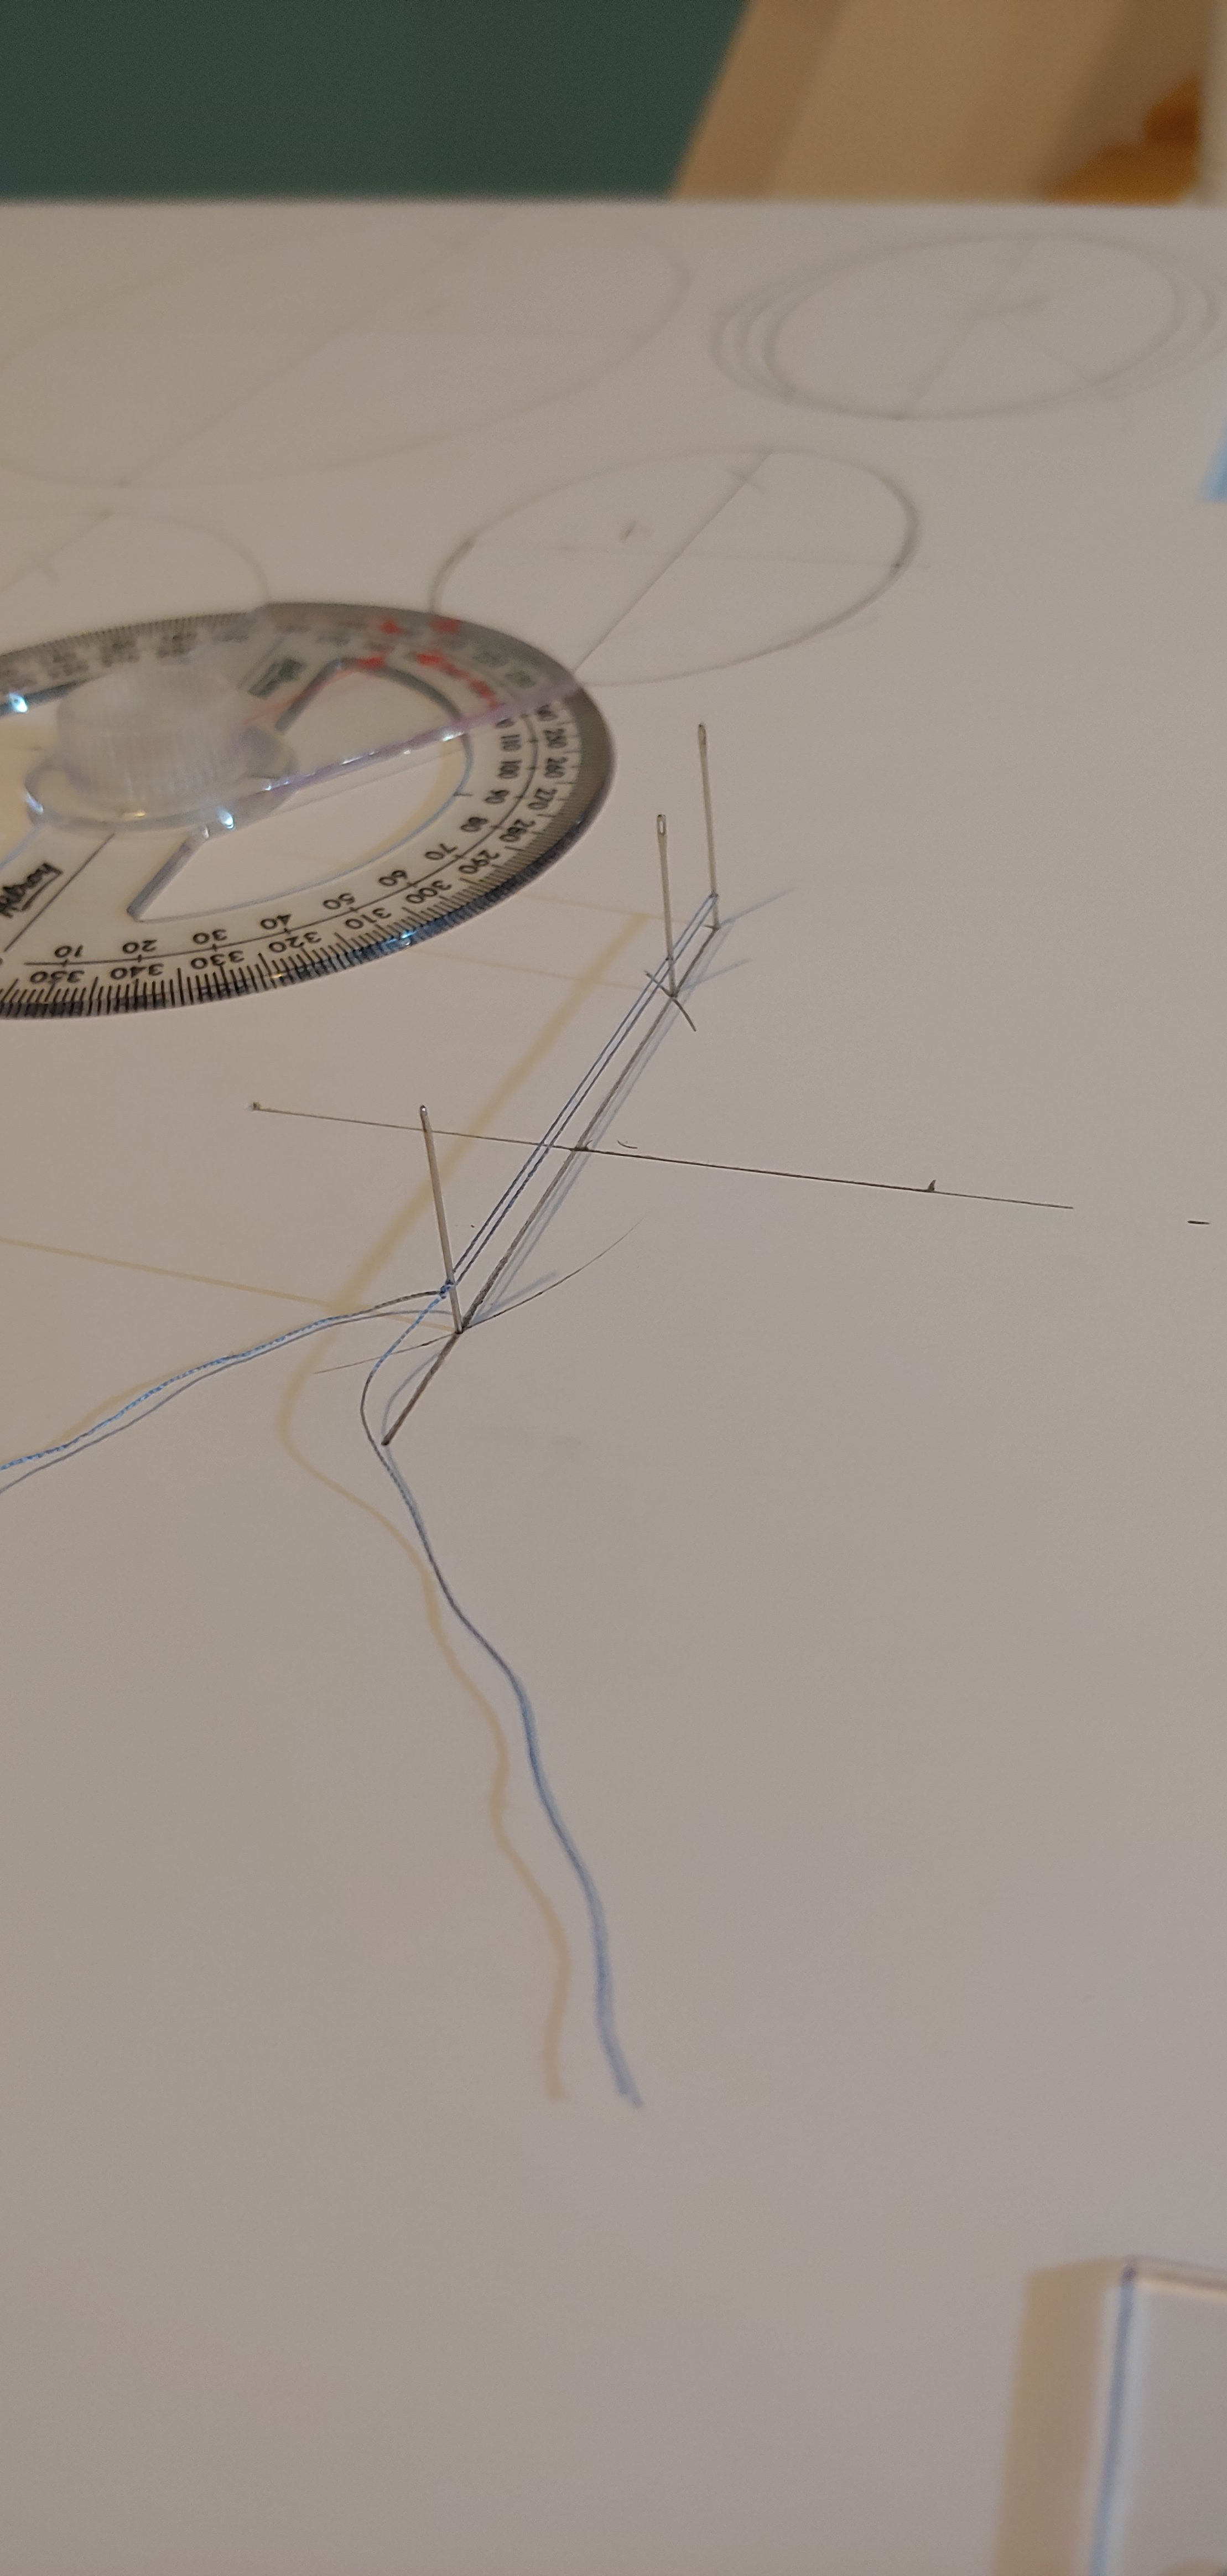
Anchor two pins at these marks.
Tie a loop of string long enough to rest against a pin and reach the opposite end of the long radius (much easier done with a third pin).
20191108_205900.jpg

Now, take a pen/pencil, remove the third pin, and use the string to guide you around the oval!
20191108_210055.jpg
20191108_210113.jpg

Protip: use a razor to cut a VERY small ridge on the pencil lead. This keeps the string from slipping under (don't ask me how many freakin times I needed to cuss at a slippery string to figure this out).

On the same board I squished the fin/rudder. I love @nerdnic 's idea of doubling the empennage to make it aerodynamic, but I, uh, flubbed and accendentally made two of the same side *facepalm*
20191108_211604.jpg

(These are the outside facings, nothing a paintjob won't fix, right?)

The stabilizer is a funny story, too. I am probably going to be having nightmares about the number 6.9. Something just felt "off" about the original drawing, so I decided to go by aspect ratio, and sure enough, turned out I was off by a lot. In case anyone is wondering, the rounded tips are hand-drawn on and cut from draft paper.
20191108_213238.jpg

(Sorry for the faint lines, but hopefully you can see the shape)

Now I am working on the longerons for the fuselage, and only after a day of measuring my reference page, multiplying by 6.9, and marking on the foamcore did I remember that the formers aren't perfectly concentric. So the outline you see on the foamcore here is actually useless, but it does finally give me a visual on how much space this lady will take up. I'll use some cool trickery and fix it up. (Writeup in next process post)
 

Attachments

  • 20191108_210055.jpg
    20191108_210055.jpg
    666.8 KB · Views: 0

Robyle3

Active member
Progress report #1

Long time coming, eh?
So I managed to solder some battery leads together to make a y-harness for my ESC's. Correct me if I'm wrong, but should I cut one of the negatives from the ESCs? I heard this keeps the Bec at the correct voltage, but I'm nervous to stick a blade where it shouldn't be.

And speaking of wires, some bad news. I tested out my soldering job, and both motors spun! But when I went to hook up some servos to test them, I realized: i only have the one servo harness, and not enough servo leads to make any more.

Hindsight, eh?

Back to the progress report, though. I am happy to report that I have the entire hatch glued and skinned. If anyone was confused about my little rant about the "small details", hopefully the following pictures will shed some light.
20191122_135157.jpg

Here you can see the "extras" taped to the formers. This will make sure I get the right OUTSIDE radius of the skin peices.
20191122_135357.jpg

The "extras" removed.
20191122_160615.jpg

All skinned!

The tape is to make sure that the foam isn't eaten by the aerosols in the spraypaint. I'll be running some along the bottom so it doesn't eat at the foam along the sides. Added bonus, it'll mask the creases, making it look that much smoother.
Next, because I loose motivation quickly, I decided to glue the empennage together. I don't want to talk about how much it weighs (78g!!), But she looks smooth! nerdnic hit upon a gem of an idea when he designed the tapered edges. When I was folding the elevator over, the paper decided to split (guess I folded too far). So quickfix was to glue in some nylon hinges I had laying around. The tape you see is where I got a little too excited pulling foam out for a carbon fiber spar.
20191122_120700.jpg


...but 78 grams! I'm already getting nervous about balance issues. I think I'll go back to the rest of the fuselage formers and cut out some lightening holes, for all the few grams that'll save.
The rudder was fun to work with, too. Because of the nature of skinning with foamcore, I had to glue some cheeks to the bottom of the rudder for the correct outline. I beveled the front for clearance, then carved a decent shape out of the extra foam.
20191122_121330.jpg

I probably should have waited until after I skin the tail to carve the cheeks, but given that it'll only be soo thin, I don't think I'll notice it in the air too much, anyway.

So there you have it! First real update. Next progress report should have me glue up the rest of the fuselage, and install some electronics.
 

Attachments

  • 20191122_101508.jpg
    20191122_101508.jpg
    726 KB · Views: 0
  • 20191122_120726_HDR.jpg
    20191122_120726_HDR.jpg
    566.7 KB · Views: 0

Robyle3

Active member
Progress report #2

I've got the building bug, haha. Once I get going, I GET GOING. Bottom half is all glued and skinned. For all intents and purposes, the fuselage is done.
(We won't mention the nacelles)
I have to decide now on going ahead with the nacelles, or making a trip to the nearest dollar store for some more foam board. Nacelles are going to be less involved than the fuse, seeing as the formers are all just circles. Me being me, I'm trying to decide if I should build the cowls as functioning, or decorative.

This is for the ESC cooling. If I make a functional cowl, only edits would be making an inner ring, gluing the ESC down, and holding the cowl in place with some spacers. If it's decorative, I'll just glue the ESC to the bottom of the nacelles and cut some NACA-style vents. Any thoughts?

Well, here are some pictures of the finished fuse.
20191125_103943.jpg
20191125_130407.jpg
20191125_110911.jpg

I am actually quite proud of keeping the skins to (mostly) one sheet.
20191125_132222.jpg

Guess I didn't need to worry too much about the cheeks on the rudder. Note though, I elected to anchor the bottom of the rudder by gluing in a hinge.
20191125_132327.jpg

Here she is!
I cannot believe how strong the skins made the structure. And I'll never be knocking lightening holes again, all tallied up the cutouts weighed 20 grams! That's an entire quarter of the ungodly-heavy empennage. The missing bottom section is where I'll be doing some engineering of a way to join the wing. Idea is to set up a few strips of foam, draw the root rib on them, and use that to cut the right shape holes into the skins, then hack up some cardstock for a fillet. The wing will have a flat center section. The wing will technically be in three sections, but the center will be glued to the fuse, and the outers will be bolted through the spar (maybe).

But, I can't close anything up until I order some more harnesses, so construction on the wing probably won't start for another week at least.
Until next time!
 

Robyle3

Active member
I love it! I like how we had the same idea when it came to the rear window XD.
How does she fly?
 

Robyle3

Active member
(kinda) Process post #2

I'm stumped. I'm having trouble thinking of a good way to connect the wing to the fuselage. As I write this, I'm thinking just now of carving the shape from some layers of white styrofoam. But I tried my "two strip" idea and just couldn't be satisfied by the results. I have another week to play around until the extra y-links arrive, but I'd like to figure this out sooner rather than later.
On the plus side, I found that purposely wetting the "inside" paper removed the need to remove it for shaping the foam. And it actually holds its shape very well when dried again about two hours later.
The center strip is also a good test bed for new fold-over techniques.
Here is my "two strip" idea:
20191130_190529.jpg

Cut the ribs.
20191205_182233.jpg

A few steps skipped here (I was afraid the paper would dry too quickly). But I added a spacer in the trailing edge to give me the right foam thickness. This whole assembly was bevelled. The top trailing edge was also bevelled, and then the foam was shaped to make the fold-over easier. In hindsight, I should have glued the ribs to where they met the back spacer to keep everything aligned. But that is what trial and error is for, amiright?
20191130_203924.jpg

And this here is my problem. After the hole is cut, everything fits nice and snug. But then I have the bottom shaping to think about, and the fuselage skin/fillet on top of the wing. And when I took out the test section, pretty much all of the assembly came with it. (Did I mention that it was snug?)
Oh, and I don't know if I've written about it yet, but the canopy is held in place with some magnets. I might even make a simple latch to make sure it doesn't blow off. That seam running down the middle just screams of quick-release mechanism, haha. Well, any ideas are welcome. Thanks for any suggestions.
 

Robyle3

Active member
I think what I'm going to do is just align the center section in the slot, glue it down, and mold some foam around it to lock it in. The spar will be a carbon tube that I'll slide either side of the wing onto. Kind of like a lot of high-performance gliders. Due to dihedral, the spar will traverse from the top of the center section, to the bottom of the outer wing portion, eleminating the need for compression braces in the wing. I don't plan on pulling any crazy high-g stunts so that should be more than enough support.

But on a cooler note, the harnesses arrived today! I got inspired and cut out all the wing skins. Glue up the spars, install electronics, and she's ready for a maiden! (Plus the other 20-point checklist to make sure it'll actually fly, but, y'know, details).

Also, now is the time to start thinking about paint schemes! I'm not doing anything military, but I'm open to suggestions.
 

Attachments

  • 20191212_122850.jpg
    20191212_122850.jpg
    1 MB · Views: 0

Robyle3

Active member
Progress report #3
I have the center section attached! After I get home from work I'll make the bottom skin and cut the fillets, but now all we need is electronics! I'm going to buy some coloured tape so I can keep everything straight when connecting the wires to all those harnesses (6 seperate connections, ESC/flap/aileron X2).
But, here is my updated "two strip" idea. Simplified two steps by just contouring the top skin. Simple, really, but at the time it just never crossed my mind. And I think I'll just barely squeak in my weight goal. At present the whole fuse only weighs 300g (~1lb 4oz). Getting super excited, hehe.
I've put soo much thought into this plane that I might just do a maiden and then make it a wall hanger, haha
 

Attachments

  • 20191214_143305.jpg
    20191214_143305.jpg
    2.5 MB · Views: 0
  • 20191214_143639.jpg
    20191214_143639.jpg
    980.3 KB · Views: 0
  • 20191214_134228.jpg
    20191214_134228.jpg
    1.3 MB · Views: 0