Hell2Go
Member
Mini Fun Jet by kpl72
Projects

Rating: 4.25 16 ratings
Posted: February 15, 2015 | 1,816 views
INFLUENCE 63%
1 0 +10
Remove Bookmark
MY RATING

Overview
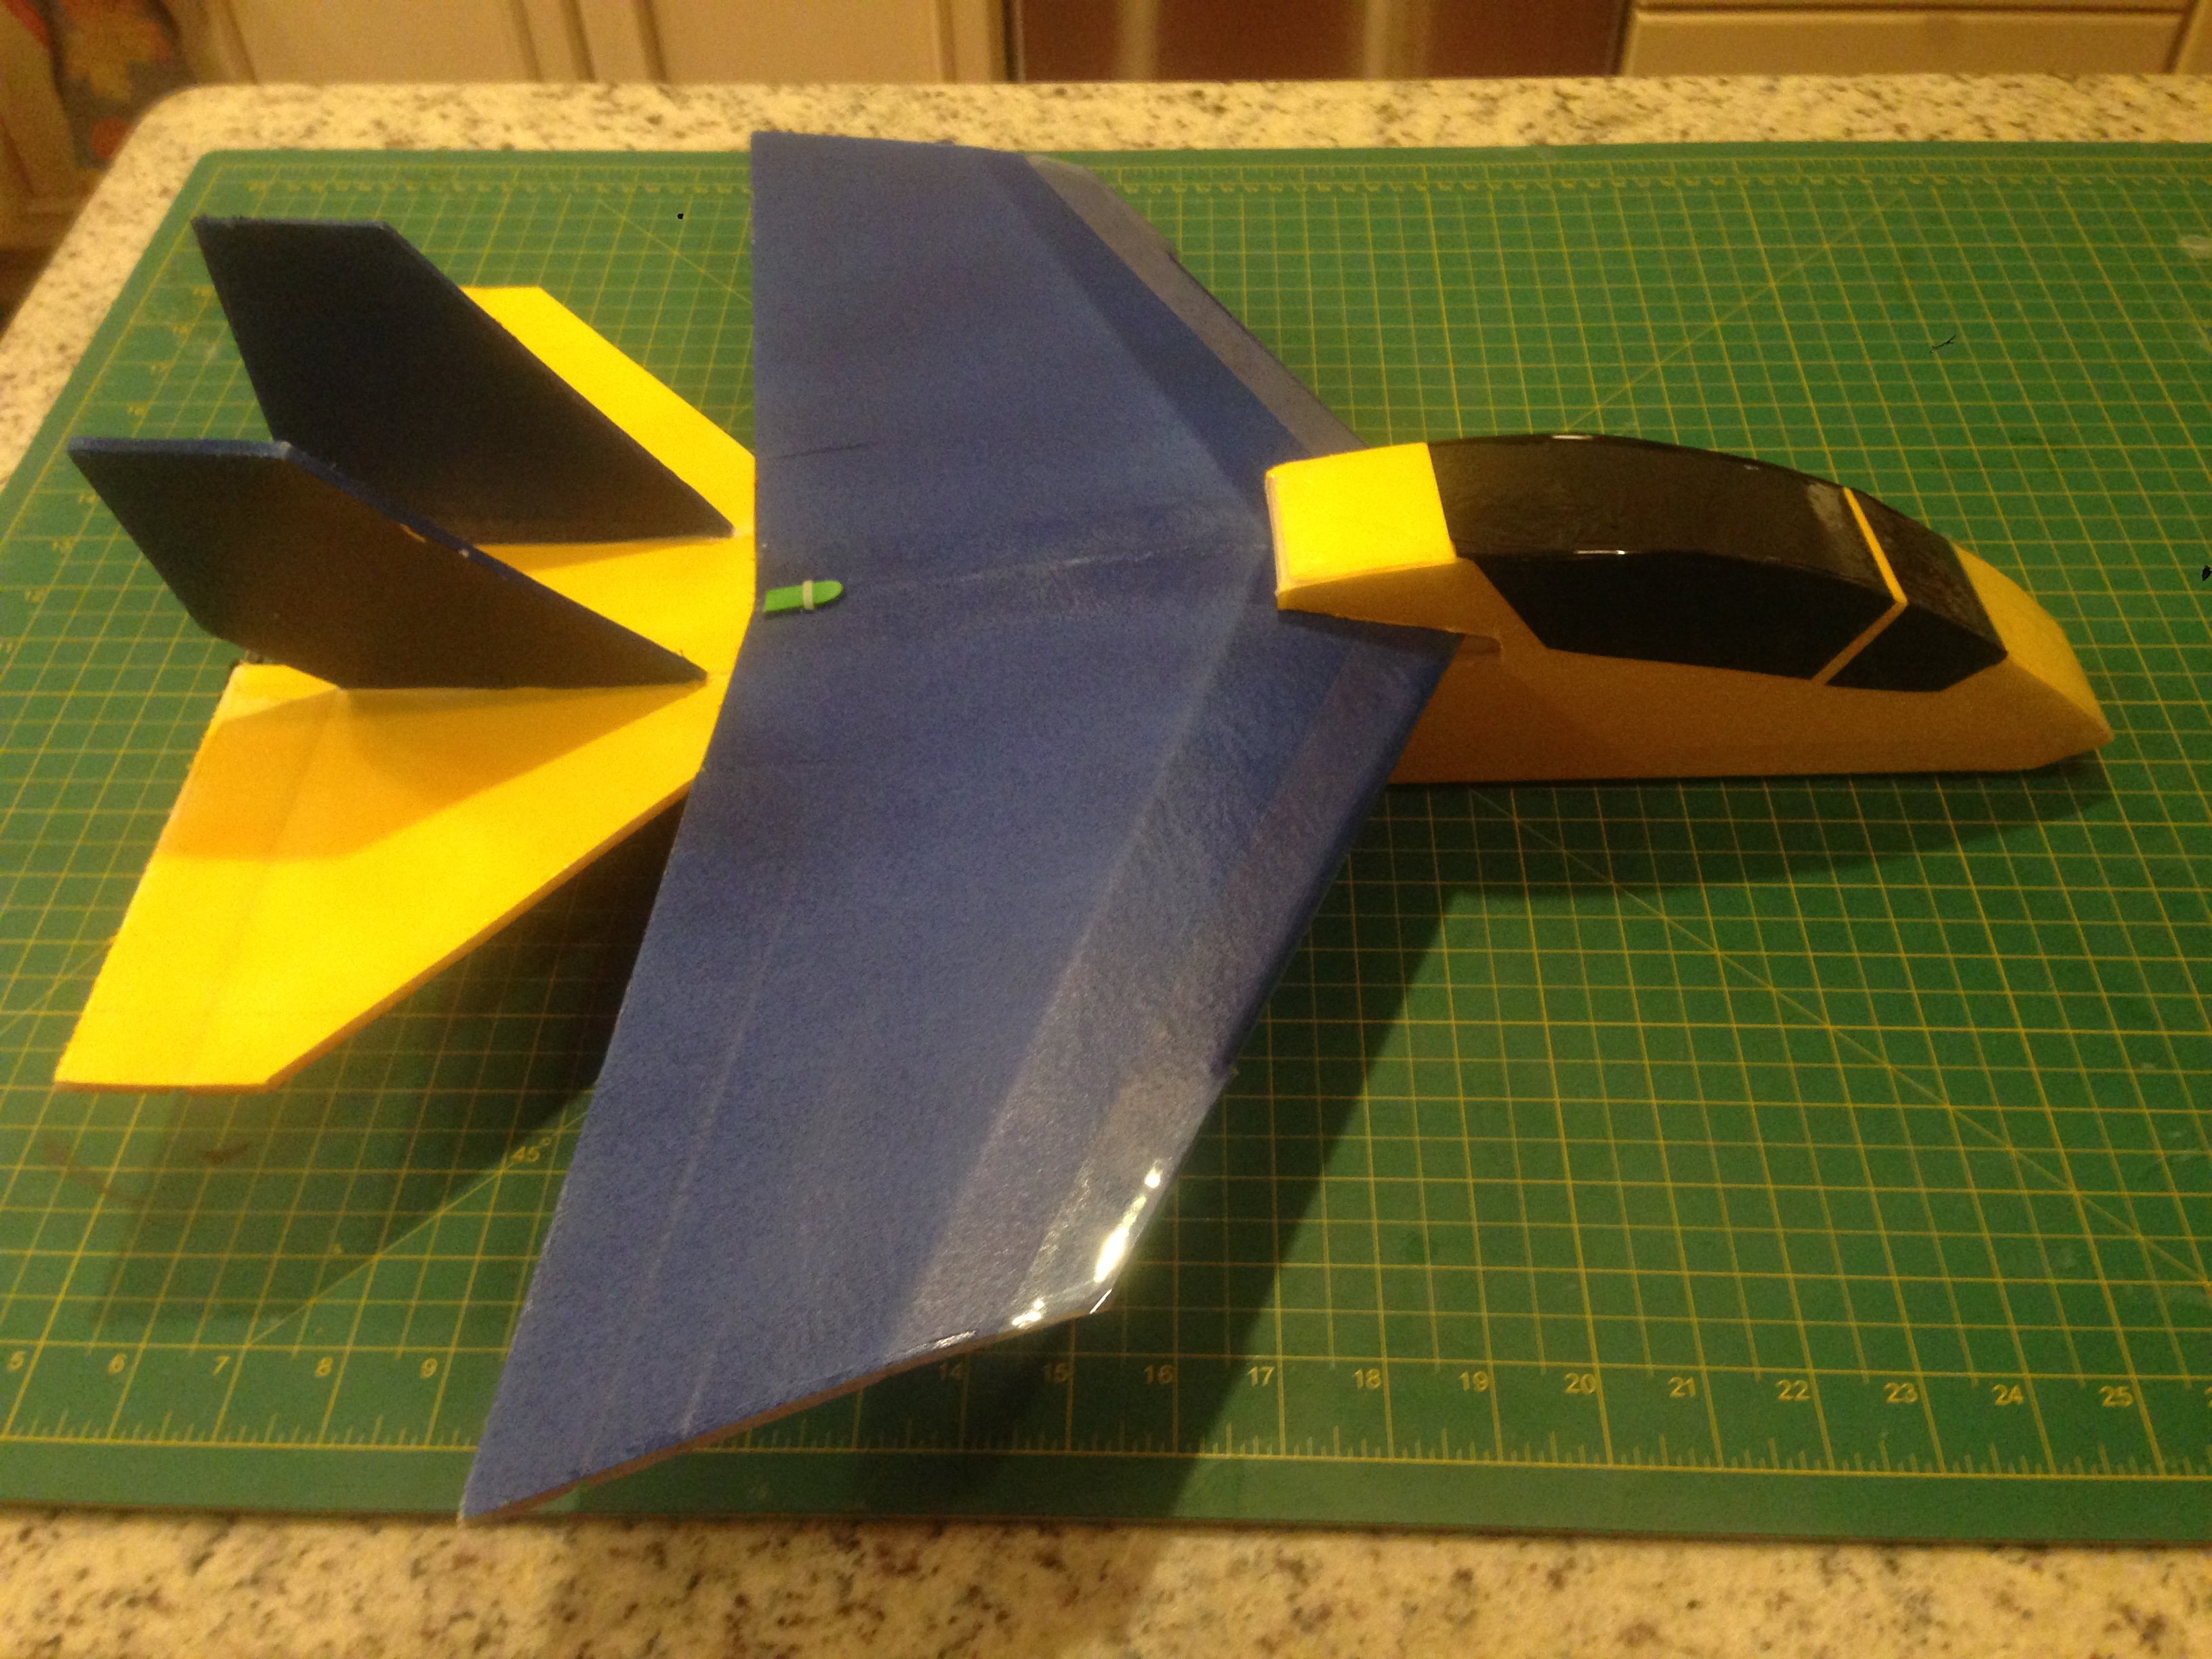
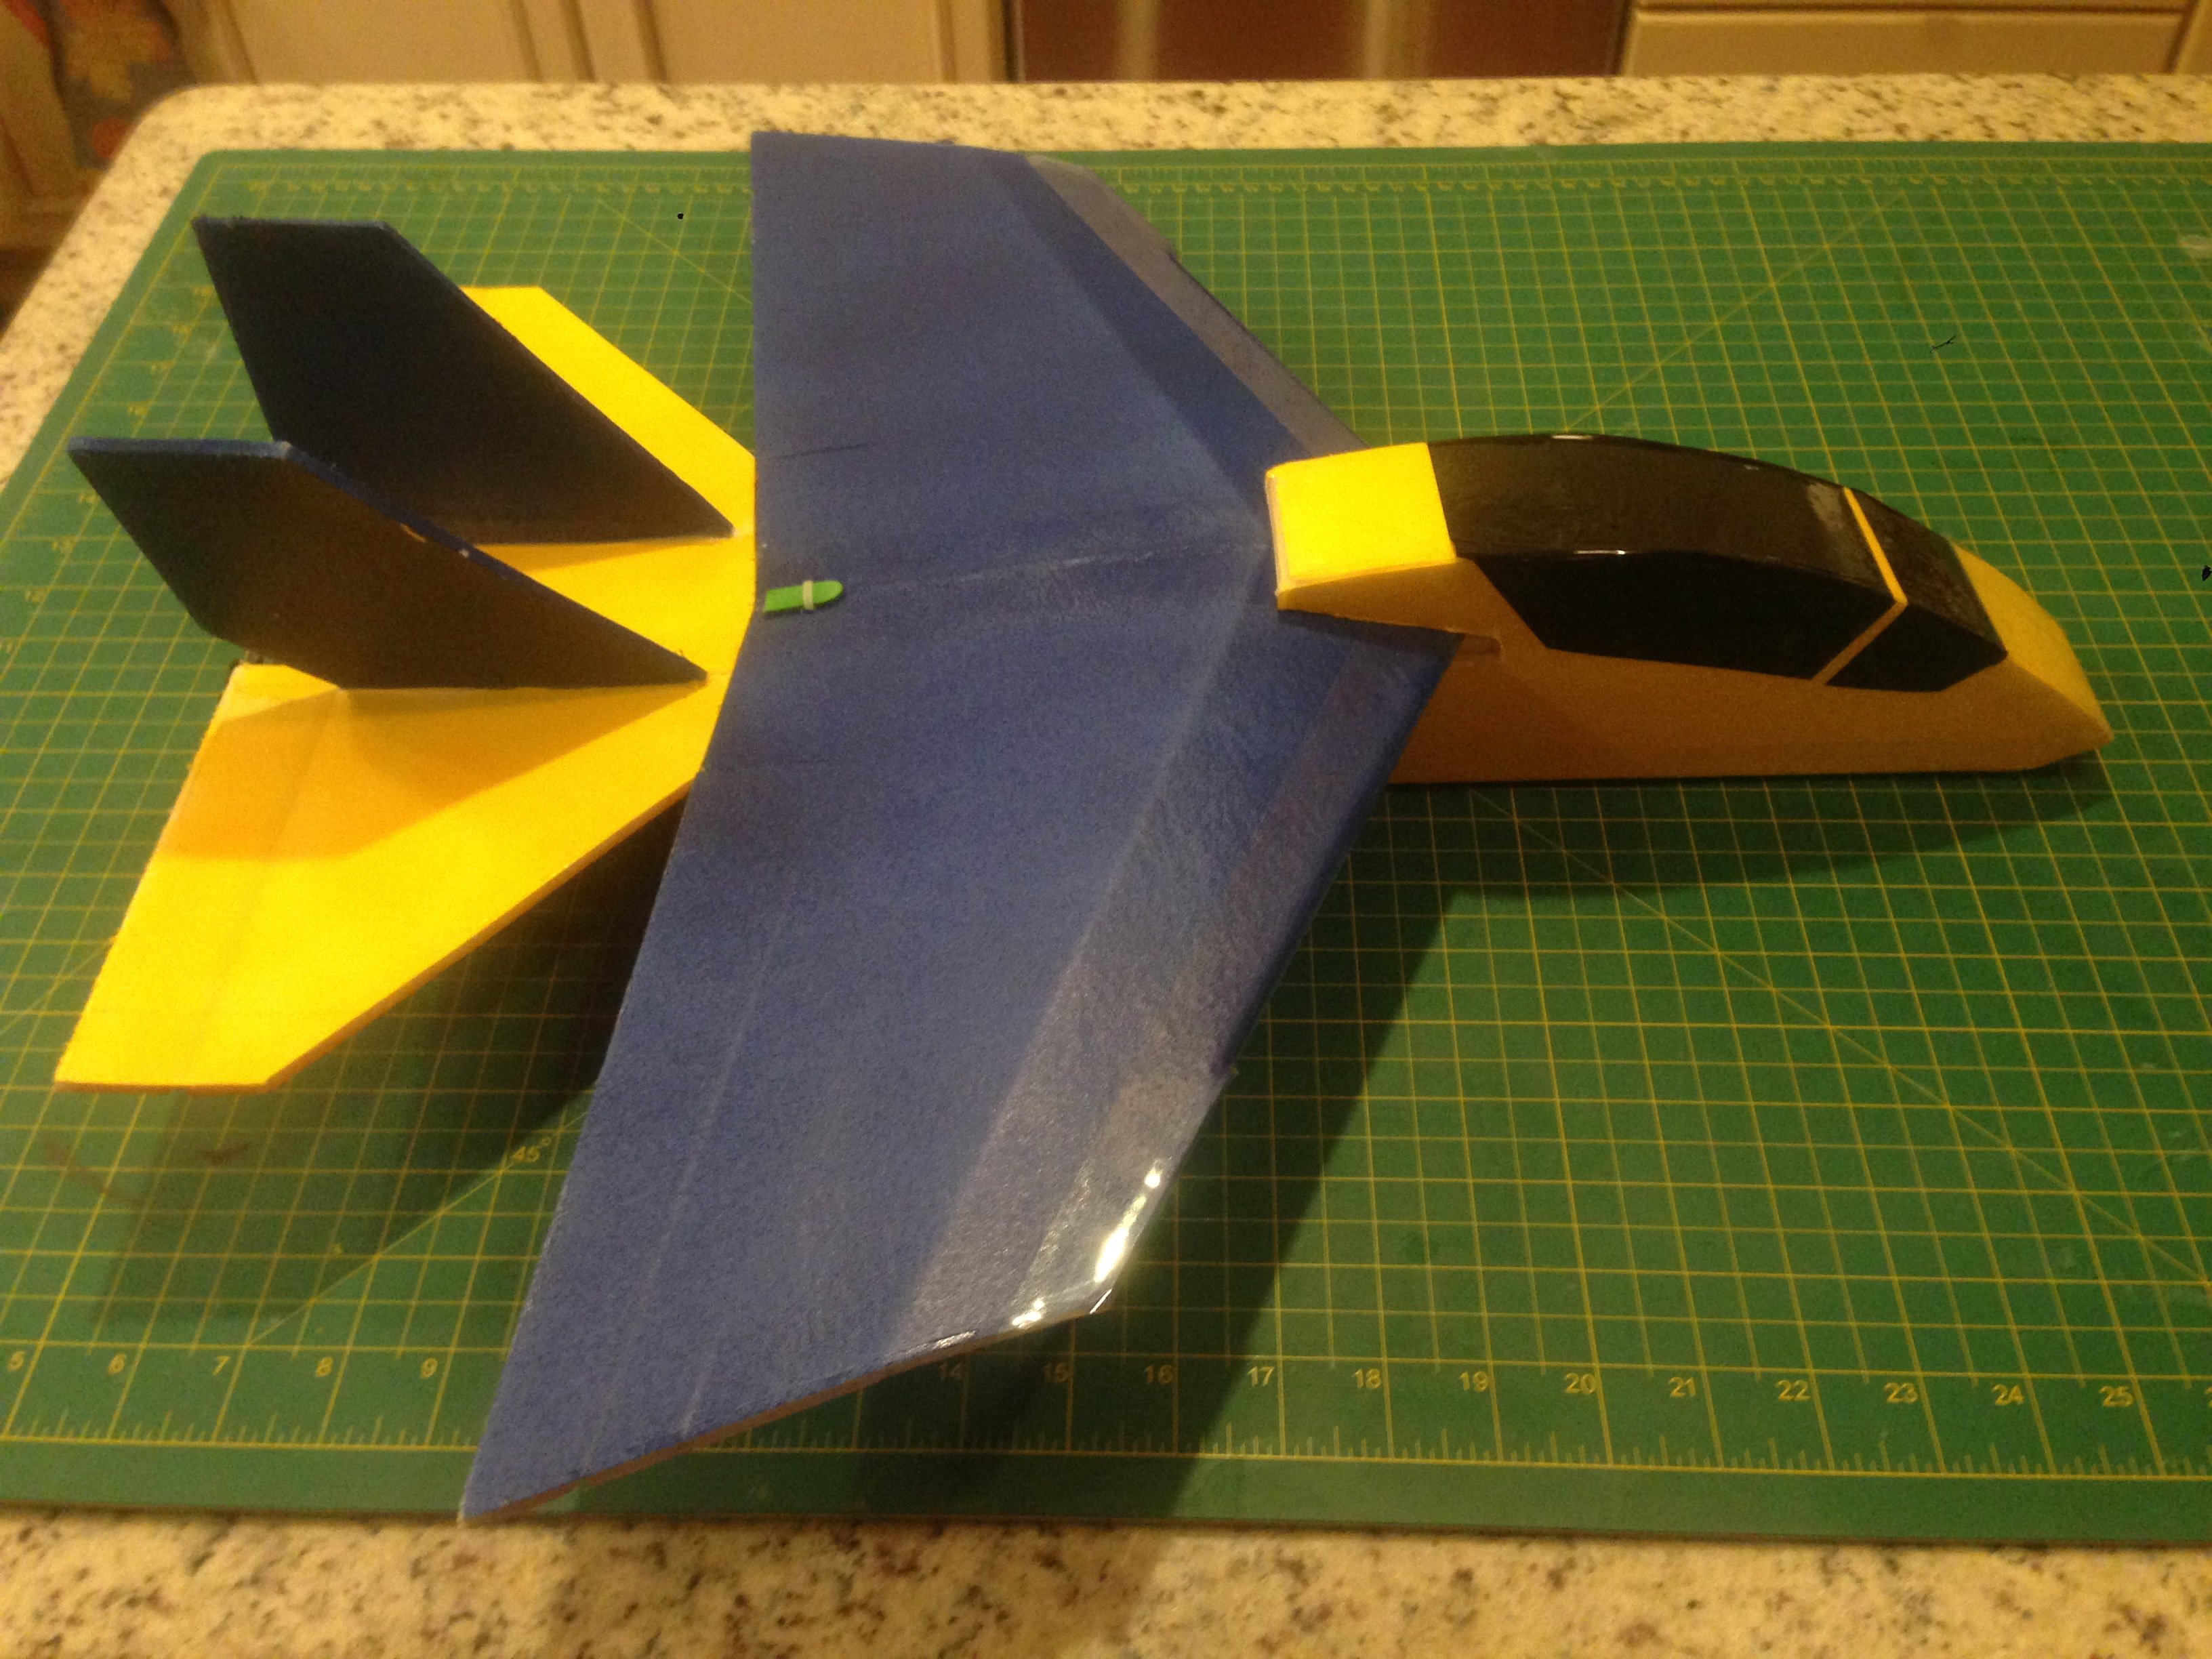
This project was a scale up of little foam gliders I got the kids at the drugstore. They are called Zrang and are just a really cool, well-flying little jet. I thought, what if I scaled it up 400%, used DT foam, and powered it with a Park 250? I just started cutting, folding and gluing, and along the way came up with some cool features.
Construction
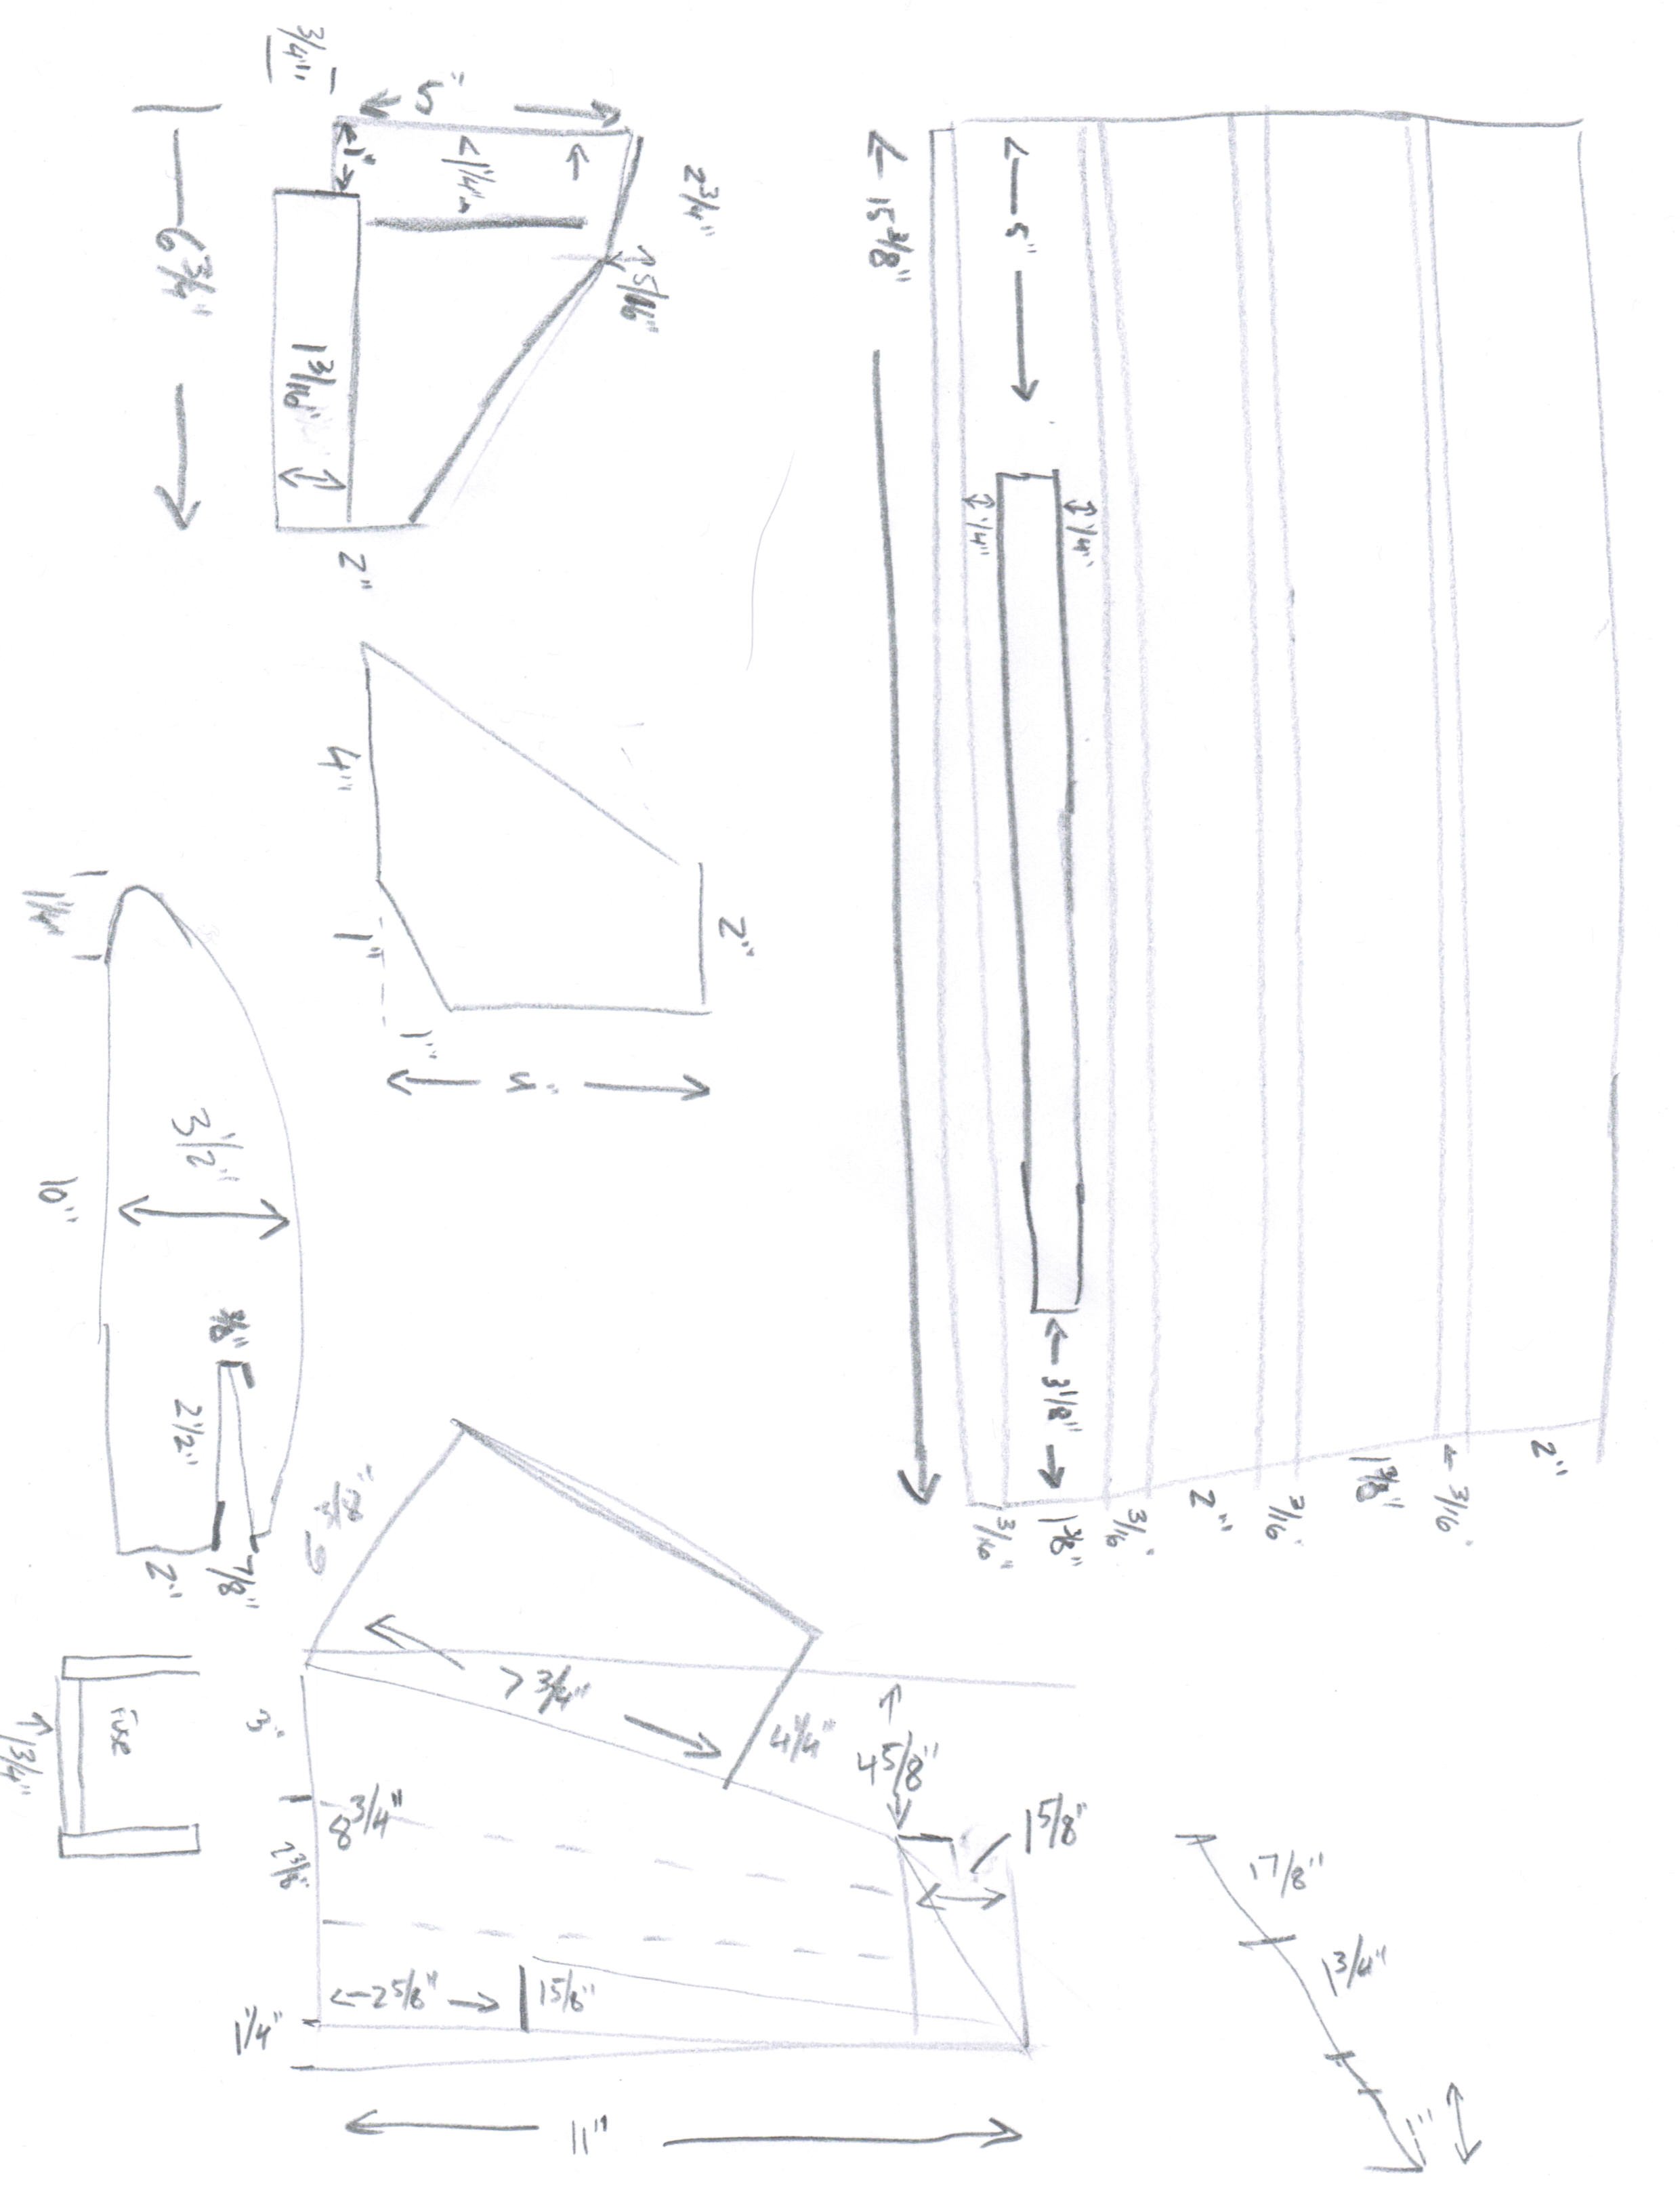
Of course, I forgot to take pictures during construction, but it was so simple, I'm not sure they are needed. Here is a really rough sketch of the dimensions, I'll try to move into CAD and make them printable in a pdf. Measurements are in inches, and probably only works for folks with some experience with FT models. Click to make them readable.
Wing:
I started with the wing:
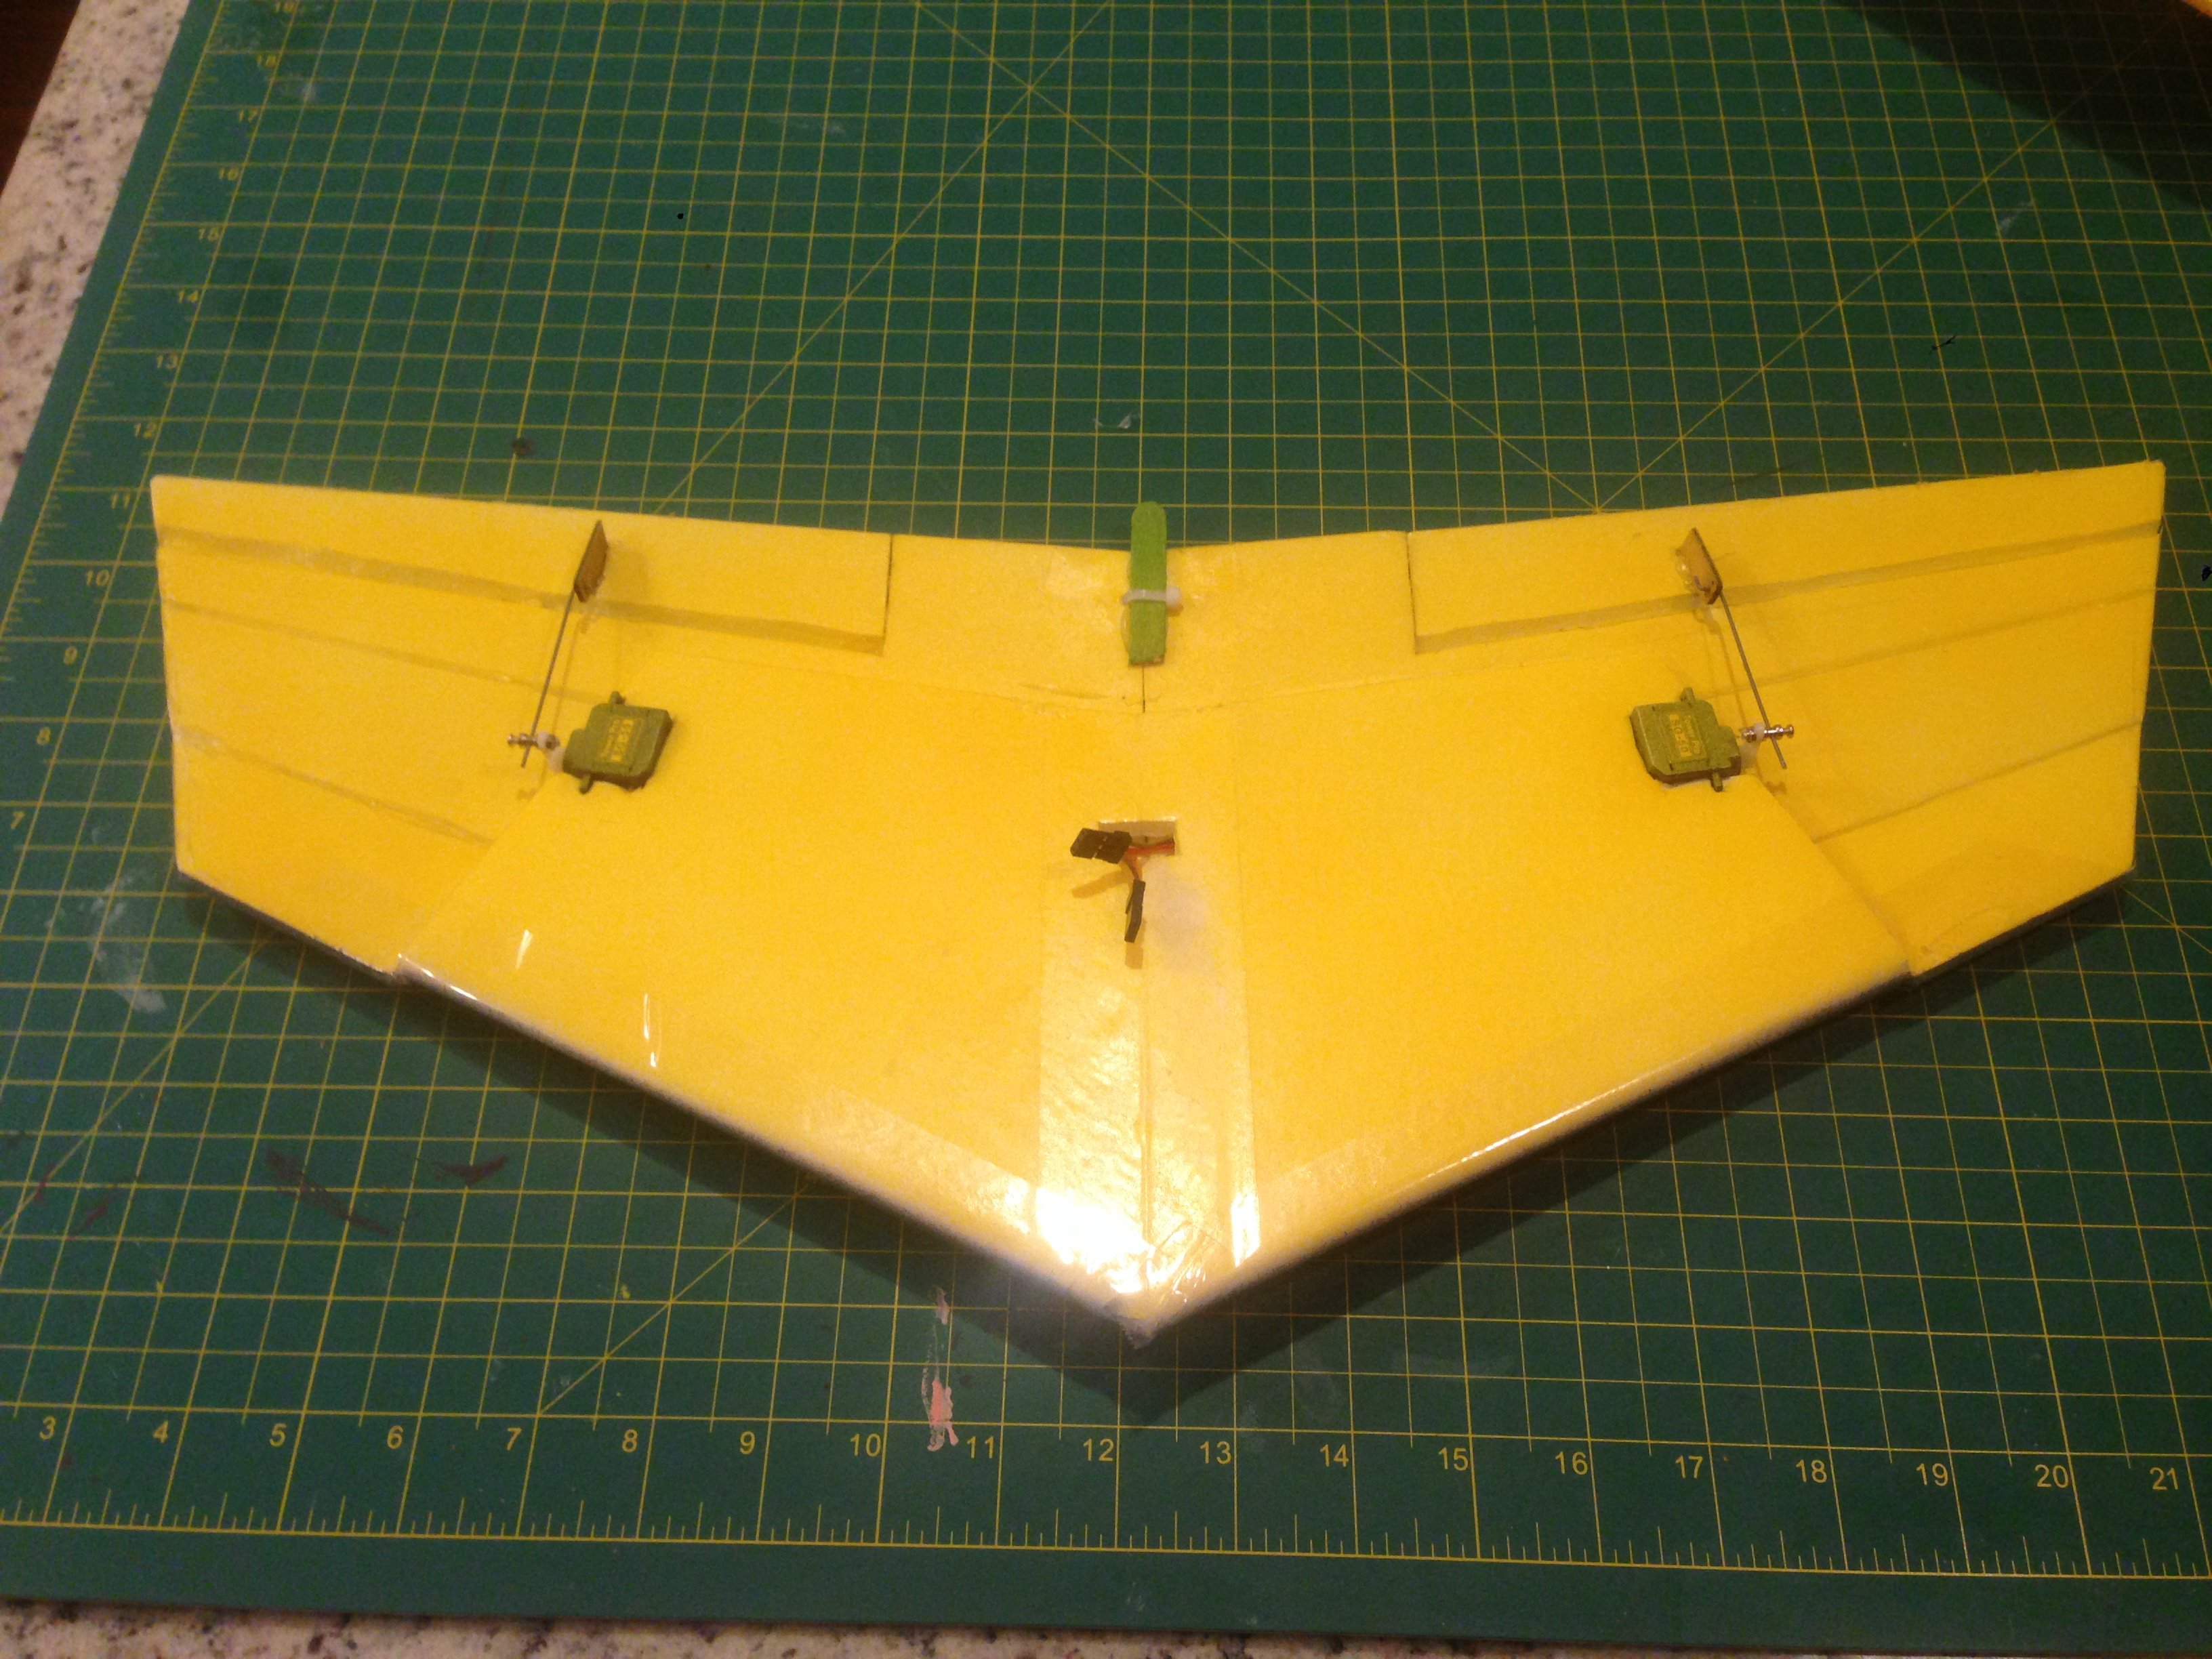
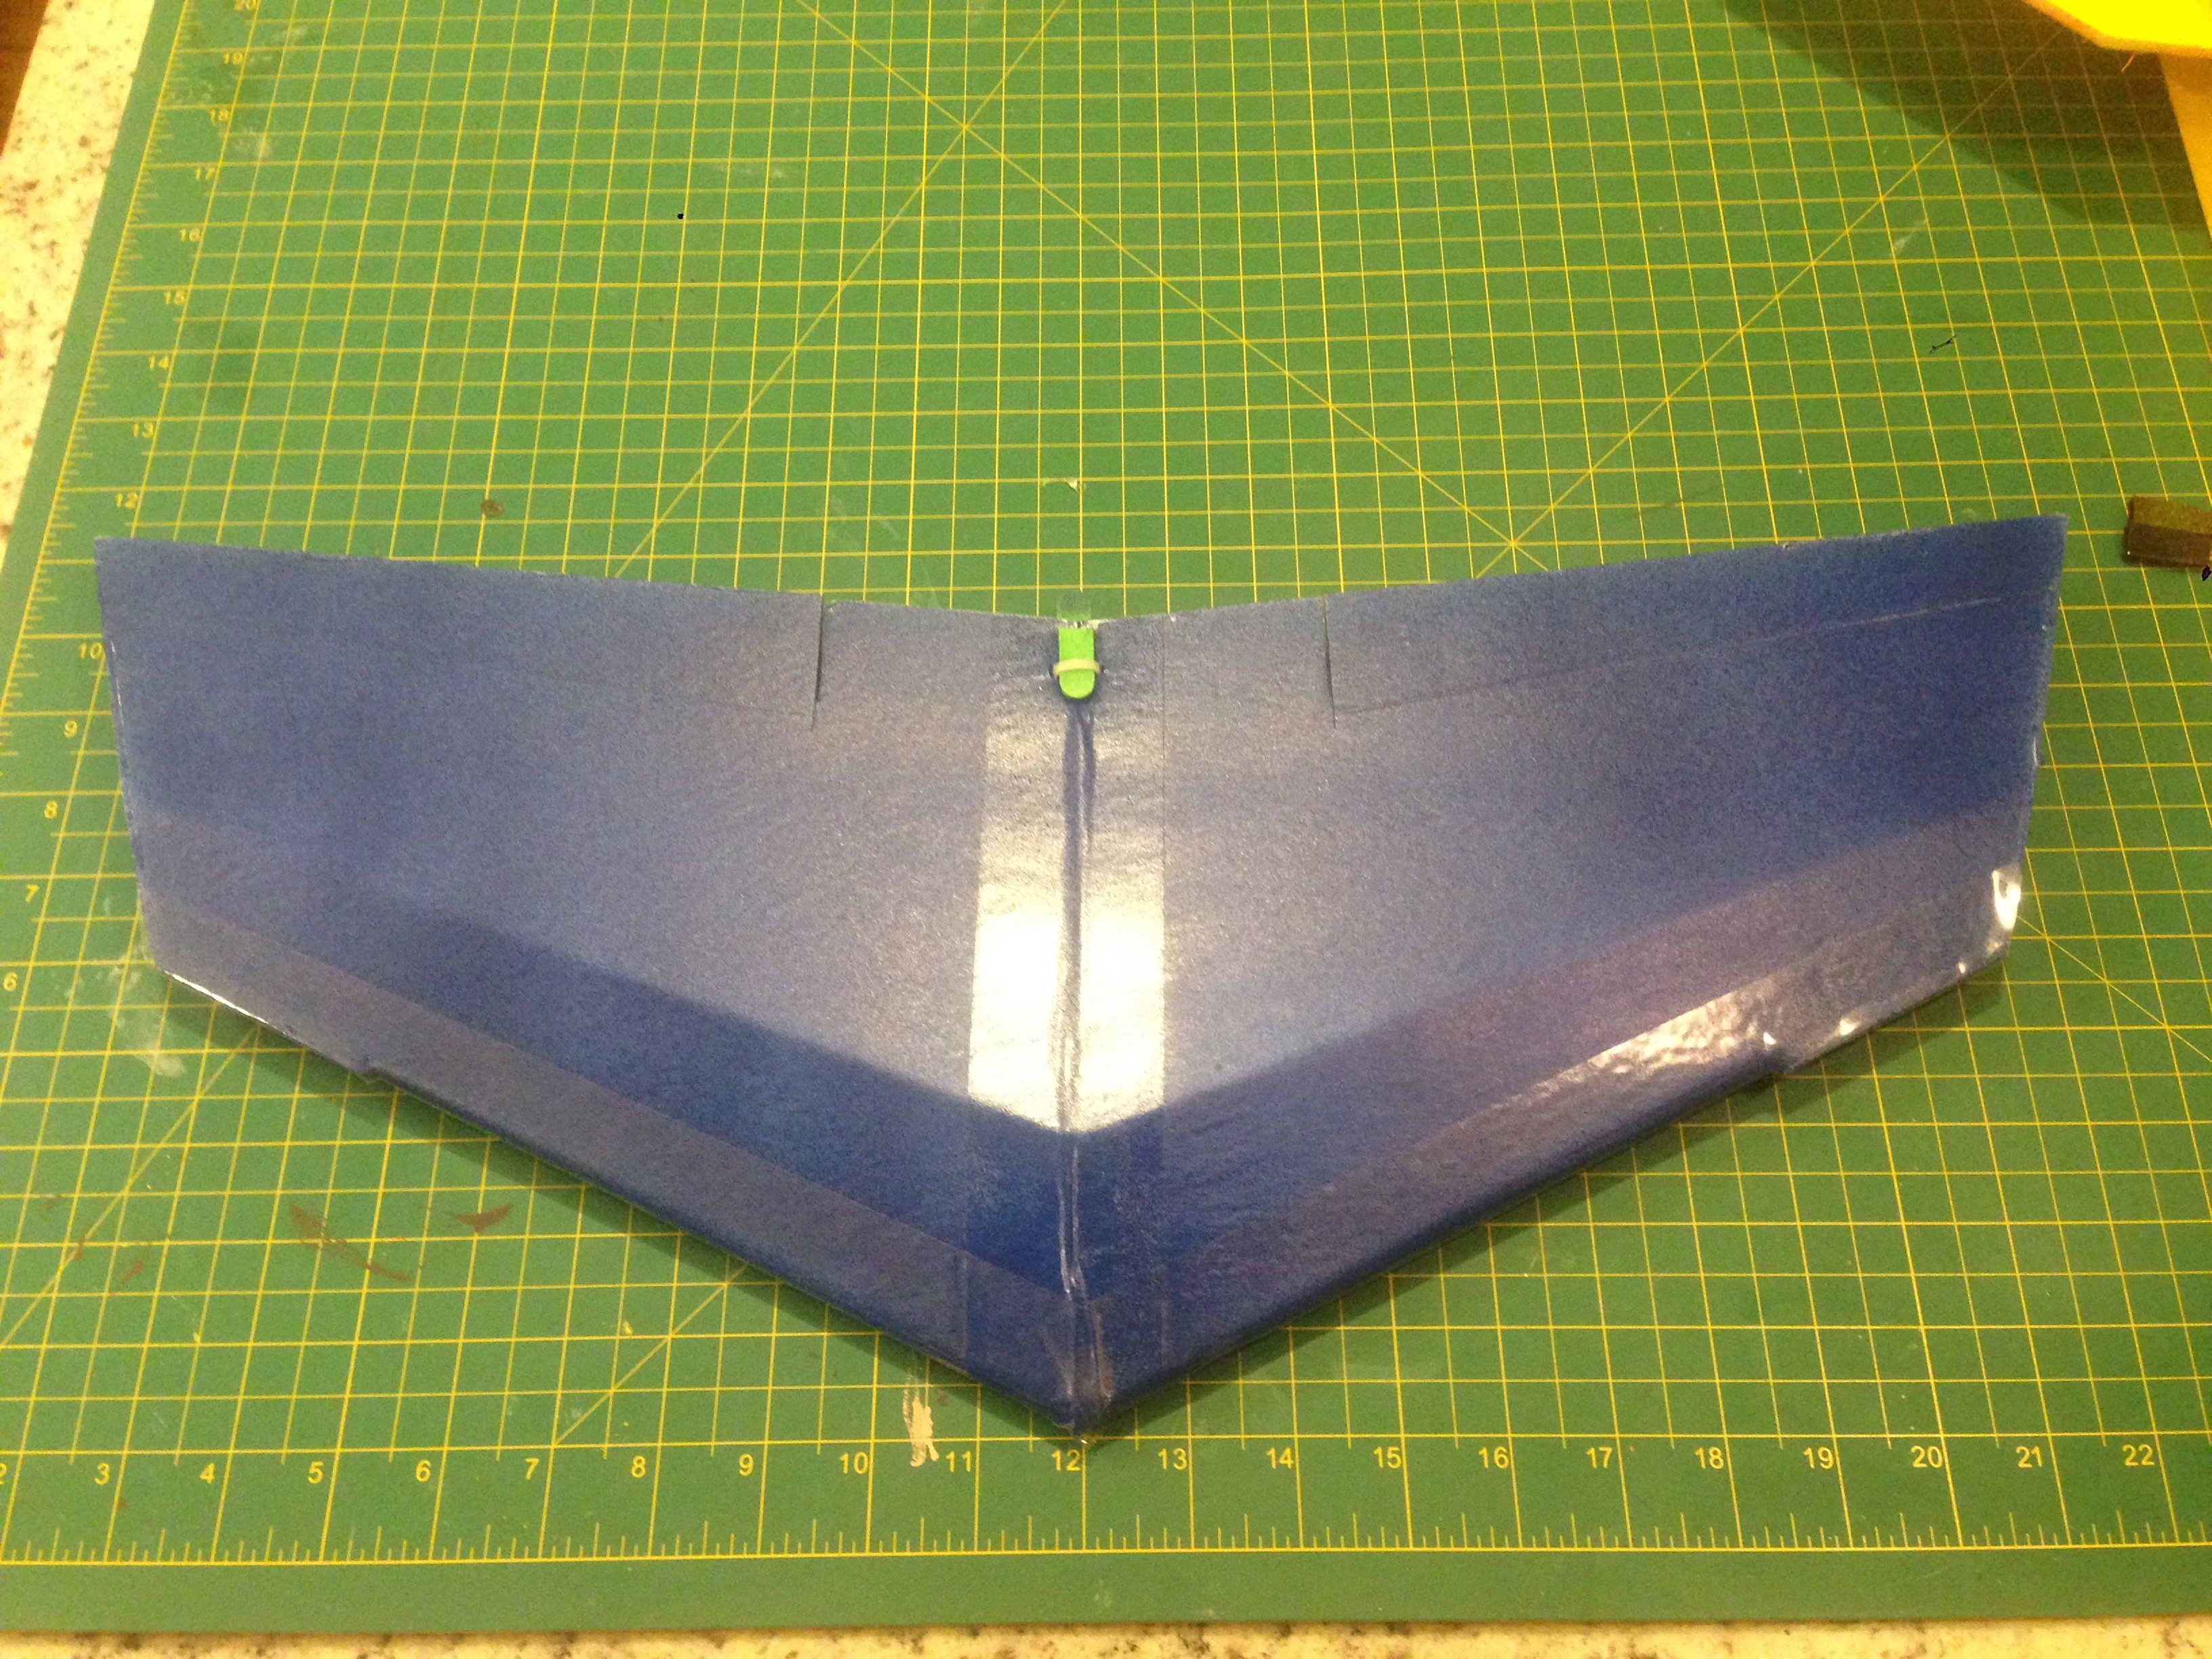
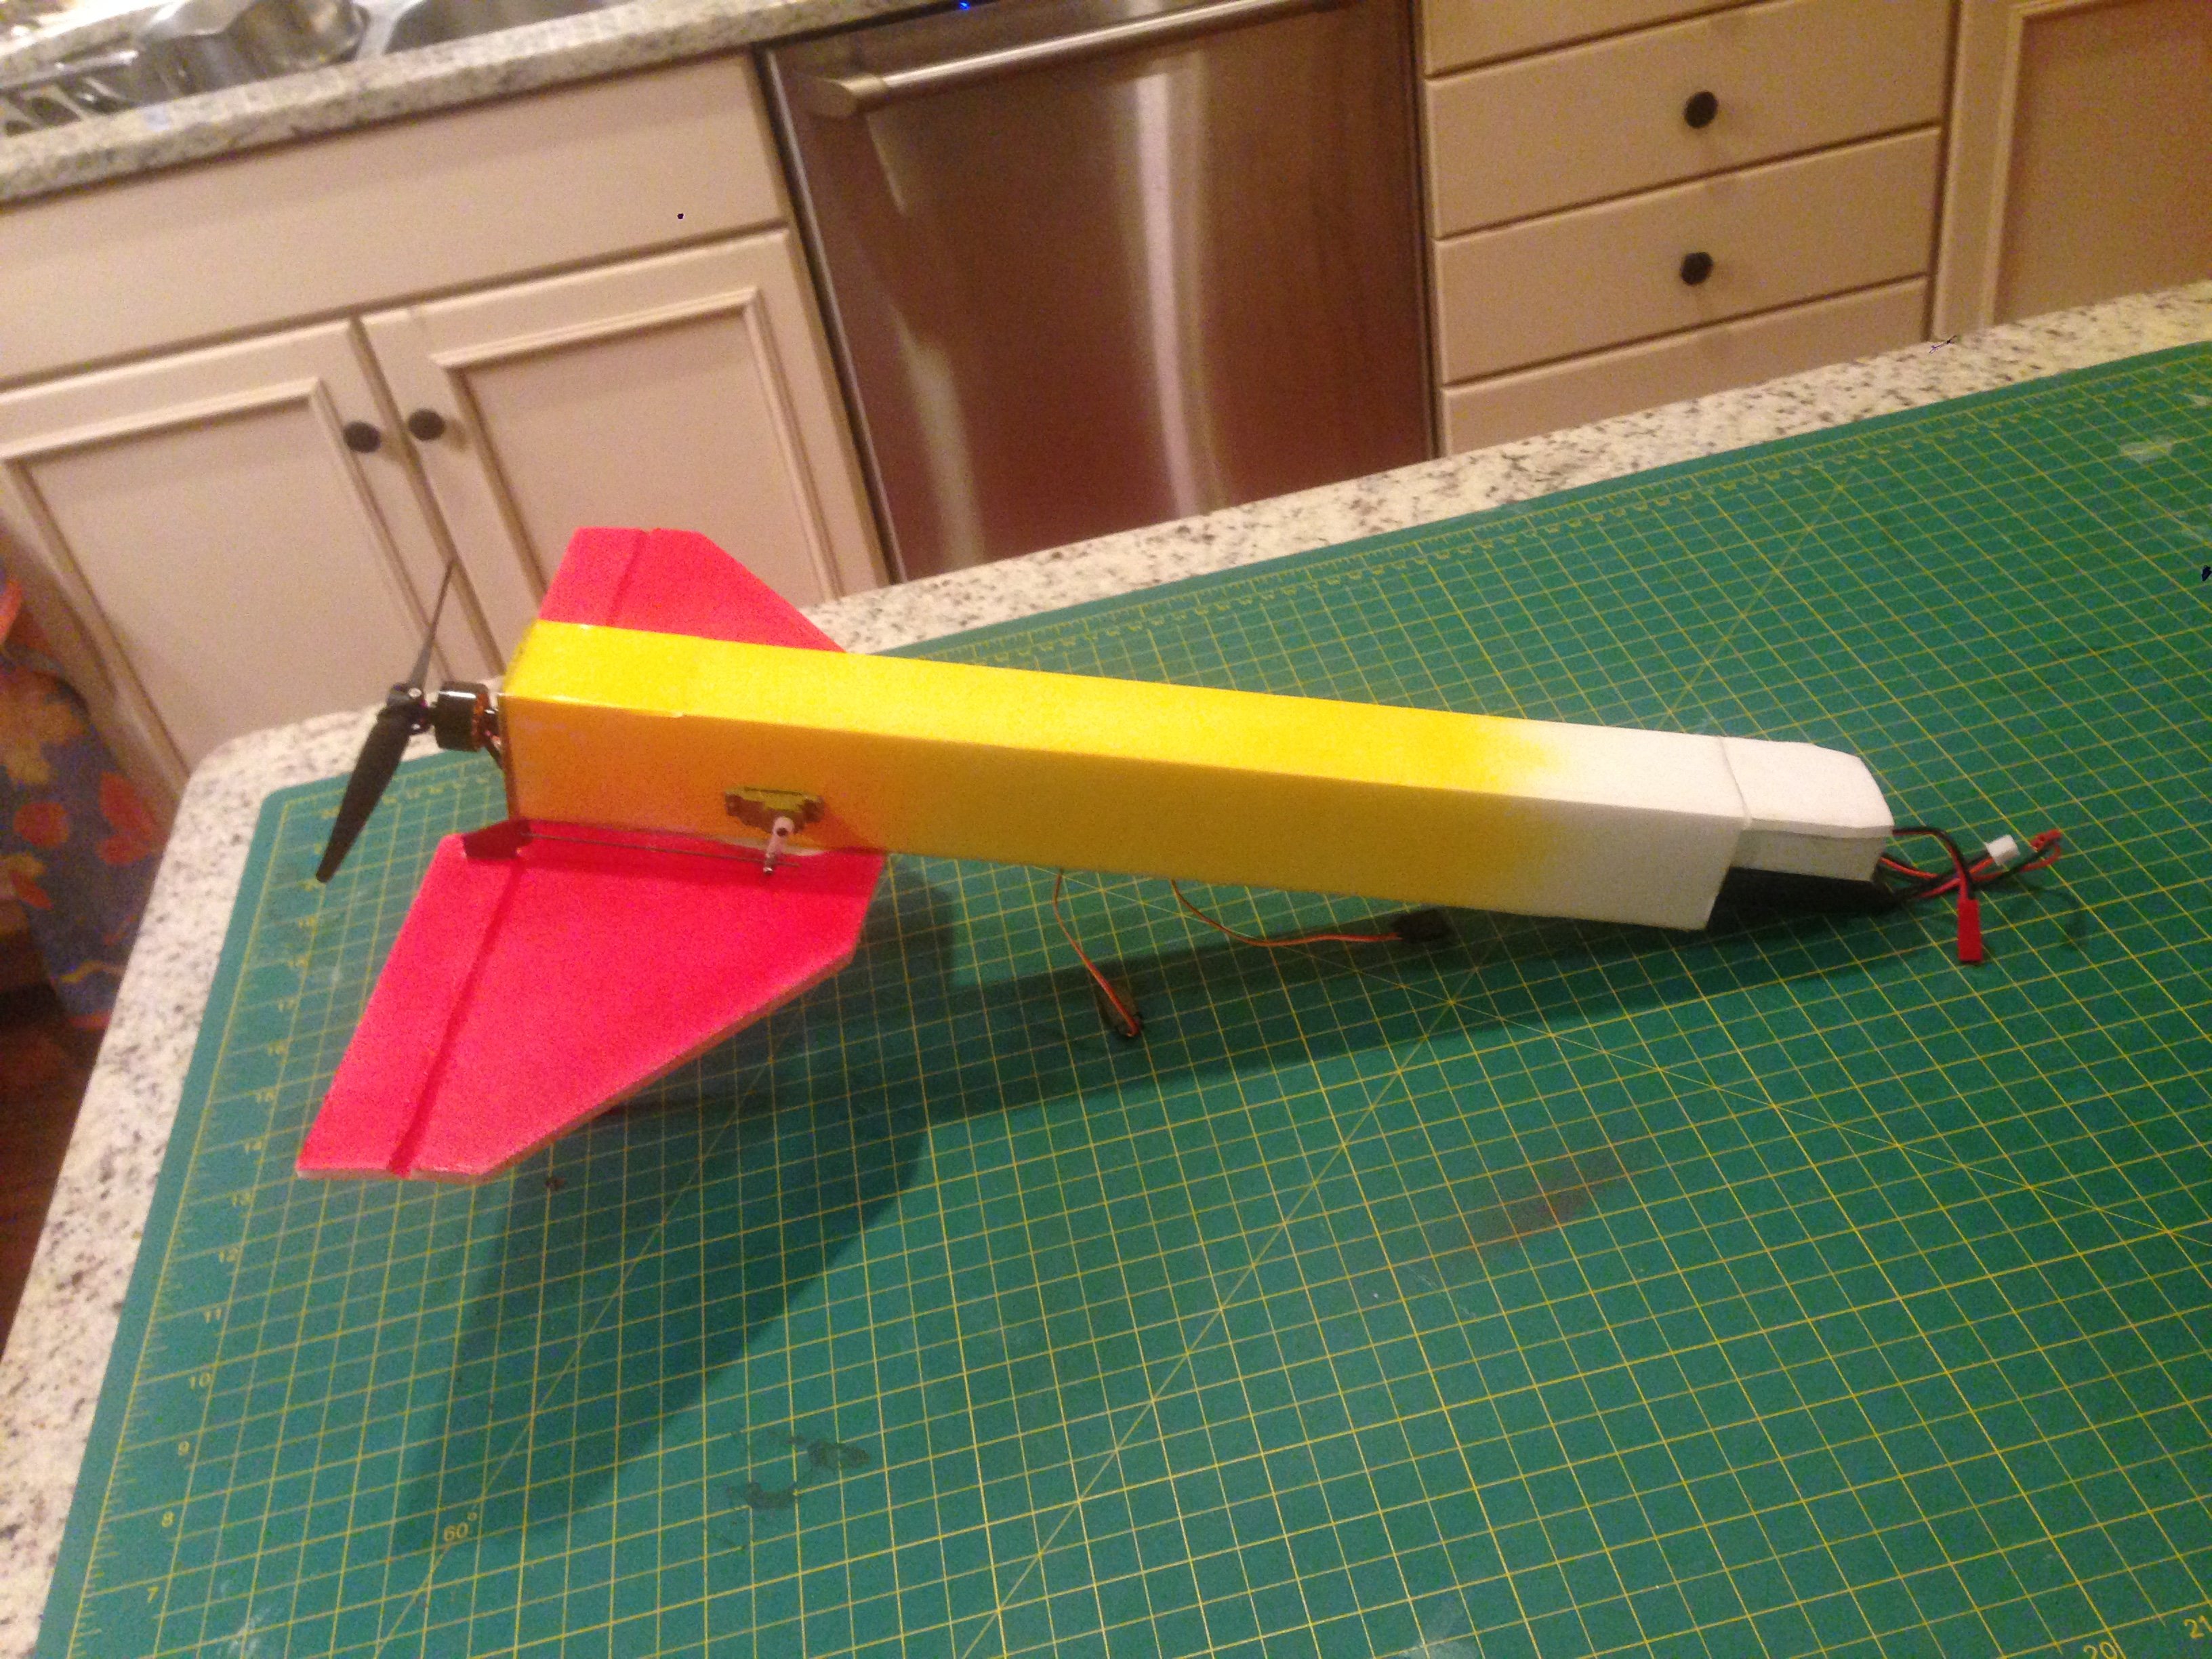
The wing is a basic flitetest style folder wing. Since it's swept, I cut two pieces, left and right. I taped and glued the bottom panels, scored the top panels and beveled the leading edge where it folds. There is a tapered "spar" consisting of a larger and small triangle so that it is 2 layers thick at the root, tapering to one layer at the end of the bottom panel. I then scored the top panel, folded and glued it back in flitetest fashion. I then cut and tapered the ailerons and installed servos. Servo leads were fed along the spar to the access hole in the center section. They are just long enough.
Fuselage & Tailfeathers


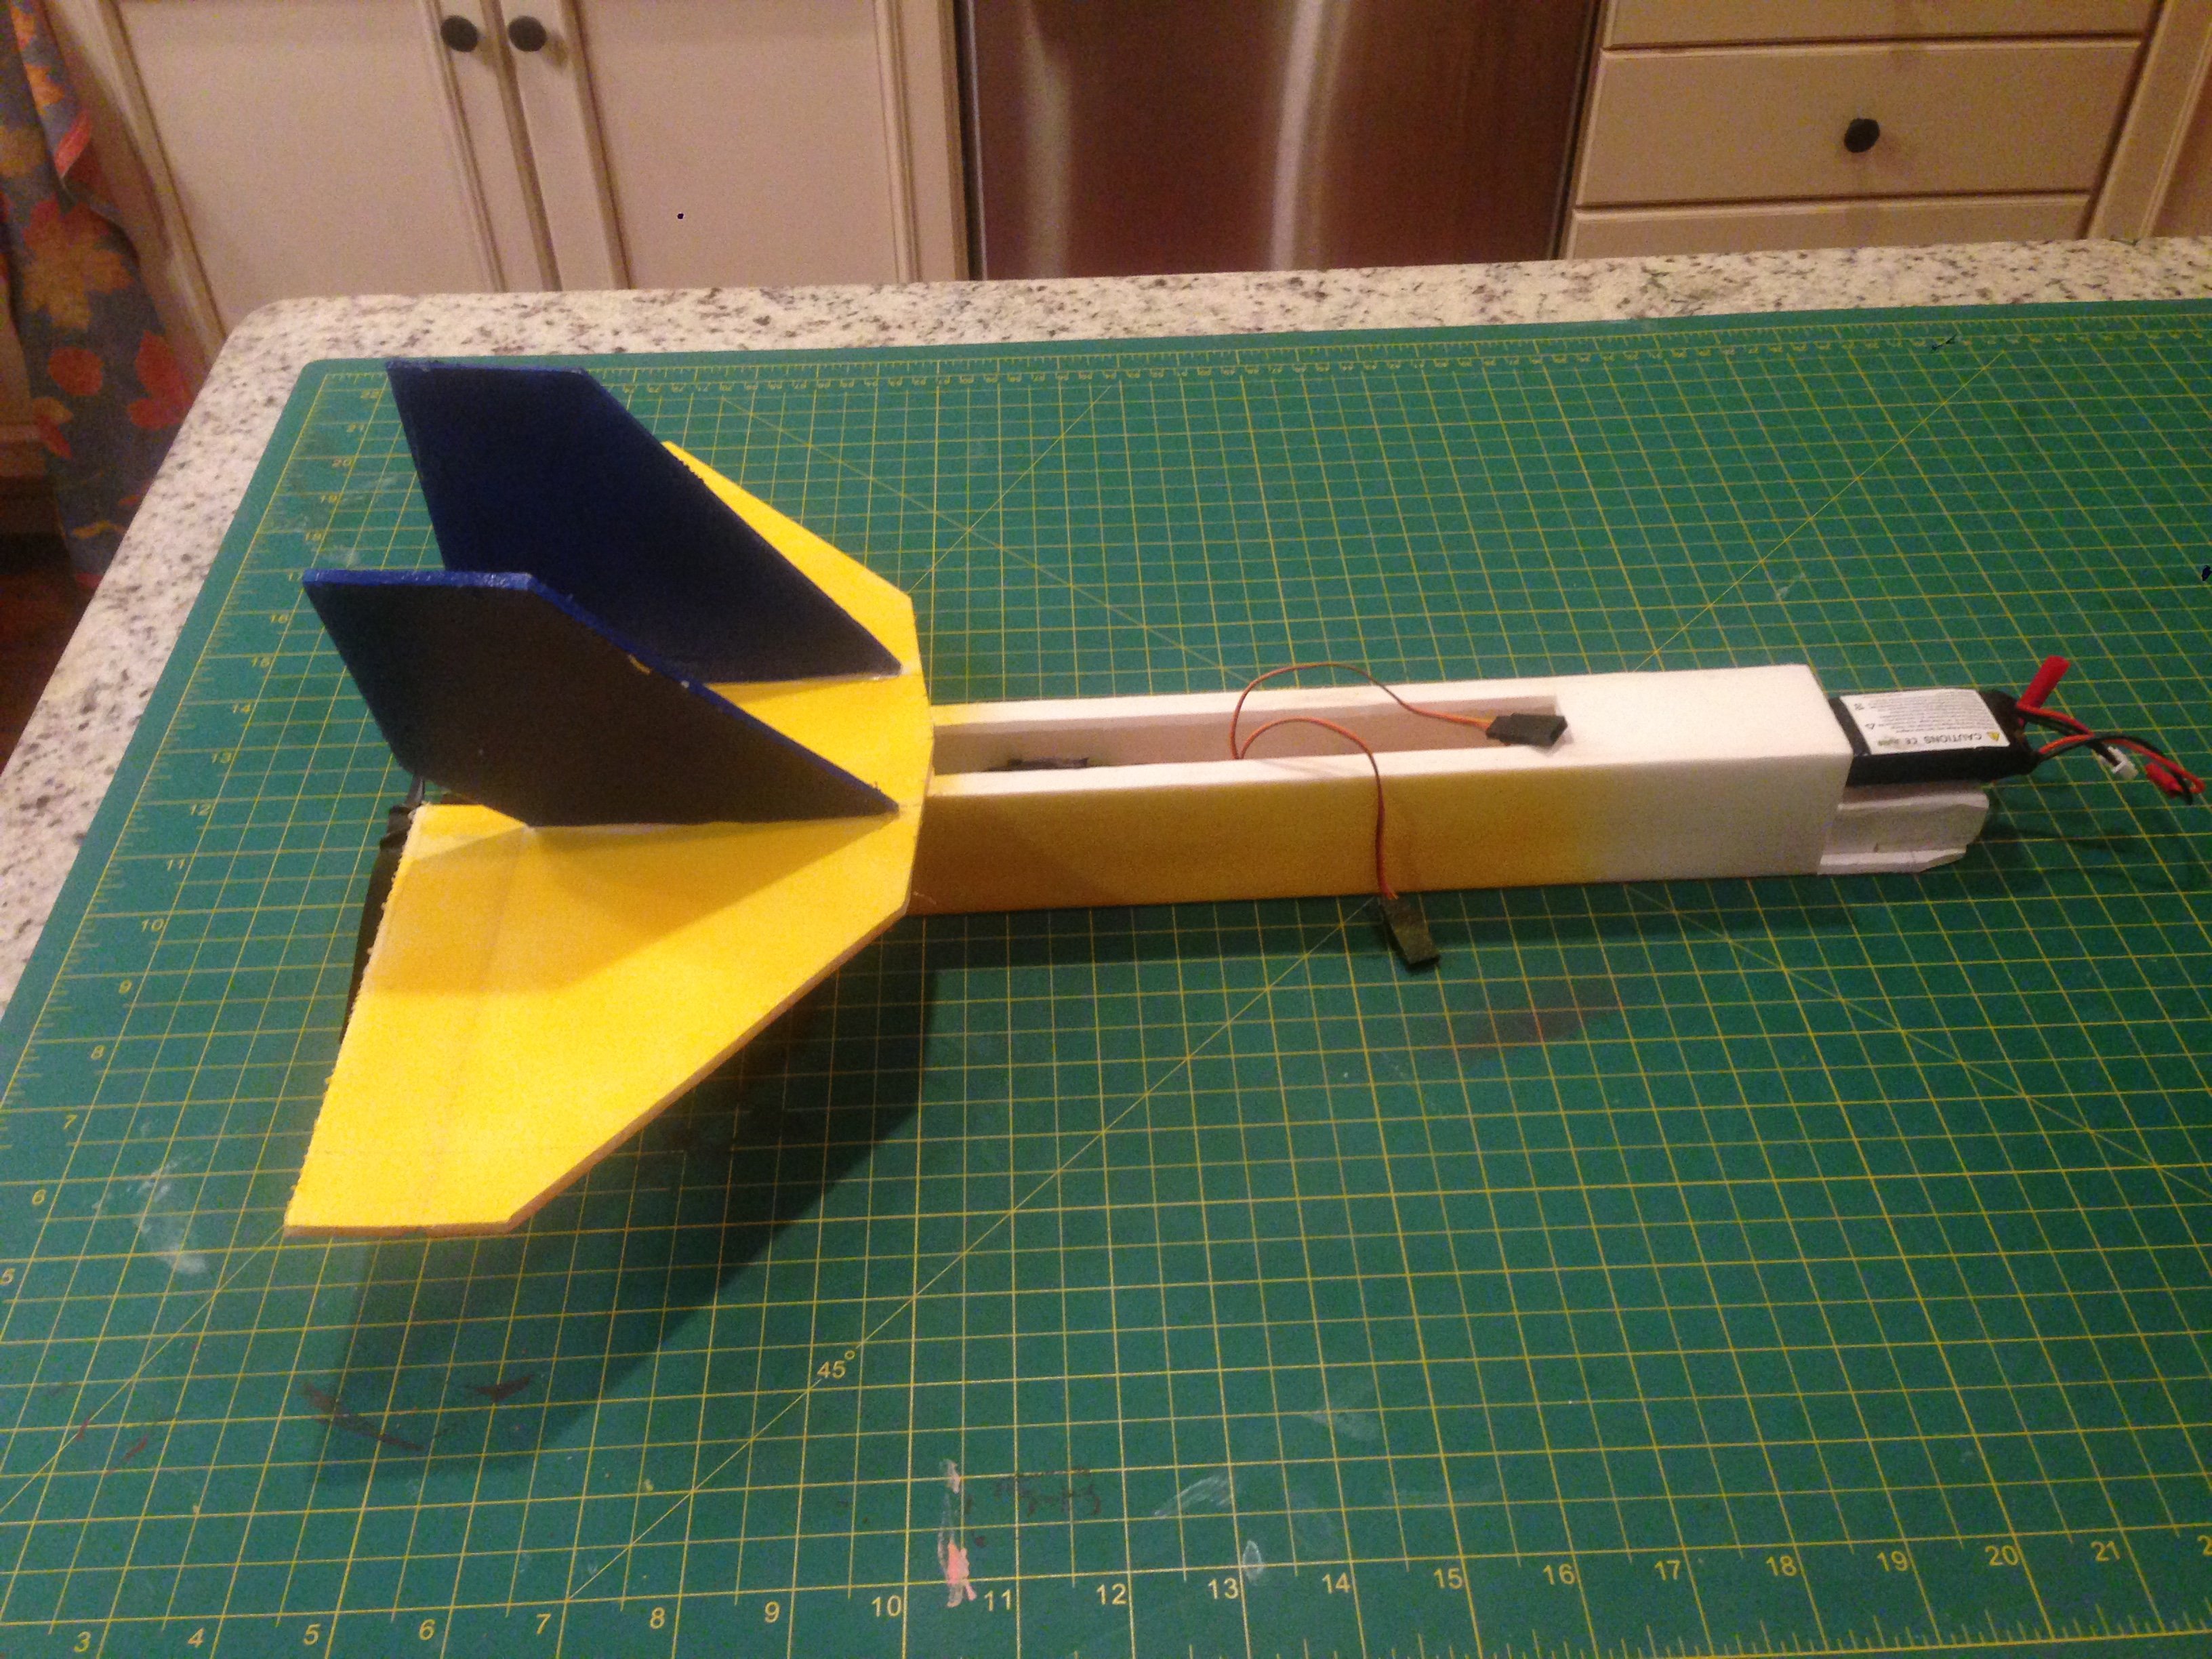
Next I built the fuselage which is just a basic rectangle tube to fit a standard FT motor mount. I folded the fuselage (B folds) and I glued and taped the mount on the back. Next I cut the horizontal stab, beveled the elevators (FT style glue-hinge) and then glued it on to the fuselage. Following that, I glued on the two vertical stabs at about 15 degrees from vertical. The motor was then screwed on and the servos slid and glued in place. I use one servo for each elevator so they can be tailerons. This is import so that I have roll control because the wing has flaperons and I wanted positive control with the flaps lowered.
Nose & Wing Hold Down

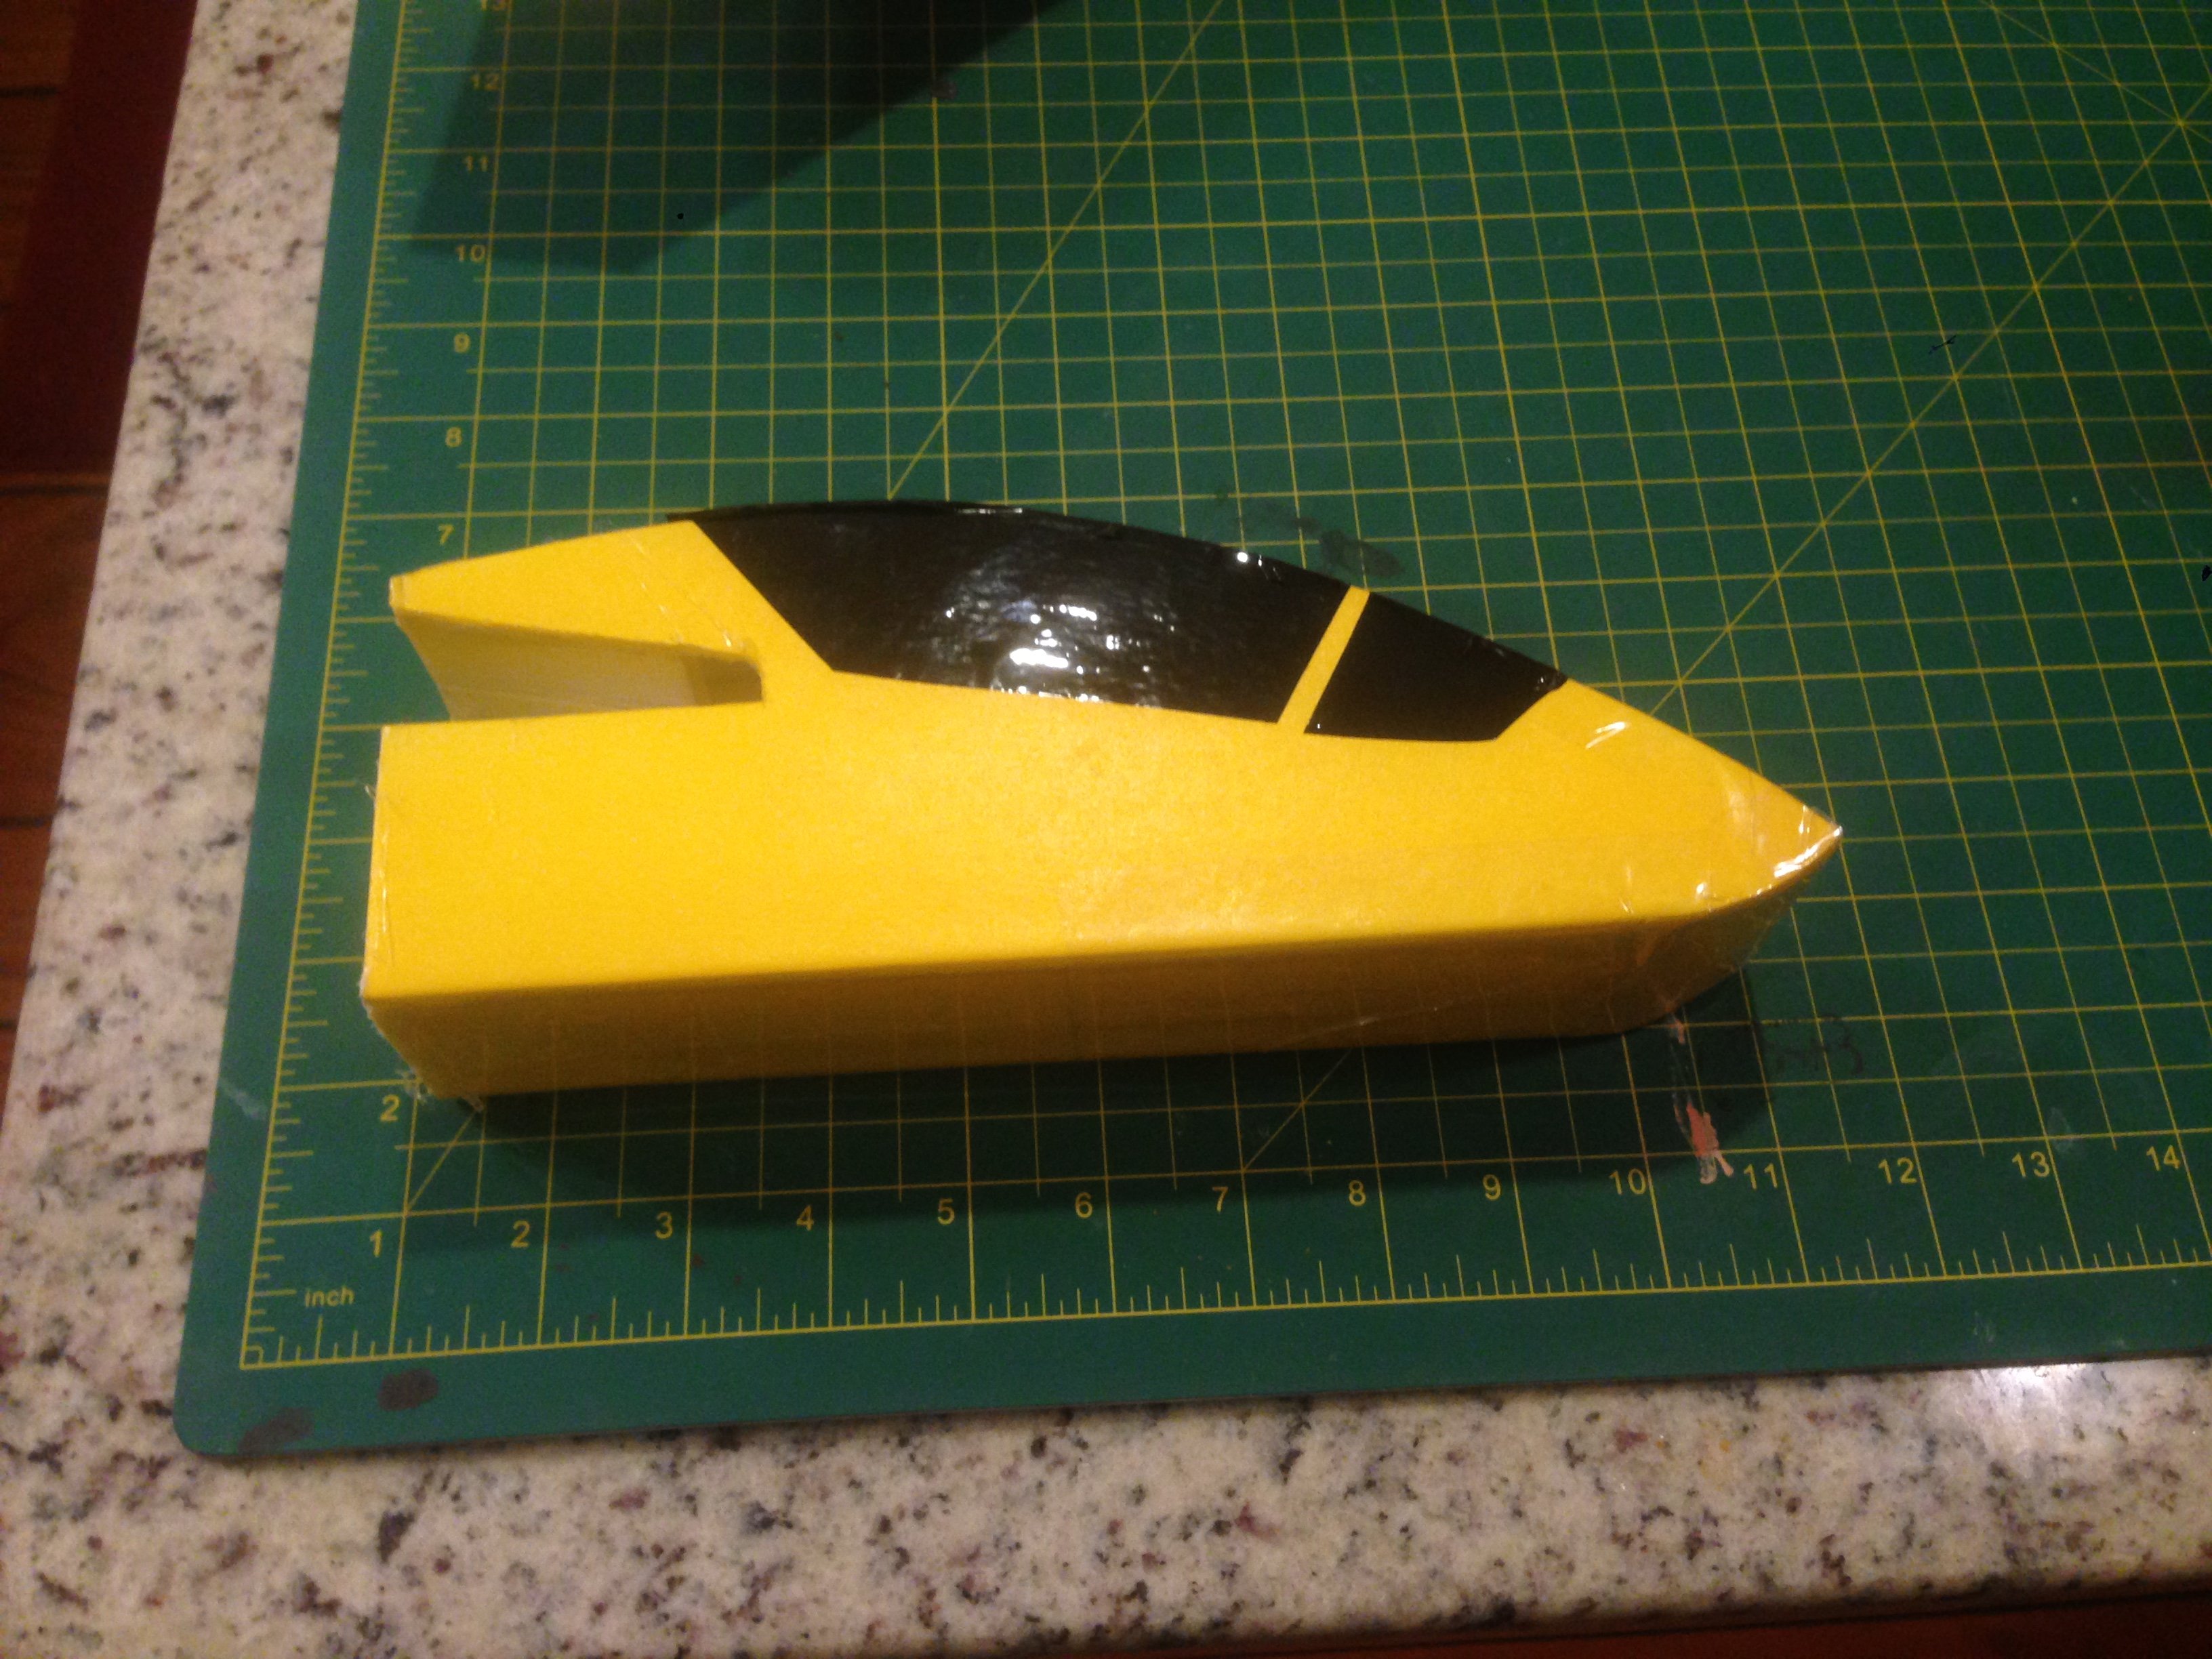
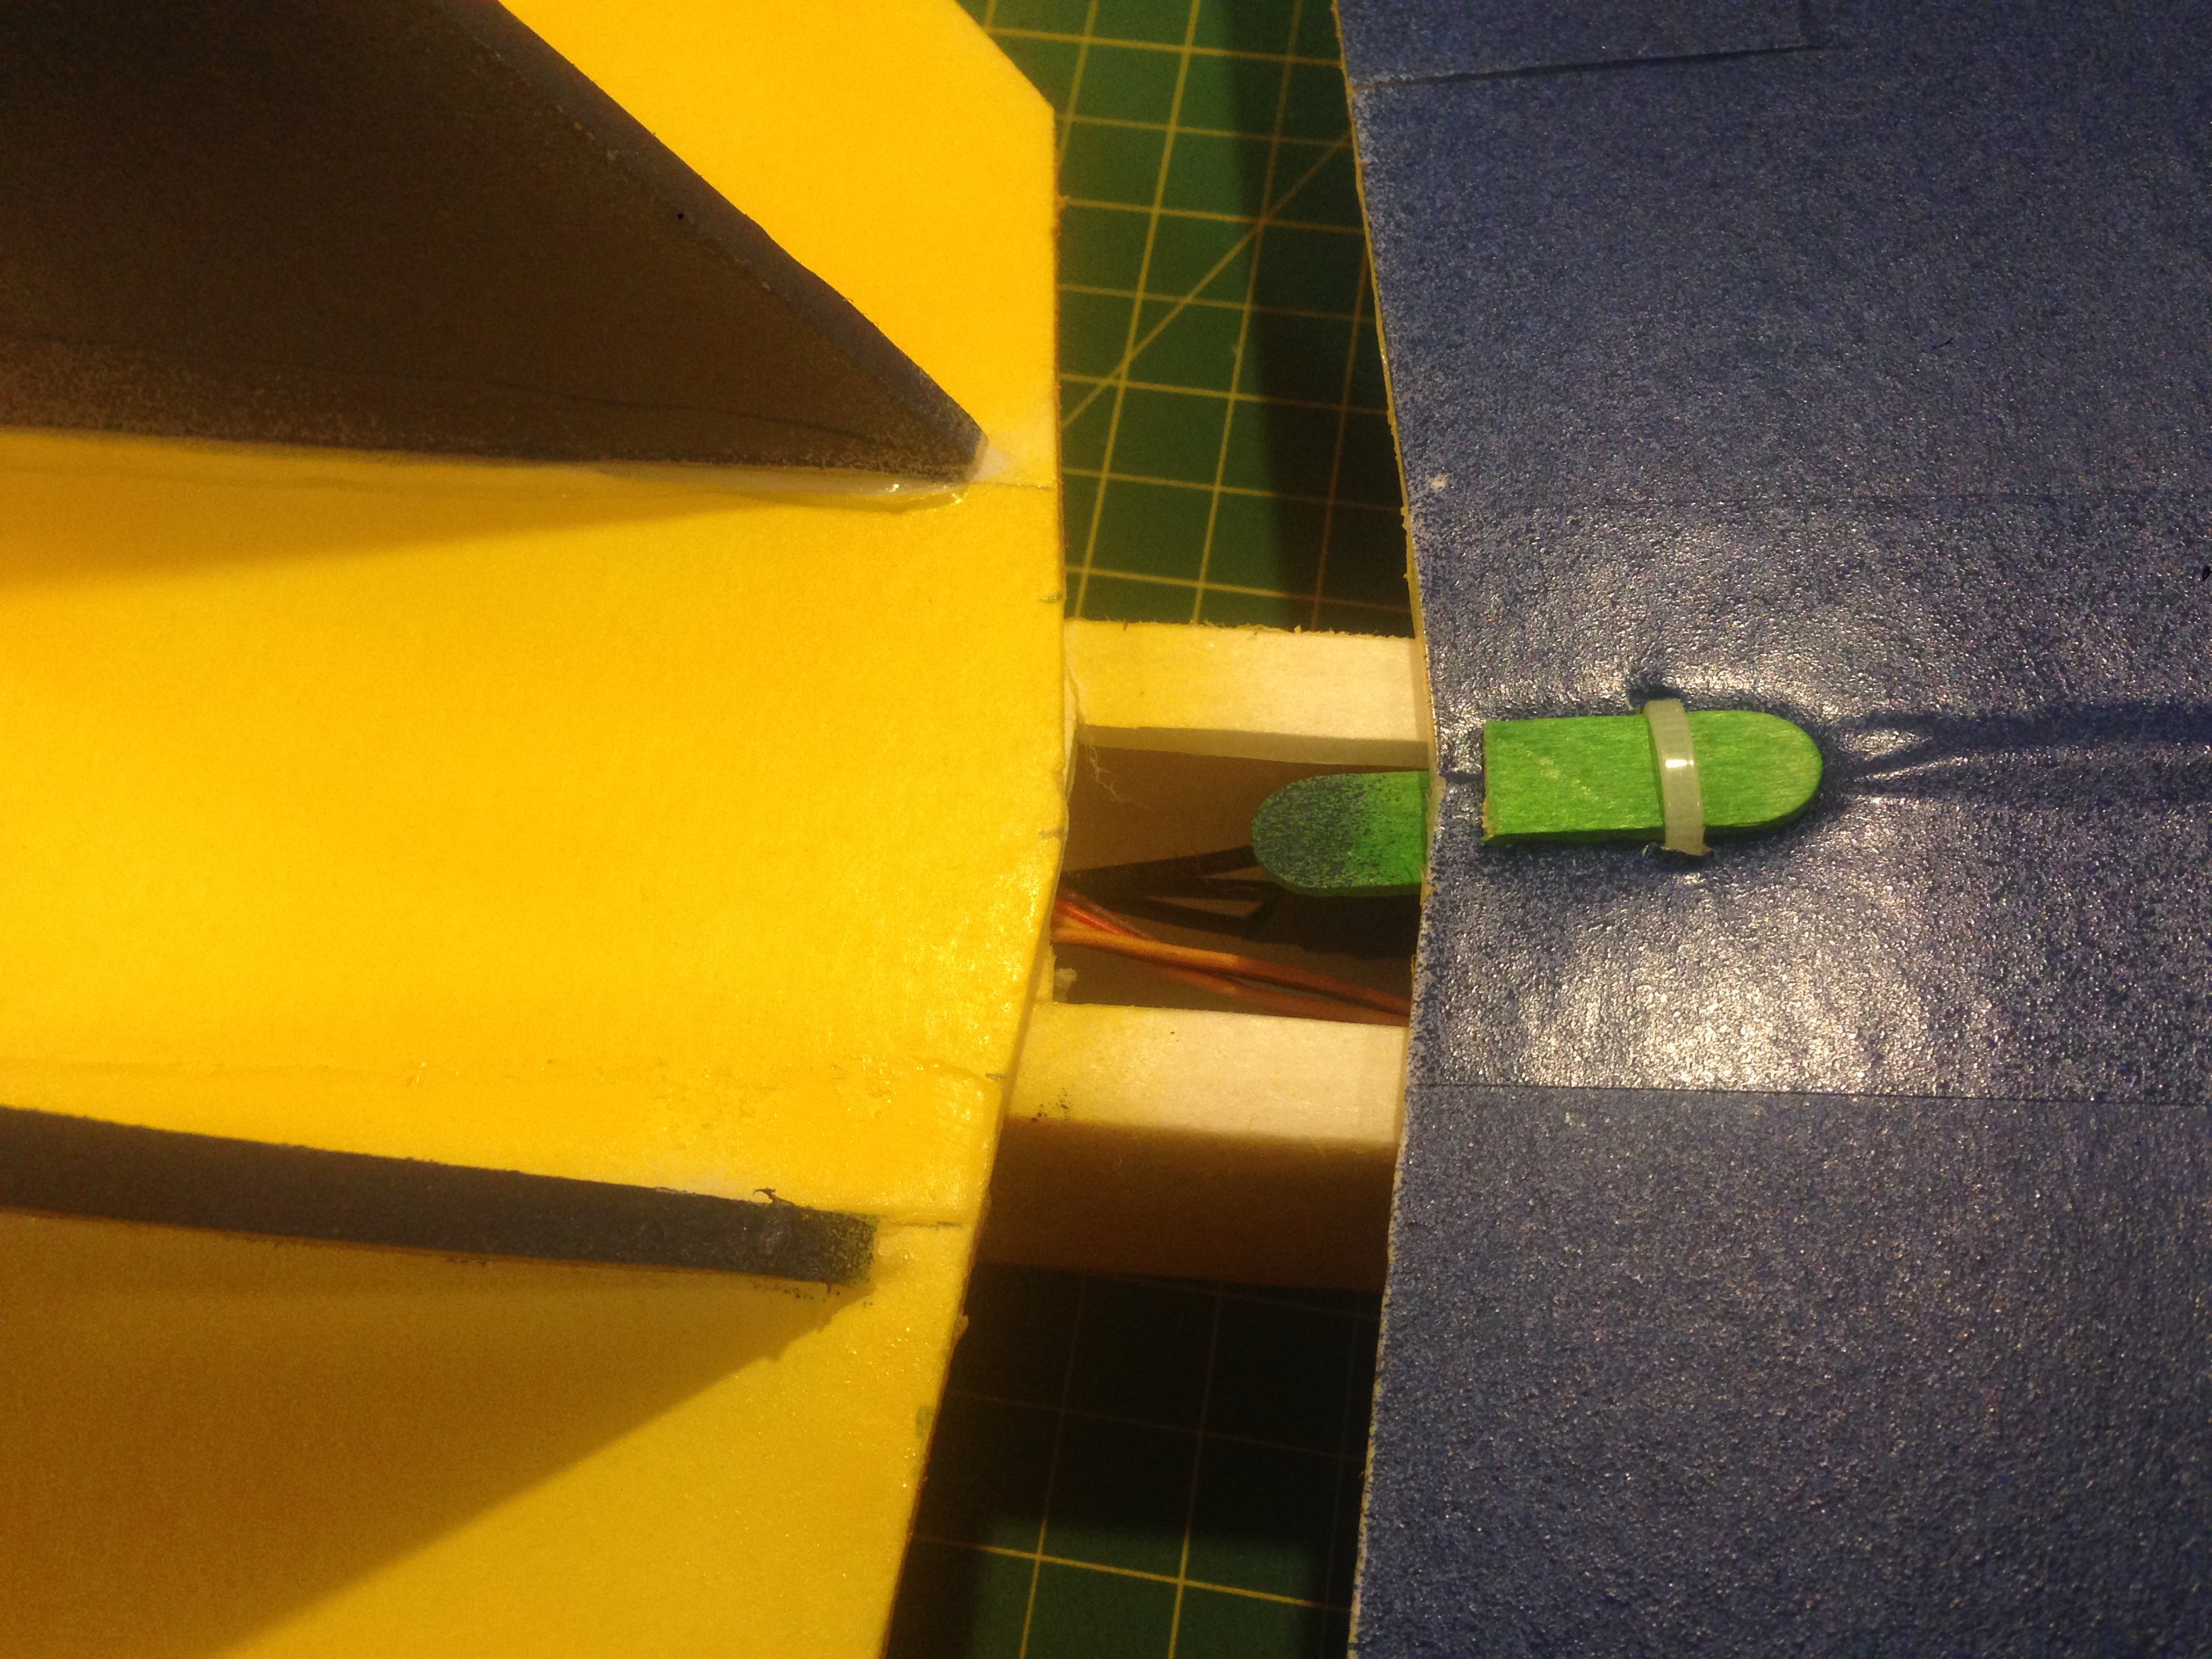
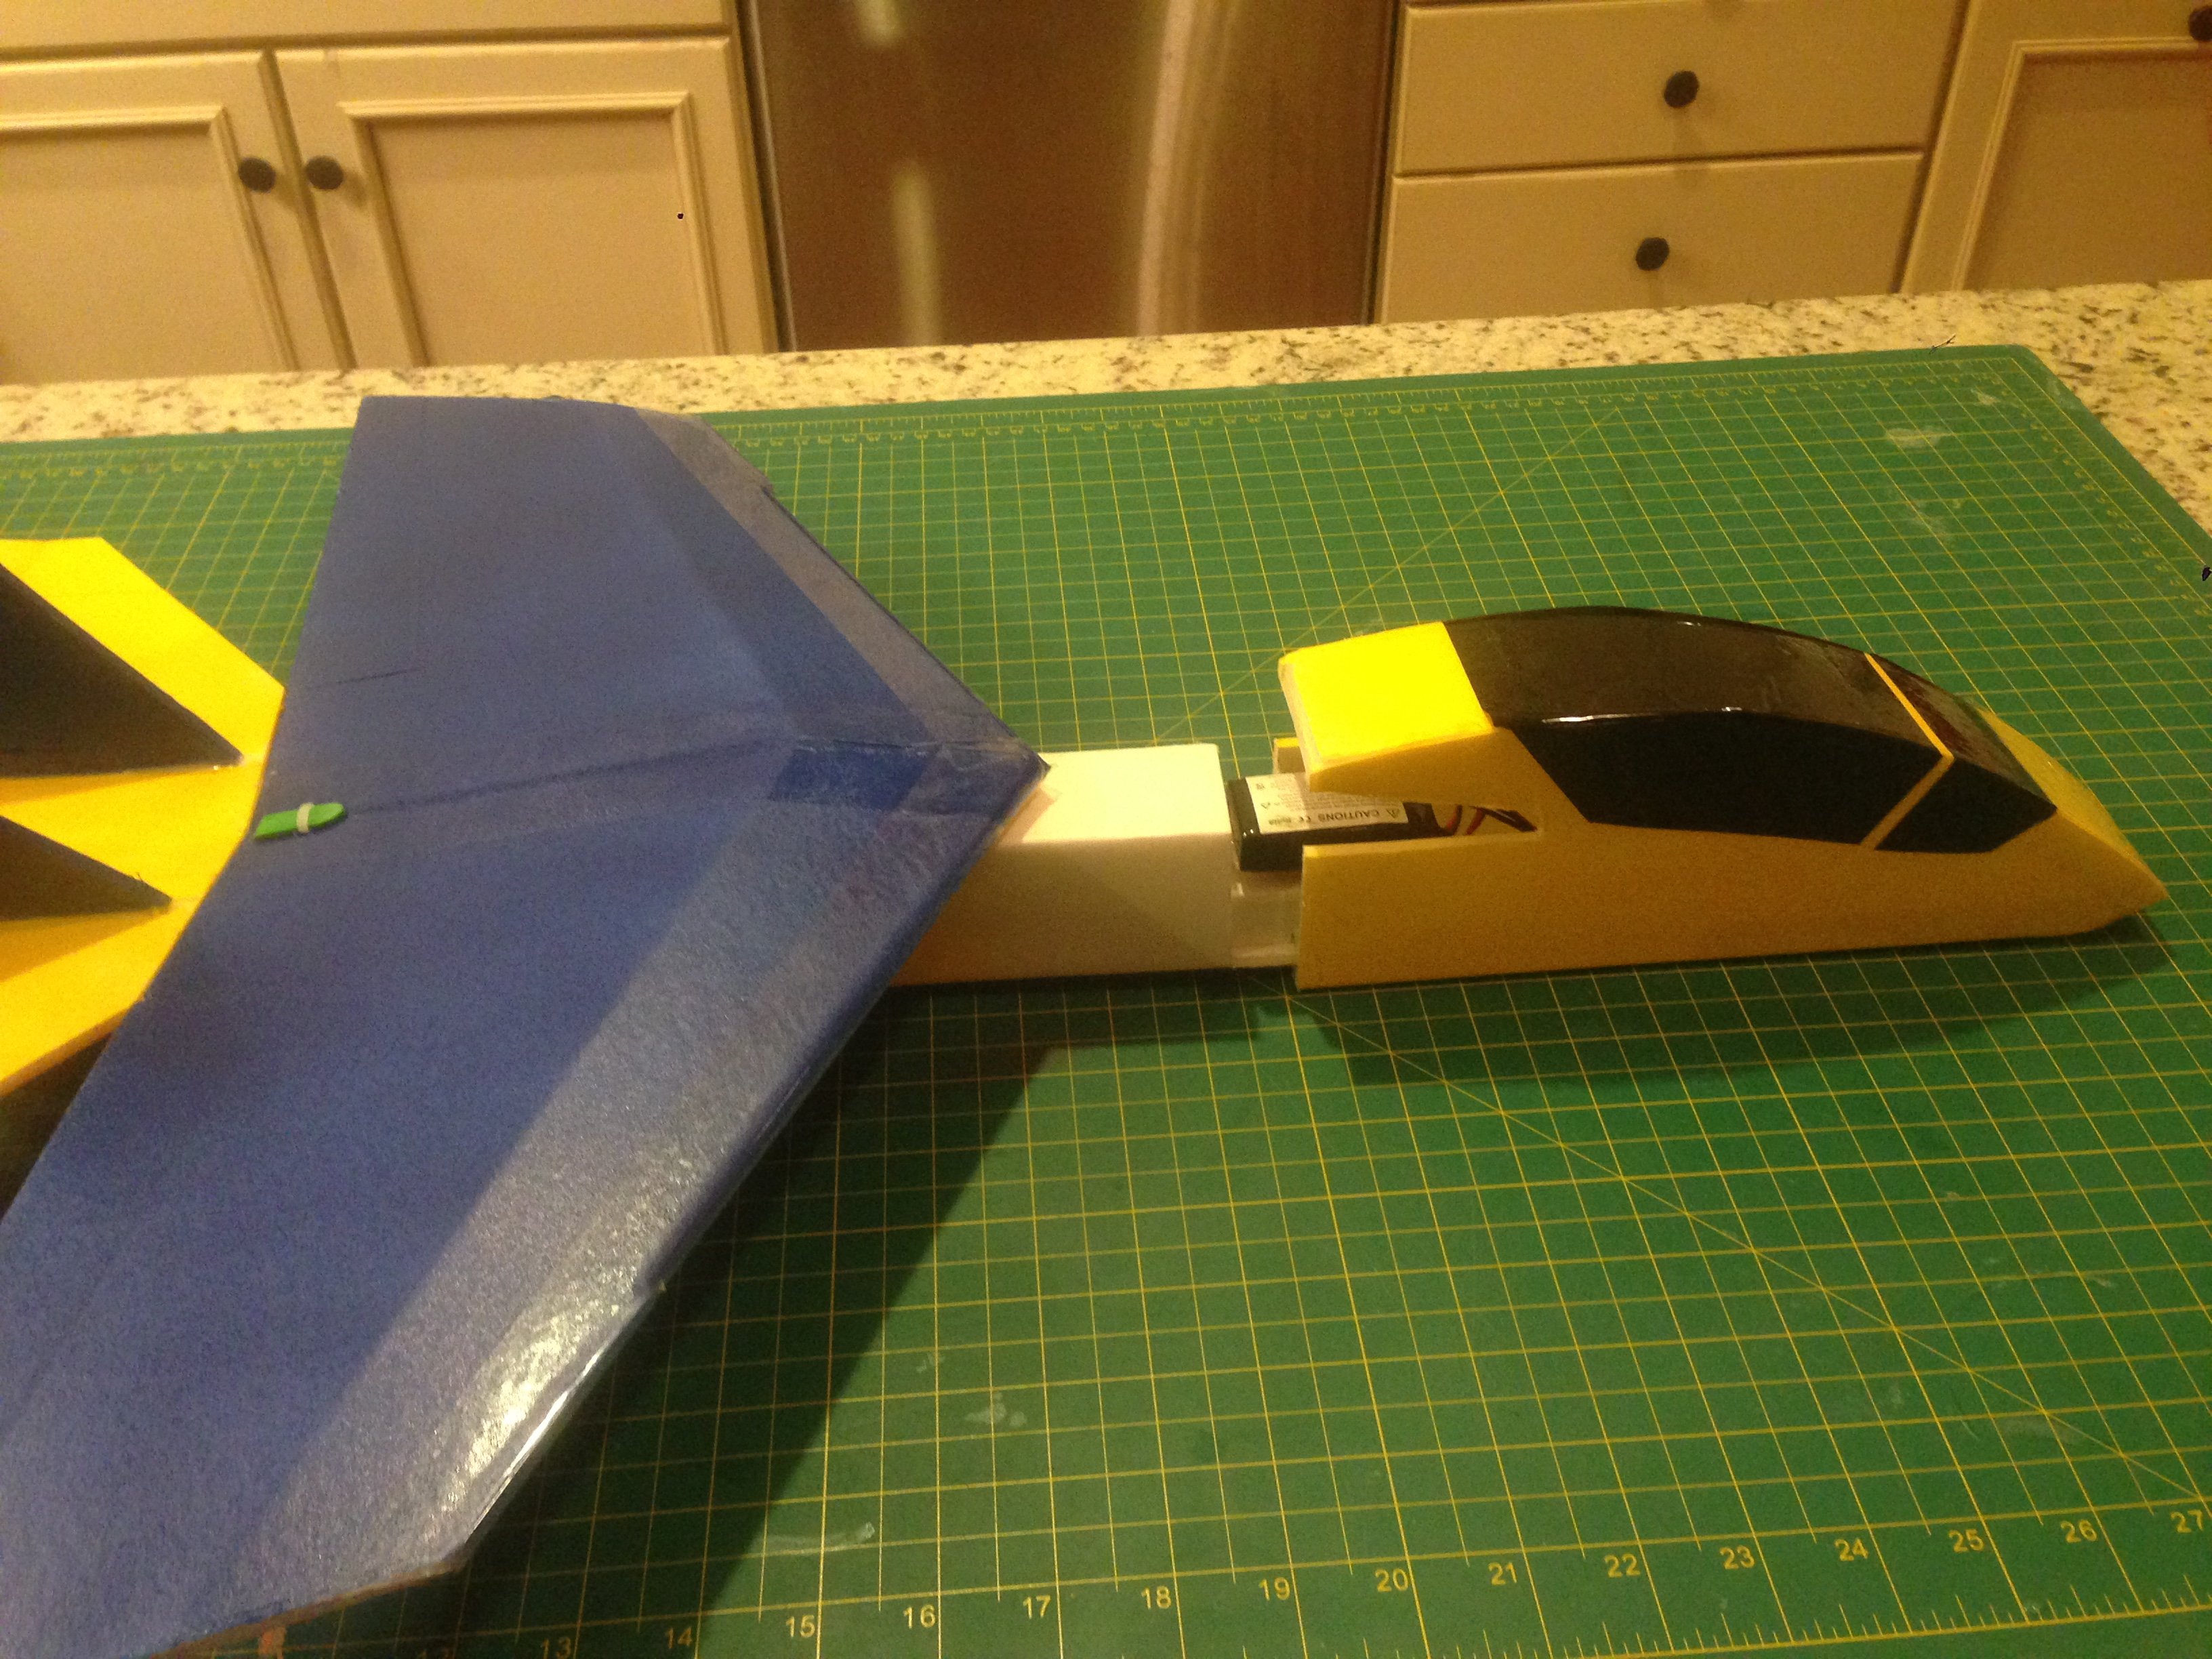
The final step was to build the nose. I wanted a slip on nose similiar to the FT Mini Guinea which I had build the week before. I liked the idea of the internal battery - good for cold weather - and the ability to have a sacrificial nose for the inevitable oops. I glued in a small battery platform like the MG, but then realized if I put the upper portion in, it would be too narrow for my battery. Hmmm.. This became a happy accident, because I then decided to have the nose just slip over the entire front of the fuse, which then solved my wing hold down decision. I was going to use rubber bands, but then realized if I tabbed the back of the wing to slide under the fuse/tail, the nose could slide over the front of the wing and hold it in place. COOL! It not only gave real shape to the design, but it kept the wing solidly in place. I used popsicle stick to sandwich the foam board with a zip tie to keep it strong. The nose section slides over top of the fuselage and the wing cutout holds the leading edge in place. Right now it is a friction fit, but if it loosens up, I'll use a skewer to hold it in place.


Nose section
Assembly Video:
Waterproof and Paint
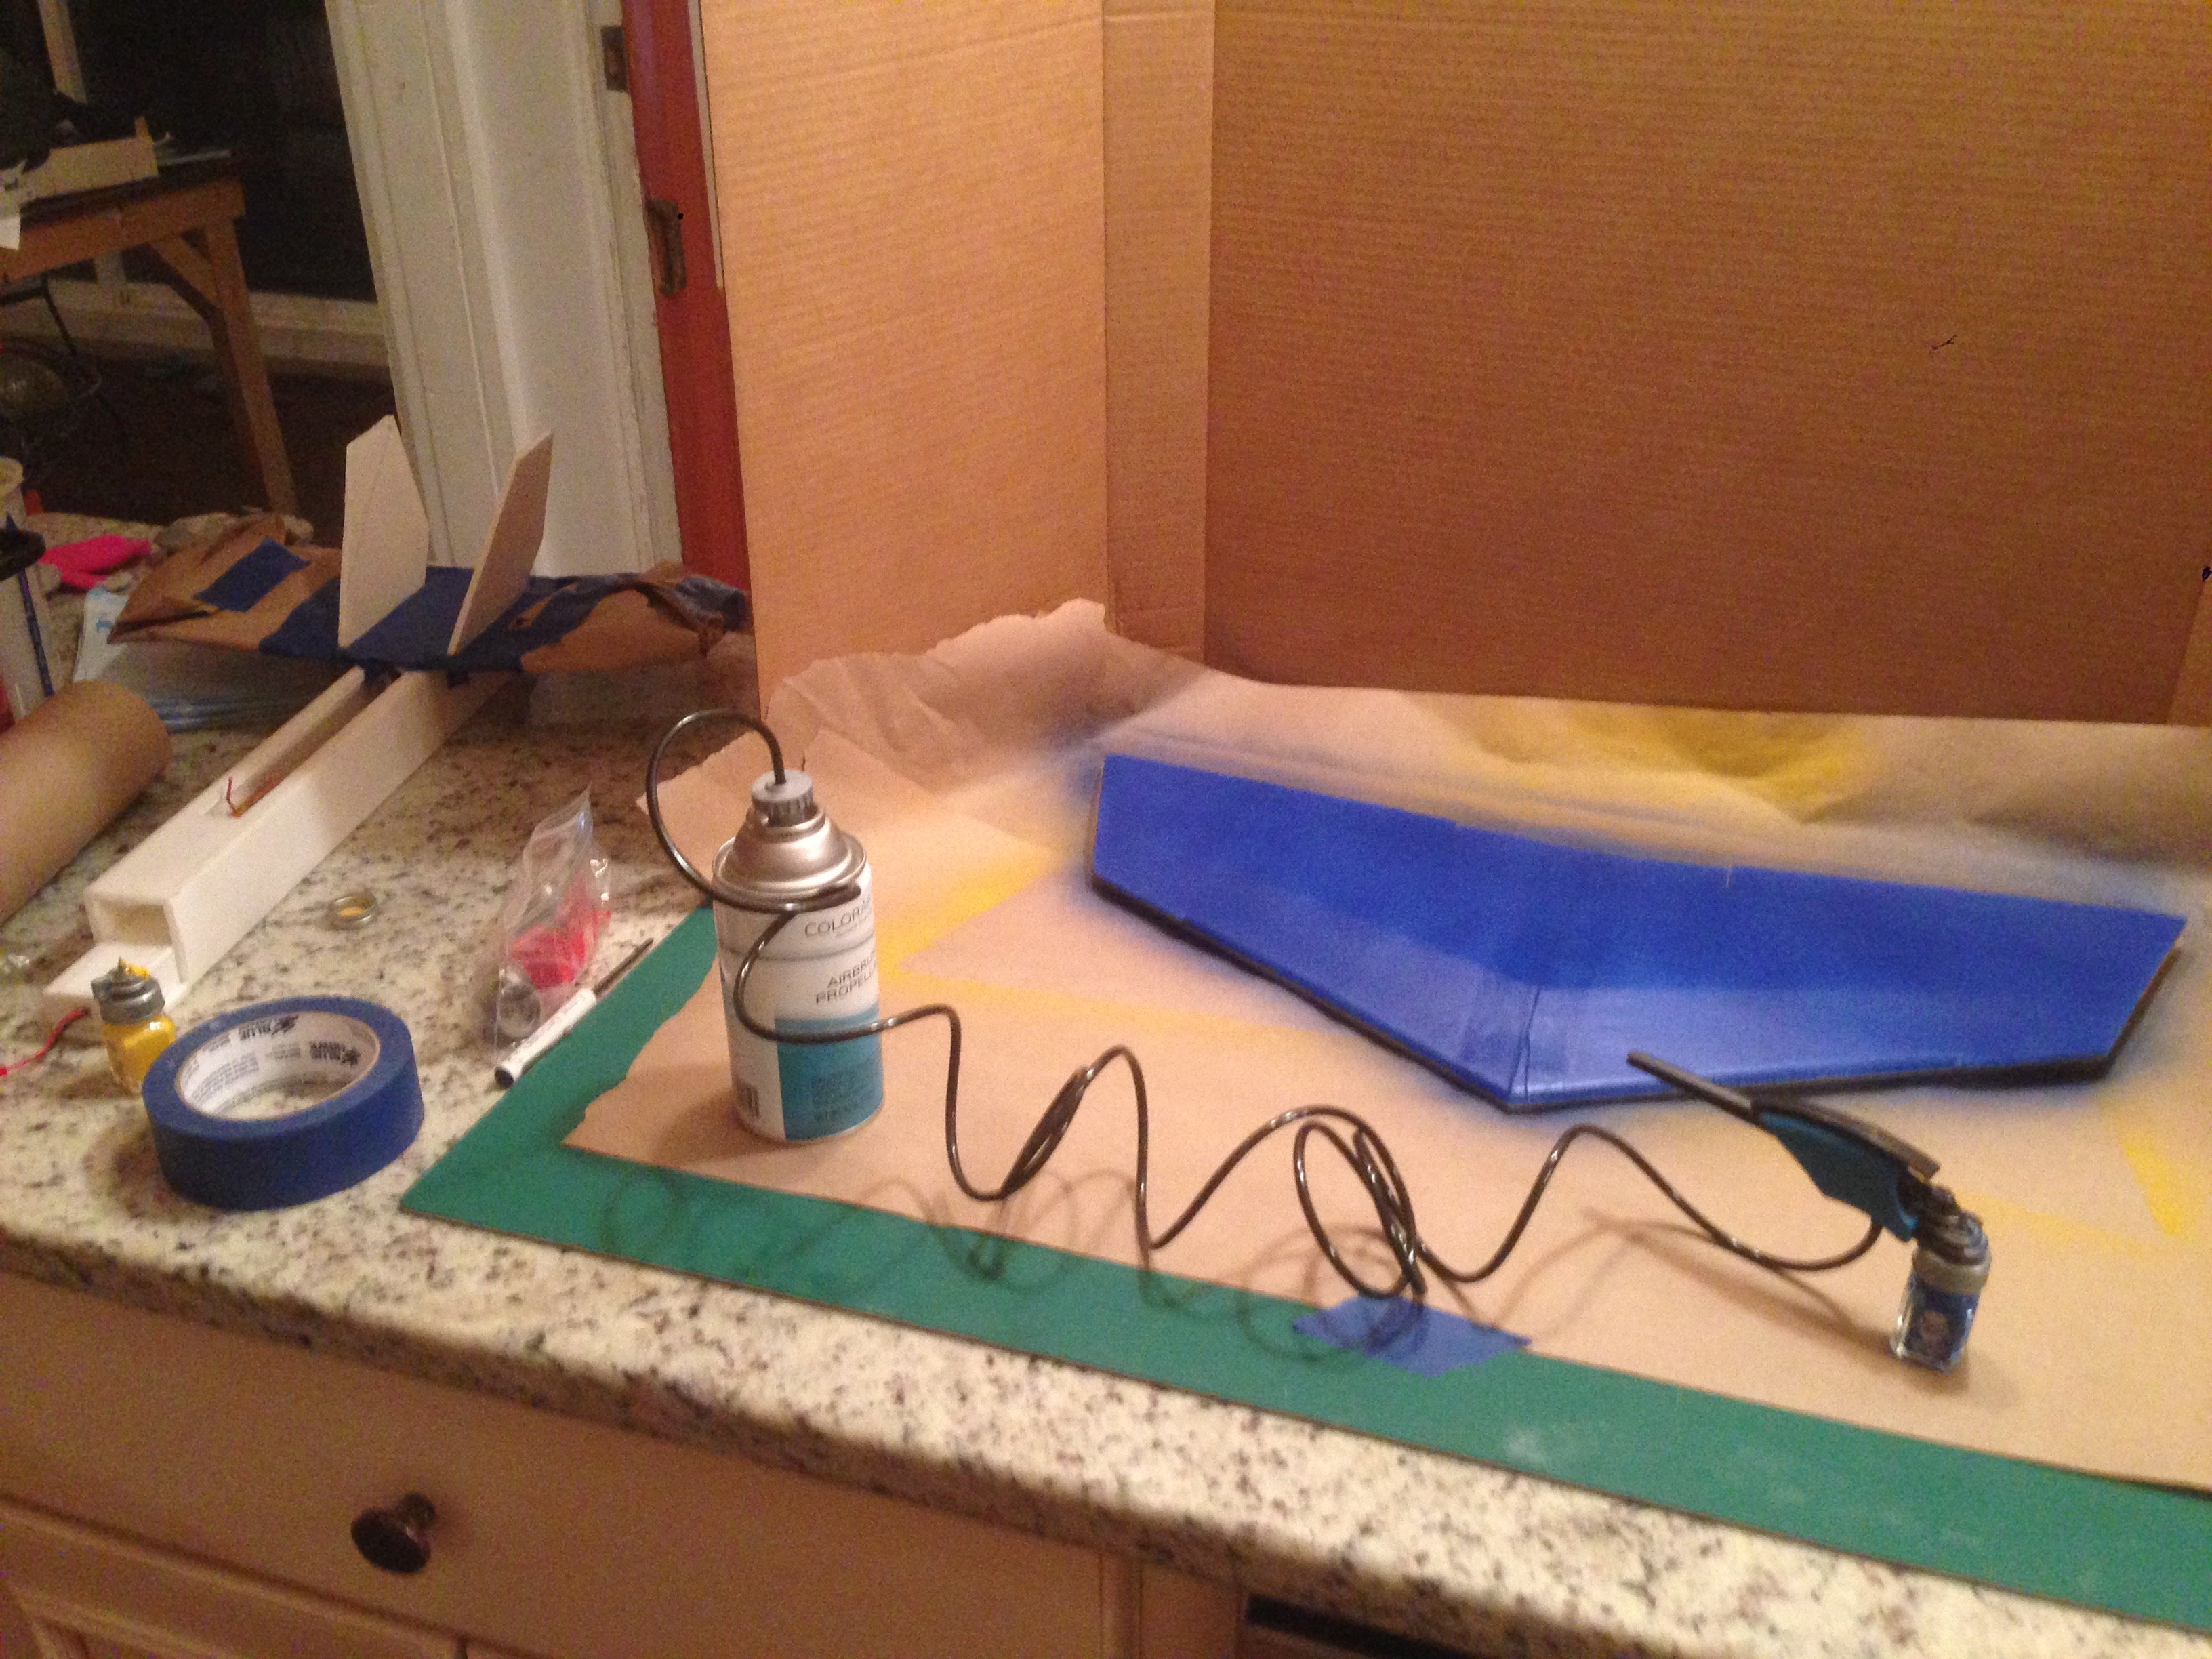
Next step was to seal all the edges with hot glue/squeegee method, then the entire plane was polyurethaned to water proof it. Next I sprayed the color with Testor's acrylic.

I ran out of yellow and blue, so the underside of the horizontal stab is red. It should help with orientation anyway... I then applied clear 2" packing tape to the leading edge of the wing and the nose. The cockpit is black monokote trim.
Electronics:
I used a PowerUp 250 sport 2300kv for power with a 10A Hurc esc, 4 5G towerpro servos and an Orange RX from HobbyKing. Battery is a 800mah2S, although a 1000mah3S will fit, but I'll need to swap to an emax 1804 or similiar, I don't think the PowerUp will handle the 3S. Oh yeah, I had to make an extension on the power for the esc. I just did an JST extension on the battery side, but you could also extend the motor leads if you wanted to move the weight of the esc forward.
Radio Setup:
I wanted flaps to enable the plane to slow down for a steeper approach in my back yard. I have lots of airspace over a nice little valley, but the yard has trees and requires a pretty tight approach. I've used flaperons before, but I don't like the reduction in roll control as they approach full down. To help with this, I incorporated tailerons that I can turn off/on. I wanted traditional ailerons, because I've use just tailerons on the F22 and other prop in slot, but I was looking for more axial rolls. So, in typical flight this is a aileron/elevator yank and bank, but if I want blistering roll, I can use ailerons and tail together. For landing, tailerons automatically mix in when full flap is selected (3Pos Switch). See video for details:
Choose a Moderation Template
Comments
RacerX February 17, 2015
Nice build! The removable nose is ingenious as well as the control mixing.
Reply
sailorJohn February 17, 2015
Really like it. PLS add general measurements length of main fuse, wing span and cord. 5*
Reply
kpl72 February 17, 2015
I took most of the photos on the measuring board, squares are 1/2" Wingspan is 23" and fuse is about the same. If I get a chance, I'll sketch up some rough plans. Check back in a day or two... I'll get some flight videos once we get past these -30 windchills.....
Reply
Christopher14 February 17, 2015
Please get the plans up. I really would like to build one. (I have a small motor that will take this thing over 100mph). Call it stress testing.
Reply
kpl72 February 17, 2015
OK - I added the plans, sketched out on paper - really rough, it will take some intepretation of my chicken scratching. If someone can recommend an easy browser based CAD program, I'll clean them up. I use tinkerCAD for 3D, and recommendations for 2D CAD?
Reply
sailorJohn February 18, 2015
Thank you this give me a good stating point.
Reply
nicktutttle February 18, 2015
You might give autocad360 a try. It's still in beta, but might get you going!
https://www.autocad360.com/
Reply
Hell2Go February 26, 2015
Sketchup is pretty easy to use if you have CAD experience, plus there is a FT article on it with tutorials and a link to download it for free. This is what I love about this community. If you make up a printable plan I'd build it in a heartbeat, looks fun!
Reply | Remove Comment
Hell2Go February 27, 2015
KLP72 - I used your drawing and drew the plans in Sketchup to make a printable version. I'm still tweeking it a little and want to fold up a wing to make sure its good, then I'll post it somewhere for everyone to use. You should start a thread in the forums on this build as I think there will be a lot of interest in this plane.
Reply | Remove Comment
- See more at: http://flitetest.com/articles/mini-fun-jet#sthash.Nmzp2tco.dpuf
Projects

Rating: 4.25 16 ratings
Posted: February 15, 2015 | 1,816 views
INFLUENCE 63%
1 0 +10
Remove Bookmark
MY RATING

Overview
This project was a scale up of little foam gliders I got the kids at the drugstore. They are called Zrang and are just a really cool, well-flying little jet. I thought, what if I scaled it up 400%, used DT foam, and powered it with a Park 250? I just started cutting, folding and gluing, and along the way came up with some cool features.
Construction
Of course, I forgot to take pictures during construction, but it was so simple, I'm not sure they are needed. Here is a really rough sketch of the dimensions, I'll try to move into CAD and make them printable in a pdf. Measurements are in inches, and probably only works for folks with some experience with FT models. Click to make them readable.
Wing:

I started with the wing:
The wing is a basic flitetest style folder wing. Since it's swept, I cut two pieces, left and right. I taped and glued the bottom panels, scored the top panels and beveled the leading edge where it folds. There is a tapered "spar" consisting of a larger and small triangle so that it is 2 layers thick at the root, tapering to one layer at the end of the bottom panel. I then scored the top panel, folded and glued it back in flitetest fashion. I then cut and tapered the ailerons and installed servos. Servo leads were fed along the spar to the access hole in the center section. They are just long enough.
Fuselage & Tailfeathers


Next I built the fuselage which is just a basic rectangle tube to fit a standard FT motor mount. I folded the fuselage (B folds) and I glued and taped the mount on the back. Next I cut the horizontal stab, beveled the elevators (FT style glue-hinge) and then glued it on to the fuselage. Following that, I glued on the two vertical stabs at about 15 degrees from vertical. The motor was then screwed on and the servos slid and glued in place. I use one servo for each elevator so they can be tailerons. This is import so that I have roll control because the wing has flaperons and I wanted positive control with the flaps lowered.
Nose & Wing Hold Down

The final step was to build the nose. I wanted a slip on nose similiar to the FT Mini Guinea which I had build the week before. I liked the idea of the internal battery - good for cold weather - and the ability to have a sacrificial nose for the inevitable oops. I glued in a small battery platform like the MG, but then realized if I put the upper portion in, it would be too narrow for my battery. Hmmm.. This became a happy accident, because I then decided to have the nose just slip over the entire front of the fuse, which then solved my wing hold down decision. I was going to use rubber bands, but then realized if I tabbed the back of the wing to slide under the fuse/tail, the nose could slide over the front of the wing and hold it in place. COOL! It not only gave real shape to the design, but it kept the wing solidly in place. I used popsicle stick to sandwich the foam board with a zip tie to keep it strong. The nose section slides over top of the fuselage and the wing cutout holds the leading edge in place. Right now it is a friction fit, but if it loosens up, I'll use a skewer to hold it in place.


Nose section
Assembly Video:
Waterproof and Paint
Next step was to seal all the edges with hot glue/squeegee method, then the entire plane was polyurethaned to water proof it. Next I sprayed the color with Testor's acrylic.

I ran out of yellow and blue, so the underside of the horizontal stab is red. It should help with orientation anyway... I then applied clear 2" packing tape to the leading edge of the wing and the nose. The cockpit is black monokote trim.
Electronics:
I used a PowerUp 250 sport 2300kv for power with a 10A Hurc esc, 4 5G towerpro servos and an Orange RX from HobbyKing. Battery is a 800mah2S, although a 1000mah3S will fit, but I'll need to swap to an emax 1804 or similiar, I don't think the PowerUp will handle the 3S. Oh yeah, I had to make an extension on the power for the esc. I just did an JST extension on the battery side, but you could also extend the motor leads if you wanted to move the weight of the esc forward.
Radio Setup:
I wanted flaps to enable the plane to slow down for a steeper approach in my back yard. I have lots of airspace over a nice little valley, but the yard has trees and requires a pretty tight approach. I've used flaperons before, but I don't like the reduction in roll control as they approach full down. To help with this, I incorporated tailerons that I can turn off/on. I wanted traditional ailerons, because I've use just tailerons on the F22 and other prop in slot, but I was looking for more axial rolls. So, in typical flight this is a aileron/elevator yank and bank, but if I want blistering roll, I can use ailerons and tail together. For landing, tailerons automatically mix in when full flap is selected (3Pos Switch). See video for details:
Choose a Moderation Template
Comments
RacerX February 17, 2015
Nice build! The removable nose is ingenious as well as the control mixing.
Reply
sailorJohn February 17, 2015
Really like it. PLS add general measurements length of main fuse, wing span and cord. 5*
Reply
kpl72 February 17, 2015
I took most of the photos on the measuring board, squares are 1/2" Wingspan is 23" and fuse is about the same. If I get a chance, I'll sketch up some rough plans. Check back in a day or two... I'll get some flight videos once we get past these -30 windchills.....
Reply
Christopher14 February 17, 2015
Please get the plans up. I really would like to build one. (I have a small motor that will take this thing over 100mph). Call it stress testing.
Reply
kpl72 February 17, 2015
OK - I added the plans, sketched out on paper - really rough, it will take some intepretation of my chicken scratching. If someone can recommend an easy browser based CAD program, I'll clean them up. I use tinkerCAD for 3D, and recommendations for 2D CAD?
Reply
sailorJohn February 18, 2015
Thank you this give me a good stating point.
Reply
nicktutttle February 18, 2015
You might give autocad360 a try. It's still in beta, but might get you going!
https://www.autocad360.com/
Reply
Hell2Go February 26, 2015
Sketchup is pretty easy to use if you have CAD experience, plus there is a FT article on it with tutorials and a link to download it for free. This is what I love about this community. If you make up a printable plan I'd build it in a heartbeat, looks fun!
Reply | Remove Comment
Hell2Go February 27, 2015
KLP72 - I used your drawing and drew the plans in Sketchup to make a printable version. I'm still tweeking it a little and want to fold up a wing to make sure its good, then I'll post it somewhere for everyone to use. You should start a thread in the forums on this build as I think there will be a lot of interest in this plane.
Reply | Remove Comment
- See more at: http://flitetest.com/articles/mini-fun-jet#sthash.Nmzp2tco.dpuf
Last edited:

