TwitchFrames Mini-Tri 175 Build Log

Twitchity

Senior Member
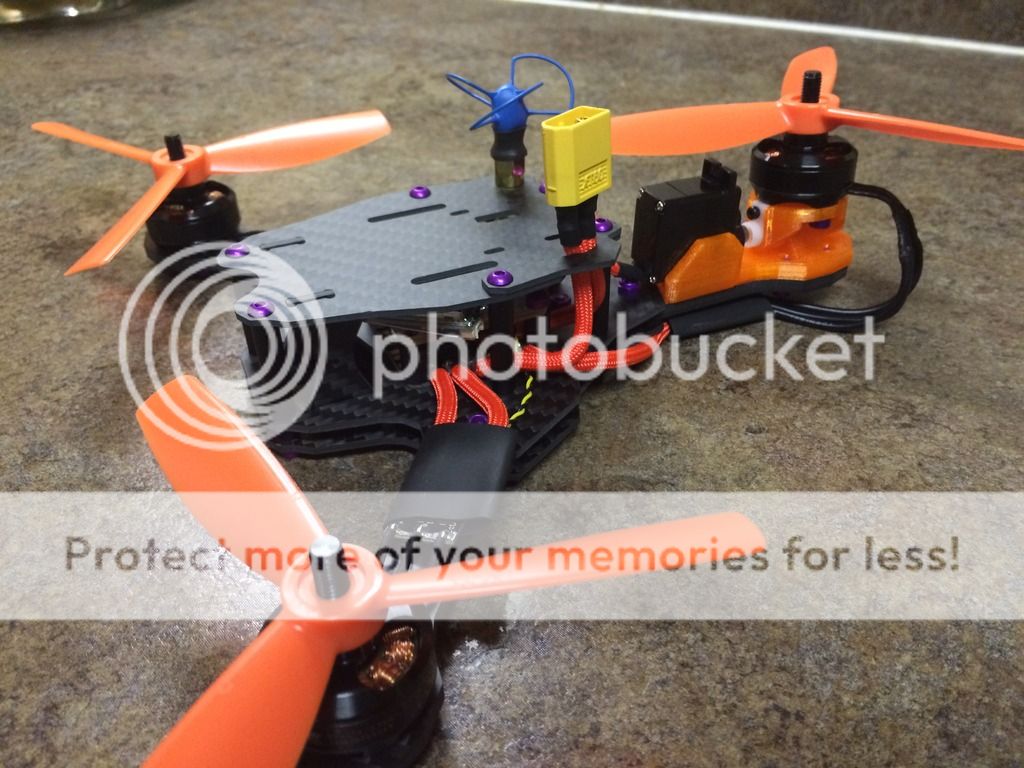
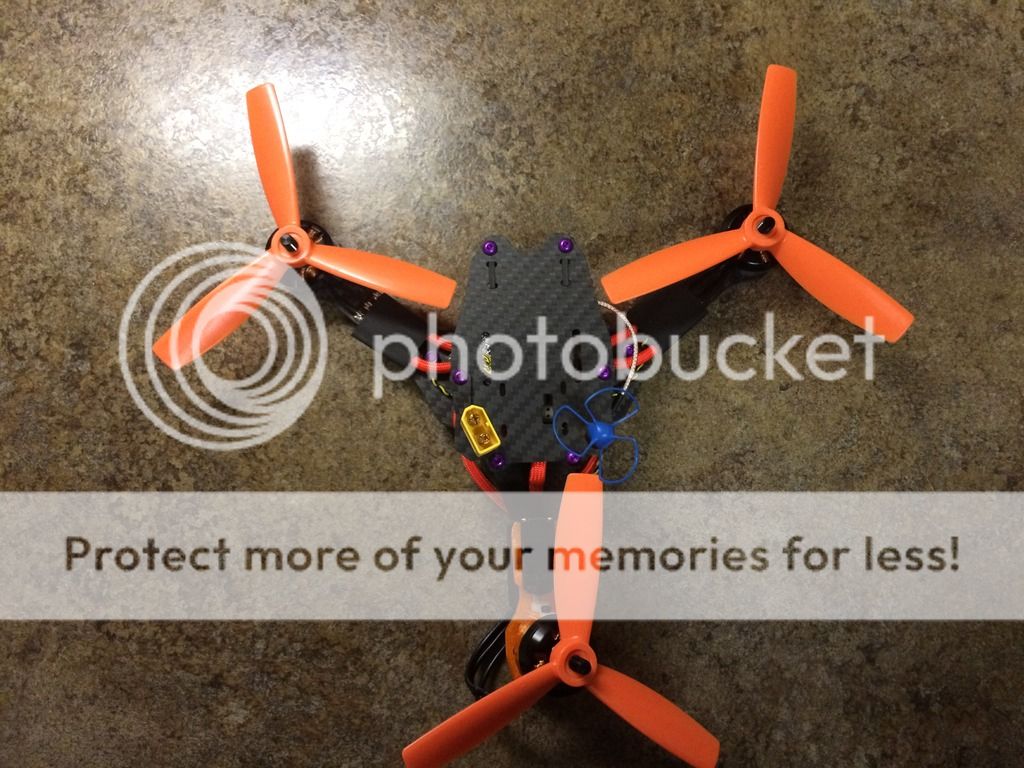
Having sold my previous tricopter (pic below), I decided it was time to make another one since Cranial wouldn't sell me his :black_eyed:. After seeing the quality of Armattan's cutting service on mpbiv's SCX-200 quad http://forum.flitetest.com/showthread.php?25620-SCX-200-Race-Quad-Build-Log I decided to give Armattan a shot and created a new tricopter design similar to the original since the hard drive I had my files on got fried and couldn't recover the files.
8111B2C6-D06F-490D-BDA8-445828C543CB_zpsi4yjgmla.jpg


So I'll go over my initial impressions of the kit provided by Armattan. Overall I'm extremely happy with the quality and service they offer, and this tri will be on their store once I finish my build to ensure everything fits how it was intended. For the price of the kit I would have to give the quality an A, but disregarding the price and looking at the CF strictly from an aesthetic view I would give it a B-, and that may be a little on the conservative side. The cuts are nice and smooth, and the edges aren't sharp.

This brings me to my first (somewhat) complaint. It looks like they sanded the edges of all the pieces which is great as the edges aren't sharp and won't slice your wires. The bad part (for my OCD at least) is the edges aren't consistent. Some parts you can visibly see where the edge was sanded down more to give it a more rounded edge, while others are closer to being square. There are also some light surface scratches/scuffs that you can see when the light hits the CF just right. I expected this but not in the amount that's on the pieces. It's going to get beat up anyways, but again my OCD doesn't like it.

The last complaint is there are some tiny chips in the cuts, not many, but there are some. It almost appears that the tooling used was dull and needed to be changed so chances are this isn't always going to be an issue. But like I said earlier, for the price Armattan can cut you a custom frame, all of these issues aren't anything that would keep me from buying another frame from them again. All of the parts fit together perfectly and I didn't have to sand anything to make the pieces work.

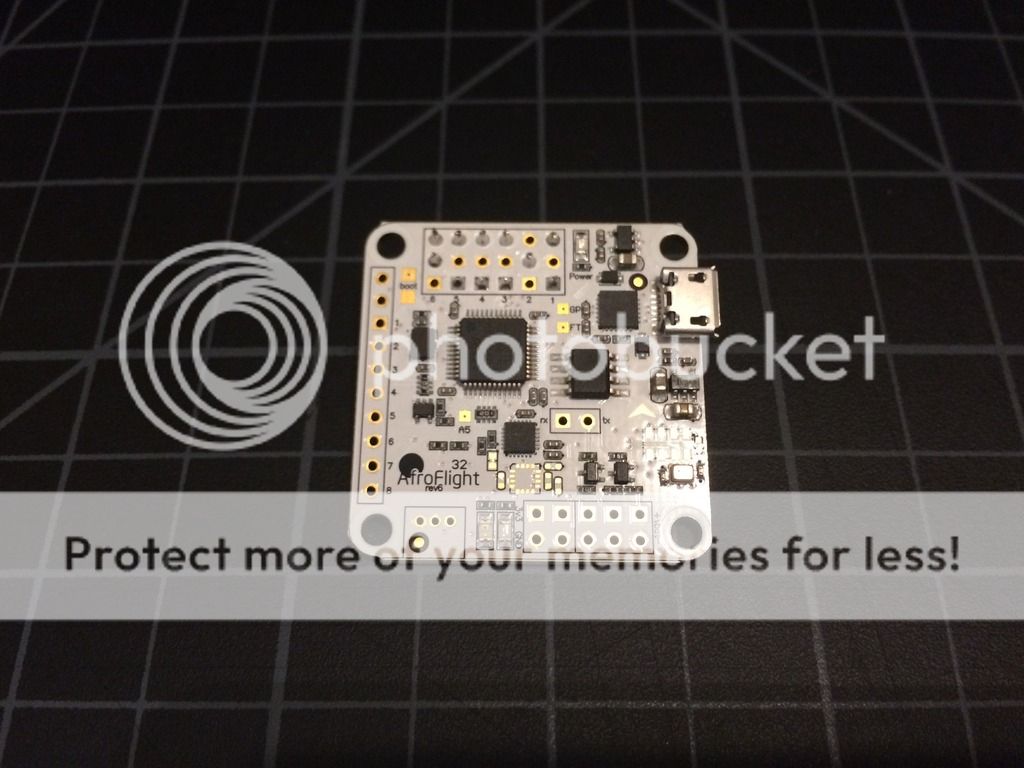
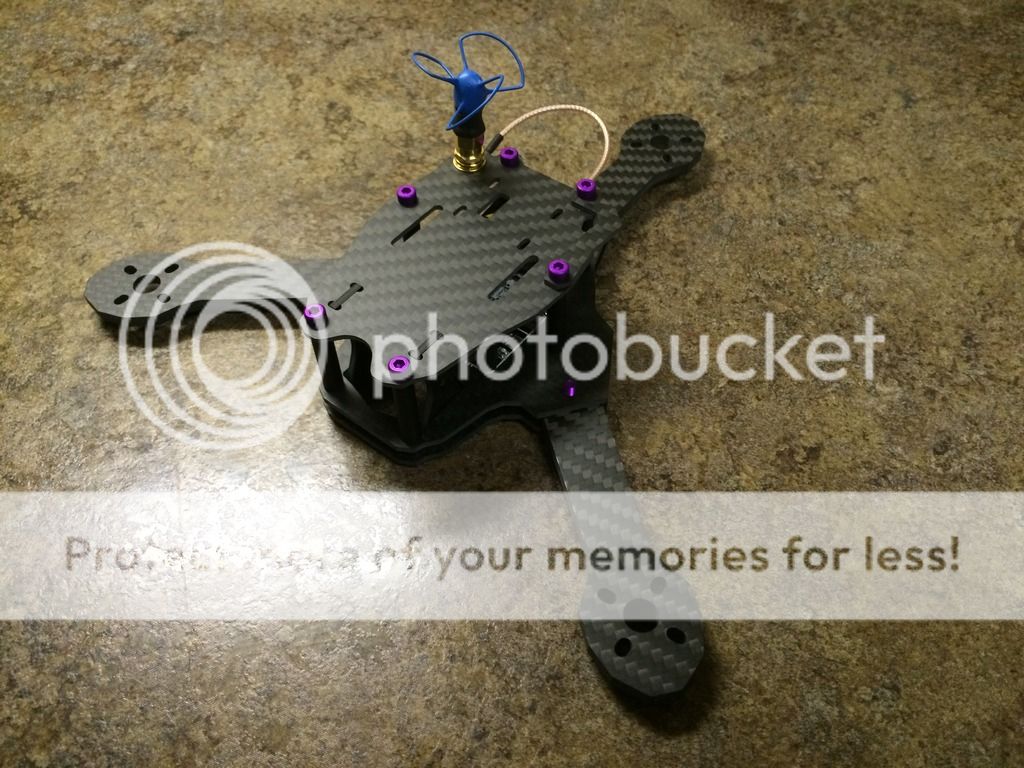
So now onto the new frame. This is designed to run any 16x19 motors with 5" props; the MTM distance is 175. The camera bracket is designed to work with the h1177 camera, and mounting for any standard 30.5mm x 30.5mm FC. I originally made the top plate for a TS5823 VTX but I've recently switched to a Hawkeye VTX so I'll have to cut a new top plate. Once I finish my build I'll have a link to the kit on Armattan and upload the 3D parts to Thingiverse.

Now time for pictures. Here's the frame assembled when I got in from Armattan. The antenna will mount in the back right of the top plate, and there is a clamp for the battery wires in the back left.

CEE3500E-9F2D-47C7-A916-9C7113312520_zpsksh3xqsb.jpg


All the CF pieces included in the kit
504AC3EC-8D05-44BE-A419-C4118D742DE6_zpsjxdmxch5.jpg


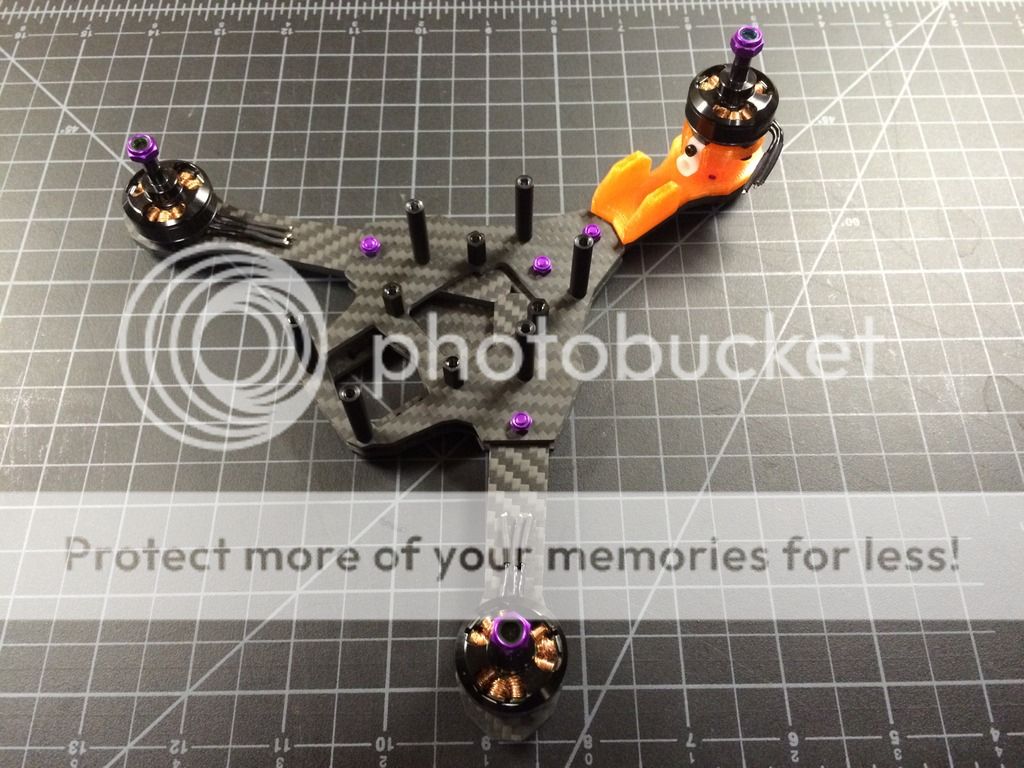
Now time for the build. First I assembled the frame. You can see in the picture where all three arms come together and meet in the center. The cutout isn't necessary in the top plate for my current build, but I originally was going to mount the FC close to the frame and wanted the little extra space for clearance. All of the 25mm standoffs are held in place by 16mm bolts, the 10mm standoffs and bolts with locknuts got 12mm bolts. Everything was tightened up at this point.

20AE9939-5BC6-4FDF-BDA0-43C62C0365BF_zpselmb4h0h.jpg


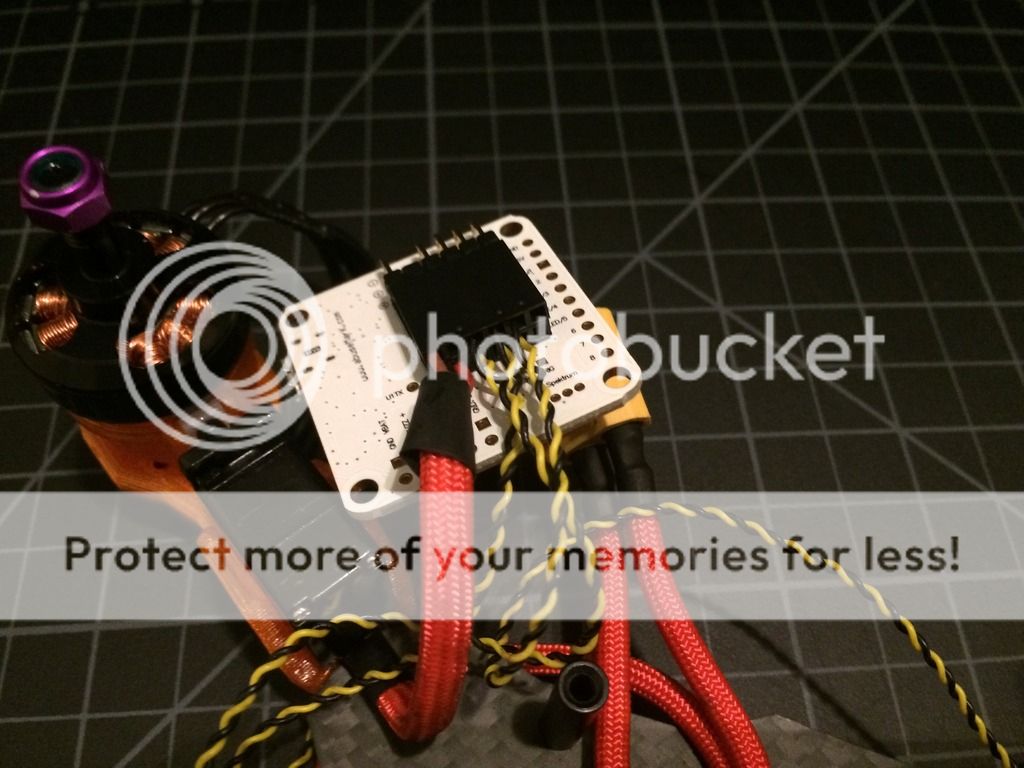
Next I fitted the motors and tilt mechanism
75168423-BAA8-4FF1-BE83-D0AE606BBDA0_zpsvaucbyzg.jpg


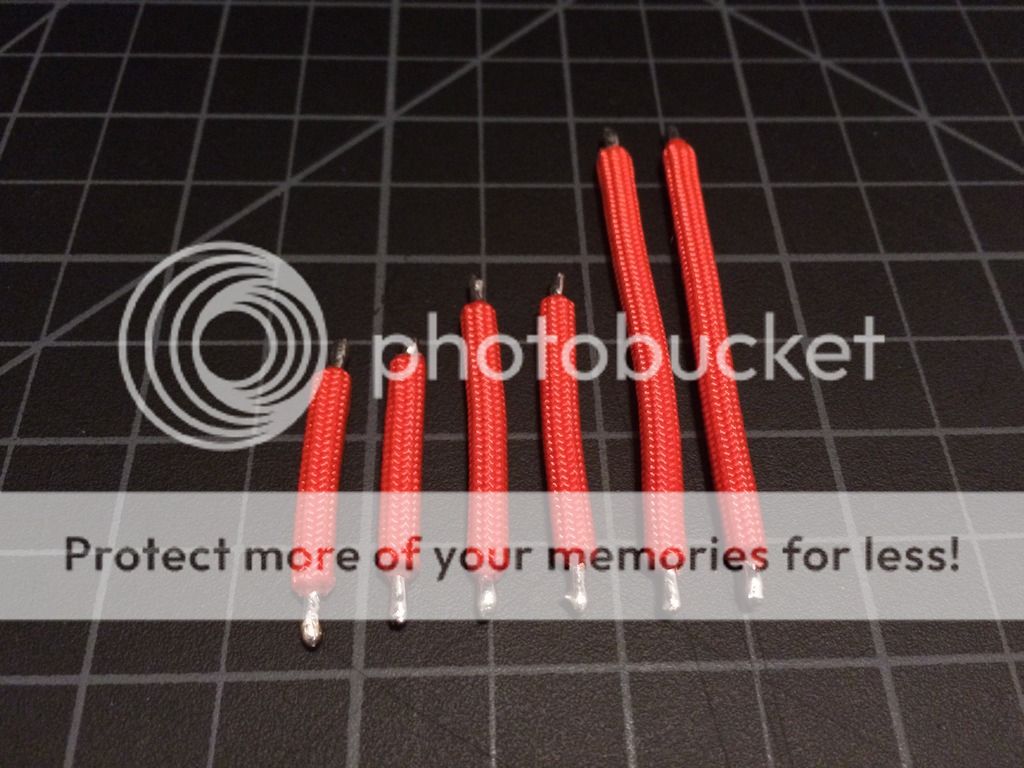
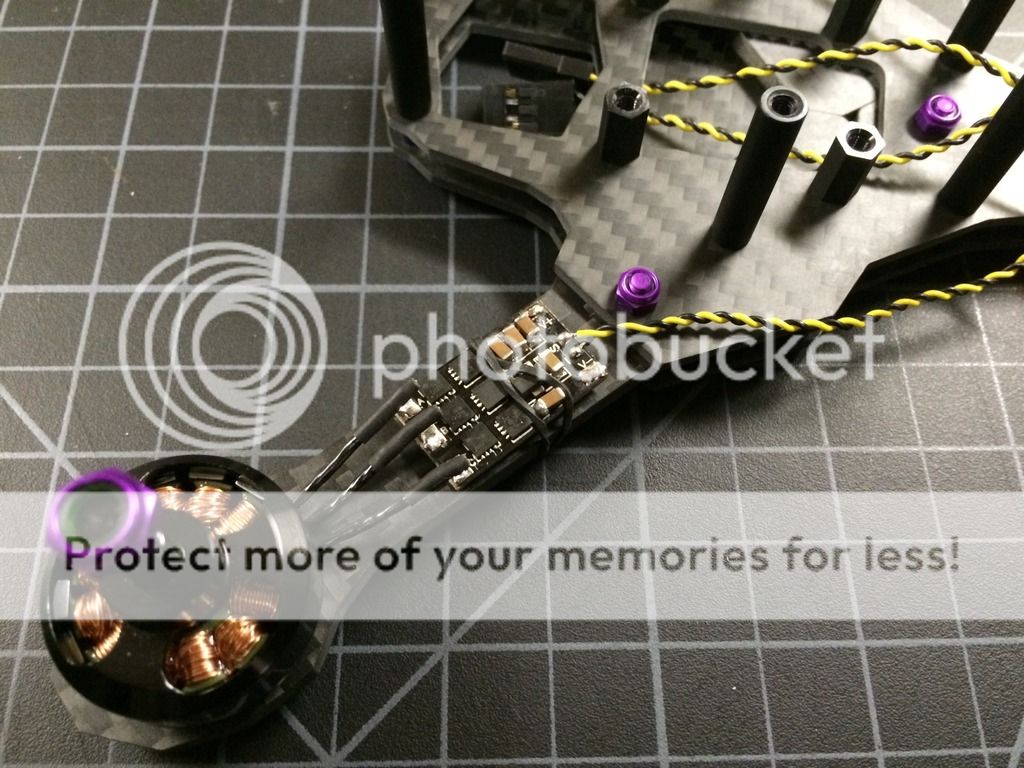
With the motors mounted it came time to solder the wires to the ESCs. I'm going with DYS XM20A ESCs for this build as they were on sale at the time I purchased them, and the LittleBee ESCs were all sold out. Once I got the ESCs I instantly regretted that decision as the soldering on them was horrible, hopefully this isn't an indication as to their quality. Anyways, motor wires were cut to size and soldered to the ESCs.
80297881-59C9-47CA-8B1F-B02A2F70932A_zpscs25e7xw.jpg


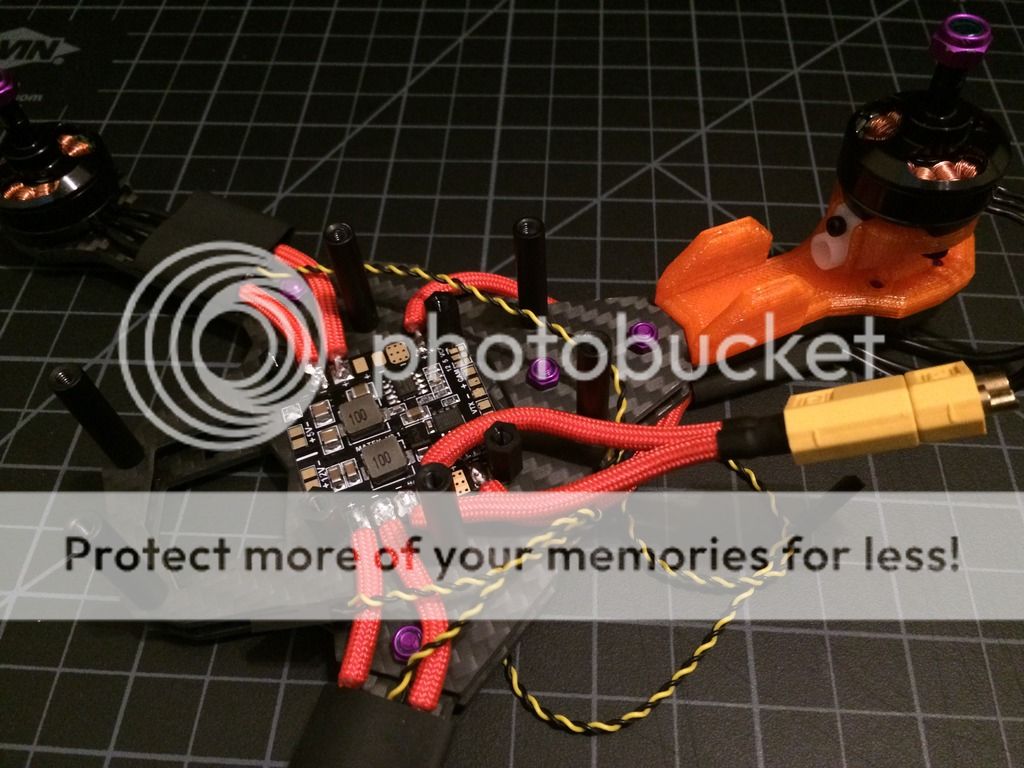
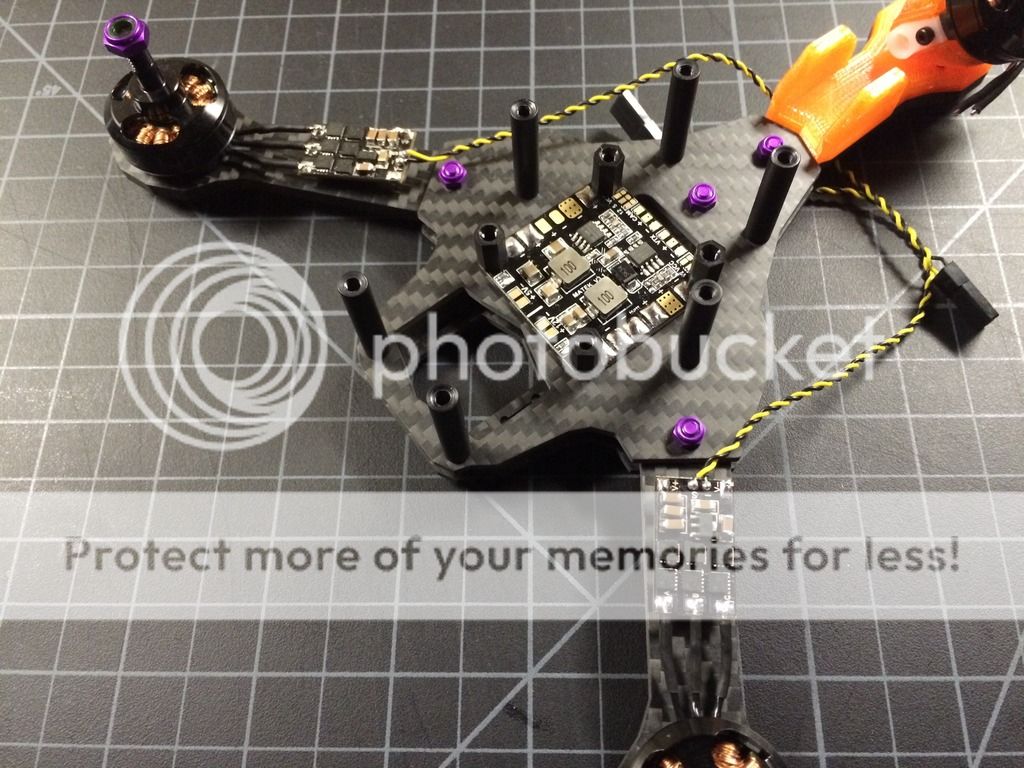
The pads on the Matek PDB were tinned and the PDB was mounted directly to the frame. There is a layer of kapton tape on the bottom of the PDB to insulate it from the frame. I may raise it up with some 4mm spacers before I finish the build, but I think the kapton tape will be just file.

95EFE80E-54CA-42C5-940A-868DE994D8AB_zpsxwelv0bw.jpg


And that's as far as I got for the night. Hopefully more build progress will happen tomorrow.
 

mpbiv

New member
This thing is going to be wild! I like it, and 175! I didn't expect it to be that small when you first told me you were going to re-do it.

I didn't inspect my Armattan carbon fiber closely enough to see any scratches from sanding. I'll have to check that on the next order.
 

cranialrectosis

Faster than a speeding face plant!
Mentor
Beautiful work Twitch!

Your designs are elegant, almost sexy.

What servo did you decide on? EDIT: found it. :)


I finally started my 4" Alien build. It took me three days to finish the carbon fiber due to all the mess it makes. I kinda wish Soma would finish these and would put up with some scratches if he did. CF is messy and always makes my wife cringe when I sand it.


No. I am not selling my mini-tricopter. :)

It flies well and I am cruising it around the yard today.
 
Last edited:

jipp

Senior Member
hey twitch cool frame.. i think since its recommend to apply supper glue to all edges on the carbon frame for durability you can probably over look your complaint about uneven sanding? since after superglue its gonna look like wet doo anyhow, just be able to smack the cement a few times with out issue. i think its cool you are gonna be able to offer your tri to more people through this service.

thanks for honest review of the quality of the ESC. the DYS XM10A that came with my DYS 1104 motors do not have this issue. but it sure is something to consider when buying ESC. since it seems we are limited to DYS XMs, littlebeers and i guess KISS ( these are the top dogs right now? kiss being alpha). seems the DYS SN are on there way out!

also i have had zero issues with Matek PDB i think they are maybe the ebst PDB on the market.. for the quality/options. they are like the Cadillac of PDBs.. im impressed with each one i have used. even if all the LED driver stuff is way over my head how to use it yet. but its nice that option is there for the guys who can take advantage of it.. also what is kopton tape?
is that just black tape? im not sure if i am familiar with the take you ]
 

Twitchity

Senior Member
Cranial, I don't think I mentioned the servo I'll be using on this build, but it was the same servo I used on my previous tricopter, Turnigy TGY-9018MG. Only using it because I had an extra one laying around. Everything I mentioned about the CF you have to look for it up close, so it's a fair trade-off for not having to do any finishing work. But still, I almost never had to do any sanding with the stuff I cut. I always found an old pair of jeans or a towel rubbed across the edges knocked it down just right.

jipp, thank you. I've seen superglue on the edges of CF before, but it's not for me. I'm sure it adds a lot to the strength of the CF, but the looks would drive me crazy. As far as my review on the DYS ESCs, it was only a cosmetic review as I haven't used them yet. I'm sure they will be fine, but it was odd seeing resistors not lined up properly with the rest, and the solder from the positive wire bridging to the closest resistor. I got all of the power wires run today and no smoke, so I'm assuming it's fine.

Here's a little reading for kapton tape https://en.wikipedia.org/wiki/Kapton. They'll do a much better job explaining it than I ever could. Short story is it's a high temp tape that has good abrasion resistance. My 3D printer uses this tape to hold wires/thermistors in place near the hot parts. Since the PDB I'm using mounts flat to the frame and won't move around, I don't see this being an issue in my build. The tape will provide insulation between the frame and the PDB.
 

Twitchity

Senior Member
So I was able to do some building today, and after not using paracord on my last two builds (micro and race quad), it's back for this build! I really wish I could find a good source for orange anodized hardware to go along with this, but the purple hardware doesn't look bad with the orange. The paracord was cut to size, the guts removed, then slid over the wires. I used a lighter to heat up the ends of the paracord and then pinched the melted part down around the wire to hold it in place. Very clean look this way and no need for heatshrink.

A01826F6-868B-4E6C-9A3E-B93D3F1CA6BF_zpsmg4dzzcp.jpg


Next came time to solder the power wires to the PDB and the ESCs. This gave me some issues, but mostly with the PDB. This Matech PDB has the pads on the left side really close to the mounting holes, so close that the aluminum standoffs I was going to use was touching the solder pads. Oh well, I don't need a lot of strength for this part so I threw on some nylon standoffs to eliminate the possibility of a short.

4F715C30-622D-47F9-BDFE-C31D12BF2AB9_zpsixp5pjyb.jpg


Next came the power wires. This was a tight fit and I'm not sure if I like the placement just yet, but they are on there and out of the way. It looks a little sloppy in the photo, but it's all covered up when the Naze is installed so I'll more than likely leave it as is.

8133F1D8-4C5B-4040-8760-E28CA62D0288_zpsxluhqp27.jpg


Next came time to solder the pins to the Naze. Using the 10mm standoffs on top of the PDB allowed just enough room to let me have a two stack high connection on the bottom of the board. Here's the pin layout from the top and from the bottom.

BB7D641C-14C7-4363-8C05-429E309A3FCF_zpsxqqa9fzi.jpg

28649300-3FEC-4772-B043-3022A9741D1C_zpsdkfmokrp.jpg


And with the servo and ESCs wires connected. The last two empty holes are for the power and ground to power the Naze. I used two 1x6 connectors I bought from Pololu awhile ago to allow for an easy installation/removal when needed. This way I just have to worry about the two connectors, and not 4.

752355A2-EA61-4F95-B9CF-3109F5F24522_zpsd2llkht0.jpg


And that's as far as I got today. I just placed an order for a receiver for this build along with motors and LittleBee ESCs for the Micro Tri build which I'll probably throw on this frame and give the micro the DYS ESCs. I decided to throw on the top plate, FPV antenna, and some props for a picture. The power wires are held in place by a clamp and the fit is nice and snug with the paracord around the wires. I originally thought about using a rubber wire grommet, but the paracord sleeved wires just fit so nice. This will ensure the wires are up and out of the props way in flight.

EF512083-E269-49EB-B45A-76D796729DAB_zpstuvrly0b.jpg


EDE44B28-F438-4937-B86A-EDE09BC1439D_zpsctl18prh.jpg


And no, the prop isn't anywhere close to the antenna, it just looks that way in the picture. Even if it was, I could throw on a normal antenna to raise it higher (which I might need to do to have room for the battery). The blue doesn't go too well with all the orange and purple.
 

cranialrectosis

Faster than a speeding face plant!
Mentor
Do you leave the ground wires on those ESCs for a reason?

That is the first Naze32 rev 6 I have seen up close. Wow that is beautiful work, Twitch!
 

jhitesma

Some guy in the desert
Mentor
Here's a little reading for kapton tape https://en.wikipedia.org/wiki/Kapton. They'll do a much better job explaining it than I ever could. Short story is it's a high temp tape that has good abrasion resistance. My 3D printer uses this tape to hold wires/thermistors in place near the hot parts. Since the PDB I'm using mounts flat to the frame and won't move around, I don't see this being an issue in my build. The tape will provide insulation between the frame and the PDB.

Just a minor correction. Kapton is really neat stuff, super light, great insulator and handles ridiculous temperatures with ease. But it's not good at all for abrasion resistance. From that wikipedia article:

However, Kapton insulation ages poorly: an FAA study shows degradation in under 100 hours in a hot, humid environment.[6] It was found to have very poor resistance to mechanical wear, mainly abrasion within cable harnesses due to aircraft movement. Many aircraft models have had to undergo extensive rewiring modifications—sometimes completely replacing all the Kapton-insulated wiring—because of short circuits caused by the faulty insulation. Kapton-wire degradation and chafing due to vibration and heat has been implicated in multiple crashes of both fixed wing and rotary wing aircraft, with loss of life.[7]

So it's good for places where you need to deal with high heat, but if there's any movement or potential for wear it's not a very good choice. So I personally don't rely on it for insulation on a multicopter unless it's provided some additional protection since even places that shouldn't move can due to the vibrations from the motors.
 

mpbiv

New member
Do you leave the ground wires on those ESCs for a reason?

That is the first Naze32 rev 6 I have seen up close. Wow that is beautiful work, Twitch!

BLHeli pass through programming using the Naze? That would be my first thought. I'm pretty sure you cannot do this without the ground wire still connected.
 

Craftydan

Hostage Taker of Quads
Staff member
Moderator
Mentor
BLHeli pass through programming using the Naze? That would be my first thought. I'm pretty sure you cannot do this without the ground wire still connected.

You can, since the ESCs still have to be powered via battery to flash, and the UBEC will make the battery and USB grounds common.

Noise suppression down the ESC signal is the primary advantage. Not necessarily required, but it helps, particularly when you've got so much packed so tightly in pushing so hard.

Now if he'd gone with yellow paracord I'd say ascetics, but we all know how Twitchity balances function and forum ;)
 

Twitchity

Senior Member
Craftydan is correct, I remembered reading/watching a video somewhere on the lesser FC (cough Naze) and how the signal going back to the ESC could be noisy. The ground wire is supposed to help with this. I want to say it was an article on the KISS FC and ESC combo that I read this and it stated that the noise was the cause of the ESC fires everyone was having (I've had 4...). The KISS FC apparently addresses this issue and the ground wire is not needed. Anyways, that's what I read, and it's on the internet so it must be true.

As far as the yellow/black signal wires go... It's driving me crazy! They just look so out of place along with the XT60 connector. I'll be switching out the DYS ESCs for some LittleBee's once they arrive and they have white/black signal wires which will be better. I would sleeve them, but the paracord wouldn't fit nicely around those thin wires. I'll be thinking of something between now and when the new parts arrive. But yes, function before form :black_eyed:. Maybe I'll take the ground wires off of these DYSs and use them on the LittleBees so I have two black wires... Hmm...

On a side note, DO NOT use battery voltage to power the Naze and connect a servo to the board... The board can handle 16v input, but it will also supply the full battery voltage to the servo which is made to handle 5v. Ask me how I know. Oh well, stupid mistake after a long days work and I just wasn't thinking as every other tri I've build has operated off of a 5v regulator going to the FC. New servos are on their way.
 

cranialrectosis

Faster than a speeding face plant!
Mentor
On a side note, DO NOT use battery voltage to power the Naze and connect a servo to the board... The board can handle 16v input, but it will also supply the full battery voltage to the servo which is made to handle 5v. Ask me how I know. Oh well, stupid mistake after a long days work and I just wasn't thinking as every other tri I've build has operated off of a 5v regulator going to the FC. New servos are on their way.

ARRRRGGGHHHHHH!

That just has to blow...

Question, does smoked servo smell anything like smoked KISS ESC?
 

Twitchity

Senior Member
No smell, no smoke. Just made a weird noise when I plugged in the battery and now I can't rotate the gear.
 

Twitchity

Senior Member
*Ahem*

http://www.hobbylobby.com/search/?text=Royal+%2395+Paracord

AKA, Accessory cord. Appropriate, doncha think?

Well, not that color, but one of them would be ;)

You are my hero, except there isn't a hobby lobby near me. Paracord Planet on Amazon did have some #95 paracord in neon orange which is the same vendor/color as the current 500 paracord I'm using. The color in the image looks darker, but my hopes are it's the same.

Dan, you sir are a life saver.
 

Craftydan

Hostage Taker of Quads
Staff member
Moderator
Mentor
You are my hero, except there isn't a hobby lobby near me. Paracord Planet on Amazon did have some #95 paracord in neon orange which is the same vendor/color as the current 500 paracord I'm using. The color in the image looks darker, but my hopes are it's the same.

Dan, you sir are a life saver.

As short as you cut it, I doubt it'll save your life.

Sanity? perhaps ;)
 

jipp

Senior Member
So I was able to do some building today, and after not using paracord on my last two builds (micro and race quad), it's back for this build! I really wish I could find a good source for orange anodized hardware to go along with this, but the purple hardware doesn't look bad with the orange. The paracord was cut to size, the guts removed, then slid over the wires. I used a lighter to heat up the ends of the paracord and then pinched the melted part down around the wire to hold it in place. Very clean look this way and no need for heatshrink.

A01826F6-868B-4E6C-9A3E-B93D3F1CA6BF_zpsmg4dzzcp.jpg


thanks for the info on the tape stuff. so far i have used liquid tape.. now this stuff is great/cheap/durable! as long you are done with the build and have zero reasons to continue tweaking with the given design. i have not a found a simple way to remove it yet. so a little truly does go a long way. the other thing i have used instead of electric taped, is a silicone self healing clear not adhesive back tape like stuff *not sure what its original use is for my step dad gave me a roll to play with. so you put the ESC to the carbon arm for example.. i put a piece under the ESC just for a bit safety . it works well.. offers good electron isolation from the esc/carbon arm.. then you just wrap it a few times, and the silicon clear plastic stuff melts into it self leaving a clean finish, giving ya moisture, and dust protection and you do not even need zip locks to hold them. may save you that last bit . heh if you are trying to save weight to that extreme im thing probably better ways than this. LOL.


i do have some parachute wire i bought but iv yet to find away to use it that did look worse than no parachute sheathing. so i think on the reptile build since im going i. so i think tomorrow i will take some scrap wire, and try the method you used.. see what happens.. thanks for sharing. iv not seen it done like that before. so yeah tomorrow give it a try on some scrap. to be frank, id be happy with 80 percent, err proof of what you posted picture of he wires with out any heat shrink. also that color looks great.. very memorizing color for some reason. could be my pain meds i guess. i have a bunch of different colors i purchased for my first zmr 250 (only model at the time, this frame sure seems to he evolving which i dig has a linux vibe to it.. )

so thanks again twitch, i think i can pull it off.. laughs. ill be sure to post pictures regardless of good or bad laughs. maybe i wont be the only one trying encouraged by your photos. rock on. i will hit my self in the head with a 2x4 a vintage 1980s hack saw jim duggon 2x4 to be exact.. how much more American can you get that a USA made 2x4 and its ready to do some but kicking compliments mick err i mean hacksaw. hahha.. one of my go to WWF Super stars, way before all that scripted drama with micmans little innocent daughter getting kidnapped and whatever soap/drama they are acting err i mean dragging out at this point, well to be honest i should say just phoning it in.. laughs and if any of you bad guys thinking about jumping my brain dead self while i try to sleep be warned i have jake the snake, ricky the steam boat, and super fly on desk, laughs. ok im gonna try to sleep my brain has lost it, im thinking of w wrestling from my youth for no reason. laughs. good night, tomorrow will be a better dat, yeah has to be better . takes my pain meds to bed i go..
 

Twitchity

Senior Member
Jipp, when you go to sleeve with the paracord, these are the steps I take.

1. Cut the wire to length, and then strip around 2mm more of the silicone sleeving off than you normally would.
2. Go ahead and tin the ends of the wire at this point.
3. Next cut a piece of paracord to length and remove the guts. This will take a few tries to get the length right, but the cord is cheap and you get a lot of it so not a big deal.
4. Once you get the cord cut, inch it on to the wire.
5. With it in place, use a lighter to heat up one end until it starts to melt. I just roll the wire in my fingers with the tip of the paracord just barely touching the flame. You'll start to see it melt, and when you do put the lighter down and quickly pinch the melted cord around the wire.

CAUTION wire/melted paracord will be warm/hot so be careful. The tips of my fingers aren't affected by the heat so it doesn't bother me.

6. You may have to reheat the paracord and pinch a few times to get it right.

I hope this helps. I'll see if I can't get a close up video of the process one of these days and post it. Once you do a few wires it becomes simple.

I've also seen/heard about that silicone tape stuff before. It does seem interesting and I'll have to order some one of these days. I'm still in the use heat shrink mindset for everything though.
 
Last edited:

cranialrectosis

Faster than a speeding face plant!
Mentor
Twitch fails to mention patience. Paracording takes patience. Go slow and don't try this while you are hungry. :)