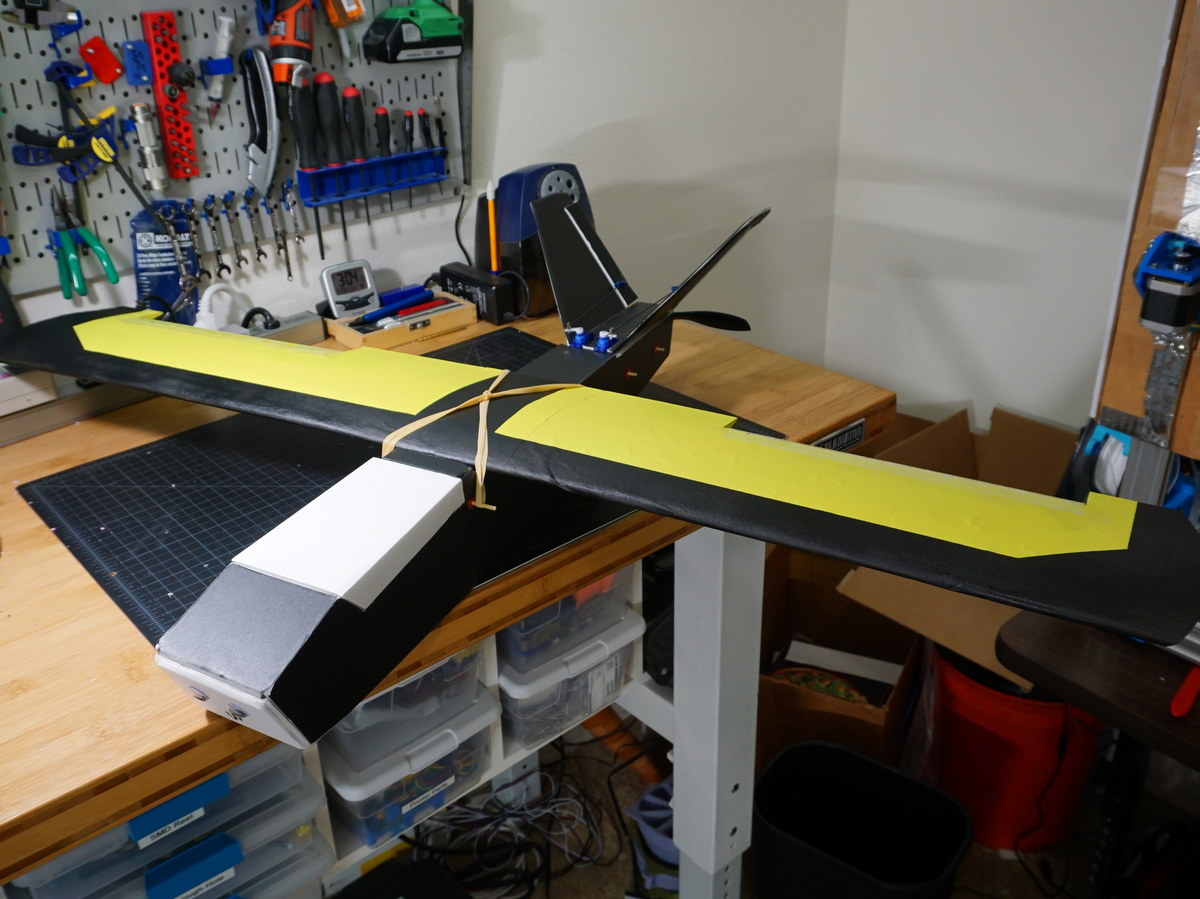
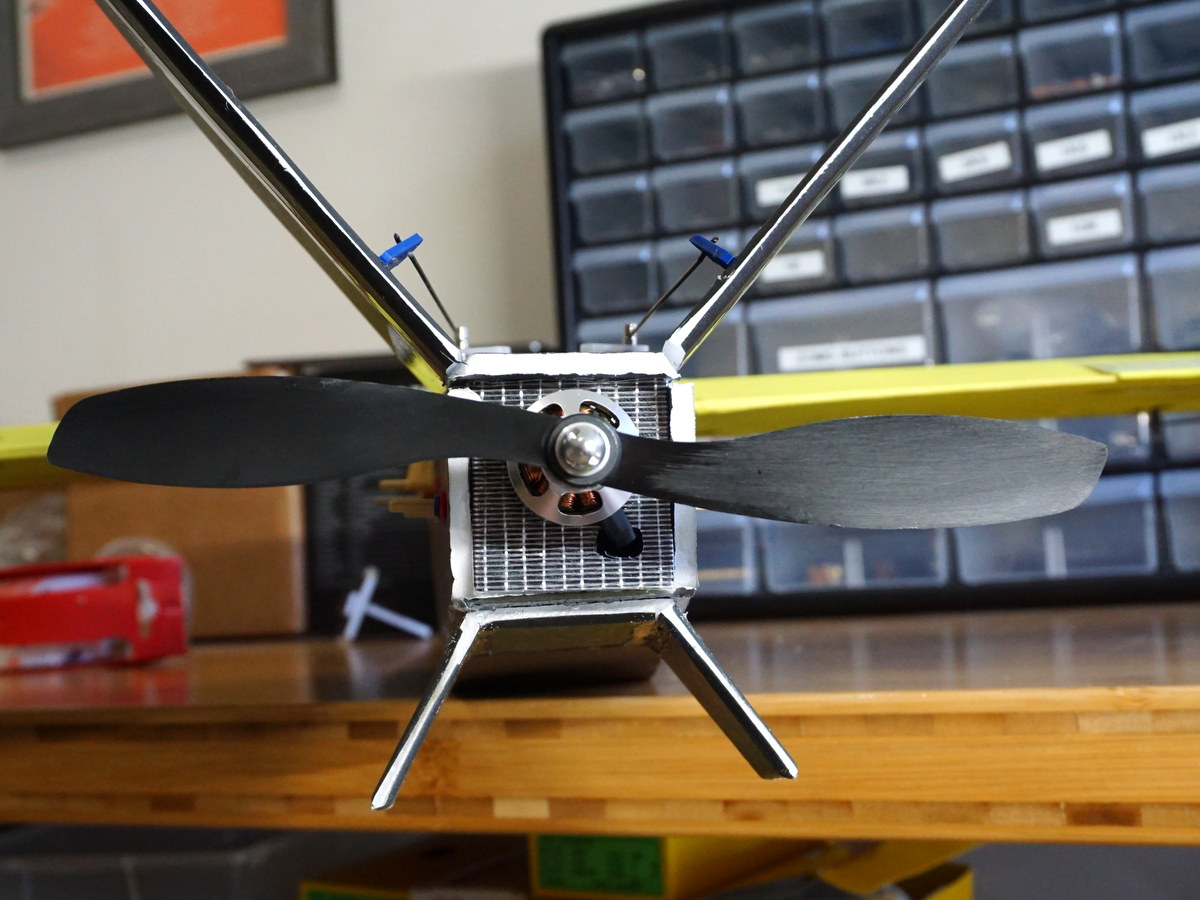
ZOHD Talon Rebel GT aka the Galleon DT(FB)

CapnBry

Elite member
Been flying my motorized Ridge Runner glider quite a bit, but fitting everything inside such a puny thin fuselage is a real challenge. What is the exact opposite of a 26mm wide fuselage? The new ZOHD Talon Rebel GT. They really went all out with the name there, just keep adding words, guys. The boxy design almost begs to be made from DTFB so yesterday I sat down and started designing my first real new scratch build. Enter the CapnBry Galleon DTFB uhh Grand Tour?
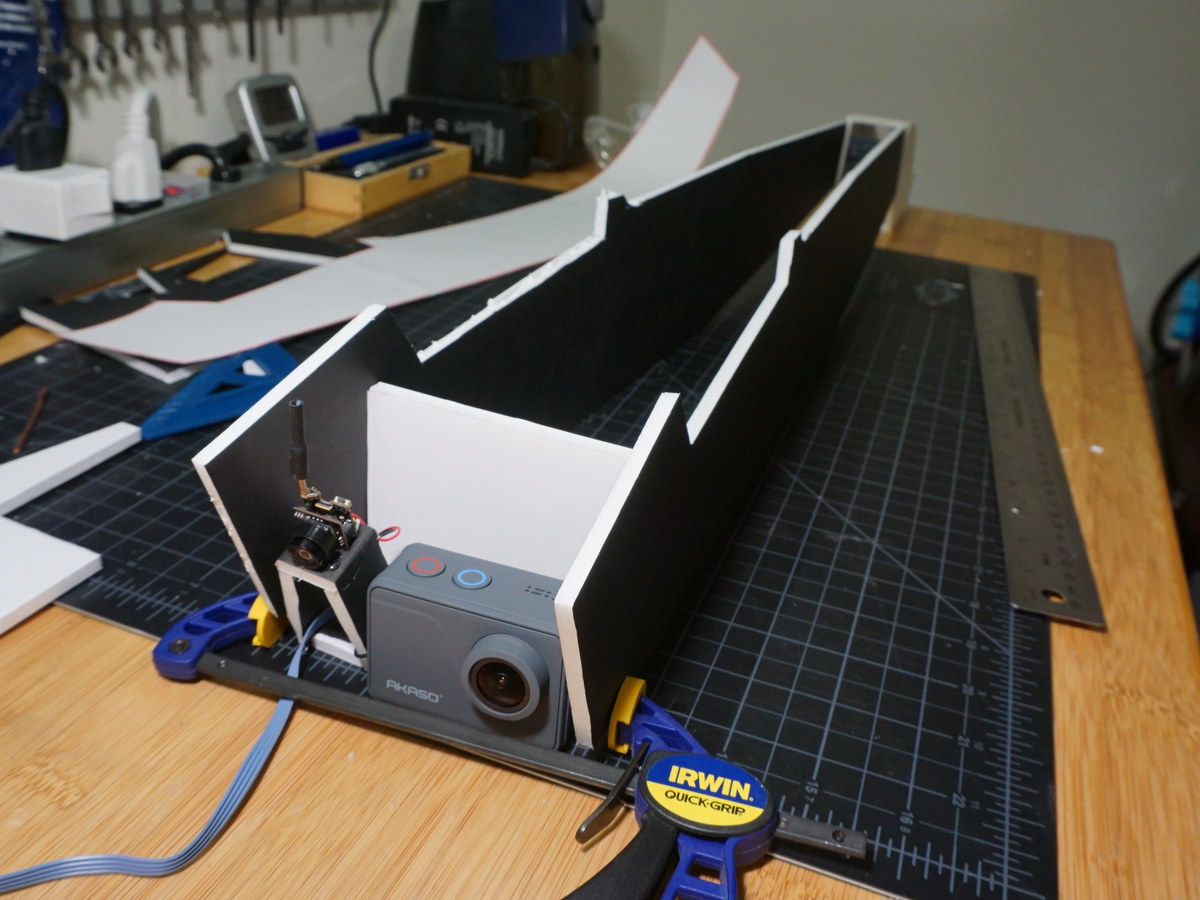
DSC06412.JPG


Wide enough at the nose to hold a GOPRO style camera and an FPV camera at the same time. Smashing ideas about aerodynamics and instead putting the biggest, fattest part right up front. The overall width of the front is 100mm or ~91mm after foam and tapers down to 1.5" in the back, which could hold a FliteTest power pod I think? I spent most of the day yesterday trying to figure out how to make the fuselage all one cut piece that has nice B folds but golly if I can't figure out how to make parallel lines that are the same length as each other. I got antsy by the end of the afternoon and just cut the sides and will connect them after the fact. The profile is spot on.
DSC06415.JPG


The ZOHD has nice carbon fiber to reinforce the nose so I decided to embed some bamboo skewers in the sides as well, to be mas fuerte. I'm not sure if these will make a difference, but I always welcome the opportunity to make something more complicated and have a chance of cutting clear through to the exterior so why not.
DSC06417.JPG

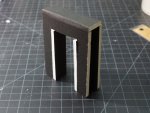
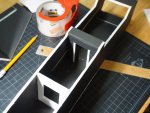
The bottom is just a trapezoidal strip. The big sides felt like an opportunity for everything to be all loosey goosey so I made a nice 3D reinforcement in front of the wing (also where the skewer to hold the wing will go through).
DSC06419.JPG DSC06420.JPG DSC06424.JPG

Now we'll start work on the tail. I'm shooting for this to be powered with a B power pack size motor with an 8" or 9" prop, but there's only around 3" of clearance between where I think the motor will go and the ground. A 6" prop with a higher KV motor might be better for preventing ground strikes, but it is easy enough to just spin the motor when I'm landing to move the prop horizontal. The wing I'm going to try hot wire cut foam with a ~1000mm wingspan, 175mm chord, but any of the FliteTest 4ch wings with about 6-6.75" chord will work.

Oh for those unfamiliar, here is what we're going for.
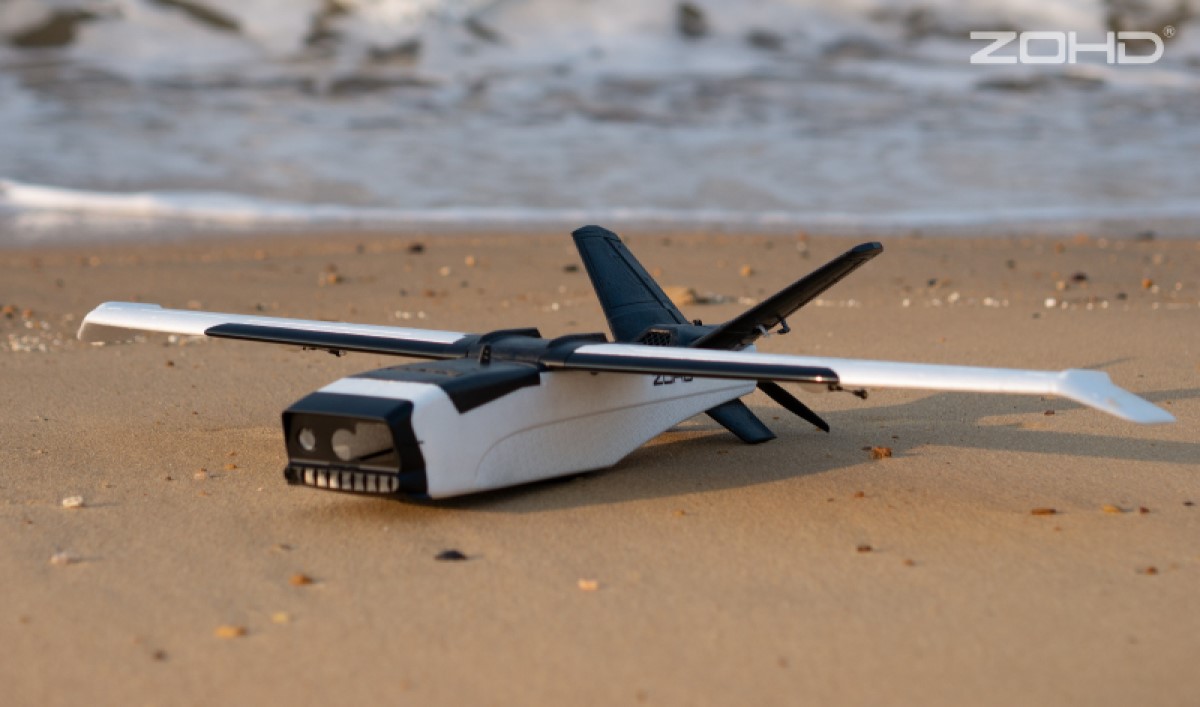
TALON-GT-HERO-SHOTS-AND-DETAILS-94.jpg


EDIT: v1.0 plans are attached in the SVG file
EDIT a year later: v1.1 plans are attached in the SVG files
 

Attachments

  • Galleon-Wing-v4.svg
    28.1 KB · Views: 0
  • Galleon-DT 1.1.pdf
    41.4 KB · Views: 0
  • Galleon-Wing-v4.pdf
    20 KB · Views: 0
  • Galleon-DT 1.1.svg
    136.4 KB · Views: 0
Last edited:

PsyBorg

Wake up! Time to fly!
Nice ambicious project mate.

As with all things fpv I will offer a suggestion. Running your fpv camera side by side with the go pro will really screw up your perception and spacial awareness.
Specifically depending on what lens you use and matching fov with camera and goggles.

I would stack them vertically with the lens as close to center as you can.

It will also offset your hd footage making people go what is wrong with this picture.
 

CapnBry

Elite member
I would stack them vertically with the lens as close to center as you can.
Oh great tips! I actually meant to have the action camera on the opposite side, so the lens is closer to the centerline, and the AIO FPV camera is just a placeholder because my nicer camera is still glued into my other model. You raise good points about trying to make them as coaxial to the centerline as possible and I'll definitely see what I can do when I build the mounts. The good news is that the mounts can just swap out since the angle of the fuselage means any wedge shape can just slide right in (although I may put magnets or a skewer on the back to keep it from falling out forward).

Moving on! What does a guy who isn't great at making bevel cuts do? Make a tail that contains many tricky and critical bevel cuts!
DSC06428.JPG

That's all one piece, with 45 degree bevels on the inside and the V-tail folds up into itself. Then you've got some control surfaces that are surrounded by foam that also need interior bevels. The control surfaces are modeled to be the same size as on the original, but from the photos I can't tell if they're supposed to be 25mm or 30mm. I went with 25 and they look a bit small. I probably should have gone the other way because if they're too big I could have adjusted that at the servo or in the rates, but now what I've got is all I've got. They have about 40 degrees of throw in either direction so hopefully it will be enough. It's starting to take shape though!
DSC06429.JPG


DSC06430.JPG


And with comedy Tiny Trainer polyhedral wing on it. The wingspan is similar, but the Galleon's wing will have 25% longer chord. Now I'm going to go stare at it for a while to figure out how I can get the servos and motor in it without making it a nightmare to get the motor screws in or out.
DSC06431.JPG
 

AircPirateNinsei

airc-pirates.com
This is a nice model for FoamBoard. I also thought about building it with 1000mm wingspan!
I am looking forward to your plans!
 

PsyBorg

Wake up! Time to fly!
Thats a really agressive and cool look with the black foam and v tail.

Almost becons to become a modified f117 if a delta wing variant was implemented.
 

CapnBry

Elite member
Thanks! I watched a couple videos of people reviewing it on youtube and everyone seemed so impressed I kinda wanted one. 200 bucks though, and if I bought every model that looked neat I'd be so poor and also need to move into a giant warehouse to hold them all. The attention to detail of how everything snaps together shows they're really learning how to make a top model.

I doubled down on the possibly-too-small-rudder...erons (tailerons?) and now the v-tail unit also is the power pod and servos.
DSC06440.JPG


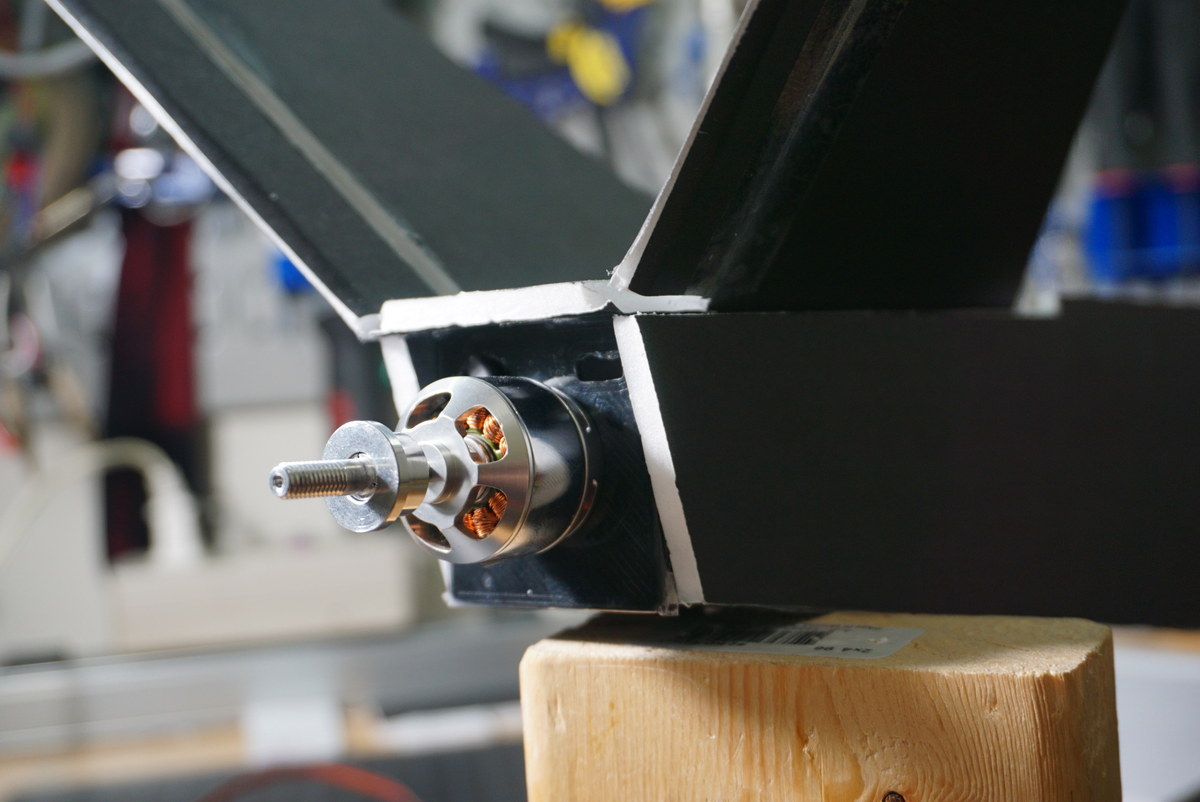
The unit just drops into the back of the fuselage and I'll run some skewers through it to hold it in place. The servos are glued to double layer thick foam and also to the side of the pod. The firewall is 2mm ABS plastic glued and packing taped on the back with 3 points of contact on the powertail unit and extends down to make contact with the bottom of the fuselage as well. I'm hoping being in contact with all the pieces, plus the skewer locking pins, plus being a pusher, it shouldn't try to exit the vehicle while in motion.
DSC06437.JPG


I also drove the 30 minutes out to Home Depot to get a sheet of 1" XPS foam to make the wing, along with all the knives, clamps and straight edges needed to cut it up in the parking lot to fit into my car. They were sold out! Undaunted I just bought some of their 2x2 project panels (at 4x the price zeesh) and some moving / packing paper to be able to laminate the wing. I was pleased when I returned home and had a look at my work so far. Sometimes when I am working on something it seems to be coming along fine but if I step away for a while and come back I feel like the work is C- at best. This is really meeting all expectations and the way everything is spaced with nice round dimensions, I swear they must have prototyped this in RediBoard.
DSC06442.JPG


I don't have a spare ESC though without taking apart another fully functional model. Didn't seem like long ago I was going plane to plane every couple of weeks after having destroyed the previous one. Now I've run out of space to store them all and don't have enough electronics to make more!
 

mayan

Legendary member
Looking really awesome, following your journey with this one and I too am waiting for the planes.
 

CapnBry

Elite member
Here's the entirety of the plans I've used so far :LOL:. Actually, 3 of the 4 are plans and the 4th is a piece of scrap foam that stowed away in my photo.
DSC06444.JPG

I tried to cut my wing too. I decided to do a 1100mm wingspan since the foam I have is 2ft wide; the ends just go into the garbage otherwise. My Galleon DTFB will be 10% better than the ZOHD right? I might use the extra length to round the tips a bit or something. The first one came out as close to perfect as I can expect for being my 4th try at hot wire, but I tried pushing the hot wire bow instead of pulling it and really messed it up bad. I'll make another one, but I also managed to melt through my template.
DSC06446.JPG


I also made the hatch while I was waiting for the printer. It is fully 3D! The tape on the front is not part of the design but is there because the first lip design did not work at all so I had to rip it off and the foam started to delaminate. It does take up some of the interior space but golly this thing is like a cavern inside-- like 100 cubic inches big (1600cm3) just in the battery section. My 1400mAh 3S takes up about 2% of the battery compartment volume. I also have to work out how to incorporate a magnet, because it only stays in place now because the fit is exact. A few in and outs and I'm sure it won't want to stay put.
DSC06449.JPG


DSC06450.JPG


That's pretty much it for the fuselage. I've just got to poke reinforced holes for skewers for the tail and wing and cover up the giant nose hole for the maiden. I am going to minwax the outside before we fly. The minwaxed black looks super swanky, but the white gets yellow so I probably won't do the canopy hatch. I have some wicked strong dye I was going to try dying the minwax, but I really like how that part looks in white. We'll see how I feel once the wing is done and painted.

Oh! I was just looking at the zohd photos and I guess I don't have the lower vertical stabilizers. I feel like single thickness foam board is going to get bent to heck back there, and they'd just be glued on at an angle? Not sure how to reproduce that part of their design. Maybe just one central one?
 

CapnBry

Elite member
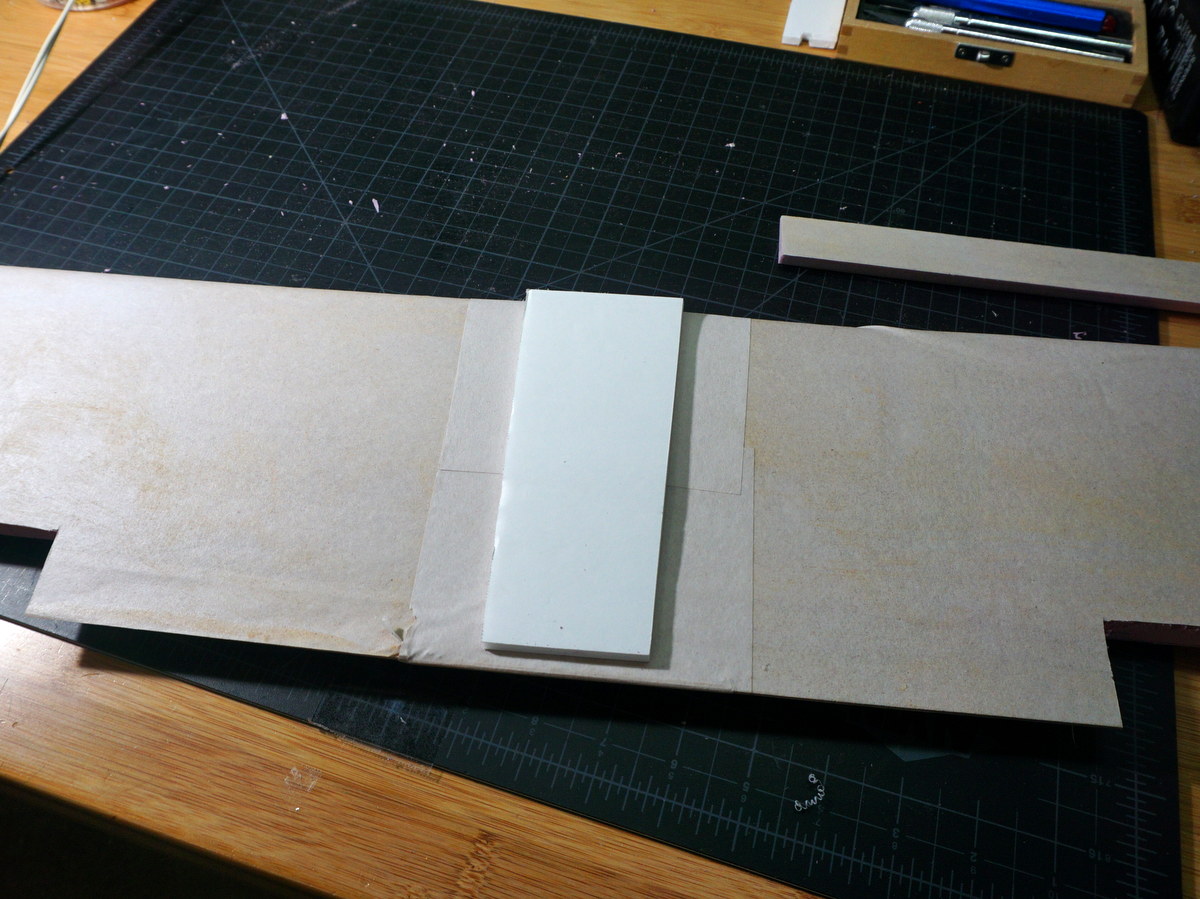
I got me hot wings cut, they didn't turn out awful. Most of the imperfections were taken care of with some sanding and then hidden by covering them with packing paper and the elmers wood glue I had on hand. For comparison as far as flex goes:
merged.jpg


The top is a 490mm wide panel that I cut when learning to cut foam, the bottom is my 550mm wide panel with the paper laminate. The weight on top is 1kg exactly. You do pay for it with weight though, it was somewhere between 60-70g before putting paper on, and 110g after. It probably will weigh a little less after it dries completely, and some of the glue has also been sanded off. I totally Britta'ed it by putting glue on the outside of the paper instead of the inside, but it seems to hold well. The paper edges can chip easily as I experienced when learning how to make my miter saw compound for the first time in its life to make 45 degree bevels on the wingtips. Thanks to the thickness, they look really cool and rounded despite just having a bevel like a hinge.

DSC06460.JPG


You can see my leading edge has a wrinkle in the paper I couldn't get out. The foam underneath is slightly low so the paper didn't want to stay stuck. It'll still fly. I also cut my ailerons, 35mm (20%) x 275mm. I should have measured these earlier, since I've since pixel-peeped some more ZOHD Rebel Talon GT photos and they have 30mm v-tail control surfaces (also 20%). Mine are 25mm, so I hope they are enough.

Gluing the wings together was a bit of a challenge. Hot glue didn't seem to want to stick, or in retrospect I don't know if the 2 minutes of dry time was enough for it to cool considering the foam insulation. I also tried Bob Smith foam glue and that stuck better to the table that it did to keep the wings together. Finally I used 3 toothpicks to (misa)line the halves and used Gorilla White glue to join them, clamping both sides to the table for the first hour and a half. Once that was looking good, the center section got a bamboo stick on the trailing edge and a second coat of paper over the whole center. I also hot glued this block to the bottom to keep the wing centered in the fuselage.
DSC06462.JPG


Holes were made for the skewers holding the pod and the wing on and reinforced with plastic bushings. The last section of fuselage was closed up as well. Wait a second, this is starting to look like a something.
DSC06463.JPG


I experimented with a bunch of hinge ideas using zip ties, nylon rope, and cargo strapping to attach the ailerons but all of them didn't go so well. I only beveled the control surfaces on one side so all the regular hinges would need a double bevel or have a gap between the surface and the wing. I'm almost positive I'm just going to paint it all up then make a monokote hinge out of packing tape. I googled around and have a hard time finding relevant results for "hot wire foam wing control surface / hinge". I'm sure the tape will be fine.

What's left?
  • Wing servos for the ailerons, pushrods, horns. Dangit! I meant to do this before I glued the centering block on so they'd be held under it. Oh well.
  • Paint the wing (question mark)
  • Strap in a receiver, ESC, and a battery and give it a go. Still don't have a spare receiver or ESC and I'm dragging my feet on ripping one out of a working model. Weight of airframe so far including wing servos , prop, and rubber bands is 320g. With a 1400mAh 3S, receiver and ESC will probably be about 480g. Add 120g for action camera and FPV stuff and that's 600g. With a 18.5dm^2 wing area, that's a cubic wing load of 7.5 which is "gentle flyer", or practically a glider (6.0) without the cameras.
 
Last edited:

CapnBry

Elite member
Oh boy oh boy, I've got myself a reverse puzzle here. All that foam so nice and neat, let's cut it up and extract it to slip in those aileron servos.
DSC06466.JPG

I decided to paint the Galleon after all, since this would be an historic flight. Lesson learned about the paper covering though: put glue on the foam and on the inside of the paper, since my glue left a horrible finish on the outside. A flaked a bit off when cutting the wingtips and I patched it, except this time with the glue in the middle and not the outside.
DSC06478.JPG

That's not two layers of paper, it is just one except with different glue applications and one looks much better. This is probably because I used WoodMax sandable / stainable which has some fiber in it. I had a whole tub of it in the garage for the past 2 years, it has to go! Anyway, it came out good enough but I'm not sure I'd do the hot wire wing again for such a simple airfoil. I can cut and build a FliteTest folded foam wing in about an hour and this takes a little longer of active time and a LOT longer waiting for things to dry.

I did monokote style hinges except out of packing tape. The tape doesn't want to stick to the rough painted surface so I ended up just gluing it. I should have made cloth hinges or something instead. It seems to be holding ok though... after I glued the tape down. :unsure: See? Is fiiiiine!
DSC06475.JPG

DSC06473.JPG

DSC06476.JPG


I did end up scavenging enough parts to be able to fly it. Stole an ESC from the thrust test stand, took the receiver out of the Tiny Trainer, and made a BEC out of some parts I had on hand, although it has to be be powered from a second battery. Since there's no cameras in it, it is tailheavy as it pleases, so having two batteries is fine, and there's even 50g of weight stuck to the googly eyes to simulate some of the camera weight. There's a giant space under the wing, a giant space under the canopy, which leads into a big space in the nose for cameras. There is just tons of space in this monster Galleon so finding the right CG is a matter of just shifting things around.

Big problem with the design: my tail goes right to the end of the fuselage and is swept back. An 8" prop has about 25mm of clearance from the v-tail which is fine for this motor but the FT Radial 2212 has less shaft so it will be pretty close. I found some better images and the Rebel GT has some dead space after the tail which I did not include, and their aft is slightly steeper angled than mine. I'll fix these in the plans for next time.

All up weight 490g (without the googly eyes) with one 125g 1400mAh 3S
So 365g just for the frame and electronics. I'm going to try to squeeze in a maiden with ground video tomorrow before I leave town, setup with 610g AUW (two batteries and extra weights). Wingspan is exactly 42" or about 1065mm. To assuage my worries about the V-tail control surfaces being too small, I configured it in opentx as 60% elevator, 40% rudder. That's 20% more influence from the control surface for elevator, which should balance out that the surface is 20% smaller. I suppose I could also set it up 100%/100% and just only use one at time if needed. Ech, let's live dangerously.
 

CapnBry

Elite member
I don't have time to edit a video together before I have to leave, but I maidened! Eeeeee results not so good.
  • First launch: rubber bands on wing weren't tight enough so the wing came off in turn #1. I was able to slow it down and land it. Whew.
  • Second launch: needed a bunch of up elevator to stay up (more than I had trim) so I landed and moved the batteries back
  • Third launch: Was able to almost fly straight with elevator trim maxed. Landed and removed 25g of nose weight
  • Fourth launch: HOLY SHIRTBALLS so tailheavy it almost immediately looped on take off, then nosedived, then almost looped again. Managed to land again and move the batteries forward.
  • Fifth launch: Hey this isn't bad. Let's try a stall test from ~20m up. Tip stall into what felt like near death dive, but on the video it doesn't look like I almost put it in a lake and then a tree. Flew around like this and did some tricks getting a feel for it. Landed with 25% battery left and broke the motor off on landing.
  • Flew for about 13 minutes total, 9 mins throttle %, and the charger put back in 870mAh.
To fly straight it needs about 3mm of up elevator and the CG is too far back still. I'm going to have to take a good look at the tail to see if it has some incidence? The thrust line is below the wing and there's 0 thrust angle so that should be pushing the nose up, right? The motor mount is going to need a redesign as well since I can't have it getting ripped off every few landings. I wonder if adding those lower vertical stabilizers would make any difference. Bonus feature: each landing, the tips of the prop were covered in dirt, which flew into my eyes on launch. I'm also thinking it would have made sense to add some wing incidence (currently at 0 degrees), just a degree or so and built a couple of degrees of washout into the wing tips. We can also try some vortex generators on the existing wing tips.

I only have 70 throw on the ailerons since it visually looked like enough, but I did a roll and it took ~2.5 second to make it around, so long I nearly lost it. I was able to fly upside down easily though, almost as easy as right side up. I think the 60/40 mix on the elevator/rudder is pretty good. It is agile enough for FPV sightseeing. I'll need to add more up elevator though once the CG is moved forward so I might need to go up to 65/35. There's plenty of rudder for quickish rudder turns, but it really dips the inside wing and needs a touch of opposite aileron to keep from rolling and then pitching.

Some work to do. I'll be back on Friday and should have time to edit the video and put it up.
 

CapnBry

Elite member
I'm back, and remembering how hard it is to shoot decent video by yourself. I've put together the video of the maiden although it isn't very exciting at all. On the first flight listen for the THWUMP sound of the wing coming off in the turns then slapping back down.

Tonight I'll be modding the plans a bit and trying out some ideas for the lower stabilizers. I think they'll help prevent the motor mount from breaking off on landing by keeping the tail from fully contacting the ground-- perhaps that is their true purpose on the ZOHD Talon Rebel GT as well. Since the firewall is off, I also am going to print a new firewall with the motor shifted up 5mm, which is about as far as it can go before it gets close to interfering with the fuselage top.
 

CapnBry

Elite member
92 degrees out with 5kt winds gusting to 20kt, what do you do, hot shot? Go test pilot our changes! The motor is back on, with the firewall shifted up 5mm and this time taped with EXXXTREME packing tape instead of regular sissy tape.
DSC06489.JPG


The motor didn't fall off on landing, although I only landed it 3 times today. I also set the "stop on idle" in blheli_32 to 90% (up from 50%). I'm not sure why I am so adverse to going all the way for 100% since I'm sure the voltage spikes are probably the same regardless of the duty cycle of the FETs.

As you can see, the lower stabilizers were also added. I did 5 different iterations on this, a double angled tab+slot version, a single vertical tab+slot, a single vertical flush-glue-on, and two iterations of a design identical to the V-tail with bevels (which were both a little too large as you can tell from the above picture. This last one is the one that's on the model, but I'd be concerned about adding a second weird fold like this to the plans. It can easily be the wrong size due to cutting variance, although any errors would just be largely cosmetic since they are just there to keep the tail from dragging. I might do a both the single tab+slot version (which is surprisingly strong in the highly technical "throw it at the table" test) and this version and let the builder decide which they're up for.
DSC06480.JPG DSC06484.JPG

I reinforced one side with a piece of skewer, and the other side is just ironed to a point. I want to see which breaks first. The skewer is definitely stronger, but the ironed version seems pretty stout as well and this may not need to be strong enough to smash rocks into dust on landing.

Finally to experiment with that horrible tip stall problem, I 3D printed a 256mm wide x 8% chord (14mm) x 2mm tall strip of vortex generators at a 12 degree angle and a 21.2774mm spacing (2 * 10 * vg_h * vg_d * 0.75 / (PI * PI * vg_h)). They are installed to end at 14% chord, so they start 11mm back from the leading edge.

DSC06487.JPG


I don't know if it is this or if I changed something else that had a positive impact but it doesn't dip a wing at all any more. 10% throttle, full up elevator and it just floats down with a positive attitude. Very controllable allowing me to battle the wind. The CG was back to where I calculated it should be (35-40mm). 35mm needs more up elevator (even more than the ~3mm I baked into the centers in the transmitter) but is more gentle, and 40mm needs just the 3mm but flies a little more aggressively and wobbles a touch in a stall.

Upped the throws on the ailerons to 90% and set the last 10% as flaperons. Very weird, when they are down, the nose points down. It also doesn't fly quite as well despite not hitting the end of servo travel. They're not really needed so I'll just ignore this for now.

Flown weight was ~620g with 115g being ballast (camera mocks) and 125g being battery, so the frame and electronics weigh in at 380g and the power is just proud of being not enough. It is more than "scale" feeling but you're not getting much vertical out of it. This Turnigy motor I got for $9 on sale at hobby king, and with a 100% fully charged battery I get 762g of thrust, but 90% throttle is only 650g. Flying in ANGLE mode in iNav, it should be sufficient, but if you try to do tricks you're going to feel the lack of power. I'd prefer to have a little more power in reserve, so I might pick up some 8x6 props for it or maybe try 4S (although that will definitely exceed the 175W max motor power).

What's next? Going to work on the plans a bit and start cleaning them up and integrating all the changes I've made along the way. Also need to get iNav in there, but first need to decide which model that equipment is coming off of. Tomorrow morning I want to go out early though and fly it with a degree of wing incidence to see how it affects the characteristics, to decide if I'll put that in the plans or not. Hard to believe this was just an idea a week ago, eh?
 

CapnBry

Elite member
Holy smokes, why didn't anyone tell me this is so much work! Spent pretty much all day working on this, although 60% of the time has been learning Inkscape beyond quick simple lines.
GalleonDTFB.png


I flew this morning with 3mm of foam wedged under the front of the wing for about ~1 degree of incidence and it flew real nice so I've baked 1 degree into the wing on the plans too. I figure if someone doesn't want the 1 degree (since the tail is now -1 degree out of alignment) it can be easily cut or sanded out of the fuselage. Still have a few parts left to do as you can see with my little TODO reminder but I hope I'll have time to finish up tomorrow. I think almost all the parts are going to fit on a single sheet of DTFB too, how about that? Since the wing is 42" span and 6.889" in chord that could possibly fit on a second sheet (2x 21" spans each ~14" across).

Flying today I was evaluating gentle flying performance and getting a feel for the pitch and yaw rates. It takes about 4 seconds to do a full rudder turn (which is assisted by the automatically wing rolling into the turn). A full loop at 80% throttle takes about 3 seconds, and a roll completes in 2-2.5 seconds. The v-tail control surfaces on the plans are 20% bigger than on my model, so yaw and pitch performance should be improved. There's no dihedral in the wing, but there's a ton of stability from all the weight hanging below the wing. My wing actually has 1-2mm of anhedral by mistake and it doesn't seem to matter, but I'm sure that's because there's enough flex in the wing to cancel that out in flight.

The nose on my model is already getting kinda banged up on the first segment of the bottom of the fuselage. I think I may put a piece of reinforcing foam on the inside to give it a little structure. If I had a plastic milk carton, I'd definitely cut a piece of that to cover the bottom. It just takes a beating dragging across the ground on landings.
 
Last edited:

CapnBry

Elite member
Here's what I've got, completely untested.

Fuselage: The two red strips are for embedding 11" of bamboo skewer, optional. The "remove paper / foam" sections are just to wrap the paper around to the inside to make a nicer edge and protect it.

V-Tail: After preparing the control surfaces, cut two single bevels along the center and fold up 40-45 degrees. A 40 degree gauge is included in the plans. Do this before attaching it to part 5 Power Pod. The size of the V-Tail is roughly the size of the fuselage inner width. The power pod is an A fold, so it should be roughly the size of the fuselage inner width. The power pod glues upside down to the V-tail, with the forward sections aligned (the V-tail is longer and wider). Use the servo cutout marks to center the power pod with the v-tail when gluing them together. Note that in my images above, the v-tail is too narrow and falls down inside the fuselage so yours will be better than mine.

Fore / Aft formers: The aft former should go in first before folding the fuselage sides up and goes at the rear blue reference line. The fore former goes in after folding the sizes up in the 20mm wide space between the canopy cutout and the wing cutout. The double-C-fold wrap extra bit faces forward. That tab is where you can install a magnet to hold the canopy on.

Canopy: The front and rear pieces are sized so they line up in front of the blue reference lines (to the left in the plans). The extra tab on the front piece should extend past the end of the canopy to make a lip to secure under the fuselage front. Beveling the upward-facing edge of the front tab, and crushing the corner of the fuselage top foam a bit with the side of a skewer can help these mate better.

Lower Stabilizer: This is the same 2x single bevels like the V-tail-- it should fit inside the fuselage so the external surface is even with the surface of the fuselage bottom skin.

Wing: There is no wing in the plans. The wing should be comprised of 2x straight 21" wide panels with a chord of 175mm. Ailerons are 270mm x 35mm each and end 60mm from the wing tip. CG is 35-40mm back from the leading edge.

EDIT: Pre-1.0 plans removed and plans moved to first post.
 
Last edited: