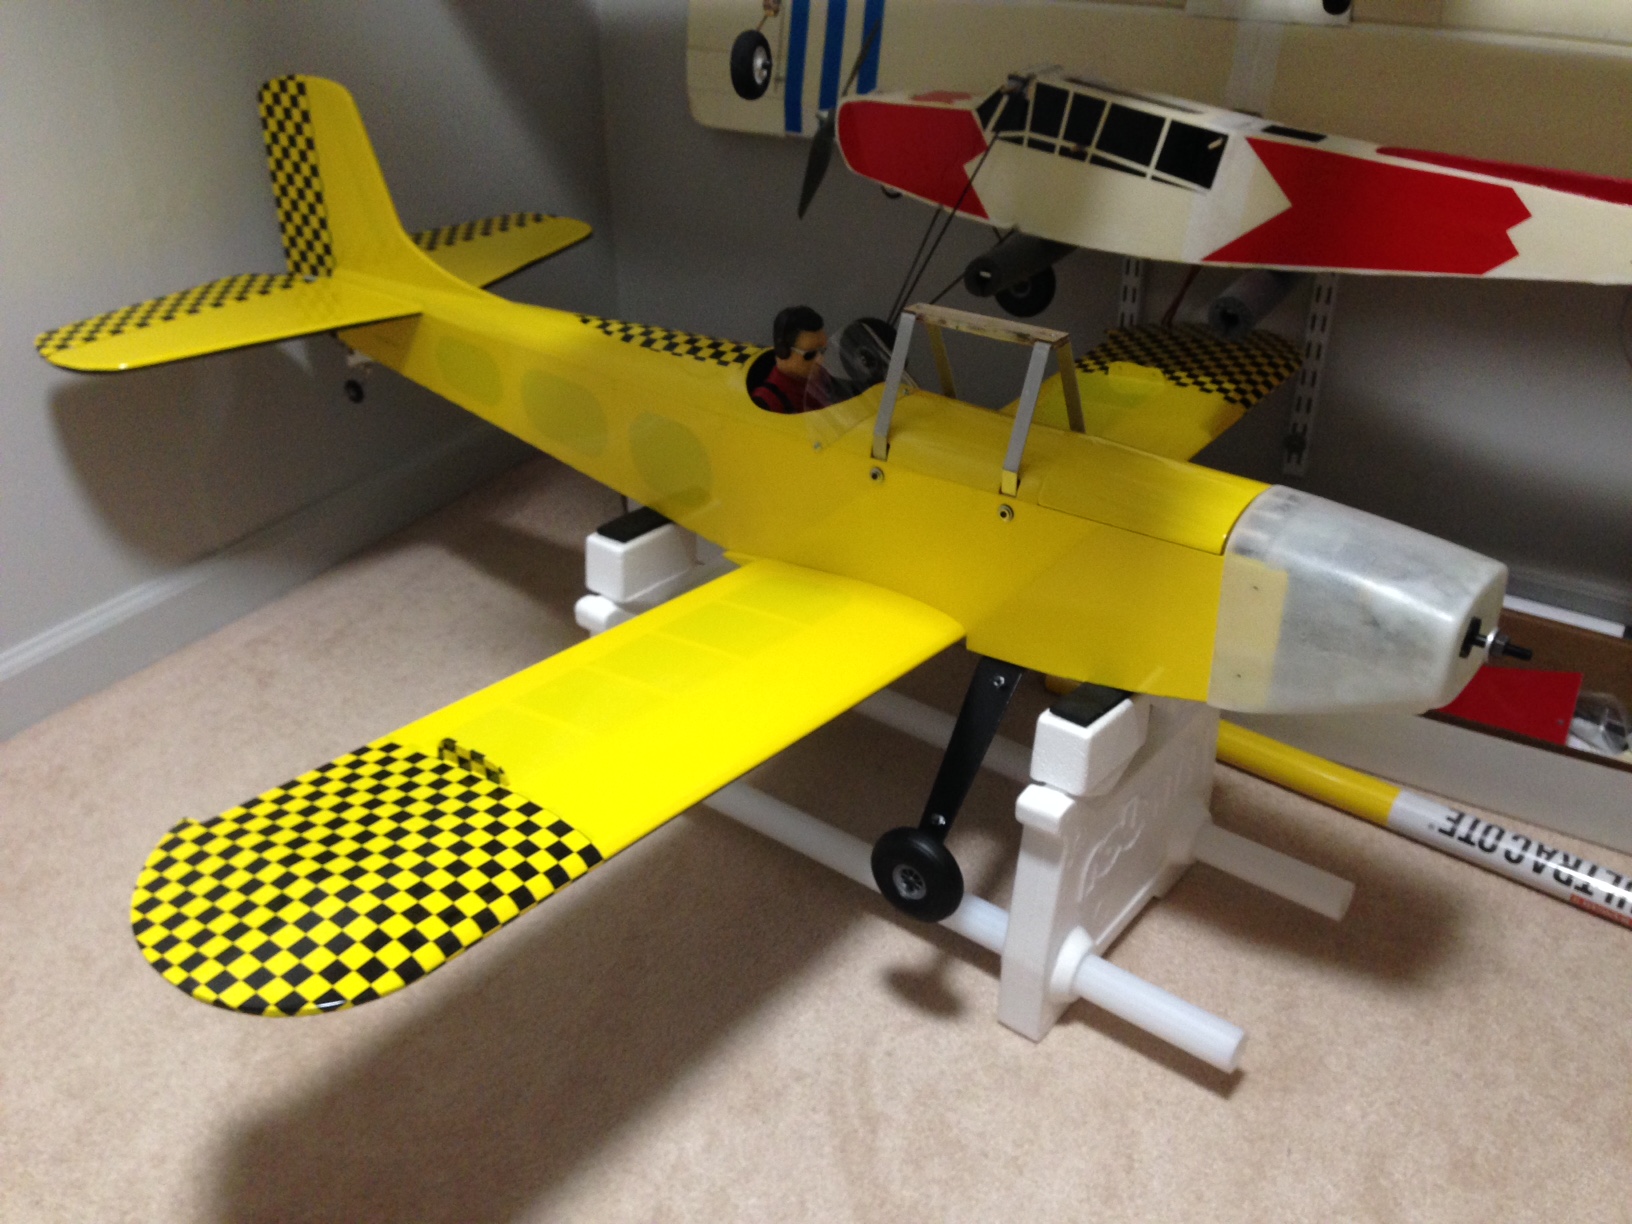
2017/2018 Balsa Build Along, SIG HOG BIPE ELECTRIC CONVERSION

nhk750

Aviation Enthusiast
Prior to melting, was the headrest hollow? Could one use it for a mold for replacement? I plan to build one of these and I'm just curious.This plane looks bigger as the covering has been applied.

Ya, it' just vacuum formed thin plastic. I had the iron too hot trying to apply covering and my inexperienced hands ended up crushing it. I should have just painted it, but I'm not too concerned at this point as this isn't a scale model and there is room for "artistic license" here. Some guys make a new one out of balsa, but I didn't want to add anymore weight as it's heavy as is, I'm also not doing wheel pants to save weight and our field is bumpy grass so they would probably not last anyway.

Got lots done this weekend and I finished the fuselage, except for the cowl which I'm painting black. Next up are the wings...

The battery hatch could be better, but it will work.

IMG_3895.JPG

Sullivan tail wheel mounted

IMG_3901.JPG
 

nhk750

Aviation Enthusiast
In case anyone is interested, here are some pics of the electronics in the fuse. I tucked the radio gear aft into the tail as far as possible to help balance out the plane and have the radio mounted on a plate that can be unscrewed then fished out of the tail if servicing is needed.

IMG_3899.JPG

IMG_3898.JPG
 
Last edited:

rockyboy

Skill Collector
Mentor
I like that removable radio tray idea... I usually try to deal with removing the receiver and keeping it clear, but the tray could make things a lot easier on some builds..
 

nhk750

Aviation Enthusiast
There is a weight penalty with the addition of a tray, but in this case I needed more weight in the rear and why not make that extra weight actually do something and be useful instead of just lead... The Velcro in-between the servos on the bulkhead is from the first placement of the remote receiver for the AR6600T, I moved the remote aft, with a 12" extension, further to eliminate interference from the servos and wires nearby.
 
Last edited:

nhk750

Aviation Enthusiast
All it does here is rain every day forever right now so I cant fly...So, I just spent 2 hours covering the interplane struts. I am not sure why it took that long, but it did.

I had to be careful with the heat so the interplanes would not warp with the Ultracote shrinkage.

From this-
IMG_3903.JPG

To this-
IMG_0081.jpg
 

Joker 53150

Mmmmmmm, balsa.
Mentor
The smaller parts always seem to take the most time, but taking the time to do them well really pays off with the final product.
 

nhk750

Aviation Enthusiast
Progress report

My plan was to finish this by the end of April and I think I am on track for that. It will be 6 months total build time. So far that seems to be my norm...

I am starting to get the compound curves down pretty good now and progress on the wings is proceeding. Unfortunately the never ending rain here in Seattle has stopped for a few days and now I need to allocate my time to mowing the lawn and some other honey doos...That will give me some time to finalize my color scheme ideas at least...

IMG_3918.JPG
 
When I lived in Port Angeles, I couldn’t always wait for the rain to stop. It was no wonder the small engine shop had lots of mower engines and a giant pile of rusted out lawnmower decks!!

The plane is looking great!
 

nhk750

Aviation Enthusiast
Just started mowing the lawn yesterday and it down poured on me. So, I came inside to work on the plane some more. Try to mow again today as it's sunny and no clouds finally.
 

nhk750

Aviation Enthusiast
GOt the lawn mowed and worked on the wing for a few hours afterwards. It is coming along nicely! I spent some time on the interplane mounts and after I was done realized that they will be hidden by the interplane struts when mounted...oh well, it looks good anyway...

IMG_3921.JPG
 

nhk750

Aviation Enthusiast
Anybody have any ideas how to Ultracote this inside curve? I tried to heat it like a wingtip, but it was a disaster. I could apply the covering and use the little cuts in the radius method, but was hoping there is a trick to it.
IMG_3940.JPG
 

Joker 53150

Mmmmmmm, balsa.
Mentor
Anybody have any ideas how to Ultracote this inside curve? I tried to heat it like a wingtip, but it was a disaster. I could apply the covering and use the little cuts in the radius method, but was hoping there is a trick to it.

Inside curves like that can be a pain, and I usually hope for "reasonably OK" when I do 'em. Heat is your friend, and you can cut relief slits to help. I like to use my trim iron turned up to high temp to help direct the heat into very small areas, but even that doesn't make it easy. One thought is to cut a strip of covering and run it down the center of the piece, maybe 1/4" wide or so. This smaller and thinner piece should be able to handle the curves much better than a big piece. Then once that trim piece is on use the larger pieces and get them as good as possible. If done right the bigger top & bottom sheets will overlap the trim and you shouldn't see any balsa. It isn't the best visually, but from a few feet away you shouldn't see it!
 

Joker 53150

Mmmmmmm, balsa.
Mentor
Oh, and one other thought - normally when covering the recommendation is to keep at least an inch of overhang to give you something to pull or hold. That excess material is going to fight you on an inside curve like this so you may want to try trimming that back to maybe 1/4" of overhang. You can grip it with a pliers to pull through the corner as the heat is applied and the material stretches.
 

nhk750

Aviation Enthusiast
Yes, the excess over hang is what caused my first failure. I will try the small strip idea. In hind-site, I should have just made this piece more square when I shaped it. Sig does like their curves though...
 

nhk750

Aviation Enthusiast
It came out pretty good. I cut relief cuts in the curves where the covering was binding up and worked the covering around the curves with a hot iron (300 deg F) and with my fingers (nitrile gloves on). Then I put the main covering (large sheet on top of wing) over it so it overlapped a bit then hot ironed it all down and worked the seams together so they kind of melted together a bit.

Overall I could have done a little more sanding on the upper wing to blend things in better, but I am happy with how it is coming out anyway. Since this is a learning build for me it is serving it's purpose and teaching me things I can do better on the next build.

covering.jpg


IMG_3945.JPG
 
Last edited: