IamTheGriz
Member
I will save you my long winded intro that i had rehearsed in the mirror and get right to it 
I am positive most...no...ALL of you would say that choosing a pair of 3D printed planes as my pick for the first aircraft i will own was absolutely the worst idea possible.but this aint the sub forum for that discussion. we like material processing here so lets talk about the planes!!
I found these designs on the good old Universe of Things and knew pretty quickly that i had to try them out. Doing research on printing a R/C aircraft I could not count the amount of people having troubles with single wall, complex internal lattice structured designs that are from my short time of googles the standard for making a craft that can be printed and flown. these were not so complex to print. they also are extremely easy to assemble and should you smash it into the ground, are designed to be easily taken apart and repaired.
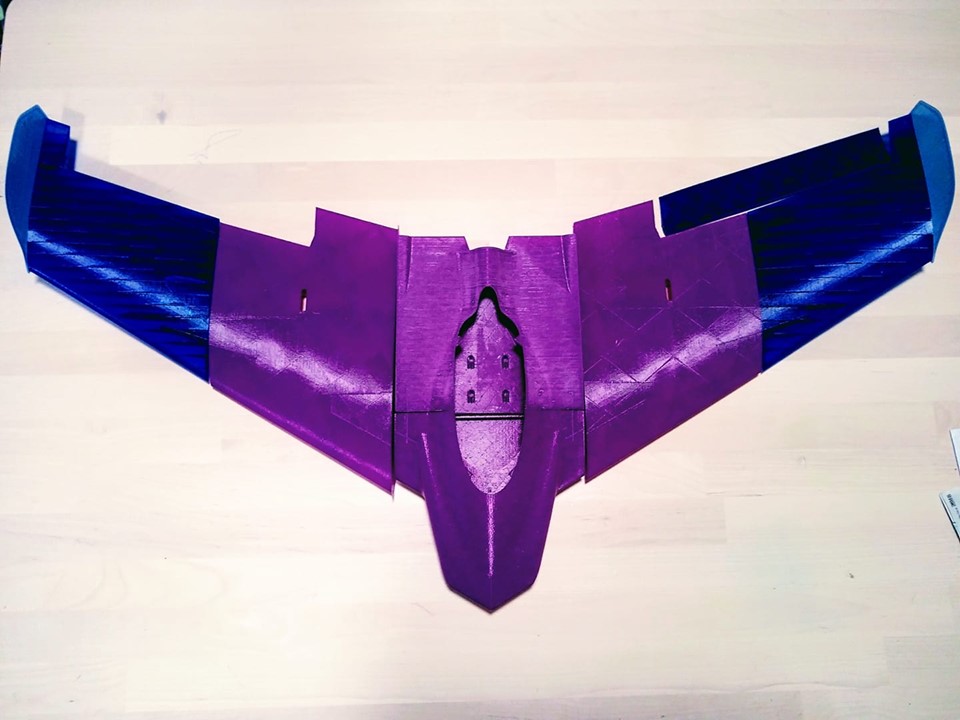
The GASB-ONE is Carletto's first design. coming from quads and multi rotors the flying wings SCREAM at me so i started with this:
 it is a single wall perimeter print but it does not contain crazy interior structures. some are built into the design to support the holes for the guide pins to align the parts for assembly but the slicer infill is what gives each part the strength. this was all made using Inland PETG. it has some minor flaws due to my retraction settings but i'm happy with it enough to assemble and fly without worry.
***I was not about to get myself wrapped up in a printed EDF jet just yet but if anyone else would like to print it out here is the link for the GASB-TWO- EDF JET. even if it only sits on my wall in the shop I do have plans to complete the Trio and print this out***
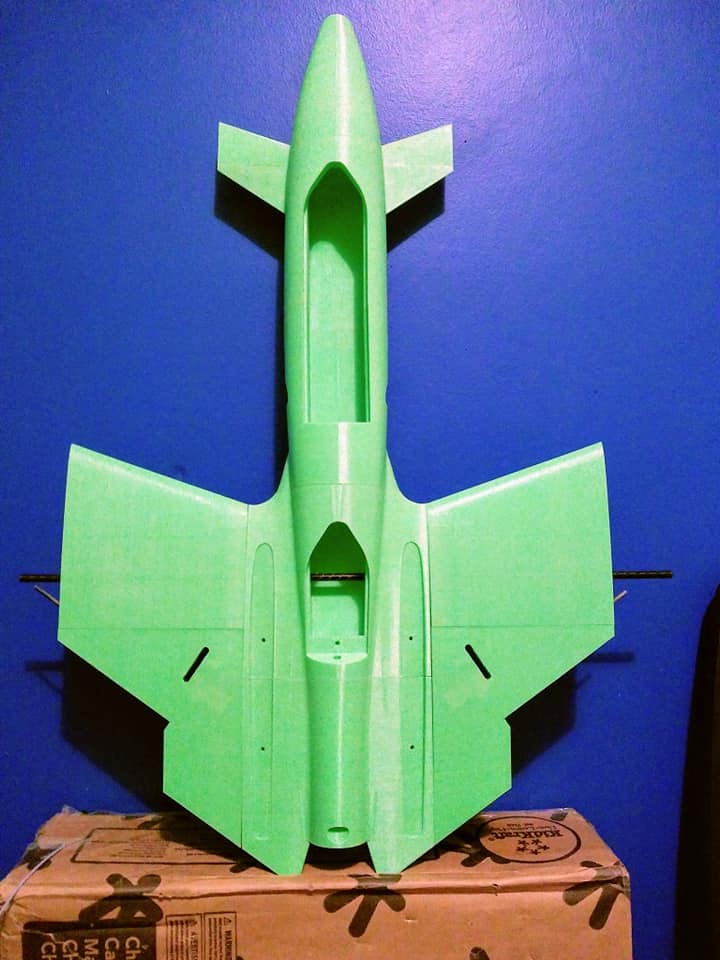
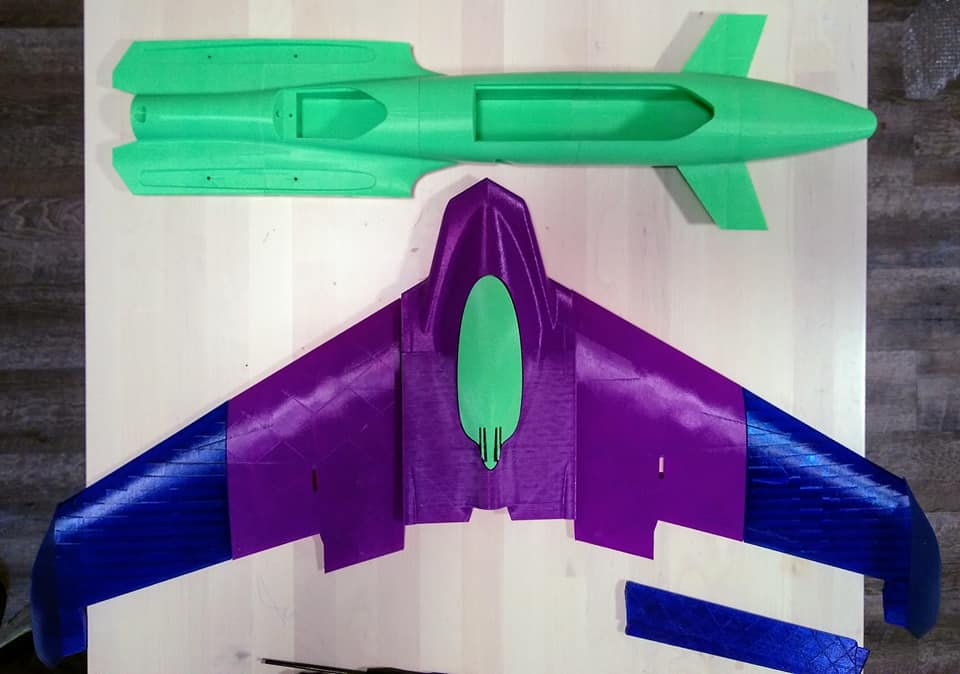
I am about 80 hours into printing the GASB-THREE. I am extremely happy with the outcome so far. The design uses 2 perimeter walls, has none of the complicated lattice ribbing just like the flying wing and It uses slicer applied infill for added strength.

The entire airplane is held together with multiple 3mm carbon rods cut to 40 mm as guide pins, a 6x450mm carbon shaft for the spar and about 30 wood screws for the body assembly and various covers for the servos, battery, esc and to hold the vert. stabs.


I decided to try this one out in PLA (also Inland band) but I will be doing another in PETG and possibly HIPS when the winter comes and I can move my printer out in the shop (heated but no AC) to avoid the nasty fumes in the house from HIPS.
I am pretty happy so far with how everything is turning out


I have another few days of printing and assembly to do and will share more when all the parts are done so I can show more of the build process.
with zero airplane stick time if these fly before the winter..they probably wont be under my control. I will work my way into them but when you have a good size pile of filament laying around why not right?? at this point im still in the free zone aside from the few cents in electricity.
it also gives the kids and myself something to do while the wife is working. I enjoy letting them help and they love going to my office to "checking on the printer" for me. I think they get as excied to wake up to find out if the next part finished or not as much as I do HAHA
Cheers!!
-Ryan
I am positive most...no...ALL of you would say that choosing a pair of 3D printed planes as my pick for the first aircraft i will own was absolutely the worst idea possible.but this aint the sub forum for that discussion. we like material processing here so lets talk about the planes!!
I found these designs on the good old Universe of Things and knew pretty quickly that i had to try them out. Doing research on printing a R/C aircraft I could not count the amount of people having troubles with single wall, complex internal lattice structured designs that are from my short time of googles the standard for making a craft that can be printed and flown. these were not so complex to print. they also are extremely easy to assemble and should you smash it into the ground, are designed to be easily taken apart and repaired.
The GASB-ONE is Carletto's first design. coming from quads and multi rotors the flying wings SCREAM at me so i started with this:

***I was not about to get myself wrapped up in a printed EDF jet just yet but if anyone else would like to print it out here is the link for the GASB-TWO- EDF JET. even if it only sits on my wall in the shop I do have plans to complete the Trio and print this out***
I am about 80 hours into printing the GASB-THREE. I am extremely happy with the outcome so far. The design uses 2 perimeter walls, has none of the complicated lattice ribbing just like the flying wing and It uses slicer applied infill for added strength.

The entire airplane is held together with multiple 3mm carbon rods cut to 40 mm as guide pins, a 6x450mm carbon shaft for the spar and about 30 wood screws for the body assembly and various covers for the servos, battery, esc and to hold the vert. stabs.


I decided to try this one out in PLA (also Inland band) but I will be doing another in PETG and possibly HIPS when the winter comes and I can move my printer out in the shop (heated but no AC) to avoid the nasty fumes in the house from HIPS.
I am pretty happy so far with how everything is turning out


I have another few days of printing and assembly to do and will share more when all the parts are done so I can show more of the build process.
with zero airplane stick time if these fly before the winter..they probably wont be under my control. I will work my way into them but when you have a good size pile of filament laying around why not right?? at this point im still in the free zone aside from the few cents in electricity.
it also gives the kids and myself something to do while the wife is working. I enjoy letting them help and they love going to my office to "checking on the printer" for me. I think they get as excied to wake up to find out if the next part finished or not as much as I do HAHA
Cheers!!
-Ryan
Last edited:


