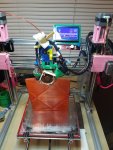
So...next test. I picked the outer wing section since it was the smallest one. It immediately presented me with the issue of how to position it. The STL opens with the outer edge towards the build plate...but the outer edge is angled. It could probably be printed with that flat on the board - but I decided to invert it.
I also slowed things down to the recommended 30mm.s max.
And I enabled a 0.2mm compensation after retraction to make up for the weak areas.
I left cooling off as suggested - still against what my experience was telling me I should do.
I also set wall thickness to 0.6mm in the slicer though it didn't make much a difference since a single wall should still be 0.48mm with a 0.4mm nozzle...but what the heck, let's try it.
The results were stronger - I had to really work to break this test. And the thin areas were gone. There were still some issues due to the lack of cooling though and....

Can you see the big issue? Kind of hard to tell from this angle. How about this one:

The post-retraction compensation was too much even at 0.2mm

There's now a blob anywhere it had done a retraction.
And with the angled end up having the top layer set to 0 meant that only the very top layer got excluded...all the other "top" layers as it worked up to that top got a single useless strand across them - not a huge deal and fairly easy to remove but...

What, what's that at the fart left?

Ugh. The very top came out horrible as I suspected it would with no cooling. Cooling doesn't just mean a fan...in slic3r it will also slow down the printer to give layers time to cool. These are the cooling settings I usually use:

So without those the print goes a lot quicker (this was still only a 3 hour print even with the lower speed and smaller layer height) but there's a definite loss in quality.
Ok, 3rd time's the charm. Let's dial that retraction compensation back out and do what I've been suspecting is needed from the start and enable cooling...fan and all.

The 3rd test is on the right. Yeah, printing different pieces isn't as rigorous of a testing regime as printing the same piece would be...but it's less boring and lets me see how things fit together overall. Thankfully these single wall prints don't use a lot of filament even if they do use a lot of time - so no worry about using up too much filament testing.
It's hard to see in the photo but the color is significantly different. The slower thinner layers are much darker. And this piece is even stronger. It doesn't have the sagging between struts and I can almost squeeze it enough for the top and bottom to touch without it breaking. It's not perfect...but it's good enough I'm probably going to use this piece without reprinting it.

The biggest problem is that the servo pocket didn't bridge very well. I probably need to turn up the bridging speed a bit since usually I get much better bridges and bridging usually seems to benefit from a bit more speed than normal printing. But that's not really functional so I can live with it, the parts that matter came out fine.

Also, with the retraction compensation dialed back the weak spots came back...but with the speed slowed down they're not nearly as bad and there are no actual gaps. I could probably dial retraction back a hair bit more still and get this just about perfect.
But it's good enough for me to move forward and I've got the 1st piece back on the printer tonight. With the new settings the piece that took a bit over 2.5 hours in my first test is now taking 5.5 hours - but it's looking a LOT better. Printer is about an inch away from where it starts hitting the LCD and I've got 30 minutes left on the print. So we'll see how it turns out.
One other thing I did differently is that test fitting all these together I learned that using a solid first layer, while great for bed adhesion, means you have to cut that layer out to assemble these parts. So this time I turned off the solid bottom layer and instead gave it a 4mm brim. That seems to have held it down (along with some elmers and my glass at 60c) so I'll probably stick with that. Brim's are usually fairly easy to remove (harder in PLA than ABS but not horrible) while cutting out the inside solid layer is kind of a pain. So this should make for easier final assembly.
And if it goes well...then maybe I'll start to experiment with cura some more to see if I can get the 3dlabs planes to print

Oh - this is Maker Geeks Crystal series translucent red that I got in their december maker box. It's not a full roll, instead of 2 full rolls they sent 3 rolls that were a bit more than 2 full rolls between them. This red, a matching green (since it was Christmas) and a clear PETG. I haven't opened the green yet but both this red and the clear PETG made for some nice Christmas light covers:


With clear/transparent filament thicker layer heights look best...but aren't as strong

Those were printed at 0.45mm layer heights so there was very little squish. But looking at them under the microscope my daughter got for christmas I could see tiny air bubbles in the extrusion since I printed them at 60mm/s and spiral vase mode. Printing slower and with individual layers probably would have given even better results.
For the ultimate in clear prints:
https://twitter.com/DanielNoree/status/801453732189839360/photo/1
0.5mm layer heights and SUPER slow with colorfabb HT filament. The design in the middle is air


