Cutting templates with Cameo cutter for flitetest plans

kevintieman

New member
I already built a few flitetest designs, such as the tiny trainer, the baby blender and the Spear. But I always spent a lot of time taping the printed plans together and cutting them out. My next plane will be the edge, so that means a lot of cutting and taping together the A4 sheets to make the templates.

However recently I gained access to a Cameo Silhouette 3 cutter so I started converting the edge 540 pdf plans to Silhouette Studio compatible files . I'm still waiting for the necessary cutting mat, but once that's in I'll start cutting the templates hoping to save time and gain some higher quality templates. Also I expect It will be cut on A3 cardboard, so I rearranged the parts to fit on A3 cardboard as that's the biggest format I can feed the Cameo cutter.

If anyone is interested I'll post the Silhouette Studio files and will post my progress, I added a screenshot as an example.
 

Attachments

  • Screenshot 2019-04-11 10.34.26.png
    Screenshot 2019-04-11 10.34.26.png
    29.1 KB · Views: 0
  • Screenshot 2019-04-11 10.34.26.png
    Screenshot 2019-04-11 10.34.26.png
    29.1 KB · Views: 0

mayan

Legendary member
I already built a few flitetest designs, such as the tiny trainer, the baby blender and the Spear. But I always spent a lot of time taping the printed plans together and cutting them out. My next plane will be the edge, so that means a lot of cutting and taping together the A4 sheets to make the templates.

However recently I gained access to a Cameo Silhouette 3 cutter so I started converting the edge 540 pdf plans to Silhouette Studio compatible files . I'm still waiting for the necessary cutting mat, but once that's in I'll start cutting the templates hoping to save time and gain some higher quality templates. Also I expect It will be cut on A3 cardboard, so I rearranged the parts to fit on A3 cardboard as that's the biggest format I can feed the Cameo cutter.

If anyone is interested I'll post the Silhouette Studio files and will post my progress, I added a screenshot as an example.
That’s a cool idea good luck with it and let us know how it goes.
 

Keno

Well-known member
I have the Cricut machine I will have to look into how it would do the same, thanks for the idea.
 

thenated0g

Drinker of coffee, Maker of things
Mentor
nice, i have a cricut explorer and while i haven't tried foam board i have been using it for some hot wire cutting. I created a couple templates for the root and tip airfoils and i cut them out of cardstock. Than i apply them to aluminium and follow the cardstock template with some scissors. Works great. Plus all the stickers you can make too, great little tools for the shop. Heres a vertical stabalizer i cut using it:

1554998118553.png 1554998215544.png
 

Keno

Well-known member
I did research this subject on the Circut's ability to cut foam and I came up with three issues. The first is the thickness of foam board oF Adams foam board. The second issues was the cutter knife has the ability to cut but the method they would leave "tacking" marks on the board. The third was you have to purchase their new machine. This is only a quick look at their product but I will leave it to others to look deeper into their product as it may have potential to become a value.
 

kevintieman

New member
Hi all,

Didn't have a lot of time due to work and family, however I did cut out some pieces. Especially the nose part is complicated but turned out pretty well. The score cuts are cut like the plans and I just cut through the template to mark the score cuts (those are a lot of cuts!).

Lessons learned, I really need to exclude the text from the image as that takes the cameo a really long time to cut. So I did with the second sheet of cardboard. Also I did not include the score cuts with some of the smaller parts.. Now I have to print them out anyway..

Some tips for anyone attempting to convert flitetest plans to cameo compatible files. I cropped the individual parts before importing them in Silhouette studio, using png images to have a transparant background. Then using the trace tool to virtually cut out the image, so make sure you are only including lines that need to be cut. Play around with the treshold and use "trace: for complex parts, and "trace the outer edge" for the simple parts.

About the benefits. You don't have to worry about the paper warping when tracing the template, as cardboard is much stronger. And I really don't want to think about cutting these templates by hand (especially the complicated ones), either with a scissor or knife. The cameo definitely does a much better job!

Next is cutting out the second complex part from the fuselage, I'll let you know how it goes.

Cheers,

Kevin
 

Attachments

  • IMG_6495.JPG
    IMG_6495.JPG
    1 MB · Views: 0
  • IMG_6499.JPG
    IMG_6499.JPG
    1.3 MB · Views: 0
  • IMG_6498.JPG
    IMG_6498.JPG
    1,022.6 KB · Views: 0

kevintieman

New member
Drew on the foamboard using the template, i kinda looks like the actual plan :cool: Next I just score on the outlined parts with a knife, then start the actual cutting. A bit tedious maybe, but I want good results.
IMG_6501.JPG
 

Attachments

  • IMG_6500.JPG
    IMG_6500.JPG
    1.1 MB · Views: 0

Keno

Well-known member
I did a little work with my Cricut and it can cut out basic shape of your project to create templates but you would be left to add the other details needed. Their new, Cricut Maker can do more as it has a roller cutting blade and a knife similar to a hobby knife blade but the knife cut is limited to 2.4 mm depth. And so far the reviews on cutting in not the best, broken blades, and tearing. What I have not check out is the pen feature but would have to purchase the items. Maybe others have used this feature. The roller cutter reviews stated that it can leave unwanted tracks on some materials. If you want graphics for you projects it is a great machine.
 

mayan

Legendary member
I think that if it cuts out the outline of the parts and you only need to score the plans thats better than nothing. Too bad I don't have such a machine, although my wife talks about it none stop so that might have to change :).
 

kevintieman

New member
I made a tinie tiny mistake.. The templates I made were a factor too small! I had a suspicion and printed out the template on A4 which has the actual dimensions. Next I took a measurement and recalculated the dimensions of each part and adjusted that in Silhouette studio, unsurprisingly some parts came out the big for the cameo so I will have to join them. Luckily I did not cut out all the small parts yet, or I would have had a micro edge :-D.

So progress is a bit slow, and this proves that 50$ is not a lot of money for the lasercut parts! However I am a DIY guy on principle so I will continue.

IMG_6502.JPG
 

Keno

Well-known member
I made a tinie tiny mistake.. The templates I made were a factor too small! I had a suspicion and printed out the template on A4 which has the actual dimensions. Next I took a measurement and recalculated the dimensions of each part and adjusted that in Silhouette studio, unsurprisingly some parts came out the big for the cameo so I will have to join them. Luckily I did not cut out all the small parts yet, or I would have had a micro edge :-D.

So progress is a bit slow, and this proves that 50$ is not a lot of money for the lasercut parts! However I am a DIY guy on principle so I will continue.

View attachment 129968
Merv offered https://www.ebay.com/itm/28-34-53-L...hash=item569eed6a22:m:m_eLL-r_uRwo0QABNm4WpDQ in another thread. Surprisingly the machine in low cost within my budget, Don't know much about it yet still looking. I was kind of Leary about what you found could happen. I have taken plans into other programs and resizing was a real problem including the Cricut machine.
 

kevintieman

New member
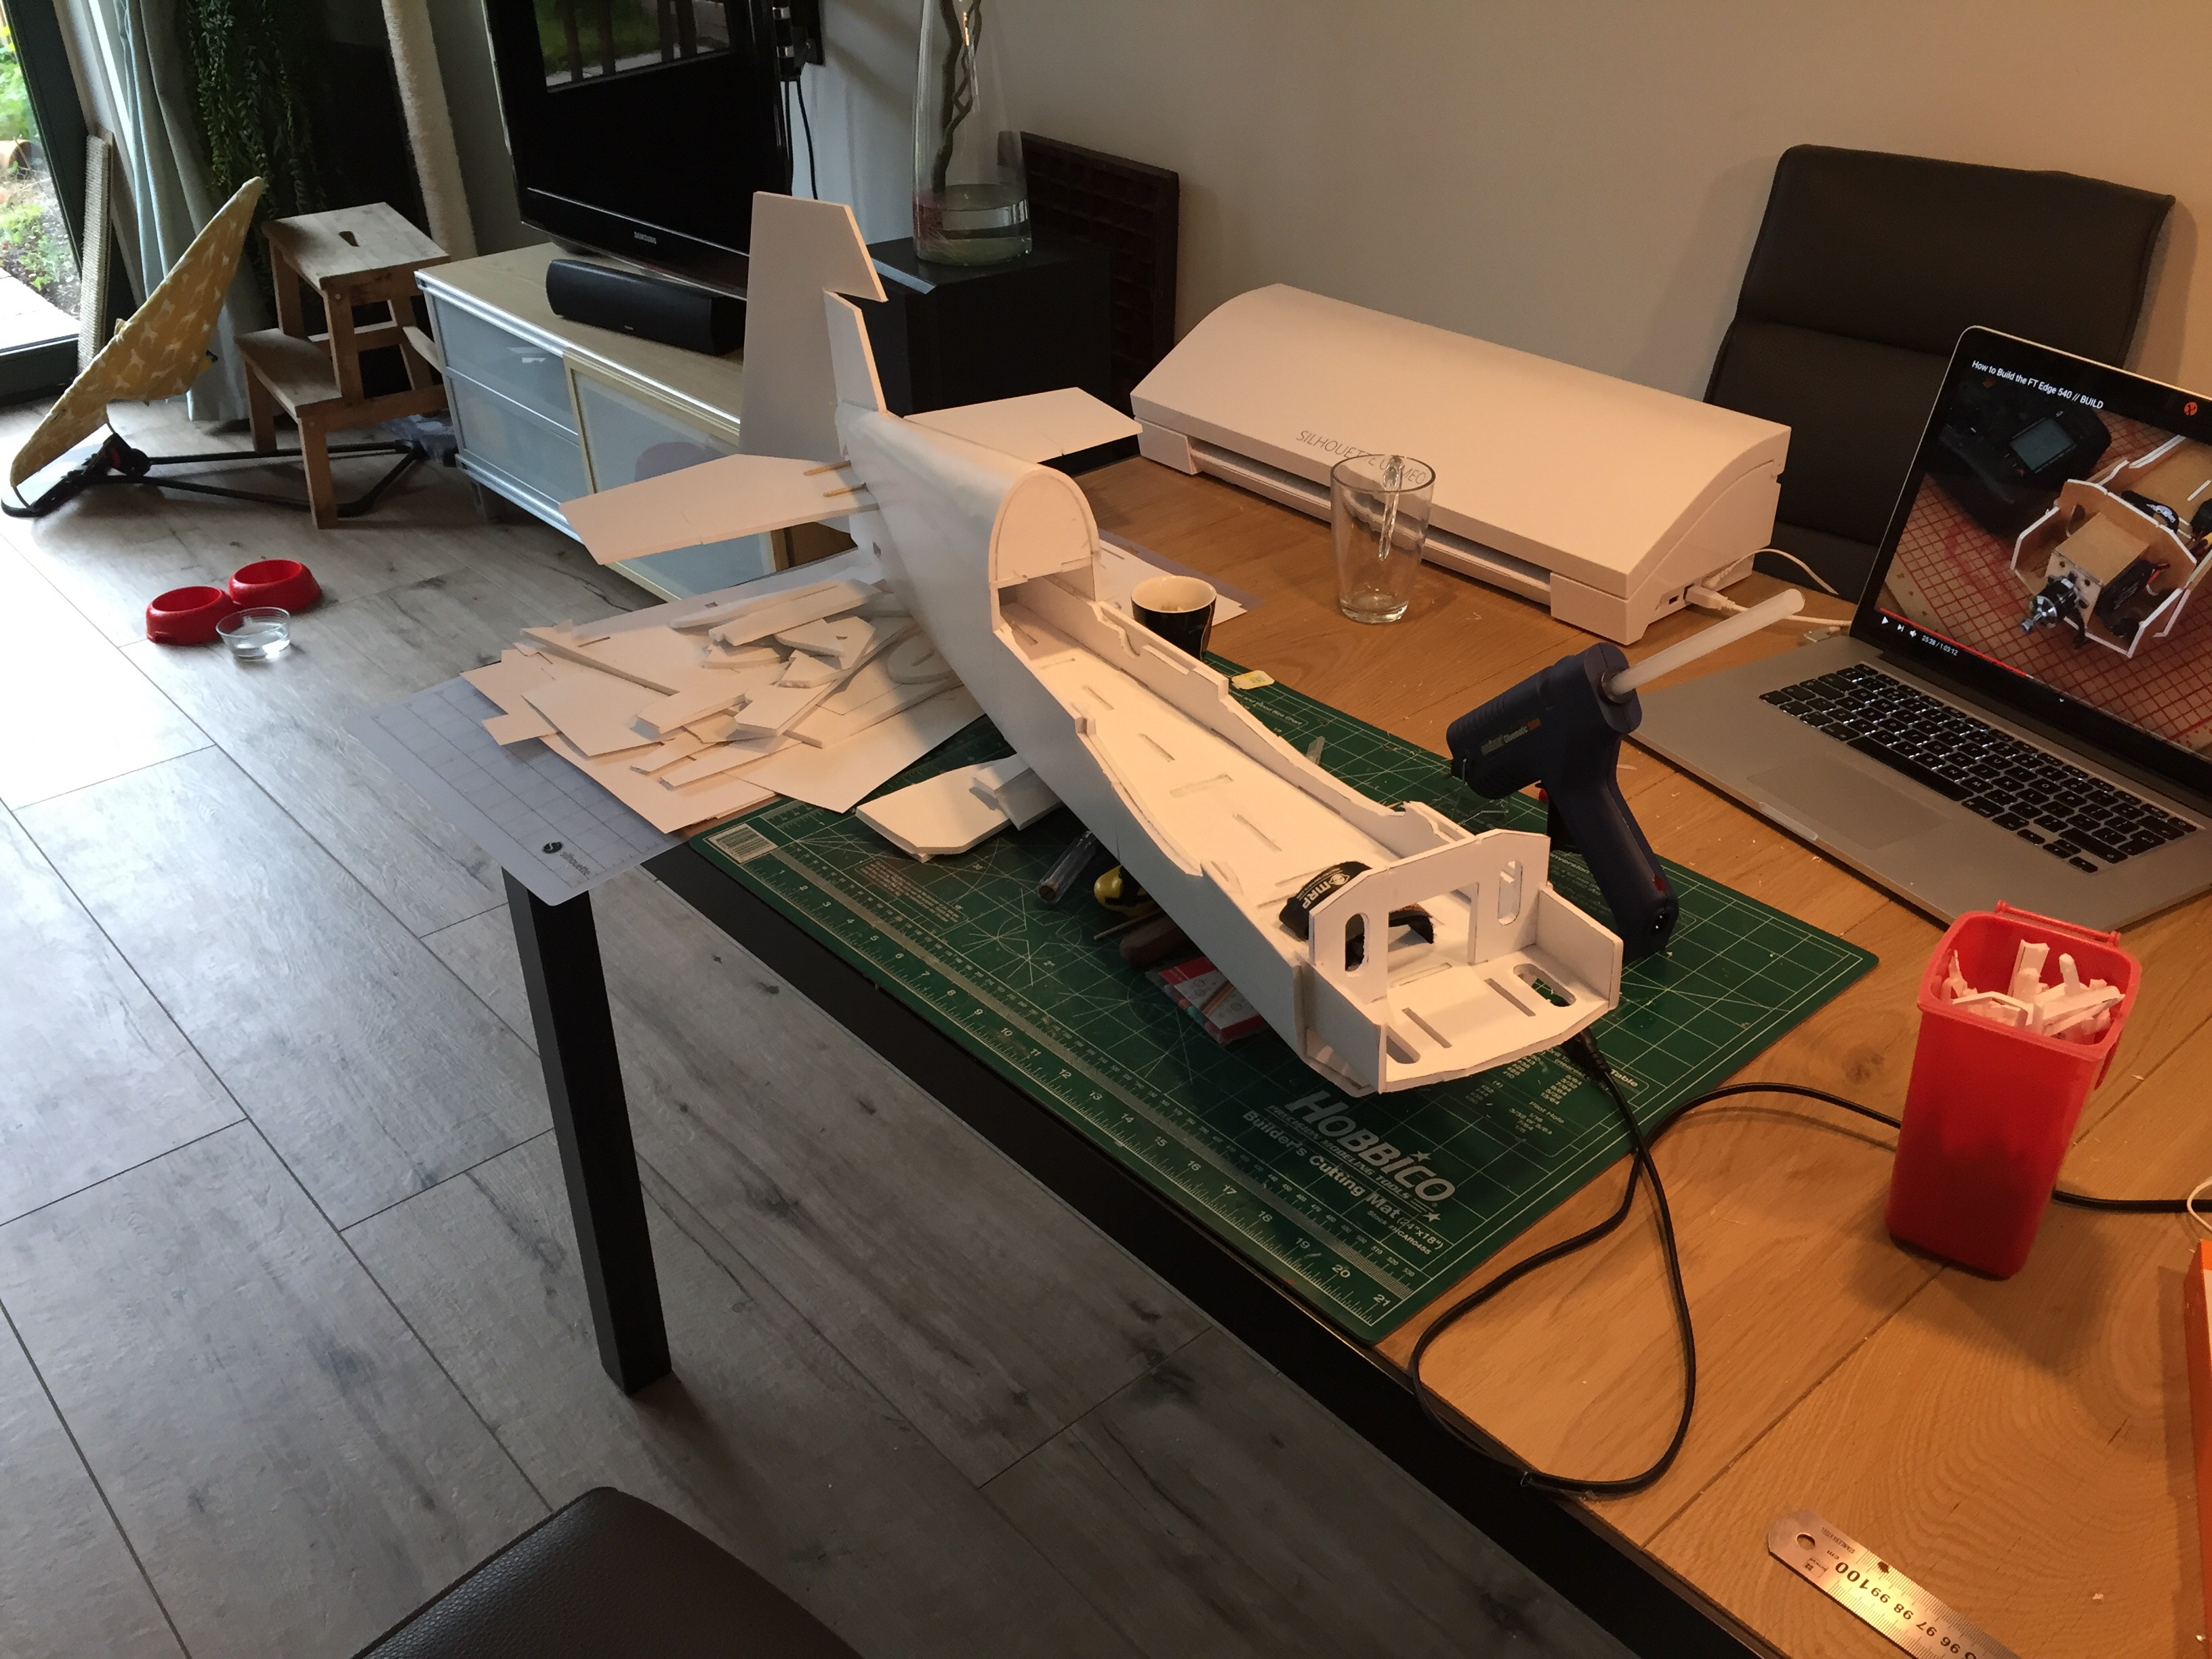
The resizing was indeed a bit of work, but paid off. Once the templates sizes checked out I started cutting the foam and made some "test fits". Already coming along nicely :-D, off course thanks to my cat overseeing my work.

Below is the bottom view of the fuselage of the edge 540, matching the picture on my laptop :).
IMG_6516.JPG
 

kevintieman

New member
Some more progress, beginning to look like an actual airplane. The parts fit really well, which is very important with this plane. This is a very enjoyable build and can't wait to maiden the plane!

IMG_6517.jpg
 

kevintieman

New member
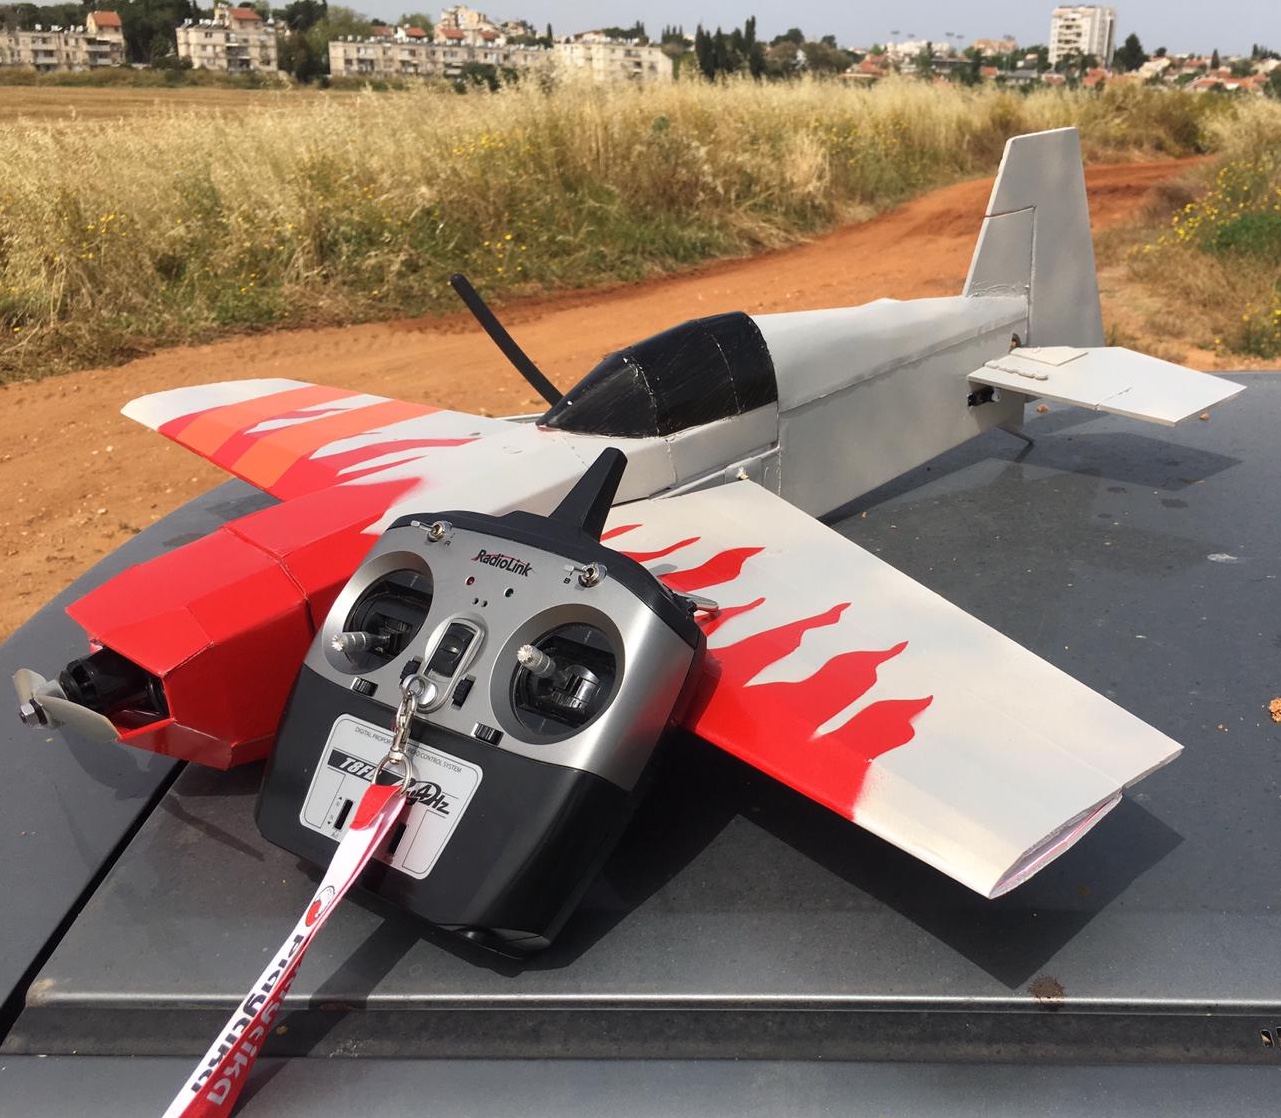
Did turn out nicely overall, some parts did not fit exactly but that's probably due to my rudimentary cutting skills. It did however soak up some rain while the paint was drying outside.. So it's quite a bit heavier than andres model (above 1 kg). So naturally I fitted a bigger motor (turnigy 3536 1000kv) with a 10 inch prop. That setup should get it in the air, maiden as soon as time and weather permits :-D.

IMG_6522.jpg
 

kevintieman

New member
Maiden:

Electronics
motor: turnigy 3536 1100kv
esc: turnigy plush 60A bulletproof
prop: APC 10x7
servo's: 17g digital/metal gear
receiver: frsky
lipo: turnigy 2200 4S

Thoughts: it's a bit tail heavy so I'll probably move the tail servo's to the center of the fuselage. Also overall it turned out quite heavy, about 1.5kg. Really like the FT edge, once it's properly balanced I'll try some aerobatics :-D.