FT Mustang - Build

Mid7night

Jetman
Mentor
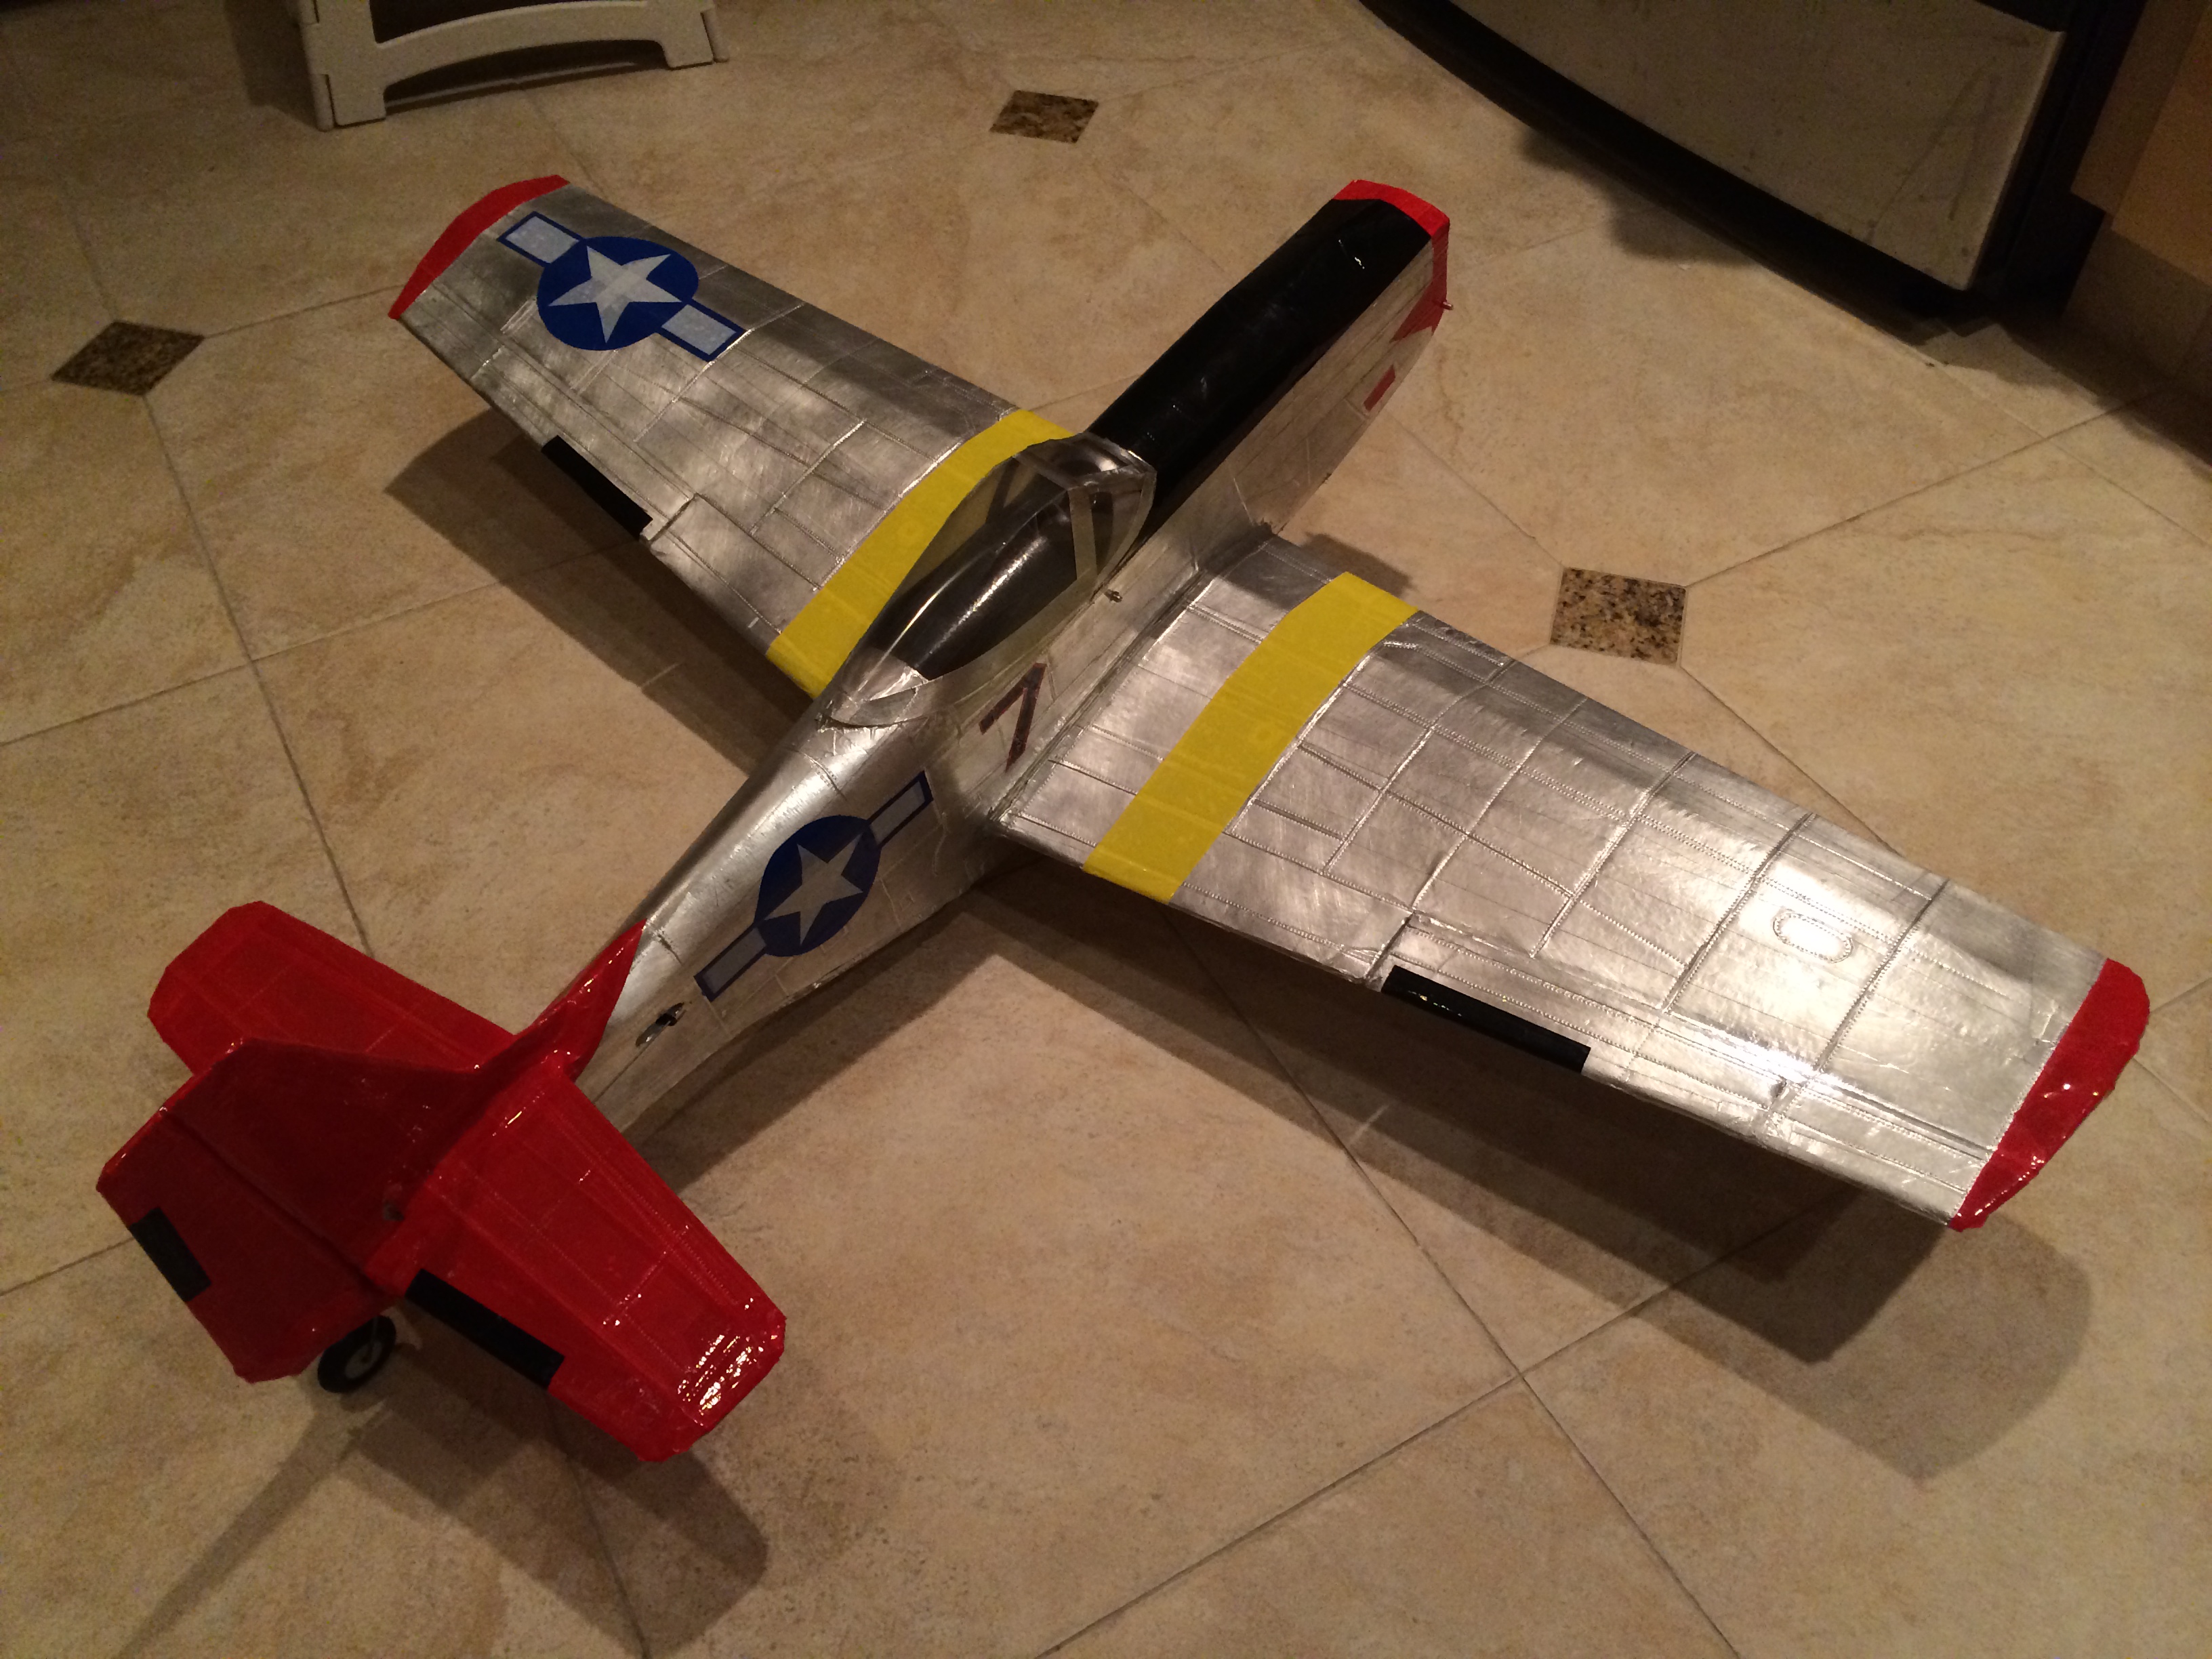
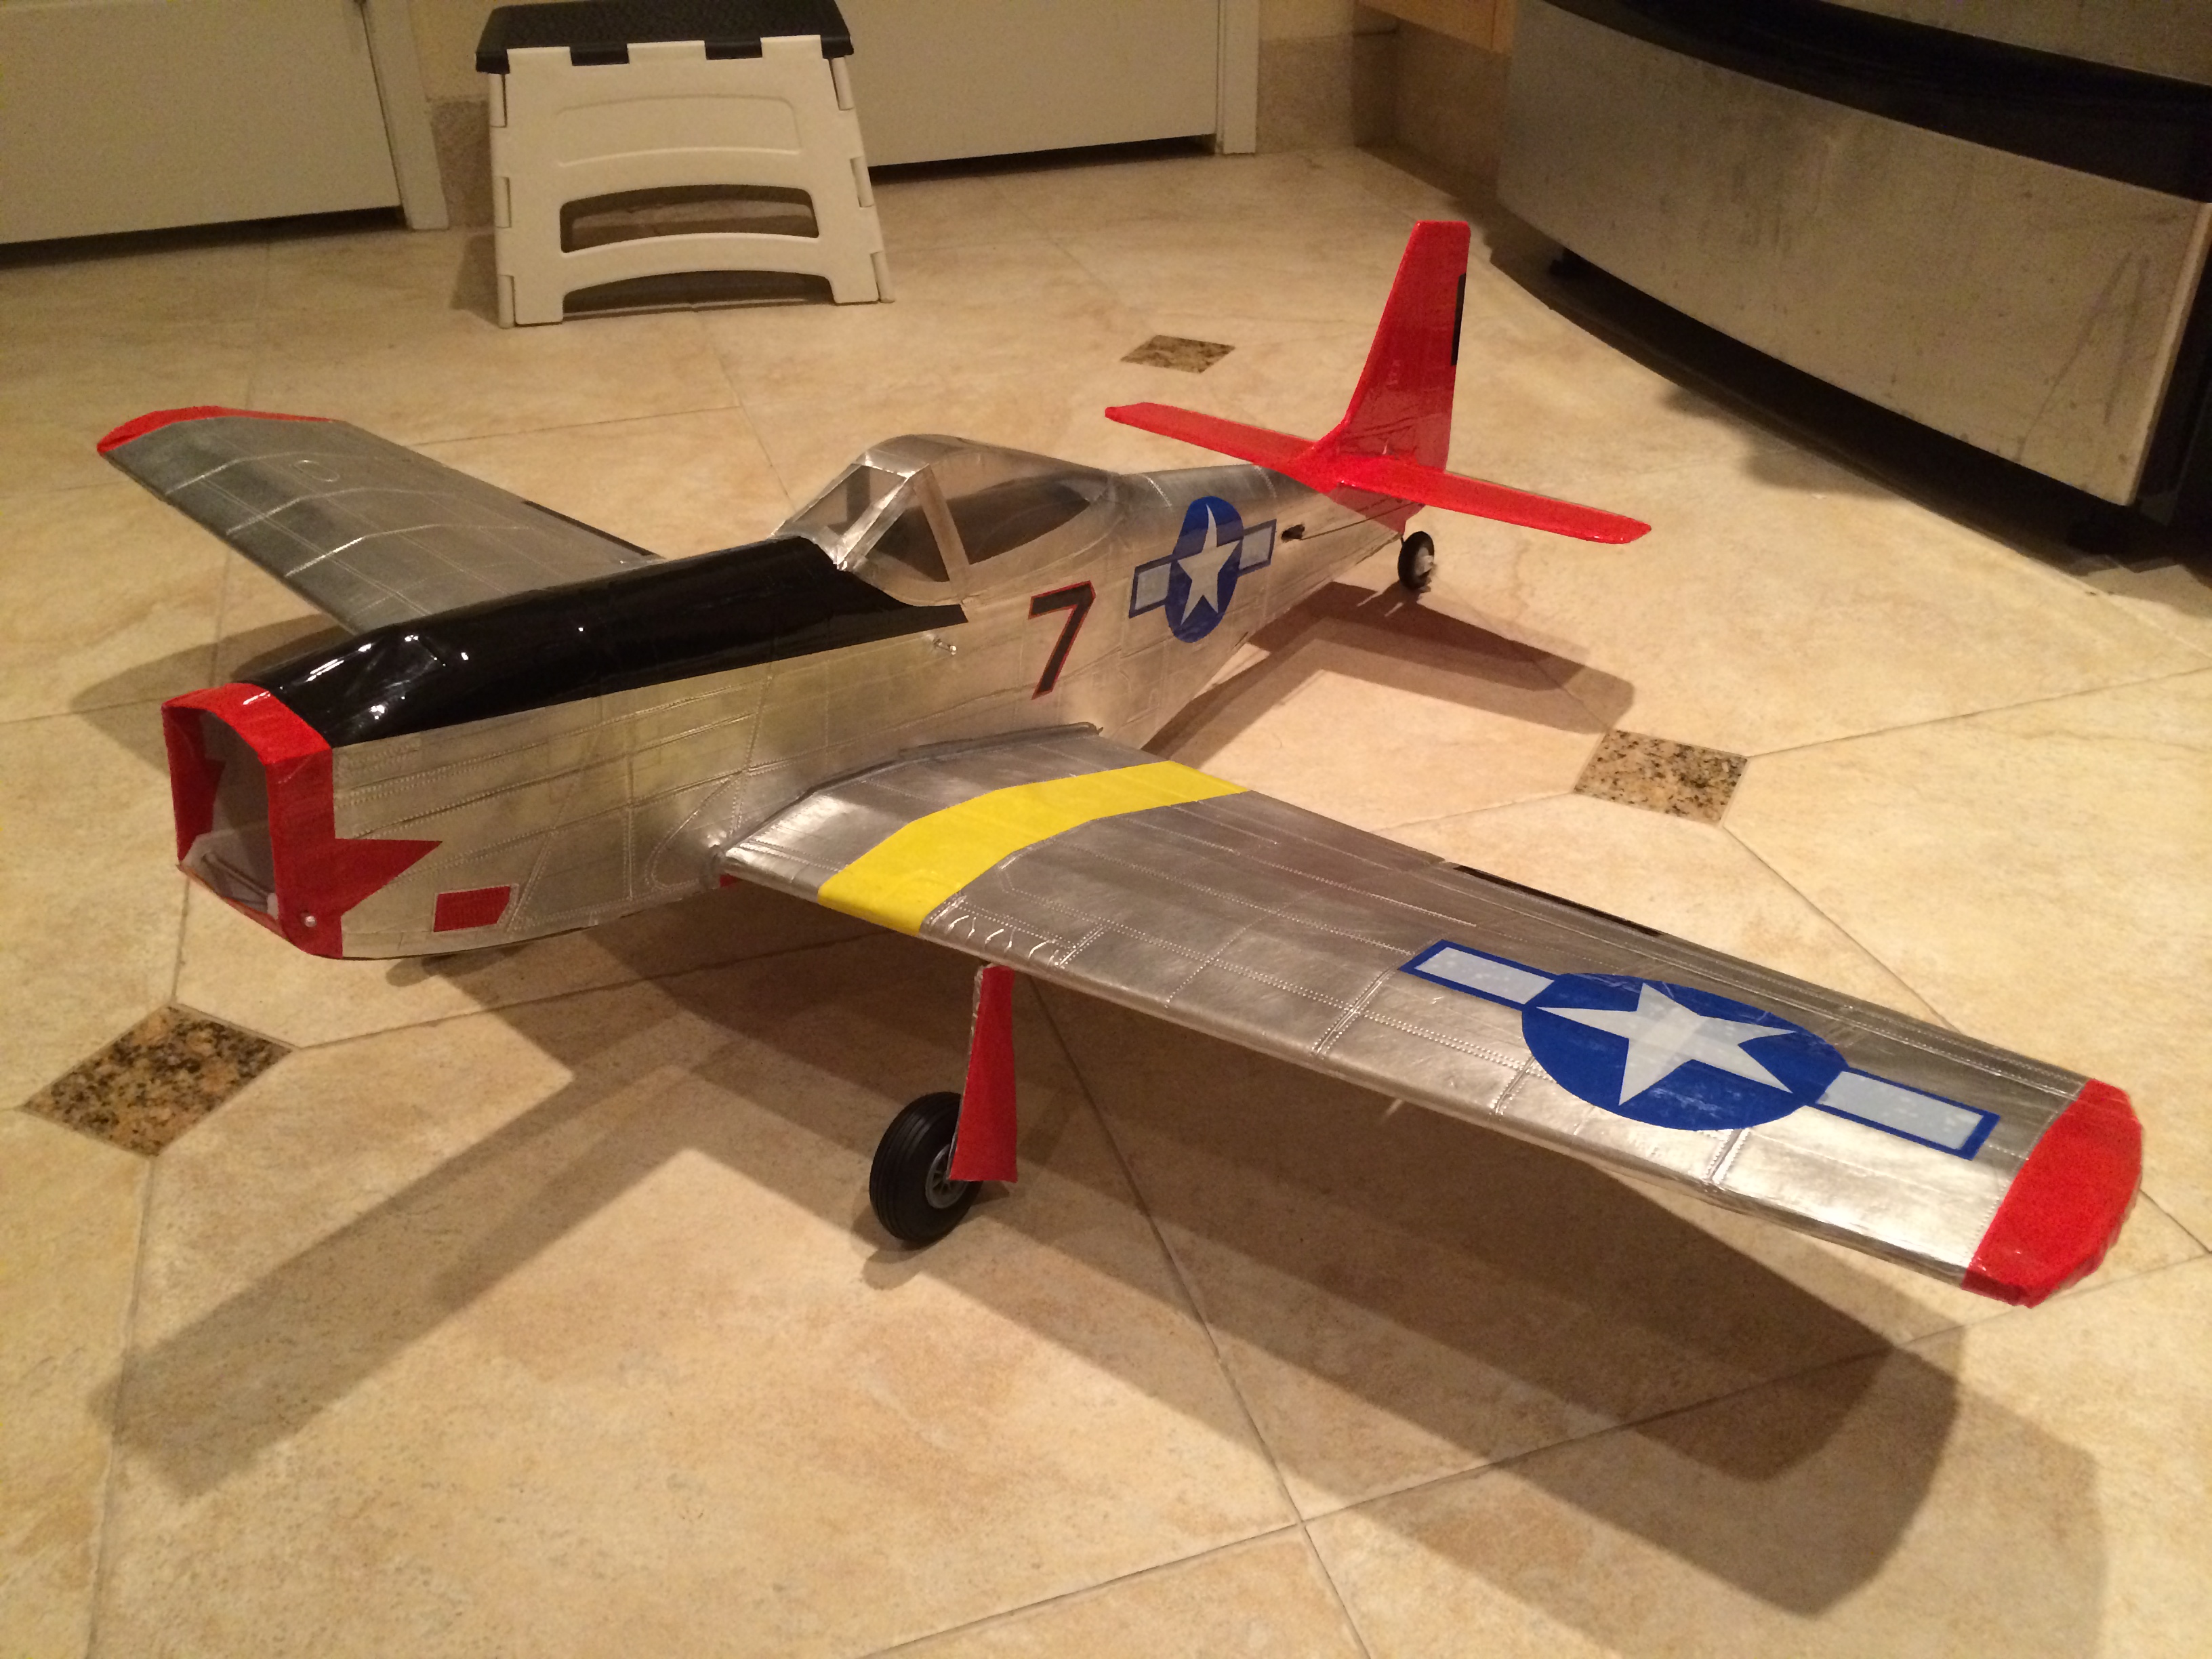
PS. Has anyone found retracts that will actually fit inside the wing? I bought some HobbyKing retracts, but they'd be a really tight fit. I've seen the ones on the FT site using regular servos, but I'm thinking a rough landing would kill those servos pretty quick.
Owen

I don't know what the dimensions are, but I had my eye on these: http://www.motionrc.com/servoless-e-retract-with-metal-trunnions-set-of-2/

They are actually the units used in the Art-Tech P-51 I'm gonna steal the prop from too. It's the same span (a tad shorter actually), so I can't imagine that the wing would be much thicker. You might have to cut into the upper surface a little, but you can just reinforce around it.

The bigger hurdle I see with doing proper retracts is where the wheels go, because they don't just go into the wing; they actually go up under the fuselage a bit, so we have to actually cut into the fuse sides a little. Again, probably doable, but will need some reinforcement.
 

Mid7night

Jetman
Mentor
Scoring panel lines and rivets half done!

Simply traced the lines through the paper using a flathead screwdriver and a ruler, then went over them again after removing the paper. Then run the pouncing-wheel along either side of the panel lines, and add a few in-between lines for good measure. ;)

Also tried roughing it up with the scotchbrite pads - the difference is subtle, but I think it's noticeable and helps the lines/rivets to pop a bit more.

My giant box of tape from Tapebrothers.com arrives tomorrow, so I'll finally be able to add some color! I know some of my lines and rivets will be covered by the tape - most notably because the tail will be ALL red - but I should be able to just run over it once more after applying the tape.

Along with the new/better-looking 4-blade prop, I think I'll be ordering a lower-Kv but stronger motor to properly make full use of the big 10x6 paddle-prop.

It also just dawned on me; if I'm going through all this trouble for panel-lines and rivet detail, I should probably figure out how to do something for the exhaust stacks... :)

I'll have to re-evaluate the following statement after the actual maiden, but I think I'm enjoying BUILDING this Mustang more than I will flying it! :p
 

Attachments

  • IMG_8962.JPG
    IMG_8962.JPG
    1.8 MB · Views: 17
  • IMG_8961.JPG
    IMG_8961.JPG
    1.8 MB · Views: 18
  • IMG_8960.JPG
    IMG_8960.JPG
    1.6 MB · Views: 37
  • IMG_8959.JPG
    IMG_8959.JPG
    1.7 MB · Views: 23
  • IMG_8958.JPG
    IMG_8958.JPG
    1.7 MB · Views: 17
  • IMG_8957.JPG
    IMG_8957.JPG
    1.6 MB · Views: 21
  • IMG_8956.JPG
    IMG_8956.JPG
    1.6 MB · Views: 16
  • IMG_8955.JPG
    IMG_8955.JPG
    1.8 MB · Views: 18
  • IMG_8954.JPG
    IMG_8954.JPG
    1.6 MB · Views: 17
  • IMG_8953.JPG
    IMG_8953.JPG
    1.5 MB · Views: 16
  • IMG_8952.JPG
    IMG_8952.JPG
    1.8 MB · Views: 20
  • IMG_8951.JPG
    IMG_8951.JPG
    1.7 MB · Views: 27
  • IMG_8949.JPG
    IMG_8949.JPG
    1.7 MB · Views: 28
  • IMG_8948.JPG
    IMG_8948.JPG
    1.9 MB · Views: 19
  • IMG_8947.JPG
    IMG_8947.JPG
    1.7 MB · Views: 21
  • IMG_8946.JPG
    IMG_8946.JPG
    1.6 MB · Views: 19
  • IMG_8945.JPG
    IMG_8945.JPG
    1.6 MB · Views: 20
  • IMG_8944.JPG
    IMG_8944.JPG
    1.6 MB · Views: 24

Craftydan

Hostage Taker of Quads
Staff member
Moderator
Mentor
Man that looks nice! I hadn't thought how AL tape takes to embossing -- great idea!

Have you considered darkening the embossing lines? add a layer of dark paint, and wipe off immediatly -- the paint should wipe clean except in the grooves . . . It would highlight any scars, creases or inperfections, though.
 

Kurt0326

Your ADD Care Bear
Mentor
Added thought. You thought about the exhaust stacks, well you could use coffee straws. You could use them for the guns too...

Didn't the mustangs have a drop tank option too?
 

Mid7night

Jetman
Mentor
Thanks guys!

Depending on batteries (still deciding on 2S vs 3S and capacity) I'm right around 31 ounces all-up. Colored tape might add a few grams. I'm also ordering a new prop and motor, but that shouldn't change things too dramatically. Even if it does, the new motor/prop should have more than enough power, and look way better! :)

Man that looks nice! I hadn't thought how AL tape takes to embossing -- great idea!

Have you considered darkening the embossing lines? add a layer of dark paint, and wipe off immediatly -- the paint should wipe clean except in the grooves . . . It would highlight any scars, creases or inperfections, though.

I've thought about it, but I don't want to go overboard with dark lines. I remember watching Adam Savage (Mythbusters) talk about weathering his models, and how subtlety is important; I think he used a rag dipped in a little dirty motor-oil and gave the model a light rub-down. What better to dirty-up a warbird than, well, dirty oil! :p

The surface already has a bit of "wear" on it just from handling - the Al-tape-over-foam actually takes "wear marks" real easily, and they don't go away as easily. I'll have to reevaluate the weathering issue after I've got the colored-tape on.


On a separate note - Retractable Gear: (which I have NOT done yet, but am thinking about)

I measured the wing thickness and it looks like we have about 21mm of useful height if you push it all the way through. I've found a couple candidates on Hobbyking (US warehouse) that should work for us if you're so inclined:

Main gear: http://www.hobbyking.com/hobbyking/...ls_32mm_x_25mm_Mount_2pcs_USA_warehouse_.html
The included struts can be swapped if we need a different height, but the short mechanism is the important part.

Steerable tail(nose) wheel: http://www.hobbyking.com/hobbyking/...runnion_33mm_x_35mm_Mount_USA_warehouse_.html
I think this is meant as a nose wheel, but who says it can't be used as a tail-wheel?! :)
 

Mid7night

Jetman
Mentor
Added thought. You thought about the exhaust stacks, well you could use coffee straws. You could use them for the guns too...

Didn't the mustangs have a drop tank option too?

They did have drop tanks, but I don't think I'll go there. Straws are definitely what I was thinking about for the stacks...hadn't thought about guns though! Good idea! :)
 

Craftydan

Hostage Taker of Quads
Staff member
Moderator
Mentor
For the tail wheel, I'd warn there's not a lot of room back there, and it's much harder to install after everything is put together.

For mine, I installed (after the fact) a Sullivan S859 tail wheel assembly:

http://www.sullivanproducts.com/LandingGearContent.htm

Punched the T-nuts into the fuse, then gorilla-glued them in place. They recommend mounting the T-nuts to a interior mointing plate, and sandwitch it in, but I'd already built mine too :eek: It's held together pretty well, and the steering takes it's lead from the rudder. you'll have to provide your own wheel, but everythign else was included. it's not retractable, but if the wheel is small, the airstream won't notice it.

As for drop tanks -- good call. they look nice but leave the drag back on the ground ;)
 

Mid7night

Jetman
Mentor
For the tail wheel, I'd warn there's not a lot of room back there, and it's much harder to install after everything is put together.

Yeah I know there's not much room in the tail, and after looking at a scaled-overlay of the real thing and the FT-Mustang plans...the tail servos are kinda RIGHT where the tailwheel wants to go! :(
 

Attachments

  • FT-MUSTANG-tailwheel_overlay.jpg
    FT-MUSTANG-tailwheel_overlay.jpg
    569.3 KB · Views: 26

Mid7night

Jetman
Mentor
Box of tape arrived yesterday, so I was able to start adding color! Red is mostly done, just a few small accents to add. Then on to the yellow and black.
 

Attachments

  • IMG_8979.jpeg
    IMG_8979.jpeg
    1.5 MB · Views: 19
  • IMG_8980.jpeg
    IMG_8980.jpeg
    1.4 MB · Views: 18
  • IMG_8981.jpeg
    IMG_8981.jpeg
    1.5 MB · Views: 18
  • IMG_8982.jpeg
    IMG_8982.jpeg
    1.5 MB · Views: 19
  • IMG_8983.jpeg
    IMG_8983.jpeg
    827.5 KB · Views: 19
  • IMG_8988.jpeg
    IMG_8988.jpeg
    712.6 KB · Views: 18
  • IMG_8989.jpeg
    IMG_8989.jpeg
    649.2 KB · Views: 14
  • IMG_8990.jpeg
    IMG_8990.jpeg
    634 KB · Views: 25
  • IMG_8991.jpeg
    IMG_8991.jpeg
    668.7 KB · Views: 15

Strix

Member
Nice work, Mid7night! It's gorgeous! Those panel lines look great.

What did you use to make the clear canopy?
 

Mid7night

Jetman
Mentor
Thanks again guys!

For the clear canopy, I just traced the canopy-shape in the kit (or plans) onto transparency-film/paper - the stuff you would use for overhead projectors. And I actually traced and cutout TWO copies, folded and taped them up individually, then stacked them and taped them onto the fuse. I felt that a single-layer of film was "too see-thru", but two layers gave the right "feel" of a glass canopy.

It's coming along slowly, but I'm enjoying the process. :)

Added a few more red accents, also did the black trim tabs. I know the turtle-deck in front of the canopy is supposed to be olive-drab, but I didn't have any tape really good for that color. Black seemed closer than a regular dark green, especially from a flying-distance. The last bit of color left to add is the yellow wing stripes, and then the main color scheme is pretty much done. Still need to glue on some straws for exhaust stacks (and maybe guns).

I've also got an idea of how to piece together some "decals" using the tape, at least for the star-roundals and number "7", so that should be fun. :)

EDIT: Finished the yellow stripes last night after posting this, so I just added the pics here.
 

Attachments

  • photo 1.JPG
    photo 1.JPG
    1.7 MB · Views: 15
  • photo 2.JPG
    photo 2.JPG
    1.5 MB · Views: 17
  • photo 3.JPG
    photo 3.JPG
    1.6 MB · Views: 16
  • photo 4.JPG
    photo 4.JPG
    1.6 MB · Views: 18
  • IMG_9009.JPG
    IMG_9009.JPG
    1.7 MB · Views: 15
  • IMG_9008.JPG
    IMG_9008.JPG
    1.8 MB · Views: 15
  • IMG_9007.JPG
    IMG_9007.JPG
    1.7 MB · Views: 16
Last edited:

Mid7night

Jetman
Mentor
Gosh, I feel like I'm monopolizing a bit, but I just can't help it!

Got decals done! I made my own by laying packing tape on wax paper, then cutting out the shapes using simple paper-printed templates. This works really well for basic stuff like roundals and numbers (especially simple straight numbers like "7") ;)

It doesn't work as well for words though, which is why I haven't got the actual nose-art done. One side says "Bunnie" and the other says "Miss Kentucky State". I might end up just printing the words on paper and spray-gluing them on. :p

New prop and motor should be in by Thursday, then I can finally wrap this baby up and go fly! Though I'll probably do some taxi-tests first... ;)

Anyway, enjoy! :D
 

Attachments

  • IMG_9018.JPG
    IMG_9018.JPG
    1.6 MB · Views: 18
  • IMG_9017.JPG
    IMG_9017.JPG
    1.6 MB · Views: 22
  • IMG_9016.JPG
    IMG_9016.JPG
    1.6 MB · Views: 15
  • IMG_9015.JPG
    IMG_9015.JPG
    1.9 MB · Views: 19
  • IMG_9014.JPG
    IMG_9014.JPG
    1.7 MB · Views: 14
  • IMG_9013.JPG
    IMG_9013.JPG
    1.7 MB · Views: 16

Corbarrad

Active member
Gosh, I feel like I'm monopolizing a bit, but I just can't help it!

Such a pretty bird deserves to be showcased!

Anyone discounting something like this as "just a foamie" must be out of their minds.

Myself, I'm still working on dividing the plans up so they can be cut on the smal laser cutter that I have access to. hope it goes well..
 

Mid7night

Jetman
Mentor
I would love to share it with a wider audience, maybe I'll have to sit down and write a proper article for the main page. :)
 

Mid7night

Jetman
Mentor
New prop and motor!

My new 4-blade "Art-Tech" prop arrived yesterday, along with a bigger/better/slower motor to handle the beefy 10x6x4. :)

Only mod I had to make was to the spinner: it comes in YELLOW. No matter; easily fixed with a good red Sharpie. :p

I'm super thrilled with this motor/prop combination, it's like they're made for each other. The motor shaft is the exact right-size for the prop and spinner, and it even comes with locking nuts and a washer (not typical for Hobbyking). Obviously I don't know how it performs yet, but I'm pretty sure I won't lack for power. I highly recommend them if you're looking for a more scale appearance for this bird. I think I mentioned them before, but I don't remember if I provided links. Here's the motor and prop combo I'm using:

D4023-850.jpg

AT_P51_Props_Spinner_web.jpg

Now on to the installed progress pics! :)

IMG_9027.JPG IMG_9026.JPG IMG_9025.JPG IMG_9024.JPG IMG_9023.JPG

Just a few more minor touch-up details (exhaust stacks, nose art) and she'll be done! I also need to acquire a proper battery before maiden. I have several smaller 2S and 3S batteries, and I was going to just gang'em all up and run it, but space is tight in the nose. Plus, I've come this far to make this bird nice, I should get it its own proper battery.

Thanks for following along! :D