
You are using an out of date browser. It may not display this or other websites correctly.
You should upgrade or use an alternative browser.
You should upgrade or use an alternative browser.
FT Mustang - Build
- Thread starter fliteadmin
- Start date
OrangutangSurfer
Member
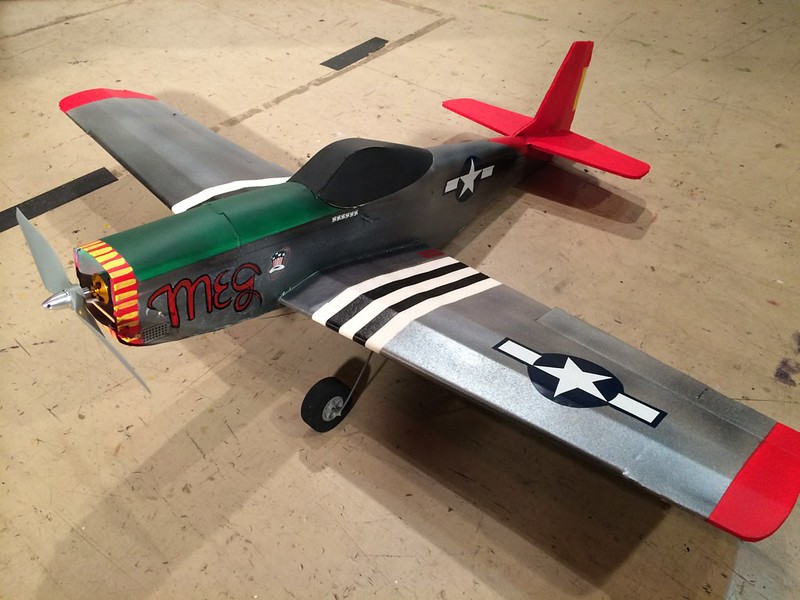
Finally got my mustang out, it flew so nice I painted it! Current setup is Exceed Rocket series 2220 1380kv motor with 8x6APC prop and a 30A ESC. I can only seem to get the CG right with a 1500mah battery  i think the big motor and spinner have a bit to do with that, I've already added weight and a steerable tail wheel. I think a battery extension cable and moving the ESC to the back of the power pod would do it.... now to make the extension. hmm....
- Jes
BTW I'm sure this motor can handle a bigger prop but my only 9x6 has too fat of a hub to fit on with the spinner.


- Jes
BTW I'm sure this motor can handle a bigger prop but my only 9x6 has too fat of a hub to fit on with the spinner.


Strix
Member
Jaxx,
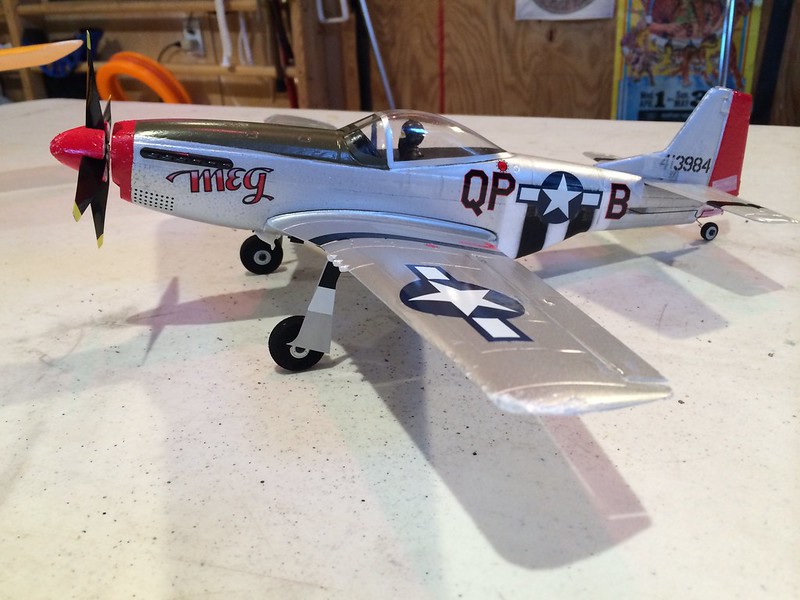
It's a 2 1/4" Dubro nylon spinner.
Prior to painting, I cover with minwax and go over the whole thing with fine grit sandpaper, like 2000 or so. After painting, I usually find a few rough spots that need a little more sanding. Then I respray as needed.
The primary color is Rustoleum 'Aluminum'. http://www.walmart.com/ip/Rust-Oleum-Professional-High-Performance-Enamel-Spray-Aluminum/35031494 It really looks like aluminum. Shiny, but not _too_ shiny.
The yellow, black, and white paints are also Rustoleum. The red on the wingtips and tail is brushed on Testors. The red around the base of the canopy is actually red electrical tape. Tail numbers are stenciled on spray paint. Squadron and unit numbers are printed on an inkjet printer, cut out with an Xacto, and then pasted on. Same for the bomb logos, kill markings, and roundels. After affixing with paste, I cover the inkjet printed 'decals' with another coat of Minwax to protect from moisture damage.
Yours looks great, too, Jes! Did you also use the Rustoleum Aluminum paint?
Foam Addict
Squirrel member
Finally got my mustang out, it flew so nice I painted it! Current setup is Exceed Rocket series 2220 1380kv motor with 8x6APC prop and a 30A ESC. I can only seem to get the CG right with a 1500mah battery  i think the big motor and spinner have a bit to do with that, I've already added weight and a steerable tail wheel. I think a battery extension cable and moving the ESC to the back of the power pod would do it.... now to make the extension. hmm....
- Jes
BTW I'm sure this motor can handle a bigger prop but my only 9x6 has too fat of a hub to fit on with the spinner.
View attachment 24662 View attachment 24659 View attachment 24660 View attachment 24661 View attachment 24658
Excellent job, the D mustangs look great in silver!
I like the scheme you chose too, it looks awesome.

I've been flying that exact motor on two mustangs, and the max prop it can really handle is an 8x6, I've tried everything from a 7x6 to a 9x4.5, including an 8x8, and the best balance of thrust and speed was the 8x6, but it was uncomfortably hot to me. (130f)
I love those motors and think they are an awesome value, but (like all Chinese motors I've seen) they are a little over rated power wise.
OrangutangSurfer
Member
Good to know about the prop, I'll just stick with the 8x6 i really don't have any complaints about the way it flies. probably switch up to the NTM 2826 1350kv eventually I have a 1200kv ntm I'm pretty happy with.
As far as the plane goes I used the mix wax and just wiped it on with a paper towel (boy was that messy) I let it dry over night and used the rustoleum metallic finish paint. I didn't think to sand it before hand, probably give that a try on my next one. I just straight airbrushed on my spitfire and it's survived with only a few minor damage crashes I figured this one ought to last as well so I spent a little more time on it.
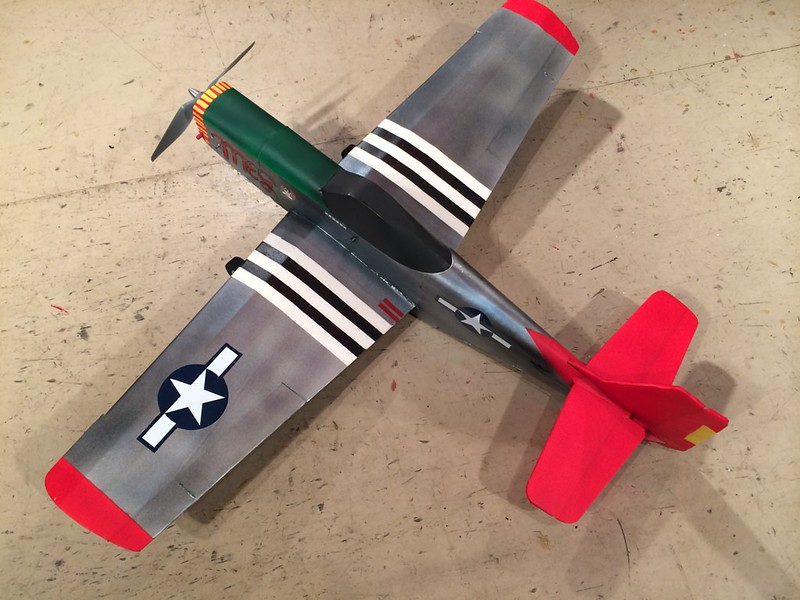
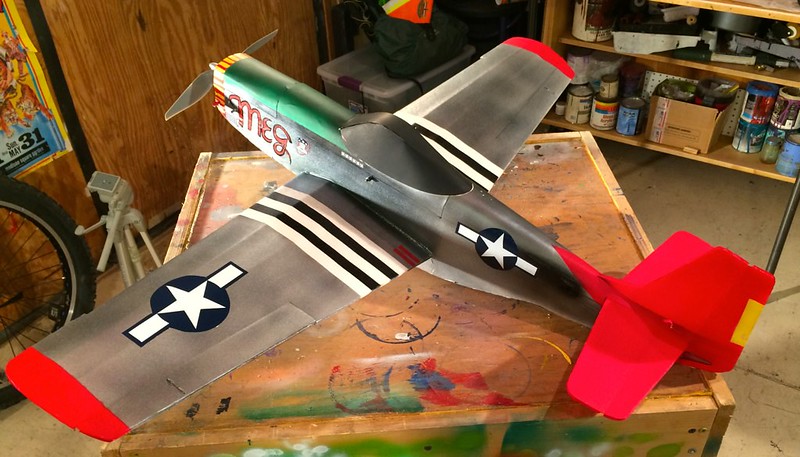
I found some logos on google image search, I added two to the back of the fuse since those last pics, my inkjet is out of color but the black and white works for the paint scheme. I used some black paint for the tail and then all the stripes are just duct tape. I really wanted to follow along with the yellow scheme in the last picture but I couldn't get the checkerboard duct take to take color very well so I stayed with the black/silver scheme. I'm plenty happy with it, it's the nicest plane I've done so far.
speaking of nice planes. all the ones I've seen here look great! I think folks are putting a little more detail in to this one than previous FT planes. Can't wait to see the next warbird!
- Jes
PS i'm in arlington texas, if anybody wants to get together and fly let me know. I don't have near as much fun flying alone.
As far as the plane goes I used the mix wax and just wiped it on with a paper towel (boy was that messy) I let it dry over night and used the rustoleum metallic finish paint. I didn't think to sand it before hand, probably give that a try on my next one. I just straight airbrushed on my spitfire and it's survived with only a few minor damage crashes I figured this one ought to last as well so I spent a little more time on it.
I found some logos on google image search, I added two to the back of the fuse since those last pics, my inkjet is out of color but the black and white works for the paint scheme. I used some black paint for the tail and then all the stripes are just duct tape. I really wanted to follow along with the yellow scheme in the last picture but I couldn't get the checkerboard duct take to take color very well so I stayed with the black/silver scheme. I'm plenty happy with it, it's the nicest plane I've done so far.
speaking of nice planes. all the ones I've seen here look great! I think folks are putting a little more detail in to this one than previous FT planes. Can't wait to see the next warbird!
- Jes
PS i'm in arlington texas, if anybody wants to get together and fly let me know. I don't have near as much fun flying alone.
nagromnewo
New member
The Nutstang! I love it! lol Nice Spitfire, too. I liked mine so much I built another one. And might do so again soon, because I really want a blue Spitfire MK XI (with landing gear). Of course I will probably get distracted by the release of more FT warbirds, hehe.
The Nutstang is a lot of fun. I flew her on skis this winter. Lots of fun doing touch and goes on the snow.
The spit is great. Very smooth and very manouverable and just looks so great in the air. It's my favorite plane to fly. I'll have to see whether that still holds true once the Mustang is ready. She's getting a bit worn though. I've been flying her all winter.
I had serious orientation problems with the all dark blue Spit until I added some (non scale) white panels under the wings. The original is in a museum in Norway. It was one of three photo rec Spitfires bought by Norway just after WWII.
There sure are a lot of very nice Mustangs showing up here!
Owen
Attachments

Last edited:

Jaxx,
It's a 2 1/4" Dubro nylon spinner.
Prior to painting, I cover with minwax and go over the whole thing with fine grit sandpaper, like 2000 or so. After painting, I usually find a few rough spots that need a little more sanding. Then I respray as needed.
The primary color is Rustoleum 'Aluminum'. http://www.walmart.com/ip/Rust-Oleum-Professional-High-Performance-Enamel-Spray-Aluminum/35031494 It really looks like aluminum. Shiny, but not _too_ shiny.
The yellow, black, and white paints are also Rustoleum. The red on the wingtips and tail is brushed on Testors. The red around the base of the canopy is actually red electrical tape. Tail numbers are stenciled on spray paint. Squadron and unit numbers are printed on an inkjet printer, cut out with an Xacto, and then pasted on. Same for the bomb logos, kill markings, and roundels. After affixing with paste, I cover the inkjet printed 'decals' with another coat of Minwax to protect from moisture damage.
Yours looks great, too, Jes! Did you also use the Rustoleum Aluminum paint?
Thanks for the info Strix. It looks great! It first glance, I thought it was a store-bought model. The FT profile is the only thing that gives it away. Jes, you did an incredible job with yours as well. Now, I really I can't wait to get mine done. I may have to go get some of that aluminum paint. I have acrylic paints for the other color, and a Harbor Freight airbrush. Will post pictures when it's done.

Shug
Senior Member
Now I am excited))))
Nice flight and fast. Rolls were fast too.
Whooooo Buddy.
Congratulations.
Shug
djentangle
Member
I built one of these couple weekends ago, flew it last weekend and crashed it into a goal post headon. I did a simple FW version so I can have more room for a battery and the fw and nose of the plane got destroyed.
I have to say, this was such a fantastic plane to fly, so easy to take off with the landing gears on a paved walkway and then flew like a more expensive RTF plane.
I love it and I'm building another one to get this back in the air, and also going to try fixing my old one. I've picked up a whole box (25) of adam foam board and 750 pages of paper to keep my printer and myself busy for months to come...
Happy early Father's Day to me: Wifey gifted* me the purchase of an FT-Mustang speedbuild kit! I've already built an FT-Racer that I cut out myself, which went pretty good but could've been better, so I'm really looking forward to putting together a nicely-laser-cut SpeedBuild kit.
Has anyone here experimented with a 4-blade prop on this bird? I found a decent looking one on Tower Hobbies, and even though I already ordered it I'm still curious to know if anyone else has an opinion on the subject. I know they're not the most "efficient" setup, but I just think they look cool and help sell the look.
*Gifted, meaning I didn't have to dip into my set-aside RC-funds. BONUS!
Nice build Strix! Congrats on the gift mid7night, but you might want to trace out the pieces on some posterboard, or some DTFB so that you can easily and more quickly build more later! My M.O. is to order a speedbuild kit, trace it all out on posterboard, then build the speedbuild kit. *When* I need to replace it, I pull out the posterboard, and start cutting.
nagromnewo
New member
Great stuff Strix and congrats on a successfull maiden.
Are those the control surface throws suggested by the Flitetest guys?
For my Spitfire I found I had to increase the aileron throws as the roll rate was dangerously slow and decrease the elevator throws to cure a very twitchy tail.
Owen
Are those the control surface throws suggested by the Flitetest guys?
For my Spitfire I found I had to increase the aileron throws as the roll rate was dangerously slow and decrease the elevator throws to cure a very twitchy tail.
Owen
Strix
Member
Thanks guys!
The control throws are whatever they ended up at. I couldn't find the throw gauge from the plans, but they looked OK to me, so I just went with it. The plane flies beautifully, with zero trim needed. I applied a couple of clicks during the maiden, but it turns out I didn't need them.
I flew three more batteries through it tonight. Multiple takeoffs and landings, on both grass and pavement. I find that it does very well in grass.
Unfortunately, the RH landing gear ripped out when I left the runway with a bit of speed and hit a rut or rock or something in the grass. No foam was broken, the LG and its attached glue simply popped out of the wing and started some paper delaminating with it. To prevent this from happening again, I reinforced the landing gear attachments with tongue depressors:

I still need to finish touching up the black paint. The paper was removed in the area under the tongue depressors. I hope I haven't made the next landing gear mishap much worse. I'll let you guys know how it holds up.
UPDATE: I'm pleased to report that the LG modification is holding up perfectly. I noticed no difference in flight characteristics, and the plane now has more landings with the mod than without.
Last edited:
Strix
Member
Dihedral is roughly the same. I think the Mustang might have a little more.
The Mustang wing is put together slightly differently than the Spitfire. Instead of being aligned with bent spar ends, it uses a large strip of de-foamed paper on one wing root to align it with the other.
I like the Mustang's construction method a little better, but both work just fine.
The Mustang wing is put together slightly differently than the Spitfire. Instead of being aligned with bent spar ends, it uses a large strip of de-foamed paper on one wing root to align it with the other.
I like the Mustang's construction method a little better, but both work just fine.
Shug
Senior Member
Got my Mustang done today. Added "Meg" to the nose same as my tiny park flier. My wife's name is Meg......buys me points!
Fun build. I ordered the kit from the fellers. Easy to follow and Josh B. is a good teacher on the builds though I had to go back and re-watch many steps. Computers are sure handy.
Hope to fly it this weekend.
Have a Grayson Hobby 480 brushless Outrunner motor and 20 amp ESC, 9.6 prop
Whoooooo Buddy)))))
Shug
Similar threads
- Replies
- 11
- Views
- 892
- Replies
- 85
- Views
- 3K
- Replies
- 15
- Views
- 796
- Replies
- 29
- Views
- 8K