Hawker P1052 - the swept wing Sea Hawk

quorneng

Master member
In 1947 the Air Ministry requested proposals for designs to quickly make use the latest swept wing information.
Hawker responded by simply adding swept wings to the Sea Hawk then nearing production. The ministry accepted the proposal and ordered 3 be built, two to fly and one for static testing. With such a relatively simple change work progressed quickly the first flying in 1948. The second early the following year.
After nearly a year of development flying the static testing indicated the rear fuselage in particular needed reinforcing so Hawker took the opportunity to build a new rear fuselage for the second P1052 but with a single exhaust at the tail. It was renamed the p1081.
The redundant rear fuselage was reinforced and fitted to the first P1052. Test flying continued and in 1952 with an arrestor hook fitted under took carrier landing trials. It was later fitted with a swept tail plane for further high speed testing. It eventually demonstrated that the modest performance improvement from the swept wing did not justify the poorer handling characteristics, particularly for carrier operations so it was retired in 1953.
Amazingly it still exists in the Fleet Air Arm museum at Yeovilton.
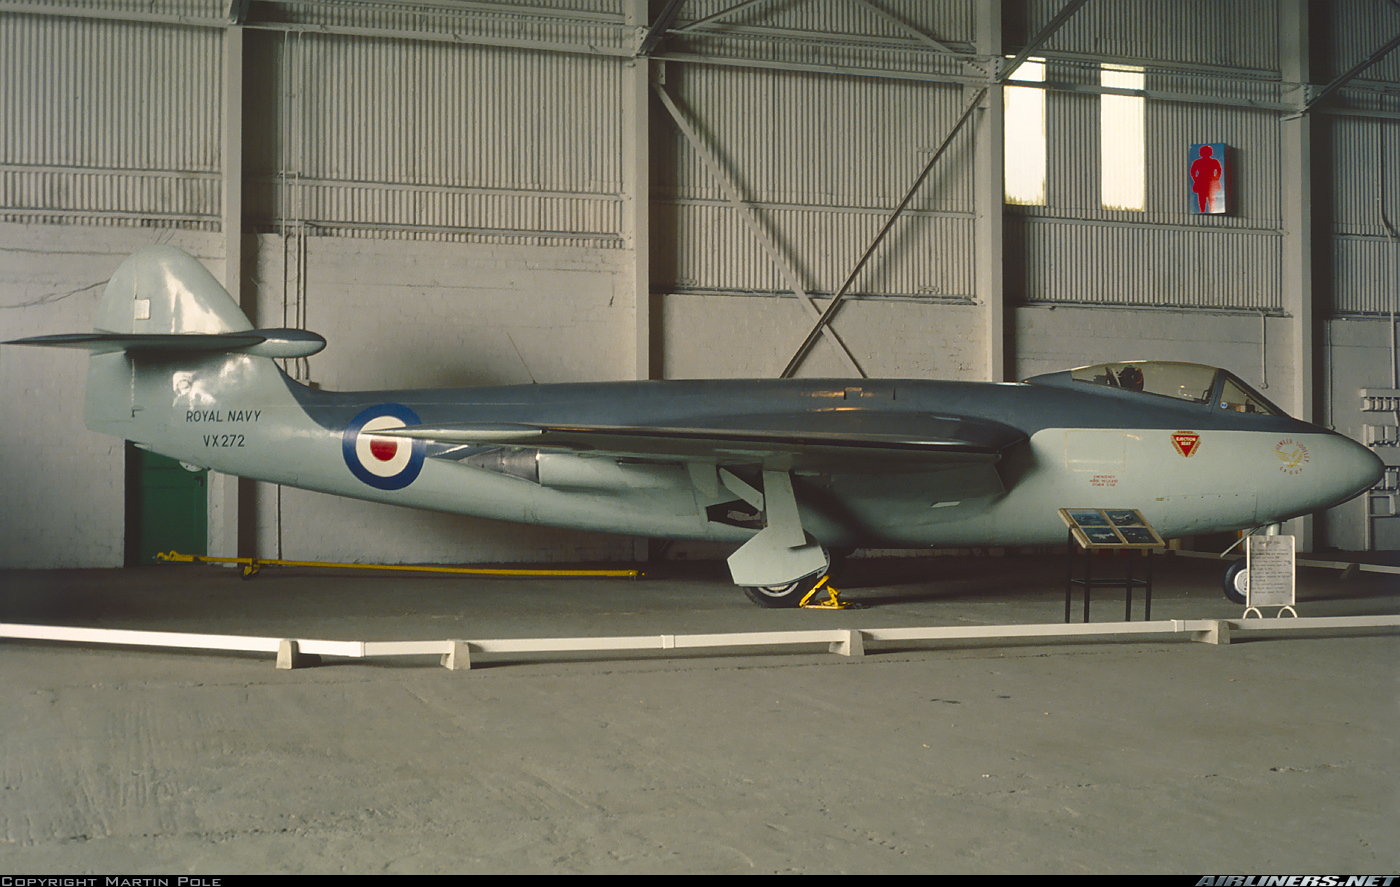
P1052a.jpg

As it uses a visually identical fuselage to the Sea Hawk and I already have the plans and built techniques so I though it would be interesting to build a P1052 for comparison to my XPS foam Sea Hawk. It just so happen I have a 'spare' 55 mm EDF too!
As the Sea Hawk's inlet proved to be rather inefficient I would take the opportunity to improve the inlet geometry even at a slight exhaust sacrifice.
The complete duct and EDF ready for a thrust test.
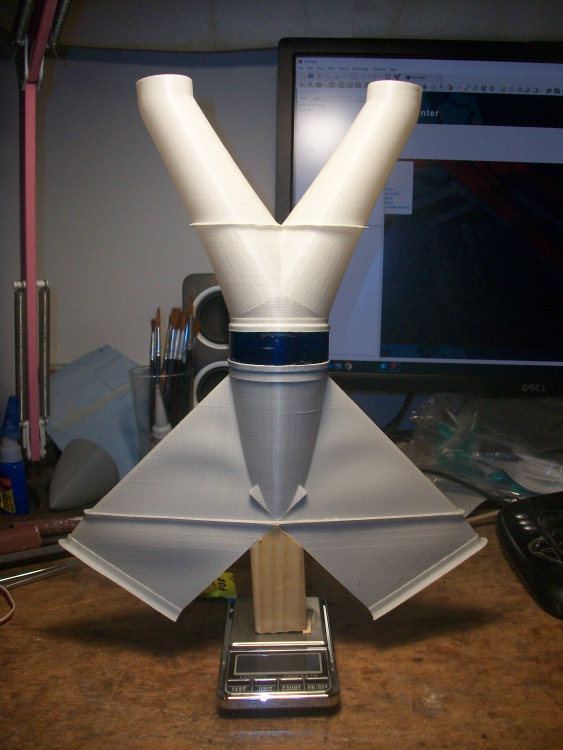
ThrustTest.JPG

As I hoped the thrust was significantly better being close to 430 g. An big improvement on the Sea Hawk.
It meant there was no reason not to proceed! :p
As before the centre section half shell is first with the duct 'inserted' exactly half way in.
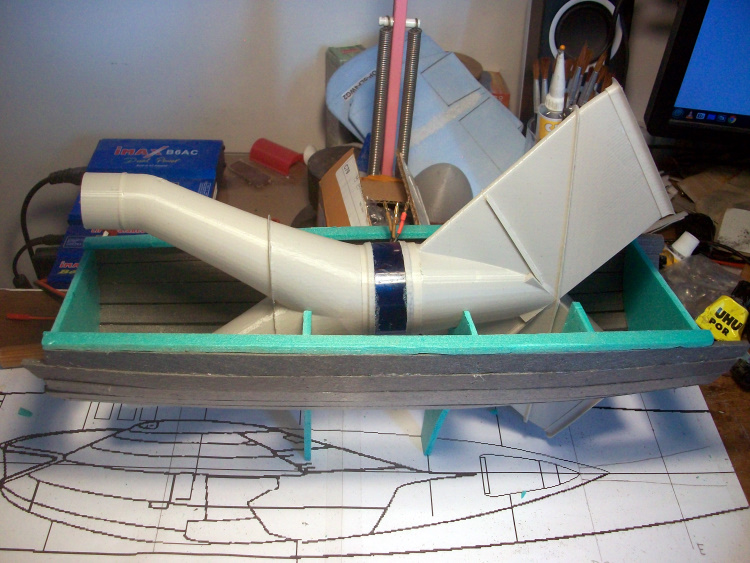
DuctIn.JPG

I did actually overlook the fact that the EDF was in a slightly different location compared to the Sea Hawk so the formers needed quite a bit of 'doctoring' to get the duct to fit but fortunately the XPS is easy to cut and to add to as required.
So far so good.
 

quorneng

Master member
Slow going but the centre section is now complete or rather as far as it can be at this stage. An area of the underside is left open so the aileron and elevator servo wires can be run through the formers to the front.
FuseCntrF.JPG

The exhaust.
FuseCntrR.JPG

Compared to the area of the fuselage cross section the exhausts are tiny!
The result of the big diameter of the RR Nene's centrifugal compressor.
 

quorneng

Master member
Next is to add the wings.
Built in exactly the same way as the Sea Hawk just two XPS sheets pulled over XPS shear webs. The inside edges of the sheets are sanded down so they give a fine trailing edge when glued together.
LhWing2.JPG

As with the Sea Hawk they are simply butt joined onto the centre section with no reinforcing at all. The thinking being that the 5 mm thick XPS skin coupled with the relatively thick wing scale wing section gives sufficient glue area. I am also using 'Technicqll' foam safe glue which, unlike POR, sets rock hard in 24 hours.
Wings1.JPG

Of course being swept it has a reduced span and slightly less wing area.
Rear fuselage next.
It should be truly identical to that of the Sea Hawk.
 

quorneng

Master member
cyclone3350
Thanks for the award!
The duct work is 3d printed from my own designs. Both the inlet and exhaust ducts are actually printed in 3 parts, a centre section and each leg individually making a total 6 which are then glued together. Each part is "vase printed" which gives a single 0.3 mm thick wall that is laid down as a single continuous bead with no stopping from start to finish.
It is a pretty flexible process that gives good results but of course you do need a 3D printer, a CAD package and a 'slicer' programme along with learning how to use them.
 
Last edited:

cyclone3350

Master member
Yeah, I thought it was 3D printed. I didn't think U could print one that thin. I imaging it is pretty light also.
 

quorneng

Master member
The rear fuselage is next. A dead copy of the Sea Hawk's except for its swept tail plane.
Tail2.JPG

Like the Sea Hawk the tail plane is made of 3 mm Depron but still two sheets drawn over a Depron shear web to give a symmetrical streamline section.
The issue I am struggling with is how to link the angled hinge line elevators to a single servo mounted in the fin under the tail plane. On te Sea Hawk the elevator hinge line was straight so they could be rigidly joined.
Not the aileron and elevator servo wires have been fed through to the cockpit area.
 

leaded50

Legendary member
with such "high" angle of stanbilizer surfaces.. you need use a Y bend pushrod system with divided connection to the stab, and single to servo, or two pushrods from servo to surfaces.
 

quorneng

Master member
Leaded50
If I had thought about it a bit more I would have used 2 servos one in half of the tail plane but I just put one servo in the same place as for the Sea Hawk. In my defence the P1052 did actually fly for a few years before the swept tail was added.
The problem is a Y link rod or even two separate rods would require a significant cut out in the fin under the tail plane right at the point of maximum structural stress.
At the moment it is set up with geometrically dirty and flexible solution that relies on the hole in the control surface horn accommodating the angular differences, particularly at the extremes of travel.
ElevLink1.JPG
It does of course require a slot arc to be cut into the rudder (fortunately it does not move!) but at least the rrudder plays no part in the security of the tail plane.
ElevLink2.jpg

It works but if it proves to be too flexible I will have to organise using a servo for each elevator half.
 
Last edited:

quorneng

Master member
The fuselage nose section is just a straight copy of the Sea Hawk.
NoseOn.JPG

As before the battery will be slightly off set to the left to counter the weight of the ESC in the RH cockpit wall.
Even the 'hatch' under the canopy is off set too.
Canopy3.JPG

As the exact characteristic of the swept wing are unknown a Lemon 'stab' rx is fitted, at least for the initial testing.
The canopy hatch in place.
Canopy2.JPG

It is secured by a peg at the front under the fixed windscreen and a small magnet at the rear.
It will be painted in normal Royal Navy colour scheme, as is the restored full size, although initially it was left unpainted aluminium and later was painted pale blue overall.
 
Last edited:

quorneng

Master member
The P1052 complete.
Complete1.JPG
Complete2.JPG

The little yellow pads on the fuselage just under the intakes are hook velcro. They give enough grip to hold the rather broad fuselage between finger and thumb for the hand launch.
The same 1800 mAh 3s battery as used in the Sea Hawk made it rather nose heavy so it flies with a slightly lighter 1500 mAh 3s. The improved efficiency of the ducts means it need less power to fly so its endurance is about the same. With some throttle management about 4 minutes to take the battery down to storage level.
Its lighter weight and 20% increase in full power thrust does allow it a 'party' piece, an unassisted 'slide' take off.

Now of course Hawker did modify the second P1052 to have a single 'straight through' exhaust. I wonder.
 
Last edited:

The Fopster

Master member
The P1052 complete.
View attachment 204916 View attachment 204917
The little yellow pads on the fuselage just under the intakes are hook velcro. They give enough grip to hold the rather broad fuselage between figure and thumb for the hand launch.
The same 1800 mAh 3s battery as used in the Sea Hawk made it rather nose heavy so it flies with a slightly lighter 1500 mAh 3s. The improved efficiency of the ducts means it need less power to fly so its endurance is about the same. With some throttle management about 4 minutes to take the battery down to storage level.
Its lighter weight and 20% increase in full power thrust does allow it a 'party' piece, an unassisted 'slide' take off.

Now of course Hawker did modify the second P1052 to have a single 'straight through' exhaust. I wonder.
Crikey. That's beautiful. Congratulations!
 

telnar1236

Elite member
The P1052 complete.
View attachment 204916 View attachment 204917
The little yellow pads on the fuselage just under the intakes are hook velcro. They give enough grip to hold the rather broad fuselage between figure and thumb for the hand launch.
The same 1800 mAh 3s battery as used in the Sea Hawk made it rather nose heavy so it flies with a slightly lighter 1500 mAh 3s. The improved efficiency of the ducts means it need less power to fly so its endurance is about the same. With some throttle management about 4 minutes to take the battery down to storage level.
Its lighter weight and 20% increase in full power thrust does allow it a 'party' piece, an unassisted 'slide' take off.

Now of course Hawker did modify the second P1052 to have a single 'straight through' exhaust. I wonder.
That looks incredible!
 

quorneng

Master member
Thank you both for the kind words.
It flies a bit faster, or rather not quite so slow, as the Sea Hawk but it is quite controllable so the 'stab' receiver has been removed and replaced with a simple 6 channel.
TwoHawks.JPG

The Stab receiver will go into the next home design & build. ;)
Hawker did build a follow up to the P1052, the P1081. A swept wing Sea Hawk but with a single 'straight through' exhaust. Hmmm.
 

quorneng

Master member
A short video of the P1052 doing its party piece - a no bungee 'slide' take off.
It flies quite nicely too!
Note it still managed a slide take off, just, even after 3 minutes of flying.