iNav Dart

French

Construire Voler S'écraser Répéter
I decided to pick up a FT Dart speedbuild kit as I have lots of spare micro quad parts laying around.

I also decided it would be a good opportunity to try out iNav. Using iNav and a flight controller should allow me to have functions like auto level flight, s.port telemetry, auto launch, and more.

This thread will chronicle the build process.


Parts
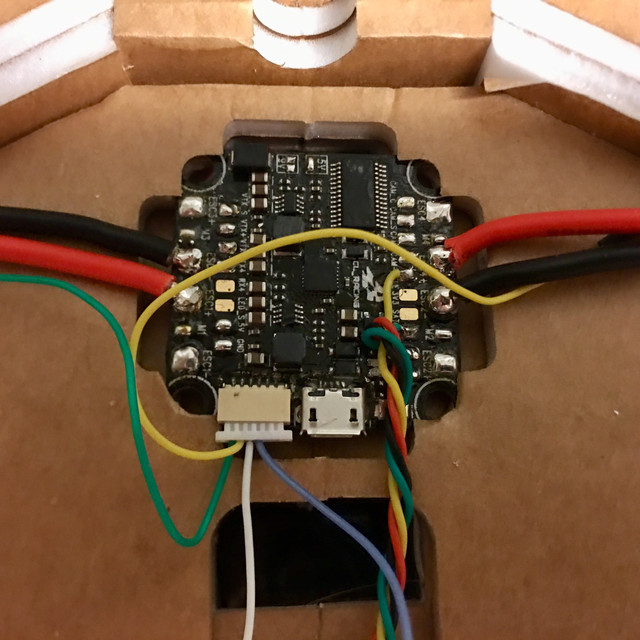
Spare CL Racing F4S flight controller
Spare 1104 6000kv motors from my old Lizard95
Spare emax 30A bullit escs (overkill)
Spare r-xsr
New FT servos

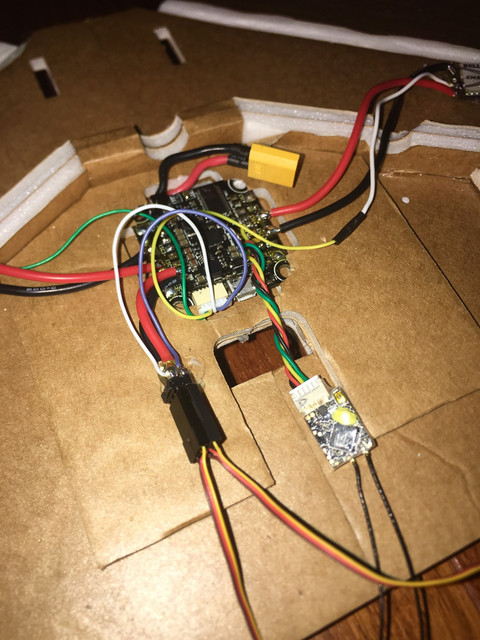
I’ll likely fly it LOS at first, but have a Caddx F1 and AKK Nano 2 (200mw with smart audio) to FPV it.

Lastly, I have a spare GPS I may throw on it (if it lasts that long). Return to home on something this small would be interesting.

Paint
As always, you want to lightly sand the surface of the waterproof foam board to take off the sheen. Remember, we’re only painting the exterior surfaces.


Don’t forget the inside of the wingtips.


Keep the first coat extremely light. I put two coats of white on everything. The white areas got a third coat. The colored areas got two coats of color (four light coats in total).


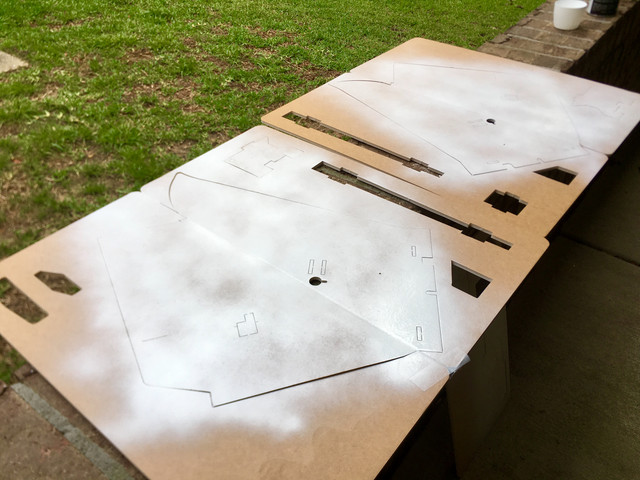
If you get overspray, like I did on the red nacelle, remove the foam after the last coat and touch-up the white wing for a clean line.

 
Last edited:

PsyBorg

Wake up! Time to fly!
Just be sure when you get to the point of setting up RTH that you tell it WHERE home is. Seems like a lot of Phantom users have skipped that part and their gear heads to the default of 00 lat and 00 long which is smack in the middle of the ocean. o_O

That is gonna be a little screamer I think. I take it this will be a differential thrust set up? If so then I offer you your first flying challenge. Launch it, put it into a spin then fly it around like a boomerang.
 

French

Construire Voler S'écraser Répéter
Sorting out the electronics...
Note, the board must be rotated so I can have the USB accessible out the back. Instead of using the motor pads, I’m opting to use the M1-4 header normally designed for a 4-in-1 esc.


Quorneng, I think 3” will be too much. I’ll likely start with 2.5” and move down to 2” if the motors are coming down hot.

Psy, the plan is differential thrust. I actually had to setup a custom motor mix in iNav. I have not tested the motor directions or the differential thrust yet.
 

PsyBorg

Wake up! Time to fly!
Smart move putting the esc control wires on that rear port. easy access if something gets troublesome or damaged. how well do you think the Fc is isolated from vibration with the foam holding it in place or does that really matter as much for a plane set up?
 

French

Construire Voler S'écraser Répéter
I don’t think vibration will be an issue. Planes bounce around anyway. The FC is somewhat “softmounted” being wedged into the little foam cavity between the paper.

I think the main thing is dialing in the pitch offset for level flight. Since the reflex on the elevens is 7°, I’m going to try and start there.

What sucks is that I had ordered new 20awg silicone wire for the escs. After I got it installed, I realized they sent me 16awg. :(
 

French

Construire Voler S'écraser Répéter
Subscribed!
It looks like I may end up maidening this one in a couple weeks over at the Eglin Aero Modellers field at Test Site C-3 with my dad. He also mentioned maybe the Holley-Navarre field where he flies too. We’ll see.

I hope to be able to get back to soldering this weekend. I’m probably half way through the build, then I need to fine tune the iNav.
 

French

Construire Voler S'écraser Répéter
It’s built!

In order to easily connect the servos, I decided to wire up some pin headers as a mock 5V and ground rail. I added epoxy for strength and to make sure nothing shorted.


That pin header was soldered directly to a 5V source on the FC. The motor 3 & 4 signal wires were soldered to the top pins on the servo pin header. I also switched out the esc power wire for 18awg.


Motors and servo tests


Wings folded and glued


Nacelles glued


Bottom pod installed


Notes
  • This thing really did come together fast after all the electronics were in and tested.
  • I reinforced the leading edge with a strip of packaging tape.
  • I hit the tips of the winglets with a thin layer of hot glue for strength too.
  • For more experienced builders, I’d suggest you set the reflex before bending and cutting your control arms. I found that Josh’s method of doing it flat resulted in pitched back control horns.
 
Last edited:

French

Construire Voler S'écraser Répéter
The differential thrust is nuts. I was testing it inside (holding the wing of course) and it pulls like no tomorrow. It pulled so hard one of the props flew off (pressure fit at the time).

The iNav does try to autocorrect the servos in angle mode.
 

PsyBorg

Wake up! Time to fly!
I'm tellin ya man. you can fly that thing like a boomerang with that differential thrust with a little practice. toss it out and knock squirrels off fences, bonk noisy neighbor kids... the uses for something like this could be endless and may revolutionize the industry...:devilish:.... Hrmm these emoji look like I feel today.. slightly off kilter.

BRB need more :coffee:...
 

PsyBorg

Wake up! Time to fly!
hahah #RippinRodents #Notsosecretsquirrel #Whoopintail

Awesome video. You must do that a lot because them squirrels are like dude.. Im eattin...go away. Almost like the whoop is a personal friend pestering them while they eat.