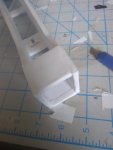
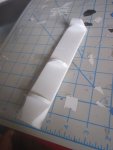
how to build the fuselage, from GrizWiz's build thread on how to assemble it.

First you want to glue the fuselage at a right angle on both sides.
Fold the paper flaps on the front then glue them in.


The next step is to glue the bottom piece onto the fuselage.

Next you will glue the bottom sheeting for the back of the fuselage onto the fuselage.

After finishing the bottom sheeting you will glue in the former in the picture.
The turtle deck assembly:

Glue all of the former's in place
The former with the longest tab goes in front, the others go after that.
Glue the back fold onto the top of the battery hatch.
Bevel the battery hatch where it shows on the plans
After apply the poster board like it shows in the flite test mighty mini p51 build video.
do not apply the rear poster board.

The nose you will need to peal the paper off of the back then glue together the rest
After glueing the rest of the nose trim the rest flush with the first flap.

Insert the nose brace without the hole on the bottom of the nose then mold the rest of the nose to it.
After it is able to hold it's shape glue it in.

The next step is crucial
You need to insert the power pod into the nose, then mark to top onto the nose
Remove the power pod then get the nose brace with the hole and glue it in.
You must make sure that the power pod still fits.

This is what the nose of the plane should look like this with the power pod in.
To hold the power pod in just stick two bbq sticks and trim them.
then insert this assembly into the front of the fuselage and glue it in place.