Rasterize - Skindex

Rasterize

Maker of skins and decals for foam board RC planes
Moderator
Mentor
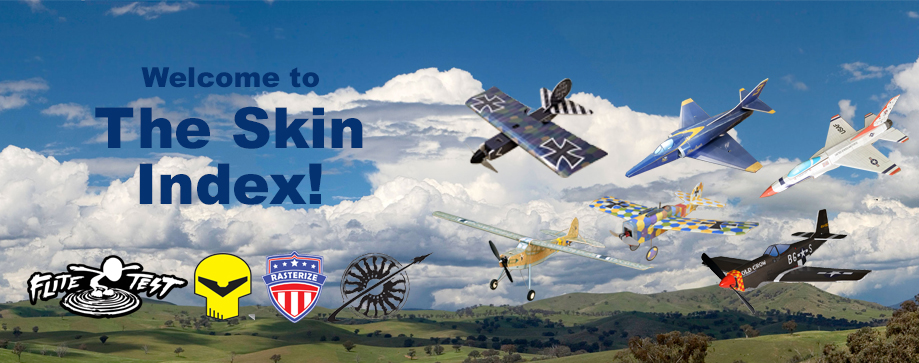
Index Thread Title Cover.jpg


Grab a cuppa of your favorite beverage and peruse the Skindex for your next "must build"!
Find the model you are interested in and click on the link.
This will take you to the skin resource page for that aircraft.
Check out the pictures to get an idea of what the skin looks like.
Then download the printable PDFs.


Happy building and go make some memories!
~ Stephen aka Rasterize

FT Simple Storch - Afrika Korp

FT MM DR1 Triplane - Red Baron

FT MM P51 Mustang - Old Crow, Bunny, Paul I

FT Mighty Mini Corsair - Major Gregory "Pappy" Boyington

FT Mini Scout - Aviatik D.I "Berg" flown by Austro-Hungarian ace Frank Linke-Crawford

XF Bloody Brit - Dan Sponholz - Eddie Rickenbacker

XF Bloody Baron - Dan Sponholz - Erst Udet

Gotha Gaggle Baby Barons- 26 skins to choose from!

Gotha Gaggle Baby Brits- 28 skins to choose from!
F16 Viper - Ben Harber - Thunderbird

MiniacRC FT Style Mighty Mini P40 - 4 skins Flying Tiger, SAAF, Pearl Harbor, Stud


Want full size printed skins and plans delivered right to your door?

Me too. Unfortunately, Fliteskins has been closed.
I don't know if or when it will reopen.
Sorry for any inconvenience.
I will still be doing skins but probably not any new ones until early 2021.


Introducing...
www.Fliteskins.com
After many years of designing skins (paper coverings) for foam RC aircraft including Flite Test, I’m now offering the ability to print full-size skins with plans. Taping and gluing of tiled are a thing of the past! All skins come with a full-size copy of the plans for reference.

We are starting off the grand opening of the Flite Skins website with the Flying Tiger color scheme for the Flite Test P40! Printed on three full size sheets of 24X36 20lbs bond paper, this kit includes a full sized set of printed plans for reference. Skins that are already available for download on the resource section of the Flite Test forums will be added soon.

Orders placed M-F ship the next day, Sat and Sun ships Mon. All prices include shipping via USPS Priority Mail in the continental USA.

June 15th www.fliteskins.com launched with announcement of FT P40 Flying Tiger livery.

June 19th Flite Test Simple Cub Classic Yellow added to site

June 22nd Flite Test Mighty Mini Scout – Aviatik D.I “Berg” added to site

June 24 Sp0nz Bloody Baron – Ernst Udet’s black Albatross added to site

June 25 Flite Test Mighty Mini P51 Mustang Old Crow added to site

June 26 Three versions of the Flite Test Mighty Mini Fokker DRI are added to the site

July 11 Flite Test Mighty Mini SE5 Billy Bishop and Lt Joseph Elwood “Child Yank” Boudwin 25th Aero Squadron added to site

I will be adding more as time permits. Check back later for new skins!
 
Last edited:

Rasterize

Maker of skins and decals for foam board RC planes
Moderator
Mentor
FAQ
My printer will only print letter sized paper. So where are all the 8.5X11 versions?
- Short answer, it's easier to do larger paper sizes (11X17 and 24X36 Arch D). Not only for designing but for building as well. Having them printed at a store like Staples or Office Max. It might cost a bit (.78 to 1.30 per page for 11X17 and $6 for a n Arch D 24x36) but you will get a more durable image. Toner is plastic after all. Long answer is that it's also boring and a bit of a pain to do them (effectively) in 8.5X11. I don't like the way apps do the clipping of images. I do all mine by hand in Illustrator so it takes longer. Time I could spend doing other things! Like more designs!
You however can print out larger sheets on your letter sized printer. Use Adobe Acrobat Reader (It's free) and do "Poster" printing (aka tiling) to print a large sheet onto smaller sheets that you cut and put back together.

Do you take requests? - Sure but this is not my full time job and the "to get done"list is already very long. See the next post.

Can I have your original art files? - Short answer - No. I already provide the PDF skins for free. I lock the PDF's to deter (a bit) the unscrupulous. Original files are not securable. I hope you understand.

How can I make my own skins? - You bet! Learn how to use a a vector based art program like Inkscape. This makes using FT plans easier. Inkscape is free and there are plenty of videos from the University of YouTube. ;) Community members like Rockyboy are even putting some tips and step by step instructions in their threads.

Basic build tips when using skins
  • These are not beginner builds! You must be comfortable with the flite Test build method. I would also advise you build a few before attempting this. You will have a much easier time building and a better chance of a successful maiden. In other words, crash the white foam planes first until you can fly them well enough. Then try a skinned version.
  • It is advisable that you download the full plans and have them available for viewing before beginning your build. You will need them for reference as score lines are usually not on the skins.
  • Basic Tools: Dollar store foam board with paper removed, spray adhesive (3M77 or like kind), X-acto or razor knives (warning: cut hazard), Scissors, Roller or plastic squeegee like a credit card.
Basic build steps:

Cut out skin part with about 1/2 inch of white around it.
  1. Glue to foam with spray adhesive. I would spray the paper, give it a few seconds, then apply to the foam
  2. Roll or squeegee paper down for good contact
  3. Trim out part and foam
  4. Let dry completely
If the part has a second side
  1. Cut out the skin part from the paprt with no white around the edges
  2. Carefully align the second side skin to the foam and glue it in place.
  3. Roll or squeegee paper down for good contact
  4. Let dry completely
More Tips
  • Horizontal stabs - Do not cut out the two tabs that engage the fuse on the top skin. It is unnecessary and will detract from the look.
  • The Wing - I opted to just remove all the paper and only use the skins. I think after the spar is in it will be more than sufficiently strong. Take extra care in trimming the edges where the wing halves come together.
  • The bottom of the fuselage - Take extra care when gluing the two bottom sections into place. Panel lines should line up and the paper on the edges should be flush for a clean look.
  • Sheeting: (Turtle deck/Part out or card stock) To keep the color between pieces the same I printed out everything on the same paper - 24lbs or 20lbs bond (75 or 90 gsm). For parts that require card stock, I just glued the printed sheet with a blank sheet to make it thicker, then cut the piece out.
  • Sharpie Touch Ups - Use black, light gray and medium to dark olive Sharpie for touch ups.
  • Weathering Tip - Use a silver fine tip Sharpie to simulate paint chipping.
  • Belly Landings - Protect you plane when doing belly landings so it stays awesome looking longer. Using packing tape on the undersides of the fuselage.

Printing Tips
  • If you print at home: Please check your Print Dialog box in Acrobat and make sure that under "Page Size & Handling" that the "Actual size" button is checked and NOT the "Fit" button. If "Fit" was chosen it can result in smaller sized prints even when the correct paper size is selected. So far this one tip, if not done, has wasted more time and money than anything else!
  • If you take it somewhere to get it printed, measure the ruler marks on the paper to ensure it’s the right size when you pick it up.
 
Last edited:

Rasterize

Maker of skins and decals for foam board RC planes
Moderator
Mentor
Videos! ...or it didn't happen.
For a better idea of what I do you can check out these videos:
Flite Test Video on skins (Starring me!):


Also check out the Blue Angels skins I did for Ben Harbors A4’s at Flite Fest 2018 starting at 2:20 in this video:


As well as the Gotha Gaggle/Gotha Bomber/Baby Brits and Barons at Flite Fest 2016 in this video:

 
Last edited:

Rasterize

Maker of skins and decals for foam board RC planes
Moderator
Mentor
Introducing...
www.Fliteskins.com
After many years of designing skins (paper coverings) for foam RC aircraft including Flite Test, I’m now offering the ability to print full size skins with plans. Taping and gluing of tiled are a thing of the past! All skins come with a full-size copy of the plans for reference.

We are starting off the grand opening of the Flite Skins website with the Flying Tiger color scheme for the Flite Test P40! Printed on three full size sheets of 24X36 20lbs bond paper, this kit includes a full sized set of printed plans for reference. Skins that are already available for download on the resource section of the Flite Test forums will be added soon.

BS5.jpg

Orders placed M-F ship the next day, Sat and Sun ships Mon. All prices include shipping via USPS Priority Mail in the continental USA.


June 15th www.fliteskins.com launched with announcement of FT P40 Flying Tiger livery.

June 19th Flite Test Simple Cub Classic Yellow added to site

June 22nd Flite Test Mighty Mini Scout – Aviatik D.I “Berg” added to site

June 24 Sp0nz Bloody Baron – Ernst Udet’s black Albatross added to site

June 25 Flite Test Mighty Mini P51 Mustang Old Crow added to site

June 26 Three versions of the Flite Test Mighty Mini Fokker DRI are added to the site

July 11 Flite Test Mighty Mini SE5 Billy Bishop added to site
 
Last edited:

flitetest

Administrator
Admin
DEF love this thread! Thanks Rasterize!! Great work on everything and as always I love you heart for the community to allow for people to literally make their planes COME TO LIFE with your skins! Keep on being awesome!

Blessings,
Stefan
 

Rasterize

Maker of skins and decals for foam board RC planes
Moderator
Mentor
Hey Rasterize, How would one go about gluing these to depron and what glue?

I would still use something like 3M 77 spray or an equivalent. Should work. The only thing I'd worry about would be the thickness of the depron. May not play well with the FT design.
 

Rasterize

Maker of skins and decals for foam board RC planes
Moderator
Mentor
Thank you kind sir
You are most welcome!

Stephen, your graphics are amazing! Thanks for giving back to the community and sharing your talents. Subscribed.
And thank you as well! Couldn't do it without you!

Awesome to get these all collected in one place too! Thank you!! :)
About time right! ;)

Yesss! Glad to see this thread and moreso to see Rasterize posting.
Been wanting to do this for a while now. Good to start being more active now that the big move is over.

Very nice. Glad to see this in a repository and looking forward to your upcoming work!
Thank you sir!

DEF love this thread! Thanks Rasterize!! Great work on everything and as always I love you heart for the community to allow for people to literally make their planes COME TO LIFE with your skins! Keep on being awesome!
Blessings,
Stefan
Thanks Stefan! The work you guys do at FT has been a great influence for good in the world. You have our thanks and support as always.
 

FoamyDM

Building Fool-Flying Noob
Moderator
Rasterize,
Beautiful Job!

Thank you for putting this in one place for all to enjoy. Were you going to put the Gotha Bomber and plethera of other skins babybrit/babybaron skins from last year's challenge here too?

Last request:
Would you consider putting a tutorial together for those of us that wish to schnaz up our FTFC'18 WWII planes as a post-challenge bonus. I'm thinking if I can get my projects up, I'd like to do a couple skin variations for my planes. I an I'm not sure were to start. Right now I have ACAD dwg files. I can convert that to vector files... is that where I start?
 

rockyboy

Skill Collector
Mentor
Would you consider putting a tutorial together for those of us that wish to schnaz up our FTFC'18 WWII planes as a post-challenge bonus. I'm thinking if I can get my projects up, I'd like to do a couple skin variations for my planes. I an I'm not sure were to start. Right now I have ACAD dwg files. I can convert that to vector files... is that where I start?

I'm pretty sure Rasterize will have a better recommendation, but so far I've been doing mine by using the CAD program to export DXF of the important shapes, then transmute the DXF to SVG using an online converter or dxf-svg-convert

Once I've got an SVG file I use Inkscape to color things in. Lots of tutorials for Inkscape on youtube. I've been doing a play-by-play on the FW-42 Mini skin in the past week or so too. Nothing as nice as Stephen puts out from an artistic perspective, but it's nicer than white foam :p
 

Rasterize

Maker of skins and decals for foam board RC planes
Moderator
Mentor
Rasterize,
Beautiful Job!
Thanks! I had a lot of inspiration from Sponz.

Thank you for putting this in one place for all to enjoy. Were you going to put the Gotha Bomber and plethera of other skins babybrit/babybaron skins from last year's challenge here too?
Never actually made a Gotha skin bit it's not a bad idea. I only put together some WW1 lozenge graphics for Wilsonman to print and do with as he saw fit. As for the babybrit/babybaron skins, I promised those I made them for that I would not give them to anyone else with their permission.

Last request:
Would you consider putting a tutorial together for those of us that wish to schnaz up our FTFC'18 WWII planes as a post-challenge bonus. I'm thinking if I can get my projects up, I'd like to do a couple skin variations for my planes. I an I'm not sure were to start. Right now I have ACAD dwg files. I can convert that to vector files... is that where I start?
Actally Rockboy hit it on the head with his recommendation of getting your file into an editable vector format and putting it into Inkscape. As he mentioned, Inkscape is free with lots of tutorials on Youtube.
 

AkimboGlueGuns

Biplane Guy
Mentor
I might pitch the skins to the UND RC club for a winter group build. Having a 20 bird skinned warbird flight would be awesome!
 

Rasterize

Maker of skins and decals for foam board RC planes
Moderator
Mentor
I might pitch the skins to the UND RC club for a winter group build. Having a 20 bird skinned warbird flight would be awesome!
That would be cool!


Very nice Steven. Awesome as always. Glad to be able to call u a friend.
jason ;)
Thanks my friend. See you at the field! Nice job on the 3D printed parts! I can't wait to see what you do with them. ;)