Seahunter
Active member
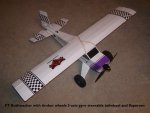
This is my FT Bushwacker. It's pictures are in my hanger in the media section. I tried to post pictures of it in an old thread, but just noticed that it's not there, so here it is again. I bought a FT kit of the Bushwacker right after Peter designed it. It sat under my workbench for a long time before I started the build. Since it was made of the old white DTFB and I was having problems with the paper falling off of the white board from the morning dew, I traced the parts onto the new water resistant board which I had just bought a box of 50 sheets from FT, cut them out and gave the white ones to my neighbor and flying, building partner. I also downloaded a set of plans for backup. Since I did not like the foam wheels that came with the kit, I bought a set of Timber wheels for it. They were not cheap, around 18.00 for the timber wheels. No problem on the CG. I also modified the tail and put the timber steerable tailwheel on as our club has a paved runway, I am happy with the timber wheels, I would not change my choice. They work great on grass, dirt whatever. I also bought the timber replacement landing gear, it's still in the box, too heavy for the Bushwacker. I used the tailwheel wire from the set, but a cheaper tailwheel is available with spring coiled pre-bent tailwheel from http://www.airborne-models.com. I put a 3 axis gyro in it for windy days, also programed in flaperons. It has a "C" pack in it. I plan to add removable slats later to see how slow can I get it to go. The timber wheels measure about 4 1/4".
I painted it with Krylon white spray cans after sanding it thoroughly and cleaning with rubbing alcohol, The checkerboard and black stripes are cut from top flite or monocote vinyl trim sheets, I cut the stripes on my monocote smart stripe machine, a picture of it's in my Guillows Cherokee thread build in balsa builders and breakers. The purple stripe on the front is colored packing tape. The decals were made and sized on my printer and applied with Mod-podge. The AMA decal on the wing was sent buy AMA. the bushwacker logo on the side was made in windows notepad using Script MT, bold oblique font and printing it out. Then cut around lettering and coat it with mod-podge and let dry, careful with that step as mod podge will smear the printer ink. Let dry, then put on with mod podge. You can apply FT logos the same way. Sticks well on paint, sometimes will slip on tape and vinyl. I noticed that James Whomsley also uses this method for decals as he covered it in a recent video. I like passing on methods and talking builds etc. please contact me anytime. Also check out http://www.airfieldmodels.com, Paul k Johnson owns the site. Membership is free and he has loads of information, tips etc. great site!


I painted it with Krylon white spray cans after sanding it thoroughly and cleaning with rubbing alcohol, The checkerboard and black stripes are cut from top flite or monocote vinyl trim sheets, I cut the stripes on my monocote smart stripe machine, a picture of it's in my Guillows Cherokee thread build in balsa builders and breakers. The purple stripe on the front is colored packing tape. The decals were made and sized on my printer and applied with Mod-podge. The AMA decal on the wing was sent buy AMA. the bushwacker logo on the side was made in windows notepad using Script MT, bold oblique font and printing it out. Then cut around lettering and coat it with mod-podge and let dry, careful with that step as mod podge will smear the printer ink. Let dry, then put on with mod podge. You can apply FT logos the same way. Sticks well on paint, sometimes will slip on tape and vinyl. I noticed that James Whomsley also uses this method for decals as he covered it in a recent video. I like passing on methods and talking builds etc. please contact me anytime. Also check out http://www.airfieldmodels.com, Paul k Johnson owns the site. Membership is free and he has loads of information, tips etc. great site!


