Work has stopped temporarily on my other 1/4 scale Cub, and started on a Funfighter and this Clipped Wing Cub. I got this one in fall at a swap meet for $100, which included the floats and standard landing gear. No motor, but it included all the servos and was fairly complete. Some hardware was missing, along with the springs to the tail wheel for steering, but it was all pretty minimal stuff. By the time the other Cub was almost complete I had enough left over pieces to take care of most missing pieces on this one!
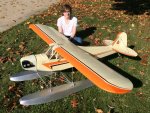
In all it's "just purchased" glory with my son, here is my starting point.

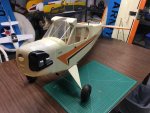
Switching over to landing gear instead of floats saves me a LOT of space on the table. Even with the wing removed, it's still a big project. This one is nowhere near as bad of condition as the other Cub. The covering was a little saggy here and there, but nothing a dose of hot air doesn't fix. Colors are a little dated and it's been patched a dozen times, but for now it'll do. Eventually it'll get re-covered and given a new color scheme.

Servos are from Tower Hobbies. Unlike the other Cub, the nose on this one is wide open and spacious for a gas tank. The dash is also an upgrade from stock and includes instruments.

The wing is a little worn, but needs no repairs to be used as-is. To give you an idea of the size difference between a standard "full" wing and the Clipped Wing, here's a side-by-side. The rectangle "window" is the center-point of the wing, so the Clipped Wing is about 2' shorter total. That should give me a little more aerobatic performance compared to stock.

A few things on the fuselage need changing. First up is the power switch. With a nitro motor you only need a single switch for the electronics. I could use it, but prefer a switch for the receiver/servos and another one for the electronic ignition for the gas motor. Oh, I'm going with gas on this build, just like the other Cub. This will be a 26cc Turnigy, which I got for 1/2 price on Hobby King. Reviews are good, but repair parts may be iffy. I'll buy what I can for it and take the chance for the price I paid.

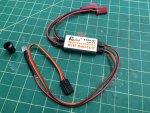
Here's the dual switch setup going into this Cub. It's a better version of what I used previously, since this one is metal and the fuel dot actually works. It's also got the dual charging ports so each battery can be charged independently, which is good since they're different voltages.

Also going into this plane is an optical kill switch. Once I program my failsafe settings on the receiver, this will kill the motor if I lose signal or if I flip a switch programmed as the kill-switch on the transmitter. It's another level of security, "just in case".

I want to re-use parts that came with the plane whenever I can. This is the original tank as it was set up for nitro. The tank itself is fine, although I'm not sold on the round shape. If I change it for any reason, it's because I switch to a flat bottom.

So the tank was good, but the rubber bung was rotting. It also probably wouldn't be compatible with gas, so it had to go.

Using the original copper lines as templates I bent a new vent line and soldered barbs on the ends to better hold the gas lines in place. Wrapping them with wire should also work just fine, but this is just cheap insurance against leaks or failures.

With the pieces all in place, the clunk and tank line are secured with a quick wrap of wire. This new rubber bung is formulated to work with gas. Kind of an important detail...!

All set and ready to fill! The tank had some slimy residue in it from the nitro used years ago. I have no idea how long it's been since the plane flew, but gunk in the tank isn't Kosher. Some fresh gas was poured in to dissolve it and it was shaken up for a while before rinsing it all out with hot soapy water. No traces remain of the old stuff, so it should be ready.

More to come!
In all it's "just purchased" glory with my son, here is my starting point.

Switching over to landing gear instead of floats saves me a LOT of space on the table. Even with the wing removed, it's still a big project. This one is nowhere near as bad of condition as the other Cub. The covering was a little saggy here and there, but nothing a dose of hot air doesn't fix. Colors are a little dated and it's been patched a dozen times, but for now it'll do. Eventually it'll get re-covered and given a new color scheme.

Servos are from Tower Hobbies. Unlike the other Cub, the nose on this one is wide open and spacious for a gas tank. The dash is also an upgrade from stock and includes instruments.

The wing is a little worn, but needs no repairs to be used as-is. To give you an idea of the size difference between a standard "full" wing and the Clipped Wing, here's a side-by-side. The rectangle "window" is the center-point of the wing, so the Clipped Wing is about 2' shorter total. That should give me a little more aerobatic performance compared to stock.

A few things on the fuselage need changing. First up is the power switch. With a nitro motor you only need a single switch for the electronics. I could use it, but prefer a switch for the receiver/servos and another one for the electronic ignition for the gas motor. Oh, I'm going with gas on this build, just like the other Cub. This will be a 26cc Turnigy, which I got for 1/2 price on Hobby King. Reviews are good, but repair parts may be iffy. I'll buy what I can for it and take the chance for the price I paid.

Here's the dual switch setup going into this Cub. It's a better version of what I used previously, since this one is metal and the fuel dot actually works. It's also got the dual charging ports so each battery can be charged independently, which is good since they're different voltages.

Also going into this plane is an optical kill switch. Once I program my failsafe settings on the receiver, this will kill the motor if I lose signal or if I flip a switch programmed as the kill-switch on the transmitter. It's another level of security, "just in case".

I want to re-use parts that came with the plane whenever I can. This is the original tank as it was set up for nitro. The tank itself is fine, although I'm not sold on the round shape. If I change it for any reason, it's because I switch to a flat bottom.

So the tank was good, but the rubber bung was rotting. It also probably wouldn't be compatible with gas, so it had to go.

Using the original copper lines as templates I bent a new vent line and soldered barbs on the ends to better hold the gas lines in place. Wrapping them with wire should also work just fine, but this is just cheap insurance against leaks or failures.

With the pieces all in place, the clunk and tank line are secured with a quick wrap of wire. This new rubber bung is formulated to work with gas. Kind of an important detail...!

All set and ready to fill! The tank had some slimy residue in it from the nitro used years ago. I have no idea how long it's been since the plane flew, but gunk in the tank isn't Kosher. Some fresh gas was poured in to dissolve it and it was shaken up for a while before rinsing it all out with hot soapy water. No traces remain of the old stuff, so it should be ready.

More to come!


