
You are using an out of date browser. It may not display this or other websites correctly.
You should upgrade or use an alternative browser.
You should upgrade or use an alternative browser.
3DLabPrint Supermarine Spitfire MkIX


Ha! I got the bigger bottles. I'm going to start assembling the fuselage this Sunday or Monday.
Good Luck!
Then on to painting and hooking up electronics. I did all the soldering on the ESC and motor bullet connectors. Tested that and it worked, so fingers crossed. Hoping to maiden it in late April or early May.

Your parts look pretty clean, what settings are you using? I find mine get some under extrusion in places.
We got that from a lot of fussing. But if you don't have it, Simplify 3D is worth the money. Although not perfect, the prints came out instantly better switching from Cura to Simplify 3D. Not to say you can't get great prints using Cura, but Steppan already dialed this in for Simplify 3D, so you don't need to mess with the settings as much.
After that we played with the extrusion settings, upping them by .02 until it came out okay. Sometimes we had to slow the print down as well (we found that the percentages in S3D are the percent of the speed already in the settings. So if the print is set to print at 60%, then you slow it down by 50%, you are really slowing it down to 30%, or 50% of the original 60%), and we constantly adjusted the retraction settings. We found, and I think Andre found the same, that the settings for the wings and fuselage are different.We had it locked in for the wings, then when we started the fuselage, they came out very thin. My buddy completely cleaned his printer, replaced the bowden tube (Capricorn), bought a bunch of cheap nozzles so he could just toss clogged ones, and he'd run some Rigid Ink floss through to clean it out if he felt it was getting clogged, but not enough to junk the nozzle. Then he ran it pretty much the way the settings were in Simplify 3D.
We were surprised to discover that 3D printing is more of an art than a science. We found that for each section, we'd take the smallest piece and run it until it came out as clean as we could get it. Sometimes it would only print for an hour or two before you'd see something was wrong. Then adjust and try again.
So we took the S3D settings, then adjusted the extrusion by .02, and the retraction settings, and even speed if necessary, until we like what we saw. Since each printer has it's own identity, you'll have to play around with yours until you find the best set up for your particular printer. Finally, check for clogs. High retraction settings cause clogs. Even small ones can cause less filament to flow, causing underextrusion. He actually ran a test, not sure what it was called, but he ran a test that measured the amount of filament that was supposed to flow through the extruder. In the test, the system said 100mm should have flowed, but only 80-something flowed. That's when he replaced the bowden tube (by-the-way--the Capricorn Bowden tube had so much less friction, we had to lower the retraction settings after putting it on) and nozzle. In one of the later prints he found the opening at the tip of the cheap brass nozzle had been worn away and was a rectangle. not sure if it was the clear filament, or if that was because they were cheap brass nozzles. But this model requires a TON of printing, so just stay on top of the hotend, and play with the settings, and you should be able to dial it in.
Oh, and he also got rid of the glass bed that came with the Creality CR10. They all have a bow in them somewhere, and it makes it totally impossible to level.
Hope that was at least a little helpful. Good luck!
Last edited:
Morning Andre,
I glued the fuselage together last night. I don't know if you've done yours yet or not, but on some of our parts, there were no tabs. Not sure if this was a print error, but nevertheless, if your plane doesn't have tabs at joints F2-F3, F3-F4, F4-F5, F5-F6 I would suggest the following. If I could do it over I would do it this way as well.
Glue the half pieces together and let them set on their own. Once those are done start with the F2-F3 joint. The model does not like to stand on the nose so starting here makes it much easier, and much more stable to do on the table, then glue these using NO activator. Then do joints F3-F4, F4-F5 and F5-F6 the same way.
The pieces are so floppy they can be hard to line up, and when I used activator on the first joint it's in the air, and on the pieces (that stuff spreads) and on my hands--so it ends up getting on the future joints before you want it to. And if those joints are off, it messes with the canopy channel (got glue in there now have to dig it out) and the battery hatch, plus it looks bad. I'm going to need do some filling and sanding to cover up some of the offsets. Just extra work that wouldn't be necessary if the darn things didn't lock together so fast. I even thought about gluing one half of the joint, then doing the other side. The other joints had tabs,so they went together easily.
Thought I'd share.
Good luck!


So I finished the tail section. Making sure those fuselage sections are properly aligned makes a huge difference. Since mine were off, I had to heat the end of the push rod and melt through the misaligned channels built into the plastic for the rods. On top of that I was sloppy with the glue and it got into the channel at the very last joint and I had to drill it out.
Now it is all about sanding, filling, and painting. I don't know about you Andre, but the weather down here is finally starting to warm up. We might see 60 tomorrow. The club field cleanup is in two weeks and the field opens a week after that (our field is on federal land and is controlled by the Army Corp of Engineers, we have to wait until they open the gates to the park).
Will be flying soon!
Andre,
Hobby King was sold out of the 15 x 8 3 blade props. One of the guys on the 3dLab print website said the 14 x 9 would be a better choice for that motor anyway. Those are in stock on another site, do you agree with that? I also have a 16 x 8 two blade I can use as well, but was kinda hoping to go with the scale look and get the three blade. I just don't know if the 14 x 9 will cause the RPMs to go up.
Hobby King was sold out of the 15 x 8 3 blade props. One of the guys on the 3dLab print website said the 14 x 9 would be a better choice for that motor anyway. Those are in stock on another site, do you agree with that? I also have a 16 x 8 two blade I can use as well, but was kinda hoping to go with the scale look and get the three blade. I just don't know if the 14 x 9 will cause the RPMs to go up.


No, lots more to do but closer.Read to fly?
Morgan
Active member
Looking good at anywayNo, lots more to do but closer.
Last edited:
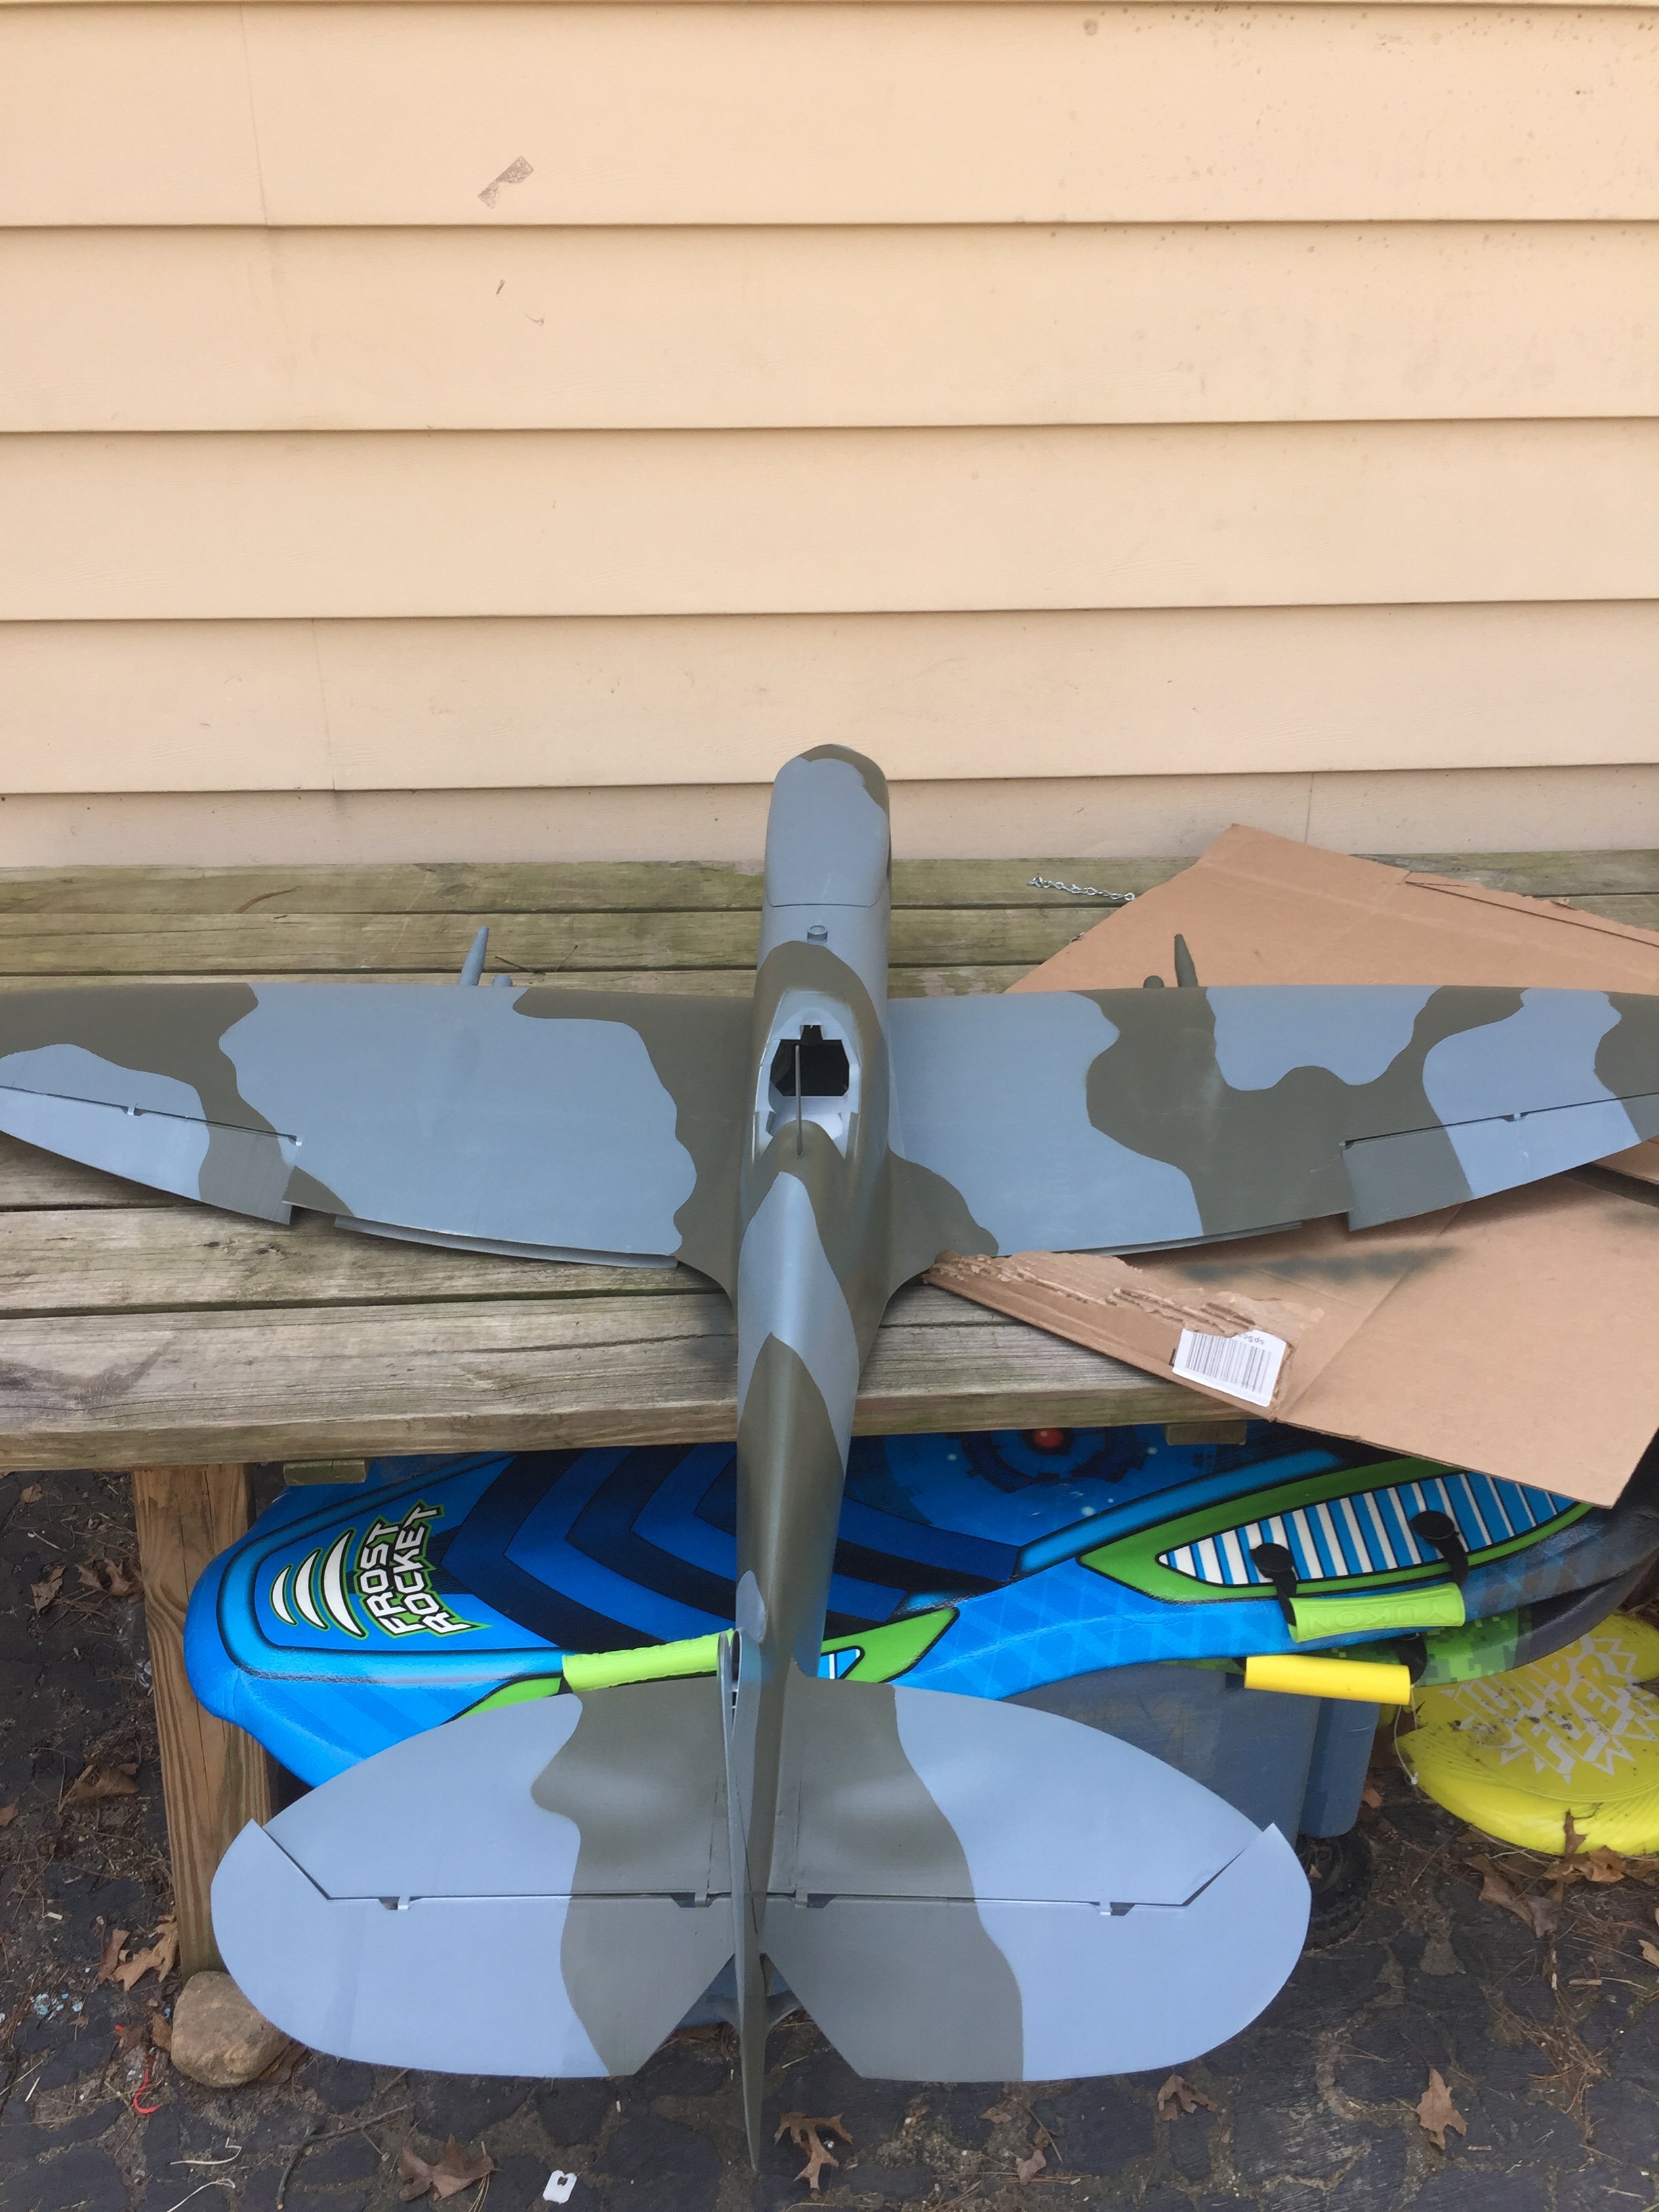
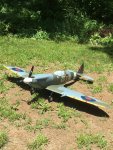
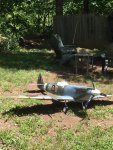
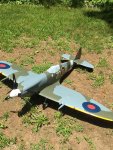
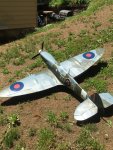
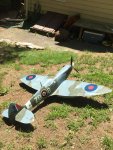
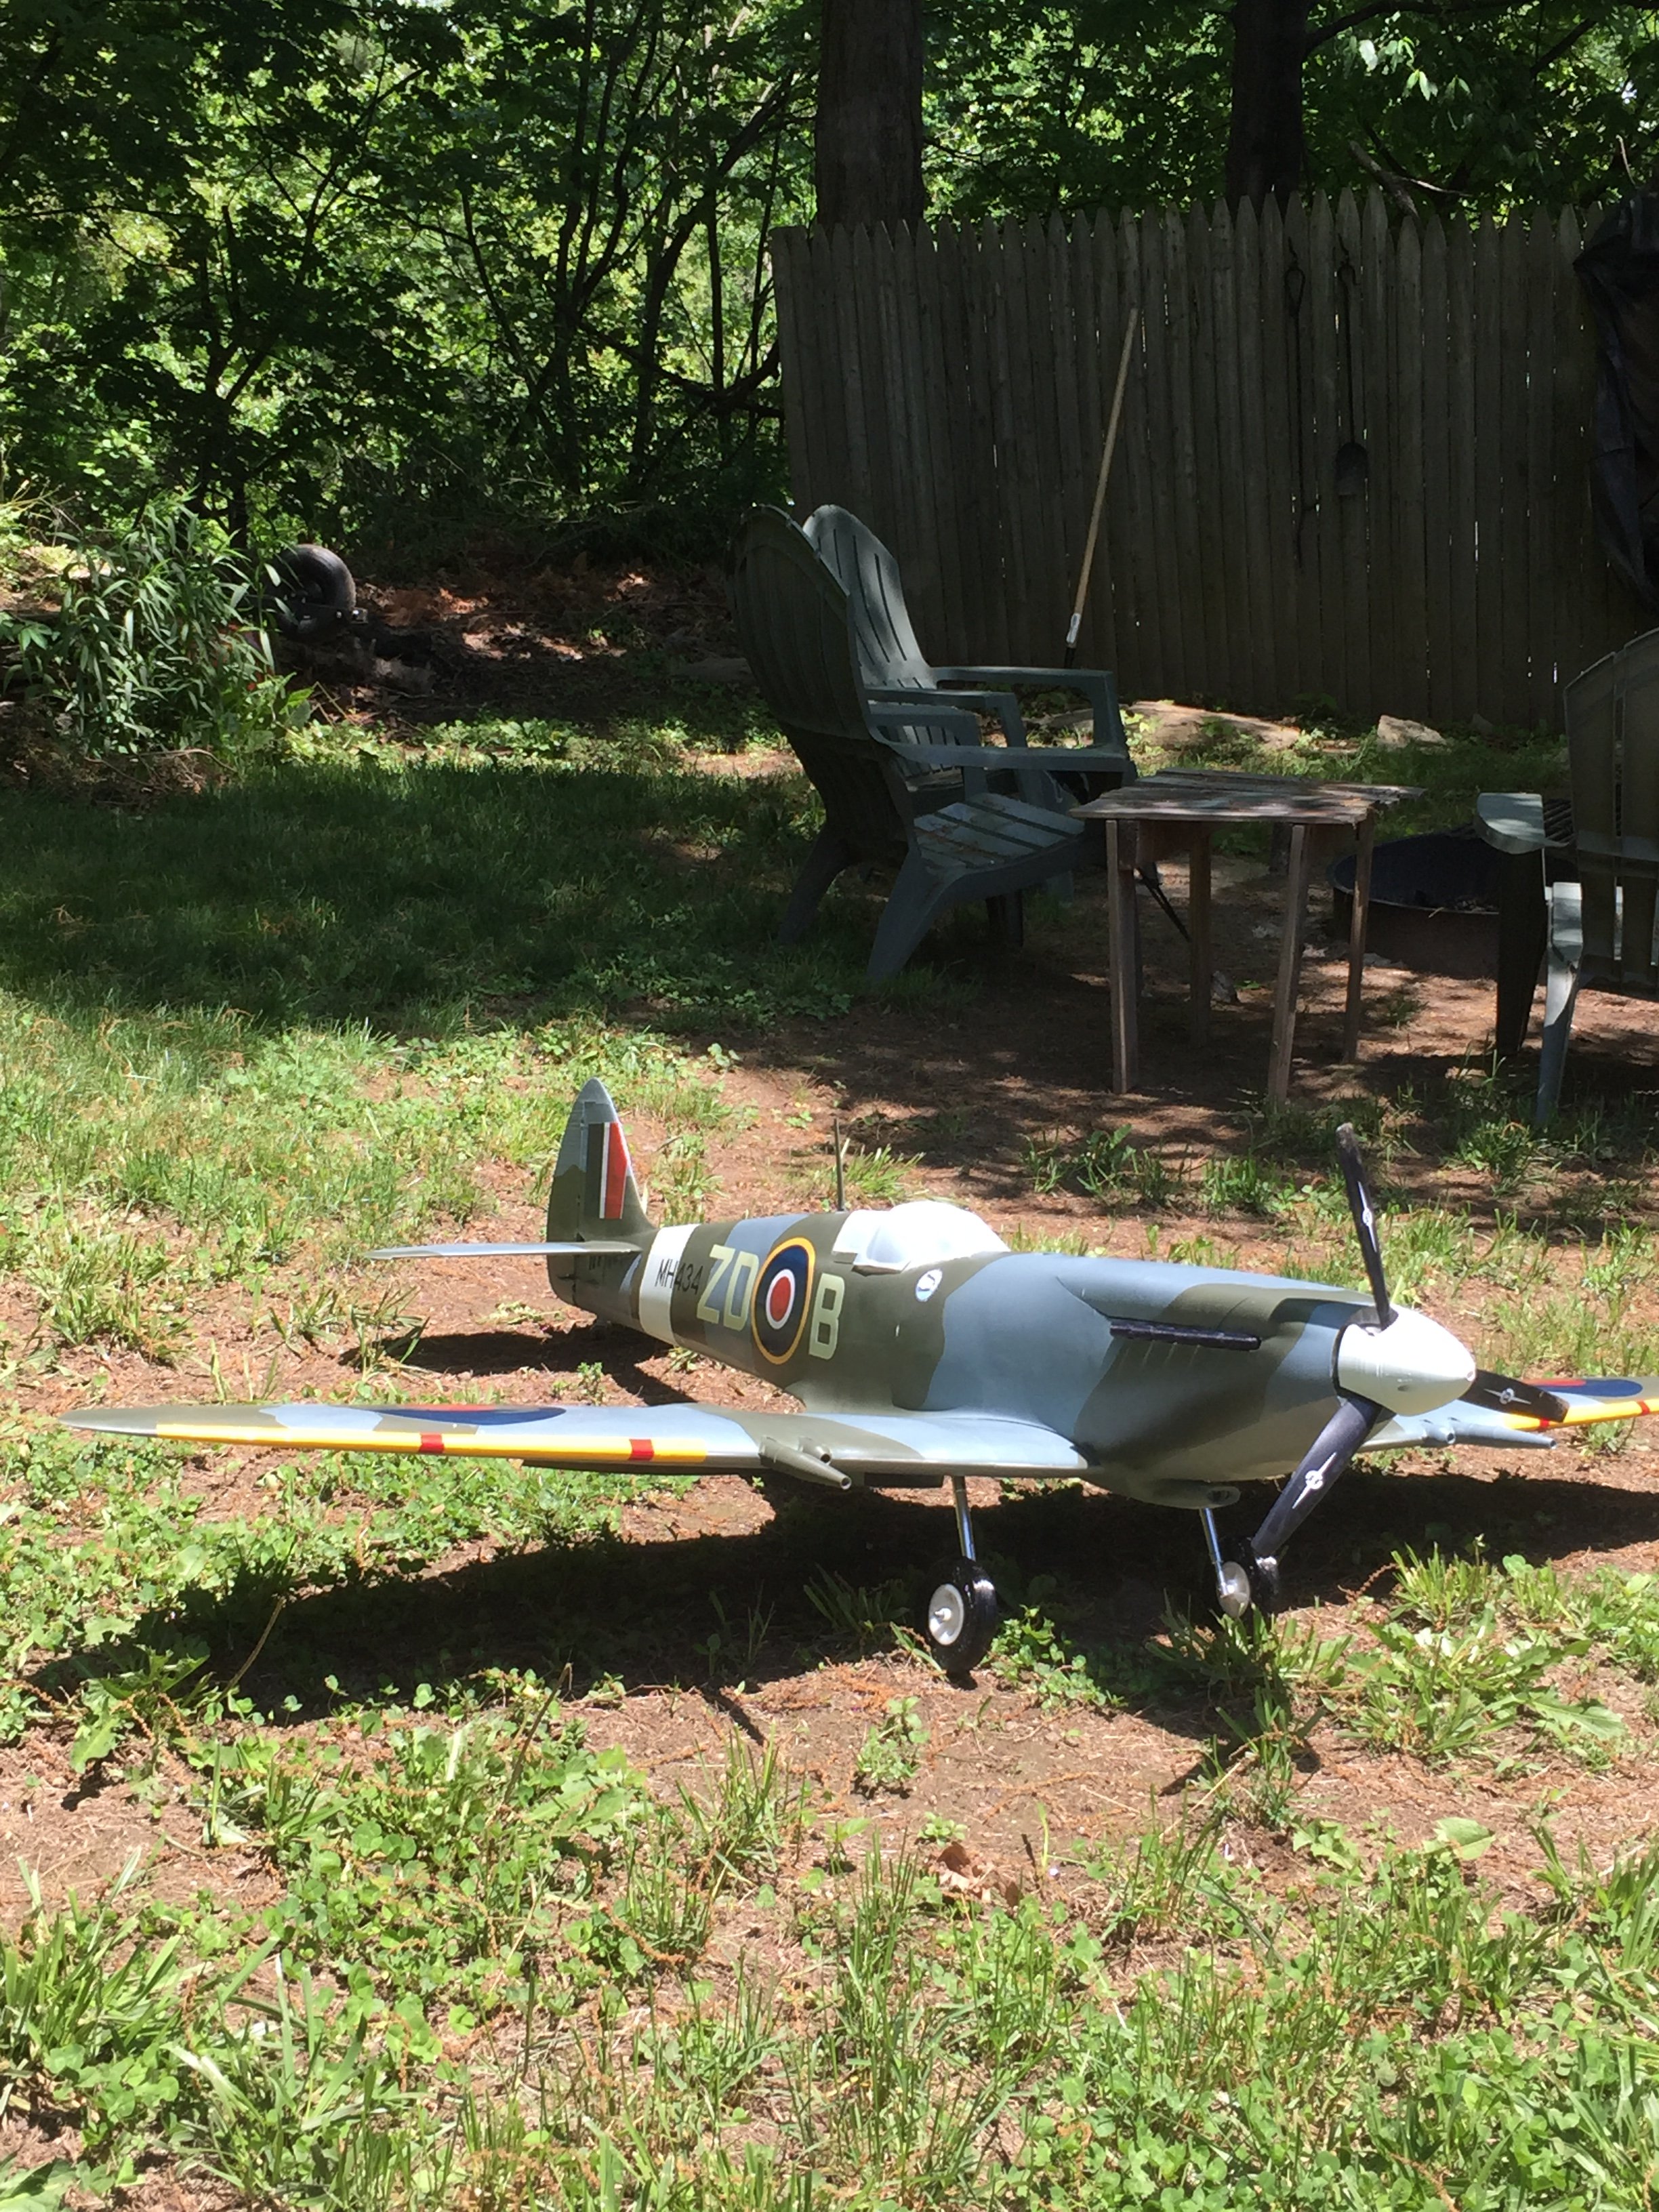
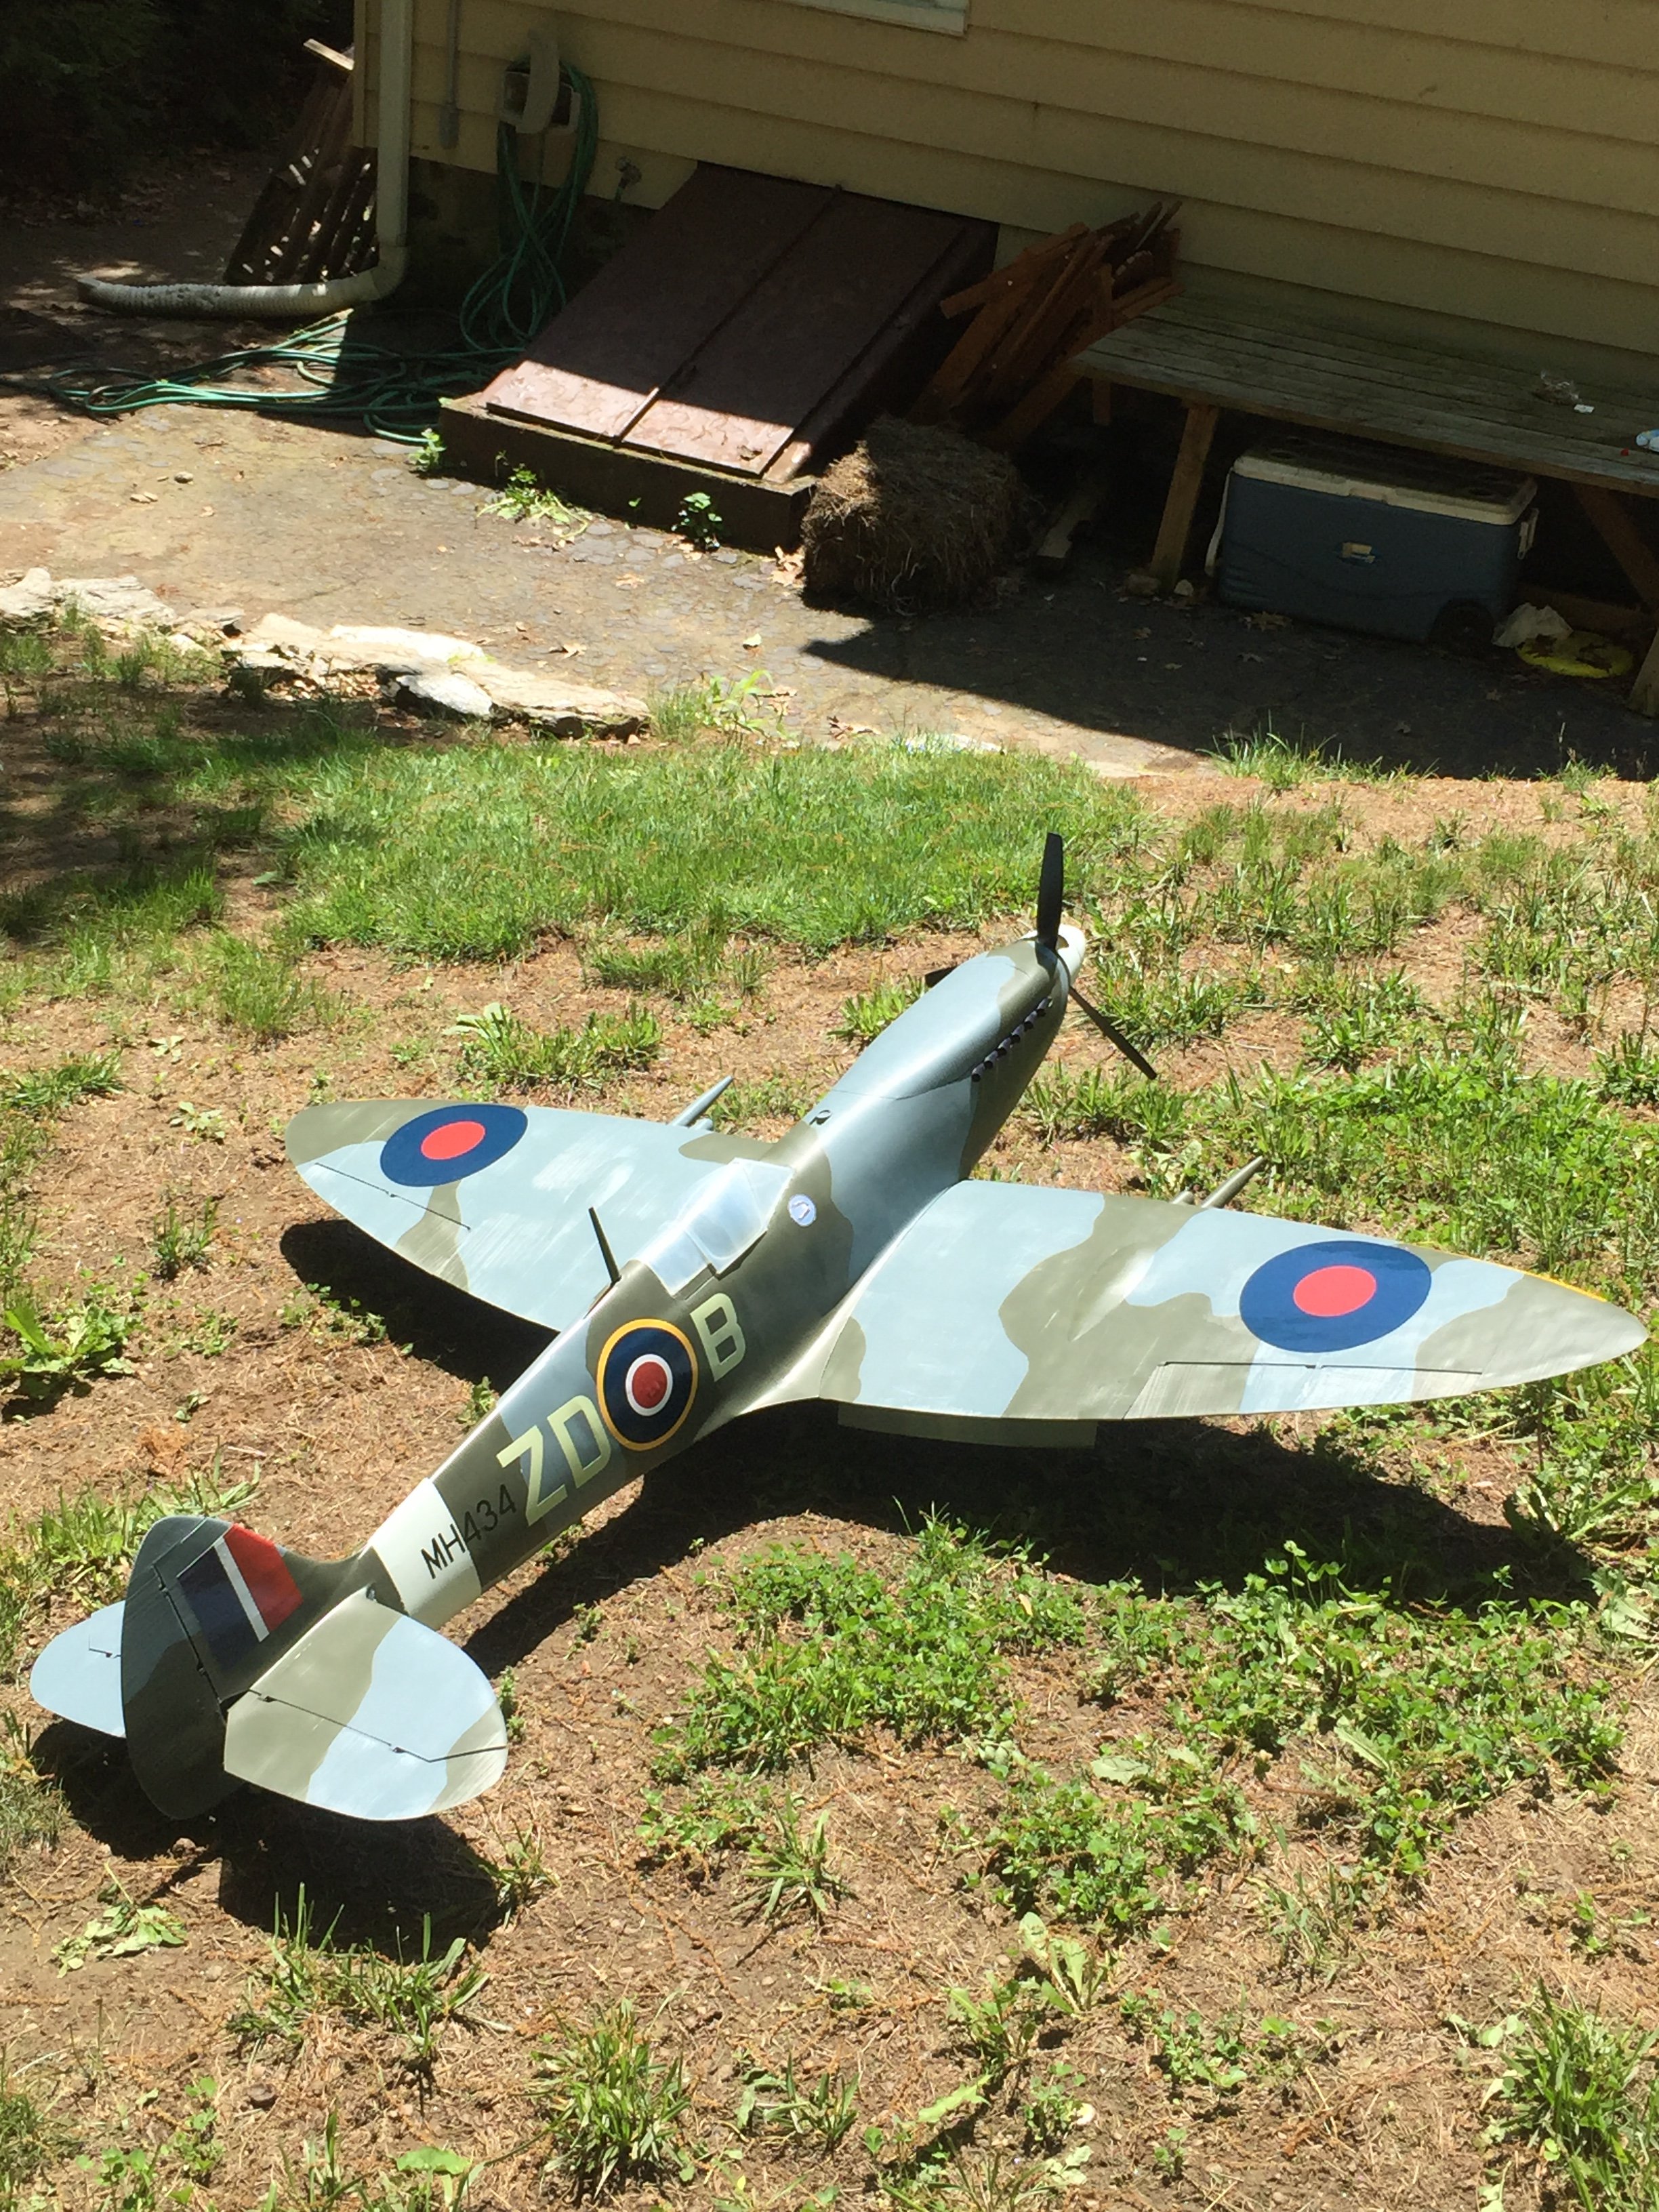
Finally got it finished. Will maiden it soon. Came in a pound over the listed weight in the manual, but the motor should be enough to handle it.——-I hope. Balance was perfect. I may add a few ounces to the nose to make it a little nose heavy.
Attachments
-
 39F3E3BB-8E9E-4F61-940E-65371455383B.jpeg1.9 MB · Views: 0
 -
 0142D622-BBB6-4CB7-9F52-2475BF67640C.jpeg1.7 MB · Views: 0
 -
 1A2E1C86-D7B9-4EA3-BDC4-9BBA7D34A198.jpeg1.7 MB · Views: 0
 -
 2A31B204-B284-451F-BA26-3E9590C89479.jpeg1.9 MB · Views: 0
 -
 31A77B55-6CDE-43D0-B36E-756ED1215933.jpeg1.8 MB · Views: 0
 -
 1713CB92-B47B-4907-A4CB-254781EC3579.jpeg1.7 MB · Views: 0


Thanks. I’m excited to see how Andre’s turns out. Because of job issues I cannot make it to FliteFest this year so i’m going to miss out. Good bad or indifferent, i’ll Post the maiden when we get a nice day here.Nice work @Grahamiw, that's gorgeous
Similar threads
- Replies
- 20
- Views
- 8K