Cross Sectioned Foam Board

rcspaceflight

creator of virtual planes
I'm starting this thread to ask two questions: Has this been done before? (and) Do you think it's feasible?

Basically the idea is to use the techniques that people use when hot wire cutting out blue foam core, but applying it to foam board. The idea is to cut out a bunch of pieces and when stacked together they form the plane. The end result would be a solid piece of foam (but with paper and glue in-between the layers) that is built to perfect scale. Well, not perfectly scale because the end result would be blocky and look Lego like. I tried to find a photo from the internet to help explain what it would look like, this photo is close:

dy0008.jpg


These photos are better:

3dmtrsm.jpg


homer_puzzle.jpg


Of course the square edges could be sanded, but that won't work for the wings. I think the wings would have to be KF step. Otherwise, you'd be cutting out A LOT of ribs to glue them all together into a solid wing. Since foam board is about a quarter of an inch thick, you'd need 160 ribs glued together to form a 40" wing! KF step is definitely the way to go with the wings. A lot less pieces to cut out and it'll keep the Lego look.

Hopefully covering the final plane with tape, vinyl, or a covering film will smooth out the rough corners. The final result should at least look great in the air or from ten feet away. Might still be a bit blocky close up.

I thought about trying this out by building a Piper Cub or Bird Dog or some other high wing trainer. But those planes are so square that it'll just be easier to build the outside shell, like you normally do when building with foam board. That isn't the point of trying this.

The point of this idea is to build scale, complicated planes that are easy to replicate and can easily be shared with the detailed plans. Planes that may be a lot of work, but easy for any one to build with basic tools. I know the plane will be heavy from all of the foam and glue, but war birds are supposed to be heavy anyway. (Plus I would have some hollow spaces for the electronics.)

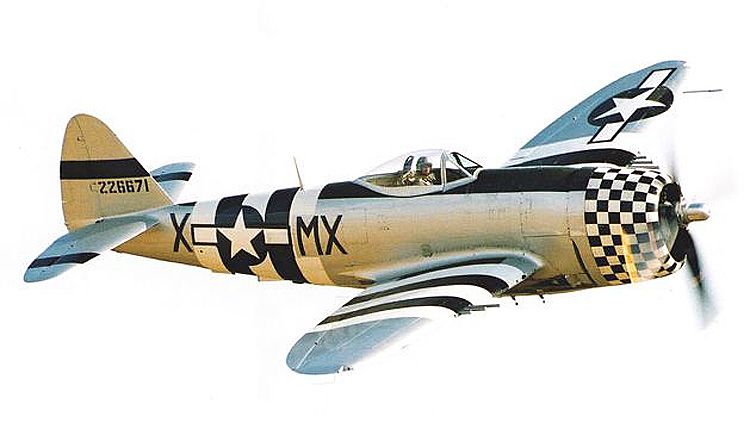
I might eventually try this, but I'm not sure what to try it on. If I was capable of using 3D modeling software I could model a plane and then use the software to come up with the cross sectioned plans. Since I can't do that, I'll have to guess on some details. So something simple would be nice. But it would also be nice to build something complicated because that's the point. I'm thinking a P-47. I like the history of that plane a lot more than the look but I think it'll be a good balance of complicated and simple. But really any war bird is.

P47.750pix.jpg


I would stack the pieces for the fuselage from the left to the right. Not the bottom up. And certainly not from the front to the back. I think the benefit would be that I could cut slots for the wings to slide into. And since the wings will slide into multiple pieces, I can easily set up built in dihedral. Also, going from front to back would make it look a lot better, but I want a few big pieces, not a bunch of small pieces.

... This project would be a lot easier if I had the right software tools and a laser cutter. It would be nice to just laser cut out the foam pieces and just have to glue 30 plus (I'm guessing) pieces together. Not have to cut them also. But it's not supposed to be easy, it's supposed to look great (and be cheap!).
 

earthsciteach

Moderator
Moderator
It is totally feasible. Quorneng, who posts on this site, is the resident master at using classic balsa techniques but with depron foam (which is pretty much the same thing as $tree foamboard). Here is an example of one of his builds (and a rather simple one by his standards): http://forum.flitetest.com/showthread.php?4710-Not-another-Super-Cub!!!!&highlight=quorneng

I realize this is not exactly what you are talking about, but there is no need for a cross section at every 5mm if done this way.
 

rcspaceflight

creator of virtual planes
Quorneng is a master builder. Too complicated for me. Well, not really too complicated, but rather more work than I'm willing to put into a plane, yet. I hate spending more time building than flying and I can't get my planes to last very long yet.

I think my/this way might end up a little too heavy. But it might turn out great for a smallish, fast war bird. Since it'll be solid, stronger, heavier and if it's smallish, it won't be too many pieces.

But we'll see if I ever even try it. If I do, it'll probably be a small free flight model first.
 

earthsciteach

Moderator
Moderator
If you are going to use the cross section technique, I'd definitely recommend using thicker foam board insulation. You definitely have that available in the land of milk and cheese!
 

Johan

Senior Member
I think my only concern would be the glue: one layer every 5 mm, maybe you'd end up with a plane of which half the weight is glue?
 

Johan

Senior Member
Well, on the other hand:

If you'd approach it like in the first picture: A "rib" every 10 mm and a perpendicular shape (spine) it attaches to:
This would be an "Airy" structure, only requiring glue every 10mm and for the most part it'd be made of air.
Add some CF ribs on the outside for strength, some covering for the surface, pretty light!
Actually it would be the Balsa build approach...
 

rcspaceflight

creator of virtual planes
I was thinking of removing all of the paper, except any cross section that has a control surface on it, to help with weight. I was also thinking that I really won't need that much glue. I can rely on the tape covering to keep everything from coming apart. The glue will only be needed to stop the pieces from sliding. Just put two dabs of glue on each end of the cross sections for the fuselage.

Actually, I was thinking of putting some bamboo skewers through the cross section pieces while test fitting stuff, but if I just use them as spars, then I won't need any glue at all. As long as I tape it up really well.
 

rcspaceflight

creator of virtual planes
There is a reason why I started this thread under the Scratch Build section. I think I'm going to go for it and try this idea out. We'll see how far I actually get.

I think the first step in this build is kind of obvious after thoroughly thinking about it. And first is to find a good side view photo on the internet.

p47_d25_3v.jpg


Good thing the internet has a picture similar to this one for pretty much any known aircraft.

Now I just have to print off the side view at the correct size. Then I can cut that out of foam board and use it as a guide for the rest of the fuselage pieces. Of course I have to guess for the rest of them, but at least when I have one side all figured out, I just copy it for the other side. And mostly I will just remove part of the tail and make it a little shorter for each cross sections as I work my way out from the center.

With some rough measurements of that photo and quick (bad) calculations, it looks like to have a 30" wingspan, the height of the fuselage will be 5 inches, and the width of the fuselage would be 3.5". (I thought the plane was rounder than that.) Which means the plane would then require 15 pieces to get that thickness for the fuselage. Which my goal for my first attempt is to be about 20-30 pieces. So, it sounds like a good size to me.

I'm not sure if I will make this first attempt a free flight plane, or fit it with all of the electronics for a full RC (probably just bank and yank) plane. Either way I plan on building the plane first, and then start cutting out pieces of the cross sections to make room for everything.

I hope to come up with plans before I glue/tape everything together. But we'll see how far I actually get.
 

rcspaceflight

creator of virtual planes
Quick Update:

I didn't really do too much, but hopefully I can hammer out a lot of the work this weekend. I took the photo that I shared of the 4 views of the P-47 and I enlarged it 400%. Which makes the wingspan 34" and the fuselage length 29". I figured out that it would take 28 pieces to build it that large and would be about 7 sheets of Dollar Tree Foam Board. I think that is the very largest a plane could be made this way. Anything more would just be too much work for what it's worth. Plus that's a great size for a warbird. However, 7 sheets of foam board?!? 28 pieces to cut out?!? I think this build will be very fast and easy to put everything together, but cutting it out is the majority of the work. That is just too many big pieces to cut out.

I decided to cut the size in half. 17" wingspan with a 14" long fuselage should be a good size for a plane. I'm stealing Chad's name of "backpack", the term he called his knuckles quad, and I'm calling this half-sized, smaller version a "backpack warbird". It won't technically fit into a backpack, but is small enough for easy transportation and can be strapped to one.

This "backpack" size means that the plane will be 14 pieces cut out of about 2 sheets of foam board. Why such a big drop in amount of foam? Because not only is each piece for the fuselage half as big, but there is also half as many. I have determined that for the 2 inch wide fuselage I need 10 pieces. However, I MUST have an odd number of pieces making up the fuselage so I can have one center piece with the rudder on it. I'm going to go with 9 pieces and hopefully adding small amounts of glue between the foam (with paper removed) will bring the thickness closer to the 2" mark. But if the scale appearance is a little off, who cares?

I have a few 2200kv motors laying around and plenty of 5x5 props. I've noticed that that motor with that prop size is pretty much useless with a 2cell battery, so I'm going to go with a 3cell 500mah battery to keep the weight down. I'm going with that prop because I have it with a known setup and the scale prop size with the size plane I'm using is 5.5" prop. Close enough to keep the scale look. Except the P-47 has a 4 blade prop, I'll be using a 2 blade.

Basically this plane is going to end up fast with a short flight time and is going to be too much for me to handle. But I guess we'll see.

And I guess this "quick update" ended up longer than I thought.
 

rockets4kids

Senior Member
A few comments on this build technique...

Foam may appear light but it is much heavier than you would think. This is why most commercial foam planes are hollow inside, and most builders build hollow planes.

However, the weight of the foam is nothing compared to the weight of the glue to bind them together. If you are going to go the lamination route, I would strongly suggest using either Spray 77 or a *very* thin coat of urethane glue mixed with water.

You also want to remove the foam when laminating. Not only is the paper very heavy, but the bond from the foam to paper is very weak -- as evidenced by how easy it is to peel away the paper from DF foam. And finally, the paper does not sand well at all.

Also, you *can* laminate up wings with this technique. While I certainly wouldn't want to use it for the majority of the wing, I have been experimenting with it to produce the gently curved and swept wingtips that are so common on motor-gliders. My experiments have been *very* promising, and I do hope to build it into a wing very soon now.
 

rcspaceflight

creator of virtual planes
Yesterday I built it. I was going to post some pictures of the build process as well, but I'll just post some pictures of the finished product for now.

I got impatient and really curious as to what the "final" product would look like, so I glued and tape it all together before the step of cutting out holes for the electronics. So, it's a "free flight" model. I mostly did it because I was unhappy with how some of the pieces turned out. Which is also why I didn't trace out the pieces to have plans. Next attempt I want to use the computer to come up with all of the pieces, not hand draw it based on pictures. I also didn't use my idea to use bamboo skewers to hold the pieces in place which would have made it a lot easier to take the fuselage apart and put it back together while keeping it properly lined up.

P1240442.jpg

P1240443.jpg

P1240444.jpg

P1240446.jpg

P1240447.jpg

P1240450.jpg

I haven't weighed it yet. That seems silly, but my scale is buried somewhere so it's actually a big job to find it... But I want to weigh it and weigh the electronics that I would have used on it to know what the flying weight would be.

This "free flight" version has a wingspan of about 17" and is about 14" long. I didn't do a very good job taping it up and I didn't cut out the pieces that well and I didn't line them up that well. But I think it turned out pretty good.

I think next time, if I do try this again, I want to only use tape to hold it together in strategic places and I want to cover it with paper. Ideally I want to print off a high detailed "paint" scheme and use that paper to cover it. So theoretically I would end up with a very scale looking plane.

I'm not sure if I want to make it bigger. This one ended up being one and a quarter sheet of Dollar Tree Foam Board, if I cut it out more efficiently it may have only been one sheet. Which isn't bad at all, but making it twice as big would be four times as much foam board because I'll need twice as many pieces to make the fuselage twice as thick.

My biggest concern is trying to hide the servos on a plane so small.

Long story short, which this post did end up a little long, I think this test plane turned out well, we'll see what the weight ends up. I'm not sure when or if I'll try this again and I'll plan it out better if there is a next time.
 

rcspaceflight

creator of virtual planes
Okay, I found my scale and the plane weighs 54grams. I weighed all of the electronics that I would have used: servos, Rx, ESC, motor, battery, prop, and prop adapter. That came out to 190grams. I didn't include control links or horns or the firewall, so this is just an estimated weight, but that would make the total flying weight about 244grams.

It's hard to know for sure because of the elliptical wings, but I'm estimating that the surface area of the wings are 51 square inches. 244grams equals 8.6oz. According to this website: http://www.flyrc.com/index.php/wing-load-calculator/ The wing loading would be about 24 and a Warbird is supposed to be 13 or greater. So... that's too heavy. I guess it might have been a waste of time to make it an RC version. Especially since it's weight means I would have to fly such a small thing fast. Which would be tricky to say the least. BUT, the motor and prop I want to use, according to this site: http://personal.osi.hu/fuzesisz/strc_eng/ I would have 15oz of thrust so... it would technically fly. If I was a master RC pilot. Which I am not. Especially since the "estimated flying speed" is 115 mph. I don't believe that.
 

rcspaceflight

creator of virtual planes
I'm still unsure if/when I'll actually finish this project, but I've come to the conclusion that the best route is to make the second version 50% bigger than that first test plane. Just like the first plane, I will remove the paper on all of the foam board except to keep the paper for hinges on control surfaces. Because my tape job was terrible and it would be difficult to tape it up properly, and because hot glue melted the foam, I'm going to take other people's suggestions of using a spray on adhesive. Then I won't need any sort of "covering" on the plane.

I think a 25.5" wingspan, 21" long and made out of 22 pieces is a good balance of size and yet not too many pieces. Plus I would have an 8" prop to keep up with scale. Which makes for a slower and easier to control plane.
 

ivan747

Junior Member
Try to use less glue, specially on the fuselage. Maybe use crossbars in the fuselage to add rigidity instead of using layers and layers of glue. Also, try to hollow out the inner sections to save weight.

A version twice as large done this way will be less dense (as in actual mass/volume) than the small plane you tried to build and could have more than twice the lift, but I can't think of how that could happen.

Also cut down on tape, it is heavy. To smooth out the surfaces you could just find a way to sculpt out the foam, and since you are not going to use paper on the foam it will be easier. I suggest you keep the paper on the wings though. I removed paper form a piece of Elmer's foam board and it flexes too much for a wing in one direction. On the other direction is OK, but it's not rigid enough to sustain 500 grams the airplane is going to weight, in my opinion. It would be rigid on the fuselage, where you will have at least 10 layers.

I am not an expert on foam, but this technique is all new, so it probably doesn't matter too much. :)
 
Last edited:

rcspaceflight

creator of virtual planes
I should probably actually work on this project again/more. I wanted to alter the pictures I have to make all of the plans for all of the pieces on the computer. But that doesn't seem like it would be any easier than drawing them by hand after printing out the main pictures at the correct size.

I know I won't get a perfectly scale plane, but it'll still look like a P-47.

We'll see if I actually work on it. Maybe tomorrow, but I doubt it.