Dumas F-105 RC Conversion

telnar1236

Elite member
I recently picked up a few Dumas kits at a yard sale. All but one were static display models, but since they are all balsa, I think they should be good for RC conversion. The F-105 looked like the simplest model to work with (I ended up with an F-105, and F-4, a Harrier, and a MiG 17 for a grand total of $43) so I am starting with that one and if it goes well I will probably convert the others over time. I haven't had much time to build recently so a small kit is about my speed right now. My current plan is to run a lightweight 40mm EDF unit with 250g of thrust running on a 1000 mAh 2s battery while aiming for an AUW under 300g. Covering will be a combination of very thin fiberglass sheeting and balsa. The control scheme I am currently aiming for is tailerons and a rudder. I need to resist the urge to add servo-driven retracts. I am adding carbon fiber reinforcements to the wings and horizontal stabilizer, but everything else looks good.

I got started this evening and assembled the wings and started a bit on the fuselage. The next step is to make the fiberglass internal ducting. and finish the assembly of the fuselage. This should be a pretty quick build because of how nice the Dumas kits are.
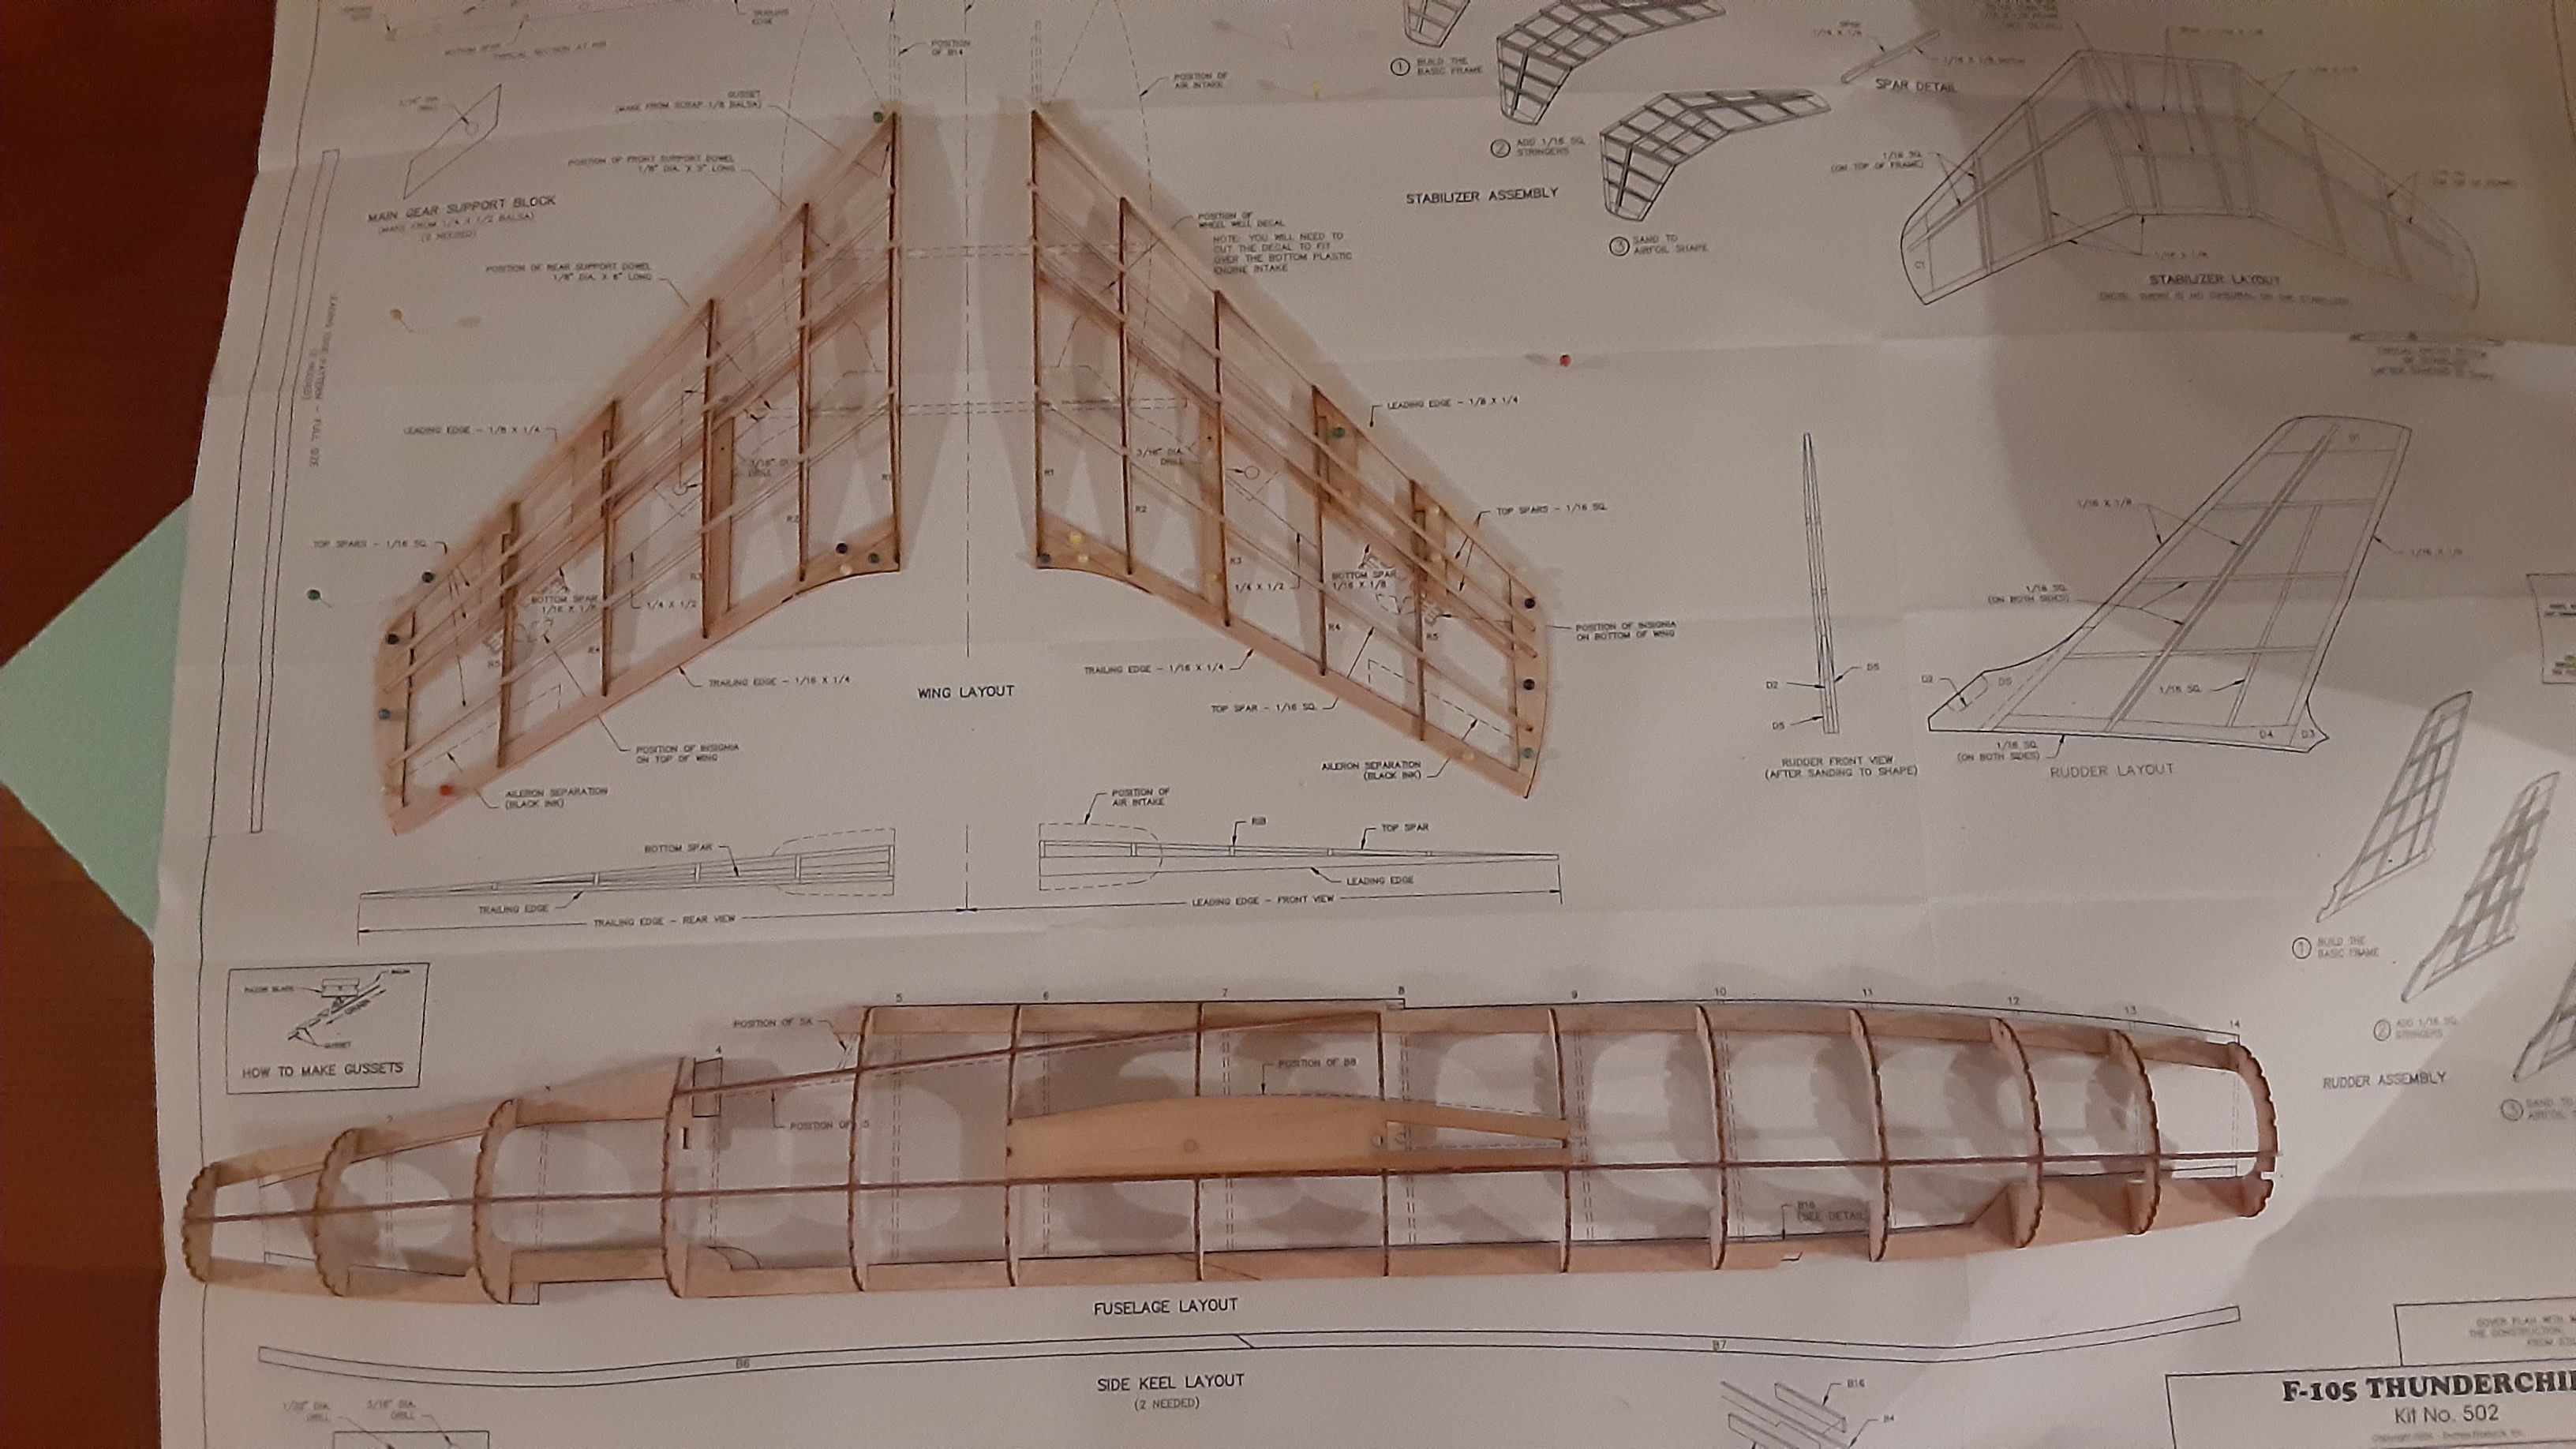
20210702_221135.jpg
20210702_162111.jpg
 
Keeping an eye on this build. (y)
Hey I didn't even know Dumas did planes. Does Dumas still exist? Do they only do static planes or do some fly? Back in the day I was always impressed with their boat models.
 

telnar1236

Elite member
Keeping an eye on this build. (y)
Hey I didn't even know Dumas did planes. Does Dumas still exist? Do they only do static planes or do some fly? Back in the day I was always impressed with their boat models.
Dumas definitely still exists. Their models are great but fairly pricey and they have a pretty wide range of mostly rubber band powered planes though they also sell a few rc models. The kits are laser cut so they go together very nicely, but sometimes the parts are a bit bigger or smaller than they are shown on the plans so angles can be a tiny bit off without sanding. Most of my experience with smaller models is with older Guillow's models and Dumas models are better in my opinion, but are more advanced to build and require more work. I didn't actually know they did static models till I saw them at the yard sale and honestly the static models are too expensive, at least for me, after looking them up on their website, unless you find them at very discounted prices. The MiG 17 I picked up is a walnut scale rubber band model, though, and the price is a bit more reasonable.

Plane Kits – Dumas Products
 

cyclone3350

Master member
Keeping an eye on this build. (y)
Hey I didn't even know Dumas did planes. Does Dumas still exist? Do they only do static planes or do some fly? Back in the day I was always impressed with their boat models.

I found this one amusing because, up until a few years ago, I did not know that Dumas made boats. They make a lot of free flight planes that make very good conversions. This was a Mr Mulligan that I converted to a GH-3/DGA-15. Yes, I believe they still exist. To see one of their static models converted, well that would be an amazing to watch.
 

Attachments

  • IMG_1303.JPG
    IMG_1303.JPG
    1.1 MB · Views: 0
I found this one amusing because, up until a few years ago, I did not know that Dumas made boats. They make a lot of free flight planes that make very good conversions. This was a Mr Mulligan that I converted to a GH-3/DGA-15. Yes, I believe they still exist. To see one of their static models converted, well that would be an amazing to watch.
That's pretty funny to me. When I was maybe 13 or 14 they seemed to be the standard for RC boat models. 40 yrs ago. I guess I wasn't looking in the planes direction. :D

EDIT: Maybe that's because I had the Dumas catalogue. (?) :unsure:
 

telnar1236

Elite member
A bit more work on the vertical stabilizer and the wings. The vertical stabilizer is now nearly done and the wings have the inlets installed. I am going for fully removable flying surfaces with this build, so both they eventually screw onto the fuselage the fuselage and the wing will have carbon fiber spars. The vertical stabilizer weighs just 4 grams in its current form, so I am happy about the weight.
20210704_184931.jpg 20210704_184952.jpg 20210704_185018.jpg
 

telnar1236

Elite member
The EDF unit is installed in the fuselage and the fuselage has been closed. The internal duct work will be done in a similar way to the covering on the vertical stabilizer.
20210704_185034.jpg
I want the wings to be removable (one of my goals is for this model to fit into a small suitcase when disassembled) so the styrene inlets fit into the splitter plate and are held in still when the wing is installed, and then the wing spars hold the wing straight. There will be a screw through the styrene on each side to keep the wings from pulling off. I am currently just using the pine dowels supplied with the kit to hold the wings in place, but those can be replaced with carbon fiber since they slide in and out easily. I still need to cut the inlet holes in the fuselage to let air in and put some card stock into the inlets to smoothly turn the air into the fuselage. Unfortunately, the inlets are not quite big enough for a 40 mm EDF, so I will need to add some cheater inlets further back. Currently my though is to situate them just behind and in-line with the wing so that they ingest part of the wing boundary layer and reduce drag.
20210704_185007.jpg
 

telnar1236

Elite member
Things got busy for me again for a bit, but I finally got all the sheeting installed. It wasn't actually too bad cutting pieces for in between each stringer. I actually prefer this greatly to sheeting on top of balsa because you can get into the rhythm of it and the end product requires a lot less post-processing. To my surprise, it did not take that much longer than conventional sheeting either.

20210808_182131.jpg
 

telnar1236

Elite member
I am guessing you also know to not sand anything until you're done installing the pieces?
My process was to build the fuselage and then do some spot sanding to get rid of places where the stringers did not quite fit into the formers or where a bit of glue had built up. I cut the sheeting by taking 1/16" balsa and cutting it into strips a bit wider than needed. Then the individual pieces were cut to shape with a hobby knife and I did a test fit. If they worked, I glued them in place and if they did not, I lightly sanded them until they did. The picture in my previous post is after the first coarse sanding but before any wood filler had been added. To finish the fuselage I will use wood filler for the places that sanding couldn't quite get there then sand the fuselage up to 200 grit. Then the final step before painting will be to apply 0.5 oz fiber glass in some strategic locations like the belly and wing roots for reinforcement.
 

telnar1236

Elite member
All the flying surfaces are now mostly complete. The wings still need a bit of filling and sanding, though. I decided to sheet the wings more conventionally because it let me build up a bit more thickness for a thicker/higher lift airfoil (the airfoil from the stock kit is pretty poor since it is not meant to be a flying model) and extend the wingtips a bit out. Since this is a small hand-launch plane, a lower stall speed is always useful.

20210809_155312.jpg
 

telnar1236

Elite member
All the flying surfaces are now installed on the airframe. For the first time, the aircraft really looks like an F-105. I decided to forgo removable flying surfaces for the sake of simplicity so everything is now permanently installed. She should be ready to maiden in the next week or so.
20210809_200000.jpg 20210809_200024.jpg
 

telnar1236

Elite member
Again, a long interlude where I could not make any good progress, but the landing gear is now installed (I couldn't help myself and went with servo driven retracts; the difference is that they actually work this time) and the nose is now attached. I also added another layer of filler that now needs to be sanded down. As can be seen in the picture, the retracts hold the airplane in a nose-high attitude on the ground to help reduce loads during the takeoff run and make rotation easier or unnecessary. Current AUW is 320 g and if anything the plane will get lighter as I sand off filler. I can finally say I am nearing the end of this project (hopefully).
20210828_190549.jpg
 

cyclone3350

Master member
Again, a long interlude where I could not make any good progress, but the landing gear is now installed (I couldn't help myself and went with servo driven retracts; the difference is that they actually work this time) and the nose is now attached. I also added another layer of filler that now needs to be sanded down. As can be seen in the picture, the retracts hold the airplane in a nose-high attitude on the ground to help reduce loads during the takeoff run and make rotation easier or unnecessary. Current AUW is 320 g and if anything the plane will get lighter as I sand off filler. I can finally say I am nearing the end of this project (hopefully).
View attachment 206150
Retracts? Wow! Do U have any pics as to what U used and how U installed it. I have a VH 64mm F-4 foam kit that is about this size. I didn't even consider retracts as i thought it would be too small.
 

telnar1236

Elite member
Retracts? Wow! Do U have any pics as to what U used and how U installed it. I have a VH 64mm F-4 foam kit that is about this size. I didn't even consider retracts as i thought it would be too small.
It depends on your project. For something this tiny, the servo can drive the retract directly if it is cleverly set up. Basically so that the impact load on landing doesn't get transmitted into torque on the servo. For the mains, the retract direction is perpendicular to the direction of movement during landing and the balsa wheel pants hit the balsa on the wing and stop the gear from traveling further. For the nose gear, the retract is supported with multiple structures that prevent over-travel and is designed so that the loads during landing push the retract open and into these supports. For both the weight is supported by a laser-cut plywood structure and the servo just provides the torque. It's hard to see the support structure because it is so buried, but you can see it if you look. I would not recommend using this technique unless you are confident about being able to evaluate the loading and are willing to destructively test a servo to see what it can actually stand up to.

The picture in my previous post does not have power, so you can see how the structure and design of the retracts locks them extended under load.

20210828_200932.jpg 20210828_200948.jpg

I think I've seen someone using this technique for a foam board FT P-51 on these forums, but I would not recommend using this kind of design for a 64mm EDF. I do put retracts on just about all my 64mm EDFs, though, using mechanical retracts like these:

Mini retractable landing gear for kt board rc airplane Sale - Banggood.com

So long as you can fit them into the wing and you make sure you are getting enough travel to lock the retracts, they are very light-weight, versatile, and reliable. Unfortunately, they have long lead times and are much more expensive than they should be.