Golden Goose Mk. II

Theuglycamel

Active member
Good Morning to All,
I know I haven't been on here long, but when I started on the forums a few months ago, I was completing my FT Speedbuild Guina Pig. I fell in love with this design instantly and have been crashing and modding (usually in that order) daily since her maiden. Recently I had the bright idea of strapping my old Duraforce phone to the nose to get some FPV video. Its been moderately successful, yet on my last run (about a week ago) I took some damage from a few rough landings. The starboard wingtip got mangled pretty good and the upper control surface on the rudder was torqued. So I hacked em off and strapped my phone back on. My crux to the run yesterday was an elevator servo that I replaced 10 min before flight. I lost my trim on the elevator and maxed the radio trim out trying to get more up. You can tell by the video she was fighting me the whole way. So I can't say that the clipped version was a failure, but I can't say it was a success either. Too many variables. I can say that the short rudder made the tail track TERRIABLE. And I did notice that it seems to gain ground speed quicker which made for some better takeoffs. The vid posted here is just the last 2 min of flight. I landed her, maxed out the trim and tried moving some weight around. There was something buzzing the whole time that I couldn't put my finger on until I got it back to the shop. You can hear a distinct motor change right before my roll-over. The port nacelle actually tore loose and was hanging on by some tape I had on the front 2". needless to say it changed the already sketchy flying characteristics and I couldn't counter the roll. I actually tried rolling with it in the end to get it back on her feet but it was a day late and a dollar short...
With that being said, I'll be scratch building the Golden Goose Mk. II this week. I've got until the 21st to have her back in the air and ready to drop Easter eggs. I'm probably going to keep the body as it didn't really take much damage. Unless I tear it to pieces getting the tail off...
I've got more pics and video that I'm in the process of cropping up. I'll have some more post later today.
 

Theuglycamel

Active member
Well I didn't get any pics last night but I did get the Goose torn down. I'm scrapping the wing and tail but I'll be keeping the body. I did figure out what I think happened with my roll-over. Like I said before, the port nacelle had separated from the wing, but this alone wasn't the culprit. I put her back together with new props just to make sure the motors didn't get smoked and I noticed that the only time the nacelle would flex was when applying left diff thrust. From the video you can hear a rather severe motor change when I start my turn. I think this was when the nacelle first gave way.
I've got several ideas I want to apply to the new wing.
1. Flaps
2. Vertical centering dowels. So the wing goes on exactly the same every time.
3. Possibly small winglets
4. Shortened nacelles to accommodate 5" flaps.
5. Engine cowlings. I've got some spray paint caps that look like they'll fit perfect.
6. Wire wing skids. The foam board skids work great, but I can tell it's affecting yaw control.
7. Modified winglets on the tail. Smaller and with bracing. Took me a total of 2 weeks to have the originals ripped off.
8. Airfoil... I'm still on the fence about this. If I do anything, I'll try and just smooth the spar lines.
I'm hoping to get started tonight and I should have it finished up by this weekend. I'll toss out some pics this evening on where I'm starting from.
 

Theuglycamel

Active member
Well I have apologies and some progress to report. First off, I started posting WAY too many projects at once, so as soon as I'm done with the goose I'll get back to the others (SparrowHawks first)! Easter snuck up on me and I've got to get my egg-layer back in the air. Here's where I'm at now:

Wing is built, ends sealed with hot glue and coated with EzDope. I don't recommend this process but it was all I had on hand and I've had good results with krylon over EzDope on balsa/tissue. If you use dope, you MUST seal the ends of your boards. Either iron them round, coat with epoxy or hot glue. I didn't bother with the hatch doors since they'll be taped over, but you can see where the dope doesn't glue to the foam very well. It does however provide a beautiful base for paint though. I've screwed it up just so I can show how not to do it. I used straight dope and a paint brush on the bottom. Way too thick and sets up on you before you can smooth it out. The top of the wing I hit with 3 coats of 75% dope to 25% water with a sponge. Needless to say it turned out WAY better than the brush. I did manage to sand out the brush strokes and after 3 more coats of dope the bottom is slick as well.

I also added split flap servo mounts. I moved the hatches inboard 3" and put the servo right where the outboard aft corner would have been. I'm going to try out these new clutch servos I picked up on Amazon. They're digital metal gear but have a pop-cog so you can't strip the gears. It doesn't have enough torque to pop the clutch on its own power so I'm pretty confident it'll hold up. Plus the resolution is WAY better than the $2 gems I was using.

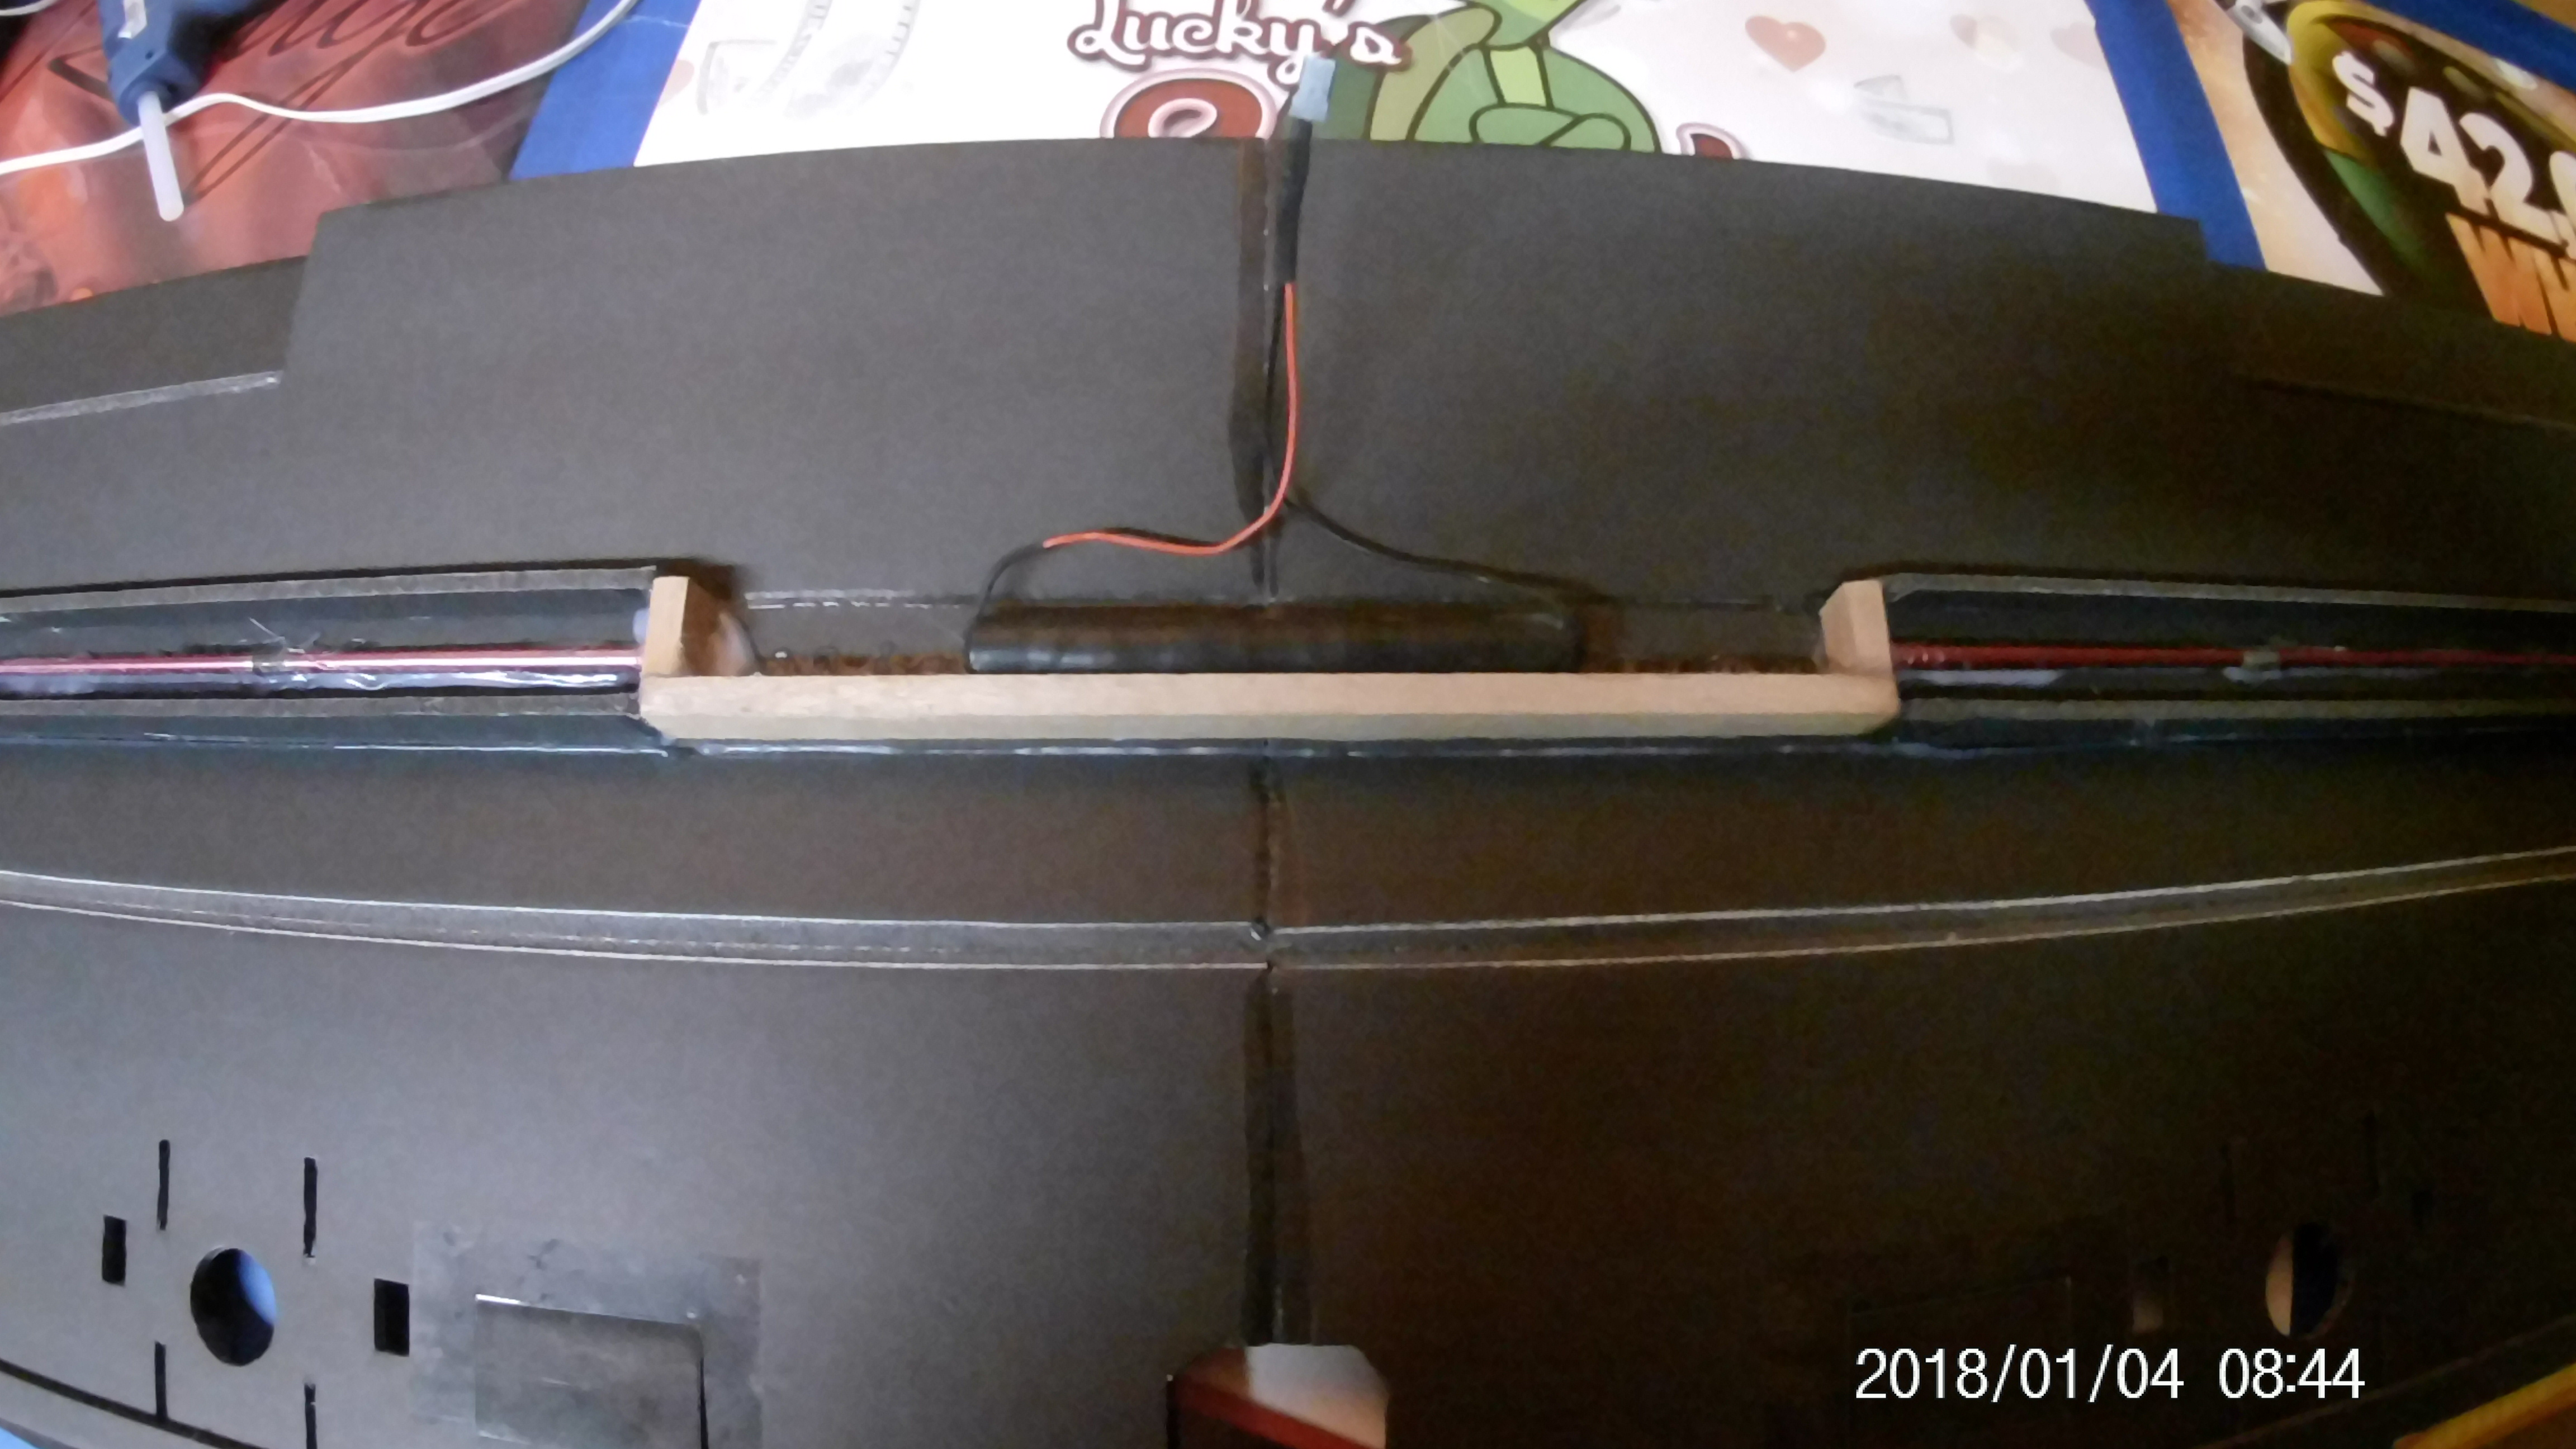
Lastly I added a receiver battery. Don't really have a good reason why but here's my excuse anyway. I plan to add a LOT of servos to this eventually. Especially when I get gimbals made up for true FPV. I'm also going to be adding some lighting and possibly gyro. So, I made a 6v 5 cell 1100mah nicad tube. I created a nook with hardwood for the spar and as a cavity for the battery to sit in. From there I'll tie it into a 3 way switch on the fuselage to turn on/off/and to a charge circuit that routes to a female JST connector. I have a 3' male to male jst I can charge with without having to take the wing off. Also there's some fiberglass I added to the forward corners of the outer spars. (Yes, fishing poles). The whole master plan is to center all of my weight along the wing-line. The receiver battery is directly centered in the CG of the wing. I'm moving the engine battery to the top of the fuselage, along with all of my wiring and electronics. Hopefully this will disrupt the heavy-pendulum tendency it had with rolls. Plus it frees up the entire bottom of the fuselage for cargo. Had way too many stuffed animals get hung up in my battery wires before this.

20180104_084407.JPG
20180105_034216.JPG
20180105_034254.JPG
20180105_210612.JPG
20180103_120747.JPG
20180104_084403.JPG
20180104_033502.JPG


My only other add is going to be a different design on the nacelles and some wire wing skids. All I like from there is new tail feathers and a a new nose.

I do love this black foam board but it's exactly like the white. Gotta be careful with peeling tape. I'm actually going to be using some of the foam board you see on the table. It's super thick glossy paper so I'll de-skin the inside. I'm also going to add a skid-bump where the front nose gear would be. The new wheel pants will be my rear skids (also being made of the gloss foam board). Anyway, I'll post again tonight after I get the nacelles on and the wing painted. Keep em level!!!
 
Last edited:
  • Like
Reactions: FDS

Theuglycamel

Active member
So I finished up the nacelles and flaps last night. Added a bit of reinforcement to the powerpods as well. I think my thrust angle was starting to suffer because of the foam beginning to crush behind the firewall. Everything got one last coat of dope and should be ready to paint this evening. I know the hinges look odd but I was shooting for a split/slotted setup. I'll have to push the servo horns toward the back but I don't think it'll be a problem. I had to notch the inboard side of the flaps to clear the rubber band rods on the body. I'm hoping to get the paint on and the tail feathers on tonight. Only thing left then will be the nose cone.
Just want to touch base again on this EzDope. I know it's been tested before and I've seen a few videos where foam was water tested after application. Granted I'm not using this for water-proofing, just water-resistance, but I can say if you let this crap dry on your hands, it'll take a full day to pick it all off. Neither soap or water touches it. It's still not a very good method, since you have to seal all of your foam before treatment, but it did what I needed it to in a pinch. I'm going to pick up some SIG butyrate dope for my balsa Messerschmidt that's 20% built. I'm pretty sure it'll eat through foam but I'm curious to try it nonetheless.
So here's an FT suggestion for all the admins that scour the threads just to read my post (lol). I'd pay good money for FT water-resistant foamboard if you could supply it in different colors. Not only the paper, but the foam as well. My black board came from Adams so I'm sure it's possible. It just makes it so much easier to finish out your paint (or go without any) when you start with the base color you want. (i HATE white edges lol). Anyway that's my rant for the day. Fly On!!!
 

Attachments

  • KIMG0151[1].jpg
    KIMG0151[1].jpg
    3.2 MB · Views: 0
  • KIMG0154[1].jpg
    KIMG0154[1].jpg
    3.5 MB · Views: 0
  • KIMG0155[1].jpg
    KIMG0155[1].jpg
    3.4 MB · Views: 0
  • KIMG0156[1].jpg
    KIMG0156[1].jpg
    3.4 MB · Views: 0

Theuglycamel

Active member
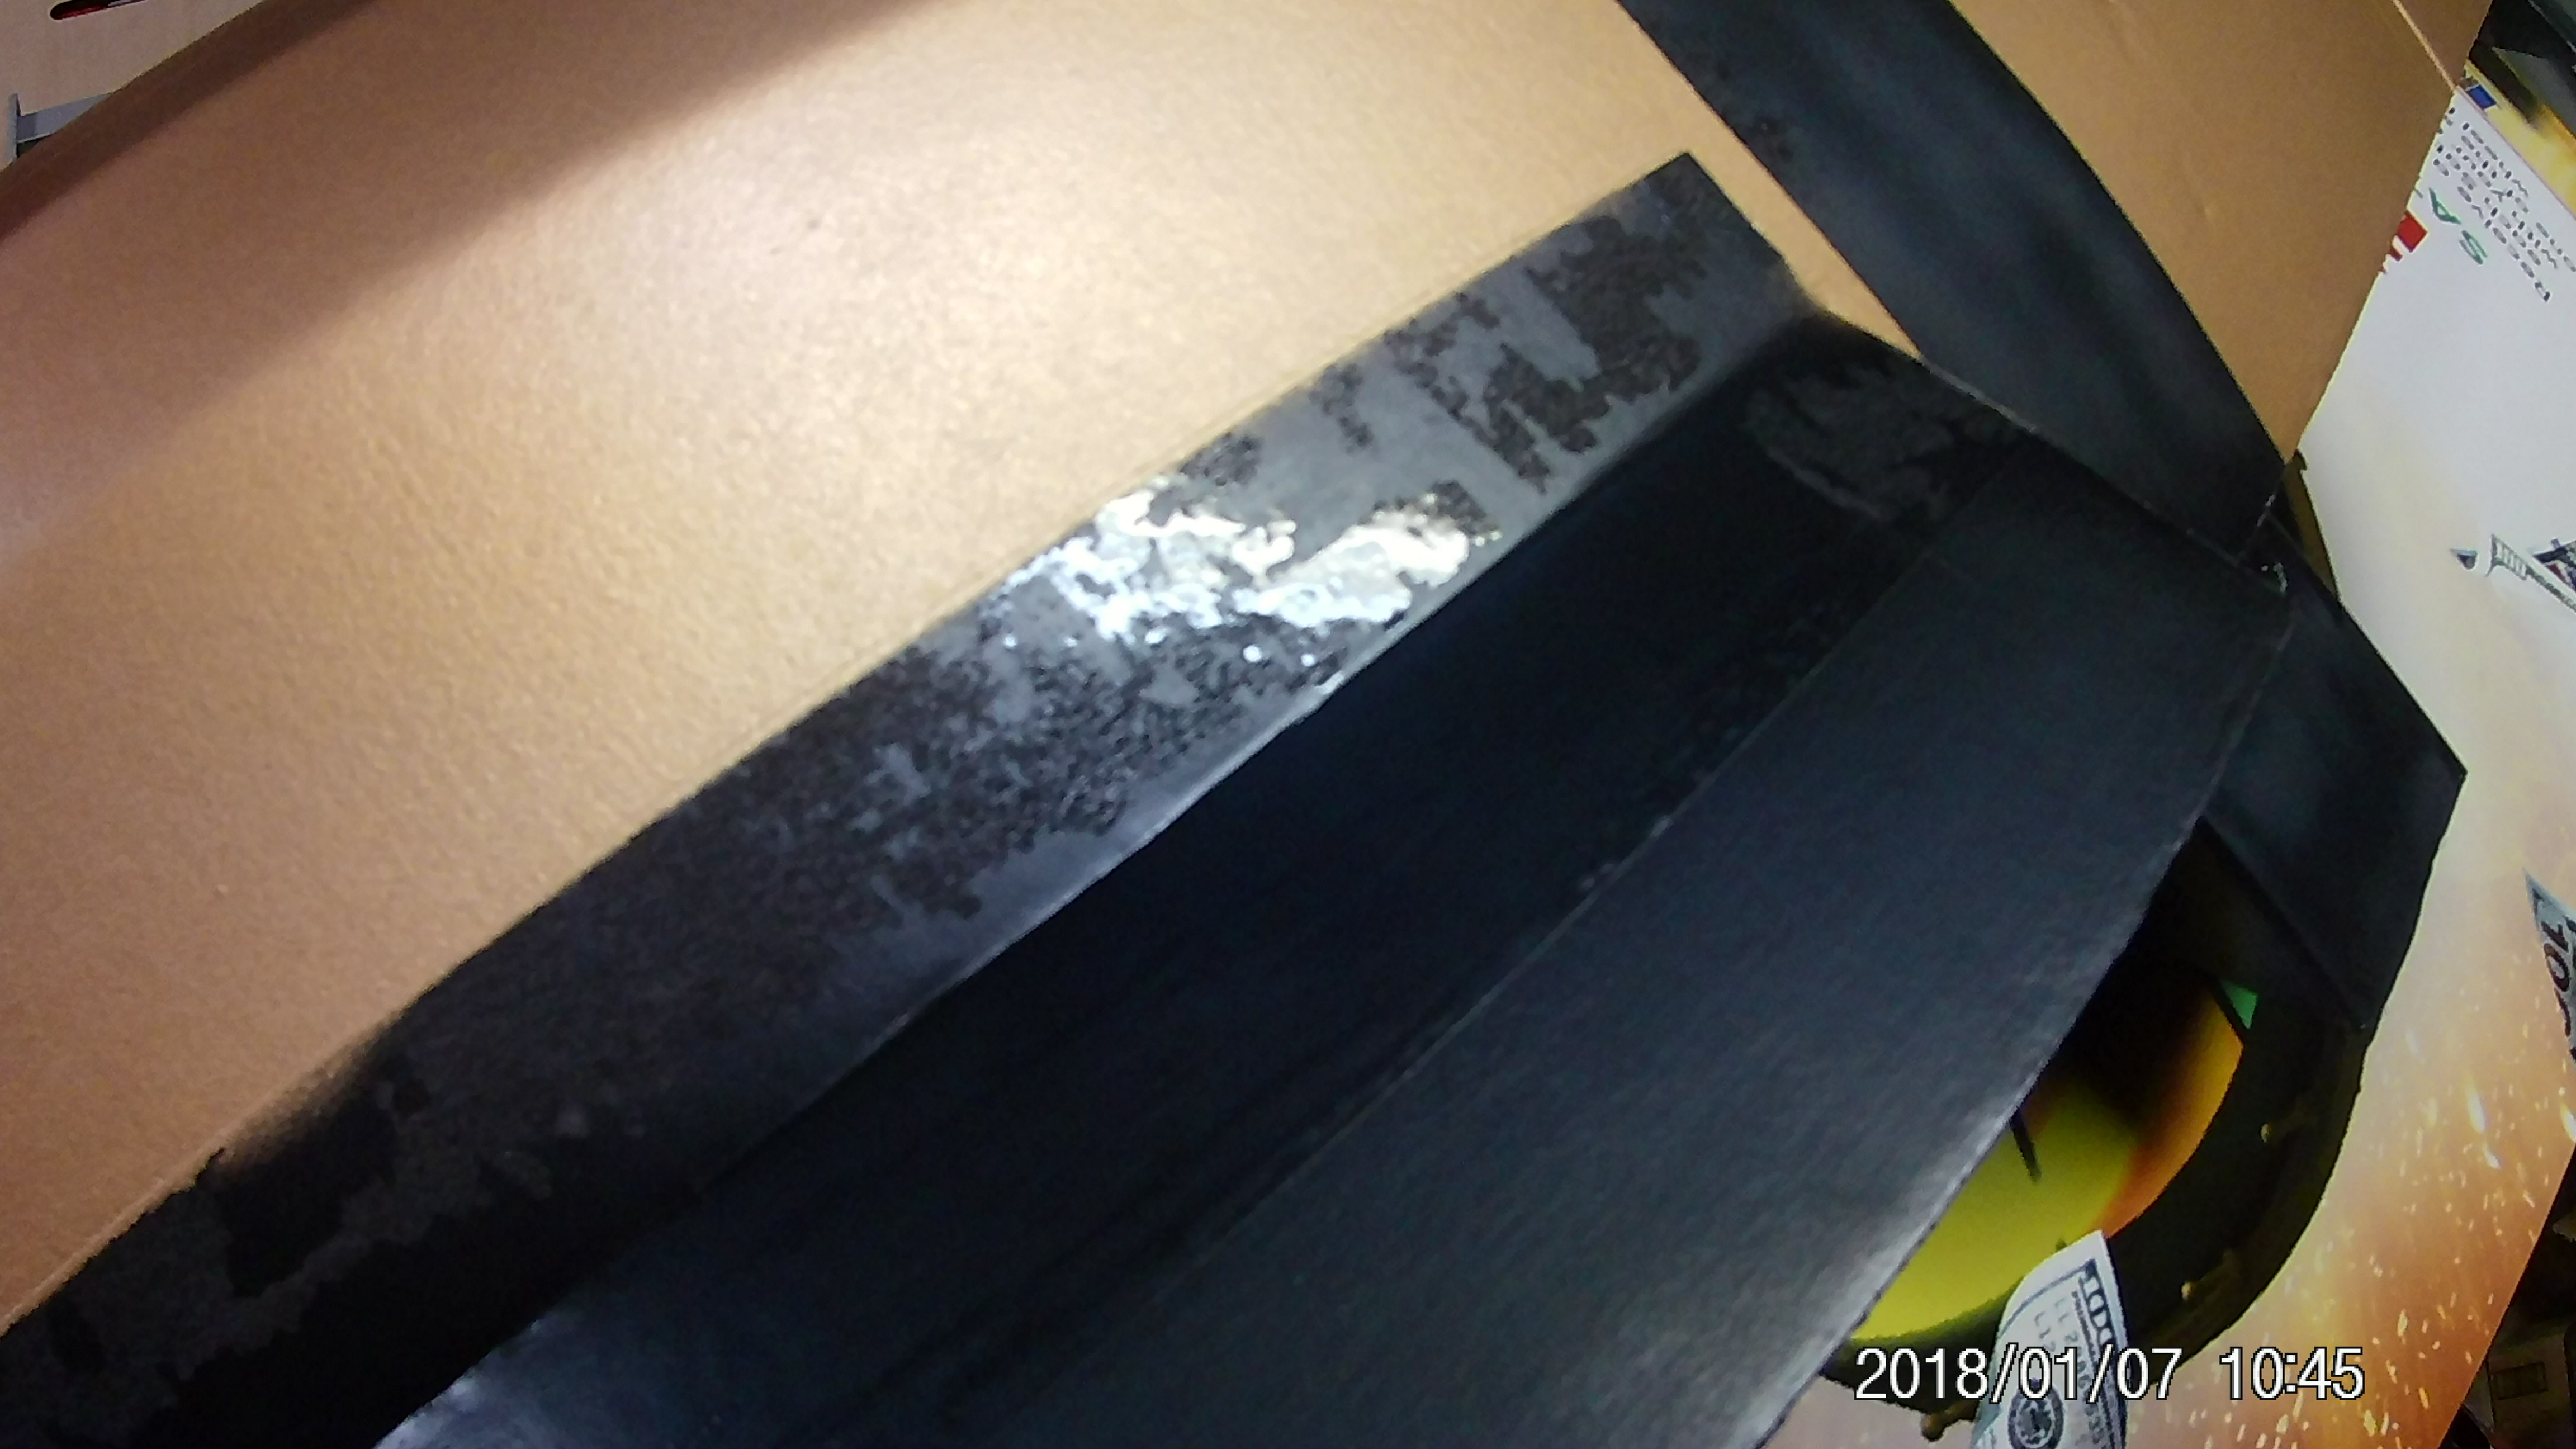
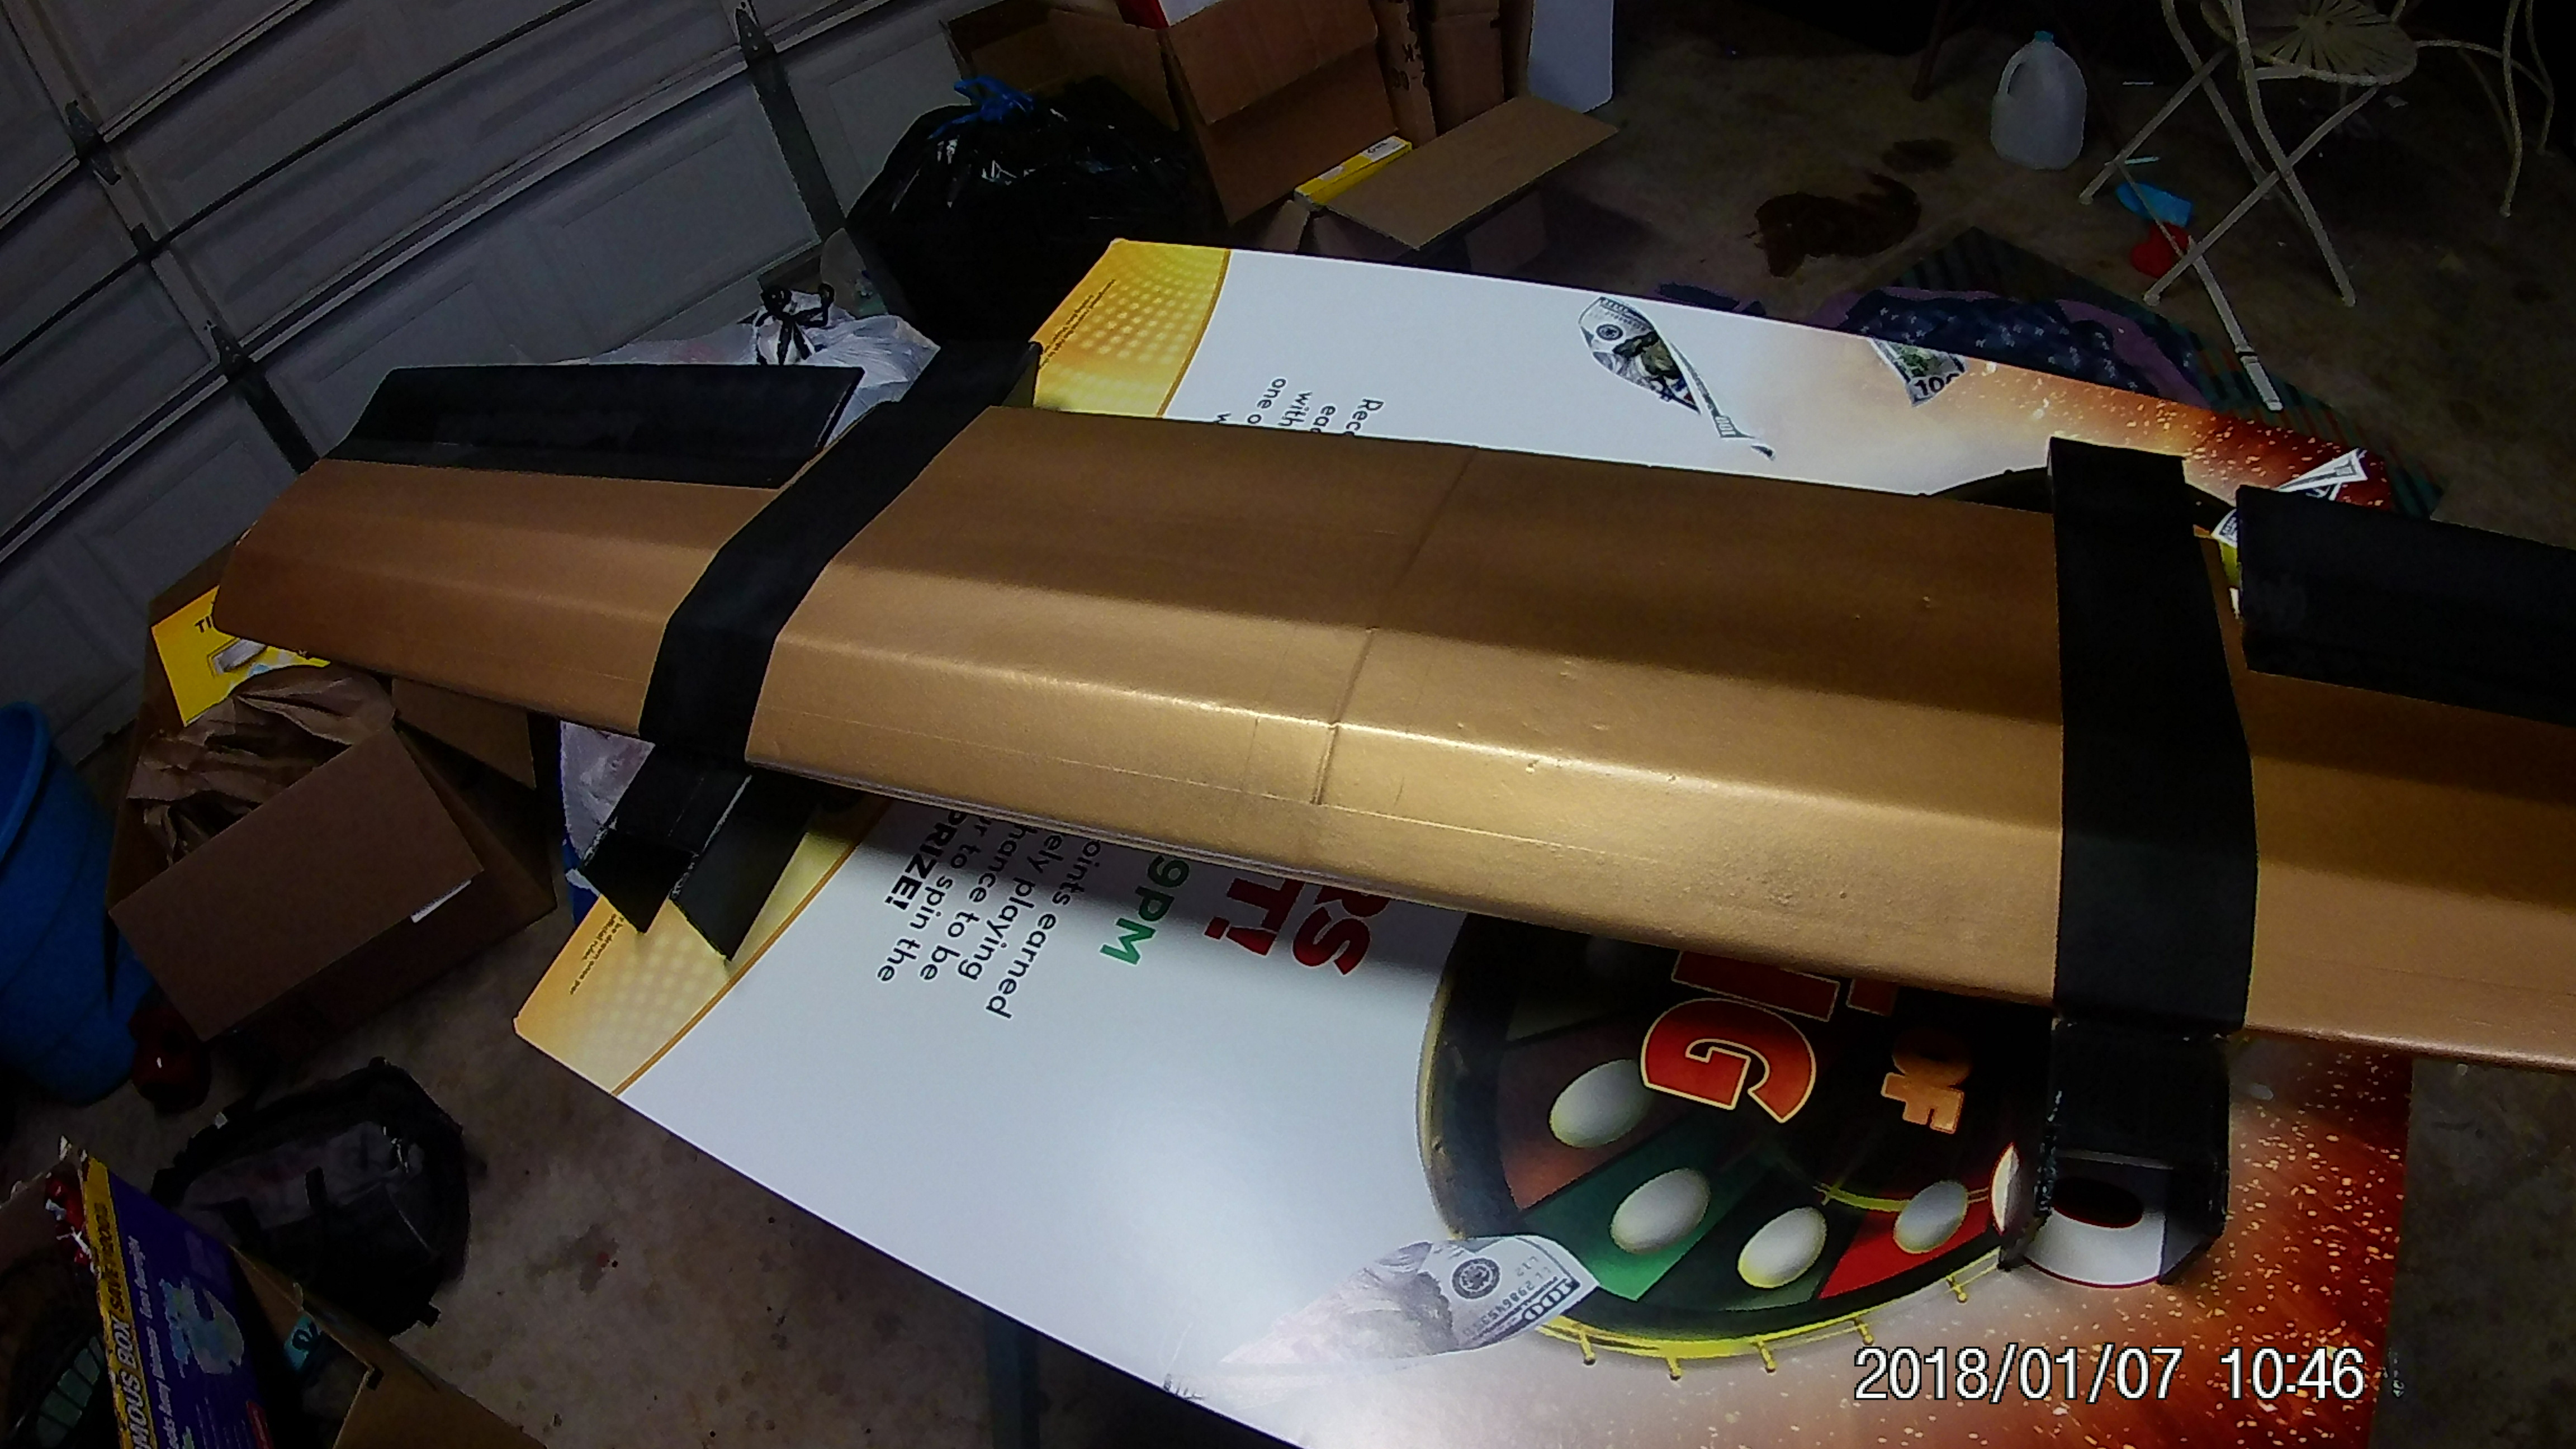
The Golden Goose is gold once again! Paint went fairly well, but I do have a "lessons learned" about this green masking tape. Frog Tape is what it calls itself and it does a fantastic job of creating sharp masking lines. Problem is, it does this by bonding to anything you stick it to like it's coated with CA. As always, I prepped each piece of tape with lint off my shirt and it really didn't seem to stick much to my hand. What I didn't realize is that it sticks VERY well to other tape. Everywhere I had taped up with packing tape tried to peel the paint on me. Once it began to peel, it just continued until I ran out of tape. Luckily the only places that peeled were black and should be easy to touch up. I also would have done the doping a little different too. I took the time to wipe all of the dope off of the tape every time I applied a coat. There were a few places that I didn't do this (the leading edge being one) and the paint turned out much better on those spots. I was surprised the dope stuck to the tape at all but it made a great primer and actually helped hide the tape line. The dope I used was a mate finish and it definitely is that. Even after 3 coats of gloss the paint still retained a dull glow. I'm sure if I had more coats and had sanded with 400 it would have glossed up more, but I like the finish like it is. I'll be mounting servos and getting the tail back on the body tonight. I'm going to go ahead and use the old body I built with the speed build kit for now. I do plan on building another body but I'm pushing it for time right now. I can always keep this one upstairs as a backup.
Hindsight: I definitely will only use a sponge to apply the dope from now on. Even after sanding and re-coating I wound up with lines in my paint. Also, I tried using Titebond to fill some "bench rash" I let get on the top. You can see where it really didn't blend very well. I didn't have any filler and Titebond shrinks WAY too much to make a decent filler. Next time I'll make sure I've got something else (or just don't dimple it to begin with lol).
My only undecided upgrade now is do I replace the iPower 2212 1000kv rotaries I have with No Name 2213 950s? I've never run these 2213s and they came with some nice BlHeli ESCs... but I KNOW the iPowers run good... Man decisions, decisions....
20180107_095629.JPG
20180107_100735.JPG
20180107_101805.JPG
20180107_100746.JPG
20180107_104538.JPG
20180107_104543.JPG
20180107_104559.JPG
20180107_104608.JPG
20180107_104605.JPG
 

Theuglycamel

Active member
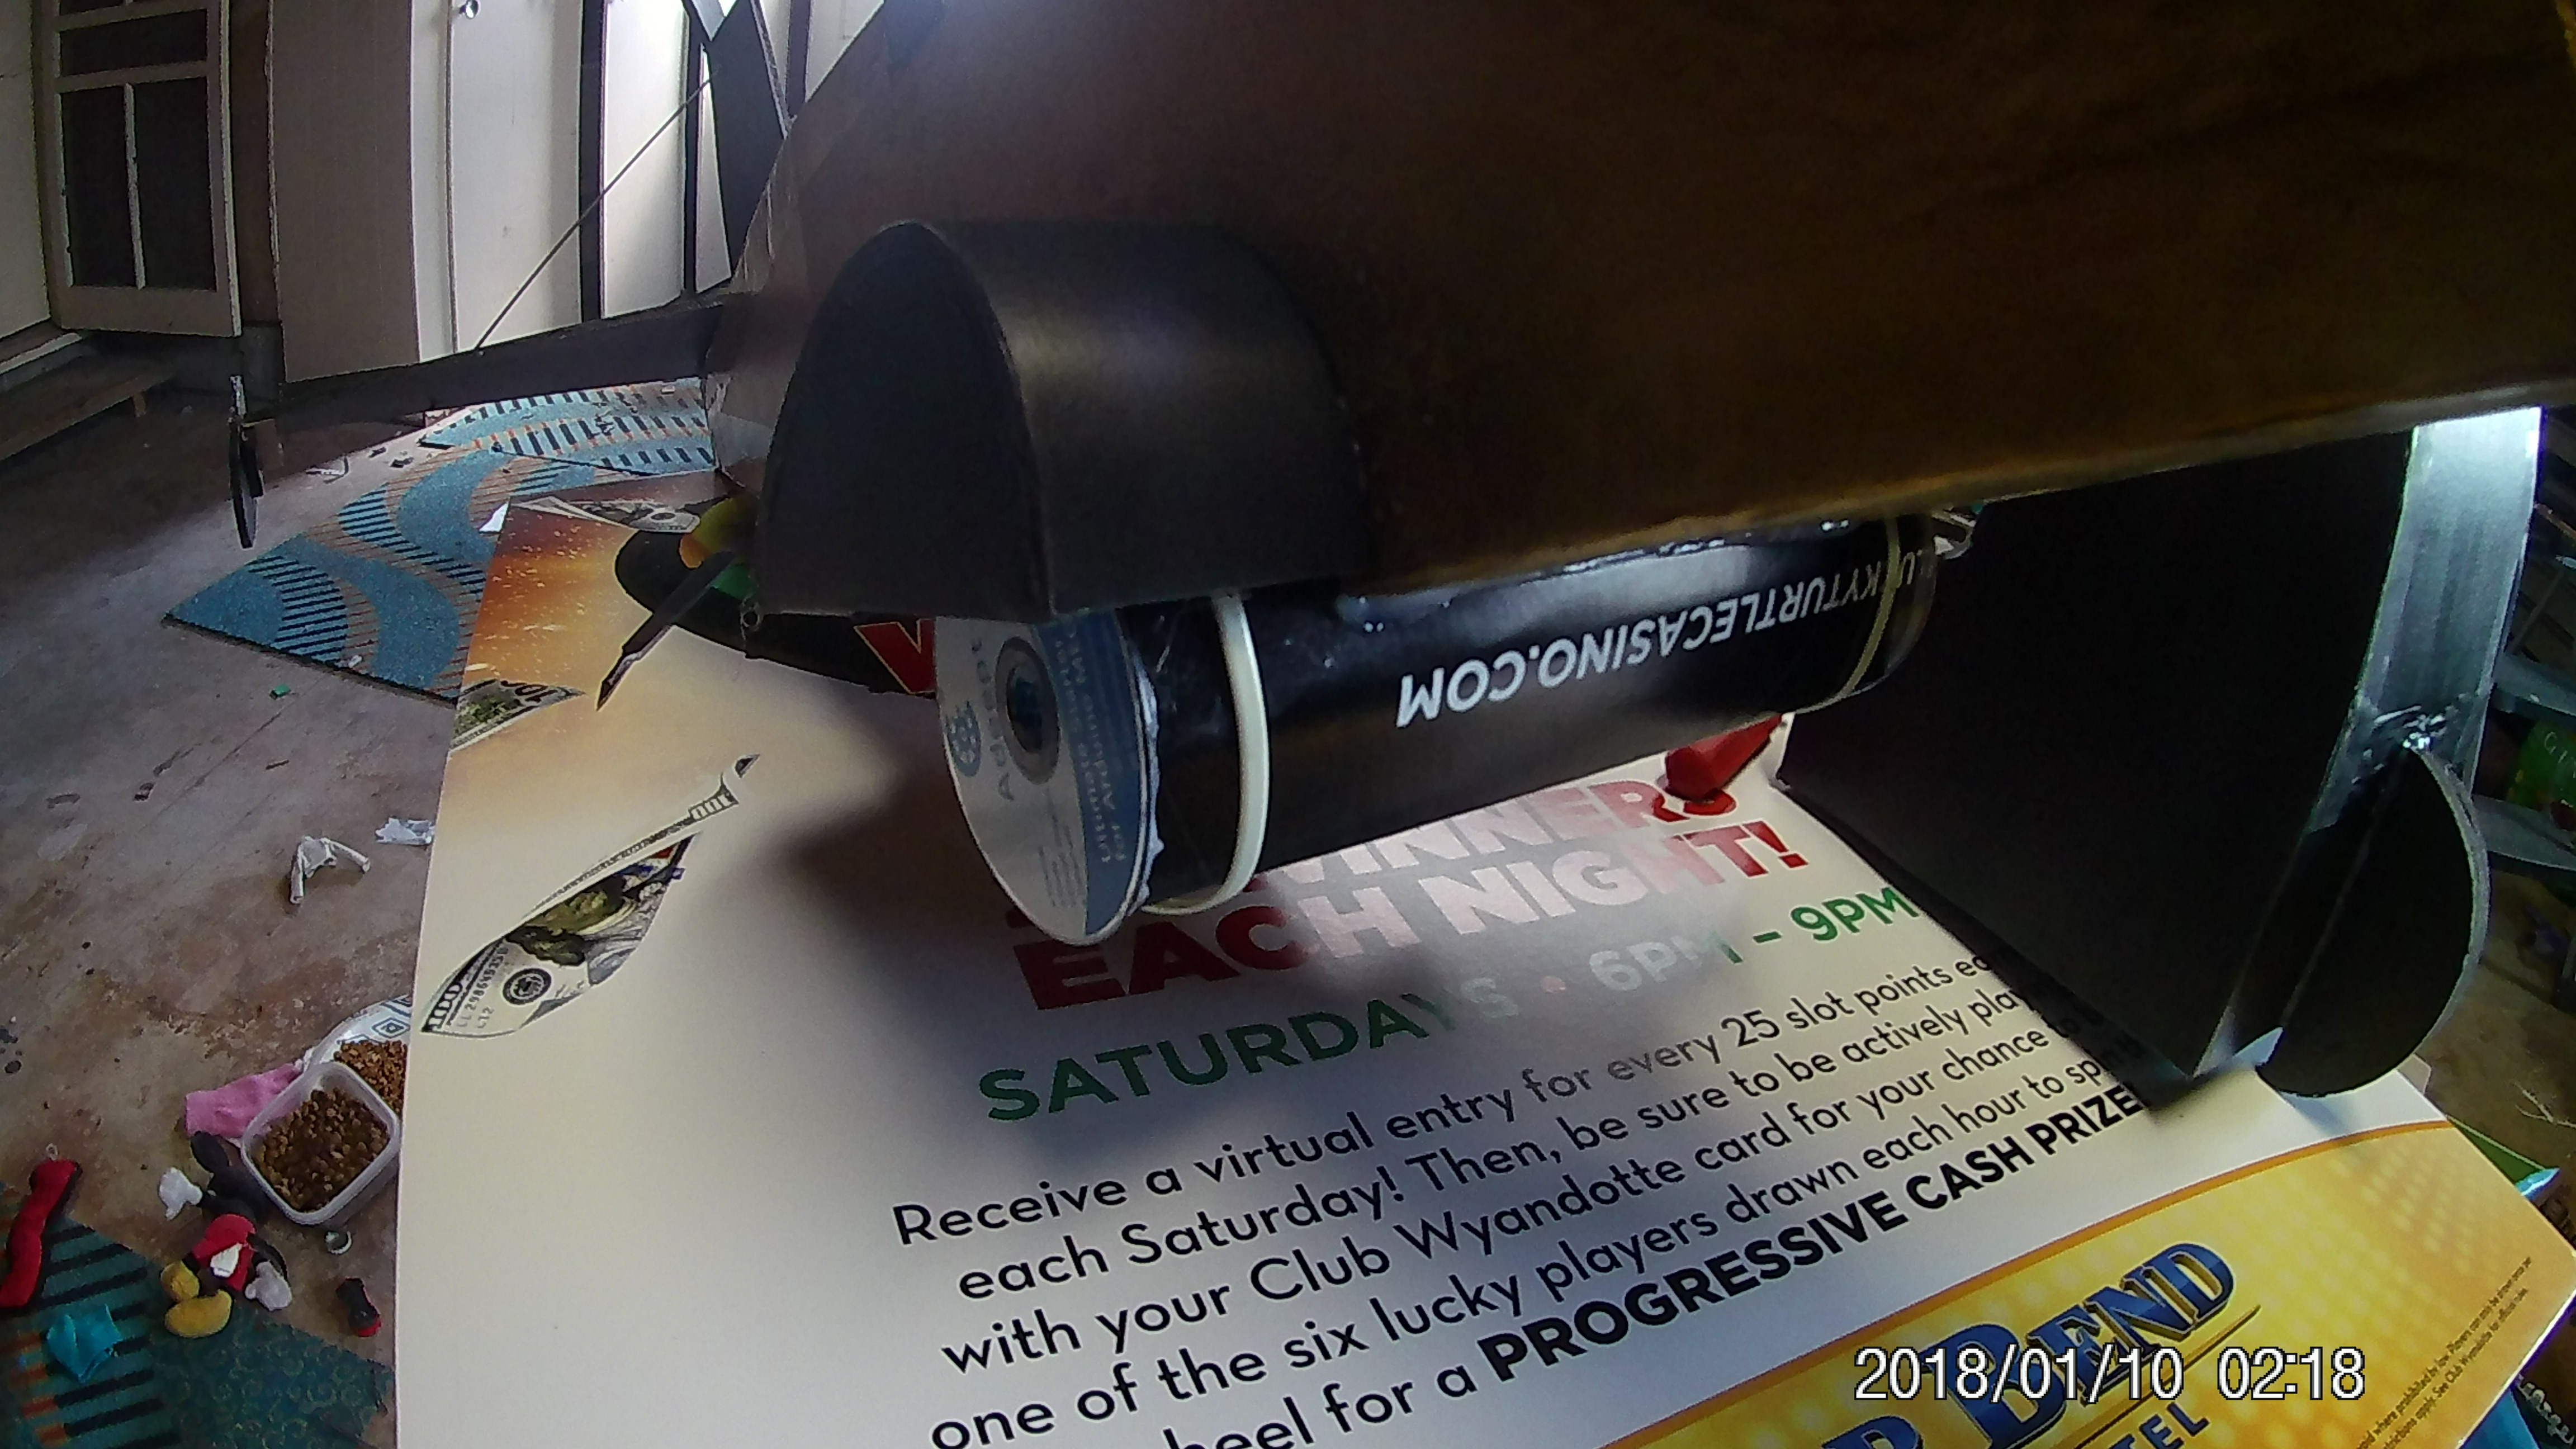
I'm sure everyone is about sick and tired of the Golden Goose, but here's my second to last post as a build. I still plan on rebuilding the fuselage (may be the Mk3) so there are a few things on this that are still in production. Only real mods are the battery tray and the landing gear. I've had nothing but bad luck here with landing gear, so I went with a skid made to look like wheels. Cheesy I know but it should work better than just sliding around on her belly. Added some mini cds to give it a wheel look. The battery tray I wont dwell on too much as I've got some more spectacular ideas for it in the new fuselage.
So tonight will be her last coat of paint and the re-maiden in the morning. Winds are suppose to be 8-12 S-SW all weekend so hopefully I'll get a few long vids to post next week. We're dropping eggs tomorrow at noon and again at dawn Sunday.

Might try some parachutes on those chocolate bunny's too lol.
20180110_021818.JPG
20180110_021825.JPG
20180110_021912.JPG
20180110_021851.JPG
 

Attachments

  • 20180110_021832.JPG
    20180110_021832.JPG
    1.8 MB · Views: 0

Theuglycamel

Active member
Ok so day 1 of Easter didn't so as planned. The re-maiden went well enough (had a rough landing) and it survived the trip over to my parents for Egg-Drops. The first run went ok except I dropped prematurely. When I circled around to land I noticed the same tendency I felt on the re-maiden. Long story short, these old drone motors I've been using finally bit the dust (at least one of them did) and cut the Egg-Drop short. I was pushing for time this week to get her ready and decided to use "tried and true" 2212s. Funny part is I had a voltage alarm on the first flight and it kicked on 3 min after take-off. I says to myself, "self, that SOB must be set for a 4 cell or somethin". I do believe that do-hicky actually told me the instant I burned out the coil. Well, Live and Learn... Got a Daylight Egg-Drop tomorrow so I'd better get to swapping these motors out.