Macross VF-4 Lightning III 64mm EDF Build/Project

Qwenther

Member
I'm not new to scratch building, and I've had in interest in edfs ever since I saw a model jet. I've also had an interest in the Robotech planes after watching the many series. So I decided to build one, and I chose the VF-4,one of the most feasible looking planes from the show.

vf-4-styled-fighter.png
3D-VF-4b.png
schematic-vf4top.gif

SPECIFICATIONS:
Wing: 48".
Length: ???.
Motor: 2 Grayson hobby 64mm edfs (Viggen).

PLANS:

FLIGHT:
 
Last edited:

Qwenther

Member
I started with the 2 engine pods.I use the thrust tube former templates from the FT Viggen for reference for my formers. It's going to have thrust vectoring for a little more control.

IMG_20190822_184855293.jpg
IMG_20190822_184928127.jpg
IMG_20190822_185132597.jpg

I need 2 engines. So poof, I made 2.:)

IMG_20190822_185346219.jpg

I work on the top pieces where the tails go later.
 
Last edited:

Qwenther

Member
I'm back, and I finally managed to make some progress. I've been working on the fuselage, and I'm really liking the result:
IMG_20190916_223227822.jpg IMG_20190916_223239119.jpg

I was going for the new FT master series look. So, I started with battery box and work out some formers. The formers are all doubled for strength with the exception of one(the 4th former from the left in picture 2).
IMG_20190917_085501715.jpg IMG_20190917_085621690.jpg IMG_20190917_085629677.jpg

I started to form the foam around the formers by section, with the section for the canopy being the last one I did. When I say I went through a lot of foam in this process trying to get them perfect, I went through a LOT OF FOAMo_O. I still need to tweek one of the angles on the nose cone and adjust the kanard's length, but I'm loving the result I got.
IMG_20190828_100052167.jpg IMG_20190828_100102544.jpg IMG_20190917_090907233.jpg
IMG_20190916_223227822.jpg IMG_20190916_223239119.jpg


I also documented all this stuff for the purpose of future plans:):cool:.

Now I just need the Canopy, which I will work on later.
 

man-bot

Well-known member
This looks cool. AND your off to a great start.

The cockpit section has me wondering how those canards being angled like that and having such a short distance ahead of the main wing will effect control. Specially using thrust vectoring.

Might want to consider leaving them off untill proof of flight then add them to see if there is any effect of flight characteristics.

Im sure more experienced engineers and pilots could give some thoughts on this as Im usually not even in the ball park when pondering things like this.:unsure:o_O
 

Qwenther

Member
been working on this all week, and progress is slow. I'm working on the wing section that joins all the pieces

. IMG_20191011_093910257.jpg IMG_20191011_094007208.jpg
IMG_20191011_094038311.jpg IMG_20191011_094137566.jpg

This wing joins the fuselage to the engine pods, but it also holds the outer wing spar boxes. This thing has a few stress point and not just the headache kind o_O:(, so I'll be reinforcing the spars near the fuselage with plywood doublers. I divided up the wing into three sections for designing purposes but the finished version will be one piece. I'm currently just working on the fuselage wing section. The slow part is making the covering sheets, but they are coming together SLOWLY:rolleyes:o_O.
 

L Edge

Master member
been working on this all week, and progress is slow. I'm working on the wing section that joins all the pieces

. View attachment 145236 View attachment 145237
View attachment 145238 View attachment 145239

This wing joins the fuselage to the engine pods, but it also holds the outer wing spar boxes. This thing has a few stress point and not just the headache kind o_O:(, so I'll be reinforcing the spars near the fuselage with plywood doublers. I divided up the wing into three sections for designing purposes but the finished version will be one piece. I'm currently just working on the fuselage wing section. The slow part is making the covering sheets, but they are coming together SLOWLY:rolleyes:o_O.


What kind of TV device are you using and is it 1 or 2 axis?
 

Qwenther

Member
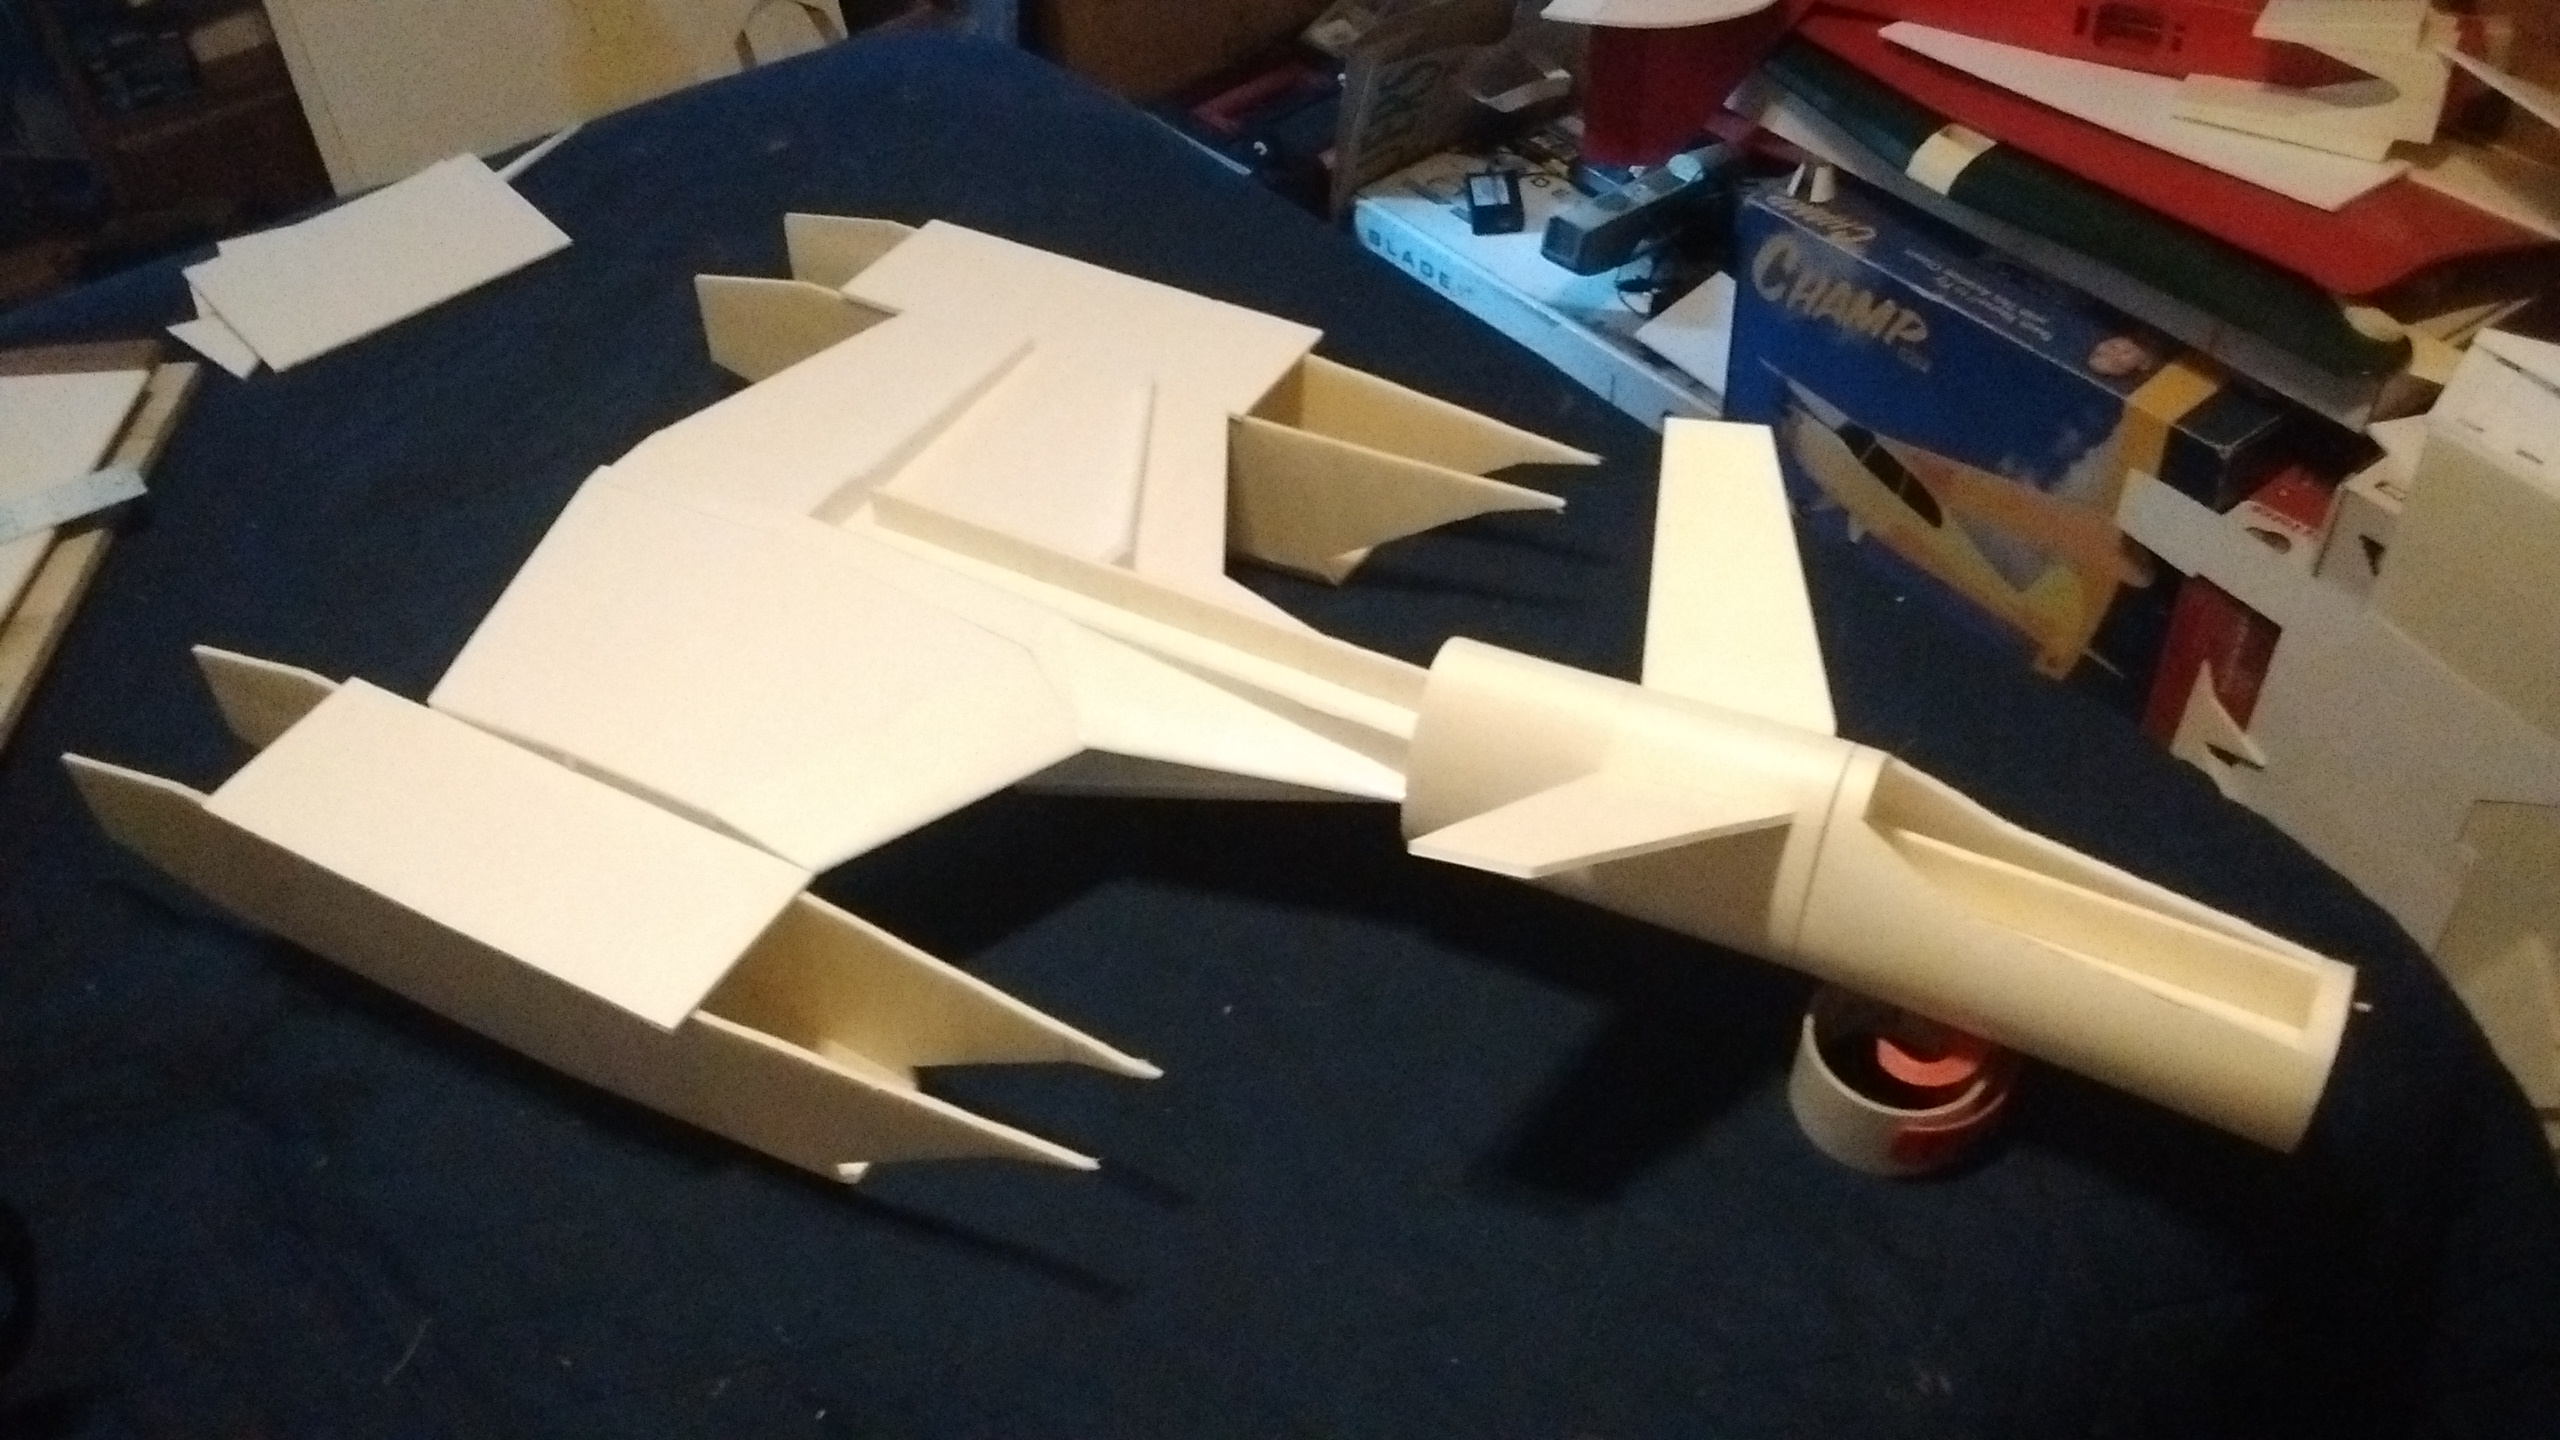
Here's the semi-finished wing-to-fuselage piece. I do still need to finish a top-center plate and the thing that looks like a rat tail off the end, but it's starting to show promise.

IMG_20191013_141539453.jpg IMG_20191013_141544966.jpg IMG_20191013_141554287.jpg

Now merging it with the fuselage and other wing parts is the next priority. The fuselage box fits nicely, but I still need a plywood reinforcer on the back spar.

PS.
This looks cool. AND your off to a great start.

The cockpit section has me wondering how those canards being angled like that and having such a short distance ahead of the main wing will effect control. Specially using thrust vectoring.

Might want to consider leaving them off untill proof of flight then add them to see if there is any effect of flight characteristics.

Im sure more experienced engineers and pilots could give some thoughts on this as Im usually not even in the ball park when pondering things like this.:unsure:o_O

You have a point, and after careful consideration(AKA a major headache with trying to find y-harnesses and designing the rotation-servo mechanism) I've decided to not install the mechanism on the prototype. However the thrust nozzle is still going on the engines, and the cool part is the nozzles are still designed with the mechanism in mind.:D:cool:
IMG_20191013_144402905.jpg IMG_20191013_144405790.jpg IMG_20191013_144415570.jpg IMG_20191013_144423089.jpg
All I'd have to do is cut the bevels and install servos and the mechanism I haven't figured out yet.:unsure:
 

Qwenther

Member
Here's my latest progress. The wing is almost done, just needs a few minor adjustments here and there then I get to glue all the pieces together. Yay!:D
IMG_20191024_135127073.jpg


I only covered half to be able to show the inside construction, and for potential editing. But here's the real fun, the sneak peak of the parts together.

IMG_20191024_164159284.jpg
IMG_20191024_164214177.jpg


She is starting to show real promise.:D:cry: And she's big, really BIG!:p
Not bad for a day's work.;):coffee:
 

Qwenther

Member
I'm back! And I've got progress to show. I've been work on the engine nacelles and outer wing joint section, and have figured most of it out and found a few places that need some tweaking. Those tweaks, however, are gonna have to wait for the next version, this one is just the glide test dummy. But I'll let my work do the talking.
IMG_20191117_115034040.jpg
IMG_20191117_114955216.jpg


IMG_20191117_115045186.jpg IMG_20191117_115116130.jpg

I inset the spar box in the wing and engine pod, and cut a small relief in the aft nacelle pieces.
Since I needed a way to access the bolts and servo connections to the outer wings, I designed the aft nacelle to also be removable like the wing. It's held in place by bamboo skewers on the front end that tab into the forward nacelle former and a pair of nylon bolts to hold the back down. A servo in each nacelle will provide rudder control.

IMG_20191117_141030885.jpg IMG_20191117_141044513.jpg IMG_20191117_141048371.jpg IMG_20191117_141255663.jpg

I noticed that the outer wing has some weak spots near the spar joint. So when I go to make the powered version of this bird(version 2.0 ), I'll modify the wood spar and some other parts to fix it. Like extending the wood spar further into the outer wing.
The wings all have a symmetric airfoil.

Now all that's left to finish is the turtle deck on the wing and the canopy. Yay!:D
 

Qwenther

Member
Great progress... have you done a C.G. toss test?
Not yet. I'm hoping to finish the last two pieces of this oversized puzzle before playing catch with it in the back yard. I have checked for C.G. though, it seems to be near the root of the first score cut of the wing near the fuselage. It's actually a little nose heavy.
 

L Edge

Master member
It looks like your battery( 2500mah or more) is going to fit in the nose, if so, and you look at CG of wing, weight position of 2 64's, ESC and wires, you will end up way nose heavy.

I added TV unit to my Viggen and the added weight change my canards from +10 degrees to zero and I moved the battery back so it isn't nose heavy. Concerned with your design.
 

Qwenther

Member
The dragon has come out of it's cave. The initial design is finally complete, and here she is.

IMG_20200102_224343245.jpg
IMG_20200102_224348900.jpg
IMG_20200102_224405592.jpg
IMG_20200102_224419976.jpg


I still need to do a chuck test with this glider, but it be wet outside. So, I think I'll wait till I get some dry weather.
There is also a lot of design refinement to do, and some adjustment to be made, but now that the headache of the initial stuff is done, it should be a little easier ;)LOL. For now though I'm gonna give my poor brain a break.