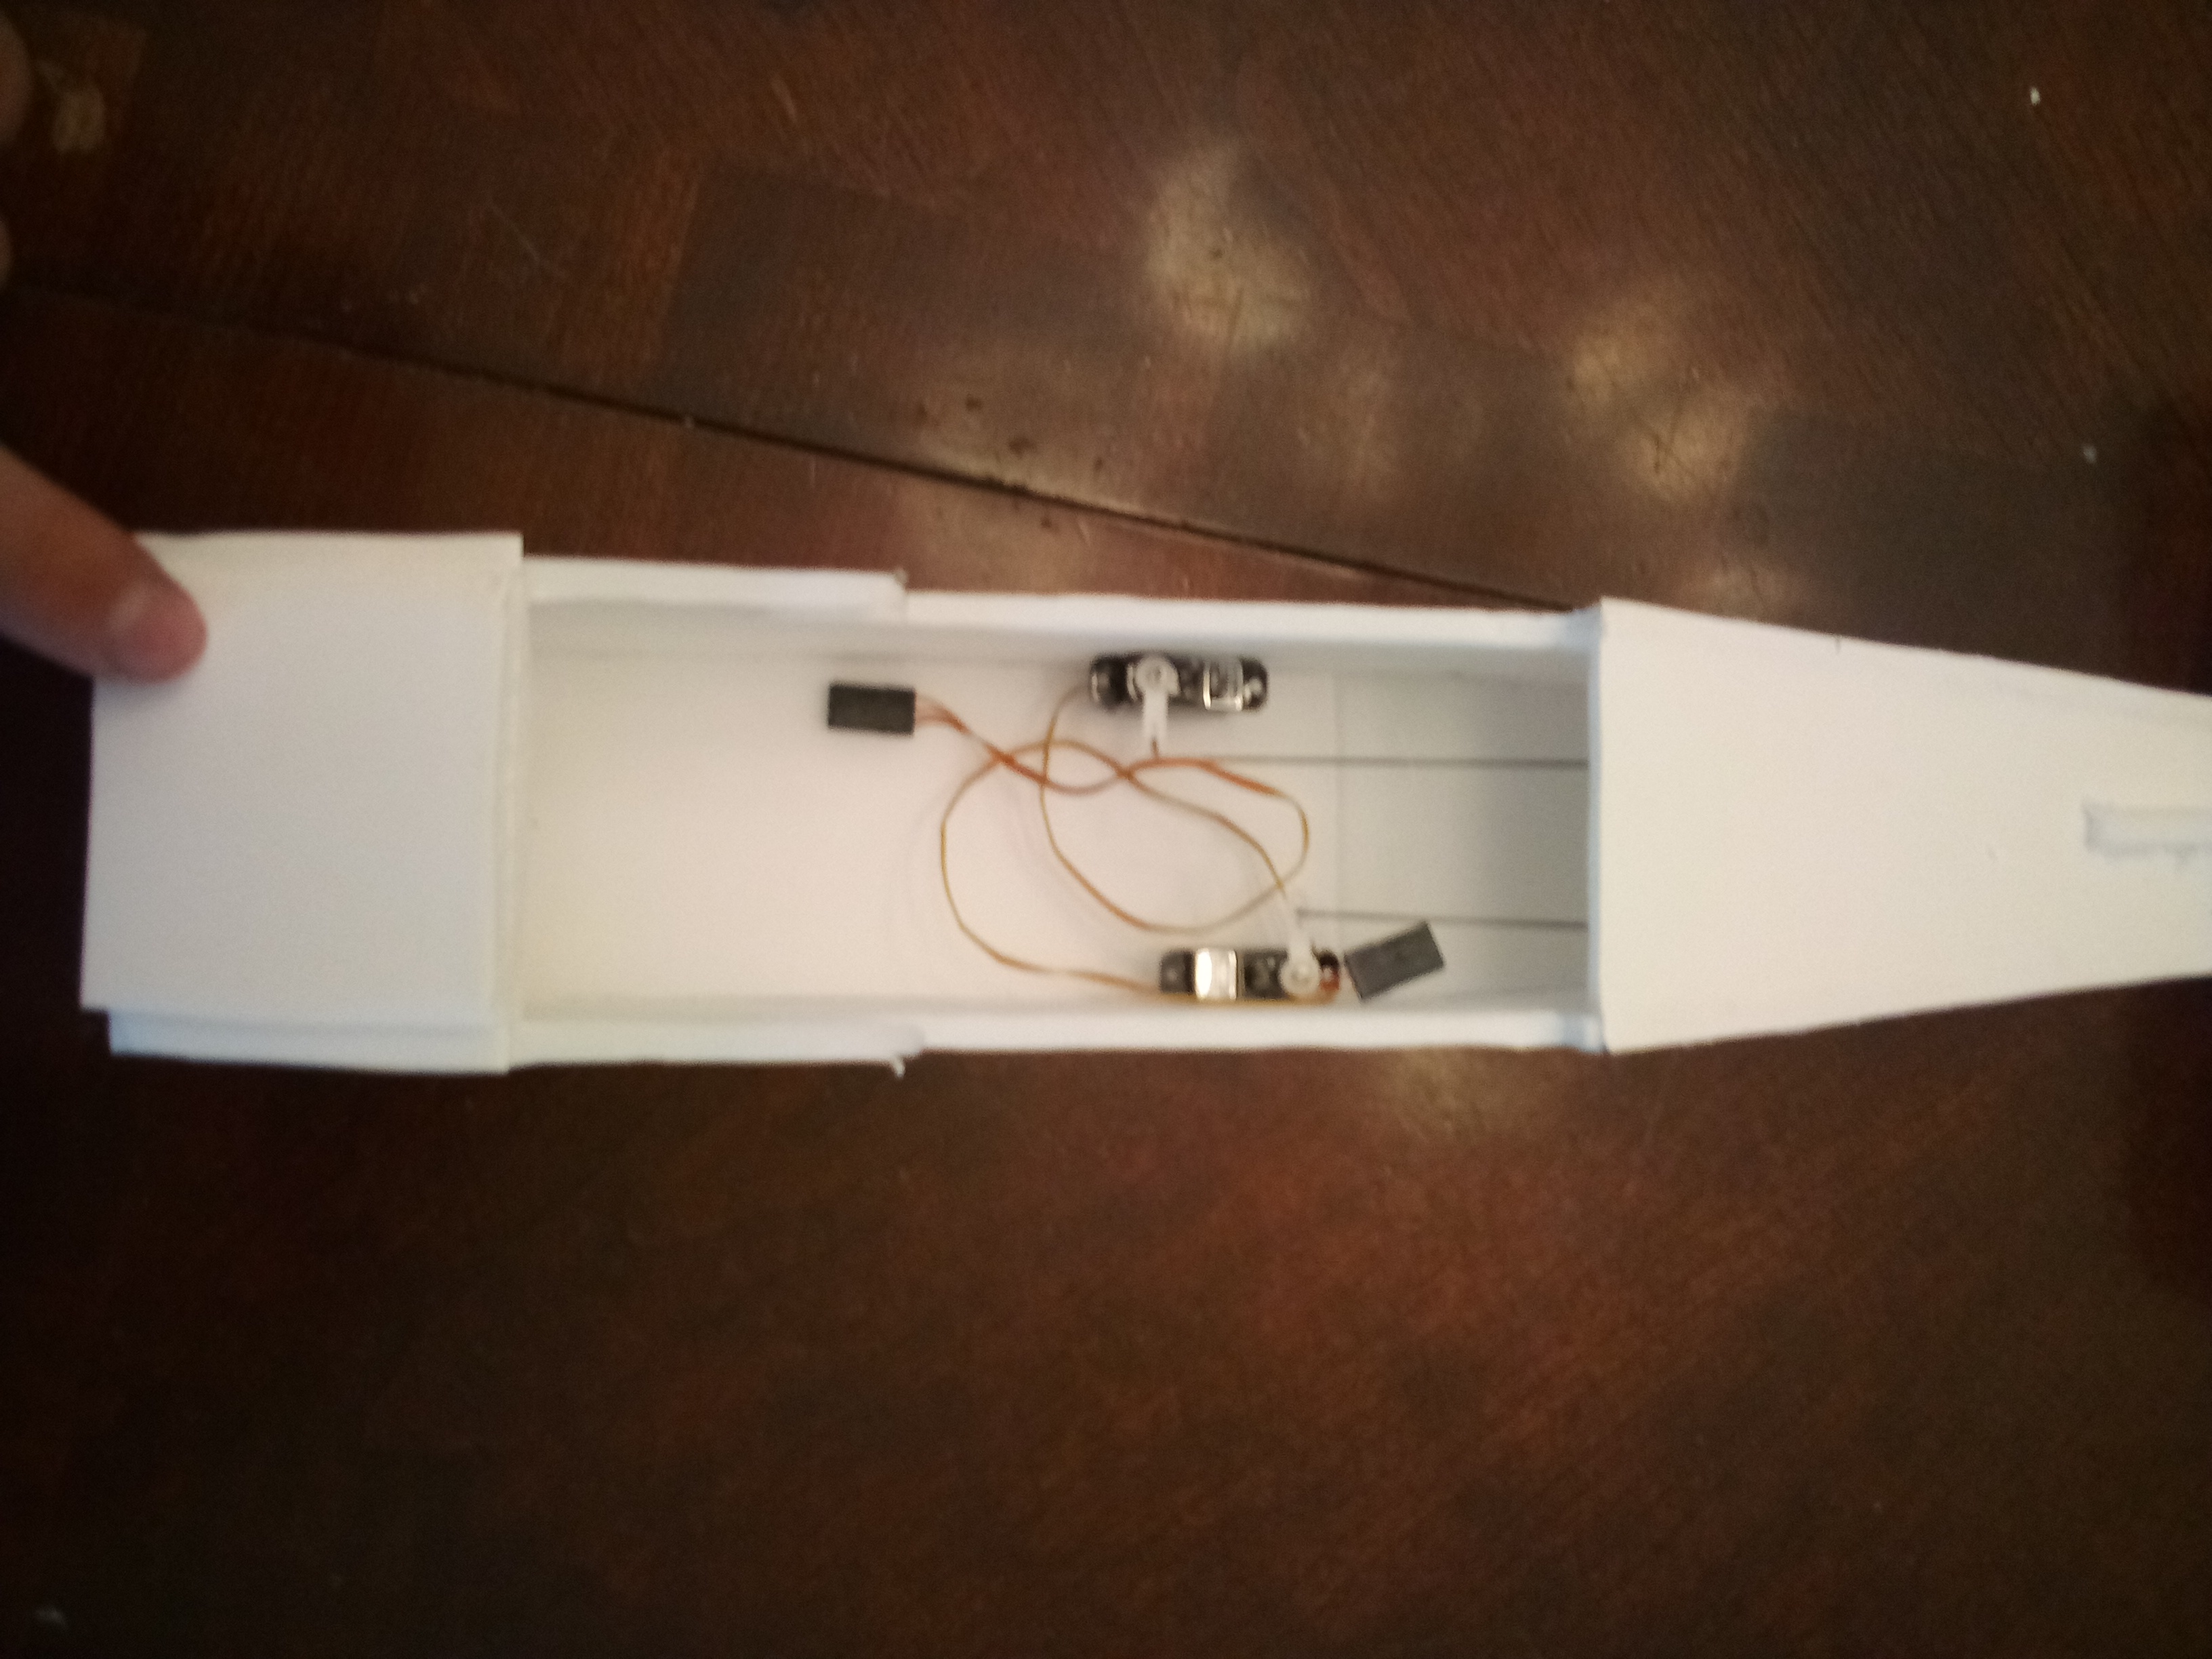
Mighty Mini Waco CG-4

ThatsALotOfPlanes

Active member
Hey guys!

I've wanted to make a Waco CG-4 for a while now, and I was spurred to make a mighty mini CG-4 after seeing a larger one in a recent Flite Test video. I started with a 3 view from Wikipedia and ended up with a semi-scale CG-4. It's a little stubbier in length and wingspan than the full size, but I wanted to keep the size down while also having enough space inside the fuselage and enough chord in the wing to make it functional.
It all looked great until I printed out the plans and realized how tiny it was! The original wingspan is just under 20 inches and the fuselage just barely has enough space for one of my smallest batteries. I haven't finished putting it together, but I'm sure the wing loading will be too high to be anything but a rock. Taking these tiny details into account, I drew up a 140% version that has yet to be printed out. I'll put both below, and add pictures soon. I think the smaller one could work as a chuck glider. Oh also, the nose folds upwards, just like the full scale :)

Thanks!
Sam

Edit 7/29: Added pics of the first and second prototypes, along with my electronics setup. I am currently on v2.1 of plans, and builder's notes are in the works for help with the build.

20210620_155158 (1).jpg

^ Small-ish banana for scale, wingspan is 28 inches.

DSC05110(2).jpg

DSC05108(2).jpg

^ With a decent paint job and window decals, it looks pretty good!
20210627_123631 (1).jpg

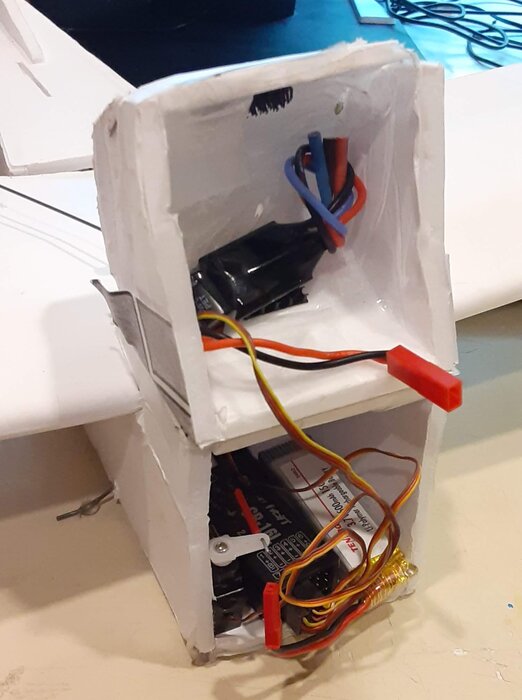
^ I've got a full-size receiver, 500mah 1s battery, and elevator servo in the nose, with a 10A ESC attached to the swinging nose hatch. It balances just about right with everything as far forward as possible. A UMX board or similar could be used with external servos for the ailerons, but it might need nose weight.
 

Attachments

  • Waco CG-4 140% window decals.pdf
    10.9 KB · Views: 0
  • Waco CG-4 140% v2.2 PDF version.svg
    670 KB · Views: 0
Last edited:

ThatsALotOfPlanes

Active member
Just built the 140% version, it went together a lot easier and lighter than the smaller one. I haven't put any elecs in it yet, but I did throw it around the yard a bit to find the CG:

20210620_155158.jpg

Banana for scale ^

20210620_155047.jpg

Here you can see how it's a little stubbier than the full scale ^

Found a few things that need mods in the plans, I'm going to focus on the 140% and leave the smaller one to the cutting room floor. I'll get a v1.1 up tonight!
 
Last edited:

ThatsALotOfPlanes

Active member
370788_b2abcbffc299a055a5e8eeff6775c468 (1).jpg


Flight testing is going well....

I started discus launching it and actually got some really good results until a tree got in the way.

370796_ea828e284ef3fccaf1ad2d6b20a0c637 (1).jpg

I had rudder and elevator initially but had no turning control, so I took the servo out and put it on the top of the wing. The ailerons were on the inboard half of the wing, which had good authority at higher speeds, but less authority close to stall speed. The wing was ripped off during the tree retrieval, but right down the middle, so all I have to do is make a new left side. Plus I can use this opportunity to put in some dihedral.
 
Last edited:

Stress Test

Well-known member
I want to build a large version of this. I just watched the episode where they towed it and it flew better than I had hoped!

Nice glide in the video, and yeah, trees tend to jump in your path. That my story and I'm sticking to it! lol.

Great work! well, speaking of work, lunch is over, back at it!
 

ThatsALotOfPlanes

Active member
I want to build a large version of this. I just watched the episode where they towed it and it flew better than I had hoped!

Nice glide in the video, and yeah, trees tend to jump in your path. That my story and I'm sticking to it! lol.

Great work! well, speaking of work, lunch is over, back at it!

Thanks! I've been meaning to build a large Waco for a while (around 60" wingspan) and building a model jeep to drive out of it. I figure plans for the FT Waco will come out soon, and also I'm running out of foam, so mini size for right now.

Here are some glamour shots of the prototype, damaged nose and all. I'm surprised at how durable this thing is, though maybe it's routine for mini foam planes. I don't usually work this small with foam.

Resized_20210623_141624.jpg

Resized_20210623_141659.jpg
 
Thanks! I've been meaning to build a large Waco for a while (around 60" wingspan) and building a model jeep to drive out of it. I figure plans for the FT Waco will come out soon, and also I'm running out of foam, so mini size for right now.

Here are some glamour shots of the prototype, damaged nose and all. I'm surprised at how durable this thing is, though maybe it's routine for mini foam planes. I don't usually work this small with foam.

View attachment 202360
View attachment 202359
I like that plane a lot! Keep us informed of any updates.
 

ThatsALotOfPlanes

Active member
First post updated with v2.0 plans! Includes a bunch of edits including aileron servo location, full-span ailerons, many reference lines, and general Sponzification. Also on the first post is a sheet of window decals with three options - olive drab frames and blue windows, black frames and gray windows, and gray frames and black windows. Not sure how any of them look in real life since I haven't used them yet!

I think when I build the second prototype (soon) I'll put together some reference photos from the process and stick them in a PDF.
 

FlyerInStyle

Elite member
Thanks! I've been meaning to build a large Waco for a while (around 60" wingspan) and building a model jeep to drive out of it. I figure plans for the FT Waco will come out soon, and also I'm running out of foam, so mini size for right now.

Here are some glamour shots of the prototype, damaged nose and all. I'm surprised at how durable this thing is, though maybe it's routine for mini foam planes. I don't usually work this small with foam.

View attachment 202360
View attachment 202359
is that the 140% one? I have some umx style electronics where the servos are detachable from the board. could I build this?
 

GliderFlyer

Elite member
After about 2 hours I haven't quite finished it yet-all that is left is for the control horns to be attached.
But this was an extremely easy build. There were some things that think should be modified though. I know @ThatsALotOfPlanes you probably are aware of these things, but I'll list them here for anyone else who builds v2.0 for now.

-The top rear skin needs to be trimmed so that the elevator can move down
-The nose side plate and the nose skin can be attached for a one part fuselage
-The bottom section of the wing needs a servo hole
-For looks, one could replace the hole in the nose side plate with just a cavity

These were the only things that I found. I like how it takes less that one sheet of foamboard to make, and the plans look nice. (y)
I wonder if this could be towed with my friend's AP Easy:unsure: I'm looking forward to the test flight
IMG_20210625_165444.jpg
IMG_20210625_165500.jpg
IMG_20210625_165615.jpg
 
After about 2 hours I haven't quite finished it yet-all that is left is for the control horns to be attached.
But this was an extremely easy build. There were some things that think should be modified though. I know @ThatsALotOfPlanes you probably are aware of these things, but I'll list them here for anyone else who builds v2.0 for now.

-The top rear skin needs to be trimmed so that the elevator can move down
-The nose side plate and the nose skin can be attached for a one part fuselage
-The bottom section of the wing needs a servo hole
-For looks, one could replace the hole in the nose side plate with just a cavity

These were the only things that I found. I like how it takes less that one sheet of foamboard to make, and the plans look nice. (y)
I wonder if this could be towed with my friend's AP Easy:unsure: I'm looking forward to the test flight
View attachment 202468 View attachment 202469 View attachment 202470
I really do like that plane. Does it have a name? I think you should call it "Little Fat Boy". :D
 

ThatsALotOfPlanes

Active member
is that the 140% one? I have some umx style electronics where the servos are detachable from the board. could I build this?

I built mine with 5 gram servos, but I think UMX electric would work. I would recommend having one servo for each aileron.
After about 2 hours I haven't quite finished it yet-all that is left is for the control horns to be attached.
But this was an extremely easy build. There were some things that think should be modified though. I know @ThatsALotOfPlanes you probably are aware of these things, but I'll list them here for anyone else who builds v2.0 for now.

-The top rear skin needs to be trimmed so that the elevator can move down
-The nose side plate and the nose skin can be attached for a one part fuselage
-The bottom section of the wing needs a servo hole
-For looks, one could replace the hole in the nose side plate with just a cavity

These were the only things that I found. I like how it takes less that one sheet of foamboard to make, and the plans look nice. (y)
I wonder if this could be towed with my friend's AP Easy:unsure: I'm looking forward to the test flight
View attachment 202468 View attachment 202469 View attachment 202470

Dude it's so rewarding to see my design built by someone else!! I definitely have a lot of changes for v2.1 that I'm planning to work on today and tomorrow. I've got some gear and tow hook and a bunch of little edits planned. I think the nose as a separate piece protects the rest of the fuselage, it's absorbed a ton of impacts from flight testing. If you think it would ease building to make it part of the fuselage, it might be worth it. I also would recommend using the really wide double sided servo arm that comes with most servos, it lessens the angle of the linkage on the aileron. Let us know how towing goes, I've only hand and discus launched the prototype. Thanks for building!
 
Last edited:

GliderFlyer

Elite member
Dude it's so rewarding to see my design built by someone else!! I definitely have a lot of changes for v2.1 that I'm planning to work on today and tomorrow. I've got some gear and tow hook and a bunch of little edits planned. I think the nose as a separate piece protects the rest of the fuselage, it's absorbed a ton of impacts from flight testing. If you think it would ease building to make it part of the fuselage, it might be worth it. I also recommend using the really wide double sided servo arm, it lessens the angle of the linkage on the aileron. Let us know how towing goes, I've only hand and discus launched the prototype. Thanks for building!
Thanks! Am I the second person to build this? I didn't consider towline launching, I should try that. I hooked up all the control surfaces yesterday, but for some reason, channels 4, 5, and 6 on my receiver are not working. It is not the servo, I already tested it. So for now I have no rudder, and I probably won't get around to it until the second week of July (I will be at CAP encampment)
 

ThatsALotOfPlanes

Active member
Thanks! Am I the second person to build this? I didn't consider towline launching, I should try that.

As far as I know you're the second person to build it. Definitely a Guinea pig builder since there's so many little things to change before it's a finished product. Not sure how you would install a tow hook for aerotow since the nose is a hatch. I put a CG hook on the bottom for an ongoing hi-start experiment.

So for now I have no rudder

Before I switched to ailerons, the rudder had very little authority, so you can totally fly it on just ailerons. I would like to figure out the rudder to make gliding a bit more efficient.
 

GliderFlyer

Elite member
As far as I know you're the second person to build it. Definitely a Guinea pig builder since there's so many little things to change before it's a finished product. Not sure how you would install a tow hook for aerotow since the nose is a hatch. I put a CG hook on the bottom for an ongoing hi-start experiment.
I didn't realize that the nose was a hatch until after I built it, so now the hatch is the flap on top that I think is supposed to be glued. The unattached nose sides make more sense now.
 

ThatsALotOfPlanes

Active member
I didn't realize that the nose was a hatch until after I built it, so now the hatch is the flap on top that I think is supposed to be glued. The unattached nose sides make more sense now.

Lol! Like I said, I'll have a PDF with build pictures made soon! I put my elevator servo as far forward as I could, so it was even with the front of the main fuselage. With the nose hatch everything is actually really accessible inside. Plus it's a sprinkle of scale realism :D