iBigNTastyi
New member
Update 1: Added paint progress, new wheel pictures.
Update 2: Added post paint progress, assembled and detailed.
Hello all! My name is Brandon. I'm 30 years old, married, and have three kids. I'm an Automated Assembly/Robotics/Numerical Control programmer at Boeing in their main factory in Everett, Washington. I am currently assigned to programming robots that paint 777 wings.
I had a RC plane once several years ago. I only flew it twice, and it was run over by a car when it drifted into a road. Over $200 down the drain, I gave up.
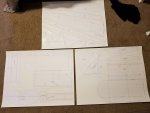
My wife bought me a 3D printer for Christmas, and I quickly found models for 3D printed planes. Researching these brought me to the FT Youtube channel. After watching videos for about a week, I decided to ease back into it. My primary fear was that for whatever reason, I wouldn't maintain interest and end up wasting money as I had before. So I started with investing about $10 into building an airplane with no electronics. I decided on the Simple Cub because I've always liked the real life design, and I like the idea of starting with three-channel, and being able to graduate into 4. So, I purchased local materials for building the plane. I also designed and 3D printed a firewall, and printed control horns and wheels that someone else had designed.


I was talking to one of my coworkers about this project and he was already familiar with FT. He later mentioned that he had a busted up Bloody Wonder (with B pack) he had built, a Spektrum DX6i, and Lipo charger he'd be willing to sell me. I ended up getting it all for a steal. I ended up buying new servos, a battery, and wire for push rods and landing gear. Sorry, I didn't get any pictures of installing that. All in all, I've invested less than $200 into this setup! So then I took it to the park with my oldest son for the first flight. I had my rudder backwards, but with a quick channel reversal, I was up in the air!
Video Link:
I also had my son try to get it in the air, but no luck. When landing, the wheels would get caught on the grass, and the landing gear was slowly bending back and crushing the foam behind it. This caused takeoff to be difficult.
I took the plane out again a few days later. Again, every landing was smooth, except that the wheels would catch and it would nose over. Eventually, the firewall pulled away from the powerpod, causing down-thrust and made it unflyable. I have since covered the entire plane in packing tape, and added wooden reinforcements to the skewers and landing gear area. I still need to fix the firewall, and I plan to paint the plane. I'm also 3D printing much larger wheels that have spiralized spokes for "suspension"

I have a GoPro session (the little cube) that I would like to put onto the plane to record flights. I know the plans have a cutout for FPV, but would I want to mount the GoPro in the same place? Or should I mount it on the wing, belly, etc?
Update 1: Sanded, primed, and painted first coat. Also finished printing new larger wheels.
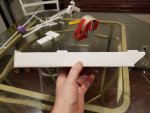
Pre-paint:

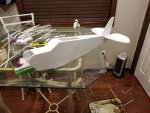
Primer:

First Coat (Well, kind of two coats because the first coat dried so fast):

New wheels:

Update 2: Assembled, added window details, added tail number.


Update 2: Added post paint progress, assembled and detailed.
Hello all! My name is Brandon. I'm 30 years old, married, and have three kids. I'm an Automated Assembly/Robotics/Numerical Control programmer at Boeing in their main factory in Everett, Washington. I am currently assigned to programming robots that paint 777 wings.
I had a RC plane once several years ago. I only flew it twice, and it was run over by a car when it drifted into a road. Over $200 down the drain, I gave up.
My wife bought me a 3D printer for Christmas, and I quickly found models for 3D printed planes. Researching these brought me to the FT Youtube channel. After watching videos for about a week, I decided to ease back into it. My primary fear was that for whatever reason, I wouldn't maintain interest and end up wasting money as I had before. So I started with investing about $10 into building an airplane with no electronics. I decided on the Simple Cub because I've always liked the real life design, and I like the idea of starting with three-channel, and being able to graduate into 4. So, I purchased local materials for building the plane. I also designed and 3D printed a firewall, and printed control horns and wheels that someone else had designed.


I was talking to one of my coworkers about this project and he was already familiar with FT. He later mentioned that he had a busted up Bloody Wonder (with B pack) he had built, a Spektrum DX6i, and Lipo charger he'd be willing to sell me. I ended up getting it all for a steal. I ended up buying new servos, a battery, and wire for push rods and landing gear. Sorry, I didn't get any pictures of installing that. All in all, I've invested less than $200 into this setup! So then I took it to the park with my oldest son for the first flight. I had my rudder backwards, but with a quick channel reversal, I was up in the air!
Video Link:
I also had my son try to get it in the air, but no luck. When landing, the wheels would get caught on the grass, and the landing gear was slowly bending back and crushing the foam behind it. This caused takeoff to be difficult.
I took the plane out again a few days later. Again, every landing was smooth, except that the wheels would catch and it would nose over. Eventually, the firewall pulled away from the powerpod, causing down-thrust and made it unflyable. I have since covered the entire plane in packing tape, and added wooden reinforcements to the skewers and landing gear area. I still need to fix the firewall, and I plan to paint the plane. I'm also 3D printing much larger wheels that have spiralized spokes for "suspension"

I have a GoPro session (the little cube) that I would like to put onto the plane to record flights. I know the plans have a cutout for FPV, but would I want to mount the GoPro in the same place? Or should I mount it on the wing, belly, etc?
Update 1: Sanded, primed, and painted first coat. Also finished printing new larger wheels.
Pre-paint:

Primer:

First Coat (Well, kind of two coats because the first coat dried so fast):

New wheels:

Update 2: Assembled, added window details, added tail number.


Last edited:
