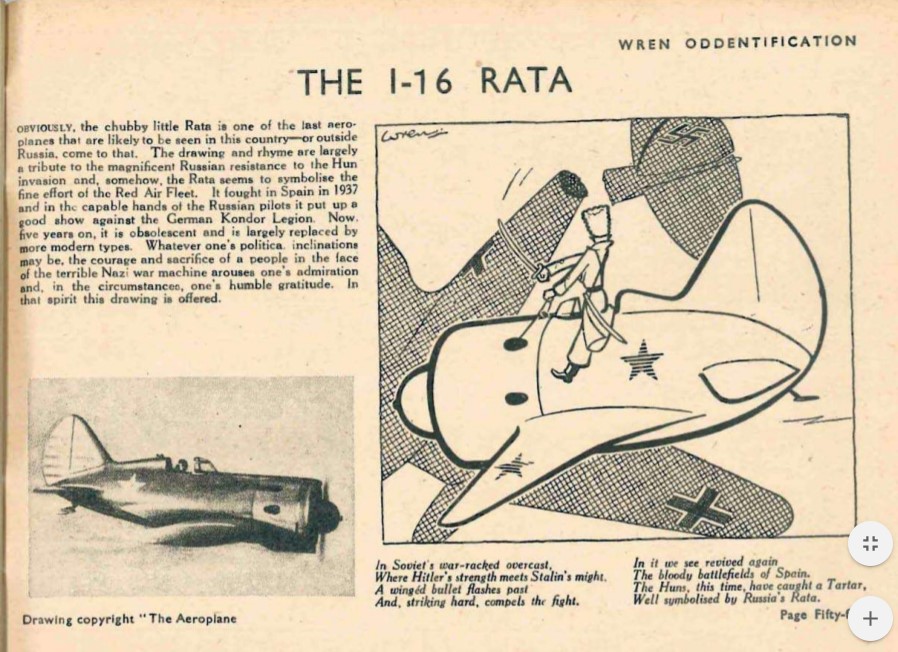
POLIKARPOV I-16 RATA

The Hangar

Fly harder!
Mentor
I have a 55" Yak-3 but I decided to order a Willy Nillies Barnstormer to get some practice with first. mostly for the covering experience but i imagine the entire process will be good to do at least once before attempting the Yak-3 ill be sure to make a thread when i finally start it.
I’m not sure what I’ll start with yet. I have a gentle lady kit which I’ll probably start with. But I found some plans for a wilga so I’m in the process of ordering the balsa needed for it and I’ll cut it all out while I build the gentle lady. I know it’s not a good second build but that’s what I’ve decided it will be and I’m very stubborn. :p
 

rockyboy

Skill Collector
Mentor
Blue Wonder motor came in - mocking up the mounting to make sure I can get things to line up right

IMG_20200611_191220_copy_1024x768.jpg


Yep - it's centered OK

IMG_20200611_191227_copy_1024x768.jpg


And started cutting out the ailerons and sanding them to a final shape

IMG_20200607_231739_copy_1024x768.jpg
 

willsonman

Builder Extraordinare
Mentor
Awesome. You know, years ago I made one of those cartoon planes from Park Flyer Plastics with the same motor. Cool part was the motor and spinner situation. Apparrently at that size and thrust, the c-clip on the back to retain the motor is not required for flight. The magnets will keep it in there just fine. So, You would install the prop and spinner on the motor bell and then it would just pop right onto the motor when it was done. Every once in a while it would come off on a landing situation but that's it.

Just thought I'd share in case you were contemplating options for a nice spinner on the front.
 

rockyboy

Skill Collector
Mentor
Awesome. You know, years ago I made one of those cartoon planes from Park Flyer Plastics with the same motor. Cool part was the motor and spinner situation. Apparrently at that size and thrust, the c-clip on the back to retain the motor is not required for flight. The magnets will keep it in there just fine. So, You would install the prop and spinner on the motor bell and then it would just pop right onto the motor when it was done. Every once in a while it would come off on a landing situation but that's it.

Just thought I'd share in case you were contemplating options for a nice spinner on the front.

:eek::eek::eek:

I had no idea! I really want to try that now :D
 

rockyboy

Skill Collector
Mentor
Both ailerons cut free and sanded

IMG_20200613_143640_copy_1024x768.jpg


And the horizontal stabilizer covered in doculam and glued into the fuselage.
IMG_20200614_184333_copy_1024x768.jpg


Stacked up the rest of the pieces to form the front of the cowl, rough sanded them to shape, and then glued and clamped onto the front of the fuselage.
IMG_20200614_185414_copy_1024x768.jpg


Rudder & elevator covered, and everything pinned into place.

Yep - that's an airplane! :D

IMG_20200614_231127_copy_1024x768.jpg
 

PsyBorg

Wake up! Time to fly!
Wow thats a lot of progress since Saturday on Zoom class when you did the horizontal stabilizer for the class on covering. looking forward to tonights meeting but I'm off to the sunshine to fly a bit today and not sure what state I will be in later.
 

rockyboy

Skill Collector
Mentor
Tailcone is shaped and covered... not sure if paint is going to hide or highlight any sins in here, but we'll see when it's got some color! :D

IMG_20200620_153330_copy_1024x768.jpg


After some creative bending I've got a free moving pushrod that is in the right place for the rudder control horn and still has full range of motion. Added a little balsa blocking around the exit hole.
IMG_20200621_191450_copy_1024x768.jpg


In the background of the photo is my favorite bench tool for binding receivers - a power harness with a switch. It's so much easier to flip a switch one-handed rather that plug in a battery while trying to hold the bind button :D
 

willsonman

Builder Extraordinare
Mentor
Perhaps it's just my OCD approach to building, but I would have rounded off the corners a touch on your tail planes. Not criticizing in any way. I just would never have thought to leave such a blunt surface like that.
 

rockyboy

Skill Collector
Mentor
Hmm.... yeah, I was all focused on doing a covering demo with the stabilizers and didn't finish those leading edges with a slight rounding the way I usually do. Darn distracted Covid brain. :cautious:
 

Zetoyoc

Elite member
quick question, it looks like you are using insect pins? I am gathering supplies for my first build and the t pins i have seem pretty fat. what thickness pin do you find the most useful? i may order some #1 or even #00 pins if they arent too flimsy.

thanks
-j
 

rockyboy

Skill Collector
Mentor
quick question, it looks like you are using insect pins? I am gathering supplies for my first build and the t pins i have seem pretty fat. what thickness pin do you find the most useful? i may order some #1 or even #00 pins if they arent too flimsy.

thanks
-j

Good eye! I'm using the #00 insect pins, but frequently use a little pair of needle nose pliers to put them in - just shoving with my fingers bends them pretty frequently.
 

rockyboy

Skill Collector
Mentor
Time to get the battery situated!

I am not crazy about using a velcro setup - I've damaged planes before trying to take batteries out. So I'm going to make a slot with some balsa guides instead. And it just works out that the motor firewall does nicely rest on the front of the battery too.

IMG_20200916_184322_copy_1024x768.jpg


Glued in a couple more guide blocks to keep it in place...
IMG_20200916_184918_copy_1024x768.jpg


This setup leaves room for the esc on the other side of the motor stick too!
IMG_20200916_185957_copy_1024x768.jpg


Everything settled into place...
IMG_20200916_190118_copy_1024x768.jpg


Hatch fits over everything nicely too!
IMG_20200916_190146_copy_1024x768.jpg


Plenty of ventilation for the electronics in there too.
IMG_20200916_190158_copy_1024x768.jpg


Next I'm trying something new for me - making my own spinner. The Rata has a cute little button shaped spinner that's not common, especially at a scale like this, so I'm going to follow an idea from a recently departed building hero, John Morgan, and build a two piece foam spinner with plywood base plates. First step is cutting a pair of plywood disks....
IMG_20200916_170250_copy_1024x768.jpg


And gluing up a foam block from layers of dollar tree foam board to make the body of the spinner...
IMG_20200916_172421_copy_1024x768.jpg


A little rough sanding on the back foam block, and then drilled locator pin holes through both the plates.
IMG_20200916_214317_copy_1024x768.jpg


Next I'm gluing another foam block to the front plywood plate, and then I'll chuck the combined unit up in the drill press for a little sanding into shape.
 

The Hangar

Fly harder!
Mentor
Time to get the battery situated!

I am not crazy about using a velcro setup - I've damaged planes before trying to take batteries out. So I'm going to make a slot with some balsa guides instead. And it just works out that the motor firewall does nicely rest on the front of the battery too.

View attachment 179207

Glued in a couple more guide blocks to keep it in place...
View attachment 179210

This setup leaves room for the esc on the other side of the motor stick too!
View attachment 179213

Everything settled into place...
View attachment 179212

Hatch fits over everything nicely too!
View attachment 179211

Plenty of ventilation for the electronics in there too.
View attachment 179215


Next I'm trying something new for me - making my own spinner. The Rata has a cute little button shaped spinner that's not common, especially at a scale like this, so I'm going to follow an idea from a recently departed building hero, John Morgan, and build a two piece foam spinner with plywood base plates. First step is cutting a pair of plywood disks....
View attachment 179208

And gluing up a foam block from layers of dollar tree foam board to make the body of the spinner...
View attachment 179209

A little rough sanding on the back foam block, and then drilled locator pin holes through both the plates.
View attachment 179214

Next I'm gluing another foam block to the front plywood plate, and then I'll chuck the combined unit up in the drill press for a little sanding into shape.
It’s looking really good! I’m eager to see how the spinner ends up!
 

PoorManRC

Master member
Yep - that "washout" twist is a way of helping the wing stall more predictably so you don't suddenly lose all lift / aileron / roll control on one wing causing a dive into the dreaded "spiral tip stall", and instead get a "mushy" response warning the pilot to pick up some airspeed or drop the nose.

I'm sure I'm flubbing the explanation at some level, so here's a link to smarter people than me explaining it :D

https://en.wikipedia.org/wiki/Washout_(aeronautics)
I think you did a great job of explaining that!! It's not the most common Engineering practice on Aircraft....
But surprisingly common on Air Force Fighter Jets. (Possibly Navy too, I'm just not aware of it)
It's far less pronounced in these applications, and mostly on Supersonic Jets - to improve Dogfighting performance and help with Tip Stalling during Refueling and Landing - a Fighter Jet's most vulnerable events.

The Trisonic Jets too!! Most People trying to make Model SR-71 Blackbirds fly aren't even aware of this. It's VERY subtle, nearly imperceptible, but at some angles, with GOOD eyes, you CAN actually see it.
The 2nd XB-70 Prototype also had a little Washout designed into its enormous Delta Wings!

Most of the early "Century Fighter" Jets had no Washout. It really wasn't widely known - and there was NO Internet!!! 😜😂
The F-100 Super Sabre had very Straight, Flat, Swept Wings....
The first Production Supersonic Fighter, sadly killed more than a couple of Pilots on Landings - especially Aborted Landings.....

BACK on Subject! I love the I-16!! One of my favorite Inter-War Aircraft. She was definitely advanced for its time - or even 20 years after it was built!!
It may have LOOKED like a Gee-Bee in some ways... but was WAY MORE forgiving to her Pilots! For all accounts, it was a pretty good Handling, Honest Airplane. She never got to prove herself on an EVEN playing field.

As you stated in the beginning, she was woefully outclassed by the beginning of Hostilities in 1939....

For YOU, this one seems to be taking an eternity to do!!!😜😂😁 This is my first look, but I've been through the whole Thread - so far.

Me..... Just been hanging in there, waiting for next Summer, so I can afford more Recievers for my FS6i, Motors, Servos - and eventually some KITS!! 😁
I've got a couple in mind initially in Simple Series (Sportster and Spitfire) - AND the A-10 and P-47 MS Kits!!
(Among several others. Next year I'll be VERY set!!!)
In case anyone was wondering.... 😉