Twin edf SU-27

Yupp

New member
quick question, and I realize this thread has been dead for a bit.. . you mentioned moving the EDF's back 50mm to accommodate the battery weight better. Is this reflected in the plans? would you still recommend that? If scaled up to match the size of the F18, any advice ? changes or recommendation? I don't think additional weight, with an all foam model is too much of an issue compared to the F18 and F14. curious on your thoughts. Start cutting this week!
 

Flitedesign 3d

Elite member
quick question, and I realize this thread has been dead for a bit.. . you mentioned moving the EDF's back 50mm to accommodate the battery weight better. Is this reflected in the plans? would you still recommend that? If scaled up to match the size of the F18, any advice ? changes or recommendation? I don't think additional weight, with an all foam model is too much of an issue compared to the F18 and F14. curious on your thoughts. Start cutting this week!
Yea I planned to use 4x 4 cell 1,4ah batteries but ended up using only 3 due to balancing issues. The plans are as I built it, I didn't move the fans back since it would have required quite some rework.. I don't know if I can recommend doing that, if you really want to carry a larger battery, maybe.. but it's probably just easier to stick to the plans. Although I haven't tried, I think scaling up this model should make it easier to build since the bend radii increases. Scaling up should also reduce wing loading making it even floatier. Actually, I would be quite curious to see how this model performs slightly upscaled. Happy building!
 

Flitedesign 3d

Elite member
Alright, it’s time to blow the dust off this thread and build the sequel for the su-27, the su-30/37 (they look similar enough to me). The su-30 is based on the same cad model but it’s about 90% rebuilt. There are many similarities to the old design but also some major changes to both the inner structure and outer skin. The reason for most changes is either reducing foam usage/part count or to make building easier and improve the overall assembly experience. There are also some new cool features I have added. Here is a list of the most significant improvements and features of the SU-30:
  • Optional thrust vectoring
  • Optional movable canards
  • All moving stabilizers are also optional now
  • Foam sheet count reduced from 9 to 7-8 by reducing and optimizing parts, the model size has not changed, it still has a wingspan of 1000mm and length of 1500mm
  • Reduced the amount of alignment tabs and small parts which are the bane of existence for hand cutters
  • Assembly experience should be quite a bit easier and nicer compared to the su-27, let’s get back to that after I’ve built it.
  • Battery compartment is now deeper allowing larger batteries
The model is designed such that it can also be built without a 3d printer in its basic configuration, that means conventional static horizontal stabilizer with elevator, static canards and no thrust vectoring. By using a 3d printer one can have all mentioned features and many small foam parts also now have substitutional 3d printed parts which can further reduce the number of pieces needed to be cut by hand. Depending on the configuration the build is 7-8 sheets of foam.

For the thrust vectoring, this model uses two of those generic 2-axis thrust vectoring nozzles for 70mm fans. The goal is to have full 3-axis control which, in theory, should be possible since the two nozzles quite far apart from each other should allow for roll control. Full 3-axis control should make it possible to do some cool 3d flying, for which I most certainly don’t have the skills for.

So that is the new model introduced, now for my build:

I’m going to build one with thrust vectoring, all moving stabilizers and static canards only. To save on weight and cost I’m not going for the movable canards myself, I’ll leave that for someone else to try. With thrust vectoring, there are already 6 servos onboard. The edf’s I took from the old su-27, so same 4 cell setup. I did downgrade the speed controllers from 80a to 60a to save weight, relying on the numbers they should be enough. Also, squeezing out every bit of performance by cutting corners on safety kinda fits the spirit of this aircraft, considering the original full scale aircraft and its manufacturer. I now have cut all the foam sheets and will soon start the build. Here are some renders of the cad model.
 

Attachments

  • 1.png
    1.png
    489.1 KB · Views: 0
  • 2.png
    2.png
    542.5 KB · Views: 0
  • 7.png
    7.png
    278.4 KB · Views: 0
  • 9.png
    9.png
    386 KB · Views: 0
  • P1330545.JPG
    P1330545.JPG
    4.6 MB · Views: 0
  • 10.png
    10.png
    794.8 KB · Views: 0

Flitedesign 3d

Elite member
Been building for a while now and this is the progress I've made. Kind of slow progress because firstly I'm time lapsing the build and secondly figuring out the best possible assembly order takes time. I've also had to remake some parts since there has been a few mistakes in the drawings, nothing major though.

I'm now at the stage where the inner structure is done and what's left is mainly the skin and tail stabilizers. I like this part since a lot of the inner structure is visible. Assembly so far has been really nice, expect for one part, inserting the esc. It requires fishing the wires through a small gap between the fuselage bottom piece and the wing bottom surface. Btw the esc placement may seem strange, it's because I wanted them to be firstly embedded in the engine duct for cooling and secondly close enough to the fans so no extension wire needs to be soldered. The current placement is the only reasonable placement I could come up with.

Next steps are verifying that all the electronics work properly before closing up the skin and adding the tail.
 

Attachments

  • P1330563.JPG
    P1330563.JPG
    4.8 MB · Views: 0
  • P1330564.JPG
    P1330564.JPG
    4.7 MB · Views: 0
  • P1330566.JPG
    P1330566.JPG
    4.5 MB · Views: 0
  • P1330553.JPG
    P1330553.JPG
    4.6 MB · Views: 0

Oldrover TJ

Active member
Just from those pictures I'm loving some of the construction changes. Definitely easier to build and with just as much detail in design. I'm really looking forward to this one!
 

iwpublic

Member
I am absolutely keen to build it myself!

One Q though. Is there any particular reason why the outer part of the wing misses the lower side other than weight reduction? I’d be concerned about rigidity in non-perfect landing situations.

*ordering parts already
 

Flitedesign 3d

Elite member
why the outer part of the wing misses the lower side other than weight reduction?
Yes it's mostly to use less foam but also as far as I'm concerned such high cambered airfoil is beneficial for high angle of attack stuff, and since this model isn't designed for speed but rather 3d flying I thought I'd try it out
 

Flitedesign 3d

Elite member
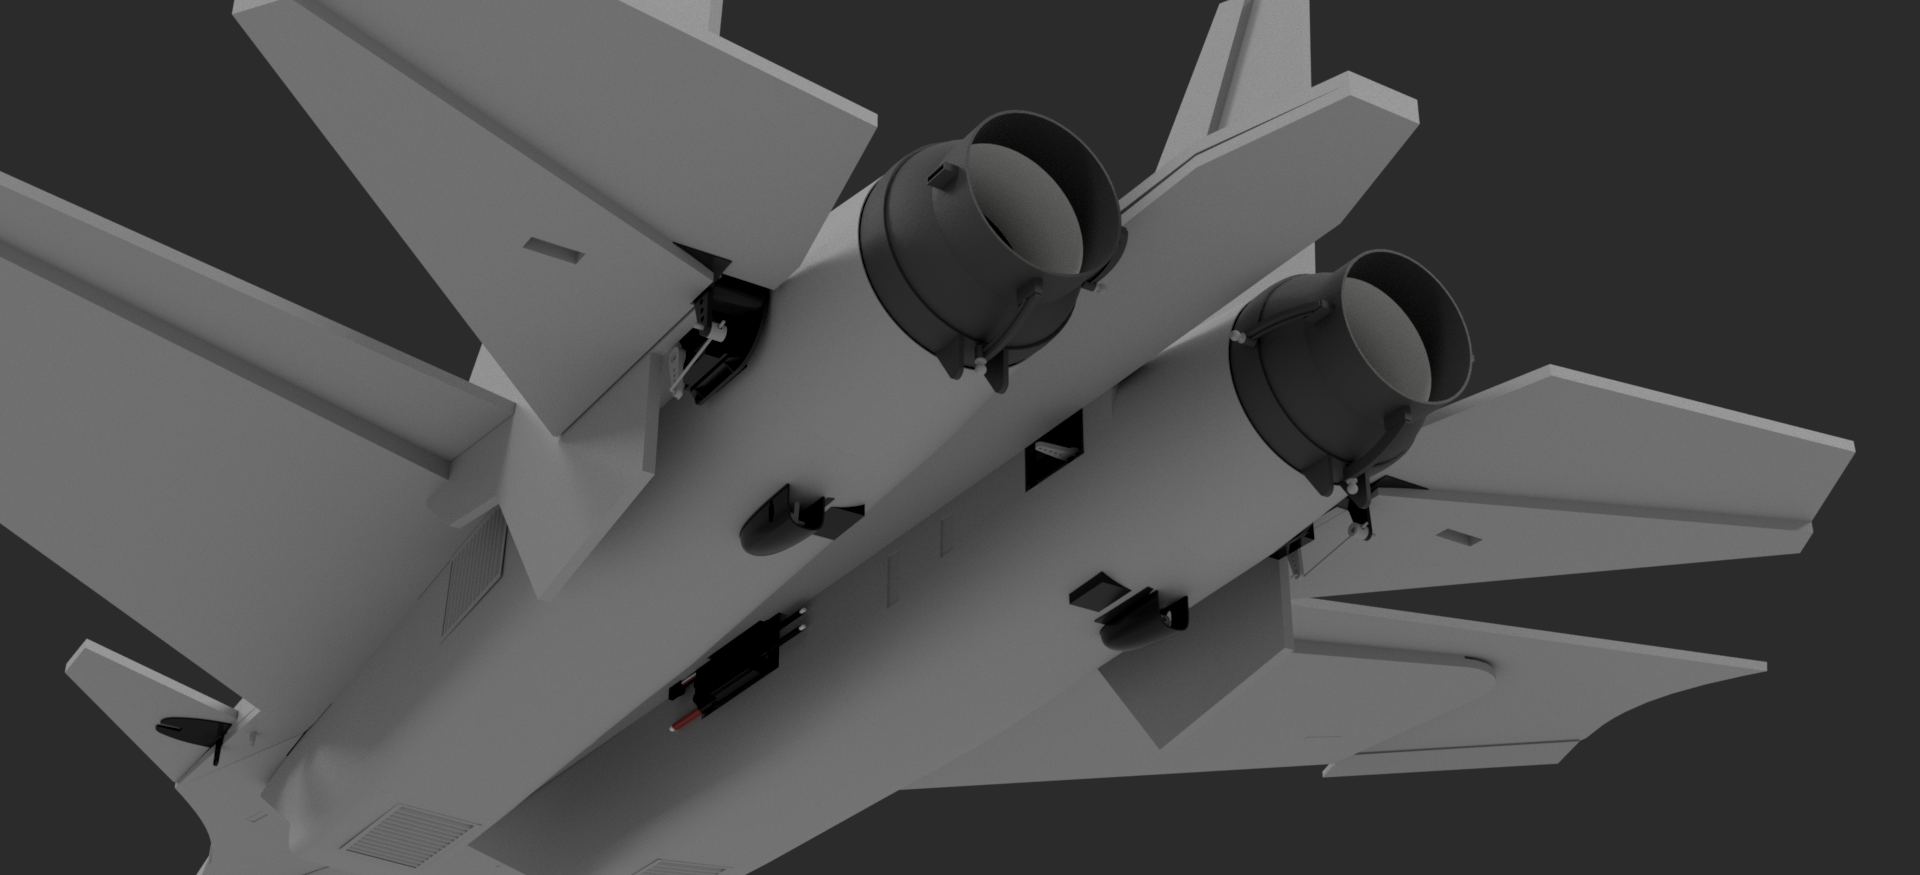
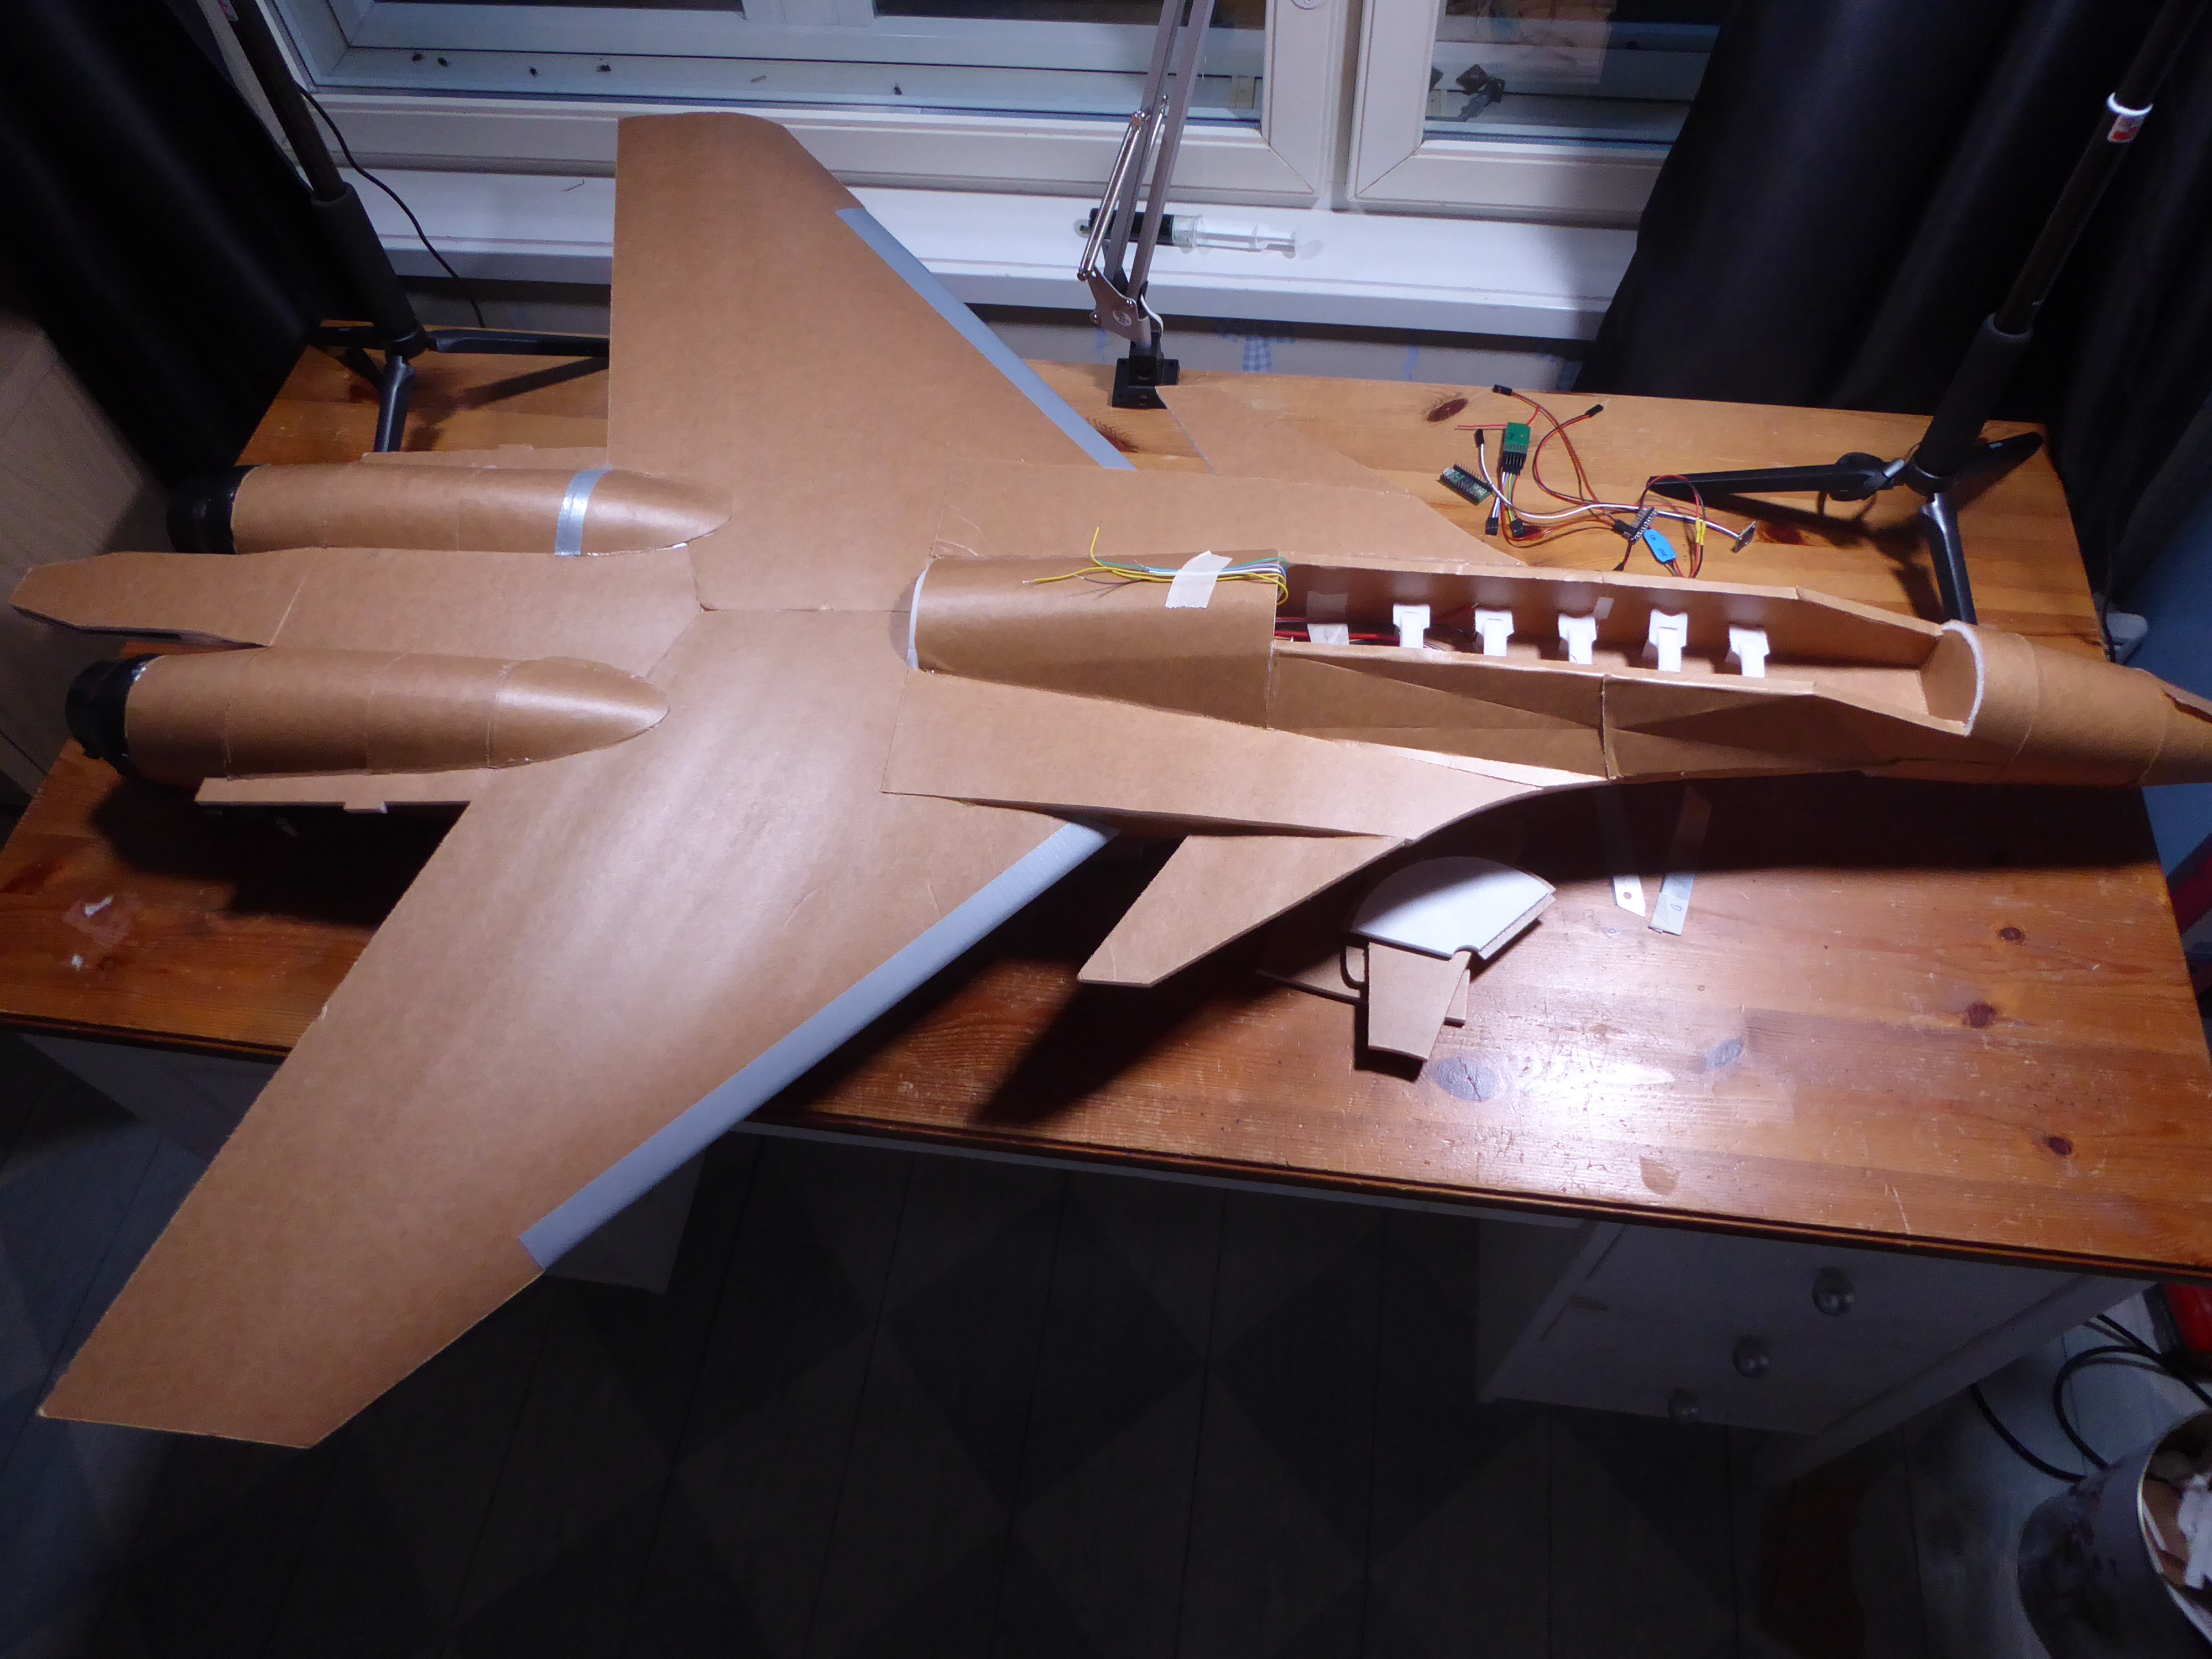
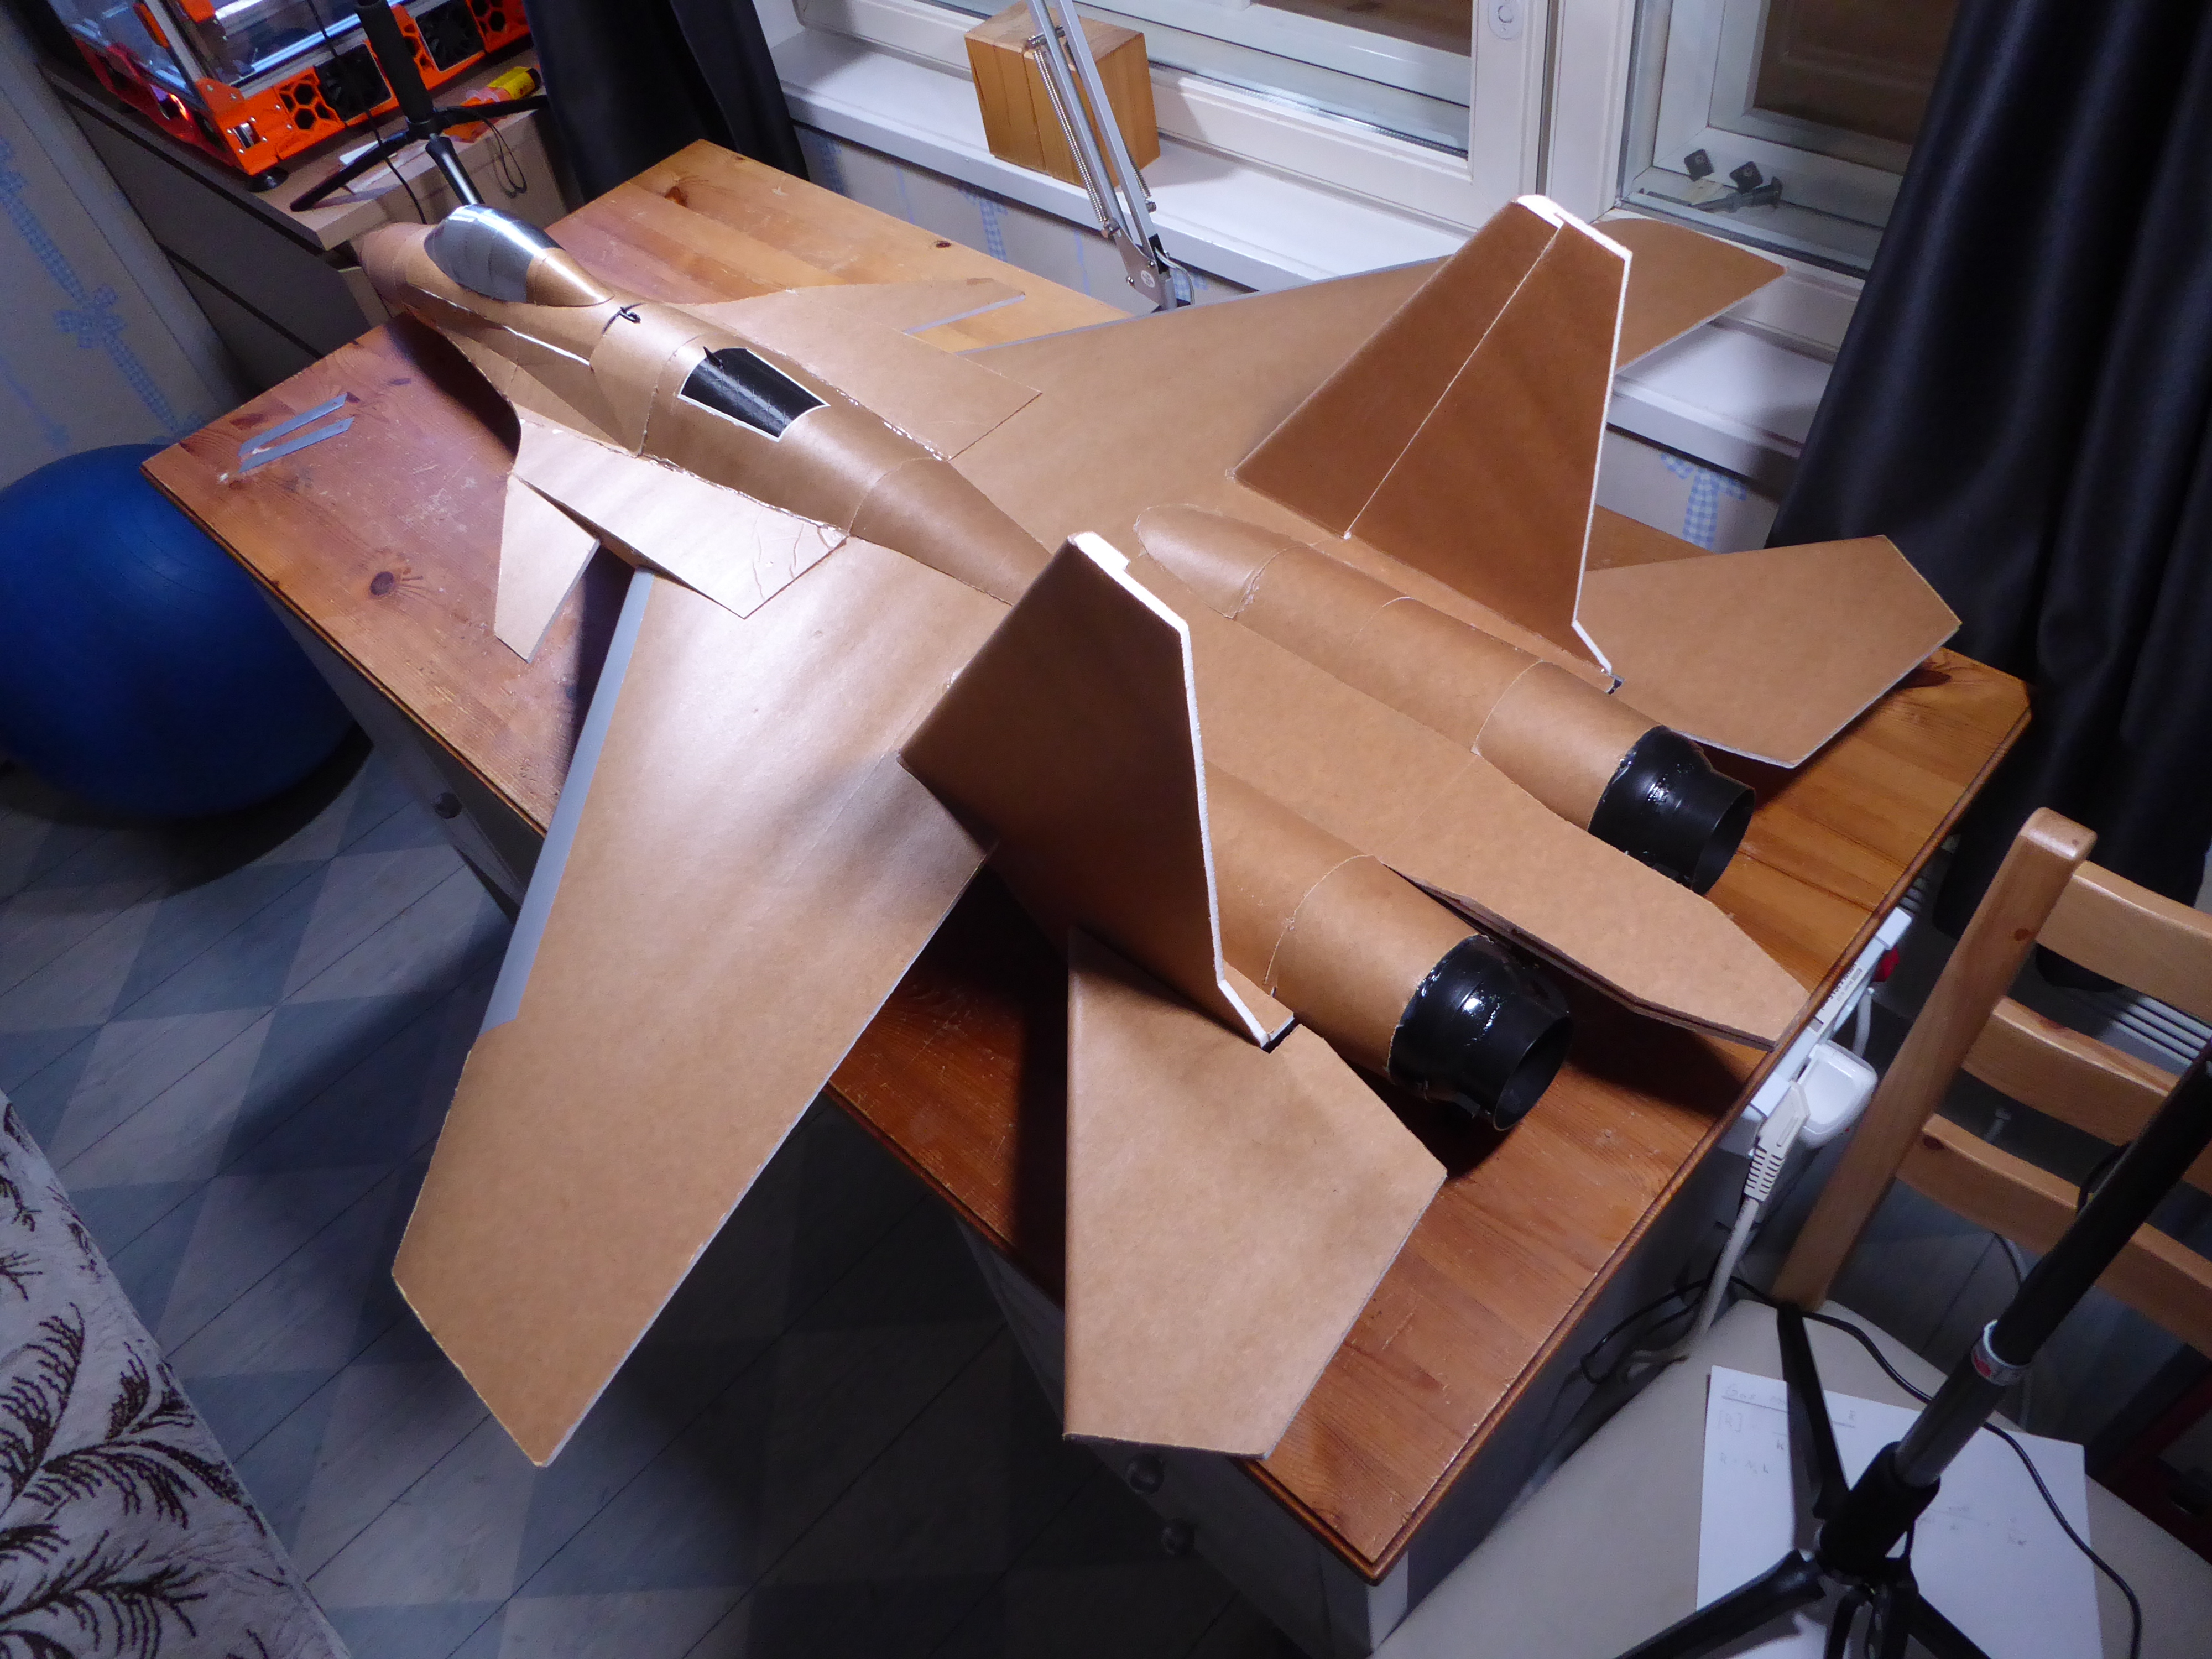
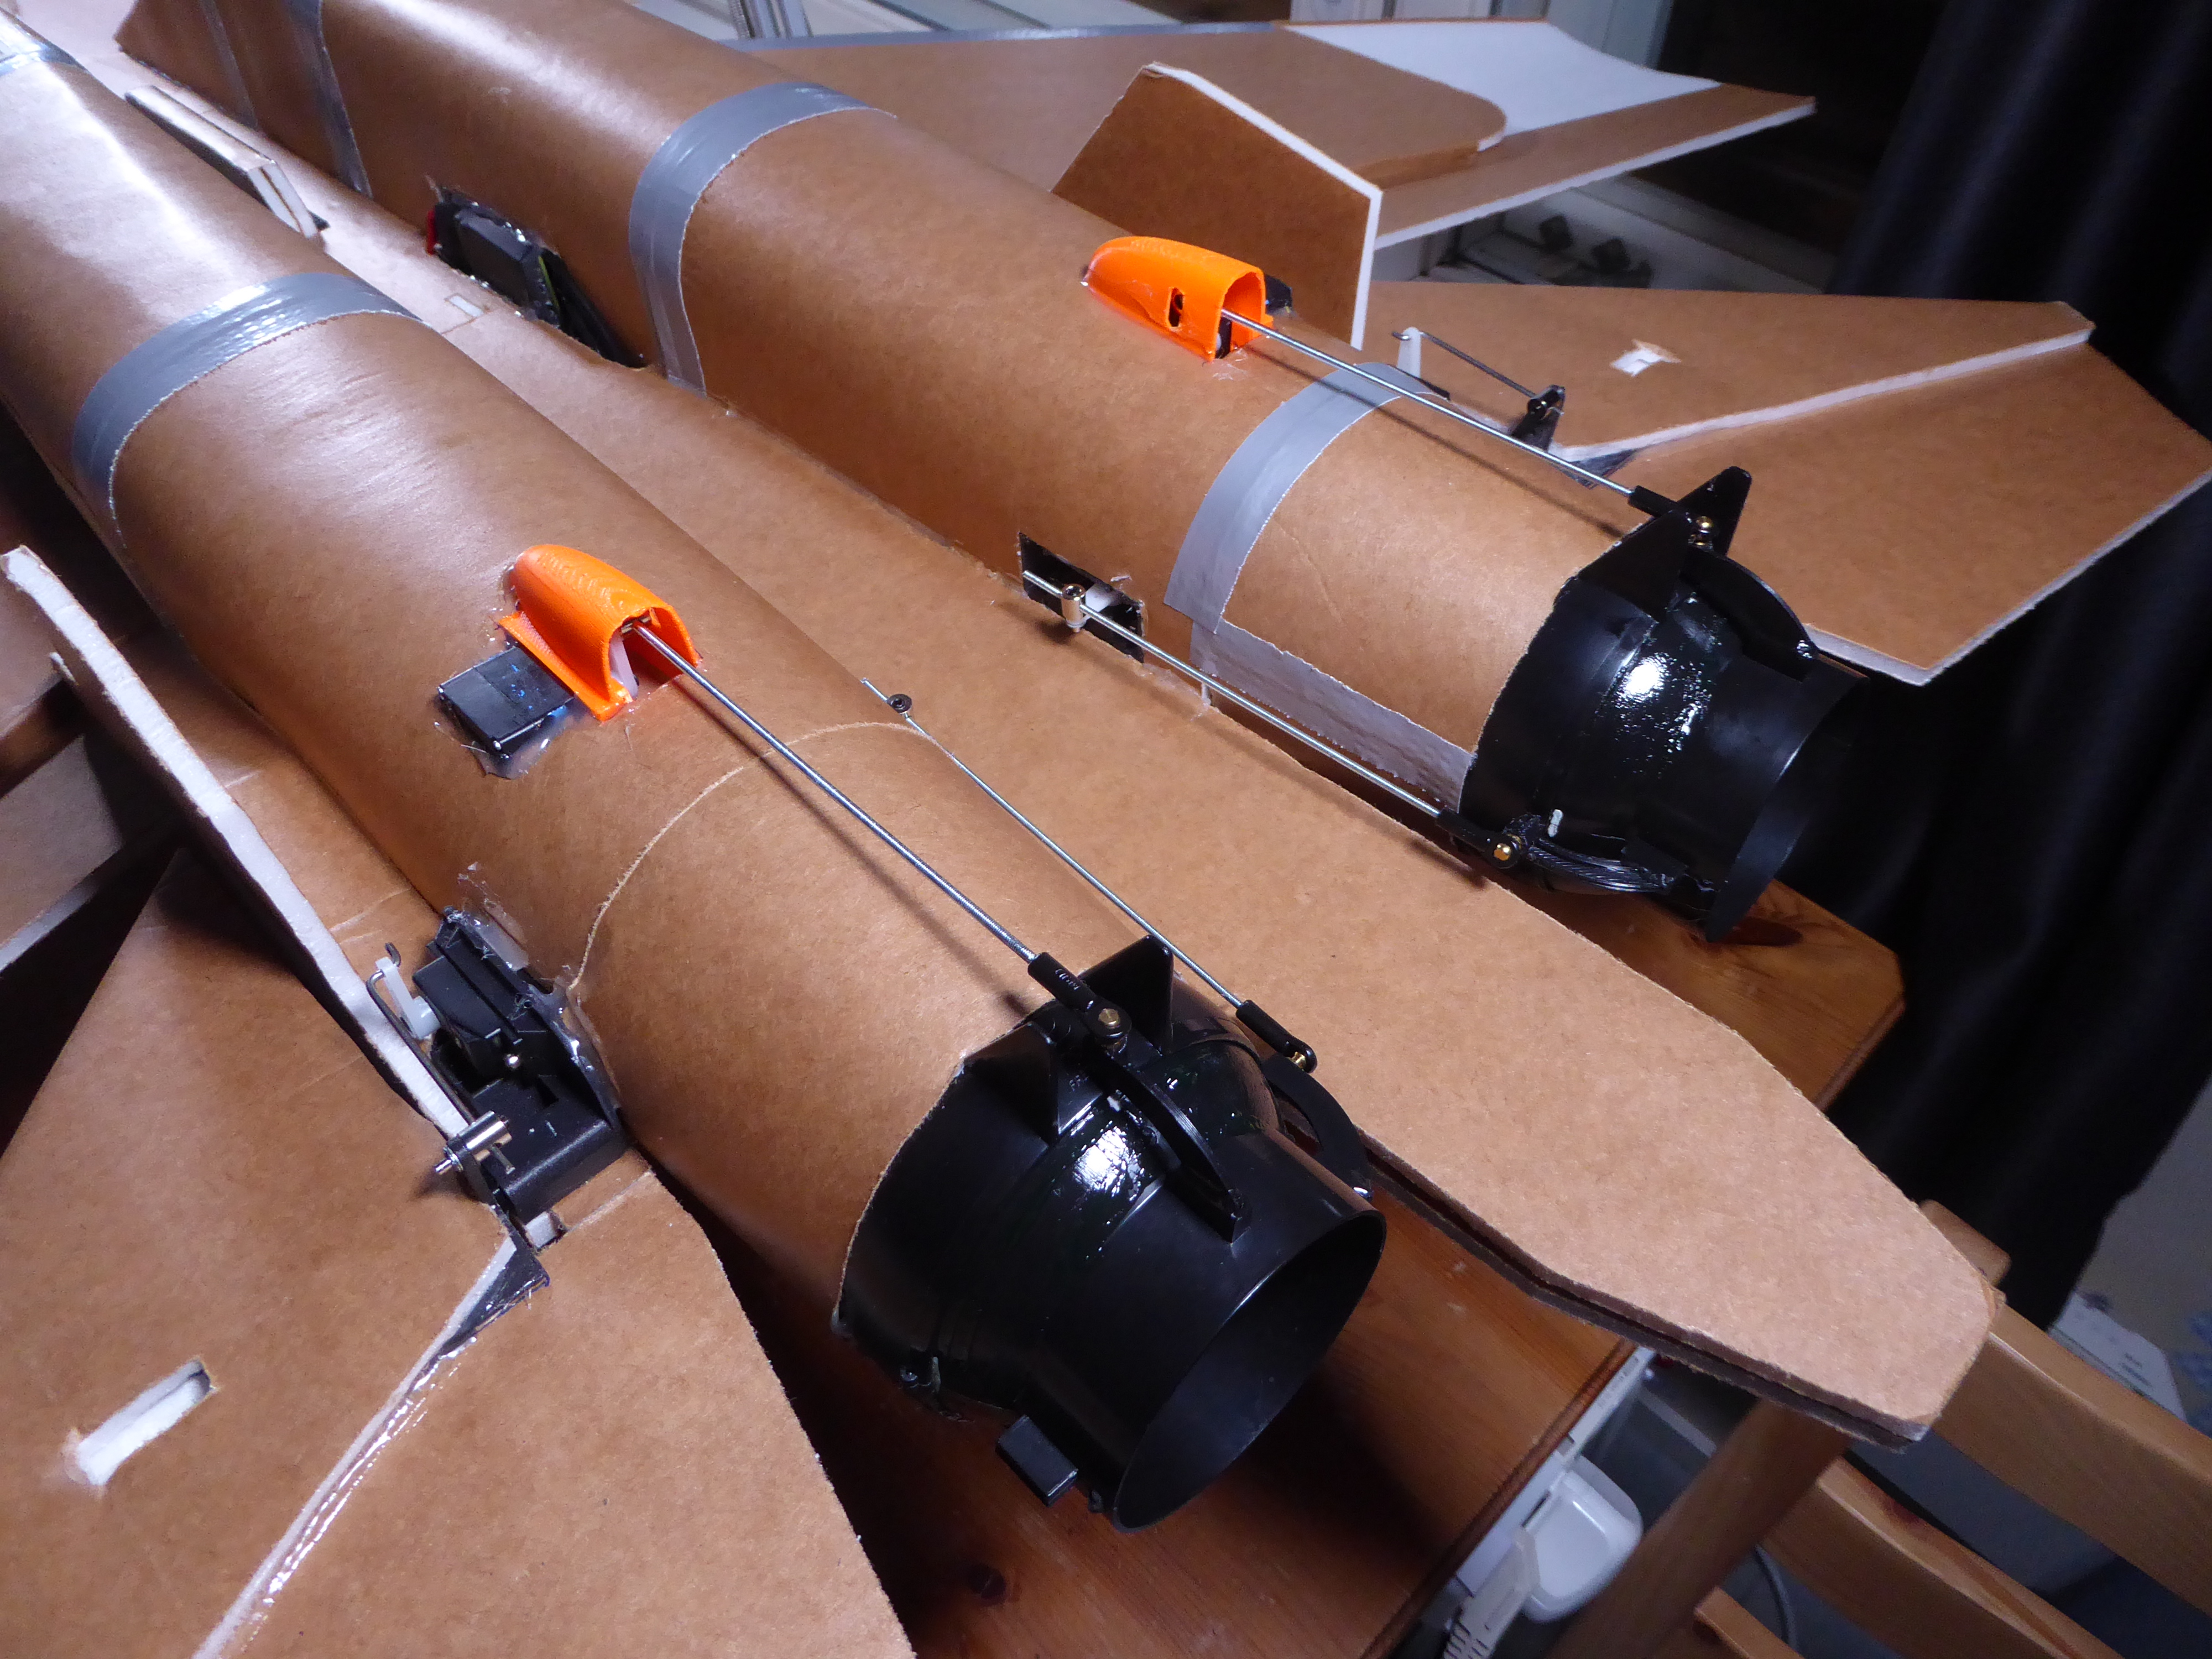
Hello again, sorry for the long break, I was traveling a whole month. I got back a couple of days ago and will finish this project now. Since the last post, I have covered up the plane, built the nose, canopy and vertical stabilizers. Horizontal stabilizers are done as well but not attached just yet. Speaking of h-stab, I've improved (I believe) it too, it no longer needs any brass bushings or shaft collars, just a hex socket m4 screw which will be screwed into the undersized hole of the printed stab/servo mount. Things left to do is some wiring, push rods, maybe some printed canopy locks this time?, and some small details like 3d printed cheat intakes.

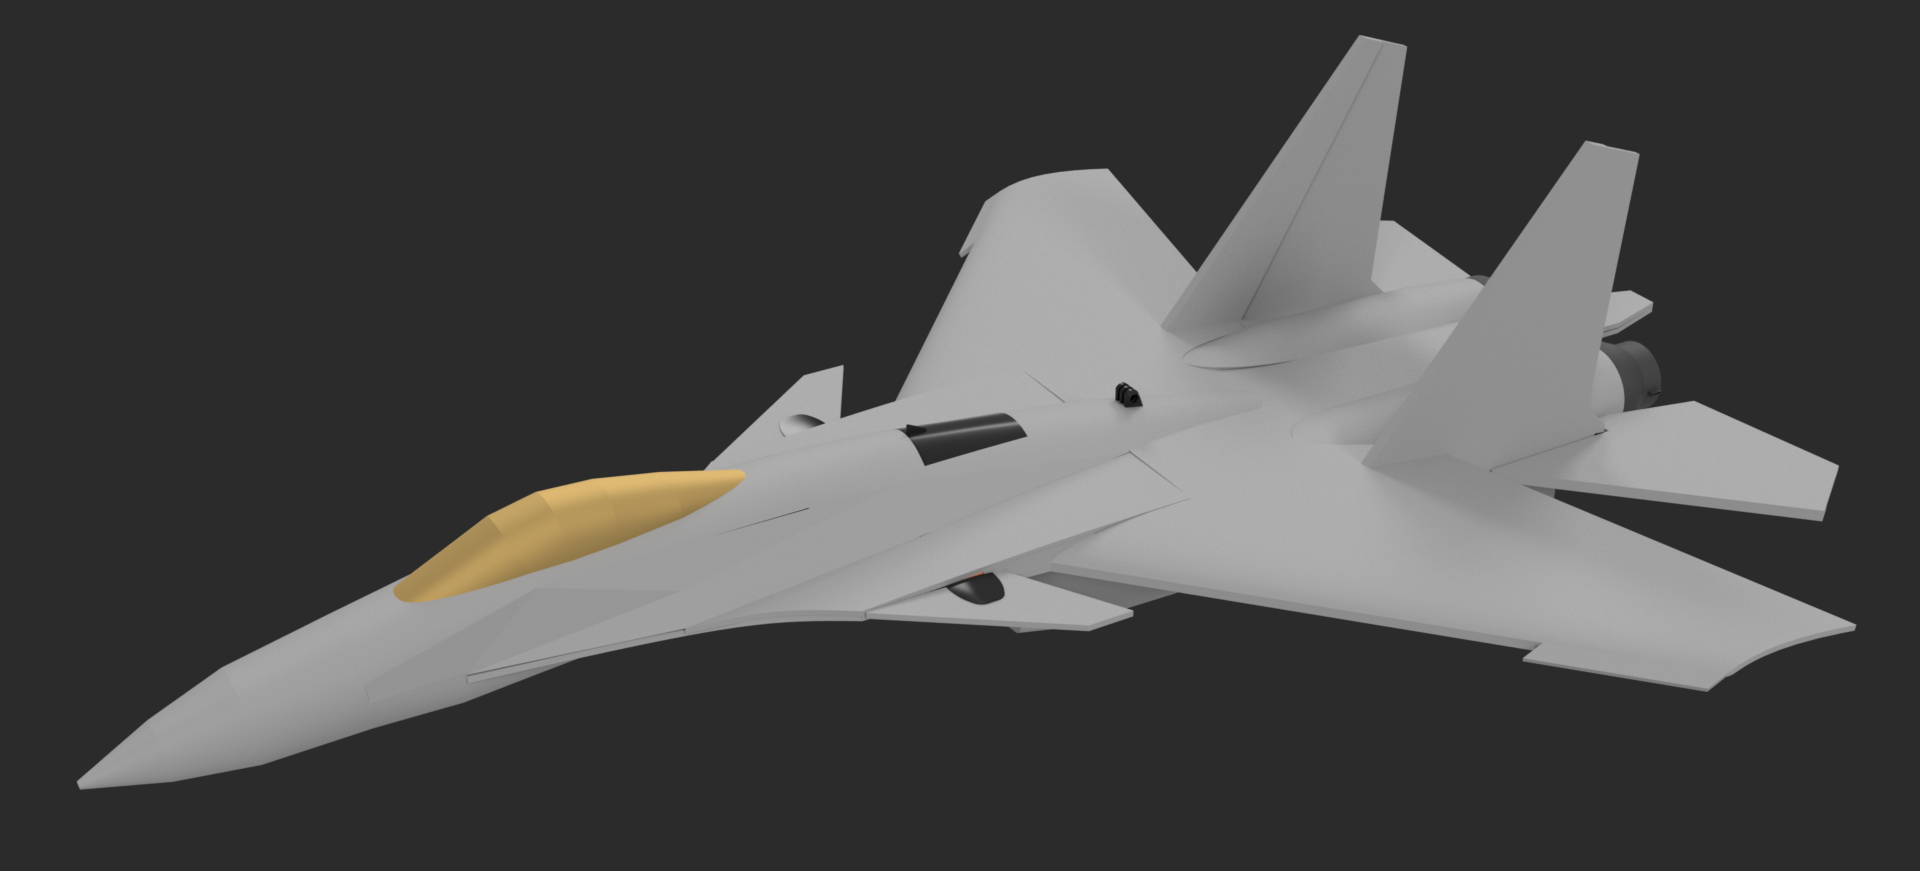
For the paint job/livery, I don't know what to do, so you go ahead and give me suggestions. It can as well be an imaginary livery, it just must not be too complicated or labor intensive.

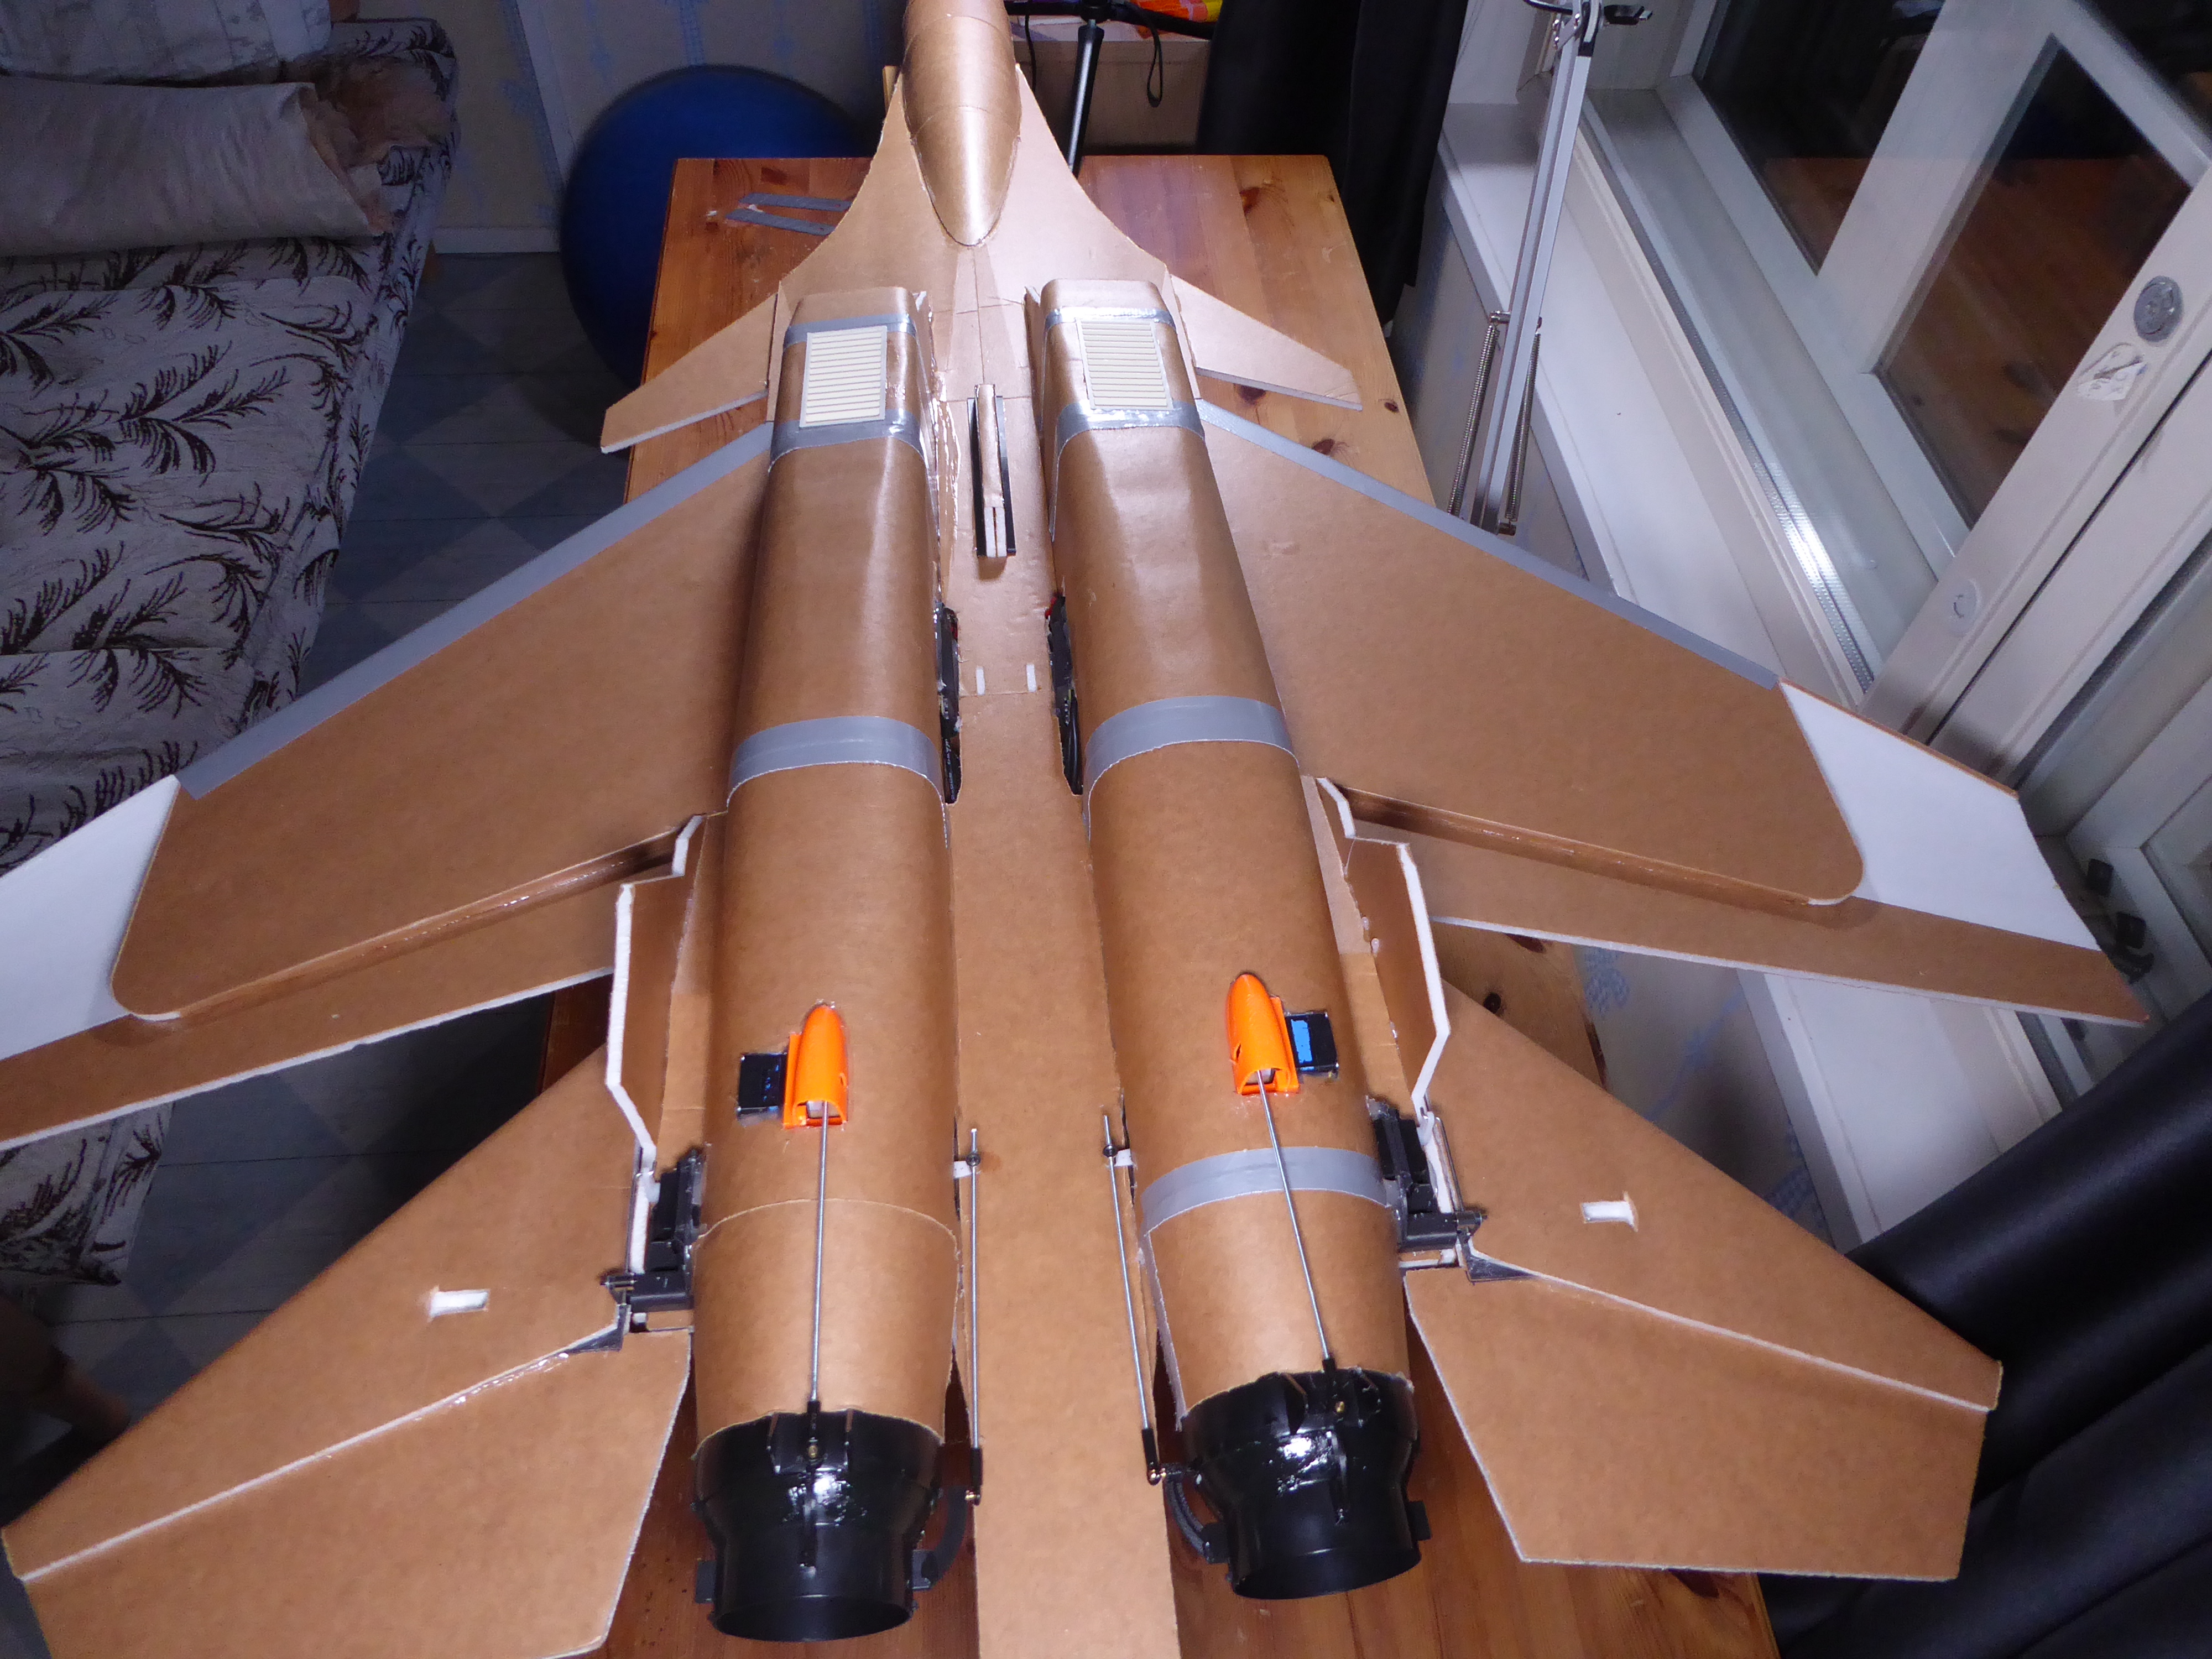
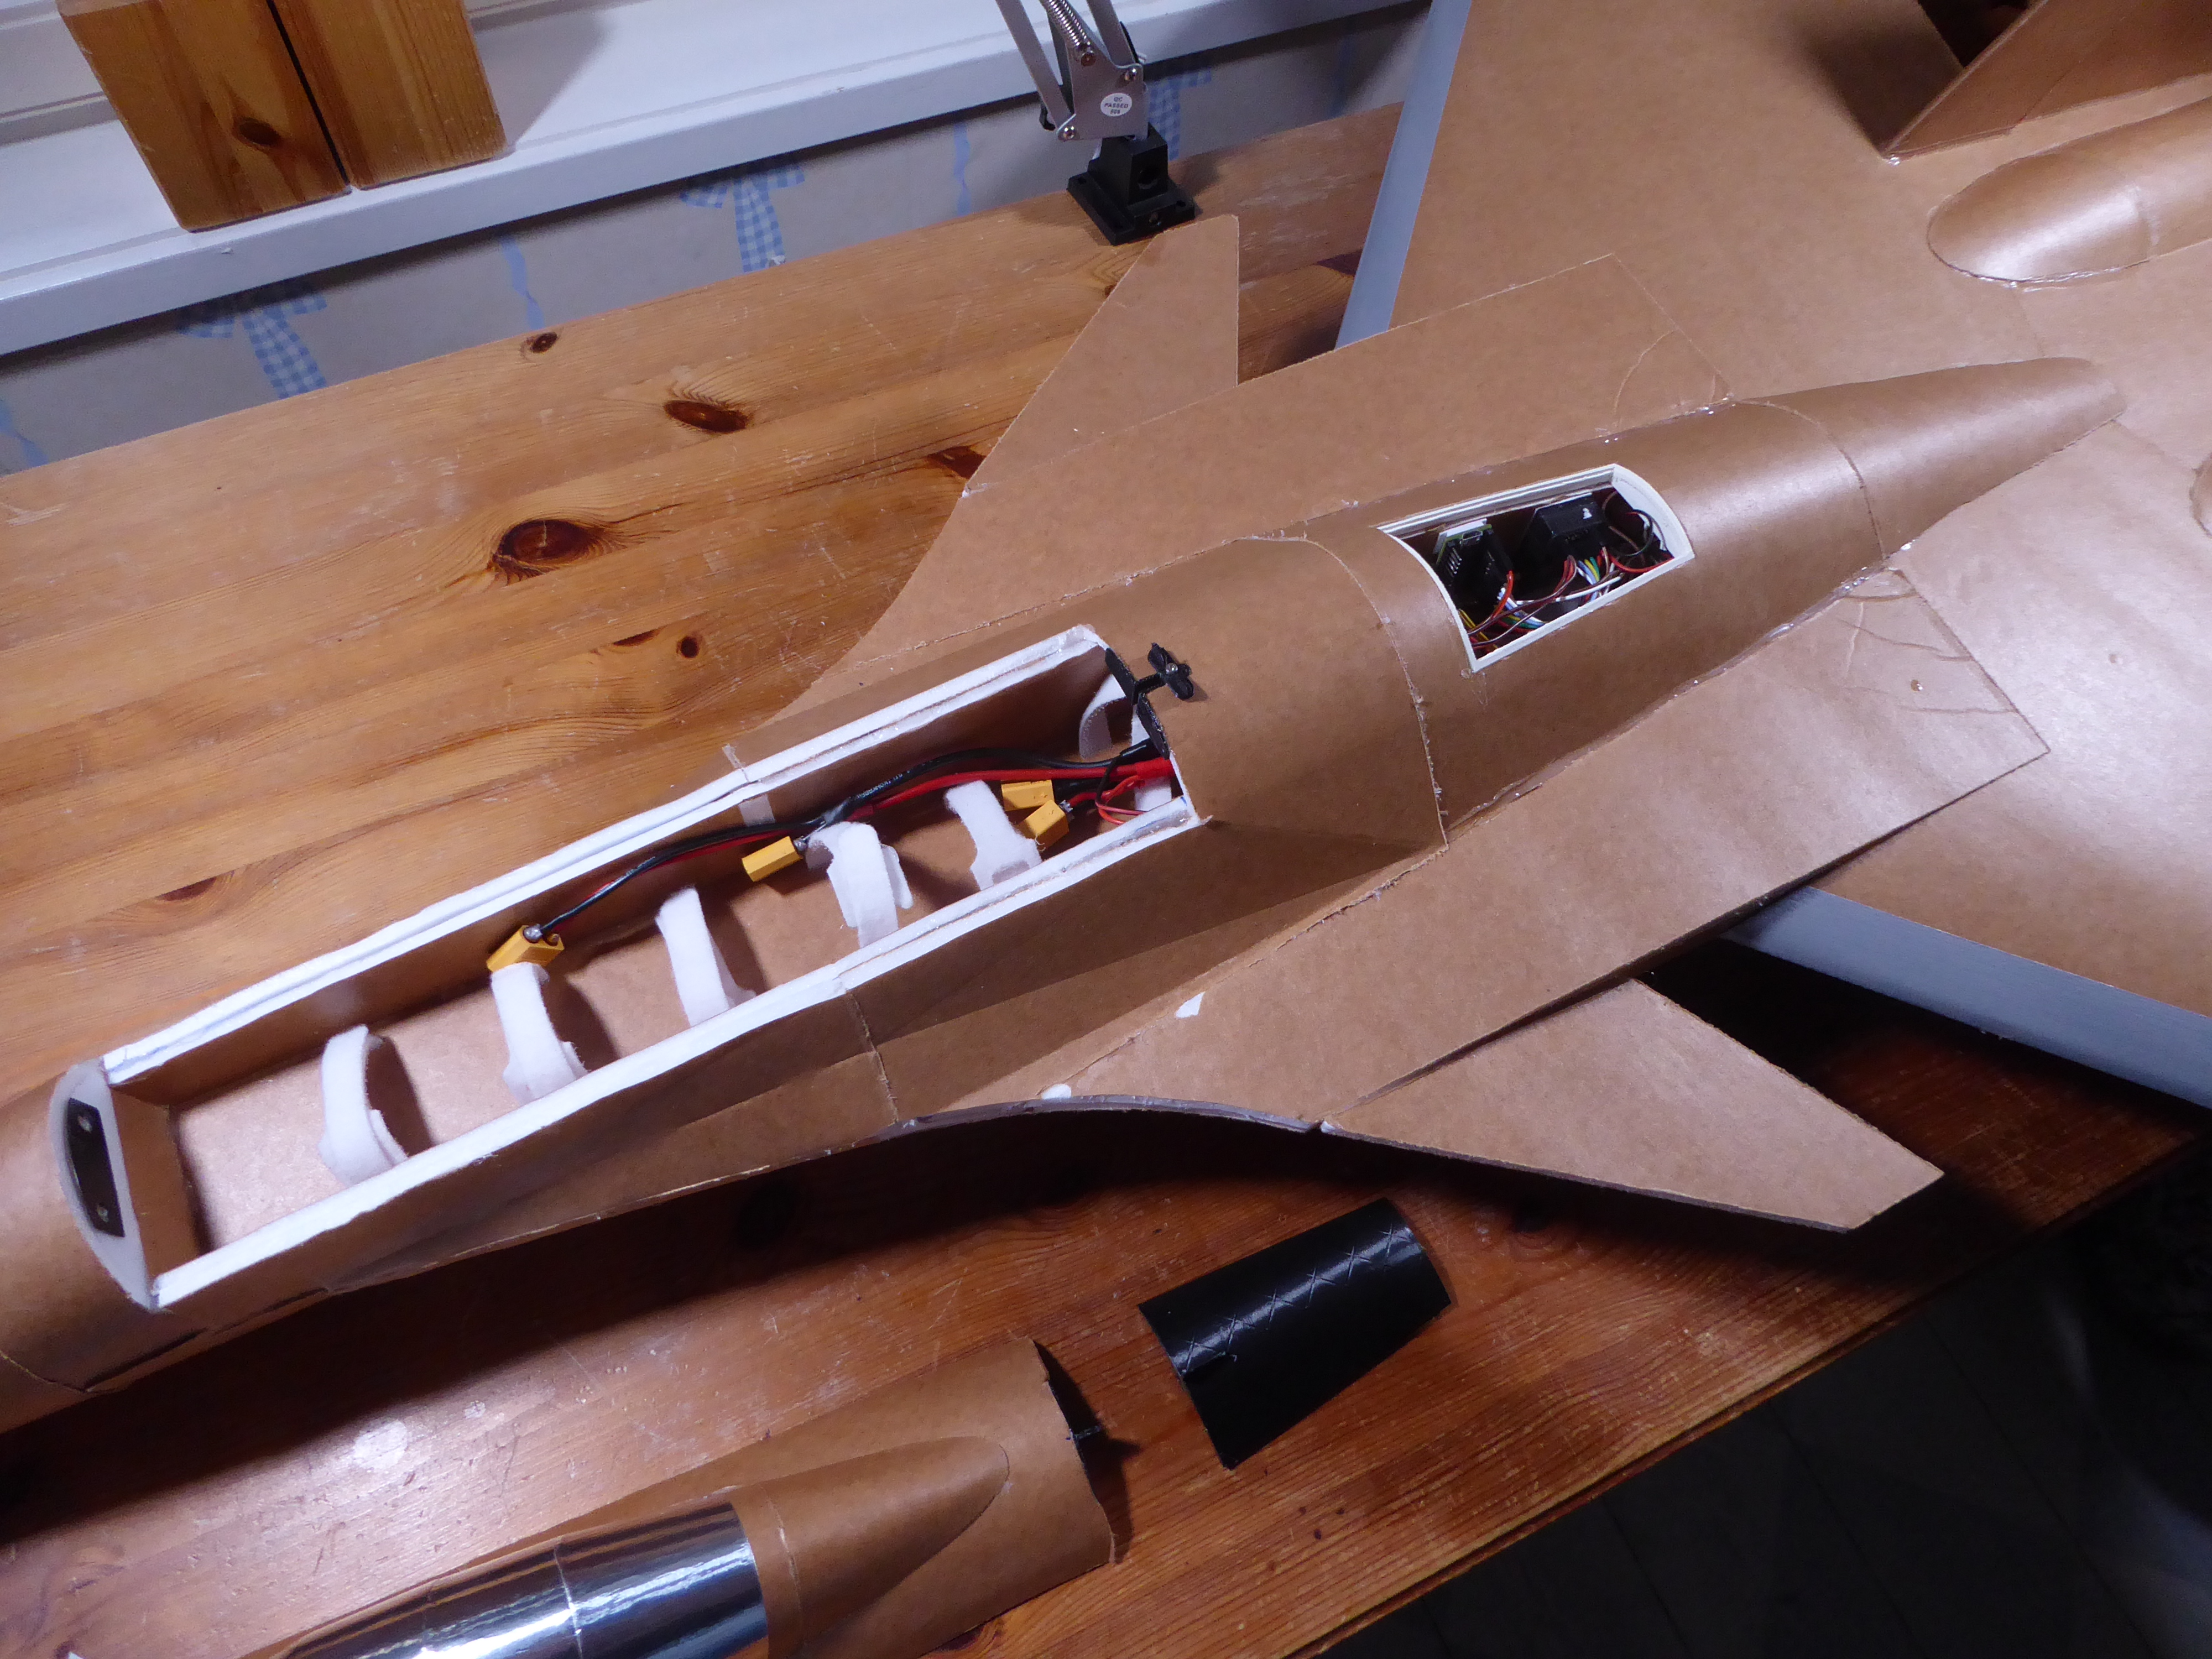
I put it on the scale today and with 4x 4 cell 1400mah batteries the weight seems to be a bit over 2000 grams, which is about as much as the su-27, but including one more battery and thrust vectoring setup. Definitely great results for my attempt to reduce the weight, very pleased with it. But obviously it does come with a cost, namely reduced rigidity of the airframe. There is definitely some flex to the fuselage, but whether or not that's bad will be seen in practice once it flies/crashes/breaks midair lol. The reason for using now 4 batteries instead of 3 is mainly because my batteries are getting a bit old and I kinda feel bad for pulling 40 amps per battery, equivalent of about 28c battery load. Maybe I will try it, just don't want to wreck my batteries.

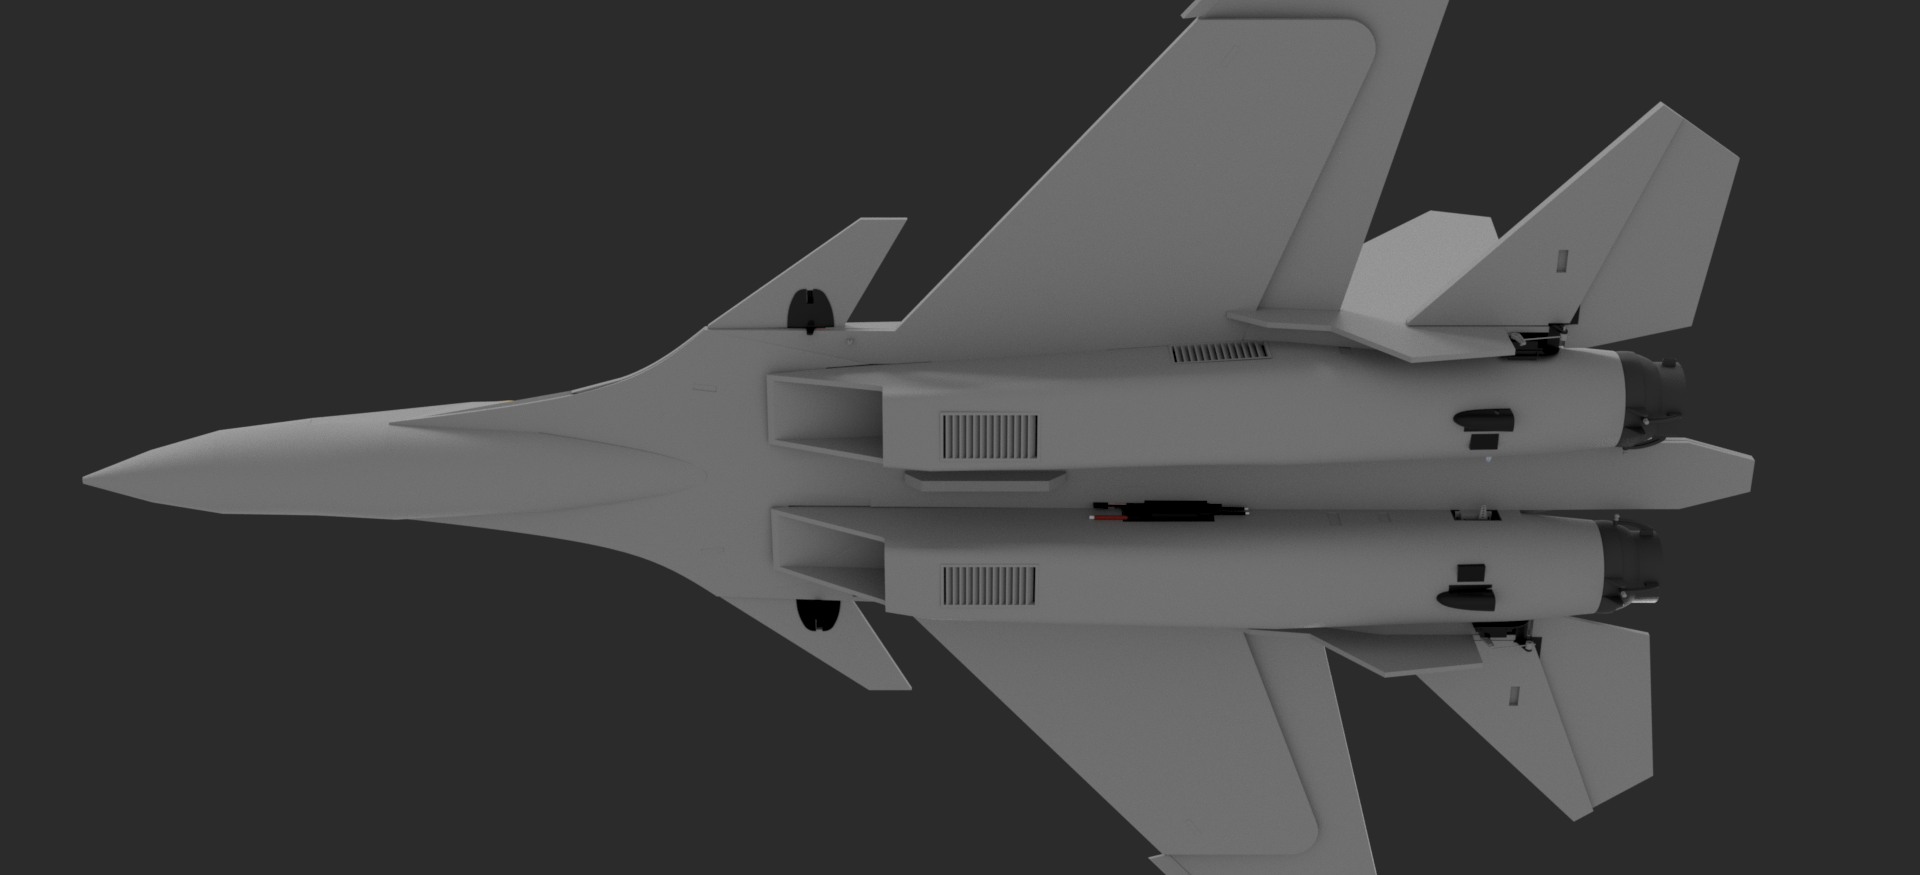
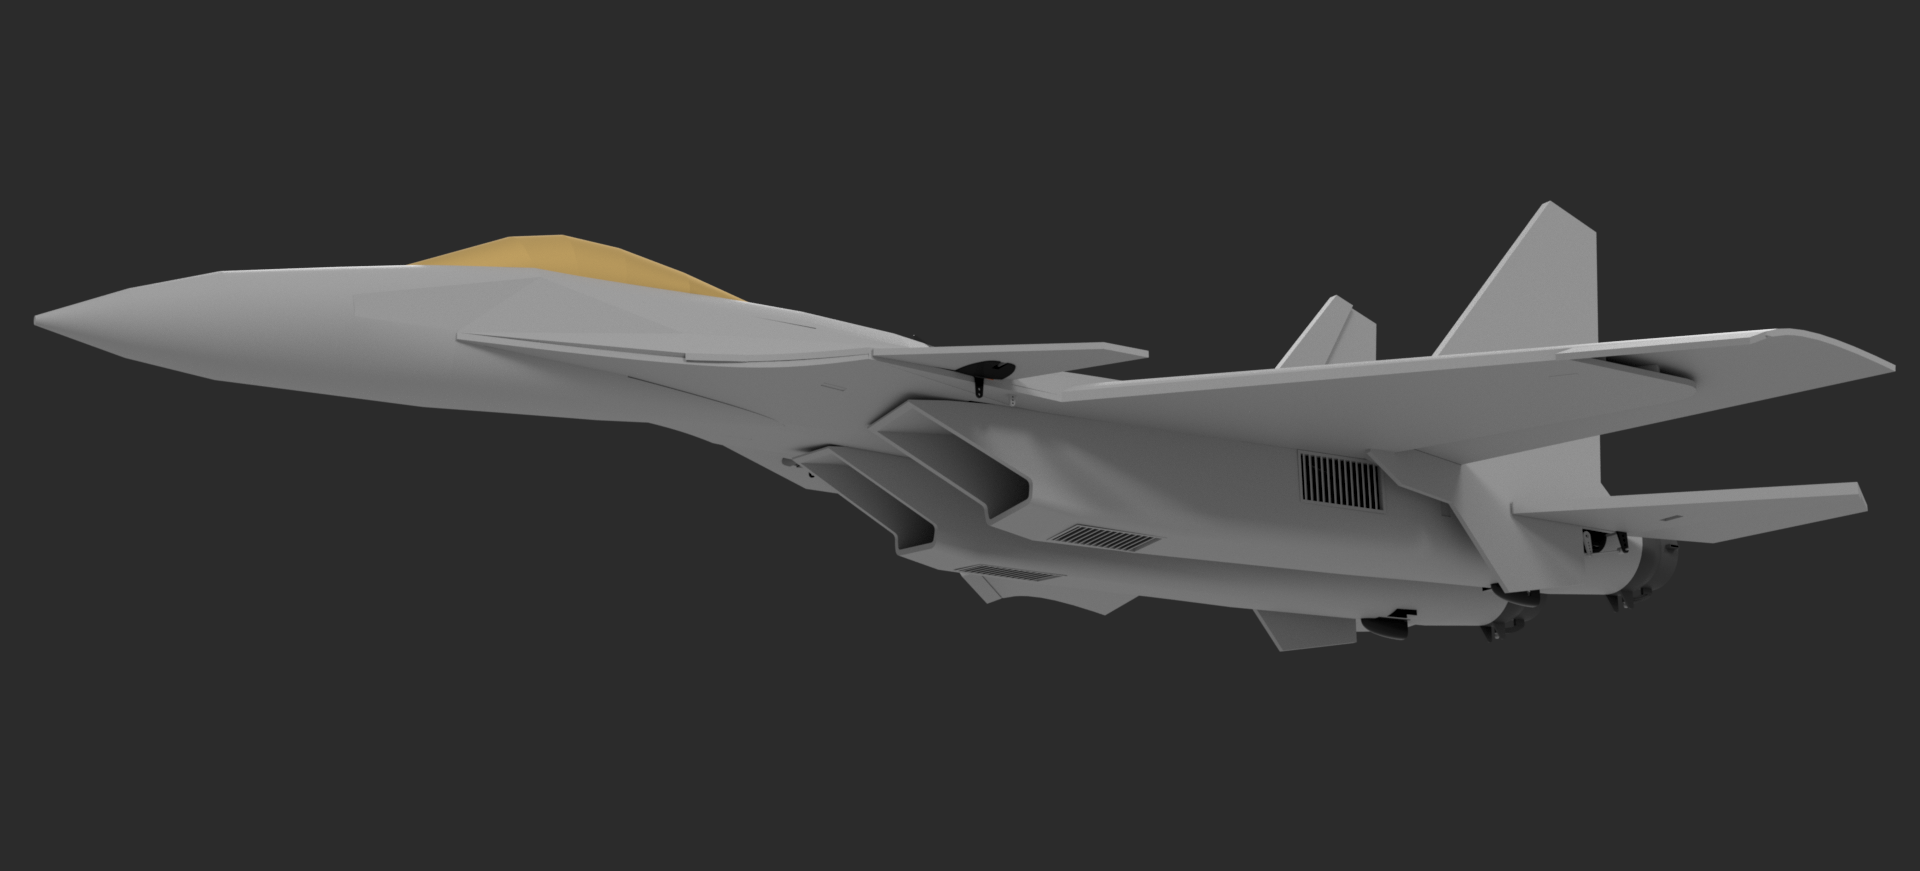
The weather is currently not so great, but according to the forecast should get better next weekend, so I'm aiming to maiden it then. And now, as you wish, all pictures I got since last update, will do more once it's maiden ready.
 

Attachments

  • P1330572.JPG
    P1330572.JPG
    4.7 MB · Views: 0
  • P1330577.JPG
    P1330577.JPG
    4.8 MB · Views: 0
  • P1330575.JPG
    P1330575.JPG
    1.3 MB · Views: 0
  • P1330574.JPG
    P1330574.JPG
    4.7 MB · Views: 0
  • P1330573.JPG
    P1330573.JPG
    4.7 MB · Views: 0
  • P1330571.JPG
    P1330571.JPG
    4.7 MB · Views: 0
  • P1330570.JPG
    P1330570.JPG
    4.6 MB · Views: 0
  • P1330569.JPG
    P1330569.JPG
    4.6 MB · Views: 0
Last edited:

Flitedesign 3d

Elite member
Good news, the su-30 is finished and successfully maidened.

Final flying weight ended up at 2100 grams, I’m happy with it. Didn’t measure the thrust yet, will do so soon. After the last post, I took a few steps backwards and redesigned the canopy and the skin pieces around the canopy area since the old canopy design seen on the last post was unpractical. Other than that, I attached the h-stabilizers, attached all the linkages (using m2 ball linkages on the vectoring nozzles since it needs to turn around 2 axis) and did the wiring.

This time, just for fun, I want to try out a flight stabilization system, so I built in an accelerometer/gyroscope board along with a Teensy micro controller running the dRehmFlight software, written by @NickRehm , thank you very much for the open source software and the excellent documentation, very much appreciated! Since I’m using my 6-channel Spectrum dx6i transmitter, which has two additional 2-position switches, I programmed one switch to toggle between manual/stabilized flightmode and the other one between elevon only/thrust vectored mode. So basically that results in 4 unique flight modes.
P1330586.JPG P1330589.JPG

The maiden went well in terms that the plane flew great. It felt very similar to the su-27, very gentle and easy to fly. It was quite windy though so I flew fairly high and carefully and didn’t use the vectoring mode yet. I quickly turned the stabilization on a few times but it needs to be tuned. Since drehmflights stabilization is a pid-based system and I have no clue what are the best pid values for my use case, I tried the default values. According to the docs, the default pids are well tuned for 7” quad so it isn’t exactly the most surprising thing that it doesn’t work perfectly on my fixed wing airplane. I will now attempt to tune it better as instructed in the docs.

The weather should be nice next week, so I’m going to do a lot of flying and tuning then. Until then, here is a video of the maiden (Sorry about the tilted camera, for the best viewing experience just tilt your monitor).


Attachments

  • P1330592.JPG
    P1330592.JPG
    4.7 MB · Views: 0
  • P1330594.JPG
    P1330594.JPG
    4.5 MB · Views: 0
  • P1330596.JPG
    P1330596.JPG
    4.8 MB · Views: 0
  • P1330598.JPG
    P1330598.JPG
    4.6 MB · Views: 0
  • P1330602.JPG
    P1330602.JPG
    4.6 MB · Views: 0
  • P1330604.JPG
    P1330604.JPG
    4.6 MB · Views: 0