
You are using an out of date browser. It may not display this or other websites correctly.
You should upgrade or use an alternative browser.
You should upgrade or use an alternative browser.
What did you crash today
- Thread starter Damig
- Start date

buzzbomb
I know nothing!
I swear you could sit on that plane and ride it!I found this pic on my phone lol View attachment 142726
OliverW
Legendary member
If only...I swear you could sit on that plane and ride it!
buzzbomb
I know nothing!
I know what SOMEBODY will be dreaming about tonight!If only...

11B4Life
New member
It looks pretty easy to fix, nothing else was damaged but a prop. If only I can drag myself away from my goblins long enough to fix it👌😀Looks like a pretty clean break there - hopefully she'll be back in the air soon!
fluffpilot
Active member
Got the wing stitched back together. Used some styrofoam packing from something else as filler for where chunks were ripped out when it spiraled into the trees after the wing broke. Just cut the ripped part square and insert a block of foam, glue in, use the heat from the glue gun and some spare wedges of foam to fill in the weak spots where it melts back, let it cool, shave it down with a razor knife and give it a smoothing with packing tape. The break in the wing is being healed with Hobby Town thick foam filler glue and reinforced with tape, as well as having two slices cut into the foam across the break and wooden dowels pressed in with foam filler glue on the inside and the top smoothed off with hot glue and tape. It seems pretty sturdy already, should be solid in 24hrs once the foam cement has had time to fully cure.
It isn't pretty, but it works! It could look pretty with a bit more care regarding the heat, and some fresh decals, but the scars give it character.
Tail was already fixed over the weekend, so if the motor comes in on time and everything works, she'll be in the air on Saturday morning.
It isn't pretty, but it works! It could look pretty with a bit more care regarding the heat, and some fresh decals, but the scars give it character.
Tail was already fixed over the weekend, so if the motor comes in on time and everything works, she'll be in the air on Saturday morning.
Attachments
-
 photo_2019-09-19_19-53-13.jpg59 KB · Views: 0
 -
 photo_2019-09-19_19-53-17.jpg73.5 KB · Views: 0
 -
 photo_2019-09-19_19-53-24.jpg67 KB · Views: 0
 -
 photo_2019-09-19_19-53-48.jpg66.1 KB · Views: 0
 -
 photo_2019-09-19_19-53-56.jpg58.1 KB · Views: 0
 -
 photo_2019-09-19_19-54-01.jpg56.9 KB · Views: 0
 -
 photo_2019-09-19_19-54-05.jpg94.5 KB · Views: 0


BATTLEAXE
Legendary member
Nice fix, quality workGot the wing stitched back together. Used some styrofoam packing from something else as filler for where chunks were ripped out when it spiraled into the trees after the wing broke. Just cut the ripped part square and insert a block of foam, glue in, use the heat from the glue gun and some spare wedges of foam to fill in the weak spots where it melts back, let it cool, shave it down with a razor knife and give it a smoothing with packing tape. The break in the wing is being healed with Hobby Town thick foam filler glue and reinforced with tape, as well as having two slices cut into the foam across the break and wooden dowels pressed in with foam filler glue on the inside and the top smoothed off with hot glue and tape. It seems pretty sturdy already, should be solid in 24hrs once the foam cement has had time to fully cure.
It isn't pretty, but it works! It could look pretty with a bit more care regarding the heat, and some fresh decals, but the scars give it character.
Tail was already fixed over the weekend, so if the motor comes in on time and everything works, she'll be in the air on Saturday morning.
fluffpilot
Active member
Thanks!Nice fix, quality work
I just put it on the plane for a test and aside from the motor being hashed, it looks like it's all good to go!
Attachments

buzzbomb
I know nothing!
It may not be pretty, but it's not ugly either! Great job on the repair. She looks like she'll fly just fine!Got the wing stitched back together. Used some styrofoam packing from something else as filler for where chunks were ripped out when it spiraled into the trees after the wing broke. Just cut the ripped part square and insert a block of foam, glue in, use the heat from the glue gun and some spare wedges of foam to fill in the weak spots where it melts back, let it cool, shave it down with a razor knife and give it a smoothing with packing tape. The break in the wing is being healed with Hobby Town thick foam filler glue and reinforced with tape, as well as having two slices cut into the foam across the break and wooden dowels pressed in with foam filler glue on the inside and the top smoothed off with hot glue and tape. It seems pretty sturdy already, should be solid in 24hrs once the foam cement has had time to fully cure.
It isn't pretty, but it works! It could look pretty with a bit more care regarding the heat, and some fresh decals, but the scars give it character.
Tail was already fixed over the weekend, so if the motor comes in on time and everything works, she'll be in the air on Saturday morning.
fluffpilot
Active member
Well, did not get the Storch built today...
The reason though, is because UPS showed up with parts!
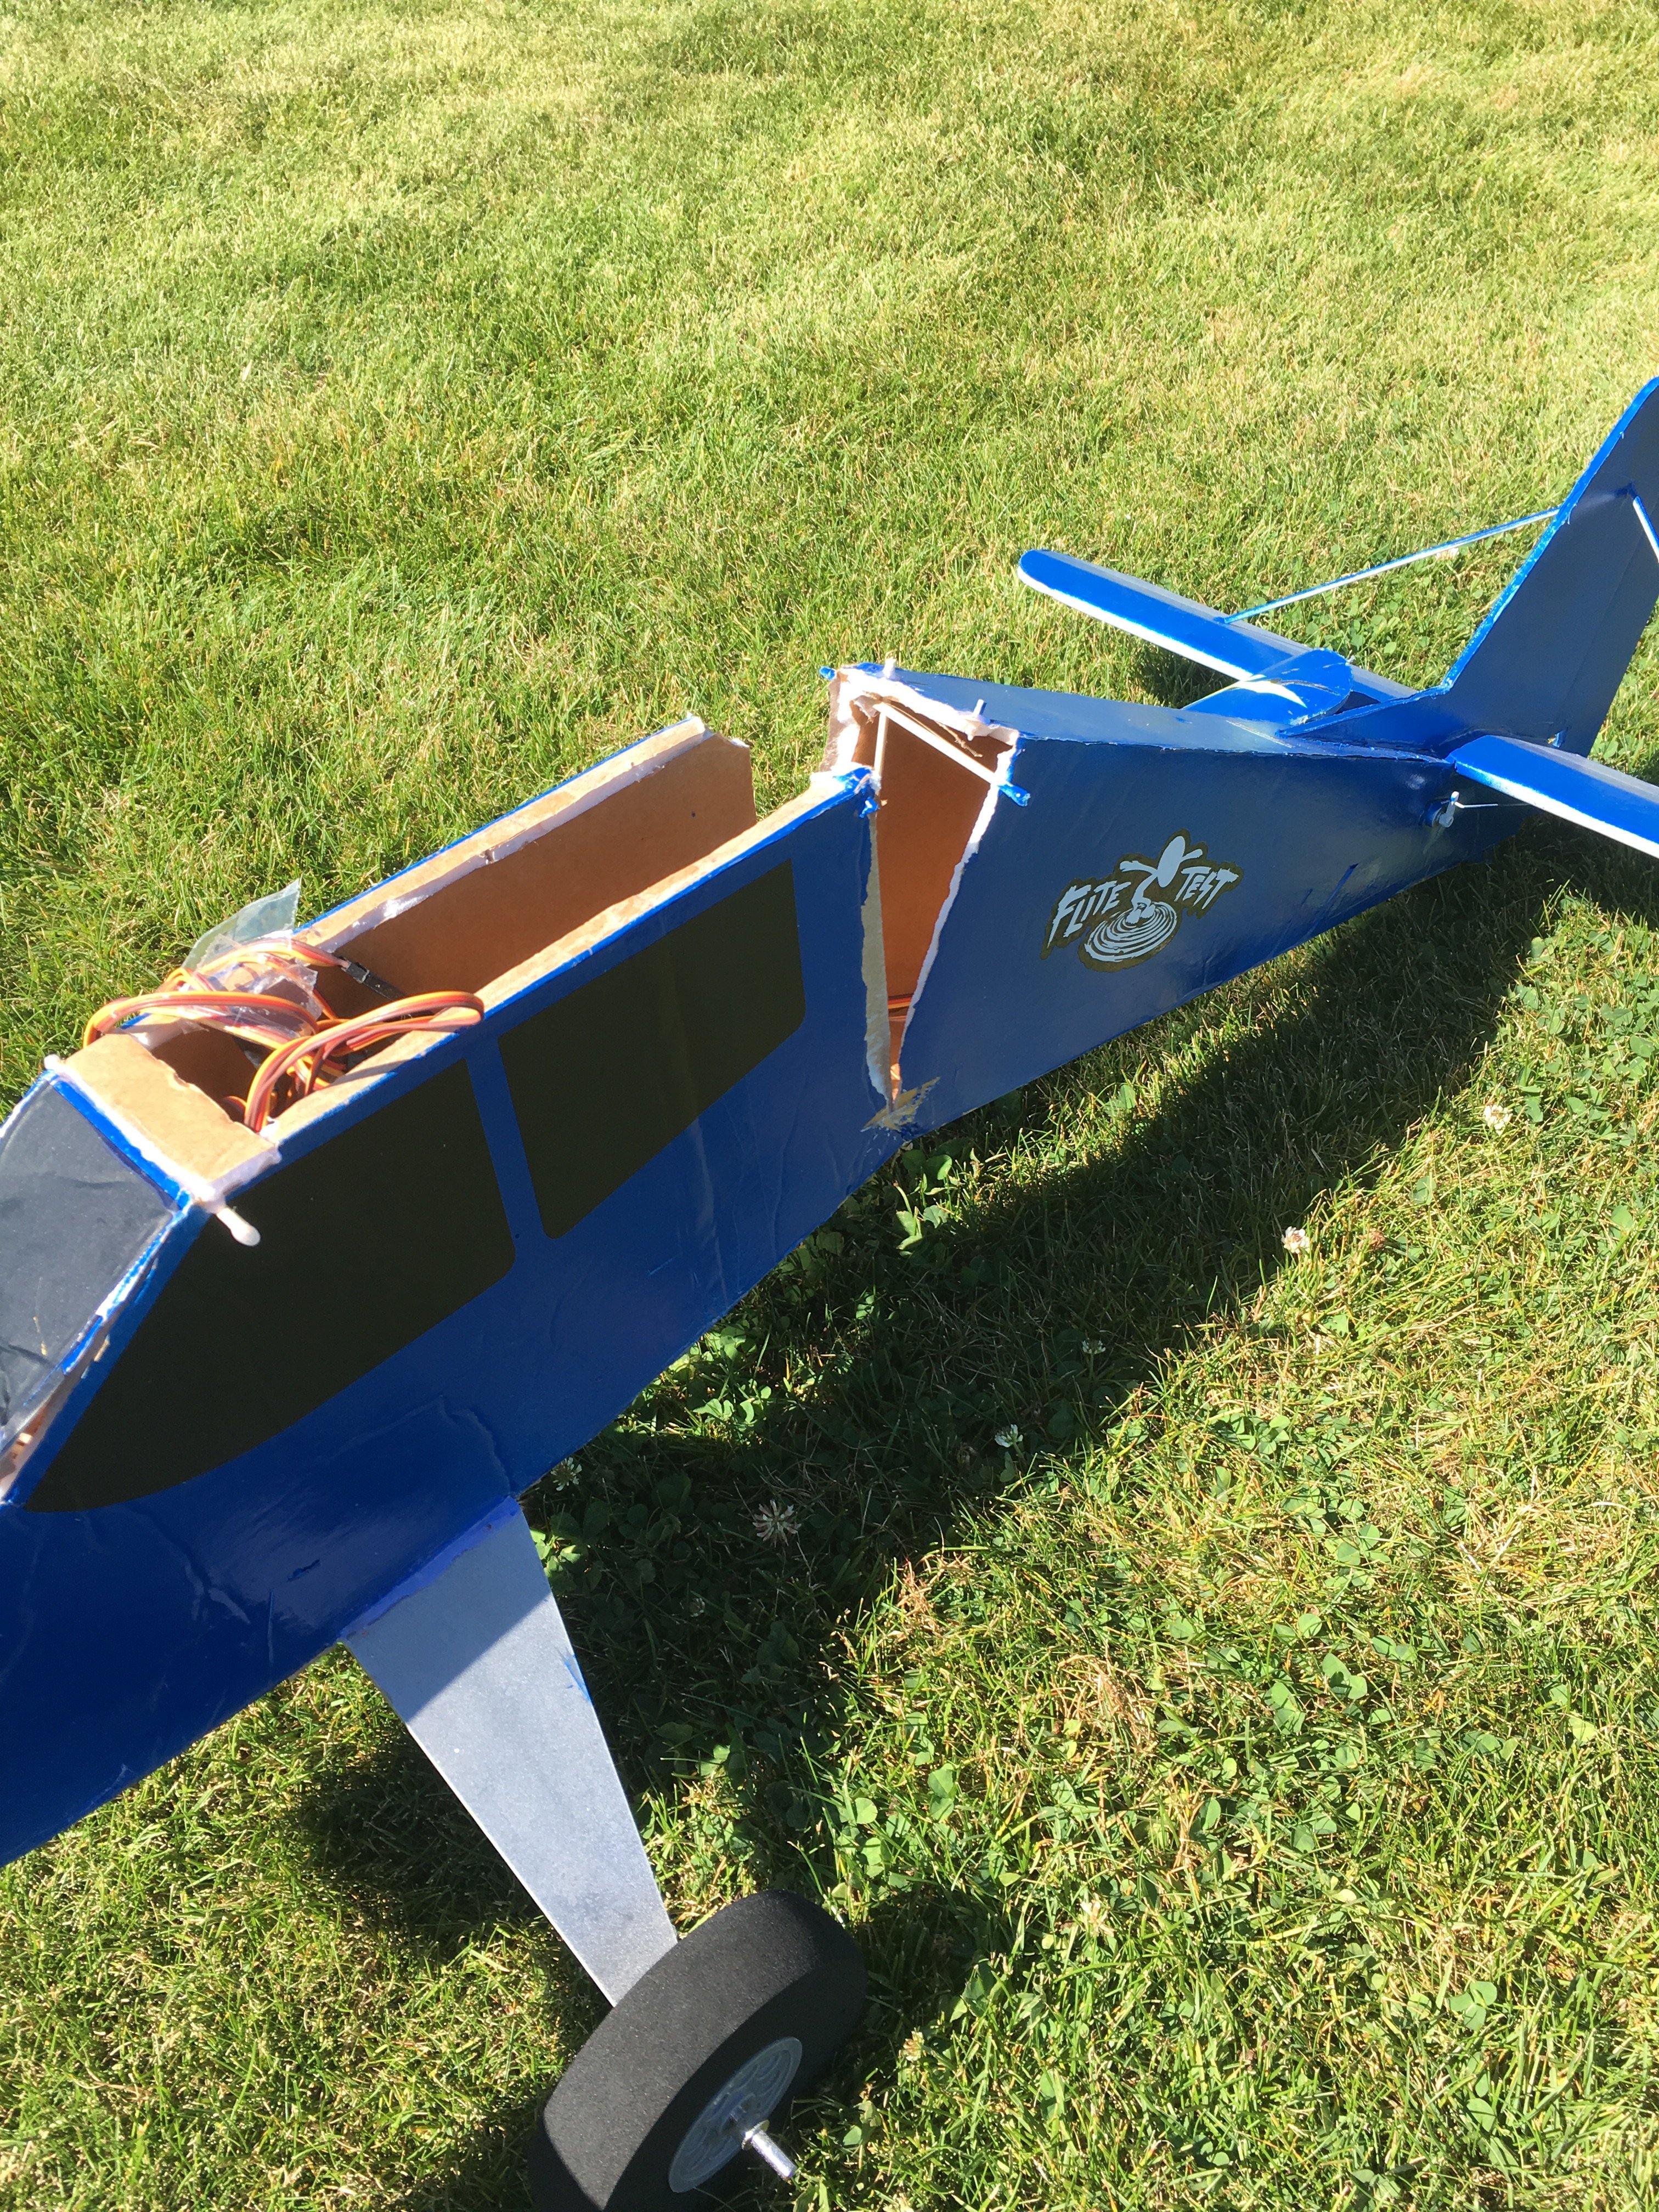
Turns out I ordered a size 25 motor when I should've probably ordered a size 15, so I did what any sensible person would do and put it on anyway. Put a new prop on, put it on the floor, pinned it down and powered it up. It went great! As a matter of fact it's an outright beast and I'm wondering if torque roll is gonna be a problem, but it spun up nice and smooth and everything went together super slick.
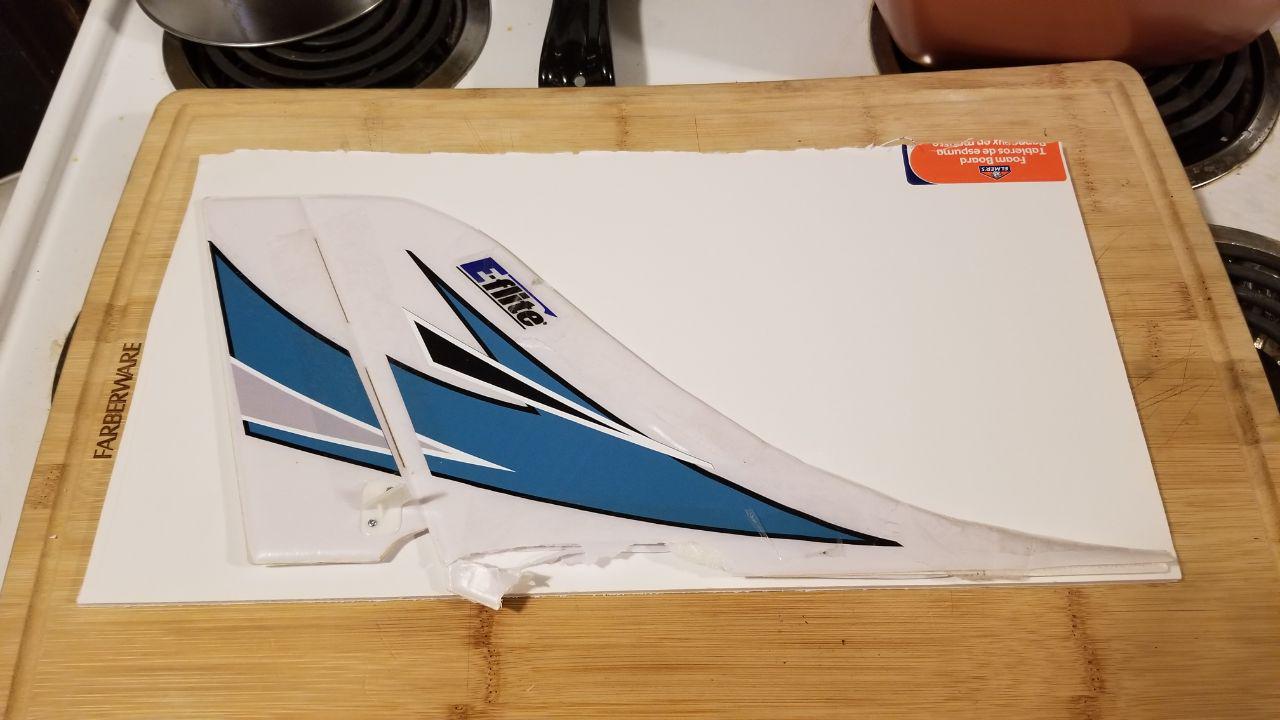
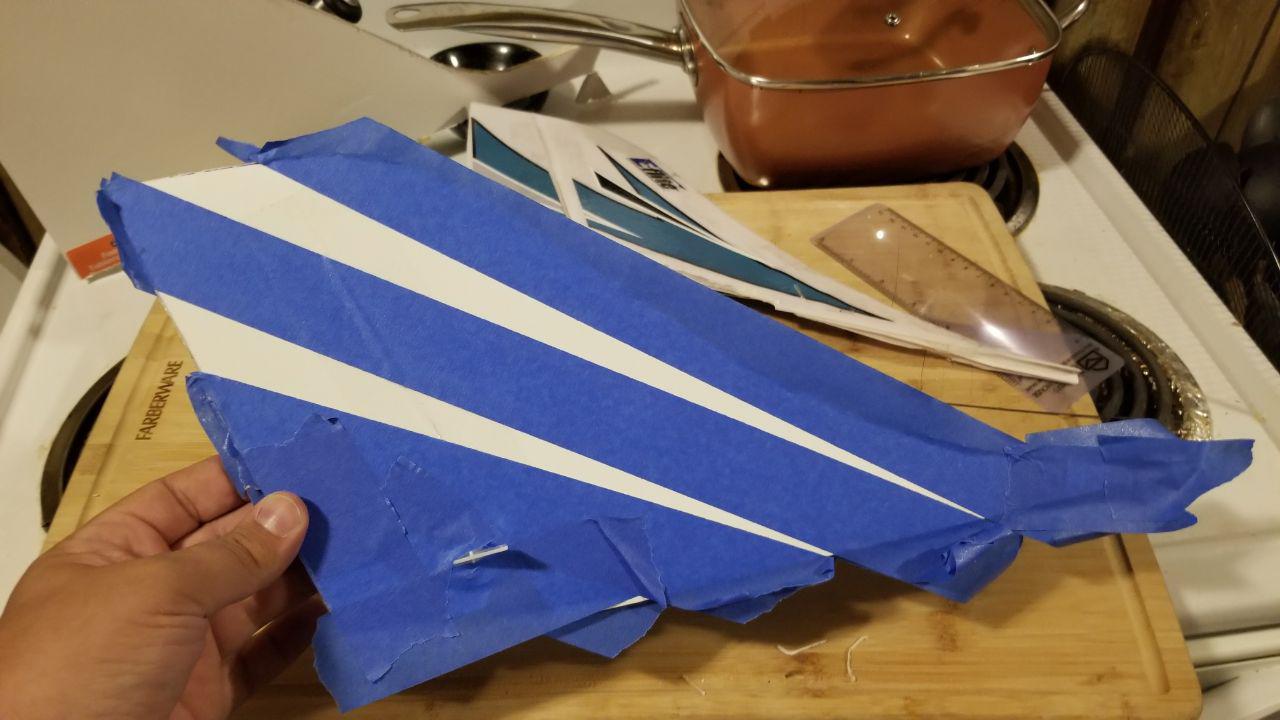
...but the vertical stabilizer was flopping around like a trash bag in the breeze when I had the motor at full power, not good. Turns out it had cracked under the surface skin and the foam was pretty much junked. So I cut it out, cleaned up the support slot, cut another one out of foam board, gave it a quick shot paint job, stuck it on and finished it with some e-flite stickers that came with the new motor.
Good to go!
She flies (hopefully) tomorrow.
The reason though, is because UPS showed up with parts!
Turns out I ordered a size 25 motor when I should've probably ordered a size 15, so I did what any sensible person would do and put it on anyway. Put a new prop on, put it on the floor, pinned it down and powered it up. It went great! As a matter of fact it's an outright beast and I'm wondering if torque roll is gonna be a problem, but it spun up nice and smooth and everything went together super slick.
...but the vertical stabilizer was flopping around like a trash bag in the breeze when I had the motor at full power, not good. Turns out it had cracked under the surface skin and the foam was pretty much junked. So I cut it out, cleaned up the support slot, cut another one out of foam board, gave it a quick shot paint job, stuck it on and finished it with some e-flite stickers that came with the new motor.
Good to go!
She flies (hopefully) tomorrow.
Attachments


I crashed mt Alien quad about 30 times today getting used to new goggles.
Figured out why I couldnt get close with the fast ones but can cut grass with the Alien.
The Alien has a runcam mini which is 4:3 aspect with a 2.5mm gopro lens. The others all have microssifts which are 16:9 and have 2.3mm lens.
My old goggles were only 4:3 and my new ones do both. Switched to 16:9 crashed the Alien gettin too close to things.
Was flying a few inches off ground straight at flags that were 1.5 ft tall and flipping over them. Tumbled a buncha times. Only killed 2 props.
When I grabbed the new mach1 build... wide screen under 6 inches over grass at 3/4 throttle is scary. Couldnt do full throttle with those motors as the props go super sonic shriek really REALLY loud and speed bleeds off quick as the tips spin flatter the longer they stay turnin that fast.
Now I have to learn to fly all over. Oh AND remember to change proper aspect ratios for each craft now.
Videos really soon.
buzzbomb
I know nothing!
I am liking you more and more every day!so I did what any sensible person would do and put it on anyway.
BATTLEAXE
Legendary member
Yesterday I was talking about flying more in the wind for weather practice, I skipped out on yesterday because of the wind so I went out today. Weather being no different I took up the Baby Blender again. She got up in the air, had to keep the throttle up more then usual to climb, once at height she got tossed around but was controllable. Did the usual maneuvers, some combos, was practicing my dive ins to low elevation and pull up to a roll out, those are cool to watch.
But what goes up must come down, time to land and it took some tossing around and dove straight into the ground. Man this plane is durable, pushed the locking skewer back a quarter inch but the pod took the damage:
 It's an opportunity to replace it with a plastic firewall. Easy peasy
But what goes up must come down, time to land and it took some tossing around and dove straight into the ground. Man this plane is durable, pushed the locking skewer back a quarter inch but the pod took the damage:
Hoomi
Master member
Crashed the Freewing 64mm A-10 at the end of her maiden flight today. Came in too high on the landing, and either didn't apply power soon enough for a go-around, or didn't have enough battery left to spin back up. I couldn't get her to climb back out after passing over the end of the runway, and she finally just floundered in.
She flew pretty nice once I started getting used to her, though.

She flew pretty nice once I started getting used to her, though.
BATTLEAXE
Legendary member
Ouch! Looks fixable thoughCrashed the Freewing 64mm A-10 at the end of her maiden flight today. Came in too high on the landing, and either didn't apply power soon enough for a go-around, or didn't have enough battery left to spin back up. I couldn't get her to climb back out after passing over the end of the runway, and she finally just floundered in.
She flew pretty nice once I started getting used to her, though.
View attachment 143279
Hoomi
Master member
Should be fixable, though worst-case is that I end up needing to order a new fuselage. I was running the smallest battery the manual listed for the plane (4S 3000mAh), and had the timer set to 2 minutes, but that might still have been more than the battery could deliver for the twin 64mm EDFs.
Similar threads
- Replies
- 12
- Views
- 709
- Replies
- 5
- Views
- 998
- Replies
- 7
- Views
- 867